Soft Garlic Bread Rolls Simple and Fluffy Recipe

WANT TO SAVE THIS RECIPE?

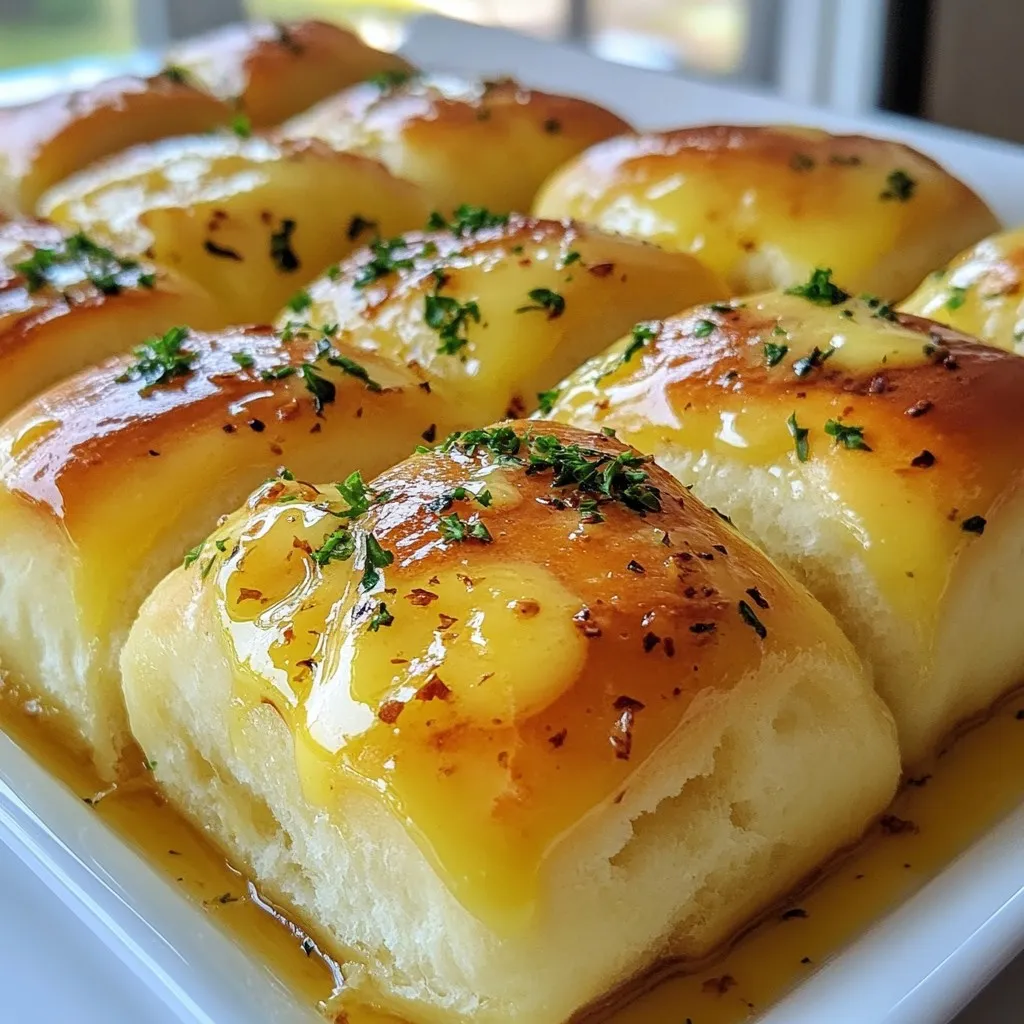
If you crave warm, fluffy garlic bread rolls, you’re in the right place! This simple recipe will help you create the softest rolls that burst with flavor. I’ll guide you through each step, from mixing the perfect yeast to baking these delicious rolls to golden perfection. Whether you’re a cooking novice or a seasoned pro, you’ll find tips to make your rolls a hit at dinner. Let’s dive in!

Why I Love This Recipe

  1. Irresistible Flavor: The combination of garlic and butter creates a rich, savory flavor that elevates these rolls to a whole new level.
  2. Fluffy Texture: These rolls are incredibly soft and fluffy, making them perfect for any meal or as a snack on their own.
  3. Simple Ingredients: With just a few basic ingredients, these rolls are easy to make, and you likely have most of them in your pantry already.
  4. Versatile Pairing: These garlic butter rolls pair beautifully with soups, salads, or as a side to any main dish, making them a versatile addition to your table.

Ingredients

List of Ingredients

– 3 cups all-purpose flour

– 2 tablespoons sugar

– 1 packet instant yeast (2 ¼ teaspoons)

– 1 teaspoon salt

– 1 cup warm milk (about 110°F)

– 1/4 cup unsalted butter, melted

– 1 large egg

– 4 cloves garlic, minced

– 1/4 cup fresh parsley, chopped

– 1/4 cup unsalted butter (for brushing)

Key Ingredient Properties

Each ingredient plays a vital role in making soft garlic bread rolls.

All-purpose flour gives the rolls structure. It helps them rise and stay fluffy.

Sugar feeds the yeast. It also adds a slight sweetness to the rolls.

Instant yeast helps the dough rise quickly. It makes the rolls light and airy.

Salt enhances flavor. It also strengthens the dough’s structure.

Warm milk activates the yeast. It makes the dough soft and tender.

Unsalted butter adds richness and flavor. It helps create a soft texture.

Egg enriches the dough. It adds moisture and a lovely golden color.

Garlic infuses bold flavor. It gives the rolls a delicious aroma.

Fresh parsley adds color and freshness. It brightens the flavor profile.

Butter for brushing adds extra flavor and shine. It makes the rolls irresistible.

Suggested Ingredient Substitutions

If you need to swap ingredients, here are some ideas:

Flour: Use bread flour for a chewier texture.

Sugar: Honey or maple syrup can replace sugar.

Yeast: Active dry yeast works but may need proofing first.

Milk: Any milk or milk alternative can be used.

Butter: Olive oil is a healthy substitute for butter.

Egg: Use a flaxseed meal or applesauce for a vegan option.

Garlic: Garlic powder can replace fresh garlic in a pinch.

Parsley: Other fresh herbs like basil or oregano can work too.

Step-by-Step Instructions

Preparing the Yeast Mixture

Start by taking a large bowl. Pour in 1 cup of warm milk. Make sure it’s about 110°F. Add 2 tablespoons of sugar and 1 packet of instant yeast. Stir gently and let it sit for 5 minutes. You want it to get bubbly and frothy. This shows the yeast is alive and ready to work.

Combining Wet and Dry Ingredients

Next, add 1/4 cup of melted butter and 1 large egg to the yeast mix. Stir well until everything blends. In another bowl, whisk 3 cups of all-purpose flour with 1 teaspoon of salt. Gradually add this flour mix to the wet ingredients. Keep mixing until a dough starts to form.

Kneading and Rising the Dough

Once the dough comes together, it’s time to knead. Place it on a floured surface. Knead the dough for about 5 to 7 minutes. You want it to feel smooth and elastic. After kneading, place the dough in a greased bowl. Cover it with a clean towel. Let it rise in a warm spot for 1 hour. It should double in size.

Shaping and Second Rise

After the dough has risen, punch it down gently. Knead in 4 minced garlic cloves and 1/4 cup of chopped parsley. This adds great flavor. Now, divide the dough into 12 equal pieces. Shape each piece into a ball and place them on a greased baking sheet. Make sure they are close but not touching. Cover them again with a towel and let them rise for another 30 minutes.

Baking Instructions

Preheat your oven to 350°F (175°C). Once the rolls have risen, brush the tops with melted butter. Bake them for 20 to 25 minutes. They should turn golden brown. After baking, let them cool slightly. If you like, brush them with more melted butter before serving. Enjoy your soft garlic bread rolls!

Tips & Tricks

Ensuring Softness in Rolls

To keep your rolls soft, use warm milk. The milk should be about 110°F. Warm milk helps yeast grow well. This makes the rolls fluffy. Knead the dough until it feels smooth. This helps build a nice texture. After kneading, let the dough rise. Cover it and find a warm spot. This helps the dough double in size.

Flavor Enhancements

Garlic and parsley give these rolls great flavor. Use fresh garlic for the best taste. You can also add cheese. Try mozzarella or cheddar for a tasty twist. Mixing herbs like rosemary or thyme can add depth. Brush melted butter on top for extra richness. This makes them golden and fragrant.

Common Mistakes to Avoid

One mistake is not using warm milk. Cold milk slows yeast growth. Don’t skip the second rise. This step helps the rolls become airy. Make sure to knead the dough enough. If it’s too sticky, add a little flour. Lastly, avoid overbaking. Check the rolls at 20 minutes. They should be golden, not dark brown.

Pro Tips

  1. Perfect Dough Consistency: Ensure your dough is slightly sticky but manageable. If it’s too dry, add a little more warm milk, and if too wet, sprinkle in a bit more flour.
  2. Flavor Boost: For an extra flavor kick, sauté the minced garlic in a bit of the melted butter before adding it to the dough.
  3. Proper Rising: If your kitchen is cool, you can create a warm environment for the dough to rise by turning on the oven for a minute, then turning it off and placing the dough inside.
  4. Storage Tips: Store leftover rolls in an airtight container at room temperature for up to 2 days, or freeze them for longer storage.

Variations

Herb-Infused Garlic Rolls

You can make herb-infused garlic rolls by adding your favorite herbs. Fresh rosemary and thyme pair well with garlic. Chop the herbs finely and knead them into the dough along with the garlic. This adds a lovely depth of flavor. You can also mix in some dried herbs if fresh ones aren’t available.

Cheese-Stuffed Garlic Rolls

For cheese-stuffed rolls, you will need a cheese that melts well. Mozzarella or cheddar works great. After shaping your dough into balls, flatten each ball and place a small piece of cheese in the center. Fold the dough around the cheese and reshape it into a ball. This gives you a gooey surprise in each bite!

Whole Wheat or Gluten-Free Options

If you prefer whole wheat, swap half the all-purpose flour for whole wheat flour. This adds fiber and a nutty flavor. For gluten-free rolls, use a gluten-free flour blend. Make sure your yeast is gluten-free as well. The texture may differ slightly, but they will still be delicious. Adjust the liquid as needed, as gluten-free flours absorb more moisture.

Storage Info

Best Ways to Store Garlic Bread Rolls

To keep your garlic bread rolls fresh, store them in an airtight container. This helps keep moisture in and prevents the rolls from going stale. You can also wrap them in plastic wrap. Make sure to place them in a cool, dry spot. If you want to enjoy them later, the fridge is not the best choice. It can dry them out. Instead, keep them at room temperature for up to three days.

Reheating Tips

When you are ready to eat the rolls, reheating them is simple. You can use the oven or the microwave. If using the oven, preheat it to 350°F (175°C). Wrap the rolls in foil to keep them soft. Heat for about 10 minutes. If you prefer the microwave, place a roll on a microwave-safe plate. Heat it for 10-15 seconds. Check to see if it’s warm enough. If not, add a few more seconds.

Freezing Instructions

To freeze your garlic bread rolls, let them cool completely first. Once cool, place the rolls in a freezer bag. Squeeze out the air before sealing. They can stay frozen for up to three months. When you want to eat them, thaw them in the fridge overnight. Reheat them in the oven or microwave to enjoy that soft, fluffy texture again.

FAQs

How do I make garlic bread rolls from scratch?

To make garlic bread rolls, start by mixing warm milk, sugar, and instant yeast in a bowl. Let it sit for five minutes until it bubbles. Next, mix in melted butter and a large egg. In another bowl, whisk together flour and salt. Gradually add this to the wet mix, stirring until a dough forms. Knead the dough for five to seven minutes until smooth. Put it in a greased bowl, cover it, and let it rise for one hour. Once it doubles in size, add minced garlic and parsley. Divide the dough into twelve pieces, shape them into balls, and let them rise again for thirty minutes before baking them.

Can I use dried garlic instead of fresh?

Yes, you can use dried garlic. However, fresh garlic gives a stronger and richer flavor. If you use dried garlic, use about one teaspoon for each clove. Dried garlic will blend into the dough well, but it may not give the same punch as fresh. Experiment to see what you like best!

How long do garlic bread rolls last?

Garlic bread rolls last about two to three days at room temperature. Keep them in a sealed container to keep them soft. If you want to keep them longer, you can freeze them. When frozen, they can last up to three months. Just make sure to wrap them well to prevent freezer burn.

What are some dishes to serve with garlic bread rolls?

Garlic bread rolls pair well with many dishes. They go great with pasta, salads, or soups. You can serve them alongside marinara sauce or pesto for dipping. They also make a nice side for grilled meats. Enjoy them with your favorite meals!

This blog post covered how to make delicious garlic bread rolls from scratch. We explored key ingredients, their properties, and good substitutes. I walked you through each step, from mixing to baking, and shared useful tips to ensure your rolls are soft and flavorful. We also looked at tasty variations and how to store your rolls.

With these insights, you can now bake perfect garlic bread rolls tailored to your taste. Enjoy creating and sharing them with other

- 3 cups all-purpose flour - 2 tablespoons sugar - 1 packet instant yeast (2 ¼ teaspoons) - 1 teaspoon salt - 1 cup warm milk (about 110°F) - 1/4 cup unsalted butter, melted - 1 large egg - 4 cloves garlic, minced - 1/4 cup fresh parsley, chopped - 1/4 cup unsalted butter (for brushing) Each ingredient plays a vital role in making soft garlic bread rolls. - All-purpose flour gives the rolls structure. It helps them rise and stay fluffy. - Sugar feeds the yeast. It also adds a slight sweetness to the rolls. - Instant yeast helps the dough rise quickly. It makes the rolls light and airy. - Salt enhances flavor. It also strengthens the dough’s structure. - Warm milk activates the yeast. It makes the dough soft and tender. - Unsalted butter adds richness and flavor. It helps create a soft texture. - Egg enriches the dough. It adds moisture and a lovely golden color. - Garlic infuses bold flavor. It gives the rolls a delicious aroma. - Fresh parsley adds color and freshness. It brightens the flavor profile. - Butter for brushing adds extra flavor and shine. It makes the rolls irresistible. If you need to swap ingredients, here are some ideas: - Flour: Use bread flour for a chewier texture. - Sugar: Honey or maple syrup can replace sugar. - Yeast: Active dry yeast works but may need proofing first. - Milk: Any milk or milk alternative can be used. - Butter: Olive oil is a healthy substitute for butter. - Egg: Use a flaxseed meal or applesauce for a vegan option. - Garlic: Garlic powder can replace fresh garlic in a pinch. - Parsley: Other fresh herbs like basil or oregano can work too. {{ingredient_image_1}} Start by taking a large bowl. Pour in 1 cup of warm milk. Make sure it’s about 110°F. Add 2 tablespoons of sugar and 1 packet of instant yeast. Stir gently and let it sit for 5 minutes. You want it to get bubbly and frothy. This shows the yeast is alive and ready to work. Next, add 1/4 cup of melted butter and 1 large egg to the yeast mix. Stir well until everything blends. In another bowl, whisk 3 cups of all-purpose flour with 1 teaspoon of salt. Gradually add this flour mix to the wet ingredients. Keep mixing until a dough starts to form. Once the dough comes together, it’s time to knead. Place it on a floured surface. Knead the dough for about 5 to 7 minutes. You want it to feel smooth and elastic. After kneading, place the dough in a greased bowl. Cover it with a clean towel. Let it rise in a warm spot for 1 hour. It should double in size. After the dough has risen, punch it down gently. Knead in 4 minced garlic cloves and 1/4 cup of chopped parsley. This adds great flavor. Now, divide the dough into 12 equal pieces. Shape each piece into a ball and place them on a greased baking sheet. Make sure they are close but not touching. Cover them again with a towel and let them rise for another 30 minutes. Preheat your oven to 350°F (175°C). Once the rolls have risen, brush the tops with melted butter. Bake them for 20 to 25 minutes. They should turn golden brown. After baking, let them cool slightly. If you like, brush them with more melted butter before serving. Enjoy your soft garlic bread rolls! To keep your rolls soft, use warm milk. The milk should be about 110°F. Warm milk helps yeast grow well. This makes the rolls fluffy. Knead the dough until it feels smooth. This helps build a nice texture. After kneading, let the dough rise. Cover it and find a warm spot. This helps the dough double in size. Garlic and parsley give these rolls great flavor. Use fresh garlic for the best taste. You can also add cheese. Try mozzarella or cheddar for a tasty twist. Mixing herbs like rosemary or thyme can add depth. Brush melted butter on top for extra richness. This makes them golden and fragrant. One mistake is not using warm milk. Cold milk slows yeast growth. Don’t skip the second rise. This step helps the rolls become airy. Make sure to knead the dough enough. If it’s too sticky, add a little flour. Lastly, avoid overbaking. Check the rolls at 20 minutes. They should be golden, not dark brown. Pro Tips Perfect Dough Consistency: Ensure your dough is slightly sticky but manageable. If it’s too dry, add a little more warm milk, and if too wet, sprinkle in a bit more flour. Flavor Boost: For an extra flavor kick, sauté the minced garlic in a bit of the melted butter before adding it to the dough. Proper Rising: If your kitchen is cool, you can create a warm environment for the dough to rise by turning on the oven for a minute, then turning it off and placing the dough inside. Storage Tips: Store leftover rolls in an airtight container at room temperature for up to 2 days, or freeze them for longer storage. {{image_2}} You can make herb-infused garlic rolls by adding your favorite herbs. Fresh rosemary and thyme pair well with garlic. Chop the herbs finely and knead them into the dough along with the garlic. This adds a lovely depth of flavor. You can also mix in some dried herbs if fresh ones aren't available. For cheese-stuffed rolls, you will need a cheese that melts well. Mozzarella or cheddar works great. After shaping your dough into balls, flatten each ball and place a small piece of cheese in the center. Fold the dough around the cheese and reshape it into a ball. This gives you a gooey surprise in each bite! If you prefer whole wheat, swap half the all-purpose flour for whole wheat flour. This adds fiber and a nutty flavor. For gluten-free rolls, use a gluten-free flour blend. Make sure your yeast is gluten-free as well. The texture may differ slightly, but they will still be delicious. Adjust the liquid as needed, as gluten-free flours absorb more moisture. To keep your garlic bread rolls fresh, store them in an airtight container. This helps keep moisture in and prevents the rolls from going stale. You can also wrap them in plastic wrap. Make sure to place them in a cool, dry spot. If you want to enjoy them later, the fridge is not the best choice. It can dry them out. Instead, keep them at room temperature for up to three days. When you are ready to eat the rolls, reheating them is simple. You can use the oven or the microwave. If using the oven, preheat it to 350°F (175°C). Wrap the rolls in foil to keep them soft. Heat for about 10 minutes. If you prefer the microwave, place a roll on a microwave-safe plate. Heat it for 10-15 seconds. Check to see if it's warm enough. If not, add a few more seconds. To freeze your garlic bread rolls, let them cool completely first. Once cool, place the rolls in a freezer bag. Squeeze out the air before sealing. They can stay frozen for up to three months. When you want to eat them, thaw them in the fridge overnight. Reheat them in the oven or microwave to enjoy that soft, fluffy texture again. To make garlic bread rolls, start by mixing warm milk, sugar, and instant yeast in a bowl. Let it sit for five minutes until it bubbles. Next, mix in melted butter and a large egg. In another bowl, whisk together flour and salt. Gradually add this to the wet mix, stirring until a dough forms. Knead the dough for five to seven minutes until smooth. Put it in a greased bowl, cover it, and let it rise for one hour. Once it doubles in size, add minced garlic and parsley. Divide the dough into twelve pieces, shape them into balls, and let them rise again for thirty minutes before baking them. Yes, you can use dried garlic. However, fresh garlic gives a stronger and richer flavor. If you use dried garlic, use about one teaspoon for each clove. Dried garlic will blend into the dough well, but it may not give the same punch as fresh. Experiment to see what you like best! Garlic bread rolls last about two to three days at room temperature. Keep them in a sealed container to keep them soft. If you want to keep them longer, you can freeze them. When frozen, they can last up to three months. Just make sure to wrap them well to prevent freezer burn. Garlic bread rolls pair well with many dishes. They go great with pasta, salads, or soups. You can serve them alongside marinara sauce or pesto for dipping. They also make a nice side for grilled meats. Enjoy them with your favorite meals! This blog post covered how to make delicious garlic bread rolls from scratch. We explored key ingredients, their properties, and good substitutes. I walked you through each step, from mixing to baking, and shared useful tips to ensure your rolls are soft and flavorful. We also looked at tasty variations and how to store your rolls. With these insights, you can now bake perfect garlic bread rolls tailored to your taste. Enjoy creating and sharing them with others!

Fluffy Garlic Butter Rolls

Deliciously soft and buttery rolls infused with garlic and parsley.
Prep Time 15 minutes
Cook Time 25 minutes
Total Time 1 hour 25 minutes
Course Bread
Cuisine American
Servings 12
Calories 150 kcal

Ingredients
  

  • 3 cups all-purpose flour
  • 2 tablespoons sugar
  • 1 packet instant yeast (2 ¼ teaspoons)
  • 1 teaspoon salt
  • 1 cup warm milk (about 110°F)
  • 0.25 cup unsalted butter, melted
  • 1 large egg
  • 4 cloves garlic, minced
  • 0.25 cup fresh parsley, chopped
  • 0.25 cup unsalted butter (for brushing)

Instructions
 

  • In a large mixing bowl, combine the warm milk, sugar, and yeast. Allow it to sit for 5 minutes until bubbly and frothy.
  • Add the melted butter and egg to the yeast mixture, stirring until well combined.
  • In a separate bowl, whisk together the flour and salt. Gradually add the flour mixture to the wet ingredients, mixing until a dough starts to form.
  • Knead the dough for about 5-7 minutes on a floured surface until smooth and elastic.
  • Place the kneaded dough in a greased bowl, cover with a clean kitchen towel, and let it rise in a warm area for 1 hour or until doubled in size.
  • After the dough has risen, punch it down and knead in the minced garlic and chopped parsley until evenly distributed.
  • Divide the dough into 12 equal pieces and shape each piece into a ball. Place them on a greased baking sheet, ensuring they are close but not touching.
  • Cover the rolls with a towel and let them rise again for about 30 minutes.
  • Preheat the oven to 350°F (175°C).
  • Brush the tops of the rolls with melted butter and bake for 20-25 minutes or until golden brown.
  • Let them cool slightly before serving, and brush again with more melted butter if desired.

Notes

Brush with additional melted butter before serving for extra flavor.
Keyword bread, butter, garlic, rolls

WANT TO SAVE THIS RECIPE?

Leave a Comment

Recipe Rating