No-Bake S’mores Icebox Cake Delightful Summer Treat

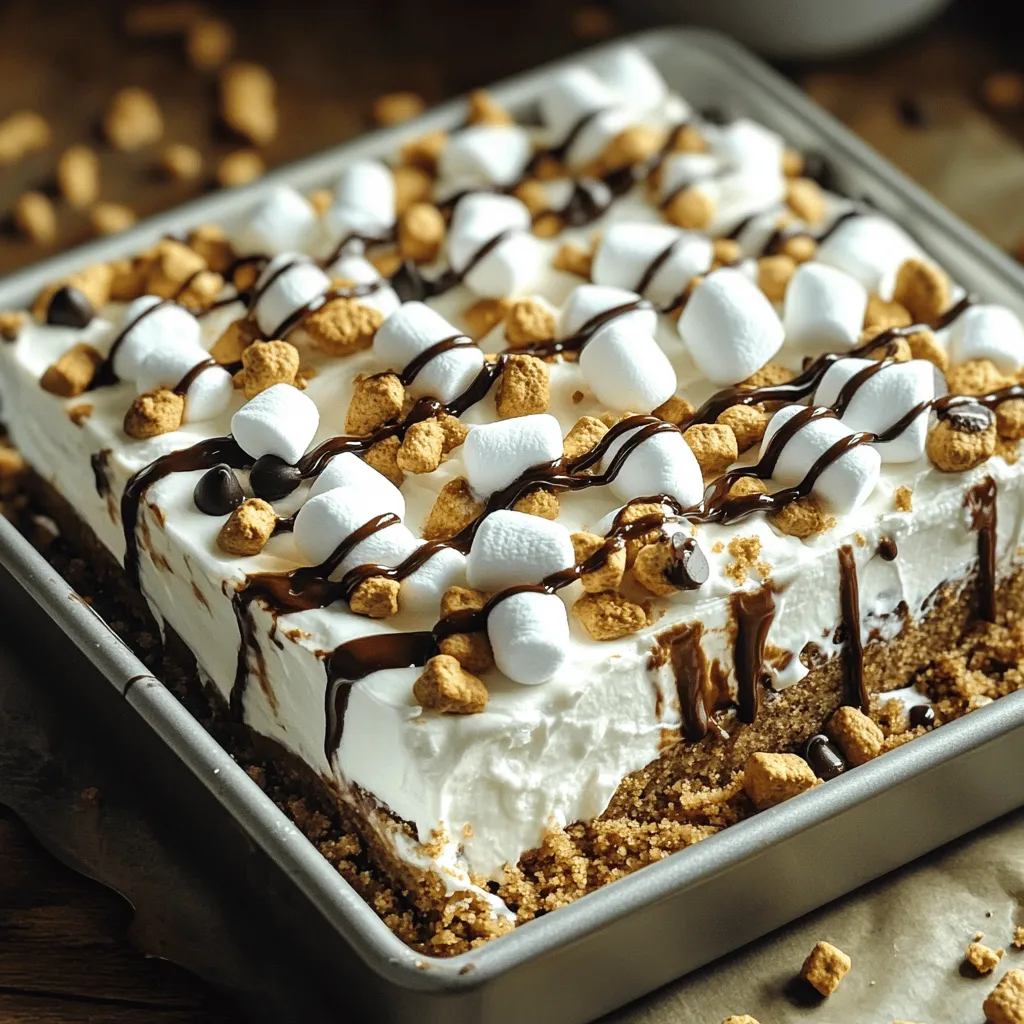
Looking for the perfect summer treat? Try my No-Bake S’mores Icebox Cake! This delightful dessert is easy to make and even easier to enjoy, blending creamy whipped layers with graham crackers, chocolate, and marshmallows. No baking means less heat in the kitchen! Ready to impress your family and friends? Let’s dive into the simple steps and ingredients that make this cake a must-have for your summer gatherings.

Ingredients

Main Ingredients

– 2 cups heavy whipping cream

– 1 cup powdered sugar

– 1 teaspoon vanilla extract

Heavy whipping cream is key for the fluffy texture. It whips up into light peaks. Powdered sugar adds sweetness and helps the cream hold its shape. Vanilla extract gives a warm flavor that enhances the cake.

Additional Ingredients

– 1 ½ cups graham cracker crumbs

– 1 cup mini marshmallows

– 1 cup chocolate chips

Graham cracker crumbs form the tasty base. They bring that classic s’mores crunch. Mini marshmallows add soft, chewy bites. Chocolate chips melt slightly, giving gooey sweetness with each bite.

Toppings

– ½ cup chocolate sauce

– Additional mini marshmallows and graham crackers

Drizzling chocolate sauce on top makes it look great. The extra marshmallows and graham crackers add a fun touch. They create a beautiful finish and make the dessert even more inviting.

Step-by-Step Instructions

Preparing the Whipped Cream Layer

To start, grab a mixing bowl. Combine 2 cups of heavy whipping cream, 1 cup of powdered sugar, and 1 teaspoon of vanilla extract. Use an electric mixer to whip this mix. Keep whipping until you see stiff peaks form. This fluffy whipped cream layer is key to your cake’s texture.

Layering the Cake

Now, let’s layer the cake. Start with a thin layer of whipped cream at the bottom of your rectangular or square cake pan. This first layer helps hold everything together. Next, sprinkle 1 ½ cups of graham cracker crumbs evenly over the whipped cream. After that, add a generous amount of mini marshmallows, about 1 cup. Follow this with 1 cup of chocolate chips. This mix of flavors creates that classic s’mores taste.

Now, spoon another layer of whipped cream on top. Smooth it out evenly. Repeat this process: graham cracker crumbs, marshmallows, chocolate chips, and whipped cream. Keep going until you run out of ingredients. Make sure to finish with a final layer of whipped cream on top.

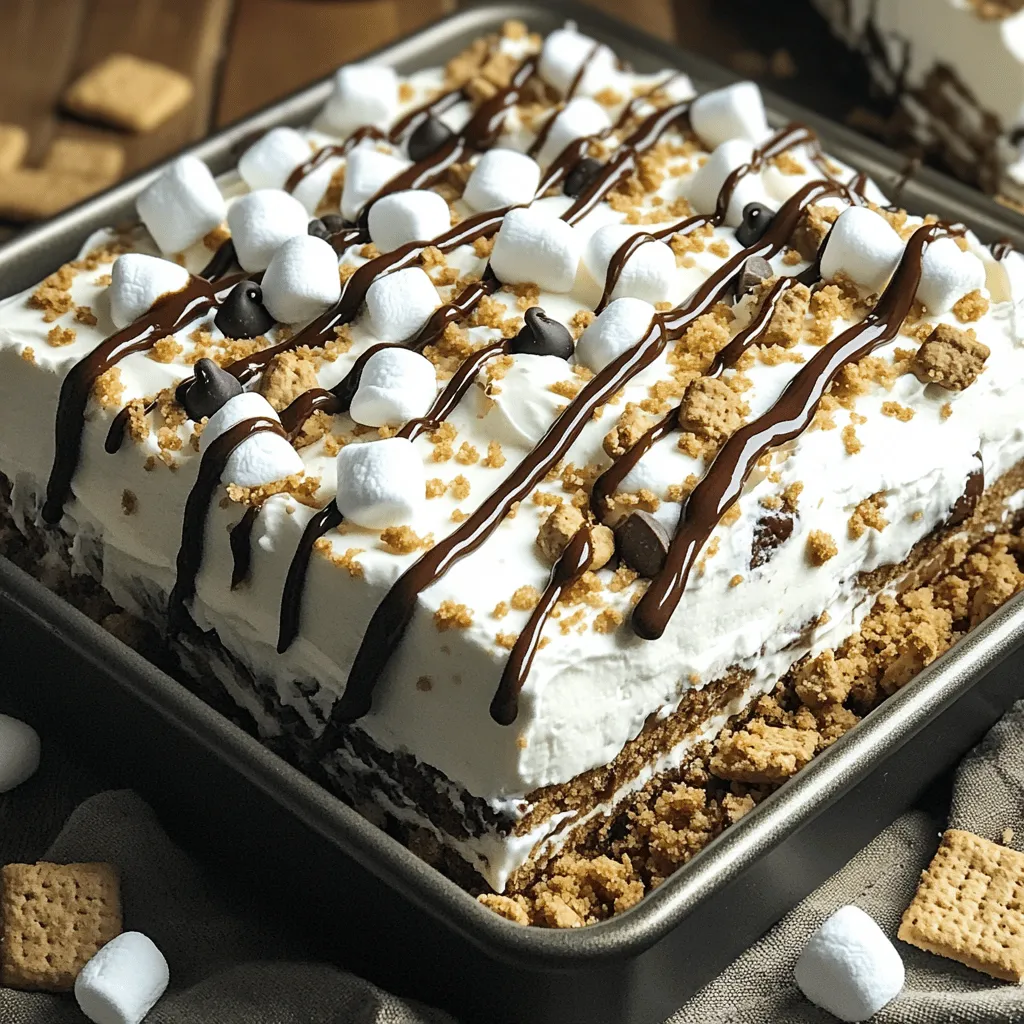
Final Assembly and Chilling

Once you complete the layers, cover the cake with plastic wrap. Place it in the fridge and let it chill for at least 4 hours. For best results, let it chill overnight. This waiting time allows the flavors to blend and the cake to set perfectly. When you’re ready to serve, drizzle some chocolate sauce over the top. Add extra mini marshmallows and broken graham crackers for a fun touch. Slice into squares and enjoy your delightful treat!

Tips & Tricks

Achieving the Perfect Whipped Cream

To create the best whipped cream, use cold ingredients. Start with heavy whipping cream right from the fridge. This helps the cream whip faster. Use a clean bowl and beaters for best results.

Tips for whipping cream to stiff peaks:

– Begin on a low speed and increase gradually.

– Watch for soft peaks first, then keep going.

– Stop when you see stiff peaks form. This means it’s ready.

Ensuring a smooth texture:

– Add powdered sugar slowly while whipping. This helps mix well.

– Use a spatula to fold in any air bubbles gently.

Layering Techniques

Layering makes this cake fun and tasty. Each layer should be even and balanced. This keeps flavors consistent throughout.

Even distribution of ingredients:

– Spread whipped cream thinly at the base.

– Make sure graham cracker crumbs cover the cream fully.

– Distribute marshmallows and chocolate chips evenly to avoid clumps.

How to prevent sinking:

– Layer lightly. Don’t press down hard.

– Avoid overloading layers with too many ingredients. This keeps them stable.

Serving Suggestions

When it’s time to serve, presentation matters! A good look makes a great treat even better.

Ideal pairings and presentation tips:

– Drizzle chocolate sauce on top for a nice touch.

– Garnish with mini marshmallows and graham cracker pieces.

– Serve chilled in squares for easy sharing.

Variations

Flavor Alternatives

You can make this cake with different flavors. Try dark chocolate instead of milk chocolate for a richer taste. White chocolate also adds a sweet twist. You can also mix in flavored extracts. Almond extract gives a nutty kick, while mint extract adds a refreshing touch.

Ingredient Substitutions

If you want a dairy-free version, use coconut cream instead of heavy whipping cream. This swap keeps the cake creamy and light. For those needing gluten-free options, look for gluten-free graham crackers. Many brands offer these tasty alternatives, so you do not have to miss out.

Seasonal Twists

Seasonal fruits can brighten up your icebox cake. Sliced strawberries add a fresh flavor, while bananas bring sweetness. You can also create themed variations for holidays. For Halloween, add candy corn for a fun look. In winter, crushed peppermint makes a festive touch. Experiment with these ideas to keep your dessert exciting!

Storage Info

Refrigeration Guidelines

To store leftover cake properly, cover it tightly with plastic wrap. This keeps the cake fresh and prevents it from absorbing other odors. You can also use an airtight container if you have one. Store it in the fridge for up to three days.

Freezing Options

For longer preservation, you can freeze the cake. First, cut it into squares. Then, wrap each piece in plastic wrap and place them in a freezer-safe bag. The cake will keep for up to two months in the freezer. When you’re ready to enjoy it, just thaw it in the fridge overnight. This method helps maintain its texture and flavor.

Freshness Tips

Watch for signs of spoilage. If you notice any off smells or a change in texture, it’s best to toss it out. Mold is a clear sign that the cake is no longer safe to eat. Always trust your senses—when in doubt, throw it out!

FAQs

How long does the no-bake s’mores icebox cake need to chill?

This cake needs to chill for at least 4 hours. For the best taste and texture, I suggest leaving it in the fridge overnight. This time allows the layers to set and blend together. The longer it chills, the better the flavors meld.

Can I make this dessert in advance?

Yes, you can make this dessert one or two days ahead. Just store it in the fridge, covered with plastic wrap. Make sure to keep it tightly sealed to avoid any fridge odors. This gives the cake time to set, enhancing its flavor.

What can I use instead of graham cracker crumbs?

If you want a change from graham crackers, try using digestive biscuits or vanilla wafers. Both will offer a nice texture. You could also crush some pretzels for a salty twist. Just keep the ratio the same for best results.

Is it possible to make this recipe gluten-free?

Absolutely! You can use gluten-free graham crackers or any gluten-free cookie. There are many tasty options available today. Always check the labels to ensure they meet your needs. This way, everyone can enjoy this delicious cake.

This no-bake s’mores icebox cake is a fun and easy treat. You learned how to create layers of whipped cream, graham crackers, and chocolate. I shared tips for perfect texture and cooling times. You can also change flavors and make it gluten-free. With a bit of care in layering, you’ll impress anyone you serve. Enjoy making this delightful dessert that captures the taste of summer anytime!

- 2 cups heavy whipping cream - 1 cup powdered sugar - 1 teaspoon vanilla extract Heavy whipping cream is key for the fluffy texture. It whips up into light peaks. Powdered sugar adds sweetness and helps the cream hold its shape. Vanilla extract gives a warm flavor that enhances the cake. - 1 ½ cups graham cracker crumbs - 1 cup mini marshmallows - 1 cup chocolate chips Graham cracker crumbs form the tasty base. They bring that classic s’mores crunch. Mini marshmallows add soft, chewy bites. Chocolate chips melt slightly, giving gooey sweetness with each bite. - ½ cup chocolate sauce - Additional mini marshmallows and graham crackers Drizzling chocolate sauce on top makes it look great. The extra marshmallows and graham crackers add a fun touch. They create a beautiful finish and make the dessert even more inviting. To start, grab a mixing bowl. Combine 2 cups of heavy whipping cream, 1 cup of powdered sugar, and 1 teaspoon of vanilla extract. Use an electric mixer to whip this mix. Keep whipping until you see stiff peaks form. This fluffy whipped cream layer is key to your cake's texture. Now, let’s layer the cake. Start with a thin layer of whipped cream at the bottom of your rectangular or square cake pan. This first layer helps hold everything together. Next, sprinkle 1 ½ cups of graham cracker crumbs evenly over the whipped cream. After that, add a generous amount of mini marshmallows, about 1 cup. Follow this with 1 cup of chocolate chips. This mix of flavors creates that classic s’mores taste. Now, spoon another layer of whipped cream on top. Smooth it out evenly. Repeat this process: graham cracker crumbs, marshmallows, chocolate chips, and whipped cream. Keep going until you run out of ingredients. Make sure to finish with a final layer of whipped cream on top. Once you complete the layers, cover the cake with plastic wrap. Place it in the fridge and let it chill for at least 4 hours. For best results, let it chill overnight. This waiting time allows the flavors to blend and the cake to set perfectly. When you're ready to serve, drizzle some chocolate sauce over the top. Add extra mini marshmallows and broken graham crackers for a fun touch. Slice into squares and enjoy your delightful treat! To create the best whipped cream, use cold ingredients. Start with heavy whipping cream right from the fridge. This helps the cream whip faster. Use a clean bowl and beaters for best results. - Tips for whipping cream to stiff peaks: - Begin on a low speed and increase gradually. - Watch for soft peaks first, then keep going. - Stop when you see stiff peaks form. This means it's ready. - Ensuring a smooth texture: - Add powdered sugar slowly while whipping. This helps mix well. - Use a spatula to fold in any air bubbles gently. Layering makes this cake fun and tasty. Each layer should be even and balanced. This keeps flavors consistent throughout. - Even distribution of ingredients: - Spread whipped cream thinly at the base. - Make sure graham cracker crumbs cover the cream fully. - Distribute marshmallows and chocolate chips evenly to avoid clumps. - How to prevent sinking: - Layer lightly. Don't press down hard. - Avoid overloading layers with too many ingredients. This keeps them stable. When it’s time to serve, presentation matters! A good look makes a great treat even better. - Ideal pairings and presentation tips: - Drizzle chocolate sauce on top for a nice touch. - Garnish with mini marshmallows and graham cracker pieces. - Serve chilled in squares for easy sharing. {{image_2}} You can make this cake with different flavors. Try dark chocolate instead of milk chocolate for a richer taste. White chocolate also adds a sweet twist. You can also mix in flavored extracts. Almond extract gives a nutty kick, while mint extract adds a refreshing touch. If you want a dairy-free version, use coconut cream instead of heavy whipping cream. This swap keeps the cake creamy and light. For those needing gluten-free options, look for gluten-free graham crackers. Many brands offer these tasty alternatives, so you do not have to miss out. Seasonal fruits can brighten up your icebox cake. Sliced strawberries add a fresh flavor, while bananas bring sweetness. You can also create themed variations for holidays. For Halloween, add candy corn for a fun look. In winter, crushed peppermint makes a festive touch. Experiment with these ideas to keep your dessert exciting! To store leftover cake properly, cover it tightly with plastic wrap. This keeps the cake fresh and prevents it from absorbing other odors. You can also use an airtight container if you have one. Store it in the fridge for up to three days. For longer preservation, you can freeze the cake. First, cut it into squares. Then, wrap each piece in plastic wrap and place them in a freezer-safe bag. The cake will keep for up to two months in the freezer. When you’re ready to enjoy it, just thaw it in the fridge overnight. This method helps maintain its texture and flavor. Watch for signs of spoilage. If you notice any off smells or a change in texture, it’s best to toss it out. Mold is a clear sign that the cake is no longer safe to eat. Always trust your senses—when in doubt, throw it out! This cake needs to chill for at least 4 hours. For the best taste and texture, I suggest leaving it in the fridge overnight. This time allows the layers to set and blend together. The longer it chills, the better the flavors meld. Yes, you can make this dessert one or two days ahead. Just store it in the fridge, covered with plastic wrap. Make sure to keep it tightly sealed to avoid any fridge odors. This gives the cake time to set, enhancing its flavor. If you want a change from graham crackers, try using digestive biscuits or vanilla wafers. Both will offer a nice texture. You could also crush some pretzels for a salty twist. Just keep the ratio the same for best results. Absolutely! You can use gluten-free graham crackers or any gluten-free cookie. There are many tasty options available today. Always check the labels to ensure they meet your needs. This way, everyone can enjoy this delicious cake. This no-bake s'mores icebox cake is a fun and easy treat. You learned how to create layers of whipped cream, graham crackers, and chocolate. I shared tips for perfect texture and cooling times. You can also change flavors and make it gluten-free. With a bit of care in layering, you'll impress anyone you serve. Enjoy making this delightful dessert that captures the taste of summer anytime!

No-Bake S’mores Icebox Cake

Indulge in the deliciousness of this No-Bake S’mores Icebox Cake that’s as easy to make as it is delightful to eat! Perfect for summer gatherings or a sweet treat at home, this cake layers whipped cream, graham crackers, mini marshmallows, and chocolate for a pop of flavor in every bite. Ready in just 20 minutes plus chilling time, click through to explore this mouthwatering recipe and delight your friends and family!

Ingredients
  

2 cups heavy whipping cream

1 cup powdered sugar

1 teaspoon vanilla extract

1 ½ cups graham cracker crumbs

1 cup mini marshmallows

1 cup chocolate chips (semi-sweet or milk chocolate)

½ cup chocolate sauce (for drizzling)

Additional mini marshmallows and graham crackers for topping

Instructions
 

In a mixing bowl, combine heavy whipping cream, powdered sugar, and vanilla extract. Using an electric mixer, whip the mixture until stiff peaks form. This will be your fluffy whipped cream layer.

    In a rectangular or square cake pan, start by spreading a thin layer of whipped cream on the bottom.

      Arrange a layer of graham cracker crumbs on top of the whipped cream, covering it evenly.

        Sprinkle a portion of the mini marshmallows over the graham crackers, followed by a handful of chocolate chips.

          Spoon another layer of whipped cream over these ingredients, smoothing it out evenly.

            Repeat the layering process (graham crackers, marshmallows, chocolate chips, whipped cream) until you run out of ingredients, finishing with a final layer of whipped cream on top.

              Cover the cake with plastic wrap and refrigerate for at least 4 hours, or overnight if possible, to allow it to set perfectly.

                Once ready to serve, remove from the fridge and drizzle with chocolate sauce. Top with additional mini marshmallows and broken graham crackers for decoration.

                  Slice into squares and serve chilled.

                    Prep Time, Total Time, Servings: 20 minutes | 4 hours (chilling) | 8 servings

                      Leave a Comment

                      Recipe Rating