No Bake S’mores Fudge Bars Easy and Tasty Dessert

WANT TO SAVE THIS RECIPE?

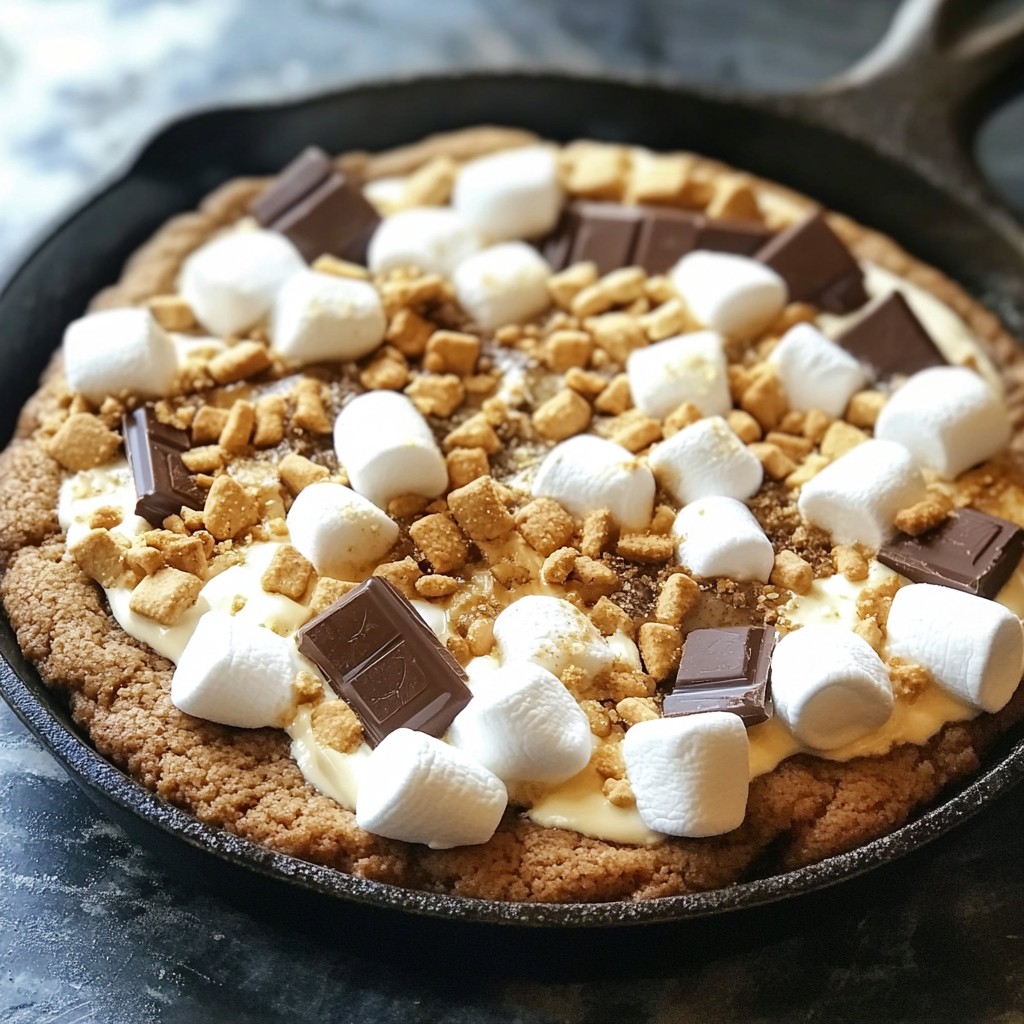
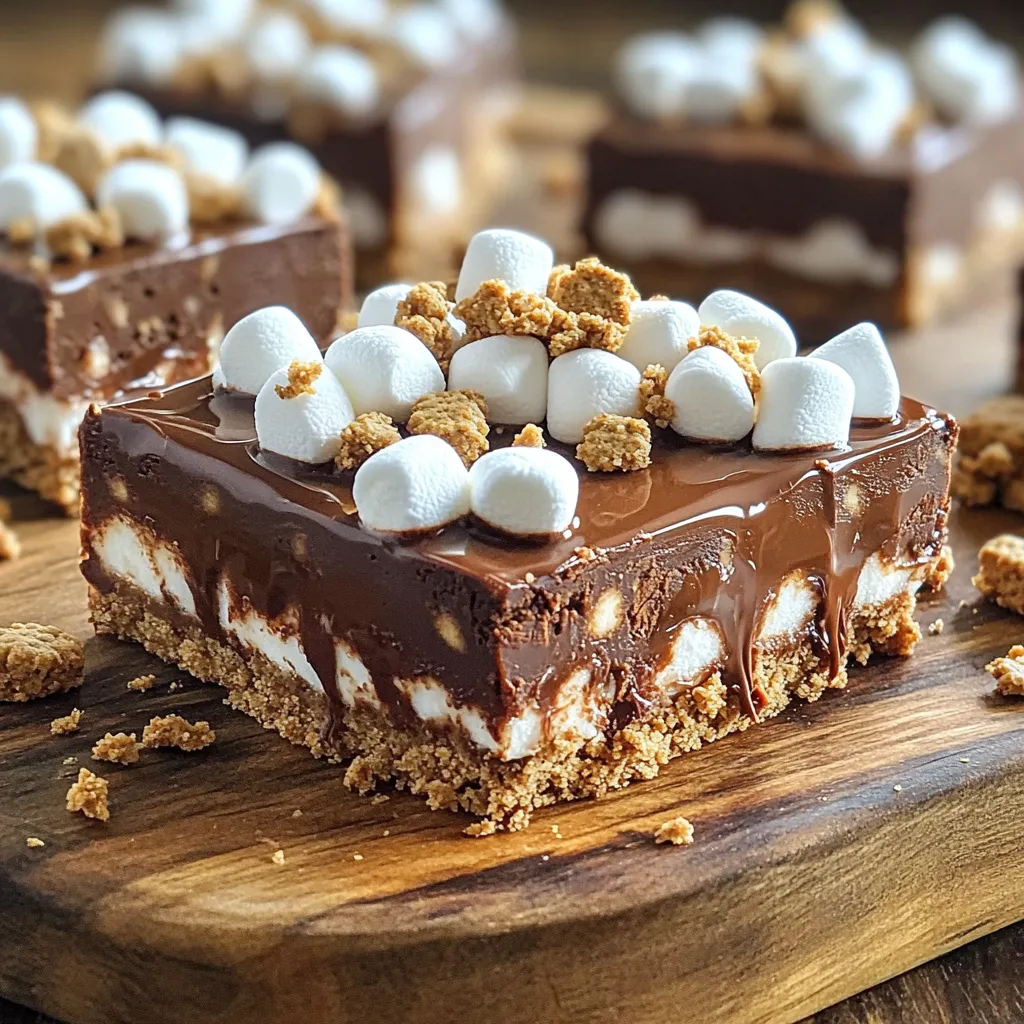
Are you craving a sweet, simple treat? You’ll love these No Bake S’mores Fudge Bars. They combine the classic flavors of s’mores into a rich, gooey dessert. Best of all, they don’t need any baking! In just a few easy steps, you can whip up a delightful dessert that’s perfect for any occasion. Let’s explore the ingredients and get started on this delicious journey!

Ingredients

List of Required Ingredients

– 1 cup graham cracker crumbs

– 1/2 cup unsweetened cocoa powder

– 1/2 cup almond butter (or peanut butter)

– 1/2 cup maple syrup

– 1 teaspoon vanilla extract

– 1 cup mini marshmallows

– 1/2 cup milk chocolate chips

– 1/4 cup crushed graham crackers (for topping)

Substitutions and Alternatives

You can swap almond butter for peanut butter or cashew butter. If you want a different sweetener, use honey or agave syrup. These changes can fit your tastes or needs.

Tools Needed

To make these fudge bars, gather a few tools:

– Mixing bowls

– Whisk

– Baking dish (8×8 inches)

– Parchment paper

Having the right tools helps make the process smooth and easy. Each item plays a key role in mixing ingredients and setting the fudge.

Step-by-Step Instructions

Preparation Overview

First, gather your ingredients. You will mix dry and wet items separately. This method helps create a smoother fudge. Next, you will fold in the chocolate chips and marshmallows. This adds sweetness and texture.

Detailed Steps

Step 1: Mix graham cracker crumbs and cocoa powder

In a medium bowl, add 1 cup of graham cracker crumbs. Then, add 1/2 cup of cocoa powder. Use a fork or whisk to mix them well. This gives your fudge a rich chocolate flavor.

Step 2: Prepare the wet mixture with nut butter and syrup

In another bowl, combine 1/2 cup of almond butter and 1/2 cup of maple syrup. Also, add 1 teaspoon of vanilla extract. Whisk these ingredients together until the mixture is smooth. This blend creates a creamy base for your fudge.

Step 3: Combine mixtures and form the fudge dough

Slowly add the dry mixture into the wet mixture. Stir continuously until everything is fully combined. The mixture will become thick and doughy. This texture is perfect for fudge bars.

Step 4: Forming and refrigerating the fudge

Line an 8×8 inch baking dish with parchment paper. This will help you remove the fudge easily later. Press the fudge mixture into the dish evenly. Smooth the top with a spatula.

Finalizing the Recipe
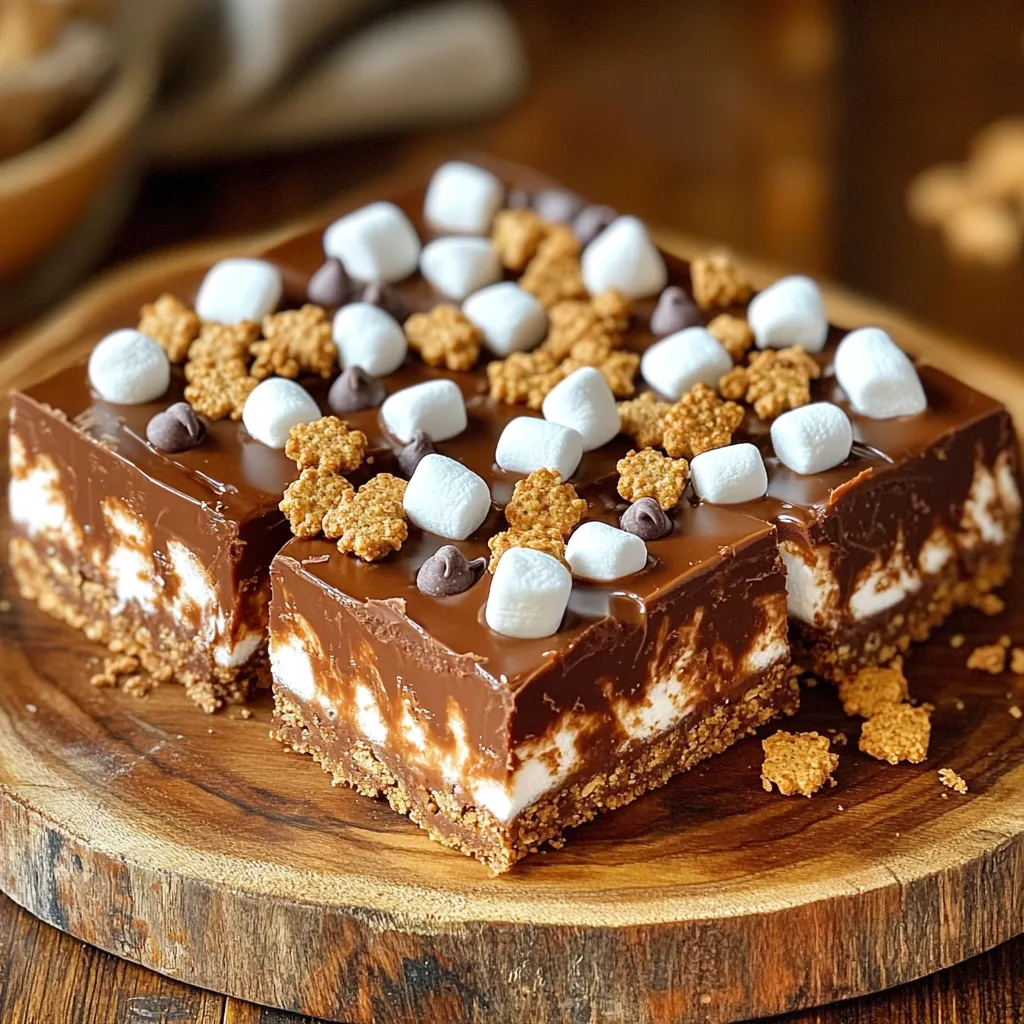
Topping with crushed graham crackers

Sprinkle 1/4 cup of crushed graham crackers over the fudge. Gently press them down into the mixture. This adds a nice crunch.

Cutting into squares for serving

Refrigerate the fudge for at least 2 hours. Once firm, lift it out using the parchment paper. Cut the fudge into squares and serve. Enjoy your tasty treat!

Tips & Tricks

Common Mistakes to Avoid

Overmixing the fudge: When you mix too much, the texture changes. You want a thick dough that holds together. Stop mixing as soon as everything is combined.

Not refrigerating long enough: If you don’t chill the fudge enough, it will be too soft. Aim for at least 2 hours in the fridge. This helps the fudge set properly.

Presentation Tips

Serving suggestions and plating ideas: For a rustic look, serve the fudge on a wooden platter. Cut it into squares for easy grabbing.

Optional garnishes: A drizzle of melted chocolate makes it shine. Extra mini marshmallows on top add a fun touch.

How to Make Ahead

Freezing instructions for longer storage: To freeze the fudge, wrap it tightly in plastic wrap. Then, place it in an airtight container. It will last for up to three months.

Best practices for thawing: To thaw, take it out of the freezer and place it in the fridge overnight. This keeps the texture nice and firm.

Variations

Flavor Variations

You can make your fudge bars even more fun! Add a few drops of mint extract for a mint chocolate twist. This gives a fresh taste that pairs well with chocolate. You can also mix in some nuts or dried fruits. Chopped walnuts or cranberries add great texture and flavor.

Dietary Variations

If you want a vegan treat, swap out dairy products. Use coconut oil instead of butter and maple syrup for sweetening. You can also choose plant-based nut butter. To make it gluten-free, use gluten-free graham crackers. This way, everyone can enjoy your fudge bars.

Unique Toppings

Get creative with toppings! Try using white chocolate chips instead of milk chocolate. Butterscotch chips also add a sweet flavor. For a fun finish, sprinkle on coconut flakes or colorful sprinkles. These small changes can make your fudge bars stand out and taste amazing.

Storage Info

How to Store

To keep your No Bake S’mores Fudge Bars fresh, you should store them in the fridge. Use an airtight container to prevent them from drying out. A glass or plastic container with a tight lid works best. This helps keep the fudge moist and tasty for longer.

Shelf Life

These fudge bars will last about one week in the fridge. After that, you might notice changes in texture and flavor. Watch for signs of spoilage like a change in smell or a dry texture. If they seem hard or smell off, it’s best to toss them.

Freezing Instructions

You can freeze these fudge bars for up to three months. To do this, cut them into squares first. Wrap each piece in plastic wrap, then place them in a freezer-safe bag. Be sure to remove as much air as possible. When you’re ready to enjoy, thaw them in the fridge overnight for the best texture.

FAQs

Can I make No Bake S’mores Fudge Bars ahead of time?

Yes, you can make these bars ahead of time. They are great for meal prep. Store them in the fridge for up to a week. Use an airtight container to keep them fresh. If you want to keep them longer, freeze them. Cut them into squares before freezing for easy servings. Thaw them in the fridge overnight before enjoying.

Can I use different types of chocolate?

Absolutely! You can swap the milk chocolate chips for dark or dairy-free chocolate. This change will give the fudge a richer flavor. If you prefer a sweeter taste, stick with milk chocolate. For a vegan option, use dairy-free chocolate chips. This way, you can still enjoy the same great taste without dairy.

Is it possible to make these bars without nut butter?

Yes, you can make these bars nut-free. Instead of almond butter, try sunflower seed butter. This option gives a similar texture and taste. You can also use soy nut butter. Both alternatives work well in this recipe. Just make sure to check for allergies when serving.

You can create delicious No Bake S’mores Fudge Bars with simple ingredients. We covered required items, alternatives, and tools needed. The steps guide you through mixing, shaping, and refrigerating your fudge. Don’t forget the tips for avoiding mistakes and making variations to suit your taste. Remember, proper storage keeps your fudge fresh longer. Enjoy getting creative and making this treat your own! With each bite, you taste the sweet reward of your effort.

- 1 cup graham cracker crumbs - 1/2 cup unsweetened cocoa powder - 1/2 cup almond butter (or peanut butter) - 1/2 cup maple syrup - 1 teaspoon vanilla extract - 1 cup mini marshmallows - 1/2 cup milk chocolate chips - 1/4 cup crushed graham crackers (for topping) You can swap almond butter for peanut butter or cashew butter. If you want a different sweetener, use honey or agave syrup. These changes can fit your tastes or needs. To make these fudge bars, gather a few tools: - Mixing bowls - Whisk - Baking dish (8x8 inches) - Parchment paper Having the right tools helps make the process smooth and easy. Each item plays a key role in mixing ingredients and setting the fudge. First, gather your ingredients. You will mix dry and wet items separately. This method helps create a smoother fudge. Next, you will fold in the chocolate chips and marshmallows. This adds sweetness and texture. - Step 1: Mix graham cracker crumbs and cocoa powder In a medium bowl, add 1 cup of graham cracker crumbs. Then, add 1/2 cup of cocoa powder. Use a fork or whisk to mix them well. This gives your fudge a rich chocolate flavor. - Step 2: Prepare the wet mixture with nut butter and syrup In another bowl, combine 1/2 cup of almond butter and 1/2 cup of maple syrup. Also, add 1 teaspoon of vanilla extract. Whisk these ingredients together until the mixture is smooth. This blend creates a creamy base for your fudge. - Step 3: Combine mixtures and form the fudge dough Slowly add the dry mixture into the wet mixture. Stir continuously until everything is fully combined. The mixture will become thick and doughy. This texture is perfect for fudge bars. - Step 4: Forming and refrigerating the fudge Line an 8x8 inch baking dish with parchment paper. This will help you remove the fudge easily later. Press the fudge mixture into the dish evenly. Smooth the top with a spatula. - Topping with crushed graham crackers Sprinkle 1/4 cup of crushed graham crackers over the fudge. Gently press them down into the mixture. This adds a nice crunch. - Cutting into squares for serving Refrigerate the fudge for at least 2 hours. Once firm, lift it out using the parchment paper. Cut the fudge into squares and serve. Enjoy your tasty treat! - Overmixing the fudge: When you mix too much, the texture changes. You want a thick dough that holds together. Stop mixing as soon as everything is combined. - Not refrigerating long enough: If you don’t chill the fudge enough, it will be too soft. Aim for at least 2 hours in the fridge. This helps the fudge set properly. - Serving suggestions and plating ideas: For a rustic look, serve the fudge on a wooden platter. Cut it into squares for easy grabbing. - Optional garnishes: A drizzle of melted chocolate makes it shine. Extra mini marshmallows on top add a fun touch. - Freezing instructions for longer storage: To freeze the fudge, wrap it tightly in plastic wrap. Then, place it in an airtight container. It will last for up to three months. - Best practices for thawing: To thaw, take it out of the freezer and place it in the fridge overnight. This keeps the texture nice and firm. {{image_2}} You can make your fudge bars even more fun! Add a few drops of mint extract for a mint chocolate twist. This gives a fresh taste that pairs well with chocolate. You can also mix in some nuts or dried fruits. Chopped walnuts or cranberries add great texture and flavor. If you want a vegan treat, swap out dairy products. Use coconut oil instead of butter and maple syrup for sweetening. You can also choose plant-based nut butter. To make it gluten-free, use gluten-free graham crackers. This way, everyone can enjoy your fudge bars. Get creative with toppings! Try using white chocolate chips instead of milk chocolate. Butterscotch chips also add a sweet flavor. For a fun finish, sprinkle on coconut flakes or colorful sprinkles. These small changes can make your fudge bars stand out and taste amazing. To keep your No Bake S'mores Fudge Bars fresh, you should store them in the fridge. Use an airtight container to prevent them from drying out. A glass or plastic container with a tight lid works best. This helps keep the fudge moist and tasty for longer. These fudge bars will last about one week in the fridge. After that, you might notice changes in texture and flavor. Watch for signs of spoilage like a change in smell or a dry texture. If they seem hard or smell off, it's best to toss them. You can freeze these fudge bars for up to three months. To do this, cut them into squares first. Wrap each piece in plastic wrap, then place them in a freezer-safe bag. Be sure to remove as much air as possible. When you're ready to enjoy, thaw them in the fridge overnight for the best texture. Yes, you can make these bars ahead of time. They are great for meal prep. Store them in the fridge for up to a week. Use an airtight container to keep them fresh. If you want to keep them longer, freeze them. Cut them into squares before freezing for easy servings. Thaw them in the fridge overnight before enjoying. Absolutely! You can swap the milk chocolate chips for dark or dairy-free chocolate. This change will give the fudge a richer flavor. If you prefer a sweeter taste, stick with milk chocolate. For a vegan option, use dairy-free chocolate chips. This way, you can still enjoy the same great taste without dairy. Yes, you can make these bars nut-free. Instead of almond butter, try sunflower seed butter. This option gives a similar texture and taste. You can also use soy nut butter. Both alternatives work well in this recipe. Just make sure to check for allergies when serving. You can create delicious No Bake S’mores Fudge Bars with simple ingredients. We covered required items, alternatives, and tools needed. The steps guide you through mixing, shaping, and refrigerating your fudge. Don’t forget the tips for avoiding mistakes and making variations to suit your taste. Remember, proper storage keeps your fudge fresh longer. Enjoy getting creative and making this treat your own! With each bite, you taste the sweet reward of your effort.

No Bake S’mores Fudge Bars

Indulge in the sweet, gooey goodness of No Bake S'mores Fudge Bars! With layers of graham crackers, chocolate, almond butter, and mini marshmallows, these easy treats are perfect for satisfying your cravings. In just 10 minutes of prep, you can create a delicious dessert that kids and adults will love. Don't miss out on this fun recipe! Click to discover how to make your own No Bake S'mores Fudge Bars today!

Ingredients
  

1 cup graham cracker crumbs

1/2 cup unsweetened cocoa powder

1/2 cup almond butter (or peanut butter)

1/2 cup maple syrup

1 teaspoon vanilla extract

1 cup mini marshmallows

1/2 cup milk chocolate chips

1/4 cup crushed graham crackers (for topping)

Instructions
 

In a medium bowl, combine the graham cracker crumbs and cocoa powder. Stir until well mixed.

    In another bowl, whisk together the almond butter, maple syrup, and vanilla extract until smooth.

      Gradually add the dry mixture to the wet mixture, stirring until fully combined and a thick dough forms.

        Gently fold in the mini marshmallows and milk chocolate chips to the mixture.

          Line an 8x8 inch baking dish with parchment paper, leaving some overhang on the sides for easy removal.

            Press the fudge mixture evenly into the bottom of the prepared baking dish, smoothing the top with a spatula.

              Sprinkle the crushed graham crackers over the top of the fudge layer, pressing them down gently.

                Refrigerate for at least 2 hours or until firm.

                  Once set, lift the fudge out using the parchment paper and cut into squares.

                    Prep Time: 10 minutes | Total Time: 2 hours 10 minutes | Servings: 16 squares

                      - Presentation Tips: Serve on a rustic wooden platter, drizzled with melted chocolate and topped with extra mini marshmallows for a delightful touch.

                        WANT TO SAVE THIS RECIPE?

                        Leave a Comment

                        Recipe Rating