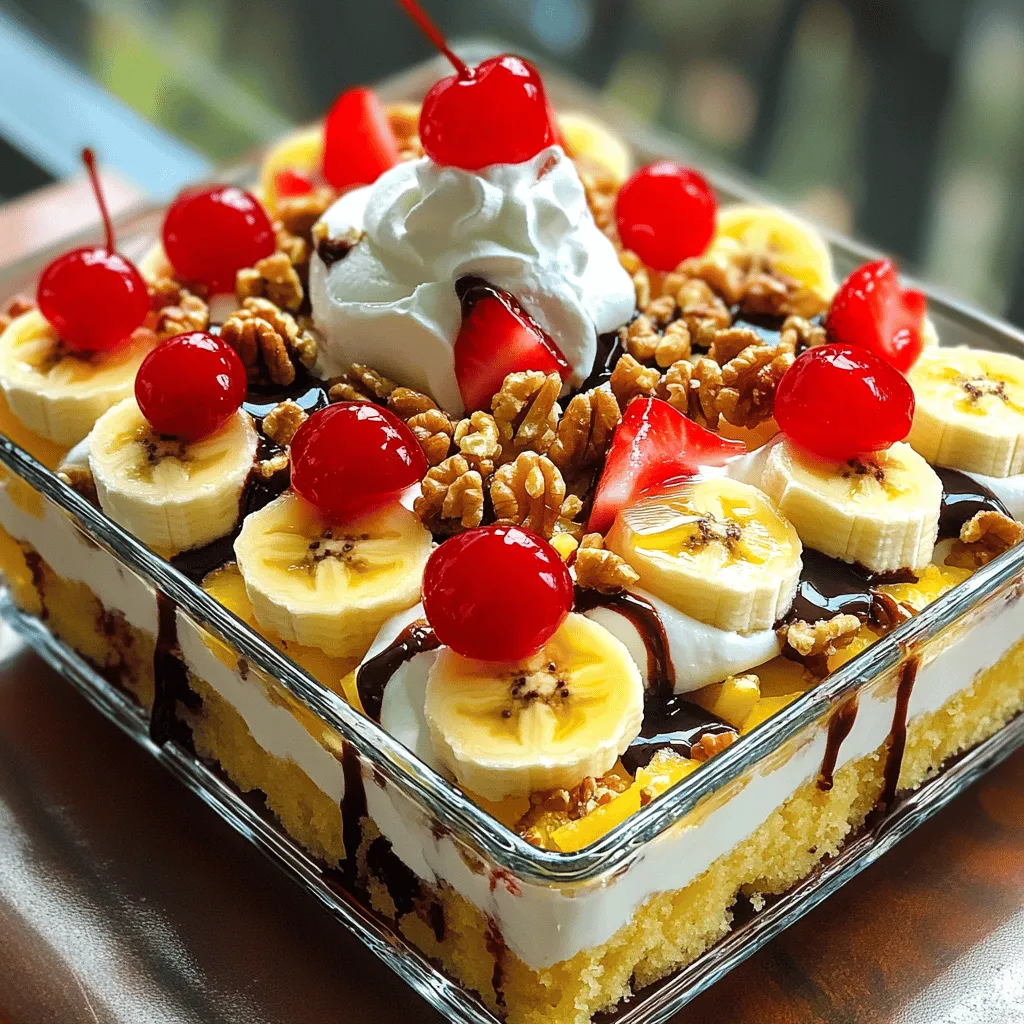
If you love easy desserts, get ready for a treat! My No-Bake Banana Split Cake combines classic flavors with a fun, creamy twist. In just a few simple steps, you can whip up this delightful dessert without turning on the oven. Perfect for parties or a sweet fix at home, it’s customizable, too! Let’s dive into the ingredients and create a cake that everyone will rave about!
Ingredients
List of Ingredients Needed
To make the No-Bake Banana Split Cake, gather these key ingredients:
– 1 box of graham crackers (about 14-15 sheets)
– 1/2 cup unsalted butter, melted
– 1 cup powdered sugar
– 1 package (8 oz) cream cheese, softened
– 1 cup heavy whipping cream
– 1 teaspoon vanilla extract
– 3 ripe bananas, sliced
– 1 cup crushed pineapple, drained
– 1 cup sliced strawberries
– 1 cup chocolate syrup
– 1/2 cup chopped walnuts (optional)
– Whipped cream for topping
– Maraschino cherries for garnish
Optional Ingredients for Customization
You can add fun twists to your cake with these optional ingredients:
– Use different fruits like blueberries or raspberries for a colorful touch.
– Add a layer of caramel sauce for extra sweetness.
– Swap walnuts for pecans or omit them for a nut-free version.
– Experiment with flavored whipped cream, like strawberry or chocolate.
Substitutions for Dietary Restrictions
If you have dietary needs, consider these substitutions:
– Gluten-free: Use gluten-free graham crackers.
– Dairy-free: Replace cream cheese with a dairy-free alternative. Use coconut cream instead of heavy cream.
– Lower sugar: Use a sugar substitute for the powdered sugar.
– Vegan: Choose vegan cream cheese and whipped cream. Use maple syrup instead of chocolate syrup.
These options help you create a delicious cake that fits your needs!
Step-by-Step Instructions
Preparation for the Crust
Start by making the crust. Take a mixing bowl and add melted butter and graham cracker crumbs. Mix them well until the crumbs are coated. You want a nice, even mixture. Now, press this mixture firmly into the bottom of a 9×13 inch dish. This creates a solid base for your cake. Set the crust aside while you move on to the next step.
Making the Cream Cheese Mixture
Next, grab another bowl. In it, beat the softened cream cheese with powdered sugar. Keep mixing until it is smooth and creamy. This step is key for a rich taste. After that, fold in the heavy whipping cream and vanilla extract. Mix until it becomes light and fluffy. This cream cheese mixture is what makes the cake so special.
Layering the Cake
Now, it’s time to build your cake. Take half of the cream cheese mixture and spread it over the crust. Then, layer on the sliced bananas, followed by the crushed pineapple. These fruits add fresh flavor. Finally, top it off with the rest of the cream cheese mixture. This smooth layer will hold everything together.
Chilling the Cake for Best Results
Cover the dish with plastic wrap. Place it in the refrigerator to chill for at least 4 hours. If you can wait overnight, do that for the best taste. This chilling time helps the flavors blend together. Enjoy this easy and delicious delight when you serve it!
Tips & Tricks
Tips for the Perfect Creamy Texture
To get a creamy texture, use softened cream cheese. Beat it well with powdered sugar. This helps eliminate lumps. When you fold in heavy whipping cream, do it gently. This keeps the mix light and airy. For extra creaminess, use full-fat cream cheese.
How to Avoid Soggy Layers
To prevent soggy layers, drain the crushed pineapple well. Excess juice makes the crust soggy. Press the crust firmly into the dish. This helps it stay together. Chill the cake for at least four hours. This allows the layers to set, keeping them firm.
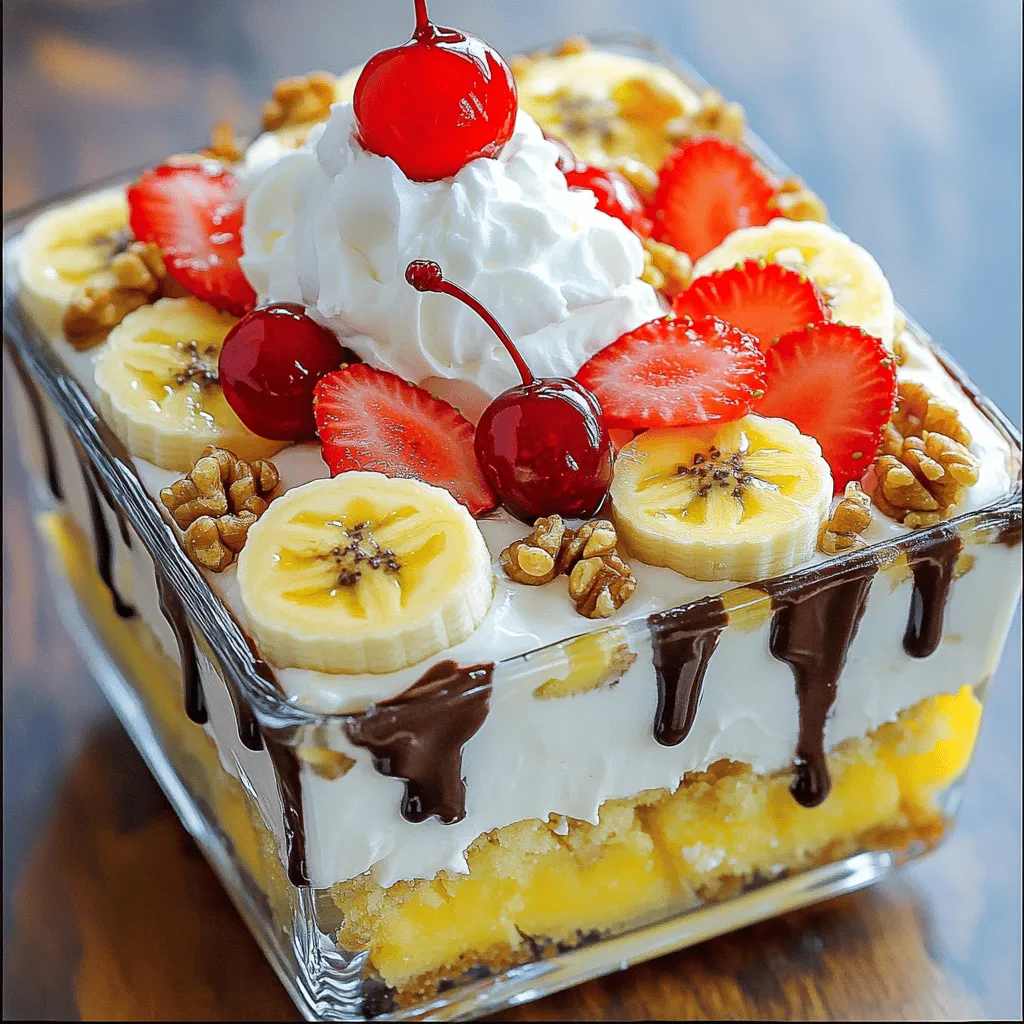
Creative Presentation Ideas
For a fun look, slice the cake into squares. Serve each square on a dessert plate. Drizzle more chocolate syrup on top. Sprinkle chopped walnuts for crunch. Add fresh banana slices and strawberries for color. Use whipped cream and maraschino cherries for that classic finish.
Variations
Different Fruit Combinations
You can change the fruits in this cake. Try using peaches or blueberries. Both fruits add great flavor. You can also mix in some kiwi slices for a tropical twist. The key is to use ripe fruits. Fresh fruit gives the cake a bright taste.
Alternative Crust Options
If you want to switch the crust, use crushed cookies. Oreos work well for a chocolatey base. You can also use almond flour for a gluten-free option. Just mix it with melted butter like you do with graham crackers. This adds a nice crunch to the cake.
No-Bake Chocolate Version
For chocolate lovers, make a chocolate version. Replace half the cream cheese with chocolate pudding. Add cocoa powder to the crust for extra flavor. Top the cake with chocolate chips instead of fruit. This variation is rich and creamy, perfect for any chocolate craving!
Storage Info
How to Store Leftovers
Store leftover No-Bake Banana Split Cake in the fridge. Use an airtight container or cover it with plastic wrap. This keeps the cake fresh and tasty. Make sure to keep it chilled until you are ready to serve. It’s best to consume leftovers within three days for the best flavor.
Freezing Instructions and Tips
You can freeze this cake, but it’s best to freeze it before adding the toppings. Wrap the cake tightly in plastic wrap and then in foil. This prevents freezer burn. When ready to eat, let it thaw in the fridge overnight. After thawing, add whipped cream and cherries just before serving. This keeps them fresh and beautiful.
Shelf Life of the Cake
The No-Bake Banana Split Cake lasts about five days in the fridge. If kept well, it can be frozen for up to three months. However, the texture may change after freezing. Use these tips to enjoy this dessert at its best!
FAQs
How do I make a gluten-free version of No-Bake Banana Split Cake?
To make a gluten-free version, use gluten-free graham crackers. You can find these at most grocery stores. Simply replace regular graham crackers with the gluten-free ones in the crust. The rest of the recipe stays the same. Enjoy the same yummy taste without the gluten!
Can I use other types of fruit?
Yes, you can use other fruits! Try peaches, blueberries, or raspberries. Just make sure to slice or chop them into small pieces. Mix and match to find your favorite flavor combos. This recipe is very flexible and fun!
How long can I refrigerate No-Bake Banana Split Cake before serving?
You can refrigerate the cake for up to 24 hours before serving. Chilling it for at least four hours is key. This wait time helps the flavors mix well and gives it a better texture. Longer chilling also makes it easier to slice.
Is it possible to add a layer of chocolate mousse?
Absolutely! You can add a layer of chocolate mousse for extra richness. Just whip up some chocolate mousse and spread it on top of the cream cheese layer. This addition makes the cake even more indulgent and delicious.
How can I make this recipe without cream cheese?
If you want to skip cream cheese, try using whipped coconut cream or Greek yogurt. Both options will give a creamy texture. Whip them until smooth and fluffy, then layer just like the original recipe. You’ll still have a tasty cake!
You now have all you need to make a No-Bake Banana Split Cake. We covered the ingredients, step-by-step instructions, tips for the perfect texture, and fun variations. Remember to store your leftovers properly to enjoy them later. You can easily customize this dessert to fit your taste and dietary needs. Now, gather your ingredients and start creating this delicious treat. You’ll impress everyone with your baking skills!