Mini Pumpkin Pies Simple Delightful Dessert Recipe

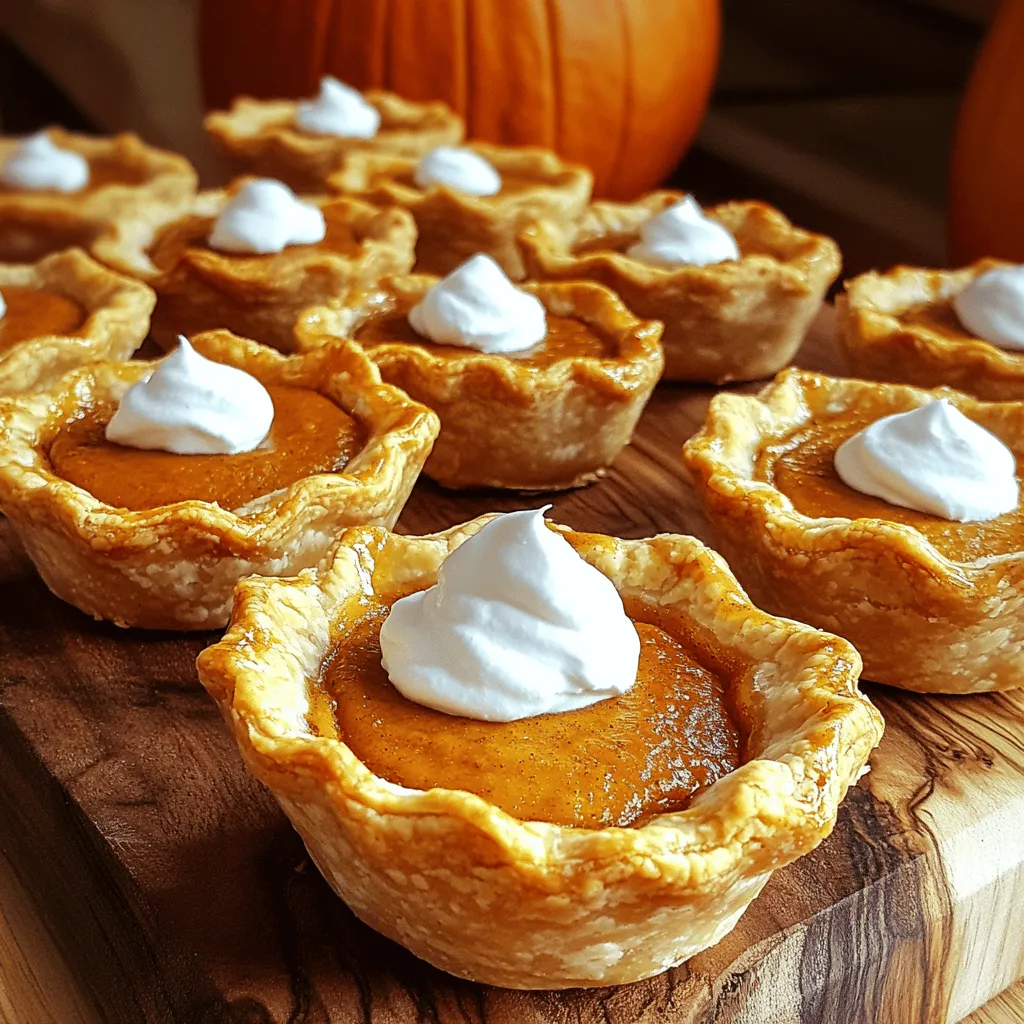
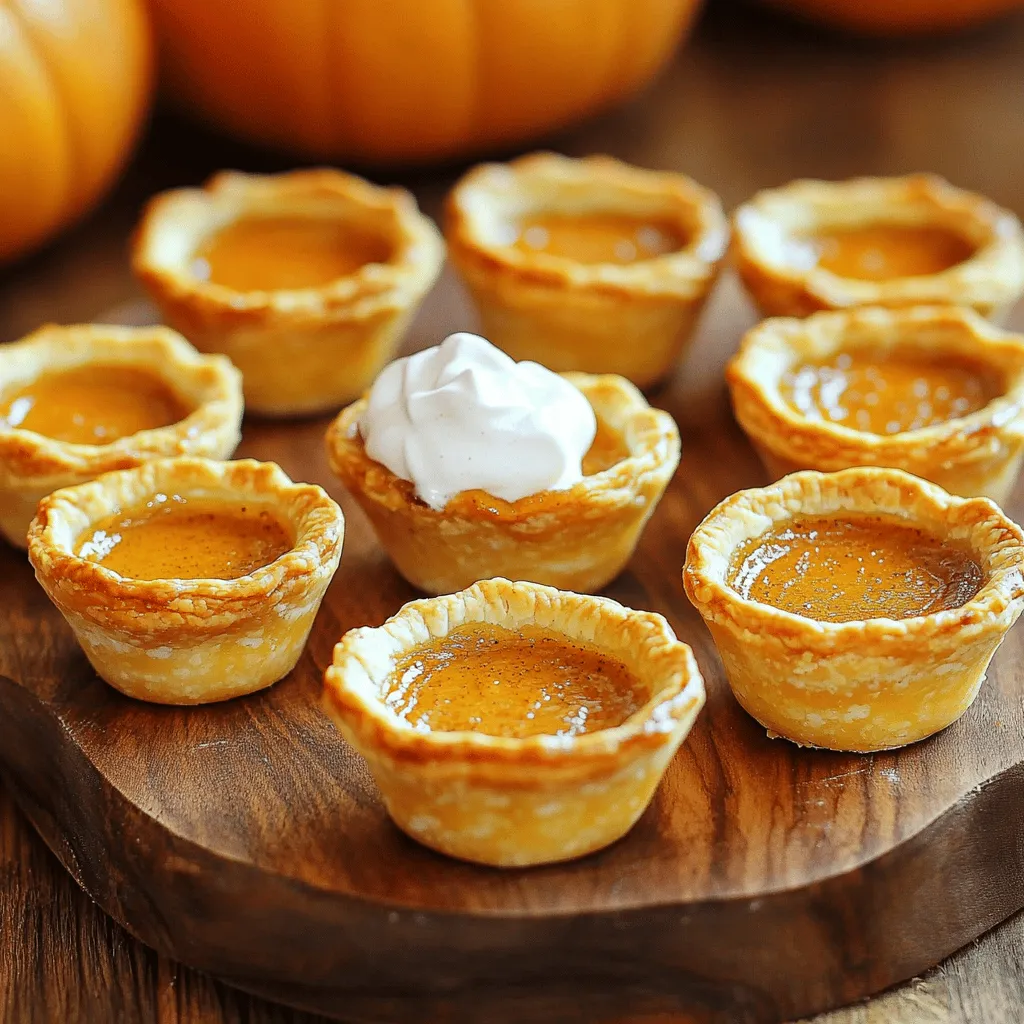
Are you craving a sweet treat that captures the essence of fall? Look no further! My mini pumpkin pies are easy to make and packed with flavor. With just a few ingredients, you can whip up these delightful desserts in no time. Whether you’re hosting a gathering or simply want a tasty snack, this recipe is sure to impress. Let’s dive in and create your new favorite fall dessert!

Ingredients

List of Ingredients

– 1 cup canned pumpkin puree

– ½ cup brown sugar

– ½ teaspoon ground cinnamon

– ¼ teaspoon ground nutmeg

– ¼ teaspoon ground ginger

– ¼ teaspoon salt

– 2 large eggs

– 1 cup evaporated milk

– 1 package pre-made pie crust (or make your own)

– Whipped cream, for serving

The key to great mini pumpkin pies starts with fresh and high-quality ingredients. Using canned pumpkin puree makes this recipe easy and quick. You can also make your own puree using fresh pumpkins if you prefer.

Ingredient Substitutions

Alternatives for canned pumpkin

If you can’t find canned pumpkin, use fresh pumpkin or butternut squash. Cook and mash them well before adding them to your mix. You can also use sweet potato puree for a twist.

Substituting sweeteners

You can swap brown sugar for coconut sugar or maple syrup. Both options add a unique flavor while keeping the sweetness.

Gluten-free crust options

If you need a gluten-free crust, look for gluten-free pie crusts at the store. You can also use almond or oat flour to make your own crust from scratch.

These simple swaps keep your mini pumpkin pies delicious and enjoyable for everyone! You can find the full recipe in the main article.

Step-by-Step Instructions

Preparation Steps

1. Preheating the oven

First, set your oven to 375°F (190°C). This heat is perfect for baking our mini pumpkin pies. Make sure it reaches the right temperature before you bake.

2. Mixing the pumpkin filling

In a large bowl, combine the following:

– 1 cup canned pumpkin puree

– ½ cup brown sugar

– ½ teaspoon ground cinnamon

– ¼ teaspoon ground nutmeg

– ¼ teaspoon ground ginger

– ¼ teaspoon salt

Stir these ingredients until they blend well. In another bowl, whisk together two large eggs. Add 1 cup evaporated milk and mix until smooth. Pour this egg-milk mix into the pumpkin mix. Stir until everything is combined.

Mini Pie Assembly

1. Rolling out the dough

Take your pre-made pie crust and roll it out on a floured surface. If you want to make your own crust, that’s great too! Aim for a thickness of about 1/8 inch.

2. Cutting circles and fitting into muffin tins

Use a cookie cutter or a glass to cut out circles that are about 4-5 inches wide. You need about 12 pieces. Place each circle into a greased muffin tin. Gently press them down so they fit the bottom and sides.

Baking Tips

1. Ideal baking temperature and time

Bake your mini pies in the preheated oven for 25-30 minutes. This time allows the filling to set properly.

2. Checking for doneness

To check if they are done, insert a toothpick in the center of a pie. If it comes out clean, your pies are ready. Let them cool a bit before removing them from the tin.

Enjoy these mini pumpkin pies with a dollop of whipped cream on top! For the full recipe, check out the earlier sections.

Tips & Tricks

Perfecting the Crust

To make a flaky mini crust, start with cold ingredients. Use cold butter or shortening. Mix the fat into the flour until it resembles small pebbles. This technique helps create layers in your crust. Chill your dough for at least 30 minutes before rolling it out. This step keeps it from shrinking while baking.

To avoid a soggy crust, bake your crusts briefly before adding the filling. This pre-bake step helps firm up the base. Consider using a fork to poke small holes in the bottom of the crust. It allows steam to escape and prevents puffing.

Flavor Enhancements

For a richer flavor, add spices. Ground cloves and allspice can elevate the taste. A splash of vanilla extract also works wonders. These flavors blend perfectly with the pumpkin. You can adjust the spice levels to suit your taste.

Toppings can add sweetness and texture. Try adding a sprinkle of cinnamon sugar on top before baking. You can also drizzle caramel or chocolate sauce over the whipped cream. These details make your mini pumpkin pies extra special.

Serving Suggestions

Serve your mini pumpkin pies with a generous dollop of whipped cream. The cream’s richness balances the pie’s spices. You can also offer a side of vanilla ice cream for a warm and cold treat.

For presentation, arrange the mini pies on a colorful platter. Garnish with fresh mint leaves or a dusting of powdered sugar. This simple touch makes your dessert look professional and inviting. Try different serving styles to impress your guests!

If you want to explore the recipe further, check out the Full Recipe for detailed instructions.

Variations

Alternative Fillings

You can change the filling in mini pumpkin pies for fun. Try adding chocolate or caramel for a sweet twist. Simply melt chocolate and mix it with the pumpkin filling. You can drizzle caramel on top after baking for extra flavor.

Another option is to add nuts like walnuts or pecans. Chop them finely and mix them in with the pumpkin filling. This gives a nice crunch and adds depth to the flavor.

Themed Mini Pies

Mini pumpkin pies can fit any theme. For Halloween, use fun decorations like candy eyes or spooky sprinkles. You can also use cookie cutters to shape the crust into ghosts or pumpkins.

During the holidays, think about seasonal flavors. You can add spices like allspice or cloves to match the festive vibe. Decorate with cranberries or edible glitter for a holiday touch.

Dietary-Friendly Options

There are ways to make mini pumpkin pies fit different diets. For vegan options, replace eggs with flaxseed meal mixed with water. Use coconut milk instead of evaporated milk for a creamy texture.

If you want to cut down on sugar, try using a sugar substitute like stevia or erythritol. This keeps the pies sweet without the extra calories. These adaptations make it easier for everyone to enjoy this delightful treat.

For the full recipe, check out the [Full Recipe].

Storage Info

Storing Mini Pumpkin Pies

To keep your mini pumpkin pies fresh, follow these best practices:

Cool completely before storing. This step prevents moisture buildup.

Wrap each pie in plastic wrap or place them in an airtight container.

Refrigerate if you plan to eat them within three days.

If you want to keep them longer, freezing is a great option:

Freeze the mini pies for up to three months.

– Use a freezer-safe container or bag. Make sure to label them with the date.

Reheating Tips

When it’s time to enjoy your stored mini pumpkin pies, here’s how to reheat them without drying out:

Oven method: Preheat your oven to 350°F (175°C). Place the pies on a baking sheet. Heat for about 10-15 minutes.

Microwave method: Place a pie on a microwave-safe plate. Heat for 15-20 seconds. Check to avoid overheating.

After reheating, consider these serving suggestions:

– Add a dollop of whipped cream on top.

– Serve with a sprinkle of cinnamon for extra flavor.

Shelf Life

Mini pumpkin pies can last:

In the fridge: About 3-4 days.

In the freezer: Up to three months.

Keep an eye out for signs of spoilage:

– A sour smell or off taste indicates the pies are bad.

– Look for any mold or unusual texture. If you see any, it’s time to toss them.

For a delightful treat anytime, remember to check the [Full Recipe] for making these tasty pies!

FAQs

What can I use instead of canned pumpkin?

You can use fresh pumpkin instead of canned pumpkin. To make fresh pumpkin puree, start with a small pumpkin. Cut it in half and remove the seeds. Roast the halves in the oven until soft. Scoop out the flesh and blend it until smooth. Fresh pumpkin gives a rich taste. It may take more time, but the flavor is worth it! Canned pumpkin is quick and easy, but fresh can be more flavorful.

Can I make mini pumpkin pies in advance?

Yes, you can make mini pumpkin pies ahead of time. Prepare the filling and crust a day before. Store them in the fridge until you are ready to bake. You can also bake the pies and keep them in the fridge. Just cover them well. When you are ready to serve, reheat them in the oven for a few minutes. This keeps them tasty and fresh.

How do I know when the pies are done baking?

To tell when the mini pies are done, check for a set filling. Insert a toothpick into the center. If it comes out clean, they are ready. The edges should be firm, but the center may still jiggle a little. It will firm up as they cool. A golden crust is also a good sign that they are baked well.

What can I serve with mini pumpkin pies?

Mini pumpkin pies pair well with whipped cream. A dollop on top adds sweetness and creaminess. You can also serve them with vanilla ice cream for a fun twist. Hot drinks like coffee or spiced cider work great too. For a special touch, add a sprinkle of cinnamon or nutmeg on top. Enjoy exploring different pairings for your mini pumpkin pies!

You learned how to make mini pumpkin pies from scratch. We covered ingredients, substitutions, and steps for success. With tips on crust, flavor, and serving, you can impress anyone. Don’t forget to explore variations and storage ideas to keep them fresh. Make these pies your own. Enjoy the delicious results whether for a holiday or a simple treat. Now you’re ready to bake and share joy with each mini pie!

- 1 cup canned pumpkin puree - ½ cup brown sugar - ½ teaspoon ground cinnamon - ¼ teaspoon ground nutmeg - ¼ teaspoon ground ginger - ¼ teaspoon salt - 2 large eggs - 1 cup evaporated milk - 1 package pre-made pie crust (or make your own) - Whipped cream, for serving The key to great mini pumpkin pies starts with fresh and high-quality ingredients. Using canned pumpkin puree makes this recipe easy and quick. You can also make your own puree using fresh pumpkins if you prefer. Alternatives for canned pumpkin If you can't find canned pumpkin, use fresh pumpkin or butternut squash. Cook and mash them well before adding them to your mix. You can also use sweet potato puree for a twist. Substituting sweeteners You can swap brown sugar for coconut sugar or maple syrup. Both options add a unique flavor while keeping the sweetness. Gluten-free crust options If you need a gluten-free crust, look for gluten-free pie crusts at the store. You can also use almond or oat flour to make your own crust from scratch. These simple swaps keep your mini pumpkin pies delicious and enjoyable for everyone! You can find the full recipe in the main article. 1. Preheating the oven First, set your oven to 375°F (190°C). This heat is perfect for baking our mini pumpkin pies. Make sure it reaches the right temperature before you bake. 2. Mixing the pumpkin filling In a large bowl, combine the following: - 1 cup canned pumpkin puree - ½ cup brown sugar - ½ teaspoon ground cinnamon - ¼ teaspoon ground nutmeg - ¼ teaspoon ground ginger - ¼ teaspoon salt Stir these ingredients until they blend well. In another bowl, whisk together two large eggs. Add 1 cup evaporated milk and mix until smooth. Pour this egg-milk mix into the pumpkin mix. Stir until everything is combined. 1. Rolling out the dough Take your pre-made pie crust and roll it out on a floured surface. If you want to make your own crust, that's great too! Aim for a thickness of about 1/8 inch. 2. Cutting circles and fitting into muffin tins Use a cookie cutter or a glass to cut out circles that are about 4-5 inches wide. You need about 12 pieces. Place each circle into a greased muffin tin. Gently press them down so they fit the bottom and sides. 1. Ideal baking temperature and time Bake your mini pies in the preheated oven for 25-30 minutes. This time allows the filling to set properly. 2. Checking for doneness To check if they are done, insert a toothpick in the center of a pie. If it comes out clean, your pies are ready. Let them cool a bit before removing them from the tin. Enjoy these mini pumpkin pies with a dollop of whipped cream on top! For the full recipe, check out the earlier sections. To make a flaky mini crust, start with cold ingredients. Use cold butter or shortening. Mix the fat into the flour until it resembles small pebbles. This technique helps create layers in your crust. Chill your dough for at least 30 minutes before rolling it out. This step keeps it from shrinking while baking. To avoid a soggy crust, bake your crusts briefly before adding the filling. This pre-bake step helps firm up the base. Consider using a fork to poke small holes in the bottom of the crust. It allows steam to escape and prevents puffing. For a richer flavor, add spices. Ground cloves and allspice can elevate the taste. A splash of vanilla extract also works wonders. These flavors blend perfectly with the pumpkin. You can adjust the spice levels to suit your taste. Toppings can add sweetness and texture. Try adding a sprinkle of cinnamon sugar on top before baking. You can also drizzle caramel or chocolate sauce over the whipped cream. These details make your mini pumpkin pies extra special. Serve your mini pumpkin pies with a generous dollop of whipped cream. The cream's richness balances the pie's spices. You can also offer a side of vanilla ice cream for a warm and cold treat. For presentation, arrange the mini pies on a colorful platter. Garnish with fresh mint leaves or a dusting of powdered sugar. This simple touch makes your dessert look professional and inviting. Try different serving styles to impress your guests! If you want to explore the recipe further, check out the Full Recipe for detailed instructions. {{image_2}} You can change the filling in mini pumpkin pies for fun. Try adding chocolate or caramel for a sweet twist. Simply melt chocolate and mix it with the pumpkin filling. You can drizzle caramel on top after baking for extra flavor. Another option is to add nuts like walnuts or pecans. Chop them finely and mix them in with the pumpkin filling. This gives a nice crunch and adds depth to the flavor. Mini pumpkin pies can fit any theme. For Halloween, use fun decorations like candy eyes or spooky sprinkles. You can also use cookie cutters to shape the crust into ghosts or pumpkins. During the holidays, think about seasonal flavors. You can add spices like allspice or cloves to match the festive vibe. Decorate with cranberries or edible glitter for a holiday touch. There are ways to make mini pumpkin pies fit different diets. For vegan options, replace eggs with flaxseed meal mixed with water. Use coconut milk instead of evaporated milk for a creamy texture. If you want to cut down on sugar, try using a sugar substitute like stevia or erythritol. This keeps the pies sweet without the extra calories. These adaptations make it easier for everyone to enjoy this delightful treat. For the full recipe, check out the [Full Recipe]. To keep your mini pumpkin pies fresh, follow these best practices: - Cool completely before storing. This step prevents moisture buildup. - Wrap each pie in plastic wrap or place them in an airtight container. - Refrigerate if you plan to eat them within three days. If you want to keep them longer, freezing is a great option: - Freeze the mini pies for up to three months. - Use a freezer-safe container or bag. Make sure to label them with the date. When it’s time to enjoy your stored mini pumpkin pies, here’s how to reheat them without drying out: - Oven method: Preheat your oven to 350°F (175°C). Place the pies on a baking sheet. Heat for about 10-15 minutes. - Microwave method: Place a pie on a microwave-safe plate. Heat for 15-20 seconds. Check to avoid overheating. After reheating, consider these serving suggestions: - Add a dollop of whipped cream on top. - Serve with a sprinkle of cinnamon for extra flavor. Mini pumpkin pies can last: - In the fridge: About 3-4 days. - In the freezer: Up to three months. Keep an eye out for signs of spoilage: - A sour smell or off taste indicates the pies are bad. - Look for any mold or unusual texture. If you see any, it’s time to toss them. For a delightful treat anytime, remember to check the [Full Recipe] for making these tasty pies! You can use fresh pumpkin instead of canned pumpkin. To make fresh pumpkin puree, start with a small pumpkin. Cut it in half and remove the seeds. Roast the halves in the oven until soft. Scoop out the flesh and blend it until smooth. Fresh pumpkin gives a rich taste. It may take more time, but the flavor is worth it! Canned pumpkin is quick and easy, but fresh can be more flavorful. Yes, you can make mini pumpkin pies ahead of time. Prepare the filling and crust a day before. Store them in the fridge until you are ready to bake. You can also bake the pies and keep them in the fridge. Just cover them well. When you are ready to serve, reheat them in the oven for a few minutes. This keeps them tasty and fresh. To tell when the mini pies are done, check for a set filling. Insert a toothpick into the center. If it comes out clean, they are ready. The edges should be firm, but the center may still jiggle a little. It will firm up as they cool. A golden crust is also a good sign that they are baked well. Mini pumpkin pies pair well with whipped cream. A dollop on top adds sweetness and creaminess. You can also serve them with vanilla ice cream for a fun twist. Hot drinks like coffee or spiced cider work great too. For a special touch, add a sprinkle of cinnamon or nutmeg on top. Enjoy exploring different pairings for your mini pumpkin pies! You learned how to make mini pumpkin pies from scratch. We covered ingredients, substitutions, and steps for success. With tips on crust, flavor, and serving, you can impress anyone. Don’t forget to explore variations and storage ideas to keep them fresh. Make these pies your own. Enjoy the delicious results whether for a holiday or a simple treat. Now you’re ready to bake and share joy with each mini pie!

Mini Pumpkin Pies

Indulge in the festive flavors of fall with these delightful mini pumpkin pies! Perfect for gatherings or a cozy treat at home, this easy recipe combines canned pumpkin puree with warm spices and creamy filling. In just 45 minutes, you can have 12 delicious mini pies ready to enjoy, each topped with whipped cream for the ultimate sweetness. Click through to discover the full recipe and impress your friends and family with these adorable bites!

Ingredients
  

1 cup canned pumpkin puree

½ cup brown sugar

½ teaspoon ground cinnamon

¼ teaspoon ground nutmeg

¼ teaspoon ground ginger

¼ teaspoon salt

2 large eggs

1 cup evaporated milk

1 package pre-made pie crust (or make your own)

Whipped cream, for serving

Instructions
 

Preheat your oven to 375°F (190°C).

    In a large mixing bowl, combine the pumpkin puree, brown sugar, cinnamon, nutmeg, ginger, and salt. Mix until well blended.

      In a separate bowl, whisk together the eggs until well beaten. Add the evaporated milk and continue whisking until the mixture is smooth.

        Gradually add the egg and milk mixture to the pumpkin mixture, stirring until fully combined.

          Roll out the pie crust on a floured surface and cut out circles (about 4-5 inches in diameter). You can use a cookie cutter or the rim of a glass.

            Fit the circles into a greased muffin tin, pressing them gently into the bottoms and sides to form mini pie shells.

              Pour the pumpkin filling into each crust, filling them about ¾ full.

                Bake in the preheated oven for 25-30 minutes, or until the filling is set and a toothpick inserted comes out clean.

                  Remove from the oven and let cool for a few minutes before gently removing the mini pies from the muffin tin.

                    Serve warm or at room temperature, topped with a dollop of whipped cream.

                      Prep Time: 15 minutes | Total Time: 45 minutes | Servings: 12 mini pies

                        Leave a Comment

                        Recipe Rating