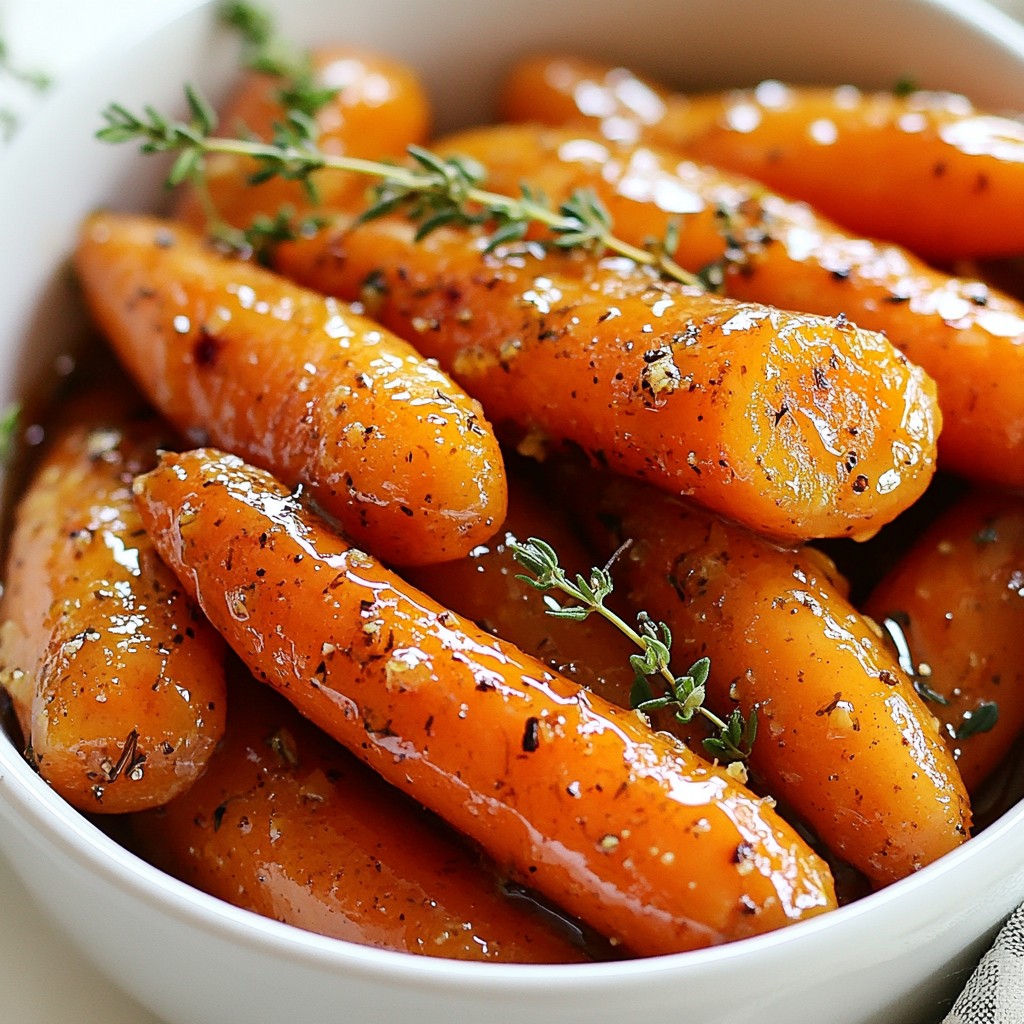
Looking for a side dish that steals the show? Maple Glazed Carrots are your answer! This dish brings together sweet maple syrup and tender carrots, creating a taste explosion you won’t forget. Whether it’s for a holiday feast or a weeknight dinner, these carrots are sure to impress. Let’s dive into a fun and easy recipe that will make your meals shine! You’ll love every bite!
Why I Love This Recipe
- Sweet and Savory Balance: The combination of maple syrup and cinnamon offers a delightful contrast of flavors that enhances the natural sweetness of the carrots.
- Quick and Easy: This recipe can be made in just 20 minutes, making it a perfect side dish for busy weeknights or last-minute gatherings.
- Versatile Ingredients: Using fresh thyme and lemon juice adds depth and brightness, but you can easily customize it with herbs you have on hand.
- Beautiful Presentation: The vibrant colors of the glazed carrots make them a stunning addition to any plate, elevating your meal visually.
Ingredients
List of Ingredients
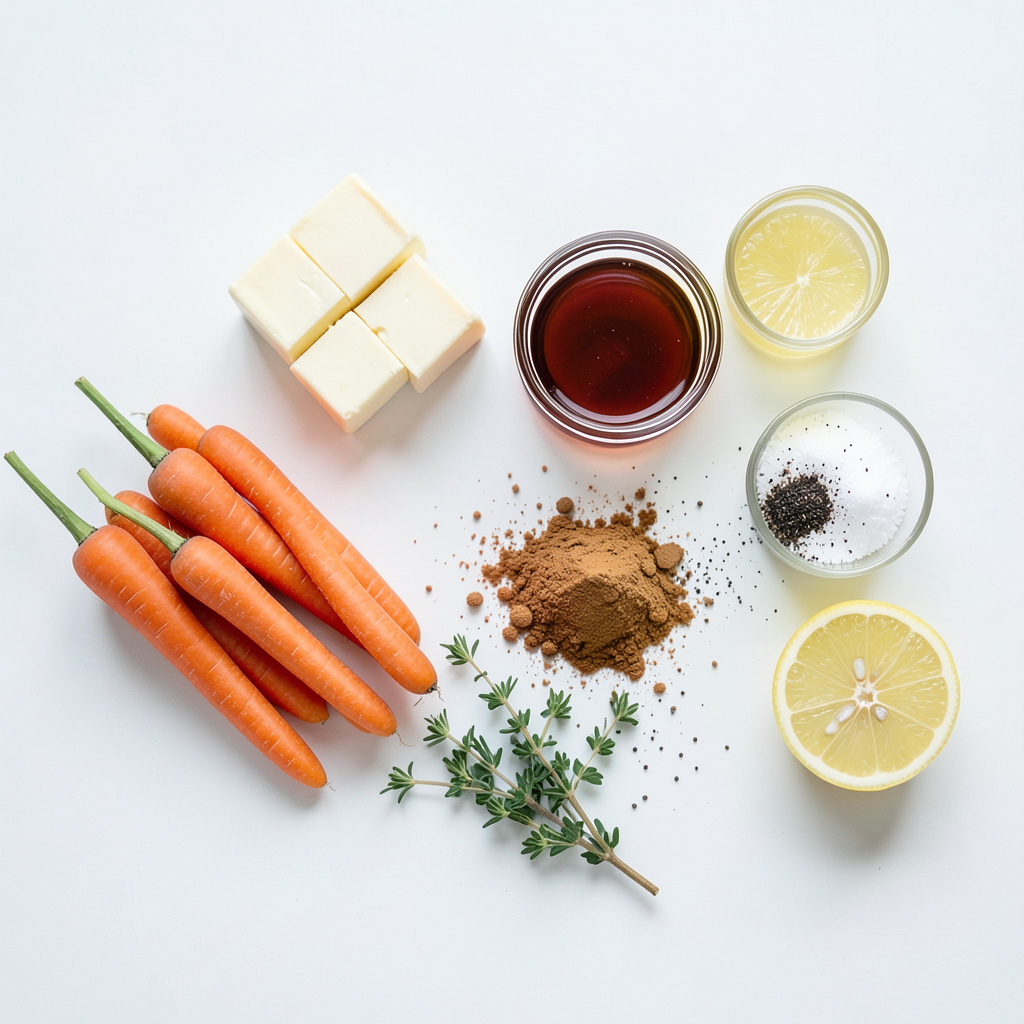
To make Maple Glazed Carrots, you need:
- 1 pound baby carrots (or regular carrots, peeled and cut into sticks)
- 3 tablespoons unsalted butter
- 2 tablespoons pure maple syrup
- 1 teaspoon ground cinnamon
- 1 tablespoon fresh thyme leaves (or 1 teaspoon dried thyme)
- Salt and pepper to taste
- 1 tablespoon fresh lemon juice
Optional Additions
If you want to jazz up your carrots, try these additions:
- A pinch of nutmeg for warmth
- Chopped pecans for crunch
- A drizzle of balsamic vinegar for tang
Substitutions for Key Ingredients
You can swap some ingredients if needed:
- Use olive oil instead of butter for a dairy-free option
- Honey or agave syrup can replace maple syrup
- Use rosemary instead of thyme for a different flavor
These choices can help you make the dish your own!
Step-by-Step Instructions
Preparation Overview
First, gather all your ingredients. You need baby carrots, butter, maple syrup, cinnamon, thyme, salt, pepper, and lemon juice. This dish takes about 10 minutes to prep and 20 minutes to cook. It serves four people.
Detailed Cooking Steps
1. Start by boiling water in a large saucepan.
2. Add the baby carrots to the boiling water.
3. Cook them for about five minutes. They should be slightly tender.
4. Drain the carrots and set them aside.
5. In the same saucepan, melt three tablespoons of unsalted butter over medium heat.
6. Once the butter is melted, add the boiled carrots back to the pan.
7. Pour in two tablespoons of pure maple syrup and one teaspoon of ground cinnamon.
8. Toss the carrots well to coat them evenly.
9. Sauté the carrots for about five to seven minutes. Stir occasionally until they caramelize and get tender.
10. Add one tablespoon of fresh thyme leaves. Season with salt and pepper to taste.
11. Drizzle in one tablespoon of fresh lemon juice and mix well.
12. Remove from heat and let them sit for a minute. This helps the glaze thicken.
Tips for Perfecting Texture
For the best texture, don’t overcook the carrots. Boil them just until slightly tender. When you sauté them, keep stirring. This helps them caramelize evenly. If you want a bit of crunch, you can cook them for less time. Enjoy the sweet and savory flavor of these glazed carrots!
Tips & Tricks
Achieving the Best Flavor
To make your maple glazed carrots truly shine, focus on quality ingredients. Use fresh baby carrots for the best taste. If you use regular carrots, cut them into even sticks. This helps them cook evenly. Always choose pure maple syrup. Avoid imitation syrup, as it lacks real flavor. Ground cinnamon adds warmth. It enhances the sweet notes of the maple syrup. For a fresh twist, use fresh thyme. It adds a bright herbal note that balances the sweetness.
Common Mistakes to Avoid
One common mistake is overcooking the carrots. Boil them just until slightly tender. This keeps them firm and crisp. Another mistake is not draining the carrots well. Excess water can dilute your glaze. Be sure to toss the carrots in the glaze well. This ensures every bite is coated in sweet goodness. Lastly, don’t skip the lemon juice. It brightens the dish and enhances all the flavors.
Time-Saving Suggestions
For a quicker prep, use pre-cut baby carrots. They save time and effort. You can also boil the carrots ahead of time. Store them in the fridge until you are ready to glaze them. When you are ready, just heat the butter, add the carrots, and glaze them. This method cuts down your cooking time significantly. If you want to add more flavor, consider making the glaze while the carrots boil. This way, you can combine them faster once they are tender.
Pro Tips
- Choose the Right Carrots: For the best flavor and presentation, use fresh, vibrant baby carrots or select firm, young regular carrots.
- Perfect Caramelization: Make sure to sauté the carrots over medium heat to achieve that beautiful caramelized finish without burning them.
- Enhance the Flavor: Add a pinch of nutmeg or a splash of balsamic vinegar for an extra layer of flavor to your glaze.
- Serving Suggestions: Pair these glazed carrots with roasted meats or as a side for holiday meals for a delightful contrast of flavors.
Variations
Seasonal Additions
You can change the flavor of maple glazed carrots with seasonal ingredients. In spring, try adding peas for a pop of color and sweetness. You can mix in diced radishes for a crunchy bite. In fall, consider adding roasted pumpkin or squash. These veggies pair well with the maple glaze. They add new tastes and textures to the dish.
Alternative Sweeteners
If you want to change the sweetness, use other options. Honey works well for a floral note. Agave syrup can also be a great choice; it has a mild flavor. For a low-calorie option, use stevia. Each sweetener changes the dish, so feel free to experiment with what you like best.
Different Vegetable Options
Carrots are great, but you can try other veggies too. Sweet potatoes add a rich, sweet flavor. Parsnips bring a nutty taste that complements the maple glaze. You could even use beets for a bold color and sweetness. Always adjust the cooking time to ensure the veggies are tender and coated in the glaze.
Storage Info
How to Store Leftovers
To store leftover maple glazed carrots, let them cool. Place them in an airtight container. You can keep them in the fridge for up to three days. This helps keep their flavor and texture.
Reheating Instructions
To reheat, use the microwave or a pan. If using the microwave, place the carrots in a bowl. Heat them for about 1-2 minutes until warm. If using a pan, add a bit of butter. Heat on medium until they are hot. Stir them often to avoid burning.
Freezing Preparation Tips
You can freeze maple glazed carrots for later use. First, let them cool completely. Then, place them in a freezer-safe bag. Remove as much air as possible to prevent freezer burn. These can last up to three months. When ready to eat, thaw in the fridge overnight. Reheat as described above.
FAQs
How do I make Maple Glazed Carrots taste sweeter?
To make Maple Glazed Carrots taste sweeter, add more maple syrup. You can also use honey or brown sugar. These options boost sweetness without changing the dish's flavor much. Just mix in a little extra syrup or sugar when you add the carrots. This way, they will soak up the sweet goodness while cooking.
Can I use frozen carrots for this recipe?
Yes, you can use frozen carrots. They save time and are convenient. Just remember to thaw them first. Frozen carrots may not be as crisp as fresh ones, but they will still taste great. Cook them until they are warmed through and add the glaze. The flavor will still shine through.
What can I serve Maple Glazed Carrots with?
Maple Glazed Carrots pair well with many dishes. They are great next to roasted chicken or pork. You can also serve them with grilled fish. Their sweet flavor balances savory meats nicely. For a complete meal, add rice or quinoa. The carrots will add color and taste to your plate.
This blog post shared key ingredients, steps, and tips for making Maple Glazed Carrots. You learned about optional additions and how to make the dish yours. I gave you useful cooking tips and common mistakes to avoid. I also explained how to store leftovers and answered common questions. Use these ideas to create a dish that impresses. Enjoy your cooking and have fun exploring new flavors!