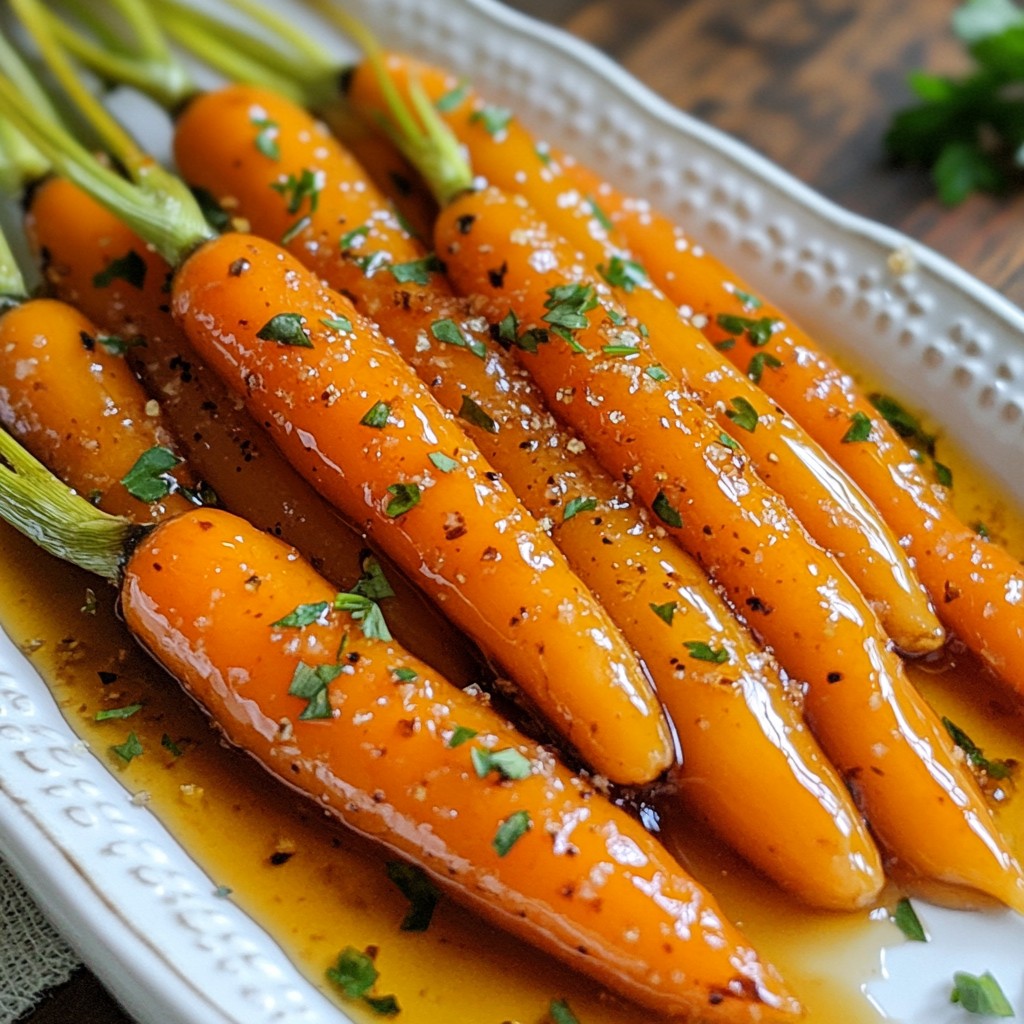
If you’re looking for a side dish that impresses without the fuss, try maple glazed carrots. This easy recipe combines the natural sweetness of carrots with rich maple syrup for a flavor blast. With just a few simple ingredients, you’ll create a dish that turns any meal into a special occasion. Get ready to make your dinner memorable with this vibrant and delicious side! Let's dive into the details.
Why I Love This Recipe
- Simple and Quick: This recipe takes only 15 minutes from start to finish, making it perfect for busy weeknights.
- Deliciously Sweet: The combination of maple syrup and cinnamon gives the carrots a delightful sweetness that appeals to all ages.
- Healthy Side Dish: Packed with nutrients, these carrots are a great way to add vitamins and minerals to your meal without sacrificing flavor.
- Beautiful Presentation: The vibrant color of the glazed carrots makes for an eye-catching addition to any plate, perfect for special occasions.
Ingredients
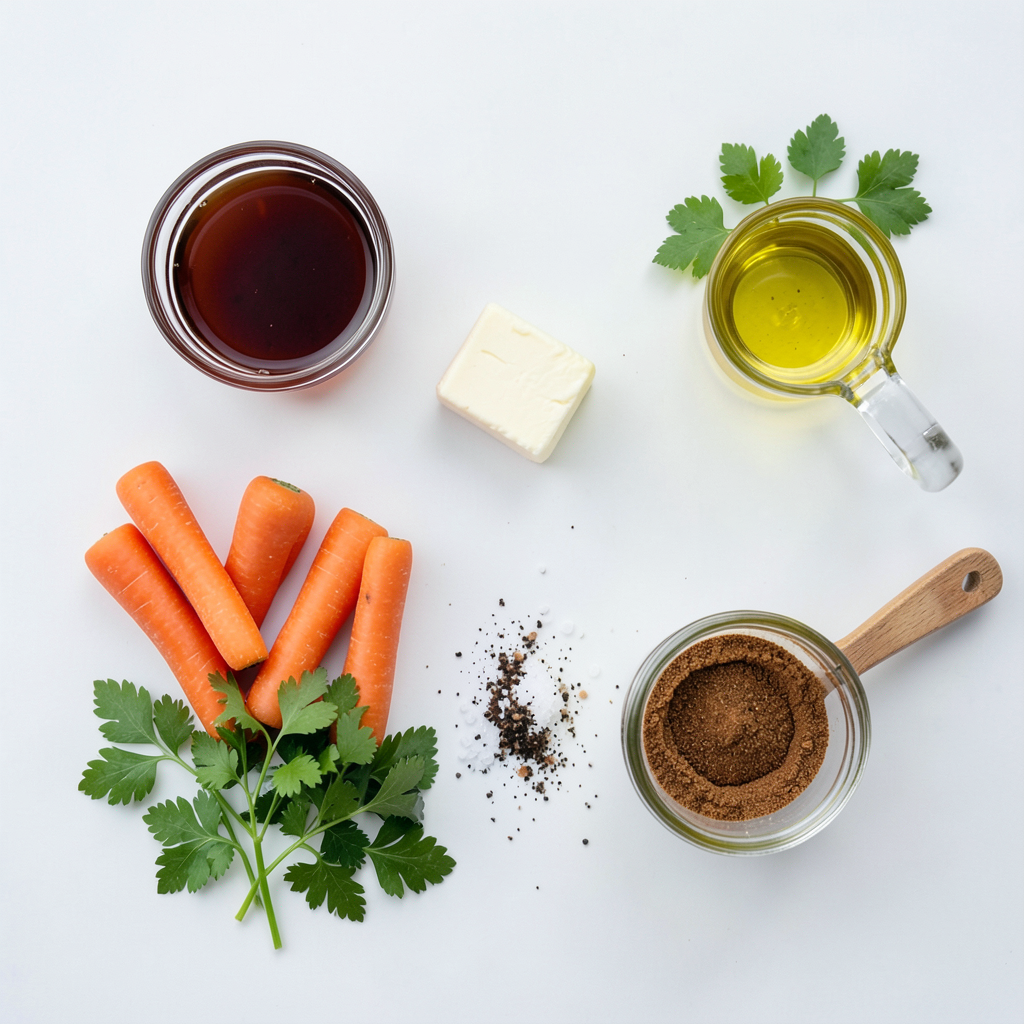
Here’s what you need to make maple glazed carrots. Each ingredient plays a big role in the flavor.
List of Ingredients
- 1 lb baby carrots (or regular carrots, peeled and cut into sticks)
- 3 tablespoons pure maple syrup
- 2 tablespoons unsalted butter
- 1 tablespoon olive oil
- ½ teaspoon sea salt
- ¼ teaspoon black pepper
- ½ teaspoon ground cinnamon
- Fresh parsley or thyme for garnish
You can use baby carrots for easier prep. If you pick regular carrots, peel and cut them into sticks. This makes sure they cook evenly. Maple syrup gives the dish a sweet touch. The butter and olive oil help the glaze stick to the carrots. Salt and pepper add basic seasoning. Cinnamon gives a warm flavor. Lastly, fresh herbs like parsley or thyme make the dish look nice.
Gather these ingredients before you start cooking. This makes the process smooth and fun. Enjoy the cooking journey!
Step-by-Step Instructions
Preparing the Carrots
Choose fresh carrots that are firm and colorful. Look for carrots that feel heavy for their size. If you use regular carrots, peel them first. Then cut them into sticks. Aim for pieces about 2-3 inches long. Try to make them all the same size. This helps them cook evenly.
Cooking the Carrots
Boil water in a medium saucepan. Add the carrots once the water is boiling. Cook for about 5 to 7 minutes. You want them tender but still a bit firm. Check them by poking with a fork. If they slide off easily, they are ready. Drain the carrots and set them aside.
Making the Maple Glaze
In the same pan, heat 2 tablespoons of butter and 1 tablespoon of olive oil over medium heat. Wait until the butter melts. Then stir in 3 tablespoons of pure maple syrup, ½ teaspoon of sea salt, ¼ teaspoon of black pepper, and ½ teaspoon of cinnamon. Let the mix bubble gently for 1-2 minutes.
Combining Carrots and Glaze
Add the drained carrots back into the pan. Use tongs to toss the carrots in the glaze. Make sure they are well coated. Cook for another 3-5 minutes. This helps the glaze thicken and stick to the carrots. Now, they are ready to shine on your plate!
Tips & Tricks
Perfecting Flavor
To make the flavors pop, adjust the seasoning. Taste the glaze as you cook. If you want it sweeter, add more maple syrup. For a richer taste, try different types of maple syrup. Grade A syrup is lighter and milder, while Grade B is darker and stronger. Choose based on your taste.
Cooking Techniques
You can switch up your cooking method. Roasting the carrots gives them a nice caramelized flavor. To roast, preheat your oven to 400°F. Toss the carrots in the glaze and place them on a baking sheet. Bake for about 20 minutes until they are tender. Remember to drain the carrots well after boiling. This step helps the glaze stick better.
Garnishing Ideas
Fresh herbs add a nice touch. Try using parsley or thyme for a pop of color. You can also be creative with serving. Plate the carrots on a large dish. Drizzle some extra glaze on top for a lovely finish. For a fun twist, serve them in small jars or cups. This adds a unique flair to your table.
Pro Tips
- Choose the Right Carrots: For the best flavor and texture, opt for fresh, vibrant baby carrots or young, tender regular carrots. They will have a sweeter taste and are less woody than older varieties.
- Perfectly Cooked Carrots: Be careful not to overcook the carrots when boiling. They should be just tender yet firm to the bite. This helps them retain their shape and adds a nice crunch to the dish.
- Customize the Glaze: Feel free to experiment with the glaze by adding a splash of balsamic vinegar or a pinch of nutmeg for a unique flavor twist. These additions can elevate the sweetness of the maple syrup.
- Garnish for Presentation: Fresh herbs like parsley or thyme not only add color to the dish but also enhance the overall flavor. Make sure to chop them finely for an even distribution of taste.
Variations
Different Vegetable Options
You can swap out carrots for other tasty veggies. Try using baby potatoes, parsnips, or sweet potatoes. Each of these adds its own flavor. When you use different veggies, you need to change the cooking time. For example, potatoes may need more time than carrots.
- Baby potatoes: Boil for 10-12 minutes until tender.
- Parsnips: Cook for 7-9 minutes until fork-tender.
- Sweet potatoes: Boil for 8-10 minutes, then glaze.
Dietary Modifications
If you want a vegan option, you can make a few easy swaps. Use coconut oil instead of butter. Maple syrup is already vegan, so you can keep that. This gives you a rich, sweet taste without the dairy.
For gluten-free diets, this recipe is already safe. All the ingredients are gluten-free, so you can enjoy this dish without worry.
Flavor Variations
To boost flavor, add spices. Nutmeg gives a warm note. A dash of cayenne adds a spicy kick. Start with a pinch and taste as you go.
You can also add citrus for brightness. Squeeze in some lemon or orange juice. You might even toss in some dried fruit like cranberries or raisins. These additions create a fun mix of flavors.
Storage Info
Storing Leftovers
To store your maple glazed carrots, let them cool down first. Place the carrots in an airtight container. This helps keep them fresh. You can use glass or plastic containers. Both work well for this. Make sure to squeeze out any extra air before sealing. This keeps the glaze from drying out.
Reheating Instructions
When reheating, the best method is to use a skillet. Heat it on low. Add a splash of water or broth to keep them moist. Stir the carrots gently. This will help them warm up without burning. Avoid using the microwave if you can. It can make the carrots soggy. For glaze consistency, add a little water if it thickens too much.
Freezing Guidelines
Yes, you can freeze maple glazed carrots! To do this, first cool them completely. Then, place them in a freezer-safe bag. Make sure to remove all the air. You can freeze them for up to three months. When ready to eat, thaw in the fridge overnight. Reheat them in a skillet, just like before. This way, they stay tasty and fresh!
FAQs
Can I use regular carrots instead of baby carrots?
Yes, you can use regular carrots. Just peel and cut them into sticks. Aim for similar sizes as baby carrots. This helps them cook evenly. Cooking time may vary slightly. Regular carrots might take a few minutes longer to soften.
How can I adjust the sweetness in this recipe?
You can easily change the sweetness. To reduce it, cut back on the maple syrup. You can also add a bit of lemon juice for balance. To increase sweetness, add more syrup or a sprinkle of brown sugar. Taste the glaze as you go for best results.
What can I serve with maple glazed carrots?
These carrots pair well with many dishes. Try them with roasted chicken or pork. They also go great with rice or quinoa. Add a simple salad for a full meal. The sweetness complements savory flavors nicely.
How long do the glazed carrots last in the fridge?
Glazed carrots can last about 3 to 5 days in the fridge. Store them in an airtight container. Make sure they cool down before sealing. This helps keep them fresh and safe to eat.
Can I make maple glazed carrots ahead of time?
Yes, you can prepare them ahead. Cook the carrots and glaze them, then cool and store. Reheat them gently on the stove or in the microwave. This keeps them tasty and warm for serving.
In this blog post, you learned how to make delicious maple glazed carrots. We covered the key ingredients, from fresh carrots to rich maple syrup. I shared steps for preparing and cooking, along with tips for perfect flavor. You also discovered fun variations and storage tips. These glazed carrots are simple to make and can brighten any meal. Feel free to explore different veggies or spices to make this dish your own. Enjoy the sweet taste of success in your kitchen!