Craving a dessert that is both easy and scrumptious? Look no further! My Easy Tiramisu Icebox Cake is the perfect choice. You'll discover how to create this delightful treat in no time. With simple ingredients and a few easy steps, you can impress friends and family. Let's dive into this delicious adventure and bring the flavors of Italy right to your kitchen!
Why I Love This Recipe
- Decadent Flavor: This icebox cake combines rich chocolate and coffee flavors, creating a dessert that is both indulgent and satisfying.
- Easy Preparation: The no-bake nature of this recipe means you can whip it up quickly and easily, with minimal kitchen fuss.
- Make-Ahead Convenience: With a chill time of just a few hours, this cake is perfect for prepping ahead of time for gatherings or special occasions.
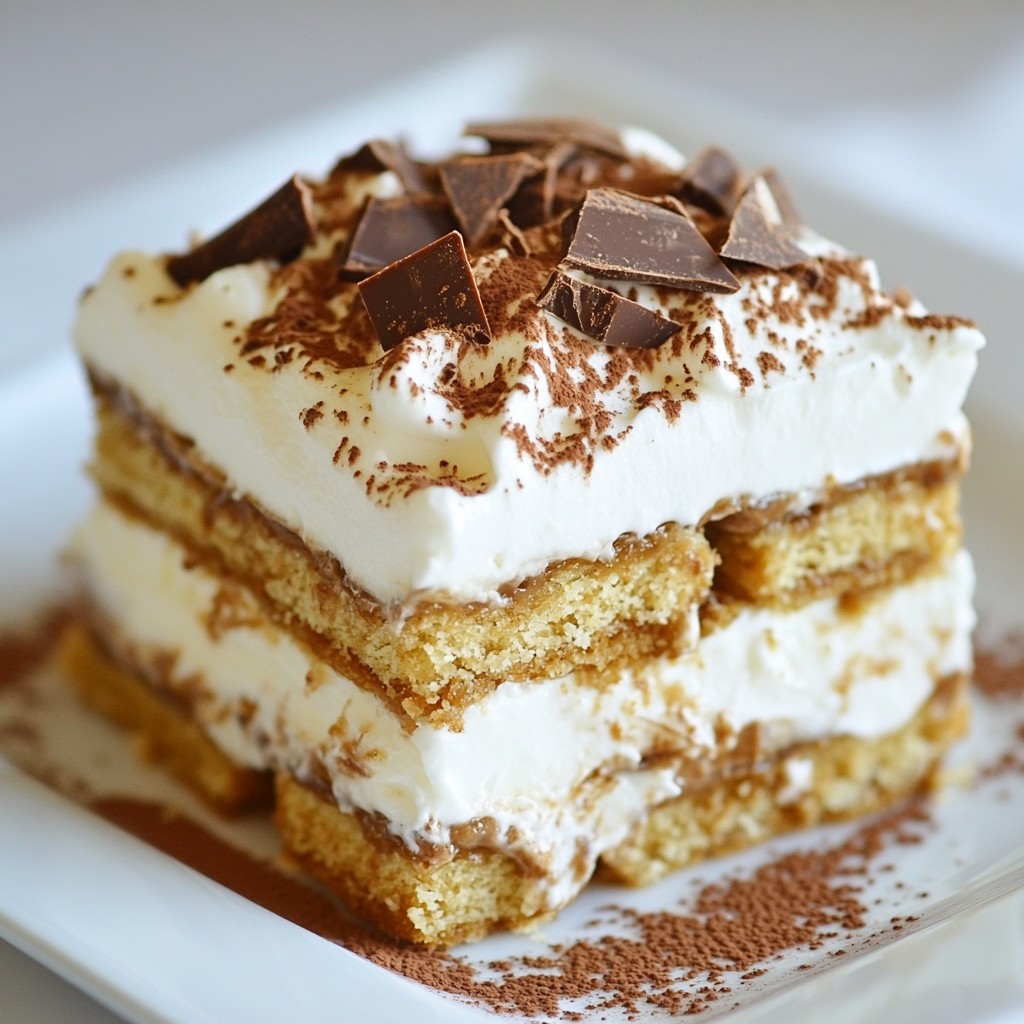
- Stunning Presentation: Layers of cream, cocoa, and chocolate shavings make for a beautiful dessert that is sure to impress your guests.
Ingredients
List of Required Ingredients
To make Easy Tiramisu Icebox Cake, you will need the following:
- 2 cups heavy whipping cream
- 1 cup mascarpone cheese
- 1 cup granulated sugar
- 1 teaspoon vanilla extract
- 2 cups brewed coffee, cooled
- 30 ladyfinger cookies
- 3 tablespoons unsweetened cocoa powder
- 1/2 teaspoon cinnamon (optional)
- Chocolate shavings for garnish
Ingredient Notes and Substitutions
- Heavy whipping cream: This gives the cake its light and fluffy texture. You can use regular cream, but it won’t be as airy.
- Mascarpone cheese: This creamy cheese adds richness. If you can’t find it, cream cheese can work, but the taste will change.
- Granulated sugar: This sweetens the mix. You can swap it with powdered sugar for a smoother texture.
- Vanilla extract: Fresh vanilla adds flavor. You can use vanilla bean paste as a fancy option.
- Brewed coffee: Use strong coffee for best flavor. You can switch to decaf if you prefer.
- Ladyfinger cookies: These are key for texture. If you want a gluten-free option, look for gluten-free ladyfingers.
- Cocoa powder: This adds a rich taste. Dark cocoa powder gives a deeper flavor.
- Cinnamon: Optional, but it adds warmth. You can skip this if you don’t like cinnamon.
Optional Garnishes
- Chocolate shavings: These add a nice touch on top. You can use a vegetable peeler to create shavings from a chocolate bar.
- Whipped cream: Adding a dollop on the side can make your presentation pop.
- Extra cocoa powder: Dusting more cocoa on top adds to the look and taste.

Step-by-Step Instructions
Preparation Overview
Making this Easy Tiramisu Icebox Cake is fun. You will need just a few simple steps. First, prepare your ingredients. Then, layer them just right. Finally, chill your cake to let the flavors blend.
Detailed Instructions for Each Step
1. Beat the Cream: Start by taking a large bowl. Pour in 2 cups of heavy whipping cream. Use a mixer on medium speed. Beat until you see soft peaks form. This will take about 3-5 minutes.
2. Mix the Mascarpone: In another bowl, add 1 cup of mascarpone cheese, 1 cup of granulated sugar, and 1 teaspoon of vanilla extract. Mix until it’s smooth and creamy.
3. Fold Together: Now, take your whipped cream and gently fold it into the mascarpone mix. Be gentle! You want to keep the air in the whipped cream.
4. Prepare the Coffee: Pour 2 cups of cooled brewed coffee into a shallow dish.
5. Dip the Ladyfingers: Take each ladyfinger cookie and dip it into the coffee. Hold it there for 1-2 seconds. Do not soak it too long! You don’t want it to fall apart.
6. First Layer: Lay the dipped ladyfingers on the bottom of a 9x13 inch baking dish. Make sure they cover the bottom fully.
7. Add Mascarpone Mix: Spread half of your mascarpone mixture over the ladyfingers. Use a spatula to smooth it out.
8. Dust with Cocoa: Sprinkle half of the cocoa powder and the cinnamon (if using) over the mascarpone layer. This adds great flavor!
9. Repeat the Layers: Add another layer of dipped ladyfingers. Then, top with the rest of the mascarpone mixture.
10. Final Touch: Dust the top with the remaining cocoa powder. Use your spatula to make it nice and smooth.
11. Chill: Cover the dish with plastic wrap. Place it in the fridge for at least 4 hours. If you can wait overnight, that’s best!
12. Garnish: Before serving, add some chocolate shavings on top for a special touch.
Tips for Layering and Assembly
- Be Gentle: When folding whipped cream, be careful. You want to keep it fluffy.
- Even Layers: Make sure each layer is even. This helps with presentation.
- Chill Well: Chilling allows flavors to mix. It makes each bite creamy and delicious.
Enjoy your Easy Tiramisu Icebox Cake! It’s a treat everyone will love.
Tips & Tricks
Making the Perfect Whipped Cream
To make great whipped cream, chill your mixing bowl and beaters first. This helps the cream whip faster. Use cold heavy whipping cream, as it whips best when cold. Beat the cream on medium speed until you see soft peaks. That means it holds its shape but still looks smooth. Be careful not to overbeat; it can turn grainy quickly.
Achieving the Best Flavor in Tiramisu
For the best flavor, use fresh brewed coffee. Let it cool before dipping the ladyfingers. You can add a bit of cinnamon to the cocoa powder for a warm touch. Vanilla extract is key too. It adds depth to the mascarpone mix. Mix it well with the sugar and cheese to bring out the sweet notes.
Common Mistakes to Avoid
One common mistake is soaking ladyfingers too long. Just a quick dip is best. If they soak too much, they become soggy. Another mistake is not folding the whipped cream gently. This can deflate the mixture and make it less airy. Finally, don’t rush the chilling time. Let it sit in the fridge for at least four hours. Overnight is best for deeper flavors.
Pro Tips
- Chill Your Tools: For a fluffier whipped cream, chill your mixing bowl and beaters in the freezer for about 10 minutes before whipping the cream.
- Perfect Coffee Soaking: Dip the ladyfingers in coffee for just 1-2 seconds to achieve the perfect balance of flavor and texture without making them too soggy.
- Let it Set: Allow the icebox cake to refrigerate overnight if possible; this helps the flavors meld together beautifully and improves the overall texture.
- Garnish Wisely: Use a vegetable peeler to create chocolate shavings from a chocolate bar for a decorative and delicious garnish that adds elegance to your dessert.
Variations
Different Flavor Profiles (e.g., Matcha, Chocolate)
You can switch up the flavor in your Tiramisu Icebox Cake for a fun twist. To make a matcha version, add 2 tablespoons of matcha powder to the mascarpone mix. This gives a bright green color and a unique taste. For a chocolate version, use chocolate-flavored ladyfingers. You can also mix cocoa directly into the mascarpone. This adds richness and deep flavor. Both options are easy and delicious.
Gluten-Free Options
If you need a gluten-free dessert, don’t worry! Use gluten-free ladyfinger cookies instead of regular ones. You can find these at many stores. Make sure to check the label. The rest of the recipe stays the same. This way, everyone can enjoy your tasty icebox cake without worry.
Dairy-Free Substitutions
For a dairy-free version, try using coconut cream instead of heavy whipping cream. Chill a can of coconut milk overnight. Then scoop out the solid cream. It whips up nicely and adds a light coconut flavor. Use dairy-free cream cheese in place of mascarpone. You can find this at health food stores. These swaps create a cake that still tastes amazing and fits your dietary needs.
Storage Info
How to Store Leftover Tiramisu Icebox Cake
To store leftover tiramisu icebox cake, cover it tightly with plastic wrap. This helps keep it fresh. You can also use an airtight container. Store it in the fridge for up to three days. The flavors will deepen as it sits, making it even more delicious.
Freezing Guidelines
You can freeze this cake for later use. First, cut it into individual slices. Wrap each slice in plastic wrap. Then, place the wrapped slices in a freezer-safe container or bag. This method helps prevent freezer burn. The cake can stay good in the freezer for up to two months. Thaw it in the fridge before serving.
Best Practices for Preserving Freshness
To keep your tiramisu icebox cake fresh, avoid adding garnishes until you serve it. This keeps the chocolate shavings and cocoa powder looking nice. When you store it, place a paper towel under the plastic wrap. This helps absorb extra moisture. If you follow these tips, your cake will remain tasty and appealing for days!
FAQs
How long does Tiramisu Icebox Cake last?
Tiramisu Icebox Cake lasts about 3 to 4 days in the fridge. Store it in an airtight container. This keeps it fresh and tasty. After a few days, the flavors blend nicely. However, enjoy it sooner for the best texture.
Can I use different cookies instead of ladyfingers?
Yes, you can! Try using chocolate wafers or even graham crackers. These cookies work well with coffee. They can add a nice twist to the flavor. Just remember to soak them briefly in coffee. This makes sure they soften but do not get too soggy.
How can I make my dessert less sweet?
To reduce sweetness, cut back on the sugar in the mascarpone mix. You can also use less granulated sugar in the whipped cream. Adding a pinch of salt can help balance the sweetness too. For a more intense flavor, try using dark cocoa powder. It adds richness without extra sugar.
This blog post covers all you need to know about making Tiramisu Icebox Cake. We looked at ingredients, step-by-step instructions, and useful tips. You learned about flavor options, storage, and common mistakes.
Remember, the key is to enjoy the process and get creative. With these insights, you can make a delicious cake that suits your taste. Happy baking!