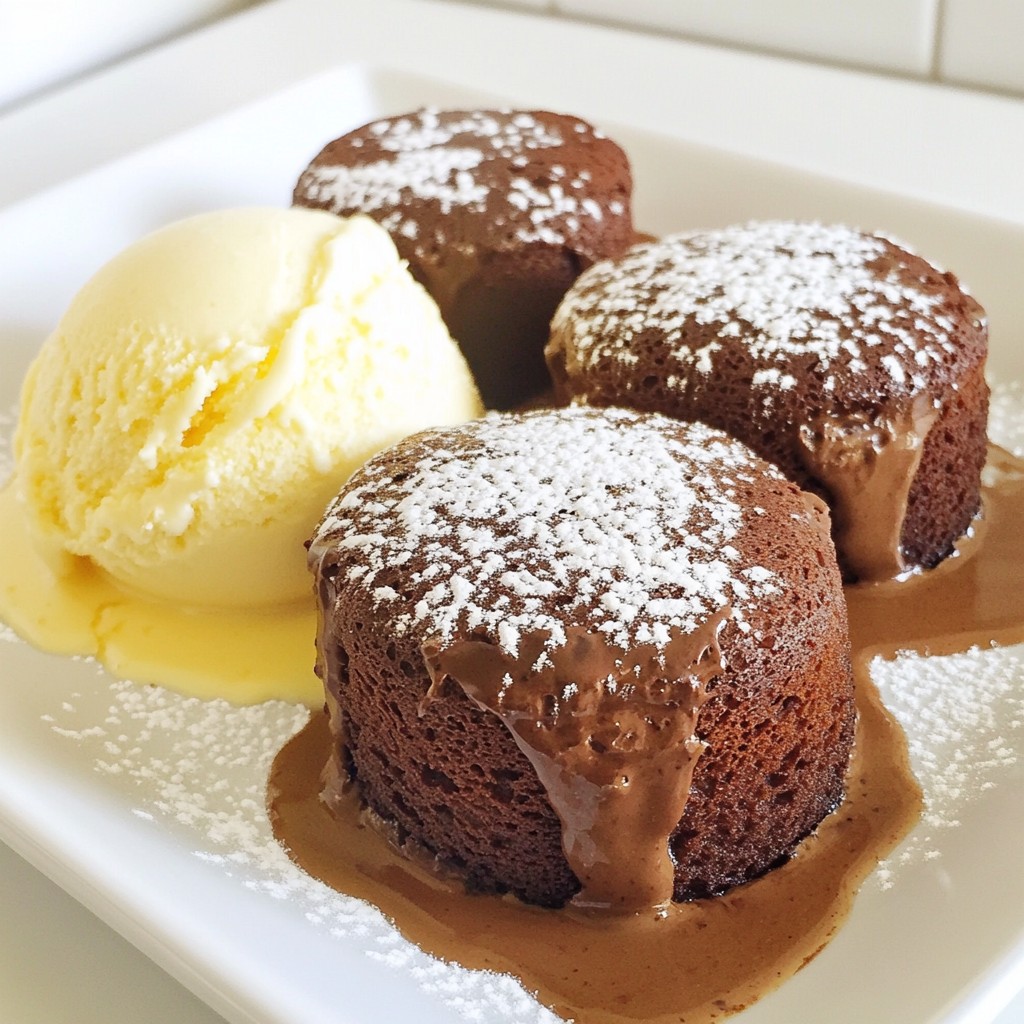
Craving that gooey, rich Chocolate Lava Cake from Chili’s? I’ve got you covered! My decadent copycat recipe brings that warm, melting chocolate experience right to your kitchen. You’ll impress friends and family in no time. With easy steps and common ingredients, you'll create a restaurant-quality dessert that satisfies your sweet tooth. Ready to indulge in chocolate bliss? Let’s get baking with this simple and delicious recipe!
Why I Love This Recipe
- Decadent Flavor: This chocolate lava cake offers a rich, indulgent flavor that satisfies any sweet tooth, making it a perfect dessert for special occasions or a cozy night in.
- Easy to Make: With simple ingredients and straightforward steps, this recipe is accessible for bakers of all skill levels, ensuring success every time.
- Impressive Presentation: When you invert the ramekins, the molten center oozes out, creating a stunning visual that will impress your guests.
- Customizable Toppings: Serve with vanilla ice cream or fresh berries, allowing you to customize the dessert to your taste and elevate the experience.
Ingredients
List of Ingredients Needed
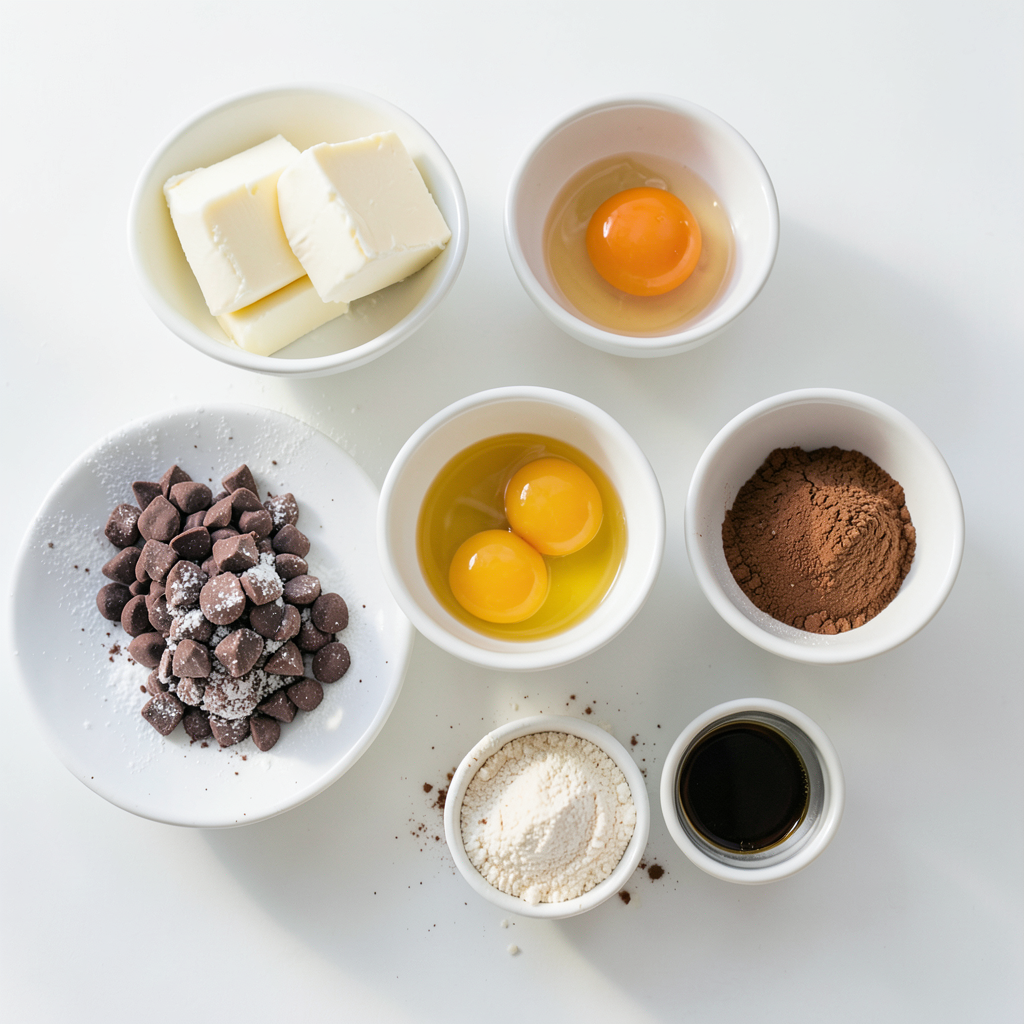
To make this delicious chocolate lava cake, gather these ingredients:
- 1/2 cup unsalted butter
- 1 cup semi-sweet chocolate chips
- 1 cup powdered sugar
- 2 large eggs
- 2 large egg yolks
- 1 teaspoon vanilla extract
- 1/2 cup all-purpose flour
- A pinch of salt
- Cocoa powder (for dusting ramekins)
- Vanilla ice cream (for serving)
Optional Ingredients and Toppings
You can add more fun to your lava cake with these extras:
- Chocolate sauce for drizzling
- Fresh berries like raspberries or strawberries
- Whipped cream for a light touch
- Nuts, such as chopped walnuts or pecans
These toppings can make your dessert even more special!
Ingredient Substitutes and Alternatives
If you need swaps, here are some ideas:
- Use coconut oil instead of butter for a dairy-free option.
- Dark chocolate chips can replace semi-sweet ones for a richer taste.
- For a gluten-free version, try almond flour instead of all-purpose flour.
- Maple syrup can take the place of powdered sugar for a twist in sweetness.
These substitutes can help you tailor the recipe to your needs!
Step-by-Step Instructions
Preparing the Ramekins
Start by preheating your oven to 425°F (220°C). Next, take four 6-ounce ramekins and grease them with unsalted butter. This step stops the cake from sticking. After greasing, dust the inside of each ramekin with cocoa powder. This adds flavor and helps with easy removal later.
Melting the Chocolate
In a microwave-safe bowl, combine 1/2 cup unsalted butter and 1 cup semi-sweet chocolate chips. Heat the mixture in the microwave. Use 30-second intervals and stir each time. Keep heating until it is smooth and melted. Once melted, set it aside to cool slightly.
Mixing and Filling the Batter
In a mixing bowl, whisk together 1 cup powdered sugar, 2 large eggs, and 2 large egg yolks. Mix until everything is well combined. Then, add the melted chocolate and 1 teaspoon vanilla extract. Stir until the mixture is smooth. Next, gently fold in 1/2 cup all-purpose flour and a pinch of salt. Be careful not to overmix; you want a thick, glossy batter.
Now, take the batter and evenly distribute it into the greased ramekins. Fill each ramekin about 3/4 full.
Baking the Cakes
Place the filled ramekins on a baking sheet for easy handling. Bake them in your preheated oven for 12-14 minutes. The edges should be firm, but the center needs to stay soft. Look for a puffed top that looks set.
Serving Suggestions
After baking, remove the ramekins from the oven. Let them cool for just 1 minute. Carefully run a knife around the edges to loosen each cake. Invert each ramekin onto a plate and gently lift it off. Serve your lava cakes warm. For a special touch, add a scoop of vanilla ice cream on top. Enjoy the melty goodness!
Tips & Tricks
Achieving the Perfect Molten Center
To get that gooey center, timing is key. Bake the cakes for 12-14 minutes. The edges should feel firm, while the center remains soft. If you bake too long, the center will cook through. Remember, you want the center to flow like lava when you cut into it.
Common Mistakes to Avoid
One common mistake is overmixing the batter. When you add the flour, stir gently until just combined. Overmixing can make your cake dense and dry. Another mistake is using cold ingredients. Always use room temperature eggs and melted chocolate. This helps your cake rise well and stay light.
Enhancements for Flavor and Presentation
To elevate your cake, add a pinch of espresso powder to the batter. This deepens the chocolate flavor. For a fancy touch, drizzle chocolate sauce on the plate before placing the cake. Fresh berries and mint leaves also make a beautiful garnish. Don’t forget to serve with a scoop of vanilla ice cream for a nice contrast!
Pro Tips
- Use Quality Chocolate: The flavor of your lava cake relies heavily on the chocolate you use. Opt for high-quality semi-sweet chocolate chips for a richer taste.
- Don’t Overbake: Keep an eye on the baking time. If you overbake, the molten center will turn solid. Aim for a soft center that jiggles slightly when you take it out of the oven.
- Cool Briefly: Allow the cakes to cool for just one minute before inverting them. This helps maintain their structure while still keeping the center gooey.
- Experiment with Flavors: For a twist, try adding a splash of espresso or a hint of orange zest to the batter. These flavors complement chocolate beautifully and enhance the overall dessert experience.
Variations
Different Flavors and Add-ins
You can change up the flavor of your lava cake. Try using dark chocolate chips instead of semi-sweet. This gives a deeper flavor. You can also add a bit of espresso powder for a rich coffee taste. Want something fruity? Mix in some raspberry or orange zest. These flavors make the cake even more special.
Mini Lava Cakes or Cupcake Version
If you want smaller portions, make mini lava cakes. Use smaller ramekins or muffin tins. Fill each about half full with batter. Bake them for less time, around 8-10 minutes. This way, everyone gets their own little cake. Kids love these fun-sized treats!
Dietary Adjustments (e.g., gluten-free)
You can make this recipe gluten-free easily. Just swap the all-purpose flour for a gluten-free blend. Make sure the blend works for baking. This way, everyone can enjoy the cake. If you want it dairy-free, try using coconut oil instead of butter. Use dairy-free chocolate chips too. These changes keep the cake tasty while meeting dietary needs.
Storage Info
Storing Leftovers
To store any leftover chocolate lava cake, let it cool first. Place each cake in an airtight container. You can keep them in the fridge for up to three days. Make sure the lid fits well to avoid drying out.
Reheating Tips for Best Results
When you’re ready to enjoy your leftover cake, preheat your oven to 350°F (175°C). Place the cakes on a baking sheet. Heat them for about 10 minutes. This method helps keep the center gooey. You can also use the microwave. Heat each cake for about 30 seconds. Check to ensure it’s warm but not too hot.
Freezing for Later Use
If you want to save some for later, freezing works great. Wrap each cooled lava cake tightly in plastic wrap. Then place them in a freezer-safe bag. They can last for up to three months. When you’re ready to eat, thaw them in the fridge overnight. After that, follow the reheating tips for the best results. Enjoy that melty center again!
FAQs
How do I know when the lava cake is done?
You want the edges firm and the center soft. The tops should look set and puffy. Check around 12 minutes. If it jiggles in the center, it’s not ready. I usually bake mine for 12-14 minutes.
Can I make this recipe ahead of time?
Yes, you can prep the batter ahead. Fill the ramekins and cover them. Chill them in the fridge for up to 24 hours. When you’re ready, bake them straight from the fridge. Just add a minute or two to the baking time.
What can I serve with chocolate lava cake?
Vanilla ice cream is a classic choice. It melts and mixes with the warm cake. You can also add fresh berries for a fruity touch. A drizzle of chocolate sauce adds extra richness. If you want to impress, dust the plate with powdered sugar.
In this post, we covered how to make delicious chocolate lava cakes. We looked at the key ingredients and even some tasty substitutes. I shared tips for perfecting the molten center and avoiding common mistakes. You can try different flavors and adjust for diets as needed. Lastly, we discussed how to store and reheat your treats. With these steps and tips, you can impress anyone with your baking. Enjoy making these cakes and sharing them with friends!