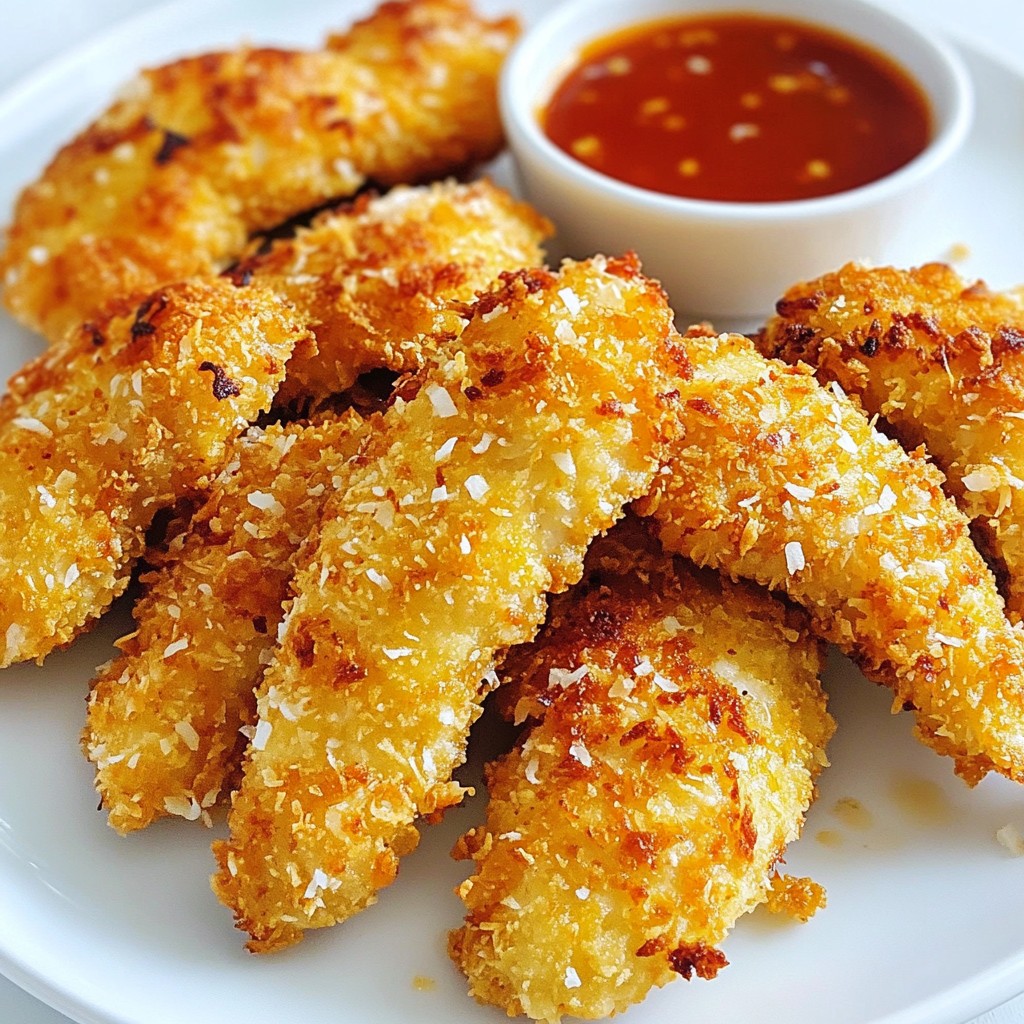
If you crave a simple meal that bursts with flavor, try my Crispy Coconut Chicken Tenders. They're easy to make and the perfect treat for any day of the week. With crunchy, golden coating and juicy chicken inside, these tenders are a hit with kids and adults alike. From gathering the ingredients to frying up your crispy bites, I’ll guide you through every step. Let’s dive into this delicious recipe!
Why I Love This Recipe
- Flavor Explosion: The combination of coconut and spices creates a deliciously unique flavor that is both sweet and savory.
- Crispy Texture: The panko breadcrumbs and shredded coconut provide an irresistible crunch that makes these tenders a real treat.
- Quick and Easy: This recipe comes together in just 30 minutes, making it perfect for busy weeknight dinners.
- Versatile Dipping Options: Pair these tenders with sweet chili sauce or honey for a delightful dipping experience that everyone will love.
Ingredients
List of Ingredients Required
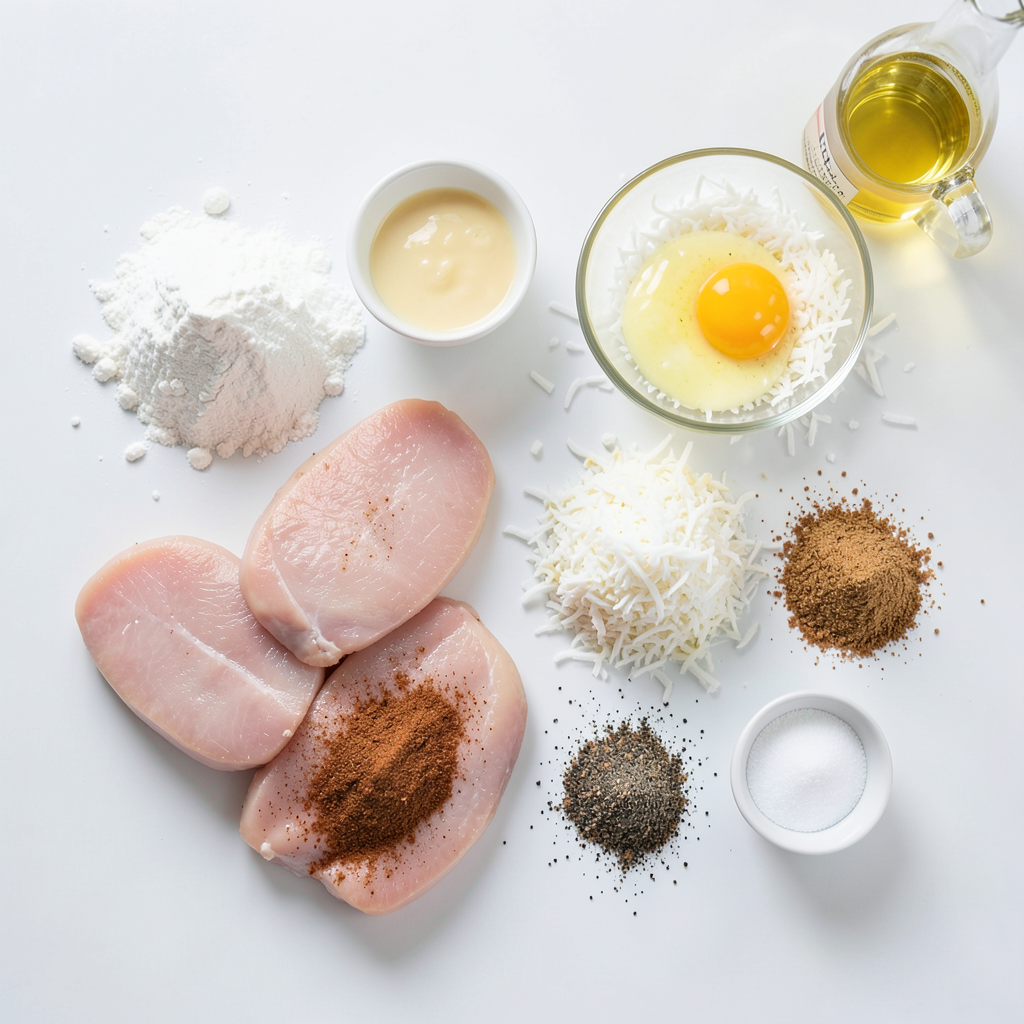
To make crispy coconut chicken tenders, you need the following items:
- 1 pound chicken breast tenders
- 1 cup all-purpose flour
- 2 large eggs, beaten
- 1 cup shredded coconut (sweetened or unsweetened)
- 1 cup panko breadcrumbs
- 1 teaspoon garlic powder
- 1 teaspoon smoked paprika
- Salt and pepper to taste
- 2 tablespoons coconut oil (for frying)
- Optional: Sweet chili sauce or honey for dipping
Ingredient Substitutions
You can easily swap some ingredients if needed:
- Chicken: Use chicken thighs for more flavor.
- Flour: Try gluten-free flour for a gluten-free option.
- Eggs: Use a flax egg for a vegan choice.
- Coconut: Use crushed cornflakes if you prefer no coconut.
- Breadcrumbs: Regular breadcrumbs can replace panko if you have them.
Recommended Dipping Sauces
These sauces pair well with your chicken tenders:
- Sweet chili sauce adds a nice kick.
- Honey brings a lovely sweetness.
- Barbecue sauce gives a smoky flavor.
- Ranch dressing offers a creamy contrast.
Feel free to try different sauces to find your favorite!
Step-by-Step Instructions
Preparing the Breading Station
To start, you need a good breading station. Grab three bowls. In the first bowl, mix one cup of flour with salt, pepper, garlic powder, and smoked paprika. This mix gives flavor to your chicken. In the second bowl, beat two large eggs. The eggs help the coating stick. In the third bowl, combine one cup of shredded coconut with one cup of panko breadcrumbs. This mix adds crunch and sweetness.
Next, pat the chicken breast tenders dry with paper towels. This step helps the breading stick better. Now, your station is ready for coating!
Coating the Chicken Tenders
Take one chicken tender and dip it into the flour mix. Make sure it gets covered well. Shake off any extra flour. Then, dip it into the beaten eggs. Allow any excess egg to drip off. Finally, roll it in the coconut and panko mix. Press gently to make sure the coating sticks. Repeat this for all the chicken tenders.
You should have a nice, thick coating on each tender. This will give you that crispy texture when cooked.
Frying and Cooking Tips
Now, heat two tablespoons of coconut oil in a large skillet over medium heat. You want it hot, but not too hot. Once the oil is shimmering, carefully add the coated chicken tenders. Do not overcrowd the pan; fry in batches if needed. Cook for about 4-5 minutes on each side. You want them golden brown and crispy.
When done, transfer the tenders to a paper towel-lined plate. This helps absorb any extra oil. Serve them hot with sweet chili sauce or honey for dipping. Enjoy your crispy coconut chicken tenders!
Tips & Tricks
Ensuring Perfect Crispiness
To make your chicken tenders super crispy, follow these tips:
- Dry the chicken: Pat the chicken tenders dry before coating. This helps the breading stick better.
- Use panko breadcrumbs: These breadcrumbs create a light, airy texture. They help achieve a great crunch.
- Heat oil properly: Make sure the coconut oil is hot before adding the chicken. A good test is to drop a small piece of bread in it; if it sizzles, it's ready.
- Don’t overcrowd the pan: Fry in batches. This keeps the oil temperature up and ensures even cooking.
Common Mistakes to Avoid
Here are some common mistakes that can ruin your crispy chicken:
- Skipping the seasoning: Don’t forget to season the flour! Garlic powder and smoked paprika add great flavor.
- Not shaking off excess flour: Shake off any extra flour after coating. This helps the next layer stick better.
- Frying too many at once: If you add too many, the oil cools down. This leads to soggy chicken.
- Not letting them rest: After frying, place the tenders on a paper towel. This soaks up extra oil and keeps them crispy.
Serving Suggestions and Pairings
These crispy coconut chicken tenders pair well with many sides and dips:
- Serve with sweet chili sauce: This adds a nice kick and complements the sweetness of the coconut.
- Try honey: A drizzle of honey gives a sweet touch that kids love.
- Pair with a fresh salad: A light green salad balances out the meal.
- Serve with rice: Jasmine or coconut rice can enhance the tropical vibe.
- Add some veggies: Carrot sticks or cucumber slices make great crunchy sides.
Pro Tips
- Choose the Right Coconut: For a sweeter flavor, opt for sweetened shredded coconut, but unsweetened will give a more subtle taste and allow the chicken's flavor to shine.
- Pat the Chicken Dry: Make sure to thoroughly dry the chicken tenders with paper towels before breading to ensure the coating adheres properly and becomes crispy.
- Don't Overcrowd the Pan: Fry the chicken tenders in small batches to maintain the oil temperature, which helps achieve a crispy texture without steaming the chicken.
- Experiment with Dips: While sweet chili sauce is a great option, try pairing the tenders with other dips like spicy mustard or a mango salsa for a fun twist.
Variations
Flavor Enhancements (Spices and Herbs)
You can easily change the flavor of your chicken tenders. Add spices or herbs to the flour mix. Try adding cumin for warmth or cayenne for heat. Fresh herbs like parsley or cilantro can also brighten the dish. Just chop them finely and mix them in. You can even add zest from a lime or lemon for a fresh twist.
Baking Option vs. Frying
You can bake your chicken tenders if you want a healthier option. Preheat your oven to 400°F (200°C). Place the breaded tenders on a baking sheet lined with parchment paper. Spray them lightly with cooking spray to help them crisp up. Bake for about 15-20 minutes, flipping halfway through. This method keeps the tenders crispy without frying.
Alternative Coatings (e.g., Gluten-Free)
If you want to make this dish gluten-free, swap the all-purpose flour with gluten-free flour. You can also use almond flour or coconut flour for a different taste. Instead of panko breadcrumbs, use crushed gluten-free crackers or cornflakes. These swaps keep the recipe tasty while meeting your dietary needs.
Storage Info
How to Store Leftovers
To store leftover crispy coconut chicken tenders, let them cool first. Place them in an airtight container. Make sure to separate layers with paper towels to keep them crisp. They stay fresh in the fridge for up to three days. If you want to keep them longer, freezing is a great option.
Reheating Tips
When you’re ready to eat the leftovers, reheating is key. The oven is best for this. Preheat your oven to 375°F (190°C). Place the tenders on a baking sheet. Bake for about 10-12 minutes until they are hot and crispy again. You can also use an air fryer for a faster method. Heat them at 350°F (175°C) for about 5-7 minutes.
Freezing Instructions
To freeze the chicken tenders, place them in a single layer on a baking sheet. Make sure they are not touching. Freeze for 1-2 hours until solid. Then, transfer them to a freezer bag. They can stay in the freezer for up to three months. When you're ready to eat them, no need to thaw. Just bake or fry them straight from the freezer.
FAQs
How long to cook chicken tenders for optimal tenderness?
Cook chicken tenders for about 4-5 minutes on each side. This time helps keep them juicy and tender. The key is to make sure they reach an internal temperature of 165°F. Use a meat thermometer for accuracy.
Can I use other types of chicken for this recipe?
Yes, you can use boneless chicken thighs instead of breast tenders. Thighs are juicier and add more flavor. You can also cut chicken breasts into strips if you prefer. Just keep the cooking time similar to ensure they cook through.
What is the best way to make coconut chicken tenders in advance?
To make chicken tenders ahead of time, bread them first and place them on a baking sheet. Cover with plastic wrap and chill in the fridge. You can store them for up to 24 hours. When ready to cook, simply fry them without thawing. This keeps them fresh and crispy.
To sum up, we explored how to make tasty chicken tenders. You learned about the right ingredients, tips for cooking, and even some fun variations. Perfecting the crispiness and avoiding common mistakes can make a big difference. Don't forget about the storage tips for leftovers, too. With these steps, you can easily whip up a great meal. Enjoy your cooking!