Skip to content
DisclaimerTerms Of UseGDPR PolicyCookie Policy

Southern Dishes

  • Home
  • Drinks
  • Appetizers
  • Dinner
  • Dessert
  • About
  • Contact
  • Privacy Policy
DisclaimerTerms Of UseGDPR PolicyCookie Policy

Isabella

- 1 cup cornmeal - 1 cup all-purpose flour - 1 tablespoon baking powder - 1/2 teaspoon salt - 1/4 teaspoon black pepper - 1 cup buttermilk (or milk + lemon juice substitute) - 2 large eggs - 1/4 cup vegetable oil - 1 cup sharp cheddar cheese, shredded - 2-3 fresh jalapeños, deseeded and finely chopped - 1 tablespoon honey (optional) The key to a great Cheddar Jalapeño Cornbread Muffin starts with fresh ingredients. I love using stone-ground cornmeal for its rich flavor. All-purpose flour gives the muffins a light texture. Baking powder helps them rise perfectly. A touch of salt and black pepper adds depth. For moisture, I use buttermilk. You can mix regular milk with a bit of lemon juice as a substitute. Eggs bind the muffin together and add richness. Vegetable oil makes them moist and tender. Sharp cheddar cheese is a must. It brings a bold taste that pairs well with jalapeños. The fresh jalapeños add heat and flavor. You can adjust the number based on your spice preference. If you like a hint of sweetness, add honey. It balances the spice and makes every bite delightful! Preheat your oven to 400°F (200°C). This step is key for perfect muffins. Grease a muffin tin or use muffin liners to prevent sticking. In a large bowl, blend the cornmeal, flour, baking powder, salt, and black pepper. Whisk these ingredients until they mix well. This gives your muffins a great base. In another bowl, whisk together the buttermilk, eggs, and vegetable oil. If you want a hint of sweetness, add the optional honey. Mixing well ensures a smooth batter. Pour the wet ingredients into the dry mix. Gently fold them together until just combined. It’s fine if a few lumps stay. Overmixing can make the muffins tough. Carefully fold in the shredded cheddar cheese and chopped jalapeños. Ensure they spread evenly in the batter. This step adds flavor and heat to your muffins. Spoon the batter into the prepared muffin tin. Fill each cup about 2/3 full. This allows room for the muffins to rise nicely. Place the muffin tin in the preheated oven. Bake for 15-20 minutes. Check if the tops are golden and a toothpick comes out clean. Let the muffins cool in the tin for a few minutes. Then, transfer them to a wire rack to cool completely. Enjoy your warm cheddar jalapeño cornbread muffins! Mixing is key for tender muffins. Start by combining dry ingredients. Use a whisk for even blending. Then, mix wet ingredients in a separate bowl. When you combine both, do not overmix. A few lumps are okay. Overmixing makes muffins tough, and we want them soft. If you run out of buttermilk, use milk with lemon juice. Just add 1 tablespoon of lemon juice to 1 cup of milk. Let it sit for five minutes. For cheese, you can swap cheddar for pepper jack or mozzarella. These changes keep the flavor fun and exciting. Presentation matters. Serve muffins in a rustic basket with a cloth. Drizzle honey on top for sweetness. You can also offer whipped butter on the side. This adds richness and flavor. Enjoy these muffins warm for the best taste! {{image_2}} You can swap out cheddar for other cheeses. Try Monterey Jack for a creamy texture. Pepper Jack adds spice and flavor. For a sharper taste, use Gruyère or aged Gouda. Each cheese brings its own twist to the muffins. Want less heat? Use fewer jalapeños or remove the seeds. You can also replace fresh jalapeños with mild green peppers. For more heat, add sliced serrano peppers or a pinch of cayenne. Adjust the spice to fit your taste. Add sweetness with ingredients like corn or diced peaches. You can also mix in a bit of sugar or maple syrup. A touch of cinnamon enhances the flavor profile. Experiment with these options for a fun twist. To keep your cheddar jalapeño cornbread muffins fresh, store them in an airtight container. Place parchment paper between layers to prevent sticking. This simple step helps keep the muffins moist and tasty. You can also wrap them tightly in plastic wrap. If you want to keep them for several days, the fridge is a great option. Freezing these muffins is easy. First, let them cool completely. Then, wrap each muffin in plastic wrap. Place the wrapped muffins in a freezer-safe bag. Make sure to squeeze out as much air as possible. To reheat, just take one out and microwave for about 30 seconds or until warm. You can also bake them at 350°F for 10-15 minutes. At room temperature, these muffins stay fresh for about 2-3 days. If you place them in the fridge, they can last up to a week. For longer storage, freezing is the best choice. This way, you can enjoy these flavorful treats whenever you like! Yes, you can make these muffins ahead of time. To prepare them in advance, follow these steps: - Bake the muffins as directed. - Let them cool fully. - Store them in an airtight container at room temperature for up to two days. - For longer storage, freeze them in a freezer bag for up to three months. - To reheat, warm them in the oven at 350°F (175°C) for about 10 minutes. If you don't have buttermilk, you have options. Here are some easy substitutes: - Mix 1 cup of milk with 1 tablespoon of lemon juice or vinegar. - Let it sit for 5-10 minutes to thicken. - You can also use plain yogurt, sour cream, or milk with a splash of vinegar. Each option will work well in this recipe. These muffins use all-purpose flour, which contains gluten. To make these muffins gluten-free, follow these tips: - Substitute all-purpose flour with a gluten-free flour blend. - Ensure the baking powder is gluten-free as well. - Check labels on all ingredients to avoid hidden gluten. - The taste and texture may differ slightly, but they will still be tasty! You learned how to make delicious jalapeño cheddar muffins. From mixing dry and wet ingredients to baking, each step is simple. Remember to avoid overmixing for the best texture. Feel free to explore different cheeses or adjust the spice. With proper storage, these muffins can stay fresh for days. Now it’s your turn to try these tasty treats. They make a perfect snack or side for any meal. Enjoy baking and sharing your creations!

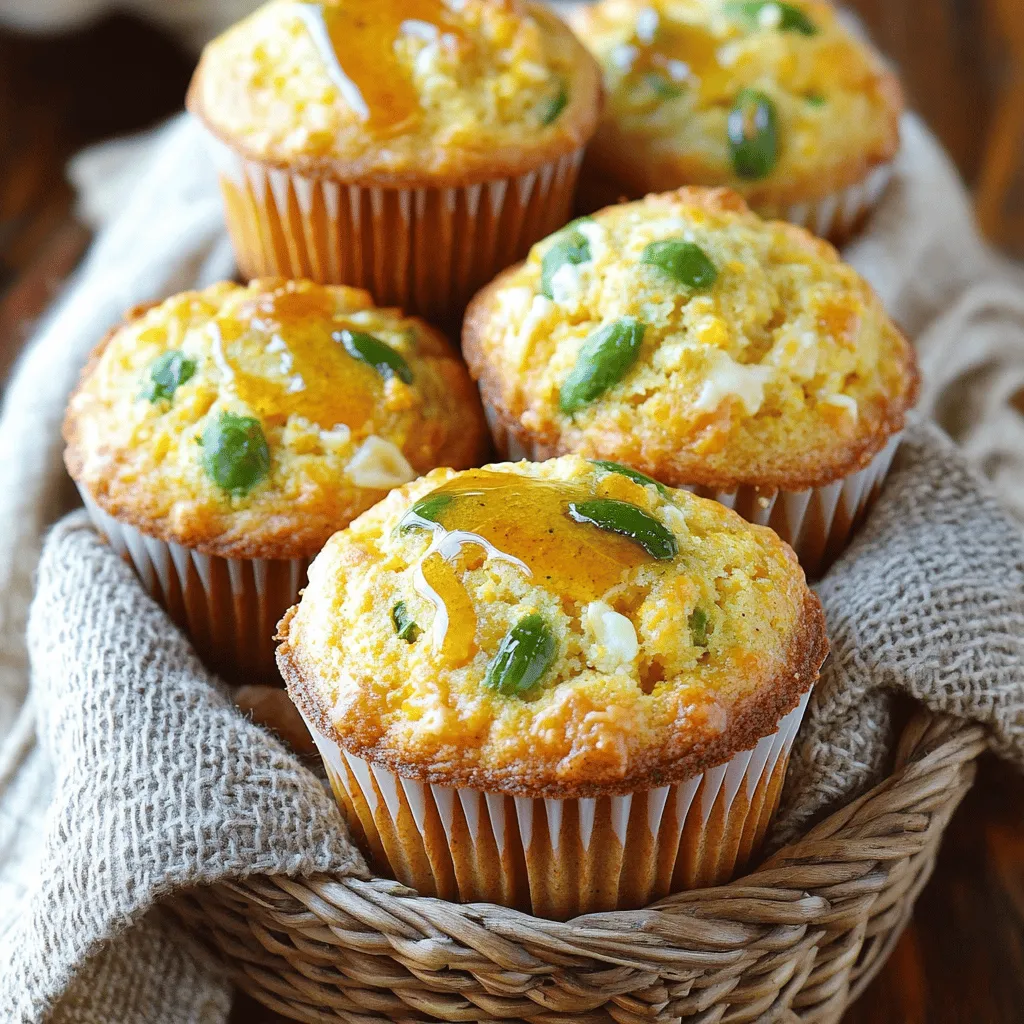
Cheddar Jalapeño Cornbread Muffins Flavorful Delight

If you’re on the hunt for a tasty snack, you’ve found it! Cheddar Jalapeño Cornbread Muffins pack a punch of

- 4 boneless, skinless chicken thighs - 1/2 cup soy sauce (or tamari for gluten-free) - 1/4 cup honey - 2 tablespoons rice vinegar - 3 cloves garlic, minced - 1 tablespoon fresh ginger, grated - 1 tablespoon sesame oil - 2 tablespoons cornstarch - 1/4 cup water - 1 teaspoon sesame seeds - 2 green onions, chopped - Cooked rice (for serving) When I make Slow Cooker Teriyaki Chicken, I focus on fresh and simple ingredients. You want to start with high-quality chicken thighs. They stay juicy and tender. I use soy sauce or tamari for a gluten-free option. Honey adds a nice sweetness. Rice vinegar gives a slight tang. Next, I add garlic and ginger. They bring a bright flavor to the dish. Sesame oil adds a nutty touch. It’s a small amount, but it makes a big difference. To thicken the sauce later, I keep cornstarch and water handy. This will help make the sauce silky and rich. Finally, I love garnishing with sesame seeds and green onions. They add color and texture to the meal. Don't forget the rice! It soaks up all the tasty sauce. This dish feels special, yet it’s easy to make. To start, mix the following in a medium bowl: - 1/2 cup soy sauce - 1/4 cup honey - 2 tablespoons rice vinegar - 3 cloves garlic, minced - 1 tablespoon fresh ginger, grated - 1 tablespoon sesame oil Stir the sauce well until all the ingredients blend together. Next, place 4 boneless, skinless chicken thighs in your slow cooker. Pour the teriyaki sauce over the chicken. Make sure each piece is well coated. Cover the slow cooker and set it to low for 6-7 hours. If you're in a hurry, you can set it to high for 3-4 hours. Once the chicken is cooked, carefully take it out. Use two forks to shred the chicken into bite-sized pieces. In a small bowl, mix 2 tablespoons of cornstarch with 1/4 cup of water to make a slurry. Stir this mixture into the sauce left in the slow cooker. This will help thicken the sauce. Turn the slow cooker to high and let it cook for 10-15 minutes. After the sauce thickens, return the shredded chicken to the slow cooker. Stir well to coat the chicken in the thickened sauce. Serve the teriyaki chicken over warm rice. For a nice finish, sprinkle with 1 teaspoon of sesame seeds and 2 chopped green onions. Enjoy your delicious meal! - Use quality soy sauce or tamari. This choice makes a big difference. - Let the sauce marinate for deeper flavor. Just a few hours will help. - Different slow cookers may cook at varied speeds. Check your manual for best times. - Perfectly cooked chicken will be tender and easily shred with a fork. Look for an internal temp of 165°F. - Pair the teriyaki chicken with steamed broccoli or stir-fried bell peppers. These add color and nutrition. - Want more spice? Add red pepper flakes or sriracha to the sauce. Adjust to your taste. {{image_2}} If you need a gluten-free meal, swap the soy sauce with gluten-free alternatives like tamari. Tamari gives the same rich taste without gluten. You can also find coconut aminos, which work well too. Adjust the amount for the same flavor in your dish. Vegetables can make this dish even better. Try adding bell peppers for a sweet crunch. Broccoli adds a nice green touch and a healthy boost. You can toss in carrots or snap peas too. Add these veggies during the last hour of cooking for the best results. If you want a less sweet dish, modify the honey level. Start with half of the amount and taste as you cook. You can always add more if you like it sweeter. This way, you can balance the flavors to fit your taste. Enjoy the savory notes more with less honey! To store leftover teriyaki chicken, let it cool first. Place it in an airtight container. Make sure to cover it tightly. Store it in the fridge. It will stay fresh for about 3 to 4 days. Always check for any off smells before eating. To freeze teriyaki chicken, let it cool completely. Place it in a freezer-safe bag or container. Remove as much air as possible to avoid freezer burn. Label it with the date. When ready to eat, thaw it overnight in the fridge. Reheat in a pot or microwave until hot. When stored properly, teriyaki chicken lasts up to 4 days in the fridge. If you freeze it, it can stay good for about 3 months. After that, the flavor may fade. Always check for signs of spoilage before consuming. Yes, you can use chicken breasts. They are leaner than thighs. This change may affect cooking time. Cook them for 4-5 hours on low or 2-3 hours on high. The result will still be tasty. To add spice, consider using red pepper flakes or sriracha sauce. You can add one teaspoon of red pepper flakes to the sauce. For sriracha, start with one tablespoon. Adjust the amount based on your heat preference. Yes, you can cook teriyaki chicken on the stovetop. Start by heating a pan over medium heat. Add the chicken thighs and sear for 3-4 minutes per side. Pour the teriyaki sauce over the chicken. Cover and simmer for 20-30 minutes until cooked through. Serve this dish with steamed rice or quinoa. You can also add sautéed vegetables like broccoli or snap peas. These sides balance the flavors and add nutrients. You can even use lettuce wraps for a fresh twist. In this article, we explored a simple and tasty slow cooker teriyaki chicken. We covered essential ingredients, step-by-step cooking instructions, useful tips, and delicious variations. Plus, we shared storage advice and answered common questions. This dish is easy to make and perfect for busy days. Enjoy it with rice, veggies, or your favorite sides. By following these steps, you'll create a meal that delights everyone at the table. Now, grab your slow cooker and impress family and friends with this flavorful dish!

Slow Cooker Teriyaki Chicken Flavorful Meal Idea

Are you ready for a dish bursting with flavor? Slow Cooker Teriyaki Chicken makes cooking easy and delicious. This meal

To make crispy Air Fryer Parmesan Zucchini Fries, you need simple ingredients. Here’s the list of what you will need: - Zucchinis - Parmesan cheese - Breadcrumbs - Seasonings - Egg - Cooking spray First, choose two medium zucchinis. Cut them into fry shapes, about 4-5 inches long. The zucchini gives a fresh taste. Next, grab half a cup of grated Parmesan cheese. This cheese adds a rich flavor and a nice crunch. For the crunch factor, use half a cup of breadcrumbs. You can use panko for extra crispiness or regular ones. Then, gather your seasonings. You will need one teaspoon each of garlic powder, onion powder, and Italian seasoning. Don't forget a pinch of salt and pepper to taste. You also need one large egg. It helps the coating stick to the zucchini. Lastly, you’ll need cooking spray. This is key for achieving that golden, crispy finish. With these ingredients ready, you are all set to create a tasty snack that is perfect for any occasion! First, set your air fryer to 400°F (200°C). Preheating helps the fries cook evenly. This step takes about 5 minutes. While it heats, you can prepare the rest. In a bowl, mix the following ingredients: - 1/2 cup grated Parmesan cheese - 1/2 cup breadcrumbs - 1 teaspoon garlic powder - 1 teaspoon onion powder - 1 teaspoon Italian seasoning - Salt and pepper to taste Stir well to blend all the flavors. In another bowl, beat one large egg. This egg will help the coating stick to the zucchini. Cut two medium zucchinis into fries. Each fry should be about 4-5 inches long. Dip each zucchini fry into the egg. Let the excess egg drip off. Then, coat it in the Parmesan mixture. Press lightly to ensure the coating sticks well. Place the coated fries in a single layer in the air fryer basket. Lightly spray them with cooking spray for extra crispiness. - Cooking time and temperature: Air fry the zucchini fries for 10-12 minutes. - Flipping guidelines: Flip the fries halfway through cooking. This ensures they brown evenly on both sides. Once golden brown and crispy, remove them from the air fryer. Let them cool for a couple of minutes before serving. Enjoy your healthy snack! To get that perfect crispiness, cooking spray is key. It helps the fries brown nicely and keeps them crunchy. Without it, the fries may turn out soggy. Use a light spray before cooking. When choosing between panko and regular breadcrumbs, I recommend panko. Panko is coarser and gives a better crunch. Regular breadcrumbs work, but they might not be as crispy. So, go for panko when you can! To make your zucchini fries even tastier, add some extra spices. Consider using paprika or cayenne pepper for a kick. Fresh herbs like basil or oregano can also brighten up the flavor. Just mix them into the breadcrumb mixture for a burst of taste. Presentation makes a big difference! Serve the fries on a nice platter. Add a small bowl of marinara sauce or ranch dressing for dipping. A sprinkle of fresh parsley on top adds a touch of color and makes the dish pop. This simple step elevates your snack from good to great! {{image_2}} For a vegan option, swap the egg with a flaxseed mixture. Combine 1 tablespoon of ground flaxseed with 2.5 tablespoons of water. Let it sit for a few minutes until it thickens. This mixture helps the coating stick just like the egg does. You can also use nutritional yeast instead of Parmesan for a cheesy flavor. If you're looking for a gluten-free option, choose gluten-free breadcrumbs. Many stores sell these, or you can make your own from gluten-free bread. This keeps your fries crispy and tasty without any gluten. To make spicy zucchini fries, add cayenne pepper or chili powder to your seasoning mix. Start with 1/4 teaspoon and adjust to your taste. This adds a nice kick to the fries, perfect for spice lovers. For cheesy zucchini fries, mix in extra cheese to your coating. You can add cheddar or mozzarella to the Parmesan. This gives the fries a rich, cheesy flavor. Just be careful not to overload them, as it may affect the crispiness. To store leftover zucchini fries, let them cool first. Place them in an airtight container. Keep them in the fridge for up to three days. If you want to keep them longer, consider freezing. To keep zucchini fries crispy when reheating, use the air fryer. Preheat it to 350°F (175°C). Place the fries in a single layer. Heat them for about 5-7 minutes. This method helps restore their crunch. You can freeze zucchini fries for up to three months. For best results, freeze them uncooked. Arrange the uncooked fries in a single layer on a baking sheet. Freeze until solid, then transfer to a freezer bag. When ready to cook, you can air fry them straight from the freezer. Adjust the cooking time to about 15-18 minutes. Yes, you can! Try using carrots, sweet potatoes, or eggplant. Each veggie adds a unique flavor and texture. Cut them into fry shapes like the zucchini. Adjust the cooking time, as some veggies may take longer or shorter to cook. You can use a mixture of flour and water instead. Mix one tablespoon of flour with two tablespoons of water to create a paste. Dip the zucchini fries into this mixture before coating them with the breadcrumb mix. This helps the coating stick without using egg. To ensure crispiness, follow these tips: - Use cooking spray to coat the fries lightly. - Avoid overcrowding the air fryer basket, which traps steam. - Flip the fries halfway through cooking to get even crispiness. - Consider using panko breadcrumbs, as they provide a crunchier texture. Zucchini fries taste great with many sauces! Here are some popular choices: - Marinara sauce adds a classic touch. - Ranch dressing gives a creamy, cool contrast. - Garlic aioli offers a flavorful kick. - Spicy ketchup can add a fun twist. Experiment with your favorites for added fun! You learned how to make crispy, tasty zucchini fries using simple ingredients. We covered the steps, from prepping your vegetables to air frying them just right. I also shared tips on flavor and variations to keep meals exciting. Storing and reheating your fries can keep them fresh for later. Feel free to experiment with different veggies and seasonings to find your perfect match. Enjoy these easy, healthy bites!

Air Fryer Parmesan Zucchini Fries Crisp and Tasty Snack

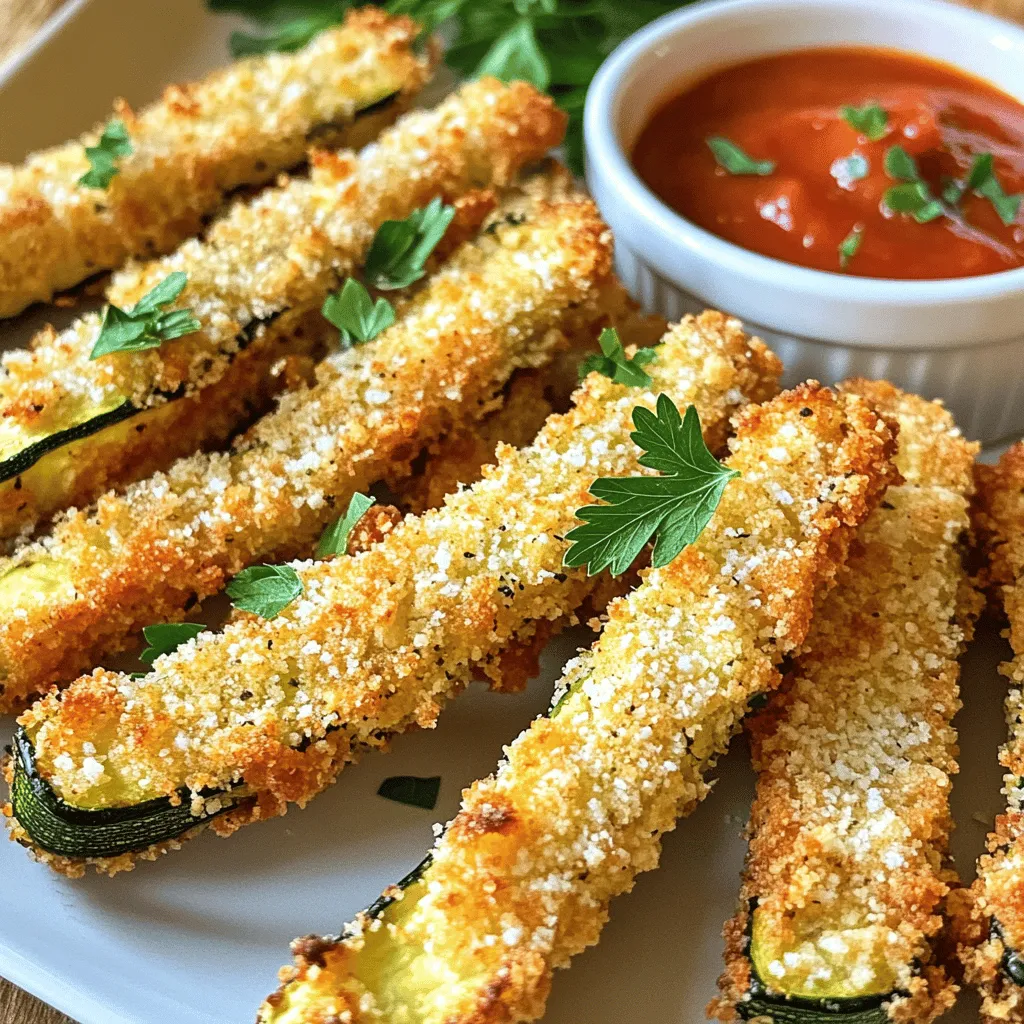
If you’re searching for a tasty, crispy snack, look no further! Air Fryer Parmesan Zucchini Fries are just the answer.

- 1 lb boneless, skinless chicken thighs - 1 cup coconut milk - Juice and zest of 2 limes The chicken thighs form the base of this dish. They stay juicy and tender when cooked. I love using coconut milk for its creamy texture and subtle sweetness. Lime juice and zest add a bright zing that makes each bite pop. - 2 tablespoons honey - 2 cloves garlic, minced - 1 teaspoon ground cumin - 1 teaspoon smoked paprika Honey balances the tartness from the lime. Garlic brings a savory depth that complements the other flavors. Cumin gives a warm earthiness, while smoked paprika adds a hint of smokiness. These spices elevate the taco experience. - 1 cup shredded cabbage (green or purple) - 1 avocado, sliced - 8 small corn or flour tortillas Shredded cabbage adds crunch and freshness. Avocado provides creaminess and richness. You can choose corn or flour tortillas based on your preference. Both work well and hold the filling nicely. - Mixing the marinade: In a medium bowl, combine 1 cup of coconut milk, juice and zest of 2 limes, 2 tablespoons of honey, 2 minced garlic cloves, 1 teaspoon of ground cumin, 1 teaspoon of smoked paprika, and salt and pepper to taste. Mix it well until blended. - Coating the chicken: Take 1 pound of boneless, skinless chicken thighs and add them to the marinade. Ensure each piece is fully coated. This step adds great flavor. - Refrigeration time: Cover the bowl and refrigerate the chicken for at least 30 minutes. You can let it sit up to 2 hours. The longer it marinates, the more flavor it absorbs. - Preheating the grill: Preheat your grill or grill pan over medium-high heat. This ensures a nice sear on the chicken. - Cooking times and temperatures: Remove the chicken from the marinade and let excess drip off. Grill each piece for 6-8 minutes on each side. The chicken should reach an internal temperature of 165°F. - Resting the chicken: After grilling, let the chicken rest for a few minutes. This helps the juices redistribute, making it juicier when you slice it. - Warming the tortillas: While the chicken rests, warm 8 small corn or flour tortillas on the grill or in a skillet for about 30 seconds per side. They should be soft and pliable. - Adding chicken and toppings: Slice the grilled chicken into strips. Place a few strips on each tortilla. Top with 1 cup of shredded cabbage, slices of avocado, and a sprinkle of fresh cilantro. - Serving suggestions: Serve your tacos with lime wedges on the side. A squeeze of lime adds a zesty kick that brightens the flavors. To make the best marinade, start with the basics. Combine coconut milk, lime juice, lime zest, honey, garlic, cumin, and smoked paprika. Taste it! You can change the lime or honey to suit your liking. For a kick, add a dash of hot sauce. Let the chicken soak in the marinade for at least 30 minutes. If you have more time, let it sit for up to 2 hours. This helps the chicken soak up all the yummy flavors. For great grill marks, preheat your grill or pan well. Make sure it is hot before adding the chicken. Place each piece down carefully and don’t move it for a few minutes. Flip the chicken after 6-8 minutes. This helps create those nice grill lines. Cook the chicken evenly by checking its thickness. If it is uneven, pound it flat before marinating. This way, it cooks at the same rate. Garnish your tacos with fresh cilantro and lime wedges. This adds color and flavor. For a nice look, pile the shredded cabbage high on each taco. When plating, stack tacos neatly on a plate. You can also serve them with a small bowl of salsa or guacamole on the side. This makes the meal fun and inviting! {{image_2}} You can switch chicken for shrimp or tofu. Shrimp cooks fast and adds a nice twist. Just marinate them the same way as chicken. Tofu is a great option for vegans. Use firm tofu and press it to remove extra water. Then, cut it into cubes and marinate. Both choices keep the dish tasty and fun. Want some heat? Add chili powder or diced jalapeños to the marinade. This change brings a nice kick. You can also try adding tropical fruits. Mango or pineapple chunks work well. They bring sweetness and a fresh flavor. Mixing these fruits with the chicken makes every bite special. Choose between flour or corn tortillas for your tacos. Corn tortillas have a nice nutty flavor. They are gluten-free, too. Flour tortillas are soft and chewy, perfect for holding fillings. If you need a gluten-free option, look for rice tortillas. They work well and are easy to find. Pick the tortilla that you love best! After enjoying your Coconut Lime Chicken Tacos, store leftovers in the fridge. Place chicken and toppings in separate containers. Use airtight containers to keep them fresh. You can store the chicken for up to three days. Toppings like cabbage and avocado are best eaten within two days. When it's time to enjoy leftovers, heat the chicken in a skillet over medium heat. This method keeps it juicy and flavorful. If you prefer, you can microwave it. Just cover the chicken to keep moisture in. Warm tortillas in a dry skillet for about 30 seconds on each side. This helps them stay soft and tasty. You can freeze leftover chicken and toppings. Just make sure the chicken is completely cool before freezing. Place it in a freezer-safe bag or container. It will last up to three months in the freezer. To use frozen chicken, thaw it in the fridge overnight. Reheat it before serving. Keep toppings separate, as they don't freeze well. To check if the chicken is done, use a meat thermometer. The safe internal temperature for chicken is 165°F. Insert the thermometer into the thickest part of the thigh. If it reads 165°F or higher, the chicken is fully cooked. This ensures it is safe to eat and juicy. Yes, you can make this recipe ahead of time. Marinate the chicken for up to two hours for more flavor. You can also grill the chicken in advance. Store it in the fridge for up to three days. Just warm it up before serving. This makes meal prep easy and quick. These tacos pair well with many sides. You can serve them with: - Mexican rice or cilantro lime rice - Black beans or refried beans - Grilled corn on the cob - A fresh salad with avocado and lime dressing - Refreshing drinks like agua fresca or a light beer These sides enhance the meal and make it even more enjoyable! You now have a clear guide to making delicious Coconut Lime Chicken Tacos. We covered the main and extra ingredients, detailed the steps for marinating and grilling, and provided tips for perfecting the dish. You can even explore variations to customize your tacos. Remember to store leftovers properly and choose the best reheating methods to enjoy them later. With these details, you’re ready to impress anyone at your next meal. Enjoy your cooking adventure and serve up these tasty tacos!

Coconut Lime Chicken Tacos Tasty and Quick Meal

Craving a quick and tasty meal? Coconut Lime Chicken Tacos are your answer! Combining juicy chicken thighs, rich coconut milk,

To make these tasty carrot fries, you need a few simple items. Here’s what you will need: - 4 large carrots, peeled and cut into fries - 2 tablespoons olive oil - 3 tablespoons pure maple syrup - 1 teaspoon ground cinnamon - 1/2 teaspoon sea salt - Freshly cracked black pepper, to taste These ingredients blend well to create a sweet and savory taste. Besides the main ingredients, you can enhance the flavor with some extra spices. Here are some great options: - Smoked paprika for a hint of smokiness - Garlic powder for a savory kick - Cayenne pepper for a touch of heat Feel free to mix and match these spices. You can find your favorite flavor. For a lovely finish, add some garnishes to your fries. Here are some ideas: - Fresh parsley, chopped for color - Grated parmesan for a cheesy touch - Toasted nuts like walnuts for crunch These garnishes make the dish even more appealing. They add flavor and texture to your carrot fries. Enjoy experimenting with these options! First, grab four large carrots. Peel them well. Cut each carrot into fry shapes. Aim for even sizes so they cook the same. Place the cut fries in a large mixing bowl. Next, add two tablespoons of olive oil to the bowl. Pour in three tablespoons of pure maple syrup. Add one teaspoon of ground cinnamon and half a teaspoon of sea salt. If you like, add freshly cracked black pepper to taste. Mix everything well until the carrot fries are coated. Now, preheat your oven to 425°F (220°C). Line a baking sheet with parchment paper. Spread the carrot fries on the sheet in a single layer. Make sure they have space. Bake for 20-25 minutes. Flip them halfway through for even cooking. When they are tender and a bit caramelized, take them out. Let them cool for a moment. Garnish with chopped parsley before serving for a fresh look. To get your carrot fries crispy, follow these steps: - Cut Evenly: Make sure you cut the carrots into similar sizes. This helps them cook evenly. - Dry Before Coating: Pat the carrot fries dry with a towel before mixing. Less moisture means more crunch. - Single Layer on Sheet: Spread the fries out on the baking sheet. If they touch, they will steam instead of crisp up. - Flip Halfway: Flipping the fries halfway through baking ensures even browning. It’s a key step for great texture. You can customize the sweetness and spice levels based on your taste: - Maple Syrup: Start with three tablespoons. If you want more sweetness, add a bit more. - Cinnamon Kick: One teaspoon of cinnamon gives a warm, cozy flavor. If you like it spicier, add a pinch of nutmeg or allspice. - Salt Balance: Use sea salt to enhance the natural sweetness of the carrots. Start with half a teaspoon and adjust to your liking. These maple glazed carrot fries are great as a snack or side dish: - Dip Ideas: Try them with yogurt dip or ranch dressing. The cool dip pairs well with the sweet fries. - Garnish: Fresh parsley adds a nice green touch. It also gives a pop of flavor. - Pairing: Serve with grilled chicken or fish for a balanced meal. The sweetness of the carrots complements savory dishes perfectly. {{image_2}} You can make these carrot fries in an air fryer. First, prepare the carrot fries as usual. Preheat your air fryer to 400°F (200°C). Place the seasoned carrot fries in the basket. Cook them for about 15-20 minutes. Shake the basket halfway through to ensure even cooking. The air fryer gives you a crispy texture with less oil. Feel free to mix in other veggies! Sweet potatoes, parsnips, or even zucchini work great. Cut them into similar fry shapes. Adjust the cooking time as needed. Each vegetable brings its own flavor to the dish. This mix can make your snack even more colorful and fun. If you like heat, add some spice! Mix in a pinch of cayenne pepper when you prepare the fries. You can also use chili powder for a different kick. The warmth of the spice pairs well with the sweetness of the maple syrup. This twist adds a zesty surprise to your healthy snack. You can store leftover maple glazed carrot fries in the fridge. Place them in an airtight container. They stay fresh for about 3 days. Make sure they cool down before sealing the container. This keeps them tasty and prevents sogginess. To reheat your carrot fries, use an oven or air fryer. Preheat your oven to 350°F (175°C). Spread the fries on a baking sheet. Heat for about 10 minutes, flipping them halfway. If using an air fryer, set it to 350°F (175°C) and cook for 5-7 minutes. This will help keep them crispy. You can freeze these fries for future snacks. First, let them cool completely. Lay them flat on a baking sheet lined with parchment paper. Freeze for about 1-2 hours until solid. Then, transfer them to a freezer-safe bag. They can last up to 3 months in the freezer. When you're ready to eat, cook them from frozen in the oven. Yes, you can use baby carrots. They are sweet and tender. Just cut them into fry shapes. This will help them cook evenly. Keep in mind that baby carrots may take less time to bake. Check for doneness a few minutes early. The fries take about 20-25 minutes to cook. Bake them at 425°F (220°C). Flip them halfway through for even cooking. Look for a golden color and tender texture. If you want them crispier, add a few extra minutes. You can serve these fries with dips like ranch or yogurt sauce. They also pair well with grilled chicken or fish. A fresh salad adds a nice touch too. Feel free to experiment with your favorite foods. The sweet and savory flavor complements many dishes. Maple glazed carrot fries offer a tasty twist on a classic snack. We explored key ingredients, like fresh carrots and maple syrup, and discussed how to make the glaze. You learned step-by-step how to prep, bake, and add spices. With tips for perfecting crispiness and options like air frying, your skills will shine. Don’t forget about storage and serving ideas to keep the fun going. Enjoy making these flavorful fries, and let your creativity guide you with toppings and variations.

Maple Glazed Carrot Fries Tasty and Healthy Snack

Looking for a snack that’s both tasty and healthy? You’ll love my Maple Glazed Carrot Fries! This simple recipe turns

- 8 oz. rice noodles - 1 cup shredded carrots - 1 red bell pepper, thinly sliced - 1 cucumber, thinly sliced - 1 cup red cabbage, shredded - 1/4 cup fresh cilantro, chopped - 1/4 cup scallions, sliced - 1/2 cup roasted peanuts, roughly chopped In this salad, rice noodles are the star. They soak up the tasty dressing well. Shredded carrots add crunch and sweetness. The red bell pepper brings color and freshness. Cucumber adds a cool, crisp bite. Red cabbage offers a nice texture and vibrant hue. Fresh cilantro and scallions give it a burst of flavor. Lastly, roasted peanuts add a satisfying crunch. - 1/4 cup peanut butter (smooth or crunchy) - 2 tablespoons soy sauce (or tamari for gluten-free) - 2 tablespoons lime juice - 1 tablespoon honey or maple syrup - 1 teaspoon sesame oil - 1-2 teaspoons sriracha (adjust for spice preference) - 1-2 tablespoons water (to thin) The peanut dressing is key to this salad. Peanut butter provides a creamy base. Soy sauce or tamari adds saltiness and depth. Lime juice brightens the flavors, while honey or maple syrup brings sweetness. Sesame oil adds a touch of nuttiness. Sriracha gives a nice kick, so adjust it to your taste. Water helps to thin out the dressing, making it easy to mix. To cook rice noodles perfectly, start by boiling water in a large pot. Add the noodles and cook based on the package instructions. Usually, this takes about 4 to 6 minutes. Stir them gently to prevent sticking. Once they are soft, drain the noodles in a colander. Next, rinse the noodles under cold water. This stops the cooking process and cools them down quickly. Spread them out on a clean surface to make sure they don't clump together. Set the noodles aside while you prepare the dressing and veggies. Now, let's make the peanut dressing. In a medium bowl, add 1/4 cup of peanut butter. Then, pour in 2 tablespoons of soy sauce and 2 tablespoons of lime juice. Next, add 1 tablespoon of honey or maple syrup for sweetness. Include 1 teaspoon of sesame oil for depth. If you like a bit of heat, add 1 to 2 teaspoons of sriracha. Now, whisk everything together until smooth. If it's too thick, add water, a tablespoon at a time, until it reaches your desired consistency. You want it creamy but pourable. In a large bowl, combine the cooled rice noodles with shredded carrots, sliced red bell pepper, cucumber, and red cabbage. Sprinkle some chopped cilantro and scallions in too. Drizzle the peanut dressing over the noodle and veggie mix. Gently toss everything together. Make sure every piece is coated in that tasty dressing. Finally, sprinkle chopped peanuts on top for crunch. If you have extra cilantro or peanuts, feel free to add those on top for a lovely garnish. Chill the salad in the fridge for at least 15 minutes. This helps the flavors blend and makes it even more delicious! Adjust the dressing to your taste. Start with the base recipe. If you love spice, add more sriracha. For a sweeter flavor, add extra honey or maple syrup. Keep tasting as you mix. This makes sure you enjoy every bite. Mix the ingredients evenly. After combining the noodles and veggies, pour the dressing over them. Toss gently. Use your hands or tongs to mix well. This way, every piece gets coated with flavor. If you see dry spots, give it another toss. Store the salad in an airtight container. This keeps it fresh and tasty. You can keep it in the fridge for up to three days. If you want to store leftovers, keep the dressing separate. This helps prevent sogginess. To keep the dressing fresh, store it in a small jar. Seal it tightly and place it in the fridge. It should last for about a week. If it thickens, just stir in a little water to thin it out. Pair your noodle salad with protein. Grilled chicken, shrimp, or tofu work well. They add extra flavors and nutrients. You can also serve it with spring rolls for a fun meal. Get creative with presentation. Use a large bowl for sharing. Garnish with extra peanuts and cilantro on top. For individual servings, use small bowls or plates. This makes each guest feel special. {{image_2}} For a gluten-free option, use rice noodles. You can also choose tamari instead of soy sauce. This keeps the bright flavors while catering to dietary needs. If you want to customize your salad, try different veggies. You can use bell peppers, snap peas, or even shredded broccoli. Each adds a unique crunch and taste. Adding protein makes this salad more filling. You can use chicken, shrimp, or tofu. For chicken, grill or bake it until fully cooked. Slice it thinly and toss it into the salad. If using shrimp, sauté them for a few minutes until pink. For tofu, press it to remove excess water, then pan-fry until crispy. You can enhance the flavor of the salad easily. Try adding spices like ginger or garlic. Fresh herbs like mint or basil also work well. Incorporating toppings like sesame seeds or crunchy fried onions adds texture. These small changes can make your salad even more exciting. After enjoying your Thai peanut noodle salad, store any leftovers in the fridge. Use an airtight container for best results. This keeps the salad fresh and tasty. Make sure to separate the dressing from the salad. This helps prevent the noodles and veggies from getting soggy. If you want to freeze components, do it wisely. Freeze the dressing in ice cube trays. This way, you can use just what you need later. For the noodles, place them in a zip-top bag. Remove as much air as possible before sealing. This keeps them from freezing in clumps. The salad can last up to three days in the refrigerator. The dressing can last about a week. Keep an eye out for any changes in smell or texture. If the salad looks wilted or slimy, it’s best to toss it. Check for a sour smell as another sign it has gone bad. Always trust your senses when it comes to food safety. Keeping track of how long you’ve stored the salad can help you enjoy it at its best. Yes, you can make this salad ahead of time. To do this, cook your rice noodles and prepare the dressing. Keep the noodles and dressing separate until you are ready to serve. This way, the noodles stay fresh. You can mix the veggies and noodles the night before. Just make sure to store them in the fridge. To make the salad vegan, swap honey for maple syrup. Use tamari instead of soy sauce for gluten-free needs. The peanut butter is usually vegan, so you don’t need to change that. This keeps all the great flavors while making it plant-based. If you don’t have sriracha, try chili paste or hot sauce. You can also use crushed red pepper flakes for some heat. For a milder version, skip the spice altogether. This keeps the salad tasty and suits your taste buds. This Thai Peanut Noodle Salad is a mix of fresh veggies and a rich dressing. You learned how to cook rice noodles, make a delicious peanut dressing, and combine everything perfectly. Don't forget the tips for storage and serving. By trying variations, you can make this salad your own. Enjoy the balance of flavors, and feel free to get creative with your ingredients. This salad is fun to make and even better to eat. Explore different proteins and spices for an extra twist!

Thai Peanut Noodle Salad Flavorful and Fresh Dish

Are you ready to enjoy a vibrant and refreshing meal? Thai Peanut Noodle Salad is bursting with flavor and freshness,

- 2 cans of refrigerated cinnamon rolls - 6 large eggs - 1 cup of milk (whole or almond) - ½ cup heavy cream - ¼ cup brown sugar - 1 tablespoon vanilla extract - 1 teaspoon ground cinnamon - ½ teaspoon nutmeg - ½ cup maple syrup (additional for serving) - Powdered sugar for garnish Gathering the right ingredients is key. First, you need two cans of cinnamon rolls. I prefer the ones that come with icing. They give the casserole a rich flavor. Next, grab six large eggs. They add structure and richness. For the liquid, use one cup of milk. You can choose whole or almond milk based on your taste. Adding half a cup of heavy cream makes it extra creamy. Now, let’s add some flavor. You’ll need a quarter cup of brown sugar for sweetness. One tablespoon of vanilla extract adds a lovely aroma. Ground cinnamon is a must—one teaspoon gives that classic cinnamon roll taste. A little nutmeg, just half a teaspoon, enhances the flavor even more. Lastly, don't forget the toppings. You’ll want half a cup of maple syrup. This is for drizzling when serving. A dusting of powdered sugar makes it look beautiful. These ingredients come together to create a delightful breakfast treat! - Preheat your oven to 350°F (175°C). Grease a 9x13 inch baking dish. - Open the cinnamon rolls and cut each roll into quarters. - In a large bowl, whisk together 6 eggs, 1 cup milk, ½ cup heavy cream, and ¼ cup brown sugar. - Add 1 tablespoon of vanilla extract, 1 teaspoon ground cinnamon, ½ teaspoon nutmeg, and ½ cup maple syrup. Mix until well combined. - Place the quartered cinnamon rolls in the greased baking dish. Spread them evenly. - Pour the egg mixture over the cinnamon rolls. Press down gently to coat all pieces. - Let the casserole sit for 10-15 minutes to soak up the flavors. - Bake in your preheated oven for 25-30 minutes. Check for a golden top and set center. - While it bakes, prepare the icing from the cinnamon roll package. - Once done, let the casserole cool for 5 minutes. - Drizzle the icing over the warm casserole and dust with powdered sugar before serving. - Soaking time for optimal flavor absorption: Letting the casserole sit for 10-15 minutes is key. This time allows the egg mixture to soak into the cinnamon rolls. It improves flavor and texture. If you skip this step, your rolls may taste dry. - Using different milk options for dietary needs: You can use almond milk or oat milk instead of whole milk. This makes the dish suitable for lactose-free diets. Each milk adds its unique taste but keeps the casserole creamy. - How to know when it's done cooking: The casserole is ready when the top turns golden brown. You can check by inserting a knife in the center. If it comes out clean, it’s done. If it’s still wet, give it a few extra minutes. - Avoiding soggy casserole: To prevent sogginess, ensure the rolls are well-coated but not swimming in the egg mixture. If your rolls sit too long, they can absorb too much liquid. - Best ways to cut and serve: For easy serving, cut the casserole into squares. Use a spatula to lift each piece gently. This keeps the layers intact. - Additional toppings for an upgraded experience: Drizzle with extra maple syrup or add fresh berries. A dusting of powdered sugar adds a nice touch too. You can also offer whipped cream for a sweeter treat. {{image_2}} You can easily swap some ingredients in this recipe. For a dairy-free option, use almond milk instead of whole milk. You can also replace heavy cream with coconut cream. If you want to cut down on sugar, try using a sugar substitute like stevia or monk fruit sweetener. These changes make the dish healthier but still tasty. Adding fruit makes this dish even better. You can toss in berries like strawberries or blueberries. Chopped apples also work great. They add a fresh taste and a nice texture. If you want to change up the spices, try using cardamom or ginger instead of cinnamon. These spices give the casserole a unique flavor. This casserole is perfect for a breakfast buffet. You can cut it into squares and serve it warm. Set out extra maple syrup and powdered sugar for guests to add. For a savory twist, you can add cooked bacon or sausage. This change gives a nice contrast to the sweet rolls. You can also serve it with scrambled eggs for a full meal. To store leftovers, let the casserole cool. Cover it with plastic wrap or foil. Place it in the fridge. It will stay fresh for about 3-4 days. You can freeze this casserole too! Cut it into squares before freezing. Wrap each piece in plastic wrap, then place in a freezer-safe bag. It can last for up to 2-3 months. When you're ready to eat, thaw it overnight in the fridge. You can reheat it in the oven at 350°F (175°C) for about 15-20 minutes. This will help keep it soft and tasty. Before serving, add a drizzle of maple syrup to revive the flavor. You can also sprinkle some powdered sugar on top for sweetness. Pair it with fresh berries or whipped cream for a fun treat! Can I make this casserole the night before? Yes, you can! To make this casserole ahead of time, follow the recipe steps but stop before baking. Cover the dish and place it in the fridge. In the morning, let it sit at room temp for about 30 minutes. Then, bake as directed. This saves time and builds flavor. How do I adjust the recipe for a smaller or larger crowd? To adjust for a smaller crowd, cut the ingredients in half. Use one can of cinnamon rolls, three eggs, and reduce other ingredients accordingly. For a larger crowd, double the recipe. Use four cans of cinnamon rolls and twelve eggs. Just be sure to use a bigger baking dish. What if my casserole is too dry? If your casserole turns out dry, next time add more milk or cream to the egg mix. You can also soak the rolls longer in the egg mixture. This helps them absorb more liquid. How can I fix a soggy casserole? To fix a soggy casserole, try not to pour all the egg mixture at once. Pour slowly and let the rolls soak a bit first. You could also bake it a little longer. This helps to firm up the texture. Can I use other types of bread for this recipe? Absolutely! You can use brioche, challah, or even croissants. Each type will add its own flavor. Just cut the bread into similar-sized pieces as the cinnamon rolls. What alternatives do I have for eggs in this dish? If you need an egg substitute, use a mix of flaxseed meal and water. For each egg, combine one tablespoon of flaxseed with three tablespoons of water. Let it sit until it thickens. You can also use unsweetened applesauce, with a quarter cup for each egg. This blog post detailed a simple and delicious cinnamon roll casserole. We explored the ingredients, preparation steps, and baking tips. I shared variations and storage options to help you make this dish your own. In closing, this recipe is easy and flexible, perfect for any meal. With a few tweaks, it can fit anyone's needs. Dive in and enjoy this sweet treat with your friends and family. Happy baking!

Cinnamon Roll French Toast Casserole Delight Recipe

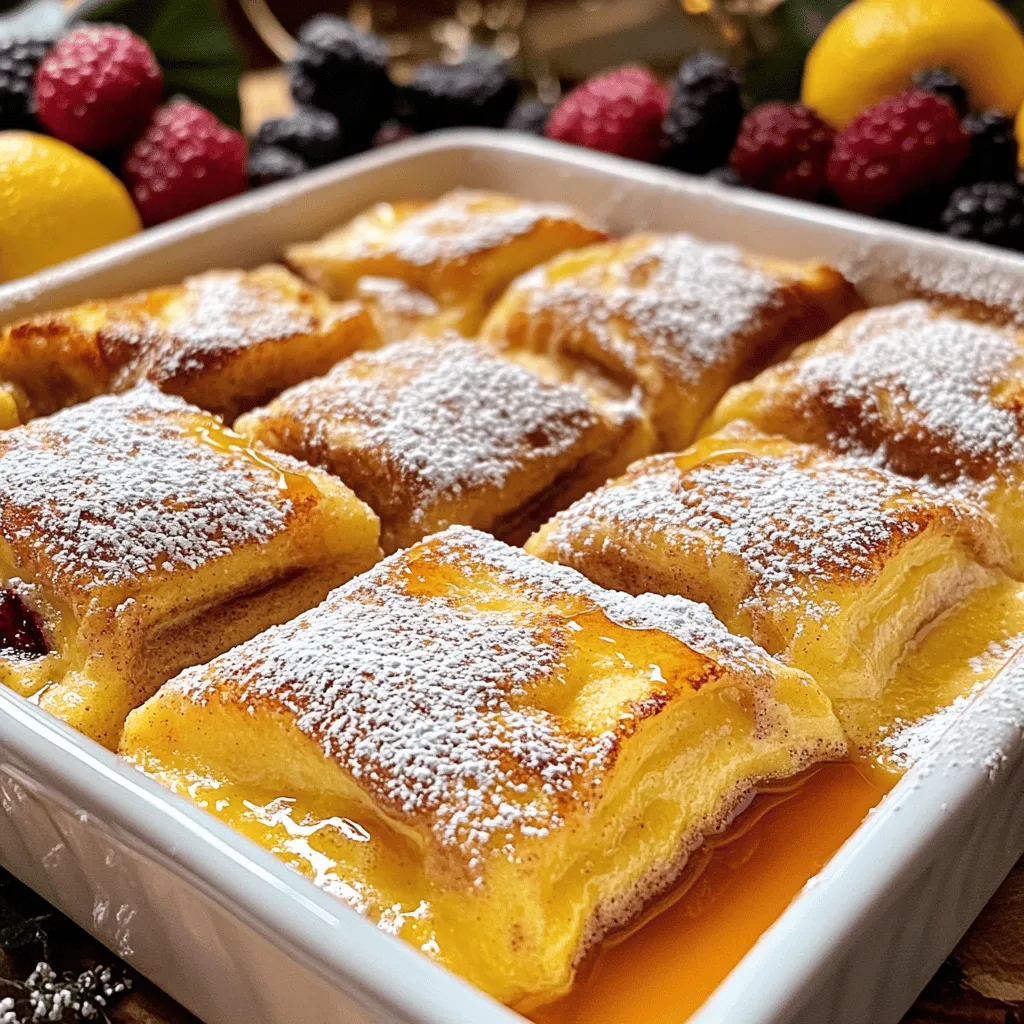
Get ready to indulge in a breakfast treat that will make your mornings unforgettable! The Cinnamon Roll French Toast Casserole

- 2 cups tortilla chips - 1 cup black beans, rinsed and drained - 1 cup corn kernels (frozen or fresh) - 1 red bell pepper, diced - 1 small red onion, diced - 1 jalapeño, sliced (seeds removed for less heat) - 1 cup diced tomatoes - 1 cup shredded cheese (cheddar or Monterey Jack) - 1 avocado, diced - 1/4 cup fresh cilantro, chopped - 1/4 cup sour cream or Greek yogurt - 1 teaspoon ground cumin - 1 teaspoon chili powder - Salt and pepper to taste - Lime wedges for serving Loaded Veggie Nacho Skillet needs fresh and vibrant ingredients. Start with tortilla chips as your base. They give the perfect crunch. Black beans add protein and fiber. Corn brings a sweet burst, while the red bell pepper and onion add crunch and flavor. For heat, slice a jalapeño. You can remove the seeds for less spice. Diced tomatoes keep the dish juicy. Don’t forget the cheese! Shredded cheddar or Monterey Jack melts beautifully. Top it all with creamy avocado and bright cilantro. A dollop of sour cream or Greek yogurt adds richness. Spice it up with cumin and chili powder. Finally, add salt and pepper to taste. Serve with lime wedges for a zesty finish. These ingredients create a fun and colorful dish that everyone will love. 1. Preheat your oven to 400°F (200°C). This step ensures the nachos bake evenly. 2. In a large oven-safe skillet, heat a drizzle of oil over medium heat. 3. Add the diced red onion and bell pepper. Sauté them for about 3-4 minutes until they soften. 4. Next, stir in the sliced jalapeño, black beans, corn, and diced tomatoes. 5. Sprinkle in the ground cumin, chili powder, salt, and pepper. Cook for another 3-5 minutes. Make sure everything is heated through. 1. Remove the skillet from the heat. Evenly layer the tortilla chips over the veggie mixture. 2. Now, generously sprinkle the shredded cheese on top of the chips. This will melt into a gooey delight. 1. Transfer the skillet to your preheated oven. Bake for 10-15 minutes. 2. Keep an eye out for melted and bubbly cheese. This is the sign that it’s ready! 1. Once out of the oven, top the nachos with diced avocado and chopped cilantro. 2. Serve hot with a dollop of sour cream and lime wedges on the side. Squeeze the lime for a fresh burst of flavor. Adjusting the spice level is easy. Just omit the seeds from the jalapeño. This small change keeps the heat down. You can also mix cheeses for a richer taste. Cheddar and Monterey Jack blend well together. You can pair this dish with your favorite salsas or guacamole. They add great flavors and textures. Serve it as an appetizer or make it the main dish. It fits any gathering or family meal perfectly. Using a colorful skillet makes your dish pop visually. It draws everyone’s attention. Garnish with extra cilantro and lime wedges for a fresh look. This adds color and flavor, making it even more fun to eat. {{image_2}} You can easily adjust this dish for different diets. If you want a vegan option, just skip the cheese. Use a dairy-free substitute instead. This keeps it creamy and delicious without any animal products. For gluten-free needs, make sure your tortilla chips are certified gluten-free. That way, everyone can enjoy this tasty dish. Feel free to swap out some ingredients to fit your taste. If you don’t have black beans, use pinto or kidney beans. They will work just as well. You can also add more veggies. Try using zucchini or spinach to give it extra nutrients and color. These options make the dish even more vibrant and wholesome. Want to change things up? You can add cooked ground meat or shredded chicken for a heartier meal. This adds protein and makes it even more filling. You can also play around with different types of cheese. Mix cheddar with Monterey Jack or even pepper jack for a spicy kick. These tweaks can really make this dish your own. To store leftovers, place them in an airtight container. This keeps the nachos fresh. Make sure to cool the nachos first before sealing. I recommend refrigerating them right away. Store them for up to three days. For best taste, eat them sooner rather than later. You can reheat nachos in the oven or microwave. The oven gives the best results. Set it to 350°F (175°C). Place the nachos on a baking sheet. Bake for about 10 minutes or until hot. For the microwave, use a microwave-safe plate. Heat for 30 seconds, checking each time. To avoid sogginess, add a paper towel under the nachos. This absorbs extra moisture. Can you freeze loaded veggie nachos? Yes, but it's not ideal. Freezing can change the texture. If you want to freeze them, layer them in a freezer-safe bag. Remove as much air as possible. When ready to eat, thaw in the fridge overnight. Reheat in the oven for the best taste. Making a Loaded Veggie Nacho Skillet takes about 30 minutes. You spend 10 minutes prepping the ingredients. Then, cooking and baking take about 20 minutes. This dish is quick and easy, perfect for a weeknight meal. Yes, you can prep this dish early. Chop your veggies and mix them in the skillet. Store the skillet in the fridge for later. When you are ready, add the tortilla chips and cheese. Bake as usual for a fresh, hot meal. You can get creative with toppings! Here are some ideas: - Sliced olives - Pickled jalapeños - Fresh salsa - Guacamole - Green onions - Hot sauce Feel free to mix and match based on your taste! Loaded Veggie Nacho Skillet can be healthy. It features beans and veggies packed with nutrients. You can make it even healthier by using low-fat cheese. Swap sour cream for Greek yogurt too. This way, you enjoy a tasty meal without compromising your health goals. Loaded veggie nachos are easy to make and fun to eat. You start with layers of fresh ingredients like chips, beans, and cheese, then add your favorite toppings. This dish works as a meal or a snack. Remember, you can mix it up with different beans or veggies. Store leftovers right, and reheat them well so they stay tasty. I hope you enjoy this loaded veggie nacho skillet as much as I do!

Loaded Veggie Nacho Skillet Flavorful and Fun Dish

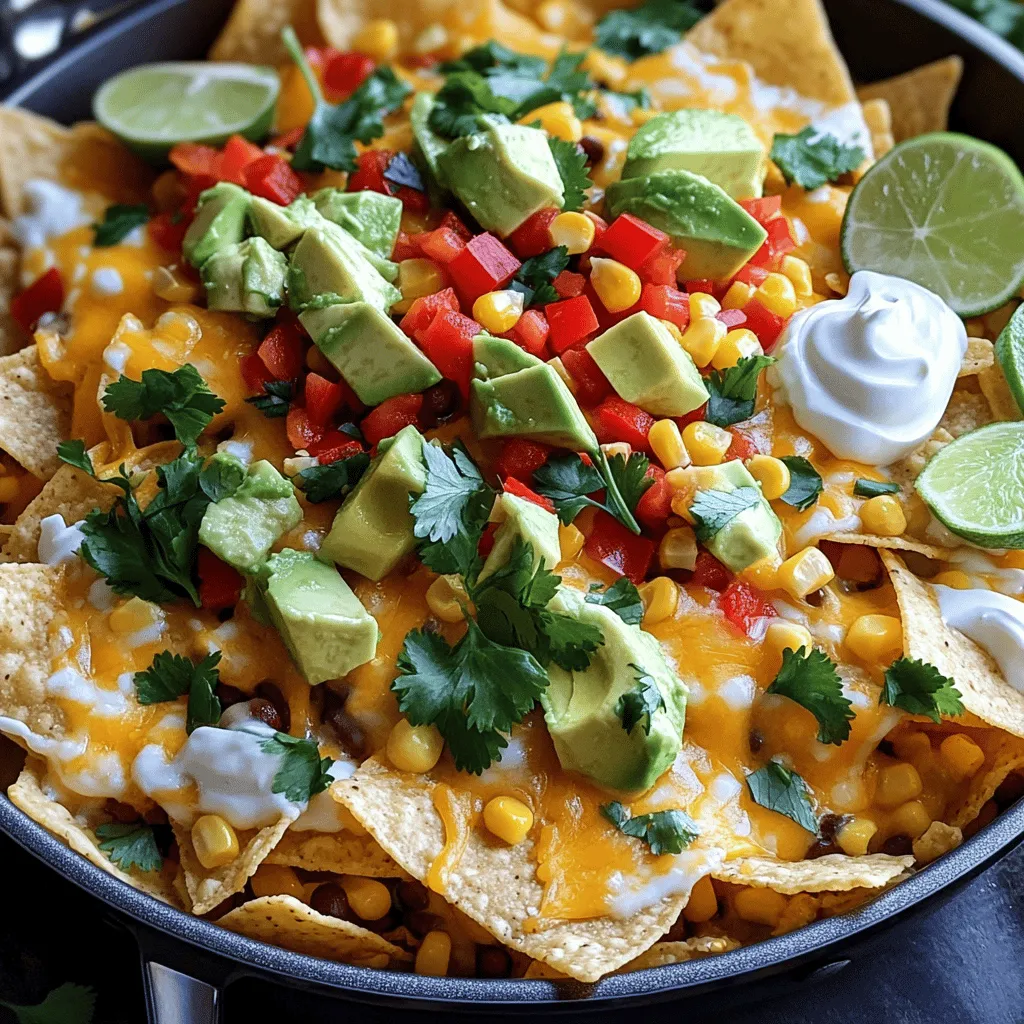
If you’re looking for a fun and tasty dish, Loaded Veggie Nacho Skillet is it! This colorful meal is packed

Here’s what you need to make Instant Pot Beef Stew: - 2 pounds beef chuck, cut into 1-inch cubes - 3 tablespoons olive oil - 1 large onion, diced - 3 cloves garlic, minced - 4 medium carrots, sliced - 3 medium potatoes, diced - 2 cups beef broth - 1 tablespoon Worcestershire sauce - 1 teaspoon dried thyme - 1 teaspoon dried rosemary - 1 bay leaf - 1-2 tablespoons cornstarch (optional for thickening) - Salt and pepper to taste Each ingredient plays a key role in making this stew rich and tasty. The beef chuck gives it that hearty flavor, while the vegetables add both texture and nutrition. The broth and Worcestershire sauce bring depth. Using fresh herbs like thyme and rosemary makes the aroma amazing. You can adjust salt and pepper to fit your taste. If you want a thicker stew, cornstarch helps create that perfect texture. Gather these ingredients before you start cooking, and you will be on your way to a delicious meal! Start by setting your Instant Pot to the Sauté mode. Pour in three tablespoons of olive oil. Let it heat up until it shimmers. Now, add the beef cubes in batches. Do not overcrowd the pot. Brown each side for about 3-4 minutes. This step adds rich flavor. Once browned, remove the beef and set it aside. In the same pot, add one diced large onion. Sauté until it turns translucent, about 3-4 minutes. This will soften the onion and release its sweet taste. Next, stir in three minced garlic cloves. Cook for another 30 seconds to bring out the garlic's aroma. Now, add four sliced carrots and three diced potatoes. Mix everything together well. Pour in two cups of beef broth. Add one tablespoon of Worcestershire sauce for depth. Be sure to scrape any browned bits from the bottom of the pot. This helps prevent burning. Return the seared beef to the pot. Now, add one teaspoon of dried thyme, one teaspoon of dried rosemary, a bay leaf, and some salt and pepper. Stir everything to combine. Close the Instant Pot lid and set the valve to sealing. Cook on Manual high pressure for 30 minutes. This will tenderize the beef and blend all the flavors. When the timer goes off, let the pot release pressure naturally for about 10 minutes. After that, switch to quick release for any remaining pressure. If you want a thicker stew, mix one or two tablespoons of cornstarch with cold water. Stir this into the stew. Use the Sauté function to simmer gently until it thickens. Taste and adjust seasoning if needed before serving. Browning the meat is key. It adds a rich taste and depth. When you sear the beef, it locks in juices. This step makes your stew much better. Using fresh herbs can enhance the flavor more than dried ones. Fresh thyme and rosemary bring a bright taste. Dried herbs are fine if fresh is not an option. Just remember, use less dried than fresh. A good rule is to use one-third the amount. To thicken your stew, cornstarch works well. Mix 1-2 tablespoons of cornstarch with cold water. This makes a slurry. Stir it in during the last few minutes of cooking. This method gives a smooth texture. If you want alternatives, try mashed potatoes or pureed beans. Both can thicken the stew without cornstarch. They also add extra nutrition and flavor. Garnish your stew with fresh chopped parsley. It adds color and freshness. You can also add a dollop of sour cream for creaminess. For side dishes, crusty bread is a great choice. It soaks up the stew's rich broth. A simple green salad can also add freshness. Consider serving roasted vegetables for more flavor and texture. {{image_2}} You can swap beef for chicken or pork. Chicken thighs work well, as they stay moist. For pork, choose a shoulder or tenderloin. Both options add unique flavors. Adjust cooking time based on the meat. Chicken usually cooks faster than beef. Use the same method and ingredients for a delicious twist. Feel free to boost your stew with more veggies. Peas and green beans are great choices. They add color and nutrition. You can also try corn or celery. Just chop them into bite-sized pieces. Add them to the pot with the carrots and potatoes. This way, you make the stew even heartier. Spices can change the flavor profile of your stew. Try adding paprika for a smoky taste. A dash of cayenne brings heat. Fresh or dried herbs like basil or oregano can also enhance the dish. Mix and match spices to find your favorite blend. Don’t be afraid to experiment; cooking should be fun! After enjoying your beef stew, let it cool down. Place it in an airtight container. This keeps the stew fresh. Store it in the fridge for up to three days. For best taste, eat it within two days. To freeze your beef stew, use freezer-safe containers. Leave some space at the top, as the stew expands when frozen. Label the container with the date. You can freeze it for up to three months. When you want to eat it, just thaw it overnight in the fridge. Reheat your stew on the stove for best results. Use a medium heat and stir often. If using a microwave, heat it in short intervals. Add a splash of beef broth if it seems thick. This keeps the flavor strong. Always check the stew's temperature before serving. It should reach 165°F to ensure it's safe to eat. Instant Pot beef stew lasts about 3 to 4 days in the fridge. Store it in an airtight container. You can also freeze it for up to 3 months. When you want to eat it, just thaw overnight in the fridge. Reheat it on the stove or in the microwave. Yes, you can cook beef stew on the stove or in a slow cooker. If using the stove, brown the beef in a pot. Then, add the veggies and broth. Simmer for about 2 to 3 hours until tender. In a slow cooker, add everything and cook on low for 6 to 8 hours. Both methods yield a tasty stew! Beef stew pairs well with many sides. Here are some tasty options: - Crusty bread for dipping - Mashed potatoes for extra comfort - Rice for a filling meal - A fresh salad for brightness Feel free to mix and match! This blog post guided you through making a tasty Instant Pot beef stew. You now know the key ingredients, steps, and helpful tips for perfect results. Experiment with different meats and veggies to find your favorite blend. Proper storage and reheating will keep your stew delicious for days. Enjoy your cooking journey and the warm flavors of comfort food!

Instant Pot Beef Stew Hearty and Flavorful Meal

Looking for a warm, hearty meal that’s quick to make? My Instant Pot Beef Stew fits the bill perfectly! This

To make Crispy Parmesan Crusted Cod, you will need a few key ingredients. Here is the list: - Cod fillets (4 pieces, about 6 ounces each) - Grated Parmesan cheese (1/2 cup) - Panko breadcrumbs (1/2 cup) - Garlic powder (1 teaspoon) - Dried parsley (1 teaspoon) - Paprika (1/2 teaspoon) - Black pepper (1/4 teaspoon) - Salt to taste - Melted butter (2 tablespoons) - Lemon juice (1 tablespoon) - Olive oil spray for cooking These ingredients are simple but create a big flavor. The cod is the star here. It has a mild taste that pairs well with the crunchy, cheesy topping. The Parmesan and panko give a great texture. The spices add depth. Garlic powder gives a nice kick. Dried parsley adds color. Paprika brings warmth, and black pepper adds a hint of spice. The butter and lemon juice mix helps the coating stick. It adds moisture and flavor. Use olive oil spray to make the crust crispy, without extra fat. Gather these items before you start cooking. With these ingredients, you can whip up a delicious dinner. Enjoy the process! 1. Preheat your oven to 400°F (200°C). This step is key for crispy cod. 2. Line a baking sheet with parchment paper. This helps with easy cleanup. 3. In a shallow bowl, mix together: - 1/2 cup grated Parmesan cheese - 1/2 cup panko breadcrumbs - 1 teaspoon garlic powder - 1 teaspoon dried parsley - 1/2 teaspoon paprika - 1/4 teaspoon black pepper - A pinch of salt Stir well until all ingredients blend. 4. In another bowl, combine: - 2 tablespoons melted butter - 1 tablespoon lemon juice This mixture adds great flavor to the cod. 1. Pat the cod fillets dry with paper towels. This helps the coating stick better. 2. Brush each fillet lightly with the butter and lemon mixture. Make sure to coat them evenly. 3. Dredge each fillet in the cheese and breadcrumb mix. Press gently so it sticks well. 1. Arrange the coated cod fillets on the baking sheet. 2. Spray them lightly with olive oil. This will make them extra crispy. 3. Bake in the preheated oven for 15-20 minutes. Keep an eye on them. 4. The cod should be cooked through and the crust golden brown. Enjoy the deliciousness! To make your cod truly crispy, use a mix of panko and Parmesan. Panko gives that light crunch while Parmesan adds rich flavor. When you coat the fish, press down firmly. This helps the crust stick well. Don't skip the olive oil spray. It helps the crust brown nicely in the oven. A light spray goes a long way to enhance crunchiness. You’ll know your cod is done when it flakes easily with a fork. The crust should be golden brown. Typically, this takes about 15 to 20 minutes at 400°F (200°C). Let the cod rest for a few minutes before serving. This helps keep it moist inside. Plus, it allows flavors to settle in. Serve your crispy cod on a bright platter. Add lemon wedges and fresh parsley for a pop of color. It looks delicious and inviting. For sides, pair the cod with steamed veggies or a fresh salad. These add flavor and make the meal complete. Enjoy your beautiful plate! {{image_2}} You can change the taste of your cod with different herbs and spices. Try adding fresh dill or thyme for a fresh twist. A pinch of cayenne pepper gives a nice kick. You can also swap out the cod for other fish like tilapia or haddock. Each fish offers a unique flavor and texture. Baking is great, but air frying can make your cod even crispier. The hot air cooks the fish quickly and evenly. If you want a smoky flavor, try grilling the cod. The grill adds a nice char that pairs well with the Parmesan crust. If you need a gluten-free option, use crushed rice cereal instead of panko. It will still give you that crunch. For a dairy-free choice, look for vegan Parmesan cheese. It melts and crisps similarly, so you can enjoy the flavors without the dairy. To keep your Crispy Parmesan Crusted Cod fresh, use airtight containers. Glass or plastic containers work well. Before sealing, let the cod cool to room temperature. This helps avoid moisture build-up. Store the leftovers in the fridge for up to three days. Avoid leaving them out for too long to keep them safe. To reheat cod and keep it crispy, use an oven. Preheat your oven to 350°F (175°C). Place the cod on a baking sheet. Bake for about 10 minutes. This method helps restore the crust’s crunch. You can also use an air fryer. Set it to 350°F (175°C) and heat for 5-7 minutes. Both methods work well to keep the fish tasty. Can I use frozen cod fillets? Yes, you can use frozen cod fillets. Just thaw them first. Pat them dry to remove extra moisture. This step helps the coating stick better. What can I substitute for Parmesan cheese? You can use other hard cheeses like Pecorino Romano or Grana Padano. Both will give a similar flavor. For a dairy-free option, try nutritional yeast. How do I know when the cod is done cooking? The cod is done when it flakes easily with a fork. It should also have an internal temperature of 145°F (63°C). The crust should look golden brown and crispy. How to get the coating to stick? Make sure to dry the cod fillets well. Brush them with the butter and lemon mix before dredging. Press the coating onto the fillets firmly for better adhesion. What is the best serving temperature? Serve the cod hot, right out of the oven. This keeps the crust crispy and the fish tender. Letting it rest for a few minutes helps the flavors settle. What to serve with crispy cod? I love pairing crispy cod with steamed vegetables or a fresh salad. You can also serve it with rice or quinoa for a complete meal. Lemon wedges add a nice touch. Can I make this recipe ahead of time? You can prepare the coating in advance. Store it in an airtight container. However, it's best to coat and bake the cod just before serving for maximum crispiness. This blog post covered how to make crispy Parmesan crusted cod. We reviewed the ingredients needed, the steps to prepare and cook, and tips for perfect results. Remember, using panko and Parmesan helps achieve that crispy texture. You can easily modify the recipe to suit your tastes too. Whether you bake it or grill it, this cod dish pairs well with various sides. Enjoy trying this approachable and delicious recipe that brightens meals!

Crispy Parmesan Crusted Cod Easy and Flavorful Dinner

If you’re looking for an easy and tasty dinner, you’ve come to the right place! My Crispy Parmesan Crusted Cod

Older posts
Newer posts
← Previous Page1 … Page31 Page32 Page33 … Page124 Next →

dsad

© 2025 Southern Dishes • Built with GeneratePress

Our Policies

  • Copyright Policy
  • Cookie Policy
  • GDPR Policy
  • Privacy Policy
  • Disclaimer
  • Terms Of Use

More Information

  • Home
  • About
  • Contact
  • Appetizers
  • Dessert
  • Dinner
  • Drinks
©2025, Southern Dishes About Back To Top