
Latest & Greatest

Air Fryer Chicken Parmesan Bites Tasty Snack Idea
Craving a tasty snack that’s quick and easy? You’ll love these Air Fryer Chicken Parmesan Bites! They’re crispy on the
Read more…
Chicken Tortilla Soup Flavorful and Easy Recipe
Are you ready to spice up your weeknight meals? My Chicken Tortilla Soup is bursting with flavor and super easy
Read more…
Teriyaki Ground Turkey Bowl Flavorful and Quick Meal
Are you looking for a quick and tasty meal? The Teriyaki Ground Turkey Bowl is perfect! It’s simple, packed with
Read more…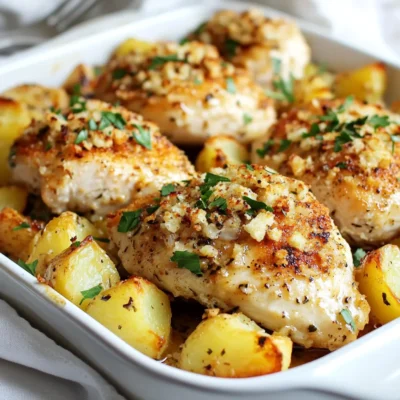
Garlic Parmesan Chicken and Potatoes Delight
Want a simple yet tasty meal? Look no further than Garlic Parmesan Chicken and Potatoes Delight! This dish combines juicy
Read more…
Creamy Crockpot Ranch Chicken Easy Family Meal Recipe
Looking for an easy and delicious family meal? You’re in the right place! My Creamy Crockpot Ranch Chicken recipe combines
Read more…
Keto Beef Stroganoff Casserole Simple and Satisfying
Want a warm, filling dish that fits your keto diet? Look no further than my Keto Beef Stroganoff Casserole! This
Read more…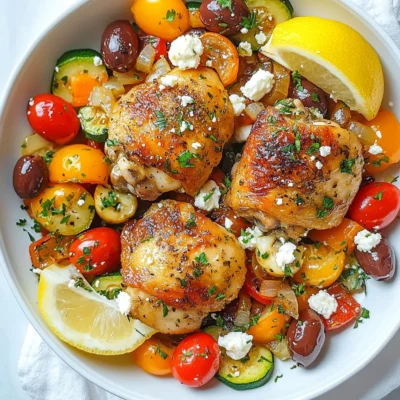
Mediterranean Chicken Skillet Easy and Flavorful Dish
Looking for a quick and tasty meal? My Mediterranean Chicken Skillet is just what you need! This dish combines juicy
Read more…
Herb Cheese Pumpkin Biscuits Savory and Flaky Delight
Welcome to a tasty journey with my Herb Cheese Pumpkin Biscuits! These savory bites blend the rich flavors of cheese
Read more…browse recipes


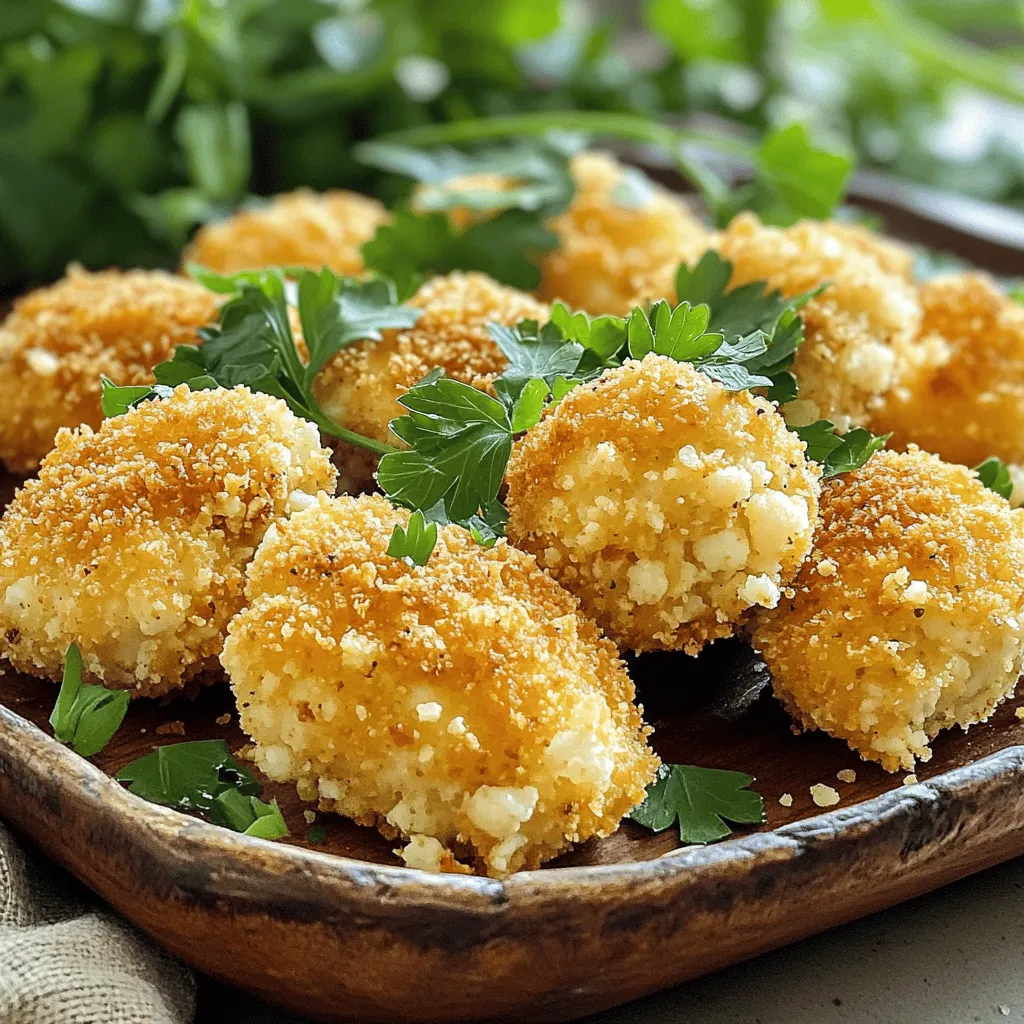
Homemade Chicken Nuggets Crunchy and Flavorful Treat
Craving a crunchy, flavorful treat? You’re in the right spot! Homemade chicken nuggets are fun to make, healthy, and packed with taste. I’ll guide…
My Latest Desserts
My Latest Recipes

hey,
i’m !
I’m so happy you’re here!
My kitchen is filled with stories, flavors, and love and I’m so happy to share them with you. Here’s to dishes that feel like home.


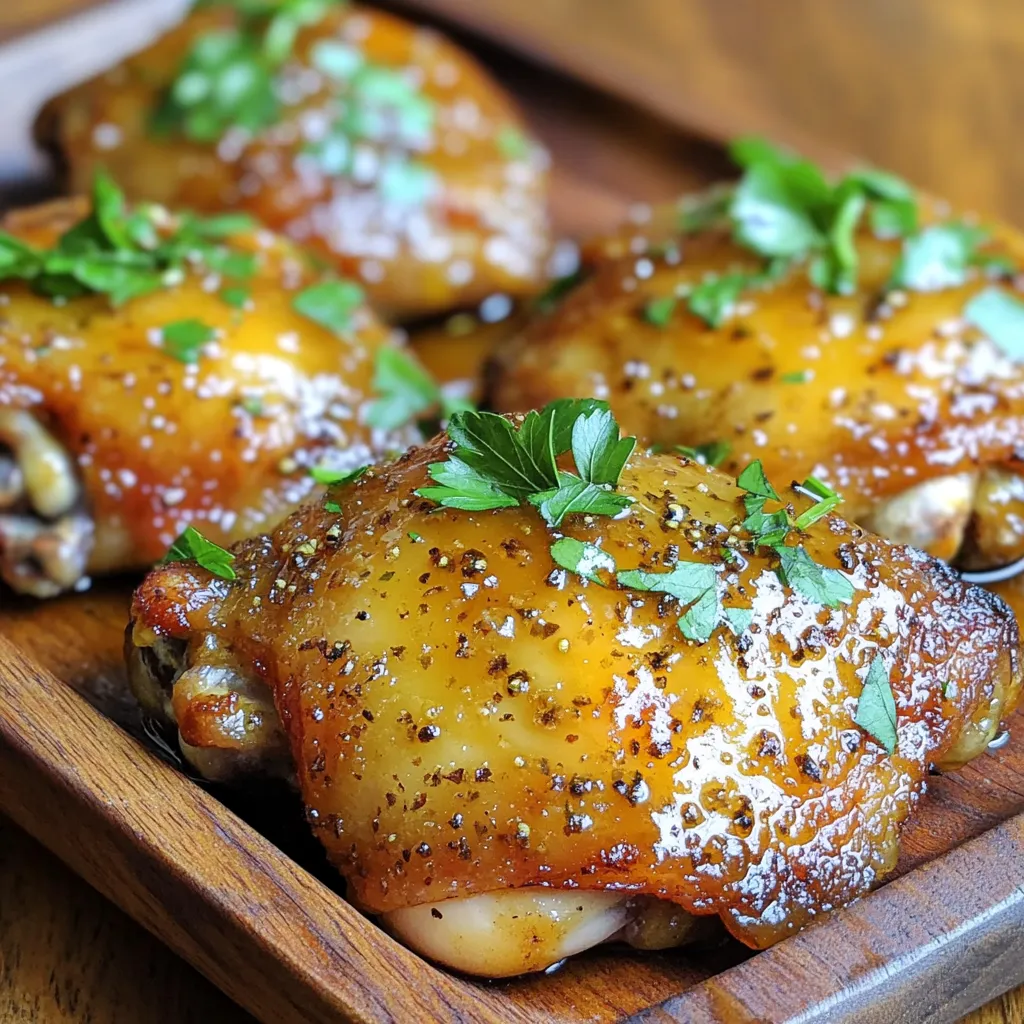
Apple Cider Glazed Chicken Thighs Flavorful Delight
Looking for a simple, tasty dish that impresses? Let me introduce you to Apple Cider Glazed Chicken Thighs! This recipe packs a sweet and…