

Latest & Greatest
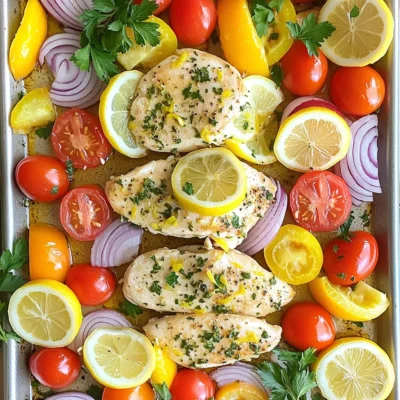
Sheet-Pan Lemon Herb Chicken Quick and Flavorful Meal
Looking for a quick and tasty dinner? Try my Sheet-Pan Lemon Herb Chicken! This simple recipe brings fresh flavors together
Read more…
Easy Butter Chicken Simple and Flavorful Recipe
If you crave a rich, creamy dish that’s easy to make, you’re in the right place! This Easy Butter Chicken
Read more…
Brown Butter Pecan Cookies Irresistible Flavor Treat
If you love cookies that melt in your mouth, you’re in for a treat! Brown butter pecan cookies combine rich,
Read more…
Air Fryer Zucchini Fries Crunchy and Flavorful Snack
If you’re looking for a fun, crunchy snack that’s both healthy and delicious, you’ve hit the jackpot with air fryer
Read more…
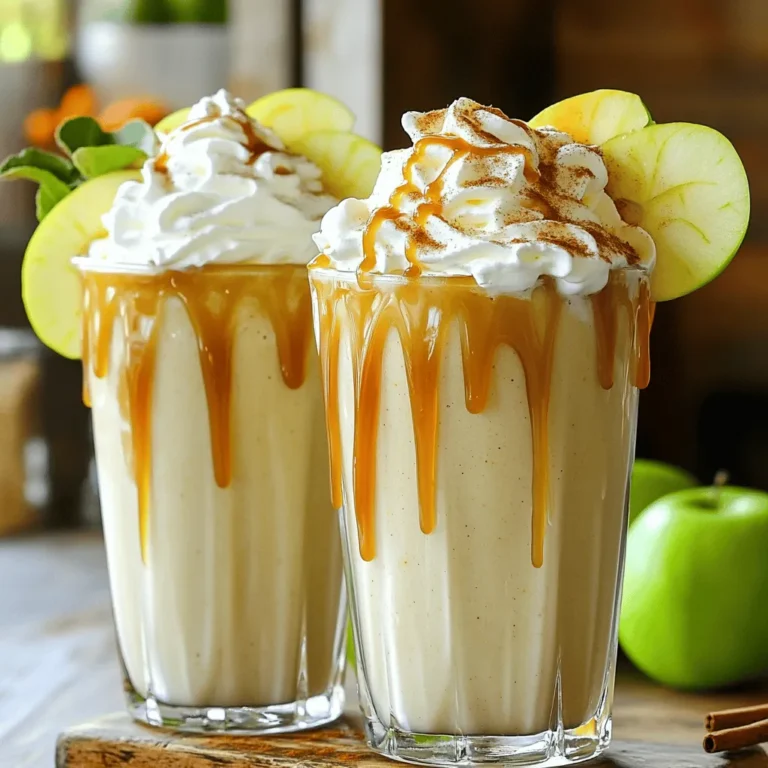
Slow Cooker Spiced Apple Cider Flavorful Drink Delight
Warm up your kitchen with my easy Slow Cooker Spiced Apple Cider. This delightful drink combines apple cider, spices, and
Read more…
Greek Yogurt Breakfast Bark Simple and Healthy Treat
Looking for a quick, healthy breakfast? Let me introduce you to Greek Yogurt Breakfast Bark! This simple treat combines creamy
Read more…
Honey Butter Roasted Carrots Flavorful and Simple Dish
Looking for a tasty and easy dish? Honey Butter Roasted Carrots are here to impress! With just a few simple
Read more…
No-Bake White Chocolate Cranberry Bars Delight
Craving a sweet treat but don’t want to bake? You’re in luck! My No-Bake White Chocolate Cranberry Bars are the
Read more…browse recipes


![- 2 ripe avocados - 4 slices of whole grain bread - 4 large eggs To make tasty avocado toast, you need ripe avocados. Ripe avocados are soft and ready to mash. Whole grain bread adds fiber and crunch. It’s best to use a good-quality bread. Large eggs will become the star of the dish. They will poach nicely and add protein. - 1 tablespoon white vinegar - 1 teaspoon red pepper flakes - Juice of 1 lemon White vinegar helps the eggs hold their shape while poaching. It makes a big difference! Red pepper flakes add heat and flavor. You can adjust the amount based on your taste. Fresh lemon juice brightens the avocado mix. It adds a zesty kick you will love. - Feta cheese - Microgreens - Fresh herbs Optional toppings can elevate your avocado toast. Feta cheese adds a creamy and salty touch. Microgreens bring a fresh crunch and color. Fresh herbs, like cilantro or parsley, will add extra flavor. You can mix and match to find your favorite combination. For the full recipe, check out the [Full Recipe]. To start, take four slices of whole grain bread. Place the slices in a toaster or on a baking sheet. Toast until the bread is golden and crisp, which usually takes about 3 to 5 minutes. Keep an eye on it. You want it just right—not too dark. Next, grab two ripe avocados. Cut them in half and scoop out the flesh into a bowl. Use a fork to mash the avocado until it’s creamy but still a bit chunky. This adds texture. Squeeze in the juice of one lemon. Add salt and pepper to taste. For a kick, mix in one teaspoon of red pepper flakes. This will make your avocado mix flavorful. Now, let’s poach the eggs. Fill a medium saucepan with water and add one tablespoon of white vinegar. Bring the water to a gentle simmer over medium heat. Crack each egg into a small bowl. Stir the water to create a gentle whirlpool. Carefully slide each egg into the water one at a time. Poach for about 3 to 4 minutes. The whites should be set, but the yolk should remain runny. Once done, use a slotted spoon to lift the eggs out. Place them on a plate lined with paper towels. This helps soak up the extra water and keeps them from getting soggy. Now, spread the creamy avocado mixture generously on each slice of toasted bread. Top each avocado toast with a poached egg. For extra flavor, sprinkle some red pepper flakes on top. You can also garnish with fresh cilantro or parsley. If you like, crumble some feta cheese or add microgreens for a tasty touch. Enjoy your delicious creation! For a complete guide, check out the Full Recipe. To make great avocado toast, you need ripe avocados. Here are some signs to look for: - They should feel slightly soft when you squeeze them gently. - The skin color can vary from green to dark purple, depending on the type. - Check the stem; if it comes off easily and is green underneath, the avocado is ripe. When it comes to storage, keep unripe avocados at room temperature. Once ripe, store them in the fridge to slow down the ripening process. Use them within a few days for the best taste. Poaching an egg can be tricky. Here are some common mistakes to avoid: - Don't let the water boil too hard. It should be a gentle simmer. - Avoid adding too many eggs at once; it can crowd the pot. For perfect poached eggs, follow these steps: 1. Add a tablespoon of white vinegar to the simmering water. This helps the egg whites stay together. 2. Crack the egg into a small bowl first. This makes it easier to slide into the water. 3. Create a gentle whirlpool in the water before adding the egg. This helps shape the egg as it cooks. Cook for about 3-4 minutes. The whites should be firm, but the yolk should still be runny. Make your avocado toast look beautiful. Here’s how: - Spread mashed avocado evenly on the toast, leaving some edges visible. - Carefully place the poached egg on top, making sure it’s centered. - Sprinkle red pepper flakes and fresh herbs for color and flavor. For a brunch spread, pair your toast with: - Fresh fruit like berries or melon. - A light salad with mixed greens and a simple vinaigrette. For the full recipe, check out the [Full Recipe]. Enjoy your meal! {{image_2}} You can choose different types of bread for your avocado toast. Sourdough is chewy and has a tangy taste. Whole grain bread adds a nutty flavor and more fiber. Both options work well with avocado. If you need gluten-free bread, many brands offer tasty choices. Look for gluten-free whole grain or sourdough options. They can still give you that perfect crunch. Adding spices or herbs can make your avocado mix exciting. Try mixing in garlic powder, cumin, or paprika for a kick. Fresh herbs like basil or dill also add freshness. Cheese can take your toast to the next level. Feta cheese adds a salty flavor. You can also try goat cheese or ricotta for creaminess. Each cheese brings its own unique taste. Seasonal ingredients can brighten up your avocado toast. In spring, add fresh radishes or peas for crunch. In summer, try diced tomatoes or peaches for sweetness. For a cozy winter twist, sprinkle roasted squash or sautéed kale on top. During the fall, add apple slices or pomegranate seeds for a festive flair. This approach makes your avocado toast not just a meal, but a celebration of flavors. You can find the Full Recipe to experiment with all these variations. To keep your leftover avocado fresh, prevent browning. First, squeeze lemon juice on it. The acid slows down the browning process. Next, store it in an airtight container. You can also cover it tightly with plastic wrap. Press the wrap directly onto the flesh. This keeps air out and helps maintain freshness. It is best to eat assembled toast right away. The bread can get soggy if stored. If you must store it, keep the avocado and toast separate. Wrap each slice of bread in foil or plastic. For the avocado, use the lemon juice method mentioned earlier. When you are ready to eat, assemble the toast for the best taste. To reheat toast, use a toaster or an oven. Avoid microwaving, as it makes the bread chewy. For the oven, preheat it to 350°F (175°C). Place the toast on a baking sheet. Heat for about 5-7 minutes until warm. This keeps the texture nice and crisp. If you have leftover poached eggs, reheat them gently in warm water. This method helps maintain their delicate texture. Enjoy your flavorful avocado toast with poached egg! For the full recipe, check out the earlier section. To poach an egg well, start with fresh eggs. Use a pot with water. Add a splash of white vinegar to help the egg hold its shape. Heat the water until it simmers, not boils. Create a whirlpool with a spoon. Crack the egg into a small bowl, then gently slide it into the water. Poach the egg for about 3-4 minutes. The white should be firm, and the yolk should be soft. Using a slotted spoon, take it out and let it drain on a paper towel. You can make your avocado toast healthier by using whole grain bread. Whole grain has more fiber and nutrients. Add extra veggies like spinach or tomatoes for vitamins. You can also skip the feta cheese or use a smaller amount. Try using less oil or butter when toasting your bread. Squeeze more lemon juice into your avocado for flavor without many calories. Yes, you can prepare parts of your avocado toast ahead of time. You can mash the avocado a few hours before, but it may turn brown. To stop this, add extra lemon juice. You can also toast the bread in advance and store it in an airtight container. Just put it in the toaster again to warm it up. Poach the eggs right before serving for the best taste and texture. Many toppings can enhance your avocado toast. Some popular options include: - Feta cheese - Microgreens - Sliced radishes - Cherry tomatoes - Smoked salmon - Sriracha sauce - Fresh herbs like cilantro or parsley These add flavor and make your dish look amazing! For the full recipe, check out the details above. Avocado toast is simple and amazing. You need ripe avocados, whole grain bread, and eggs. Adding lemon juice and red pepper flakes brings flavor to life. Don't forget to try toppings like feta cheese or microgreens. Remember to choose ripe avocados for the best taste. Poaching eggs can be tricky, but with practice, you'll master it. You can make many variations too! Store leftovers wisely to enjoy later. Get creative and enjoy every bite of your avocado toast!](https://southerndishes.com/wp-content/uploads/2025/06/f6103c06-328c-4f20-9757-2b75894c094f.webp)
Flavorful Avocado Toast with Poached Egg Recipe
Are you ready to elevate your breakfast game? This flavorful avocado toast with poached egg recipe is quick, simple, and delicious. You’ll combine creamy…
My Latest Desserts
My Latest Recipes

hey,
i’m !
I’m so happy you’re here!
My kitchen is filled with stories, flavors, and love and I’m so happy to share them with you. Here’s to dishes that feel like home.
![- Apples and Core Preparation - 2 large apples (such as Honeycrisp or Granny Smith), cored and sliced into 1/4-inch rings - Dry Ingredients for the Batter - 1 cup all-purpose flour - 1/2 cup cornstarch - 1 teaspoon baking powder - 1/2 teaspoon ground cinnamon - 1/4 teaspoon salt - 1 tablespoon granulated sugar - Additional Ingredients for Frying - 1/2 cup cold sparkling water - Vegetable oil for frying - Powdered sugar for dusting (optional) To start, choose firm apples. Honeycrisp and Granny Smith work well. Core and slice them into rings. Make sure each ring is about 1/4-inch thick. This thickness gives the perfect crunch. After slicing, pat them dry with a paper towel. This step helps the batter stick and keeps them crispy. Next, gather the dry ingredients for the batter. In a medium bowl, mix the flour, cornstarch, baking powder, ground cinnamon, salt, and sugar. This blend creates a light and airy coating. The key ingredient is the cold sparkling water. This is what makes the batter crisp. Gradually whisk in the sparkling water until smooth. No lumps, please! Now, prepare for frying. You will need enough vegetable oil to cover the apple rings. Heat the oil in a deep skillet or fryer to about 350°F (175°C). Test the oil by dropping in a small amount of batter. If it sizzles, you are ready to go! With these ingredients, you can create a delicious treat. For the full recipe, check out the detailed steps in the recipe section. Enjoy the process of making these crispy fried apple rings! - Slicing Technique: Start with two large apples. I love Honeycrisp or Granny Smith. Core them and slice into 1/4-inch rings. Make sure your slices are even for the best fry. - Pat Dry for Crispiness: After slicing, use a paper towel to pat the apple rings dry. Removing moisture helps them get crispy when fried. - Mixing Techniques for Smoothness: In a bowl, mix 1 cup of flour, 1/2 cup of cornstarch, 1 teaspoon of baking powder, 1/2 teaspoon of cinnamon, 1/4 teaspoon of salt, and 1 tablespoon of sugar. Gradually add 1/2 cup of cold sparkling water. Whisk until the batter is smooth. No lumps should remain. - Importance of Cold Sparkling Water: Cold sparkling water is key. It makes the batter light and airy. This helps create a crisp coating on each apple ring. - Proper Oil Temperature: Heat vegetable oil in a deep skillet. Aim for about 2 inches of oil. The right temperature is 350°F (175°C). Drop a small amount of batter into the oil. It should sizzle right away. - Frying Time and Techniques: Dip each apple ring in the batter. Let the excess drip off. Carefully place them into the hot oil. Fry for about 2-3 minutes on each side. Don’t overcrowd the pan. This helps them fry evenly and get crispy. To get the crispiest apple rings, choose the right apples. I recommend using Honeycrisp or Granny Smith apples. These apples have a firm texture and a nice balance of sweet and tart flavors. Their crispness holds up well during frying. Next, the batter must be dry. A dry batter sticks better to the apples. Make sure your apple rings are patted dry before dipping them in the batter. This step helps the batter cling and fry properly. Oil temperature is also key. Heat your oil to 350°F (175°C). If the oil is too cool, the batter absorbs more oil, leading to soggy rings. If it’s too hot, the batter may burn before the apples cook. You can test the oil by dropping a bit of batter in it. If it sizzles and rises, it’s ready. Crispy fried apple rings make a great snack or dessert. They pair well with vanilla ice cream or whipped cream. You can also serve them with caramel sauce for a sweet dip. For a fun twist, try garnishing the rings with powdered sugar. This adds a nice touch and makes them look even more appealing. You can also sprinkle some cinnamon on top for extra flavor. If you want a savory option, serve the rings alongside a cheese platter. The sweet and salty combo delights your tastebuds. For more details on how to make these delicious treats, check the Full Recipe. {{image_2}} You can easily boost flavors in crispy fried apple rings. Start with spices. Try adding a pinch of nutmeg or ginger for warmth. You can also mix in a bit of vanilla extract in the batter for a sweet touch. Next, think about dipping sauces. A simple caramel sauce pairs well with these rings. You can also try a tangy yogurt dip mixed with honey. If you like chocolate, melt some dark chocolate for a fun twist. If you want a healthier option, consider using an air fryer. It gives you that crispy texture with much less oil. Preheat your air fryer to 350°F (175°C). Coat the apple rings in batter, then place them in the fryer basket in a single layer. Cook for about 10 minutes, flipping halfway through. You can also bake the apple rings. Preheat your oven to 400°F (200°C). Place the battered rings on a baking sheet lined with parchment paper. Bake for 15 to 20 minutes, flipping them halfway through. This method keeps them crispy and light. For the full experience, try the [Full Recipe] for crispy fried apple rings to see how these variations can take your dish to new heights! - Best Container Options: Use an airtight container to keep your apple rings fresh. A glass or plastic container works well. - Refrigeration Tips: Place the container in the fridge. This helps maintain their crispness for up to two days. - Methods for Best Results: To reheat, use an oven or air fryer. Set the oven to 350°F (175°C) and heat for about 5-7 minutes. This keeps the rings crispy. Avoid using a microwave, as it can make them soggy. Enjoy your Crispy Fried Apple Rings from the [Full Recipe] and savor the delicious flavors! Yes, you can use other fruits to create tasty fried treats. Some great options include: - Bananas - Pineapple - Peaches - Pears Each fruit brings its own flavor and texture. Bananas turn sweet and soft, while pineapple adds a tropical twist. You can slice them into rings or chunks, just like apples. Remember to adjust the cooking time based on the fruit's firmness. Softer fruits may need less time to fry. Soggy batter can ruin your fried apple rings. Here are common mistakes and solutions: - Too much liquid: Make sure to measure your sparkling water carefully. Use just enough to create a smooth batter. - Wet fruit: Pat your apple slices dry. Excess moisture affects the batter's crispiness. - Low oil temperature: Check that your oil is hot enough, around 350°F (175°C). If it's too cool, the batter will absorb oil. Fix these issues, and you’ll have crispy, golden apple rings. You can make the batter ahead of time, but it’s best to use it fresh. If you store it, do so in the fridge for up to 1 hour. Here are some tips: - Stir before using: The batter may thicken as it sits. Stir in a little sparkling water to loosen it. - Keep it covered: Cover the bowl with plastic wrap to avoid air exposure. This helps keep the batter from getting thick or forming a skin. For the best results, try to fry the apple rings soon after making the batter. Enjoy your crispy fried apple rings! This article covered how to make crispy fried apples, from selecting your ingredients to frying them just right. We looked at techniques for slicing, making the batter, and achieving that perfect crunch. You can also try fun variations with spices and sauces. Don’t forget tips for storage and reheating! Now you have all the tools to create this tasty treat. Enjoy your cooking and share your delicious results!](https://southerndishes.com/wp-content/uploads/2025/07/8f871287-4af7-499a-b5ae-0273fed1bc36-300x300.webp)

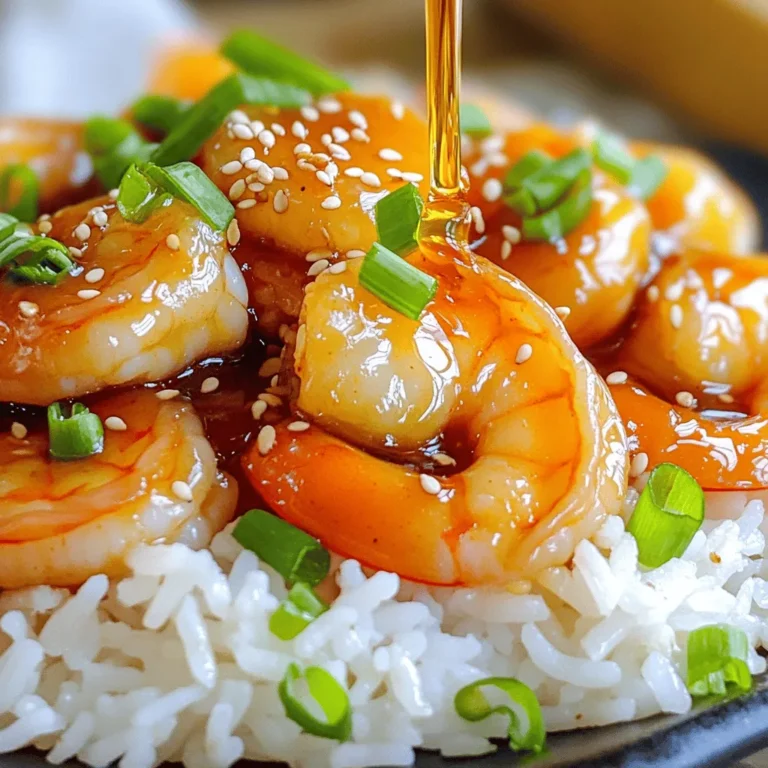
. Yes, you can make teriyaki chicken lettuce wraps ahead of time. Just marinate the chicken the night before. Store the marinated chicken in the fridge. When you are ready to cook, it will already have great flavor. You can also chop the vegetables early. Just keep them in a sealed container. This way, they stay fresh and crisp. Cook the chicken and veggies right before serving. Assemble the wraps quickly to keep the lettuce from wilting. This helps you save time and enjoy a tasty meal! If you don't have teriyaki sauce, there are good alternatives. You can use soy sauce mixed with a bit of honey or brown sugar. This gives a sweet and salty taste. Another option is to use hoisin sauce. It's thicker and sweeter but adds great flavor. You can also make homemade teriyaki sauce. Combine soy sauce, sugar, ginger, and garlic for a quick mix. Feel free to experiment with these options. They can change the taste and make your wraps unique! You’ve learned all about making teriyaki chicken lettuce wraps. We covered essential ingredients, marinating, cooking, and assembling tips. I shared tricks for storing and reheating your wraps too. With variations in protein and seasonal veggies, there’s plenty of room to get creative. Enjoy this fun meal that can suit any taste! Dive in and start cooking your delicious wraps today.](https://southerndishes.com/wp-content/uploads/2025/07/8b3f8a5d-aad1-4100-938e-76d294a25157-300x300.webp)
![- 6 large eggs - 1 ripe avocado - 1 tablespoon lime juice - 2 tablespoons red onion - 1 small jalapeño - 1 tablespoon fresh cilantro - Salt and pepper - Garnish options: Sliced radishes, extra cilantro leaves You need just a few items for guacamole deviled eggs. Start with six large eggs. The eggs give a great base. Next, grab one ripe avocado. A ripe avocado makes the filling creamy and rich. You will also need one tablespoon of lime juice. This adds a fresh zing to the mix. For some crunch and flavor, use two tablespoons of red onion. The onion adds a nice touch. You will also want one small jalapeño. This gives a little heat, but you can leave it out if you prefer mild flavors. Don’t forget one tablespoon of fresh cilantro for a fresh taste. Finally, season with salt and pepper to your liking. For a nice finish, consider garnishing with sliced radishes or extra cilantro leaves. These add color and extra flavor. With these simple ingredients, you can create a dish that impresses everyone. Check the [Full Recipe] for more details on preparation. To start, we need perfect hard-boiled eggs. First, place your eggs in a saucepan. Cover them with cold water. Bring the water to a boil over medium heat. Once boiling, cover the pan and take it off the heat. Let the eggs sit for 12 minutes. This method helps the yolks cook evenly and keeps them bright yellow. Next, we cool the eggs using the ice bath technique. Fill a bowl with ice and water. After 12 minutes, move the eggs to the ice bath. Let them sit for 5 to 10 minutes. This cools them quickly and makes peeling easier. Now, we prepare the filling. Start by scooping out the yolks from the hard-boiled eggs. Place the yolks in a mixing bowl. Then, add the ripe avocado, lime juice, red onion, minced jalapeño, and chopped cilantro into the bowl. Season with salt and pepper. Mash the mixture with a fork until it is smooth. Taste it and adjust the seasoning. This filling combines creamy avocado with a kick from the jalapeño. It’s time to fill the egg whites! You can use a spoon or a piping bag for this step. If you want a neat look, I recommend using a piping bag with a star tip. It makes the filling look fancy. Once filled, we can add some fun garnishes. Top each egg with a slice of radish and an extra leaf of cilantro. This adds color and a fresh taste to your guacamole deviled eggs. For the full recipe, refer to the earlier section. How to choose ripe avocados To pick the best avocado, check the skin. It should be dark and slightly soft when you press it. A ripe avocado feels firm but gives a little under pressure. If it’s too soft, it may be overripe. You can also look for a stem. If it comes off easily and is green underneath, the avocado is ripe. Adjusting spice level with jalapeño If you want more heat, add more jalapeño. You can also keep some seeds for extra spice. If you prefer a milder taste, use less jalapeño. You can skip it altogether and use a pinch of paprika for flavor without heat. Pairing with chips or vegetables Guacamole deviled eggs taste great with tortilla chips or fresh veggies. Serve them with carrot sticks, cucumber slices, or bell pepper strips. The crunchy textures complement the creamy eggs nicely. Ideal occasions for serving These tasty treats are perfect for parties, picnics, or holidays. They impress guests at gatherings and are simple to make. Serve them at brunch or as a fun snack for game day. For the full recipe, check the guide above. {{image_2}} You can add different spices or herbs to boost flavor. Consider adding cumin for warmth or smoked paprika for a smoky touch. If you want a fresh note, add dill or chives. You can also swap ingredients to match diets. For a vegan twist, use silken tofu instead of eggs. If you're gluten-free, rest assured, this recipe is naturally gluten-free. Adjust the jalapeño for spice lovers or leave it out for a milder taste. Creative plating makes these eggs pop. Try arranging them on a colorful platter for a festive look. You can also use a piping bag to create fun shapes with the guacamole filling. For holidays, themed garnishes work well. Use mini flags for Fourth of July or edible flowers for a spring gathering. A sprinkle of paprika or a drizzle of balsamic glaze can add a fancy touch. For the full recipe, check out the complete details above. To keep your guacamole deviled eggs fresh, use an airtight container. This helps prevent air from spoiling them. Place a piece of plastic wrap directly on the eggs before sealing the container. This can help keep them moist. You can store them in the fridge for up to three days. After three days, they may lose their taste and texture. These eggs are best served cold, so reheating is not needed. If you must, use a microwave on low power. Heat them for just a few seconds to avoid cooking the eggs more. If the eggs smell bad or look off, it is best to discard them. Safety first! Guacamole deviled eggs can last about 2-3 days in the fridge. To keep them fresh, store them in an airtight container. Cover the eggs with plastic wrap if you can't find a container. This helps keep the eggs from drying out. Yes, you can! To prep in advance, hard-boil the eggs and store them in the fridge. Make the guacamole filling a day ahead, too. Just make sure to add lime juice to keep it from browning. When you are ready to serve, fill the egg whites with the guacamole mix. If you don’t have lime juice, you can use lemon juice. It adds a nice tang. Another option is apple cider vinegar. Just use a little less than the lime juice called for in the recipe. Both choices will work well in these guacamole deviled eggs. For the full recipe, check out the detailed instructions and ingredients. This post covered how to make guacamole deviled eggs. We started with the ingredients, like eggs, avocado, and lime juice. Then, I shared easy steps to hard-boil the eggs and prepare the filling. I also shared tips for serving and storing. These deviled eggs are fun to make and can fit any event. You can change the flavors or decorations to suit your needs. Enjoy this tasty twist on a classic!](https://southerndishes.com/wp-content/uploads/2025/05/f817671b-45af-4e16-a1f6-6955663795c2-300x300.webp)
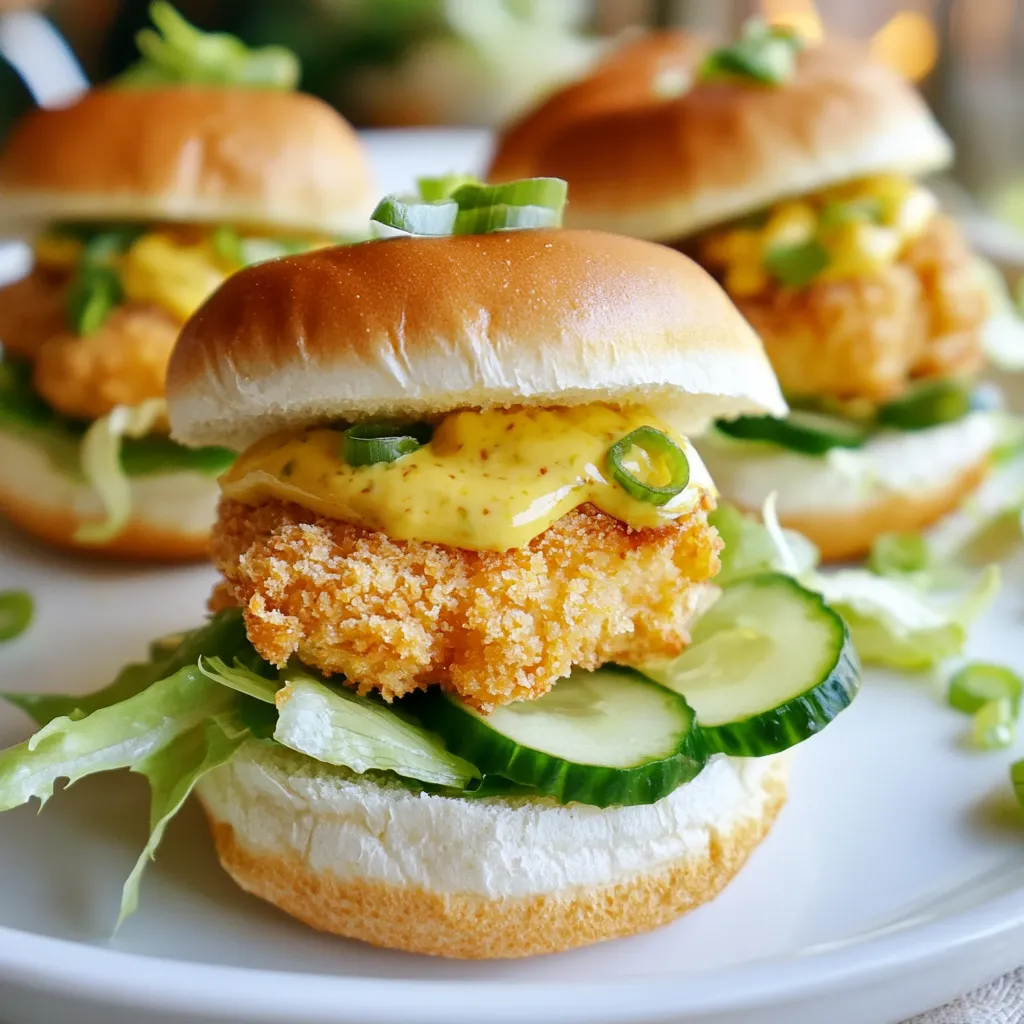
Bang Bang Chicken Sliders Quick and Tasty Recipe
Ready for a treat? Bang Bang Chicken Sliders are quick, tasty, and perfect for any gathering! In this post, I’ll share my favorite recipe,…