Skip to content
DisclaimerTerms Of UseGDPR PolicyCookie Policy

Southern Dishes

  • Home
  • Drinks
  • Appetizers
  • Dinner
  • Dessert
  • About
  • Contact
  • Privacy Policy
DisclaimerTerms Of UseGDPR PolicyCookie Policy

Isabella

To make this tasty dish, you need the following main ingredients: - 4 salmon fillets - 1/4 cup sweet chili sauce - 2 tablespoons soy sauce - 1 tablespoon honey - 1 tablespoon minced fresh ginger - 2 cloves garlic, minced - 1 tablespoon sesame oil - 1 tablespoon lime juice - Salt and pepper to taste These ingredients come together to form a rich and flavorful glaze. The sweet chili sauce gives it a nice kick, while the ginger and garlic add depth. You will love how easy it is to prepare. You can make your meal even better with these optional garnishes: - 2 tablespoons chopped green onion (for garnish) - Sesame seeds (for garnish) These garnishes not only look great but also add extra flavor and texture. You can serve this dish with steamed rice or a fresh salad. This recipe serves four people. Each serving has about: - Calories: 300 - Protein: 25g - Carbohydrates: 15g - Fat: 15g This meal is healthy and packed with protein. It fits well in a balanced diet. For the full recipe, check out the earlier sections of this article. Enjoy cooking! To start, gather your ingredients. You need: - 1/4 cup sweet chili sauce - 2 tablespoons soy sauce - 1 tablespoon honey - 1 tablespoon minced fresh ginger - 2 cloves garlic, minced - 1 tablespoon sesame oil - 1 tablespoon lime juice In a small bowl, whisk together the sweet chili sauce, soy sauce, honey, minced ginger, garlic, sesame oil, and lime juice. This mix creates a rich glaze. It adds sweetness and a hint of spice to the salmon. Set the glaze aside while you prepare the salmon. Now, preheat your grill or stovetop grill pan over medium-high heat. It's important to make sure it gets hot. While the grill heats, pat the salmon fillets dry with paper towels. This helps them get a nice crust. Season both sides with salt and pepper. Place the salmon fillets skin-side down on the grill. Brush a generous amount of the sweet chili glaze over the top of each fillet. Grill the salmon for about 5-7 minutes. After that, carefully flip the fillets over. Brush more glaze on the skin side. Grill for an additional 4-5 minutes. The salmon should be cooked through and flake easily with a fork. Once the salmon is done, remove it from the grill. Let it rest for a minute. This step allows the juices to settle. To serve, drizzle any remaining glaze over the fillets. Garnish with chopped green onions and sesame seeds for a pop of color. Pair your sweet chili glazed salmon with rice or steamed veggies for a complete meal. Enjoy the delicious flavors and beautiful presentation! For the full recipe, check out the details above. To get the best grilled salmon, start by preheating your grill. Medium-high heat works best. Make sure to pat the salmon dry with paper towels. This helps the glaze stick better. Use a grill brush to oil the grates. It prevents sticking and gives great char marks. Place the salmon skin-side down first. This helps the fish hold together better. Marinades add a punch of flavor. For this dish, you mix sweet chili sauce, soy sauce, honey, ginger, garlic, sesame oil, and lime juice. Let the salmon sit in this mix for at least 15 minutes. This allows the flavors to soak in well. If you have time, marinate it longer for deeper taste. Remember to reserve some glaze for later. You can drizzle it on after grilling. One big mistake is overcooking the salmon. Keep an eye on the time. Salmon cooks fast, usually in 5-7 minutes on each side. Another mistake is not using enough seasoning. Salt and pepper are key. Don’t forget to garnish with green onions and sesame seeds. This adds color and crunch. Lastly, avoid flipping the salmon too soon. Let it sear properly before turning. For more details on making the best Sweet Chili Glazed Salmon, check the Full Recipe. {{image_2}} You can change the sweet chili sauce to make this dish your own. Try using teriyaki sauce for a sweet twist. You can also mix in some sriracha for heat. A peanut sauce gives a nutty flavor that works well too. If you want a fresh taste, use a lemon herb sauce. Each sauce will change the taste but keep the dish delicious. Salmon is great, but other fish work too. Try using trout for a milder flavor. If you want something richer, go for mackerel. Tuna steaks are also a good option. Each type of fish will cook a bit differently, so adjust your cooking time. Fish like tilapia or cod can also pick up the glaze well. Just remember to watch how long you cook them. Grilling gives a nice char, but baking is easier. If you bake, use a foil packet to keep moisture. Set the oven to 375°F and cook for about 15-20 minutes. This method keeps the fish tender and juicy. Grilling, on the other hand, adds a smoky flavor. Both ways can be tasty and fun. Choose what fits your style best. For the full recipe, refer to the Sweet Chili Glazed Salmon section. After you enjoy your sweet chili glazed salmon, store any leftovers right away. Place the fillets in an airtight container. This keeps the salmon fresh and tasty. Make sure to refrigerate it within two hours of cooking. The salmon will stay good for 3 to 4 days in the fridge. If you have more than a few pieces, consider freezing some. To reheat the salmon, use the oven or a skillet. The oven keeps the fish moist. Preheat your oven to 350°F (175°C). Place the salmon on a baking sheet and cover it with foil. Heat for about 10-15 minutes, or until warm. If using a skillet, add a little water and cover it. Heat on low until it's warm. Avoid the microwave, as it can dry out the fish. Freezing salmon is easy and great for meal prep. Wrap each fillet in plastic wrap, then place it in a freezer bag. Remove as much air as possible. You can freeze the salmon for up to three months. When you're ready to cook, thaw it overnight in the fridge. This method keeps the salmon fresh and tasty. Enjoy your sweet chili glazed salmon anytime! For the full recipe, check out the ingredients and instructions above. Grill salmon for 5-7 minutes on one side. Then flip and grill for 4-5 more minutes. This timing helps the fish cook evenly. You want it to flake easily with a fork. Use a medium-high heat for best results. Yes, you can use frozen salmon. Just be sure to thaw it first. Thaw salmon in the fridge overnight or place it in cold water for quicker thawing. Pat it dry before grilling. This helps the glaze stick better. Serve your salmon with rice or quinoa for a filling meal. Steamed broccoli or green beans add a fresh touch. A simple salad with citrus dressing also works well. These sides balance the sweet flavors of the dish. Add red pepper flakes or sriracha to the glaze for heat. You can mix in chopped jalapeños for a fresh kick. Adjust the amount to fit your taste. A little spice enhances the sweet chili flavor beautifully. Check the full recipe for all the details! This article covered how to make sweet chili glazed salmon, from ingredients to cooking tips. You learned about garnishes, nutritional info, and variations to try. With these step-by-step instructions, you'll grill a delicious meal. Remember to avoid common mistakes for the best flavor. Proper storage ensures you enjoy leftovers, too. Cooking should be fun and easy, so use these tips to impress everyone at your table. Enjoy your tasty salmon adventure!

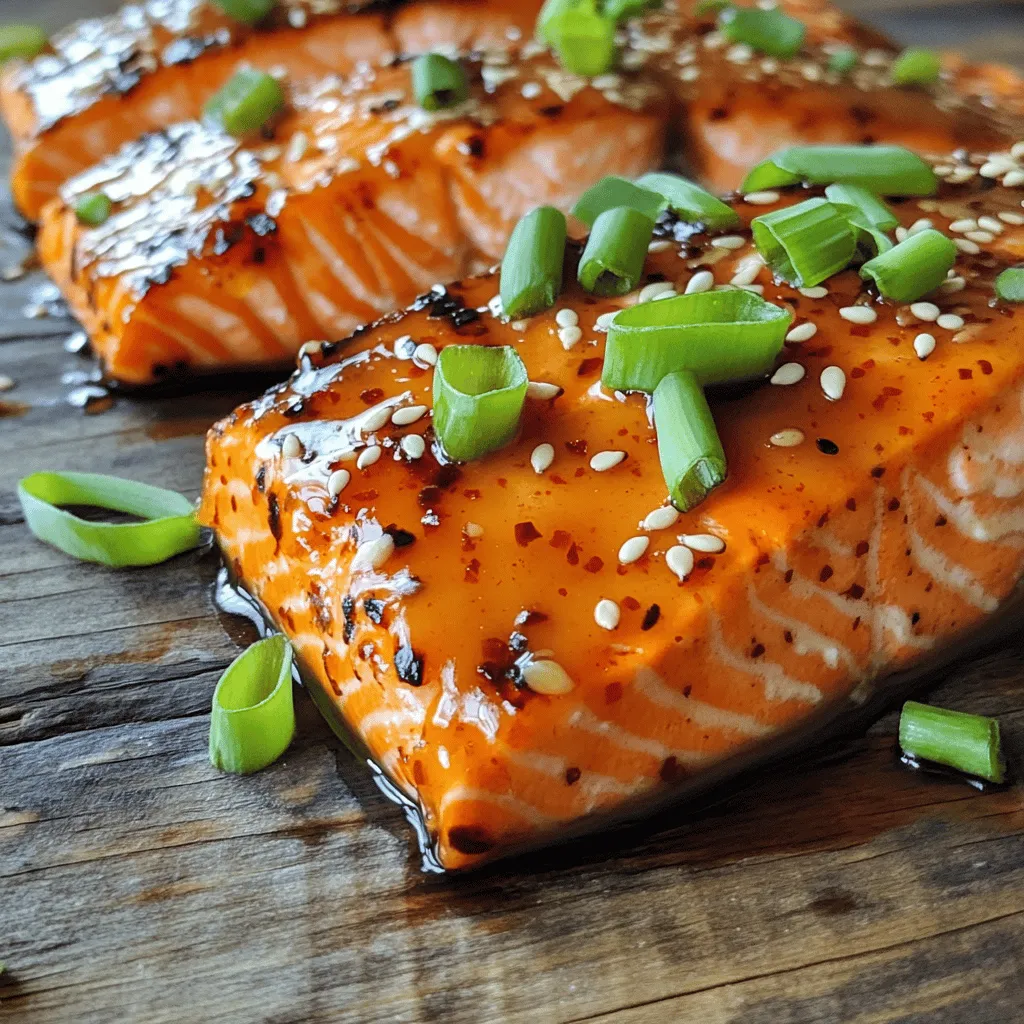
Sweet Chili Glazed Salmon Flavorful and Simple Meal

Are you ready to elevate your dinner game with Sweet Chili Glazed Salmon? This dish combines sweet, spicy, and savory

- 1 pound chicken breast, cut into bite-sized pieces - 1 cup dill pickle juice - 1 cup buttermilk - 1 teaspoon garlic powder - 1 teaspoon onion powder - 1 teaspoon smoked paprika - 1 teaspoon salt - ½ teaspoon black pepper - 1½ cups all-purpose flour - 1 teaspoon baking powder - ½ teaspoon cayenne pepper (optional for heat) - Vegetable oil for frying When making copycat Chick-fil-A nuggets, start by gathering your ingredients. You need chicken breast cut into small pieces. This helps with even cooking. The dill pickle juice gives a nice tang. The buttermilk adds creaminess and helps tenderize the chicken. Next, the seasonings are key. Garlic powder and onion powder add depth. Smoked paprika brings a subtle smokiness. Salt enhances flavor, while black pepper gives a little kick. For the coating, you’ll mix flour with baking powder. This gives the nuggets a nice rise. If you want heat, add cayenne pepper. Finally, use vegetable oil for frying. It’s perfect for getting that crispy exterior. This recipe is simple and fun. You can find the full recipe to guide you through the step-by-step process. Enjoy the cooking! - Combine chicken with dill pickle juice and marinate for at least 1 hour. - Rinse the chicken under cold water and pat it dry. Marinating in dill pickle juice adds flavor and helps keep the chicken juicy. This step is key for tasty nuggets. I often let it marinate overnight for even better results. After marinating, rinsing the chicken removes excess salt. This ensures the nuggets won’t be too salty. - Whisk together buttermilk, garlic powder, onion powder, smoked paprika, salt, and black pepper. - Marinate chicken in the buttermilk mixture for about 30 minutes. The buttermilk adds a creamy texture and tangy taste. It also helps the flour stick to the chicken. I recommend using fresh spices for the best flavor. A good soak in this mixture makes the chicken tender and flavorful. - Mix flour, baking powder, and cayenne pepper in a bowl. - Dredge marinated chicken in the flour mixture, ensuring an even coating. The flour mixture gives the nuggets that crispy crunch we love. Baking powder helps the coating puff up while frying. Make sure to coat each piece well. This step is essential for that classic Chick-fil-A crunch. - Heat vegetable oil to 350°F (175°C) in a deep skillet. - Fry chicken in batches for 5-7 minutes until golden brown. Frying at the right temperature is crucial. If the oil is too hot, the outside burns before the inside cooks. If it’s too cool, the nuggets soak up oil and become greasy. Frying in batches keeps the temperature steady and ensures even cooking. Remember to place the cooked nuggets on paper towels to absorb extra oil. To get that crispy bite, heat your oil to 350°F (175°C). This temperature fries the chicken just right. If the oil is too cool, your nuggets may turn soggy. If it’s too hot, the outside will burn before the inside cooks. Marinating the chicken in dill pickle juice is key. It not only adds flavor but also makes the meat tender. Aim to marinate for at least one hour, but overnight is even better. This extra time allows the flavors to soak in fully. One big mistake is overcrowding the frying pan. Fry in small batches to let each piece cook evenly. When the pan is too full, the temperature drops. This can lead to greasy nuggets that don’t cook well. Another common error is not drying the chicken before coating. Wet chicken can make the breading fall off while frying. Use paper towels to pat the chicken dry for a better crust. For the best dipping sauces, try honey mustard or barbecue sauce. These pair perfectly with the crispy nuggets. You can also make a spicy ranch or garlic aioli for a fun twist. As for sides, think about serving these nuggets with a fresh salad or crispy fries. You can also add fruit or a light coleslaw to balance the meal. Want more ideas? Check out the Full Recipe for more creative pairings! {{image_2}} You can make your nuggets more exciting by using different spices. Try adding a blend of Cajun seasoning or Italian herbs. Each mix gives a new twist to the flavor. You can also use hot sauces for marinating. A splash of sriracha or buffalo sauce adds heat and zest. Just adjust the amount to match your taste. Baking is a great way to enjoy these nuggets without the extra oil. Set your oven to 400°F (200°C) and bake for about 20 minutes. You can also use whole wheat flour for a healthier coating. If you need gluten-free options, try almond flour or a gluten-free blend. Kids often prefer milder flavors. Use less cayenne or skip it entirely for a gentle taste. You can also make fun shapes like stars or hearts. This makes the nuggets more appealing to younger eaters. Just use cookie cutters to create the shapes before cooking. To keep your Chick-fil-A nuggets fresh, store them in an airtight container. Place a sheet of paper towel at the bottom. This helps absorb moisture. Refrigerate the nuggets within two hours of cooking. They will stay good for about three to four days. You can also seal them in freezer bags for longer storage. When reheating, aim to keep the nuggets crispy. The best way is to use an oven or air fryer. Preheat your oven to 375°F (190°C). Arrange the nuggets on a baking sheet and heat for about 10 minutes. This method helps them regain their crunch. If using a microwave, heat in short bursts. This keeps them warm but may make them softer. You can freeze both uncooked and cooked nuggets. For uncooked nuggets, lay them on a baking sheet and freeze until solid. Then transfer them to freezer bags. For cooked nuggets, let them cool completely before freezing. This prevents ice crystals. They can stay in the freezer for up to three months. When you're ready to eat, cook them directly from frozen. Just add a few extra minutes to the cooking time. For more details on making these nuggets, check out the full recipe. Yes, you can use frozen chicken. It’s handy and saves time. However, there are some things to think about. First, thaw the chicken completely before cooking. This ensures even cooking. Cooked chicken from frozen can be dry or tough. You may need to adjust cooking times to avoid this. Fresh chicken tends to have better texture and flavor. If you use frozen, marinate it well to boost taste. If you don’t have dill pickle juice, there are good options. Try using lemon juice for a tangy flavor. Apple cider vinegar is another choice. It gives a nice acidity, but it’s stronger. You can also mix vinegar with water for a milder taste. Some people use lime juice or even mustard for a different twist. Each alternative brings its own unique flavor, so feel free to experiment! Making these nuggets gluten-free is easy. You can swap regular flour for gluten-free flour blends. Look for one that works well for frying. Almond flour or coconut flour are also good choices. They offer a unique taste and crunch. Make sure to check the baking powder too; some have gluten. This way, everyone can enjoy these tasty nuggets! For more details, check the Full Recipe. This blog post covered how to make delicious chicken nuggets from scratch. You learned about the key ingredients, marinating techniques, and frying methods essential for achieving that perfect crunch. Remember to avoid common mistakes like overcrowding the frying pan and ensure your chicken is dry before coating. You can customize these nuggets with various spices or healthier alternatives. Whether you're serving them at a party or for family dinner, these nuggets will impress everyone at the table. Enjoy your cooking and create tasty memories!

Copycat Chick-fil-A Nuggets Tasty and Easy Recipe

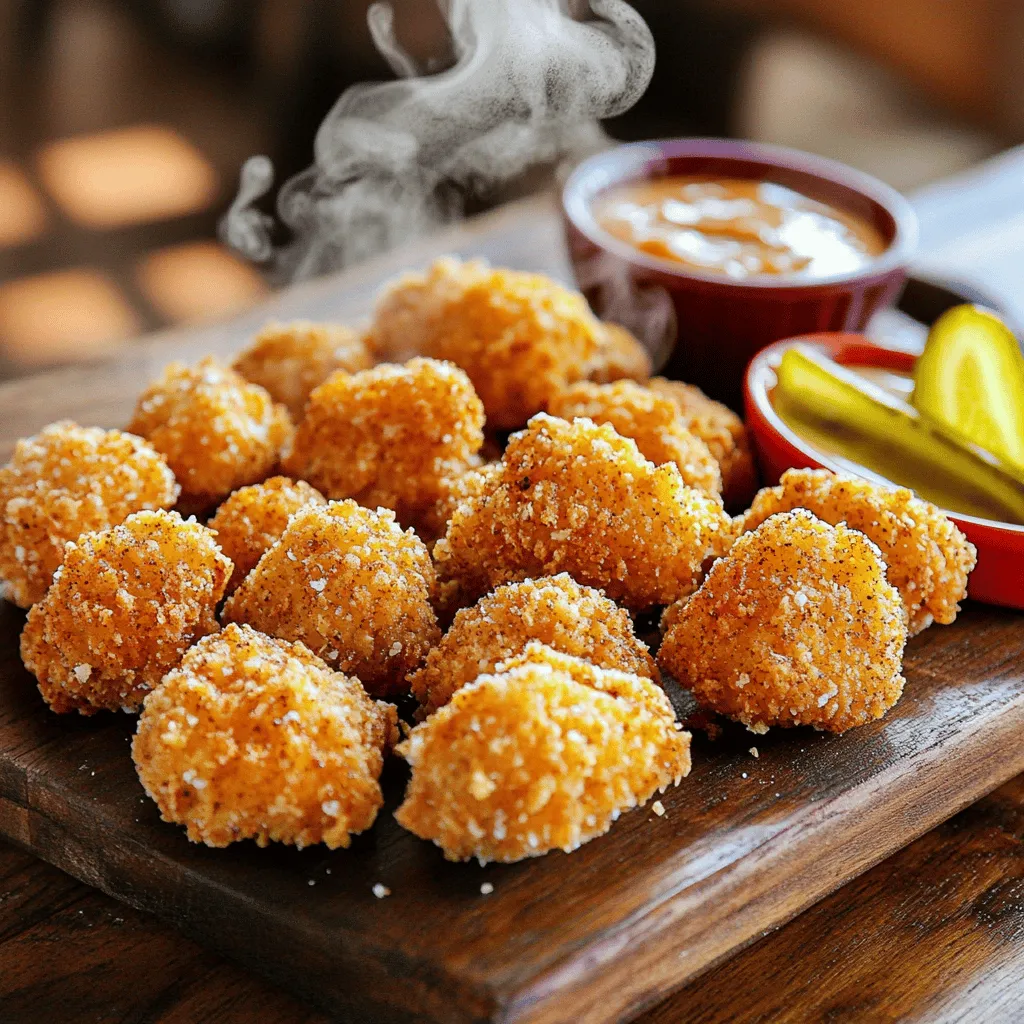
Do you crave those crispy, mouthwatering Chick-fil-A nuggets? Look no further! I’m here to share an easy, homemade recipe that

To make delicious raspberry lemonade bars, you will need the following ingredients: - 1 cup all-purpose flour - 1/2 cup powdered sugar - 1/4 teaspoon salt - 1/2 cup unsalted butter, softened - 2 large eggs - 1 cup granulated sugar - 1/4 cup fresh lemon juice (about 2-3 lemons) - Zest of 1 lemon - 1 cup fresh raspberries - 1/4 teaspoon baking powder - Extra powdered sugar for dusting These ingredients work together to create a sweet and tangy treat that is perfect for any occasion. You can use either fresh or frozen raspberries in this recipe. Fresh raspberries taste great and add a vibrant color. They also give a nice texture to the bars. Frozen raspberries can work too. Just make sure to thaw and drain them first. This prevents extra liquid from making your bars soggy. Both options deliver a tasty flavor, so choose what you have on hand. If you need to make substitutions, here are some good options: - Butter: You can use coconut oil or vegetable oil instead of butter for a dairy-free option. - Granulated Sugar: Try using coconut sugar or honey if you want a different sweetness. - Lemon Juice: If you don't have fresh lemon juice, bottled juice can work in a pinch, but fresh gives the best taste. - Eggs: For a vegan option, replace each egg with 1/4 cup of unsweetened applesauce. These substitutions help you adapt the recipe to fit your needs while still keeping the bars tasty and fresh! For the full recipe, check out the complete details above. Begin by preheating your oven to 350°F (175°C). Line an 8x8-inch baking pan with parchment paper, leaving some overhang. This helps you lift the bars out later. In a mixing bowl, combine 1 cup of all-purpose flour, 1/2 cup of powdered sugar, and 1/4 teaspoon of salt. Next, add 1/2 cup of softened unsalted butter. Mix until you see coarse crumbs. Press this mixture firmly into the bottom of your pan. Bake the crust for 15-18 minutes until it turns lightly golden. Once done, remove it from the oven and let it cool slightly. This crust is the base for your raspberry lemonade bars and adds a sweet, buttery flavor. While your crust cools, you can make the filling. In a separate bowl, whisk together 2 large eggs, 1 cup of granulated sugar, 1/4 cup of fresh lemon juice, and the zest of 1 lemon. Add 1/4 teaspoon of baking powder for a light texture. Mix until the mixture is smooth. Now, gently fold in 1 cup of fresh raspberries. Be careful not to crush them too much. You want to keep them whole for bursts of flavor. Pour this vibrant raspberry lemonade mixture over the cooled crust. Put the pan back in the oven and bake for an additional 20-25 minutes. The edges should set, but the center should still jiggle a bit. This jiggle means your bars will have a nice, soft texture. Once baked, allow the bars to cool completely in the pan on a wire rack. Use the parchment overhang to lift them out. Dust the top with extra powdered sugar before cutting them into squares. Your raspberry lemonade bars are now ready for serving! To make the best raspberry lemonade bars, follow these tips. Use fresh lemons for juice and zest. Fresh lemons bring bright flavor. When mixing the crust, ensure the butter is soft. This helps the dough mix easily. Don't rush baking the crust; it should be lightly golden. When making the filling, whisk the eggs well. This helps the bars rise and become fluffy. Gently fold in the raspberries. Crushing them too much may turn the filling mushy. Pour the filling over the cooled crust carefully. This keeps the layers distinct. Store your raspberry lemonade bars in an airtight container. They stay fresh for up to a week. If you want to freeze them, wrap each square in plastic wrap. Then place them in a freezer bag. They can last up to three months in the freezer. When you're ready to enjoy them again, thaw in the fridge overnight. For a warm treat, pop them in the microwave for 10-15 seconds. This will make the flavors shine again. Presentation makes a big difference. Serve your raspberry lemonade bars on a nice platter. Add thin lemon slices around the edges. Place a few whole raspberries on top for color. Dust extra powdered sugar over the bars for an elegant look. Consider adding mint leaves for a fresh touch. This makes them look and taste special. For a fun twist, serve with whipped cream or ice cream on the side. Enjoy your beautiful and tasty creation! {{image_2}} If you want to change things up, consider using other fruits. You can swap raspberries for blueberries or strawberries. Each fruit gives a unique taste. For a tropical vibe, try mango or passion fruit. These fruits mix well with the lemon flavor. You can also mix different fruits together for a fun blend. Just remember to adjust the sugar. Some fruits are sweeter than raspberries. You can make these bars gluten-free by using almond flour or a gluten-free blend. For a vegan version, replace the eggs with flax eggs. Mix one tablespoon of flaxseed meal with three tablespoons of water. Let it sit for a few minutes to thicken. Use vegan butter or coconut oil instead of regular butter. These swaps keep the bars tasty while meeting dietary needs. In spring, you can use strawberries for a fresh twist. In summer, peaches or cherries work great. For fall, add pumpkin puree for a creamy texture. In winter, try blood oranges for a festive look. Each season brings new flavors to explore. You can mix in spices too, like cinnamon or nutmeg. Experiment and find your favorite seasonal combo! For the full recipe, check out Raspberry Lemonade Zest Bars . To keep your raspberry lemonade bars fresh, store them in an airtight container. This helps to keep moisture out and maintain their flavor. Line the container with parchment paper to avoid sticking. Always let the bars cool completely before placing them in the container. This prevents condensation from forming, which can make them soggy. You can keep your raspberry lemonade bars at room temperature for up to three days. If you want them to last longer, they can stay in the fridge for about a week. Just remember to check for any signs of spoilage, like a change in smell or texture. Freezing is a great option for longer storage. Cut the bars into squares and wrap each piece in plastic wrap. Then place them in a freezer-safe bag or container. They will stay fresh for up to three months in the freezer. When you want to enjoy them, simply thaw them in the fridge overnight. Enjoy your treat with that fresh taste! For the full recipe, you can refer to the earlier sections. Yes, you can use bottled lemon juice. However, fresh lemon juice tastes better. Fresh juice has a bright, lively flavor. Bottled juice may lack that zing. If you use bottled juice, look for a brand that says "100% juice." It should not have added sugars or preservatives. If you don’t have parchment paper, use foil instead. Just grease the foil well with butter. This will help keep the bars from sticking. Another option is to bake the bars directly in a greased pan. Just make sure to let them cool fully before cutting. To change the sweetness, adjust the sugar in the filling. You can add more sugar for a sweeter treat. If you want less sweetness, reduce the sugar by a few tablespoons. Taste the filling before baking to find the right balance for you. For an extra twist, try adding a bit of honey or agave syrup. This can add flavor and sweetness at the same time. For the full recipe, check out the complete details in the recipe section. In this post, we explored how to make delicious raspberry lemonade bars. We covered the key ingredients, including fresh and frozen options, and substitutions. The step-by-step guide made prepping the crust and filling simple. I shared tips for perfecting your bars, storing them well, and some fun serving ideas. Variations let you try different fruits and dietary options, too. Remember, the best raspberry lemonade bars bring bright flavors and joy to any occasion. Enjoy making this treat!

Raspberry Lemonade Bars Tangy and Refreshing Treat

Are you craving a sweet and tangy treat? Look no further than these Raspberry Lemonade Bars! They combine the bright

- 1 lb sirloin steak, cut into bite-sized cubes - 4 tablespoons unsalted butter - 5 cloves garlic, minced - 1 tablespoon fresh rosemary, chopped (or 1 teaspoon dried) - 1 tablespoon fresh thyme, chopped (or 1 teaspoon dried) - Salt and pepper to taste - 1 tablespoon olive oil - 1 tablespoon fresh parsley, chopped (for garnish) - Lemon wedges (for serving) When I make garlic butter steak bites, I love using fresh ingredients. The sirloin steak is key. It stays juicy and tender. For the butter, I prefer unsalted. This way, I control the salt. The minced garlic adds great flavor. Fresh herbs like rosemary and thyme elevate the dish. They bring out the steak's natural taste. If you don't have fresh herbs, dried ones work too. Just remember to use less. The olive oil is essential for cooking. It helps to sear the steak perfectly. The fresh parsley makes a lovely garnish. It adds a pop of color to the plate. Finally, serving lemon wedges gives a nice zing. The acidity cuts through the richness of the butter. This balance makes every bite enjoyable. For the full recipe, check the details above. First, you want to pat the steak cubes dry. This step helps achieve a great crust when cooking. Use paper towels to soak up any moisture. Next, season the steak cubes with salt and pepper. This simple seasoning enhances the meat's natural flavor. Start by heating your skillet. Add one tablespoon of olive oil and let it get hot. The oil should shimmer, showing it is ready. Cook the steak bites in batches. Place them in a single layer to avoid steaming. Sear for 2-3 minutes before flipping. Cook for another 2 minutes to reach medium-rare. Adjust the time for your preferred doneness. Once cooked, set the steak bites aside on a plate. In the same skillet, reduce the heat to medium. Add the butter and let it melt. Once melted, stir in the minced garlic, rosemary, and thyme. Cook for 1-2 minutes until fragrant. Be careful not to burn the garlic. After that, toss the steak bites in the garlic butter mixture. Coat them well for a delicious finish. Enjoy your Garlic Butter Steak Bites! For the complete preparation process, check the Full Recipe. To get steak bites just right, timing is key. Here are some tips for cooking: - Medium-Rare: Cook for 2-3 minutes on each side. - Medium: Cook for about 3-4 minutes on each side. - Well-Done: Cook for 4-5 minutes on each side. Make sure not to overcrowd the skillet. If you add too many steak bites at once, they will steam instead of sear. This will ruin that nice crust you want. Cook them in batches for the best result. To make your steak bites even tastier, try adding different herbs. Here are some great options: - Fresh basil - Oregano - A pinch of smoked paprika Be careful with the garlic. It burns easily. When you add it to the melted butter, keep an eye on it. Cook for just 1-2 minutes until fragrant. This adds a rich, savory flavor without the bitter taste of burnt garlic. How you serve your steak bites can impress your guests. Here are some ideas for stylish plating: - Use a large white plate for contrast. - Stack the steak bites for height. - Add a sprinkle of fresh parsley on top for color. For side dishes, consider these: - Creamy mashed potatoes - Roasted vegetables - A fresh green salad These sides balance the richness of the steak bites. They also add more color to your plate. Enjoy the full recipe to create a meal that looks as good as it tastes! {{image_2}} You can use different cuts of steak for this dish. Try ribeye or filet mignon. These cuts add rich flavor and tenderness. If you want to explore beyond beef, consider pork tenderloin. Chicken breast also works well. Just cut it into bite-sized pieces. Each meat brings its own taste and texture, making this dish versatile. To make your steak bites even better, add extra ingredients. Sautéed mushrooms add earthiness. Bell peppers bring a sweet crunch. Both pair well with garlic butter. You can also marinate the meat. Use soy sauce, Worcestershire sauce, or balsamic vinegar for a twist. Marinades add depth and can change the vibe of the dish. You can modify this recipe to fit your diet. For low-carb eaters, skip the bread and serve with salad. If you need gluten-free options, check sauces carefully. Many brands offer gluten-free soy sauce. For a vegan twist, use plant-based proteins like tempeh or mushrooms. The garlic butter can be replaced with vegan butter for a similar taste. To keep your garlic butter steak bites fresh, store them right after cooling. Place them in an airtight container. This helps lock in moisture and flavor. You can refrigerate them for up to three days. If you want to keep them longer, freezing is a great option. Use a freezer bag or airtight container for better protection. Label it with the date for easy tracking. Reheating steak bites can be tricky. You want them warm without overcooking. The best way is to use a skillet. Heat it on low and add a little butter or oil. Then, add the steak bites. Stir gently until they are warm. Avoid using the microwave, as it can dry them out. If you must use it, heat in short bursts. Check every 30 seconds to avoid cooking them further. Freezing garlic butter steak bites is simple. First, let them cool completely. Then, pack them in a freezer bag, removing as much air as you can. They can stay in the freezer for up to three months. To thaw, place them in the fridge overnight. For quick thawing, use the microwave on low. After thawing, you can reheat them in a skillet as mentioned above. This keeps the flavor and texture intact. For the full recipe, check out Sizzling Garlic Butter Steak Bites. Enjoy cooking! You can store garlic butter steak bites in the fridge for up to three days. To keep them fresh, place them in an airtight container. Make sure they cool down before sealing. When ready to eat, just reheat them gently. This helps keep their flavor and texture. Yes, you can use frozen steak! Just thaw it first in the fridge for at least 24 hours. When it's thawed, pat it dry before cooking. This helps get a good sear. If you cook it from frozen, the steak may not brown as well, and the cooking time will be longer. Garlic butter steak bites are great on their own, but you can serve them with sides. Try them with mashed potatoes or a fresh salad. You can also add a dipping sauce, like chimichurri or a garlic aioli. For a fun touch, serve them with lemon wedges for extra zest. For the full recipe, check out my detailed guide. Garlic butter steak bites are tasty and fun to make. We covered the key ingredients, cooking steps, and helpful tips. Remember to personalize the dish with your favorite herbs or sides. Don't shy away from experimenting with different meats or flavors. Store any leftovers correctly and enjoy them later. By following these steps, your steak bites will impress everyone. Now, roll up your sleeves and get cooking! Enjoy your delicious meal and the smiles it brings.

Garlic Butter Steak Bites Flavorful and Quick Meal

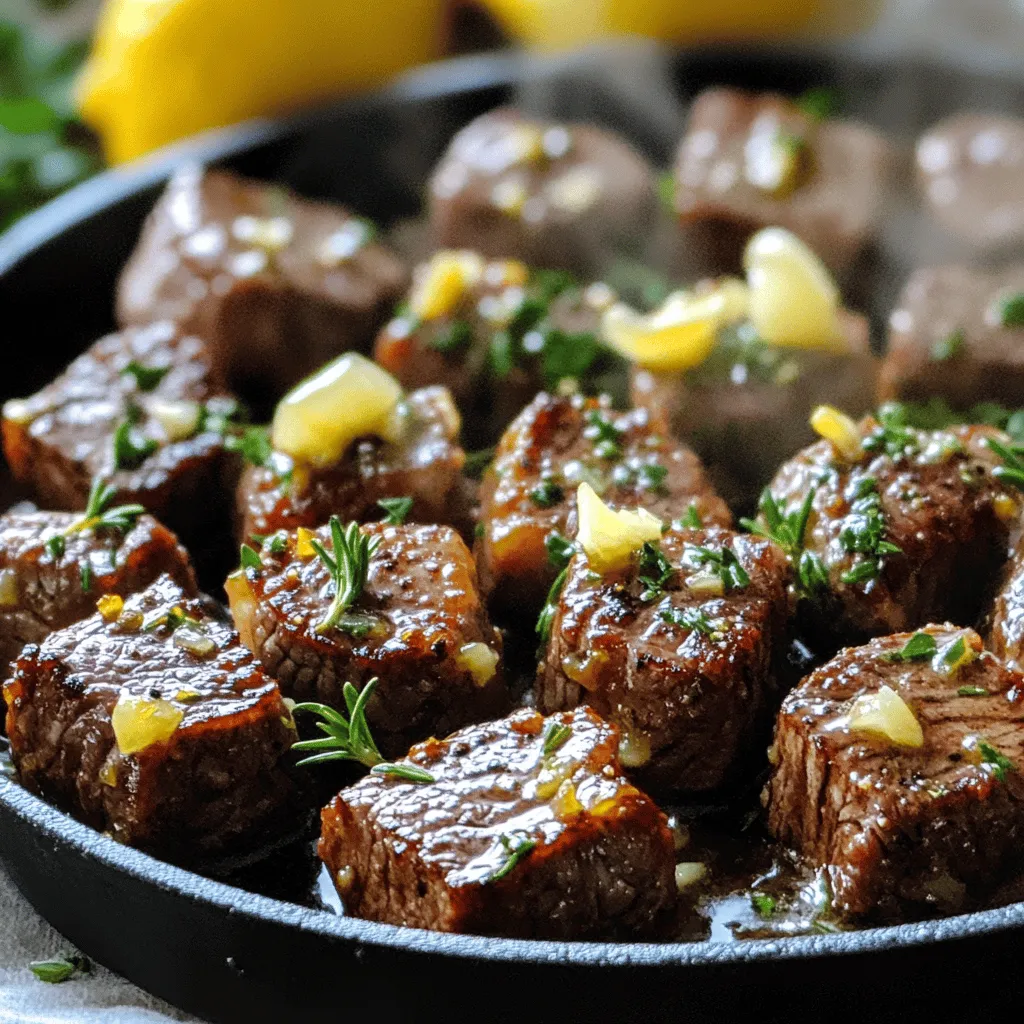
Looking for a dish that’s packed with flavor yet quick to whip up? Garlic Butter Steak Bites are your answer!

- 24 Oreo cookies, crushed - 1/4 cup unsalted butter, melted - 16 oz cream cheese, softened - 1 cup powdered sugar - 1 teaspoon vanilla extract - 1 cup heavy whipping cream - 1/4 cup cocoa powder (optional) You need just a few basic items to create this no-bake Oreo cheesecake. First, you will use 24 Oreo cookies, which give this dessert its rich flavor and crunchy texture. Crush these cookies into fine crumbs for the crust. Next, combine the crumbs with 1/4 cup of unsalted butter that you have melted. This mixture forms the base of your cheesecake. For the filling, gather 16 oz of softened cream cheese. It’s important to let it sit out for a bit so it mixes well. Then, you’ll sprinkle in 1 cup of powdered sugar for sweetness. Don’t forget to add 1 teaspoon of vanilla extract for that lovely flavor boost. For a bit of extra fluffiness, you will need 1 cup of heavy whipping cream. Whip this until it forms stiff peaks. If you want to add a chocolate twist, include 1/4 cup of cocoa powder. This step is optional but highly recommended for chocolate lovers. - 9-inch springform pan - Electric mixer - Mixing bowls - Spatula To make your cheesecake, you will need a few tools. A 9-inch springform pan is best for easy removal. An electric mixer helps blend the cream cheese and other ingredients smoothly. You will also need mixing bowls for combining the ingredients. Lastly, a spatula is perfect for spreading the cheesecake filling evenly. This recipe offers a fun way to enjoy a classic dessert. Get ready to impress your family and friends with this delightful treat! For the full recipe, check out the instructions provided. - Combine 24 crushed Oreo cookies and 1/4 cup melted unsalted butter. - Press the mixture into the bottom of your 9-inch springform pan. Start by crushing the Oreo cookies. You can use a food processor or place them in a bag and crush them with a rolling pin. Mix the crumbs with melted butter until they look like wet sand. This mixture forms a great, flavorful crust. Press it firmly into the pan. This helps it hold together when you slice the cheesecake later. After pressing down, place the pan in the freezer for about 10-15 minutes to set. - Beat 16 oz softened cream cheese until smooth. - Add 1 cup powdered sugar and 1 teaspoon vanilla extract. - Optionally, mix in 1/4 cup cocoa powder for a chocolate flavor. In a large bowl, beat the softened cream cheese using an electric mixer. It should be creamy and smooth. Gradually add the powdered sugar and vanilla extract. Keep mixing until you don’t see any lumps. If you want a richer taste, you can add cocoa powder. It gives an extra chocolatey kick. - Whip 1 cup heavy whipping cream until stiff peaks form. - Fold the whipped cream into the cheesecake filling. In another bowl, whip the heavy cream. Use an electric mixer and make sure your bowl and beaters are cold. This helps the cream whip better. Beat until stiff peaks form; this means the cream should stand up on its own. Gently fold the whipped cream into the cream cheese mixture. Be careful not to deflate it. This folding keeps the filling light and airy. - Pour the filling over the chilled crust. - Refrigerate for at least 4 hours or overnight. After mixing, pour the filling over your chilled crust. Use a spatula to spread it evenly. Cover the springform pan with plastic wrap. Place it in the fridge for at least 4 hours. For the best results, let it chill overnight. This allows the flavors to meld and the cheesecake to set perfectly. Follow these steps, and you will create a No-Bake Oreo Cheesecake that is both easy to make and simply delightful. For the complete instructions, check out the Full Recipe. To make your filling smooth, start with softened cream cheese. Cold cream cheese will not blend well. Leave it at room temperature for about 30 minutes before use. Next, when adding powdered sugar, do it gradually. This helps to avoid lumps and gives you a creamy texture. For perfect whipped cream, chill your bowl and beaters. Cold tools help the cream whip up quickly. As you whip, pay attention to the peaks. Stop mixing right when stiff peaks form. Overmixing can lead to a grainy texture, so be gentle. Garnish your cheesecake with crushed Oreos or a drizzle of chocolate sauce. It adds flair and flavor. A dollop of whipped cream on top makes it look even more tempting. These simple touches make your dessert pop and impress your guests. Enjoy this easy and delightful No-Bake Oreo Cheesecake! For the complete recipe, check out the Full Recipe section. {{image_2}} For a fun twist on the classic No-Bake Oreo Cheesecake, you can try different flavors. Here are some tasty ideas: Want more chocolate? Just add more cocoa powder to the filling. This will make the cheesecake richer and give it a deep chocolate flavor. You can start with an extra 1/4 cup of cocoa powder. Mix it in with the cream cheese and sugar. This simple step will take your cheesecake to the next level! If you love mint, this variation is for you. Just add a teaspoon of mint extract to your filling. It gives a cool, refreshing taste. The mint pairs well with the chocolate from the Oreos. This cheesecake is perfect for summer parties or any time you want a fresh flavor. You can enjoy this dessert while being mindful of health. Use low-fat cream cheese and light whipped topping. This way, you cut some calories but keep the creamy texture. You still get the delicious Oreo taste without feeling guilty. It’s a win-win! Explore these variations to enjoy a No-Bake Oreo Cheesecake that fits your taste. For the full recipe, check out the details above. Store your No-Bake Oreo Cheesecake covered in the fridge. It stays fresh for up to 5 days. Make sure it is in an airtight container or well-wrapped. This keeps it from absorbing other fridge smells. You can freeze this cheesecake for up to 2 months. To do this, slice it first. Wrap each slice in plastic wrap. Then place the slices in a freezer bag. This way, you can enjoy a piece whenever you want! When you're ready to serve, thaw the cheesecake in the fridge overnight. This helps it maintain its creamy texture. Avoid thawing at room temperature to keep it safe and tasty. For the full recipe, check out the details provided earlier! Yes, it can be made up to 2 days in advance. This makes it great for parties. Just store it in the fridge until you are ready to serve. It lasts for about 5 days in the fridge. Keep it covered to keep it fresh. After five days, the taste and texture may change. It depends on the Oreo cookies used; check the packaging. Some Oreo varieties contain gluten. If you need a gluten-free option, look for the gluten-free label. Yes, you can substitute with any similar cookies, such as chocolate wafers. This lets you create different flavors and textures. Experiment with what you like! A springform pan is recommended for easy removal, but a regular pan can be used with careful serving. Using a springform pan makes it easier to slice and serve. Slice and serve chilled, garnished with whipped cream or additional Oreos. You can also drizzle chocolate sauce on top for extra flair. Enjoy every bite! You can create a delicious No-Bake Oreo Cheesecake with simple steps. We covered the main ingredients and tools needed. Remember to chill the cheesecake to get the best flavor and texture. Use the tips to make a smooth filling and perfect whipped cream. You can customize the recipe to fit your taste. Enjoy this easy treat, whether as a fun dessert or a special occasion cake. Store it well to keep it fresh. This cheesecake is sure to impress everyone!

No-Bake Oreo Cheesecake Delightful and Easy Recipe

Looking for a dessert that’s both easy and delicious? This No-Bake Oreo Cheesecake is the answer! With just a handful

- 6 large eggs - 3 tablespoons mayonnaise - 1 teaspoon Dijon mustard - 1 teaspoon apple cider vinegar - Salt and pepper to taste - 1/4 teaspoon smoked paprika (plus extra for garnish) - Fresh chives or parsley for garnish Use the freshest eggs you can find. Fresh eggs make peeling easier. The mayonnaise adds creaminess. Choose a brand you love for the best taste. Dijon mustard brings a slight tang. If you like spice, add a bit more. Apple cider vinegar brightens the flavor. Adjust salt and pepper to your liking. Smoked paprika adds depth. You can use regular paprika if needed. Fresh herbs like chives or parsley add color and taste. If you have an egg allergy, try using chickpea flour. For a vegan option, use vegan mayonnaise. You can replace the Dijon mustard with yellow mustard. If you dislike vinegar, lemon juice works too. For a nut-free option, ensure your mayonnaise is nut-free. Always check labels if you have allergies. To start, you need to cook the eggs. Place six large eggs in a saucepan. Cover them with water, about an inch above the eggs. Bring the water to a boil over medium heat. Once it boils, cover the pan and take it off the heat. Let the eggs sit for twelve minutes. This helps them cook through without getting green yolks. After twelve minutes, transfer the eggs to an ice bath. This cools them quickly and makes peeling easier. Once the eggs are cool, it’s time to prepare the filling. Carefully peel each egg under running water. This helps remove the shell smoothly. Pat them dry with a paper towel. Next, slice each egg in half lengthwise. Gently scoop out the yolks into a mixing bowl. Add three tablespoons of mayonnaise, one teaspoon of Dijon mustard, one teaspoon of apple cider vinegar, salt, pepper, and 1/4 teaspoon of smoked paprika. Mash these ingredients together until smooth and creamy. This mixture is the heart of your deviled eggs. Now, let’s assemble your deviled eggs. Spoon or pipe the yolk mixture back into the egg white halves. Take your time to make them look nice. Once filled, sprinkle each egg with more smoked paprika. For a fresh touch, you can add snipped chives or parsley on top. This simple step makes your dish look even more appealing. For full details on this recipe, check out the Full Recipe. Enjoy your tasty deviled eggs! To make the best deviled eggs, start with the boil. First, place your eggs in a saucepan. Cover them with cold water, about an inch above the eggs. Then, bring the water to a boil over medium heat. Watch closely, as water can boil fast. When the water boils, cover the pan and turn off the heat. Let the eggs sit for 12 minutes. This method helps cook them evenly. After boiling, move the eggs into an ice bath. This step cools them quickly and makes peeling easier. When they are cool, peel the eggs under running water. This helps remove the shells without breaking the whites. Now, for creamy yolks, mash them with mayonnaise, mustard, and vinegar. Use a fork for a smooth texture. The more you mash, the creamier the filling will be. Presentation is key for deviled eggs. After filling the whites, sprinkle with smoked paprika. This adds color and taste. For a fresh touch, garnish with chopped chives or parsley. You can also add sliced olives or cherry tomatoes on top for creative flair. These simple ideas make your deviled eggs look gourmet and inviting. {{image_2}} Want to add some heat? Use sriracha or hot sauce. Mix a teaspoon into the yolk mixture. You can also sprinkle some cayenne pepper on top. This adds a nice kick. Adjust the spice to your liking. Swap mayonnaise for ripe avocado. Mash it until smooth with the yolks. Add lime juice and cilantro for freshness. This twist gives a creamy texture and a unique flavor. It's a great option for a healthy snack. For a savory twist, mix in crumbled bacon and shredded cheddar cheese. Add this right into the yolk filling. The bacon gives crunch and flavor. The cheese adds creaminess. You can even top with extra bacon bits for fun. These variations make deviled eggs fun and exciting. You can explore different flavors and find what you love. If you want to stick to the classic taste, check out the Full Recipe. To store leftover deviled eggs, place them in an airtight container. This helps keep them fresh. Make sure to cover them well to avoid drying out. You can also use plastic wrap to cover the eggs. Leftover eggs stay good in the fridge for up to 2 days. Always store deviled eggs in the fridge. The cold keeps them safe to eat. If possible, store them unfilled. This keeps the egg whites fresh longer. You can fill the egg whites just before serving. For the best taste, eat them within one day of making them. I do not recommend freezing deviled eggs. Freezing changes the texture. The egg whites can become rubbery and watery. If you must freeze, try freezing just the filling. Use an airtight container and label it. When ready to use, thaw in the fridge overnight. Then, fill fresh egg whites before serving. For the full recipe, check the Epic Classic Deviled Eggs. Yes, you can make deviled eggs a day ahead. Just prepare them and store them in the fridge. Use an airtight container to keep them fresh. This helps the flavors blend well. The deviled eggs taste great the next day. Just remember to add the garnish right before serving to keep them looking nice. I recommend using a creamy mayonnaise for the best taste. Regular mayonnaise works well, but you can also try flavored ones. Some people enjoy using organic or homemade mayo. These options can add a unique flavor. Just make sure it blends well with your other ingredients. If your filling tastes too salty or strong, don’t worry! You can fix it easily. Add more mashed yolk to balance the flavors. If you have extra eggs, use them. You can also add more mayonnaise to soften the taste. Mix well and taste again. Adjust until it's just right. You learned how to make deviled eggs step by step. We covered must-have ingredients, tips for cooking eggs, and fun variations. Remember, you can swap ingredients based on your needs. Storing leftovers is easy, so no need to waste food. Make these simple changes to enjoy your deviled eggs. Now, you can impress friends and family with your tasty treats. Enjoy your cooking and share the love of deviled eggs!

Classic Deviled Eggs Flavorful and Simple Recipe

Are you ready to elevate your appetizer game? Classic deviled eggs are tasty, easy, and perfect for any gathering! In

To make a great Buffalo Chicken Dip, you need some key items. Here’s a list of what you’ll need: - 2 cups shredded cooked chicken - 8 oz cream cheese, softened - 1 cup Buffalo sauce (adjust to taste) - 1 cup shredded cheddar cheese - 1/2 cup ranch dressing - 1/4 cup sliced green onions (plus extra for garnish) - Tortilla chips or celery sticks for serving For the chicken, I suggest using rotisserie chicken. It saves time and adds flavor. For the cream cheese, any brand will work, but I often go for Philadelphia. It blends well and gives a nice creamy texture. For the Buffalo sauce, Frank’s RedHot is a favorite among many cooks. It provides that perfect kick without being too overwhelming. Want to kick it up a notch? Here are some optional ingredients to enhance the flavor: - 1/2 cup crumbled blue cheese for a tangy twist - 1/2 teaspoon garlic powder for extra depth - 1/2 teaspoon onion powder for more flavor If you don’t have blue cheese, feel free to skip it or replace it with more cheddar cheese. You can also swap ranch dressing for blue cheese dressing for a different taste. Using Greek yogurt in place of ranch can lighten the dip while keeping it creamy. Get creative and make it your own! For the full recipe, check out the detailed instructions I provided earlier. First, gather your ingredients for Buffalo Chicken Dip. You need shredded chicken, cream cheese, Buffalo sauce, cheddar cheese, ranch dressing, and green onions. Start by preheating your oven to 350°F (175°C). This step is key for even cooking. In a large mixing bowl, combine the softened cream cheese and Buffalo sauce. Mix these two until they are smooth. You want a creamy base for your dip. Next, add the shredded chicken, ranch dressing, cheddar cheese, and green onions. Stir well until everything blends nicely. To achieve the best consistency, make sure the cream cheese is softened. If it’s too cold, it will be hard to mix. If you want a bit more creaminess, you can add a little extra ranch dressing. Once mixed, transfer the dip to a baking dish. Spread it evenly across the dish. This helps it cook evenly and bubble nicely. Now, place the baking dish in your preheated oven. Bake for about 20-25 minutes. You want to watch for doneness closely. The dip is ready when it is heated through and the cheese starts to bubble. Overbaking can make the dip dry, so keep an eye on it. When you notice the top is golden and bubbly, it’s time to take it out. Let it cool slightly before serving. This dip is best enjoyed warm, paired with tortilla chips or crunchy celery sticks. For the complete recipe, you can refer to the Full Recipe section. Enjoy making this easy and tasty party snack! To make the best Buffalo Chicken Dip, follow these tips: - Use cooked chicken. Shredded rotisserie chicken works great. - Soften the cream cheese before mixing. This helps it blend well. - Adjust the Buffalo sauce to your taste. More sauce means more heat! - Mix well to ensure all flavors combine. Common mistakes to avoid: - Don’t overbake it. Watch for bubbly cheese to know it’s done. - Avoid using too much ranch. It can mute the Buffalo flavor. - Make sure to chop green onions finely. This adds a nice crunch. Buffalo Chicken Dip shines with the right sides. Try these ideas: - Serve with crunchy tortilla chips for a classic combo. - Offer celery sticks for a fresh, crisp option. - Pair with carrot sticks for a bit of sweetness. To present the dish well: - Use a colorful serving dish to attract attention. - Garnish with extra green onions on top for a pop of color. - Serve warm for the best taste and texture. For the full recipe, check out the details above. {{image_2}} Want to add a kick? Toss in some sliced jalapeños. They boost the heat and flavor. You can also pour in extra Buffalo sauce. This gives your dip a spicy edge. If you like variety, try different sauces. Brands like sriracha or even hot sauce can work great. Each sauce brings its unique taste, keeping your guests excited. Looking for lighter choices? Swap out some ingredients for low-calorie ones. Use Greek yogurt instead of cream cheese. It tastes great and adds protein. You can also choose low-fat cheese. For a vegetarian or vegan twist, replace the chicken with shredded jackfruit. This keeps the texture while making it plant-based. Use vegan cream cheese and ranch dressing to keep it all dairy-free. These options let everyone enjoy the dip. To keep your Buffalo Chicken Dip fresh, store it in an airtight container. Make sure to cool it to room temperature first. This will help preserve its taste and texture. Buffalo Chicken Dip can last in the fridge for about 3 to 5 days. Always check for any off smells or mold before eating. If you see any, it's best to throw it out. When it's time to enjoy your leftovers, you have a few options to reheat. The oven method is great. Preheat it to 350°F (175°C) and bake the dip in a safe dish for about 15 minutes. This keeps the dip creamy and warm. You can also use the microwave. Heat it in short bursts of 30 seconds, stirring in between. This helps maintain the dip's texture. If it's too thick after reheating, add a splash of ranch dressing or some more Buffalo sauce to bring it back to life. Buffalo Chicken Dip lasts about 3 to 4 days in the fridge. Keep it in an airtight container. Signs of spoilage include a change in color or smell. If it looks or smells off, it’s best to toss it. Always check before you dig in. Yes, you can make Buffalo Chicken Dip ahead of time. Mix all the ingredients and store it in the fridge. Just cover it well. You can even bake it later. If you want to save time, prep the dip up to two days ahead of your party. You can serve Buffalo Chicken Dip with tortilla chips or celery sticks. These are classic choices. For a twist, try using crackers or cucumber slices. They add a nice crunch. You can also make it a meal by serving it with small bread bowls. This dip is very versatile, so get creative! Buffalo Chicken Dip is a tasty dish you can make with simple steps. We covered the best ingredients, baking methods, and tips for great flavor. Don't shy away from trying new ways to spice it up or make it healthier. Remember to store leftovers properly for future snacking. Each option we discussed helps you serve a great dip that impresses everyone. Enjoy making and sharing this fun dish at your next gathering!

Buffalo Chicken Dip Savory and Easy Party Snack

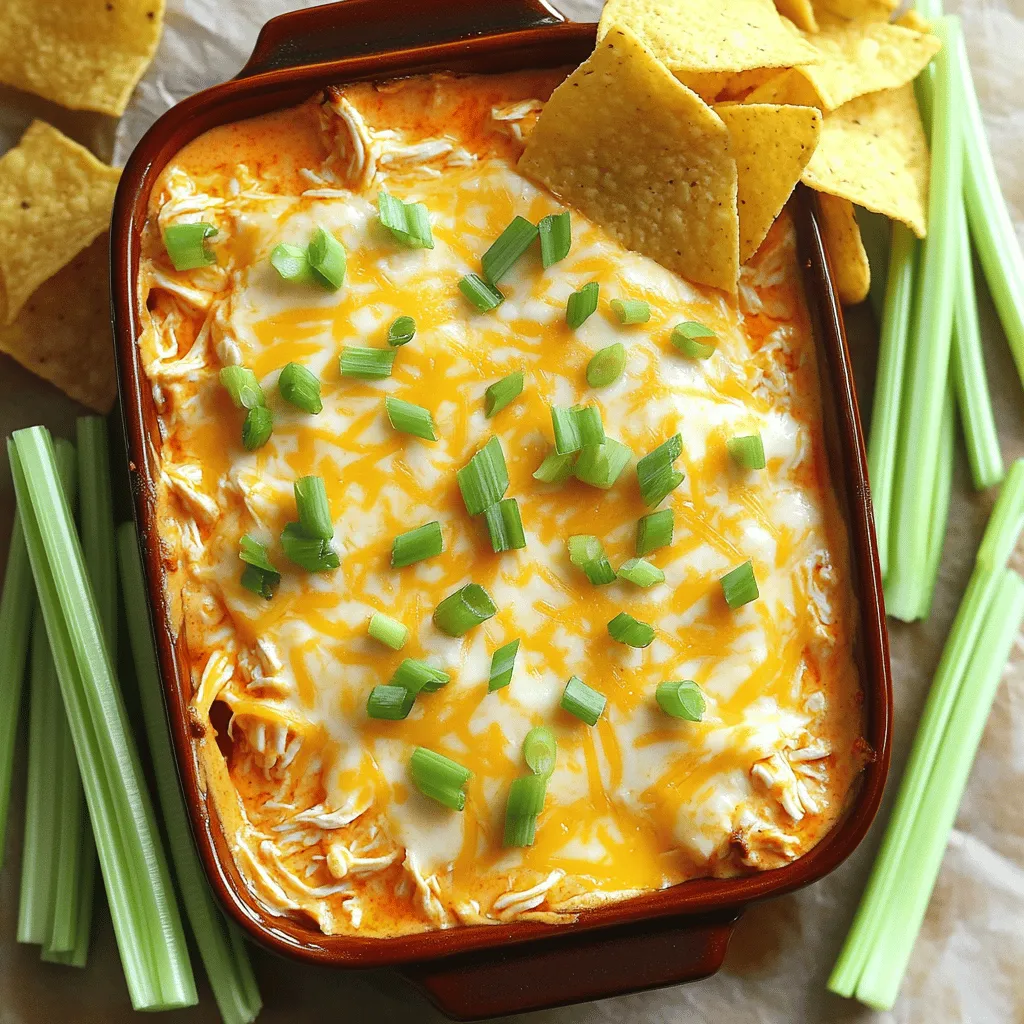
Looking for the perfect party snack that everyone will love? Buffalo Chicken Dip is your answer! This spicy and creamy

- 14 oz firm tofu, pressed and cubed - 2 tablespoons cornstarch - 2 tablespoons vegetable oil - 1 bell pepper (any color), sliced - 1 cup snap peas, trimmed - 1 carrot, julienned - 3 green onions, chopped - 2 cloves garlic, minced - 1 tablespoon ginger, minced - 1/4 cup sweet chili sauce - 1 tablespoon soy sauce - 1 tablespoon sesame oil - Sesame seeds for garnish - Fresh cilantro for garnish (optional) This Sweet Chili Tofu Stir Fry is a fun dish to make. You get a great mix of colors and flavors in every bite. The firm tofu makes it filling, while the veggies add crunch and color. Pressing the tofu helps it soak up the sweet chili sauce. You can find the full recipe if you want to see how it all comes together. The sweetness from the chili sauce pairs nicely with the fresh veggies. Don't forget the garlic and ginger; they add depth to the dish. Using sesame oil at the end gives it a rich taste. You can customize this dish with your favorite veggies, but these ingredients work perfectly together. - Press the tofu for at least 30 minutes. This helps remove excess water. - Cut the tofu into 1-inch cubes. Uniform sizes help it cook evenly. - Coat the tofu with cornstarch. This gives it a nice crispy texture when cooked. - Heat vegetable oil in a skillet or wok over medium-high heat. The oil should shimmer when hot. - Pan-fry the tofu until golden brown. This takes about 4-5 minutes. Turn it occasionally for even cooking. - Stir-fry the vegetables until tender-crisp. This should take about 3-4 minutes. You want them colorful and slightly crunchy. - Add garlic and ginger to the skillet. Stir for about a minute until fragrant. This step adds a warm flavor. - Return the tofu to the skillet with sweet chili sauce and soy sauce. Toss everything together to coat. - Drizzle with sesame oil for extra flavor. Mix everything well to combine the tastes. Now you have a tasty Sweet Chili Tofu Stir Fry! For detailed steps, check the Full Recipe. Enjoy the vibrant flavors and textures in this dish! - Use firm tofu for the best texture in this stir fry. - To get a crispy exterior, press the tofu for at least 30 minutes. After pressing, cut it into 1-inch cubes and coat them in cornstarch. This coating helps create a crunchy bite. - Cook the tofu at medium-high heat. This temperature allows it to brown evenly without burning. - For added flavor, consider using bell peppers in different colors. You can also add mushrooms or broccoli for variety. - Adjust the seasoning to fit your taste. If you like more spice, add red pepper flakes or sriracha. If you prefer sweetness, increase the amount of sweet chili sauce. - Balance the sweetness and spice by adding a splash of lime juice. This adds freshness and cuts through the sweetness nicely. Follow these tips to make your Sweet Chili Tofu Stir Fry even more delicious. Check out the Full Recipe for detailed steps and measurements! {{image_2}} You can switch tofu with tempeh for a nutty flavor. Tempeh has a firmer texture and absorbs sauces well. If you want a meat option, use chicken or shrimp. Cut the chicken into small pieces. Cook it until it's golden and cooked through. Shrimp cooks quickly, usually in just a few minutes. You might also try plant-based chicken alternatives. These mimic the texture and taste of meat. They work great in stir fries and are often easier to find. Feel free to mix in other veggies. Broccoli, zucchini, and bell peppers add great color and taste. Try seasonal variations to keep it fresh. In summer, add corn or cherry tomatoes. In the fall, use squash or Brussels sprouts. Adding more greens boosts nutrition and flavor. Spinach, bok choy, or kale can mix in easily. Toss them in at the end to keep them vibrant and crunchy. For the full recipe, check out the Sweet Chili Tofu Stir Fry . To keep your Sweet Chili Tofu Stir Fry fresh, store it in the fridge. Use an airtight container. This helps keep moisture in and air out. Make sure it cools before sealing. Leftovers will taste best within three days. Yes, you can freeze Sweet Chili Tofu Stir Fry. Place it in a freezer-safe container. Be sure to leave some space for expansion. It will last for about three months in the freezer. When you’re ready to eat, thaw it in the fridge overnight. Reheat in a skillet over low heat. Add a splash of water to help it steam. Stir until heated through. You’ll enjoy a tasty meal even after freezing! What is the best way to press tofu? To press tofu, wrap it in a clean kitchen towel. Place a heavy object on top, like a cast iron skillet. Leave it for at least 30 minutes. This helps remove excess moisture and makes it firmer. Can I make Sweet Chili Tofu Stir Fry ahead of time? You can prepare the tofu and veggies in advance. Store them in the fridge for up to two days. Wait to cook until you're ready to eat. This keeps everything fresh and tasty. How can I make it spicy? Add sliced chili peppers or a dash of red pepper flakes. You can also use a spicier sweet chili sauce. Adjust the heat to your liking for a kick. Is this recipe gluten-free? Yes, this recipe is gluten-free if you use tamari instead of soy sauce. Always check labels to ensure no gluten ingredients are present. Suggestions for a low-carb version Swap out the carrots for zucchini noodles. You can also use more low-carb veggies like bell peppers and broccoli. These changes keep the dish light and fresh. Vegan-friendly ingredients to consider All the ingredients in this recipe are vegan. Use firm tofu, fresh veggies, and plant-based sauces. This dish is perfect for vegan diets. Can I bake the tofu instead of frying? Yes, you can bake the tofu for a healthier option. Toss the cubes in cornstarch and oil, then bake at 400°F (200°C) for 25 minutes. Flip halfway through for even crispiness. How to achieve a one-pan version of this recipe Start by cooking the tofu first, then add veggies to the same pan. This keeps flavors rich and saves on clean-up. Ensure to stir often for even cooking. Tips for perfecting the stir-frying technique Use high heat and a good wok or skillet. Cut veggies into similar sizes for even cooking. Keep stirring to avoid burning and to mix flavors well. In summary, we've explored the tasty world of Sweet Chili Tofu Stir Fry. You learned about essential ingredients, step-by-step cooking tips, and ways to elevate your dish. Consider swapping proteins or veggies for fun variations. Remember to store leftovers correctly and enjoy them later. This dish is simple, healthy, and perfect for any meal. You can make it your own while following the guidance here. Try it out and make your cooking experience enjoyable and rewarding!

Sweet Chili Tofu Stir Fry Delicious and Easy Recipe

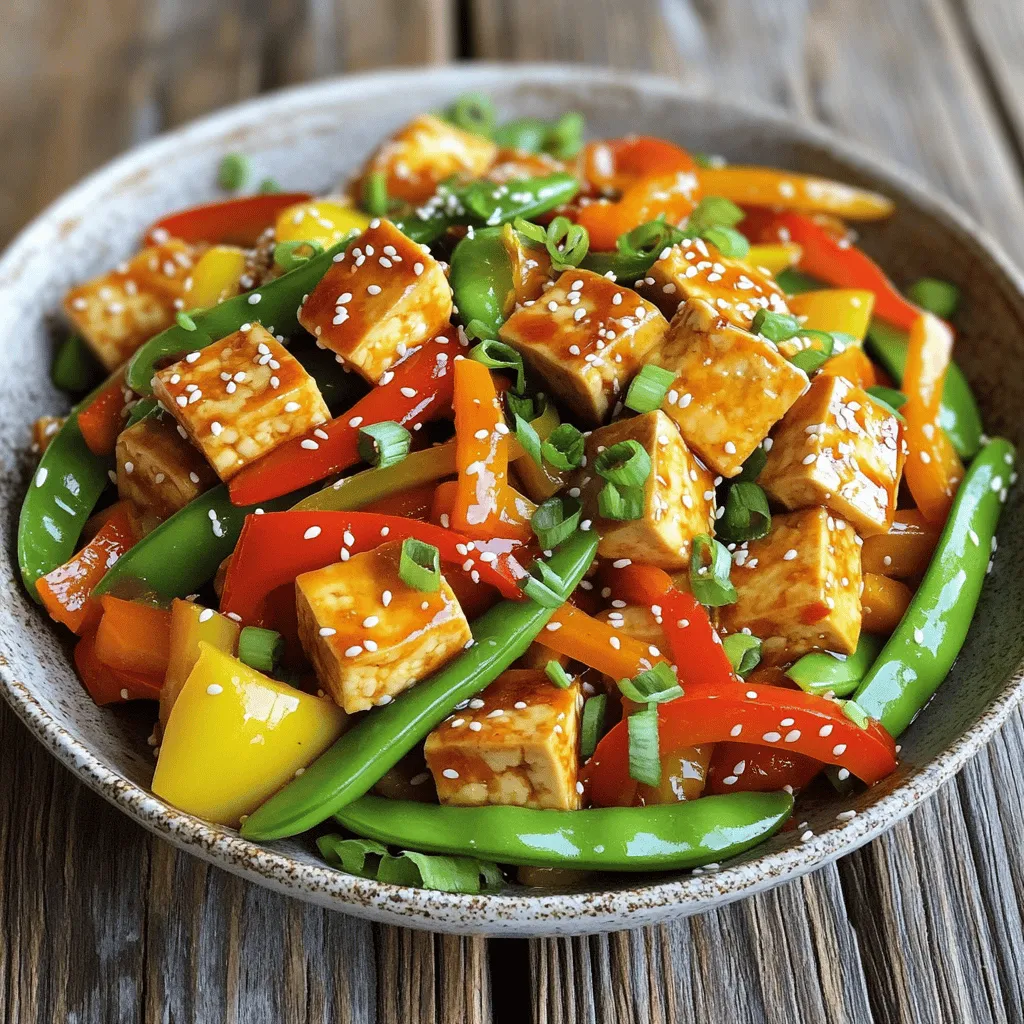
Are you ready to whip up something quick, tasty, and satisfying? Let’s dive into my Sweet Chili Tofu Stir Fry!

- 2 cups cooked chicken, shredded - 1 cup shredded cheese (cheddar or Monterey Jack) - 1 red bell pepper, diced - 1 small onion, finely chopped - 1 teaspoon cumin - 1 teaspoon paprika - 4 large flour tortillas - 2 tablespoons olive oil - Salt and pepper to taste - Fresh cilantro, chopped (for garnish) - Sour cream (for serving) Gathering the right ingredients is crucial for great chicken quesadillas. I love using cooked chicken from my fridge. It saves time and adds flavor. Choose a good cheese, like cheddar or Monterey Jack. Both melt nicely and add creaminess. Red bell peppers add sweetness and color. They pair well with onion, which adds a nice bite. Cumin and paprika bring warmth and depth to the dish. They give your quesadillas a hint of spice. Don’t forget the tortillas! Large flour tortillas hold everything well. The olive oil makes them golden and crispy. Season with salt and pepper to enhance all the flavors. Fresh cilantro is a perfect garnish. It adds a pop of freshness. Sour cream on the side provides a cool contrast. For the full recipe, check the section above! 1. Sautéing onion and bell pepper: Start by heating 1 tablespoon of olive oil in a skillet over medium heat. Add the chopped onion and diced red bell pepper. Sauté these until they soften, which should take about 3 to 4 minutes. The smell will be amazing! 2. Seasoning the mixture: Once the veggies are soft, add 1 teaspoon of cumin, 1 teaspoon of paprika, and a pinch of salt and pepper. Mix everything well. Then, stir in 2 cups of shredded chicken. Cook this for another 2 to 3 minutes until heated through. Your chicken mixture is now ready to go! 1. Layering tortillas and fillings: Heat 1 tablespoon of olive oil in another skillet over medium heat. Take one large flour tortilla and place it in the skillet. Sprinkle half of the 1 cup of shredded cheese evenly over the tortilla. 2. Cooking method for crispy texture: Spread half of the chicken mixture on top of the cheese. Then, add another layer of cheese and place a second tortilla on top. Cook for about 3 to 4 minutes until the bottom is golden and the cheese starts to melt. Carefully flip the quesadilla using a large spatula and cook the other side for another 3 to 4 minutes until it is crispy. 1. Recommended garnishes: Once both sides are golden brown, remove the quesadilla from the skillet. Let it cool for a minute, then slice it into wedges. Garnish with fresh chopped cilantro for a pop of color and flavor. 2. Accompaniments and dips: Serve your quesadillas warm with a side of sour cream. You can also add salsa or guacamole for extra flavor. Enjoy your delicious meal! For the full recipe, check out the details above. To get that perfect crisp, heat control is key. Use medium heat to start. Too high can burn your tortillas. Too low can make them soggy. Keep an eye on the quesadilla as it cooks. When the bottom is golden, it's time to flip. Flipping can be tricky. Use a large spatula to help. Slide it under half of the quesadilla. Quickly lift and flip it over. If you drop it, don’t worry. Just pick it up and try again! To spice things up, try adding cumin and paprika. These spices bring warmth and depth to each bite. You can also mix in chili powder for extra heat. Don't be afraid to experiment with flavors! Think about adding more veggies. Sliced mushrooms, spinach, or zucchini can boost nutrition. You can also add more proteins. Black beans or cooked shrimp work great. Each will make your quesadilla unique and tasty. {{image_2}} You can change up the protein in your chicken quesadillas. Using leftover rotisserie chicken makes life easy. Just shred the meat and mix it with your veggies and spices. It saves time and adds great flavor. If you want to try a vegetarian option, go for beans or mushrooms. Black beans add protein and creaminess. Sautéed mushrooms bring a nice earthy taste. Both options work well with cheese and spices. The cheese can make or break your quesadilla. I love using a blend of cheddar and Monterey Jack. This mix gives a great melt and flavor. You can also try pepper jack for a spicy kick. If you need a dairy-free option, go for dairy-free cheese. Many brands now offer great taste and melt. Look for mozzarella-style cheese for the best results. For the full recipe, check the details above. After making your cheesy chicken quesadillas, you might have some leftovers. Here’s how to keep them fresh: - Refrigeration Tips: Place any leftover quesadillas in an airtight container. They can last in the fridge for up to 3 days. Make sure to let them cool down before sealing the container to avoid moisture buildup. - Best Practices for Freezing: If you want to store them longer, freezing is a great option. Wrap each quesadilla in plastic wrap, then place them in a freezer bag. They can stay frozen for up to 2 months. Label the bag with the date for easy tracking. When it comes time to enjoy your leftovers, reheating properly is key: - Oven vs. Microwave for Best Results: The oven is best for reheating quesadillas to keep them crispy. Preheat your oven to 350°F (175°C). Place the quesadilla on a baking sheet and heat for about 10-15 minutes. The microwave works too, but it can make the quesadilla soggy. If you use the microwave, heat for 1-2 minutes, checking to avoid overheating. - Tips to Maintain Crispiness: To keep your quesadilla crispy, place a piece of parchment paper under it in the oven. This helps absorb moisture. If using the microwave, you can place a paper towel over the quesadilla to help soak up extra steam. Yes, you can make these quesadillas ahead. To prepare in advance, cook the chicken mixture and fill the tortillas. Place them in an airtight container. They stay fresh in the fridge for up to two days. When you are ready to eat, just heat them on the stove or in the oven. If you need a substitute for flour tortillas, there are many great options. Corn tortillas are a classic choice. You can also try whole wheat tortillas for a healthier option. For a gluten-free alternative, look for rice or almond flour tortillas. You can make quesadillas in the oven. Preheat your oven to 400°F (200°C). Place the assembled quesadillas on a baking sheet. Bake for about 10 minutes, flipping halfway through. This method gives you crispy quesadillas without needing a skillet. For the full recipe, check out the details above. You now have a simple guide to making delicious quesadillas. We covered ingredients, step-by-step instructions, tips for the perfect crisp, and various options. Remember to keep experimenting with flavors and fillings. Adjust the recipe to fit your taste. Enjoy your tasty creation and share it with others. Happy cooking!

Easy Chicken Quesadillas Quick and Tasty Meal Idea

Craving a quick and tasty meal? You’re in the right place! In just a few steps, you can whip up

To make Baked Feta Pasta, you need the following ingredients: - 250g pasta (penne or fusilli works great) - 200g feta cheese - 1 cup cherry tomatoes, halved - 1/2 cup Kalamata olives, pitted and sliced - 4 cloves garlic, minced - 1/4 cup olive oil - 1 teaspoon dried oregano - 1 teaspoon red pepper flakes (optional for a kick) - Salt and pepper to taste - Fresh basil leaves for garnish - Zest of 1 lemon If you don’t have feta cheese, goat cheese is a great swap. It adds a tangy taste. You can also try ricotta for a creamier feel. For olives, green olives can work too. If you want a lighter option, use whole wheat pasta. You can skip the red pepper flakes if you prefer no heat. For a dairy-free version, use a plant-based cheese. Each serving of Baked Feta Pasta has about: - Calories: 450 - Protein: 12g - Carbohydrates: 55g - Fat: 20g - Fiber: 3g This dish is rich in flavor and offers a good mix of nutrients. You get carbs from the pasta, protein from the feta, and healthy fats from the olive oil and olives. Enjoy this cozy meal with friends or family. For the full recipe, check out the details above. First, set your oven to 200°C (400°F). This high heat helps roast the tomatoes well. Next, grab a large baking dish. You want enough space for all the veggies and cheese. In the baking dish, mix together the halved cherry tomatoes, sliced Kalamata olives, and minced garlic. This mix brings all the great flavors together. Pour in the olive oil and sprinkle dried oregano. If you like spice, add red pepper flakes. Season with salt and pepper. Use your hands to toss the mixture until everything is well coated. Now, take the block of feta cheese and place it in the middle of the veggie mix. Drizzle a little extra olive oil on top. Finish with the zest of one lemon for a fresh taste. While the feta and tomatoes roast, cook the pasta according to the package instructions. Aim for al dente texture, as it will finish cooking with the sauce later. Once it's done, drain the pasta and set it aside. When the baking timer goes off after about 25-30 minutes, check the dish. The tomatoes should be blistered, and the feta should look soft and golden. Carefully mash the feta and tomatoes with a fork. This creates a creamy sauce that coats the pasta perfectly. Add the cooked pasta right into the baking dish. Toss everything well, ensuring the pasta gets coated in the feta-tomato sauce. Taste and adjust the seasoning with more salt and pepper if needed. Serve the dish hot, garnished with fresh basil leaves. This adds a burst of color and flavor. Enjoy every creamy, savory bite of your baked feta pasta! You can find the full recipe for this dish to impress your guests or simply treat yourself. To get a creamy sauce, use high-quality feta cheese. Soft feta melts better and mixes well. When the feta bakes, it becomes warm and creamy. This texture helps create a rich sauce. Mix the feta with the roasted tomatoes and garlic gently. Make sure to mash them well with a fork. This step blends all the flavors together. The key is to combine the pasta and sauce right after baking. This keeps the dish creamy and delicious. One common mistake is overcooking the pasta. Always cook it al dente, so it stays firm. Another mistake is using too much oil. A little olive oil adds flavor, but too much can make the dish greasy. Avoid skipping the lemon zest; it brightens the flavors. Lastly, don’t forget to taste before serving. Adjust the seasoning with salt and pepper as needed. These small tips help make your dish perfect. For sides, serve a fresh salad with crisp greens. A simple arugula salad with lemon vinaigrette complements the pasta well. Garlic bread also pairs nicely, adding a crunchy texture. For beverages, a chilled white wine like Sauvignon Blanc works great. If you prefer non-alcoholic drinks, try sparkling water with lemon. These pairings enhance your meal, making it even more enjoyable. For the complete cooking process, check the Full Recipe. {{image_2}} You can make Baked Feta Pasta vegetarian by omitting the olives. Use more veggies instead. Zucchini, bell peppers, or spinach add great flavor and color. To make it vegan, swap feta for a plant-based cheese. Tofu or cashew cream can also work well. Both options keep the dish tasty and satisfying. Pasta shapes matter! You can use penne or fusilli as I suggest in the recipe. But feel free to try spaghetti, farfalle, or even gluten-free pasta. Each shape holds sauce differently. You might also add protein like grilled chicken or shrimp. These additions can turn this dish into a full meal. Using seasonal ingredients makes this dish even better. In spring, add asparagus or peas for freshness. Summer brings ripe tomatoes and fresh basil. In fall, roasted butternut squash adds sweetness. During winter, use kale or Brussels sprouts for a hearty touch. Adjust based on what you find at the market for the best taste! To keep your baked feta pasta fresh, store it in an airtight container. Let it cool to room temperature first. Then place it in the fridge. This dish stays tasty for about three days in the fridge. If you want to enjoy it later, you can freeze it. When you’re ready to eat the leftovers, preheat your oven to 180°C (350°F). Place the pasta in an oven-safe dish. Add a splash of olive oil to keep it moist. Cover it with foil to prevent drying. Heat for about 15-20 minutes or until it's warm. You can also reheat it in the microwave, but the oven gives it a better texture. If you want to freeze baked feta pasta, do this before baking. Assemble all the ingredients in the baking dish but do not bake. Cover the dish tightly with plastic wrap, then foil. This will keep it fresh for up to three months. When you’re ready to cook it, thaw it overnight in the fridge. Then bake it as per the full recipe instructions. Enjoy the creamy goodness even later! Penne and fusilli work best for Baked Feta Pasta. Their shapes hold sauce well. You can also try rigatoni for a heartier bite. Any pasta that cooks al dente will work great. I suggest picking a shape that you enjoy. Yes, you can make Baked Feta Pasta ahead. Prepare the dish without baking it first. Cover it tightly and store it in the fridge. When ready, bake it as the recipe states. This makes meal prep easy and tasty. To make Baked Feta Pasta gluten-free, choose gluten-free pasta. Many brands offer great options today. Just ensure it cooks to the right texture. This way, everyone can enjoy the dish without worry. Absolutely! While feta is key, other cheeses can work too. Try goat cheese for a tangy twist. Cream cheese adds creaminess, while mozzarella makes it melty. Each will give a different flavor, so experiment and find your favorite. To boost flavor, add fresh herbs like basil or parsley. A splash of lemon juice brightens the dish too. For some heat, include red pepper flakes. You can also roast garlic for a sweeter taste. Try these ideas to take your dish to the next level! For more details on making this comforting dish, check out the Full Recipe. We covered the key ingredients and steps to make Baked Feta Pasta. You learned how to combine flavors for a creamy sauce and avoid common mistakes. I offered helpful tips for storage and meal prep. This dish is simple and fun, with many variations to explore. Use fresh ingredients or try new pasta shapes to keep it exciting. Enjoy this easy recipe and make it your own each time. Cook, share, and savor every bite!

Baked Feta Pasta Cozy and Creamy Delightful Meal

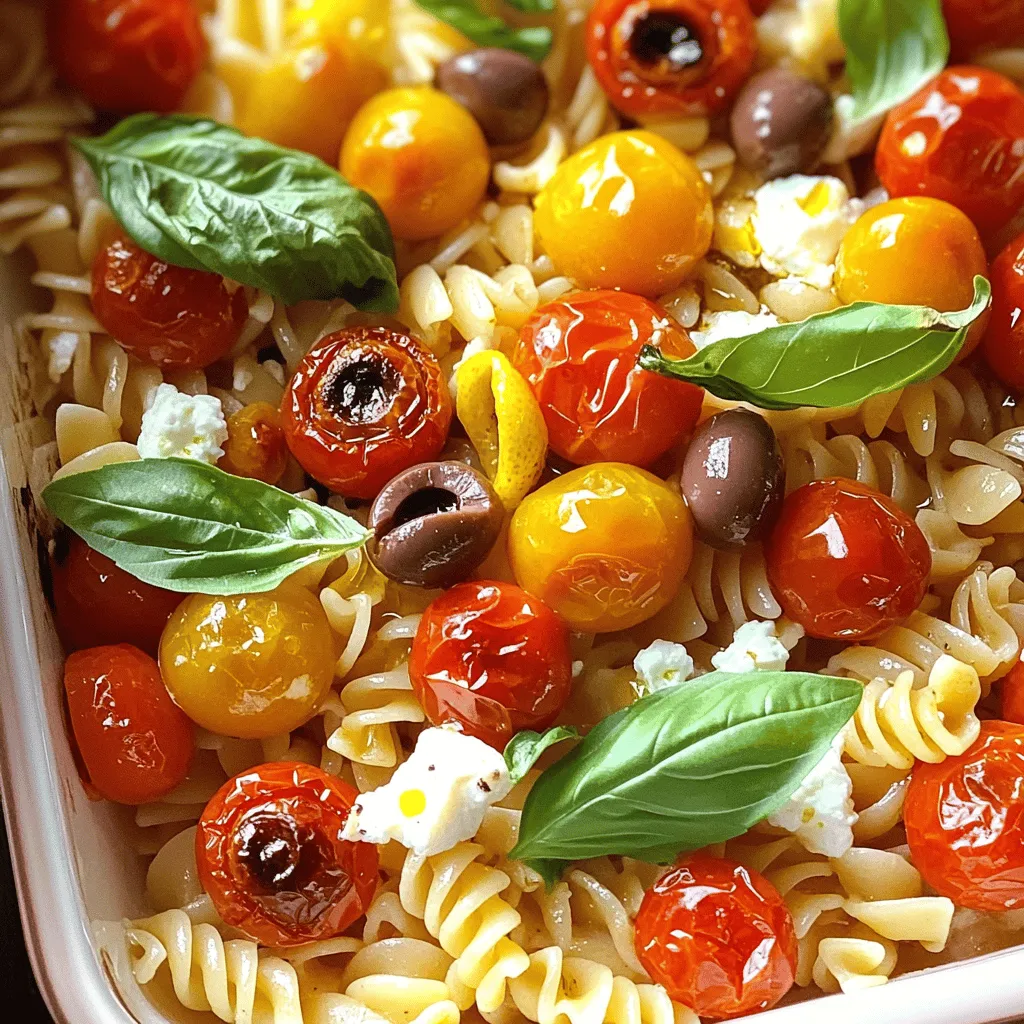
Looking for a cozy meal that warms your heart? Baked Feta Pasta is your answer! This creamy delight combines simple

Older posts
Newer posts
← Previous Page1 … Page80 Page81 Page82 … Page124 Next →

dsad

© 2025 Southern Dishes • Built with GeneratePress

Our Policies

  • Copyright Policy
  • Cookie Policy
  • GDPR Policy
  • Privacy Policy
  • Disclaimer
  • Terms Of Use

More Information

  • Home
  • About
  • Contact
  • Appetizers
  • Dessert
  • Dinner
  • Drinks
©2025, Southern Dishes About Back To Top