![- 2 ripe avocados - 4 slices of whole grain bread - 4 large eggs To make tasty avocado toast, you need ripe avocados. Ripe avocados are soft and ready to mash. Whole grain bread adds fiber and crunch. It’s best to use a good-quality bread. Large eggs will become the star of the dish. They will poach nicely and add protein. - 1 tablespoon white vinegar - 1 teaspoon red pepper flakes - Juice of 1 lemon White vinegar helps the eggs hold their shape while poaching. It makes a big difference! Red pepper flakes add heat and flavor. You can adjust the amount based on your taste. Fresh lemon juice brightens the avocado mix. It adds a zesty kick you will love. - Feta cheese - Microgreens - Fresh herbs Optional toppings can elevate your avocado toast. Feta cheese adds a creamy and salty touch. Microgreens bring a fresh crunch and color. Fresh herbs, like cilantro or parsley, will add extra flavor. You can mix and match to find your favorite combination. For the full recipe, check out the [Full Recipe]. To start, take four slices of whole grain bread. Place the slices in a toaster or on a baking sheet. Toast until the bread is golden and crisp, which usually takes about 3 to 5 minutes. Keep an eye on it. You want it just right—not too dark. Next, grab two ripe avocados. Cut them in half and scoop out the flesh into a bowl. Use a fork to mash the avocado until it’s creamy but still a bit chunky. This adds texture. Squeeze in the juice of one lemon. Add salt and pepper to taste. For a kick, mix in one teaspoon of red pepper flakes. This will make your avocado mix flavorful. Now, let’s poach the eggs. Fill a medium saucepan with water and add one tablespoon of white vinegar. Bring the water to a gentle simmer over medium heat. Crack each egg into a small bowl. Stir the water to create a gentle whirlpool. Carefully slide each egg into the water one at a time. Poach for about 3 to 4 minutes. The whites should be set, but the yolk should remain runny. Once done, use a slotted spoon to lift the eggs out. Place them on a plate lined with paper towels. This helps soak up the extra water and keeps them from getting soggy. Now, spread the creamy avocado mixture generously on each slice of toasted bread. Top each avocado toast with a poached egg. For extra flavor, sprinkle some red pepper flakes on top. You can also garnish with fresh cilantro or parsley. If you like, crumble some feta cheese or add microgreens for a tasty touch. Enjoy your delicious creation! For a complete guide, check out the Full Recipe. To make great avocado toast, you need ripe avocados. Here are some signs to look for: - They should feel slightly soft when you squeeze them gently. - The skin color can vary from green to dark purple, depending on the type. - Check the stem; if it comes off easily and is green underneath, the avocado is ripe. When it comes to storage, keep unripe avocados at room temperature. Once ripe, store them in the fridge to slow down the ripening process. Use them within a few days for the best taste. Poaching an egg can be tricky. Here are some common mistakes to avoid: - Don't let the water boil too hard. It should be a gentle simmer. - Avoid adding too many eggs at once; it can crowd the pot. For perfect poached eggs, follow these steps: 1. Add a tablespoon of white vinegar to the simmering water. This helps the egg whites stay together. 2. Crack the egg into a small bowl first. This makes it easier to slide into the water. 3. Create a gentle whirlpool in the water before adding the egg. This helps shape the egg as it cooks. Cook for about 3-4 minutes. The whites should be firm, but the yolk should still be runny. Make your avocado toast look beautiful. Here’s how: - Spread mashed avocado evenly on the toast, leaving some edges visible. - Carefully place the poached egg on top, making sure it’s centered. - Sprinkle red pepper flakes and fresh herbs for color and flavor. For a brunch spread, pair your toast with: - Fresh fruit like berries or melon. - A light salad with mixed greens and a simple vinaigrette. For the full recipe, check out the [Full Recipe]. Enjoy your meal! {{image_2}} You can choose different types of bread for your avocado toast. Sourdough is chewy and has a tangy taste. Whole grain bread adds a nutty flavor and more fiber. Both options work well with avocado. If you need gluten-free bread, many brands offer tasty choices. Look for gluten-free whole grain or sourdough options. They can still give you that perfect crunch. Adding spices or herbs can make your avocado mix exciting. Try mixing in garlic powder, cumin, or paprika for a kick. Fresh herbs like basil or dill also add freshness. Cheese can take your toast to the next level. Feta cheese adds a salty flavor. You can also try goat cheese or ricotta for creaminess. Each cheese brings its own unique taste. Seasonal ingredients can brighten up your avocado toast. In spring, add fresh radishes or peas for crunch. In summer, try diced tomatoes or peaches for sweetness. For a cozy winter twist, sprinkle roasted squash or sautéed kale on top. During the fall, add apple slices or pomegranate seeds for a festive flair. This approach makes your avocado toast not just a meal, but a celebration of flavors. You can find the Full Recipe to experiment with all these variations. To keep your leftover avocado fresh, prevent browning. First, squeeze lemon juice on it. The acid slows down the browning process. Next, store it in an airtight container. You can also cover it tightly with plastic wrap. Press the wrap directly onto the flesh. This keeps air out and helps maintain freshness. It is best to eat assembled toast right away. The bread can get soggy if stored. If you must store it, keep the avocado and toast separate. Wrap each slice of bread in foil or plastic. For the avocado, use the lemon juice method mentioned earlier. When you are ready to eat, assemble the toast for the best taste. To reheat toast, use a toaster or an oven. Avoid microwaving, as it makes the bread chewy. For the oven, preheat it to 350°F (175°C). Place the toast on a baking sheet. Heat for about 5-7 minutes until warm. This keeps the texture nice and crisp. If you have leftover poached eggs, reheat them gently in warm water. This method helps maintain their delicate texture. Enjoy your flavorful avocado toast with poached egg! For the full recipe, check out the earlier section. To poach an egg well, start with fresh eggs. Use a pot with water. Add a splash of white vinegar to help the egg hold its shape. Heat the water until it simmers, not boils. Create a whirlpool with a spoon. Crack the egg into a small bowl, then gently slide it into the water. Poach the egg for about 3-4 minutes. The white should be firm, and the yolk should be soft. Using a slotted spoon, take it out and let it drain on a paper towel. You can make your avocado toast healthier by using whole grain bread. Whole grain has more fiber and nutrients. Add extra veggies like spinach or tomatoes for vitamins. You can also skip the feta cheese or use a smaller amount. Try using less oil or butter when toasting your bread. Squeeze more lemon juice into your avocado for flavor without many calories. Yes, you can prepare parts of your avocado toast ahead of time. You can mash the avocado a few hours before, but it may turn brown. To stop this, add extra lemon juice. You can also toast the bread in advance and store it in an airtight container. Just put it in the toaster again to warm it up. Poach the eggs right before serving for the best taste and texture. Many toppings can enhance your avocado toast. Some popular options include: - Feta cheese - Microgreens - Sliced radishes - Cherry tomatoes - Smoked salmon - Sriracha sauce - Fresh herbs like cilantro or parsley These add flavor and make your dish look amazing! For the full recipe, check out the details above. Avocado toast is simple and amazing. You need ripe avocados, whole grain bread, and eggs. Adding lemon juice and red pepper flakes brings flavor to life. Don't forget to try toppings like feta cheese or microgreens. Remember to choose ripe avocados for the best taste. Poaching eggs can be tricky, but with practice, you'll master it. You can make many variations too! Store leftovers wisely to enjoy later. Get creative and enjoy every bite of your avocado toast!](https://southerndishes.com/wp-content/uploads/2025/06/f6103c06-328c-4f20-9757-2b75894c094f.webp)
Flavorful Avocado Toast with Poached Egg Recipe
Are you ready to elevate your breakfast game? This flavorful avocado toast with poached egg recipe is quick, simple, and
Are you ready to elevate your breakfast game? This flavorful avocado toast with poached egg recipe is quick, simple, and
![- 24 Oreo cookies, crushed - 1/4 cup unsalted butter, melted - 16 oz cream cheese, softened - 1 cup powdered sugar - 2 teaspoons vanilla extract - 1 cup whipped cream (store-bought or homemade) - 8 Oreo cookies, roughly chopped (for topping) Gathering these ingredients is the first step to your no-bake Oreo cheesecake bars. Each ingredient plays a key role in making this dessert creamy and delicious. The crushed Oreos form the base, giving a rich, chocolatey flavor. The melted butter helps bind the crust together. Cream cheese adds that creamy texture, while powdered sugar sweetens the filling. Vanilla extract enhances the flavor, and whipped cream adds lightness. Finally, the chopped Oreos on top give a nice crunch and extra taste. Make sure to use high-quality cream cheese for the best results. If you want a fluffier texture in your bars, whip the cream cheese until smooth before mixing in the sugar and vanilla. You can find the full recipe in the main section. Enjoy gathering your ingredients! To start, take 24 crushed Oreo cookies and mix them with 1/4 cup of melted butter. Stir until the crumbs soak up the butter. This mixture will hold together nicely. Next, press the cookie mix into the bottom of a 9x9 inch baking dish. Make sure it is even and compact. Chill it in the fridge for about 10 minutes. This helps the crust set well. Now, let’s make the cheesecake filling. In a large bowl, beat 16 ounces of softened cream cheese until it becomes smooth and creamy. Then, slowly add 1 cup of powdered sugar and 2 teaspoons of vanilla extract. Keep mixing until everything is well blended. The mixture should be thick and sweet. After that, gently fold in 1 cup of whipped cream. Be careful not to mix too hard; you want it to stay light and fluffy. Once the filling is ready, pour it over the chilled crust. Use a spatula to smooth out the top. Next, take 8 roughly chopped Oreo cookies and sprinkle them over the cheesecake layer. This adds a nice crunch. After that, cover the dish with plastic wrap and pop it in the fridge. Let it chill for at least 4 hours. This step is key for the cheesecake to set properly. When it’s ready, cut into bars and serve. Enjoy your delicious creation! For a full recipe with prep and cook times, check the [Full Recipe]. To make the best cheesecake bars, focus on beating the cream cheese well. Start with softened cream cheese to avoid lumps. Use an electric mixer for smoothness. Mix until it looks creamy and fluffy. This step is key for a rich filling. For the whipped cream, you want it light and airy. If you use store-bought, make sure it’s chilled. If you make it at home, whip until stiff peaks form. Gently fold the whipped cream into the cream cheese mixture. This keeps the filling light and gives it a nice texture. Cutting the bars can be tricky. Use a sharp knife dipped in hot water for clean cuts. Wipe the knife after each cut to keep edges neat. This way, your bars look great on a plate. For presentation, serve them on a white platter. This contrast highlights the dark Oreo crust. Drizzle chocolate sauce on top for a touch of flair. A sprig of mint adds color and freshness. These small details impress your guests. One common mistake is overmixing the filling. This can make it dense and heavy. Mix just enough to combine ingredients. Another mistake is not chilling the bars long enough. They need at least four hours in the fridge to set. If you cut them too soon, they won’t hold their shape. Be patient for the best results. For the full recipe, check out the No-Bake Oreo Cheesecake Bars. {{image_2}} You can change the flavor of your no-bake Oreo cheesecake bars easily. Here are some fun ideas: - Chocolate Oreo cheesecake variation: Use chocolate Oreo cookies for the crust. This adds a rich, deep chocolate taste to every bite. You can even mix chocolate chips into the filling for a double chocolate treat. - Adding fruit flavors like raspberry or lemon: For a fruity twist, add raspberry or lemon puree into the filling. Replace part of the cream cheese with the puree. This gives a fresh taste and bright color to your bars. If you need to make these bars fit a specific diet, here are some tips: - How to make it gluten-free: Use gluten-free Oreo cookies for the crust. Most brands offer gluten-free options that taste great. This way, you keep the yummy Oreo flavor without the gluten. - Vegan alternatives for cream cheese and whipped cream: To make a vegan version, use cashew cream or coconut cream in place of cream cheese. For whipped cream, try coconut whipped cream. This keeps the bars creamy and delicious, even without dairy. Explore these variations to make your no-bake Oreo cheesecake bars unique and fit your tastes or dietary needs. Check out the Full Recipe for more details on making these bars! To keep your no-bake Oreo cheesecake bars fresh, use an airtight container. Glass or plastic containers work well. Line the container with parchment paper for easy removal. Place the bars in a single layer if possible. This helps prevent them from sticking together. Store your cheesecake bars in the fridge. They need a cool environment to stay firm. Avoid leaving them at room temperature for long. This will keep them safe and tasty. You can store the bars in the fridge for up to five days. They will taste best within the first three days. After that, the texture may change. Look for signs that the bars may no longer be good. Check for a change in smell or color. If they feel slimy or hard, it’s time to toss them. Always trust your senses; they know best! You can use Greek yogurt or silken tofu instead of cream cheese. Both options give you a creamy texture. If you choose yogurt, use plain for the best taste. For tofu, blend it until smooth to avoid lumps. You can also add a bit of lemon juice for tanginess. This keeps the bars light and tasty. Yes, you can freeze these bars! First, cut them into slices. Wrap each slice in plastic wrap. Then, place them in an airtight container. They can last up to three months in the freezer. To thaw, move them to the fridge overnight. This keeps them fresh and ready to enjoy anytime. You can use any chocolate cookie for the crust. Try chocolate graham crackers or even peanut butter cookies. For a different flavor, use vanilla wafers. If you want a gluten-free option, use gluten-free chocolate cookies. Each choice adds a fun twist to your cheesecake bars. No-Bake Oreo Cheesecake Bars are easy, tasty, and fun to make. You learned how to prepare the crust and the filling. I shared tips for great texture and serving ideas. Remember to chill them well to avoid common mistakes. You can even mix up flavors or try dietary changes. These bars are simple to store and have a long shelf life. Enjoy making and sharing these delicious treats. They are sure to impress at any gathering!](https://southerndishes.com/wp-content/uploads/2025/06/416930f3-9832-4ed8-a9ce-85e6e38a8c4d.webp)
If you love desserts that are simple and delicious, you need to try my No-Bake Oreo Cheesecake Bars. With just
![- 12 cherry tomatoes - 12 fresh basil leaves - 12 small mozzarella balls (bocconcini) - 3 tablespoons balsamic glaze - 1 tablespoon extra-virgin olive oil - Salt and pepper to taste - Skewers or toothpicks You can change the cheese if you want. Use feta or goat cheese for a twist. If you can't find basil, try arugula. It gives a nice peppery taste. For tomatoes, feel free to use heirloom or grape tomatoes. They add different flavors and colors. Picking ripe tomatoes is key. Look for shiny, firm tomatoes with no blemishes. Quality mozzarella makes a big difference too. Choose fresh mozzarella for the best taste. When it comes to basil, look for vibrant green leaves. Avoid wilted or brown ones for the best flavor. - Rinse and dry cherry tomatoes and basil. - Assemble ingredients on skewers. Start by rinsing the cherry tomatoes under cold water. Clean them well and pat them dry with a clean towel. Next, do the same for the fresh basil leaves. This step ensures that your ingredients are clean and ready to go. Once everything is dry, grab your skewers or toothpicks. You are now ready to assemble the skewers. This is where the fun begins! - Threading order: tomato, basil, mozzarella. - Number of ingredients per skewer. Begin threading each skewer with one cherry tomato. After that, slide on a fresh basil leaf. Next, add a small mozzarella ball. Repeat this process until you have three of each ingredient on each skewer. This order keeps the flavors balanced and the colors bright. Make sure to space the ingredients evenly. This helps with both presentation and flavor. You can make as many skewers as you want, depending on how many you need! - Arranging skewers on a platter. - Drizzling oil and balsamic glaze. Now, it’s time to arrange the skewers on a serving platter. Make them look nice and neat. Once they are all set, drizzle olive oil over the skewers. Season them with a sprinkle of salt and pepper. Finally, add a drizzle of balsamic glaze for extra flavor. This step not only enhances taste but also makes your dish look beautiful. For a final flourish, consider garnishing with fresh basil leaves or microgreens around the platter. For the full recipe, check out the Easy Caprese Skewers section. Enjoy your fresh and flavorful appetizer! To make these skewers quickly, prep your ingredients ahead of time. Rinse the cherry tomatoes and basil leaves the night before. Dry them well and store them in the fridge. This saves time when you’re ready to assemble. Assembling the skewers is simple. Grab a skewer or toothpick and thread a cherry tomato, a basil leaf, and a mozzarella ball. Repeat until you fill the skewer. Aim for three of each item per skewer for a good bite. This keeps the work fast and easy. When it comes to plating, make it look fun. Use a large white platter to allow the colors to pop. Place the skewers in a cluster or in a line. Drizzle balsamic glaze over the skewers for a shiny look. For garnishing, fresh herbs do wonders. Sprinkle some extra basil leaves around the skewers. You could also add a few greens like arugula for color. This makes your dish stand out on any table. These skewers pair well with drinks. A light white wine or sparkling water works best. You can also serve them with other appetizers like bruschetta or a cheese board. These skewers fit any occasion. They shine at parties, picnics, or family gatherings. Whether it's a summer barbecue or a cozy dinner, they’re always a hit. Enjoy every bite of your Easy Caprese Skewers! For the complete recipe, check out the [Full Recipe]. {{image_2}} You can switch up the flavor of your Caprese skewers easily. Adding prosciutto or salami gives a savory kick. Just layer these meats with the tomatoes and mozzarella on the skewer. You can also try different marinades. A garlic-infused oil can add depth. A herbed olive oil brings freshness. Experiment with your favorite flavors to find a mix you adore. If you want a vegan version, use plant-based cheese instead of mozzarella. There are many tasty options available. Look for nut-based or soy-based cheeses. They melt well and taste great. For gluten-free options, just ensure your skewers and any added ingredients are gluten-free. Fresh veggies and fruits work well too, keeping it light and fun. Using seasonal produce makes your skewers fresh and vibrant. In summer, add ripe heirloom tomatoes. In fall, roasted butternut squash cubes are tasty. Adjust your skewers based on local ingredients. Visit farmers' markets for fresh finds. You can make each skewer a tribute to the season, showcasing nature's best. For the full recipe, check out the Easy Caprese Skewers section. To keep your Easy Caprese Skewers fresh, store them in the fridge. Use an airtight container to keep them safe. They will last up to two days. After that, the ingredients may lose their taste and texture. Freezing these skewers is not the best choice. The tomatoes and mozzarella can become mushy. If you do freeze them, wrap each skewer in plastic wrap. When you reheat them, use a low heat setting. This helps preserve flavor, but they may still not taste fresh. If you have leftover skewers, you can use them in many ways. Chop them up and add to salads for extra flavor. You can also mix them into pasta dishes or grain bowls. This way, nothing goes to waste, and you create new meals! To make your skewers pop for a party, add festive colors. You can use colorful cherry tomatoes like yellow or orange. Try adding mini bell peppers for crunch and color. You can also layer in some cooked shrimp or prosciutto. For a holiday theme, use red and green ingredients. Think red tomatoes and green basil for a fun look. Yes, you can prepare these skewers ahead of time. Assemble them a few hours before your event. Keep them in the fridge until it’s time to serve. Just wait to drizzle the balsamic glaze until right before serving. This keeps the skewers fresh and tasty. Serve Caprese skewers cold or at room temperature. Arrange them on a nice platter for a pretty display. You can add bowls of balsamic glaze or pesto for dipping. This adds flavor and lets guests customize their taste. You can add protein by including cooked chicken or turkey. Cubes of grilled chicken taste great with the fresh flavors. If you want a vegetarian option, use chickpeas or beans. These choices make your skewers more filling and nutritious. Making Caprese skewers is simple and fun. We covered fresh ingredients, step-by-step assembly, and tips to impress. You learned how to swap ingredients and enhance flavors for any occasion. Remember, using ripe tomatoes and quality mozzarella makes a big difference. Pack leftovers smartly for future meals or salads. Enjoy this easy, tasty appetizer at your next gathering. With these tips, you’ll create delightful bites everyone will love. Your Caprese skewers will stand out and leave a lasting impression. Keep experimenting with flavors and enjoy!](https://southerndishes.com/wp-content/uploads/2025/06/a5151b51-80a3-40e4-9bbd-9ef9dfc6f56f.webp)
Looking for a simple yet delicious appetizer? Look no further! Easy Caprese skewers are fresh, flavorful, and perfect for any
![- 4 chicken thighs (bone-in, skin-on for more flavor) - 2 cups broccoli florets - 2 cups bell peppers (mixed colors), sliced - 1 cup carrots, sliced - 1 large red onion, cut into wedges - 4 cloves garlic, minced - 4 tablespoons olive oil - 1 teaspoon smoked paprika - 1 teaspoon dried Italian herbs (oregano, basil, thyme) - Salt and pepper to taste - Juice of 1 lemon - Fresh parsley, chopped (for garnish) The main ingredients create a hearty, balanced meal. Chicken thighs offer rich flavor and juicy meat. The veggies add color, crunch, and nutrients. - Other veggie suggestions: zucchini, asparagus, or cherry tomatoes. - Protein alternatives: chicken breasts, shrimp, or tofu for a vegetarian option. Feel free to swap in your favorite veggies or proteins. This dish is flexible and easy to customize. - Sheet pan - Parchment paper - Mixing bowls Using a sheet pan makes cooking and cleanup simple. Parchment paper helps prevent sticking and saves time. Mixing bowls help you combine all the ingredients well. For the full recipe, check [Full Recipe]. This meal is quick, fun, and perfect for family nights. 1. Preheat oven and prepare the pan Start by preheating your oven to 425°F (220°C). Line a large sheet pan with parchment paper. This makes cleanup easy and helps the food not stick. 2. Seasoning the chicken In a large bowl, mix the chicken thighs with half of the olive oil, smoked paprika, Italian herbs, salt, and pepper. Use your hands to coat the chicken evenly. This step adds great flavor. 3. Tossing the vegetables In another bowl, combine the broccoli, bell peppers, carrots, and red onion. Add the remaining olive oil, minced garlic, lemon juice, and a pinch of salt and pepper. Toss everything well until the veggies are coated. 1. Arrange chicken and veggies on the sheet pan Place the seasoned chicken thighs on one side of the sheet pan. Spread the veggies out on the other side. Make sure they have space. This helps them roast well. 2. Roasting time and temperature Put the sheet pan in the preheated oven. Roast everything for 25-30 minutes. The chicken should reach an internal temperature of 165°F (75°C). The veggies should be tender and lightly browned. 3. Ensuring proper doneness Check the chicken with a meat thermometer. If it’s not done, return it to the oven for a few more minutes. The veggies should be soft but not mushy. 1. Resting time Once done, take the sheet pan out of the oven. Let it rest for a few minutes. This helps the juices settle in the chicken. 2. Garnishing before serving Before you serve, sprinkle fresh chopped parsley on top. This adds a lovely color and fresh taste. You can serve directly from the pan or transfer to a platter for a nicer look. For the full recipe, check out the details above! - Avoiding overcrowding the pan: Make sure to space the chicken and veggies apart. Crowding can lead to steaming instead of roasting. This means less crispiness and flavor. Always use a large enough sheet pan for even cooking. - Adjusting cooking time based on thickness: Chicken thighs take longer than chicken breasts. If you use different cuts, check them often. A meat thermometer helps ensure chicken reaches 165°F. This keeps everything juicy and safe to eat. - Experimenting with other herbs and spices: Don't be afraid to mix it up! Try using rosemary, cumin, or even a bit of chili powder. Each herb brings its own taste. This makes your dish exciting and new each time. - Marinating chicken ahead for extra flavor: Marinating chicken for a few hours or overnight adds depth to the taste. Use olive oil, vinegar, and your favorite spices. The longer you marinate, the better it gets! - Pairing ideas (sides and sauces): Serve with rice, quinoa, or a simple green salad. A tasty sauce, like a yogurt sauce or chimichurri, brightens the meal. It adds moisture and flavor, making every bite enjoyable. - Presentation tips: A great way to serve is directly from the sheet pan. This gives a rustic feel. For a fancier touch, transfer everything to a large platter. Drizzle more lemon juice and sprinkle fresh parsley. This adds color and freshness to the meal. For the full recipe, check out the Sheet Pan Chicken and Veggies Delight. {{image_2}} You can use different chicken cuts in this recipe. Chicken breasts are leaner than thighs. They cook quickly and stay juicy when roasted right. Thighs have more fat, which adds rich flavor and moisture. If you want a healthier option, try skinless chicken. Skinless cuts reduce fat while still giving good taste. Change the veggies based on the season. In spring, use asparagus and snap peas. Summer is great for zucchini and cherry tomatoes. Fall brings squash and Brussels sprouts. Winter is perfect for root veggies like carrots and parsnips. You can also add starches like potatoes or sweet potatoes. They give a hearty feel and bake well with chicken. Make this dish gluten-free by checking the spice labels. Most spices are safe, but some may have gluten. For a low-carb version, skip starchy veggies. Use more non-starchy options like green beans or cauliflower. This keeps the meal light and healthy, perfect for various diets. For the full recipe, check the details above. To store leftovers, let the dish cool completely. Place chicken and veggies in an airtight container. This keeps them fresh and prevents odors. In the fridge, your meal lasts about 3 to 4 days. Always check for any signs of spoilage before eating. To freeze for later use, portion out the chicken and veggies. Use freezer-safe bags or containers. Squeeze out excess air to prevent freezer burn. They can stay good for up to 3 months. When you’re ready to eat, thaw in the fridge overnight. For reheating, the oven is best. It keeps the chicken crispy and veggies tender. Preheat the oven to 350°F (175°C). Place the meal in a dish, cover it with foil, and heat for about 15-20 minutes. If you use a microwave, heat in short bursts to avoid sogginess. This way, you maintain texture and flavor. If the chicken is undercooked, check its internal temperature. Use a meat thermometer to ensure it reaches 165°F (75°C). If it’s below this, return it to the oven. Cook for an extra 5 to 10 minutes. Check the temperature again to be sure. Yes, you can use frozen veggies. However, you will need to adjust the cooking time. Frozen veggies often need a few extra minutes to cook. They may also release more water, which can change the texture. If you want crispy veggies, consider roasting them separately. You can easily make this recipe healthier. Start by reducing the oil and salt. Try using half the amount of oil. You can also add more vegetables like spinach or zucchini. This boosts fiber and nutrients without adding many calories. In this post, I covered the key ingredients and steps for a delicious roasted chicken meal. You learned about main ingredients, optional add-ins, and the needed equipment. I also shared cooking tips, variations for dietary needs, and proper storage techniques. Remember, creating this dish lets you experiment and enjoy meals that fit your taste. Embrace these ideas to make your cooking fun and tasty. Happy cooking!](https://southerndishes.com/wp-content/uploads/2025/06/1f5e7f0c-dae1-4f2b-a4fc-ec784867bfd0.webp)
Looking for a quick, tasty family dinner? Sheet Pan Chicken and Veggies is your answer! This recipe is simple, and
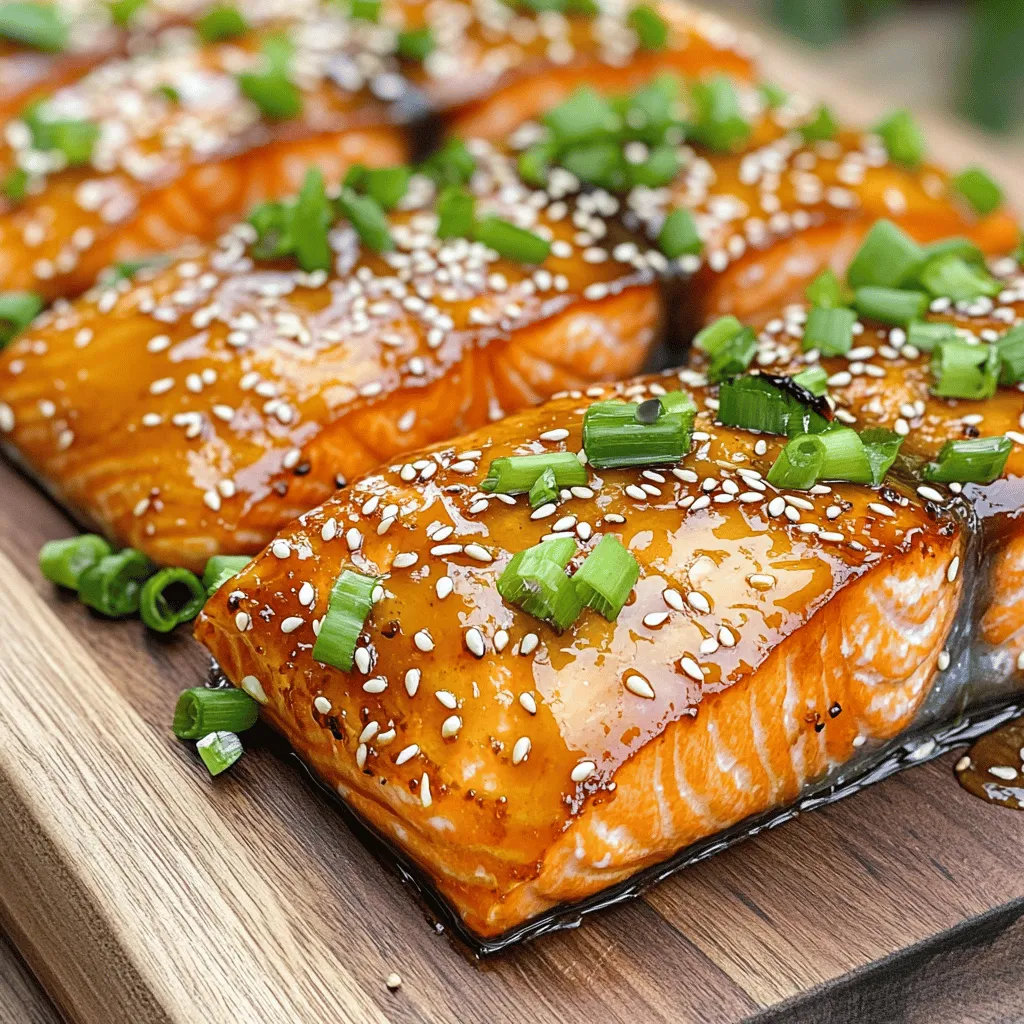
Are you ready to impress your taste buds with a simple yet delicious dish? This Honey Garlic Glazed Salmon will
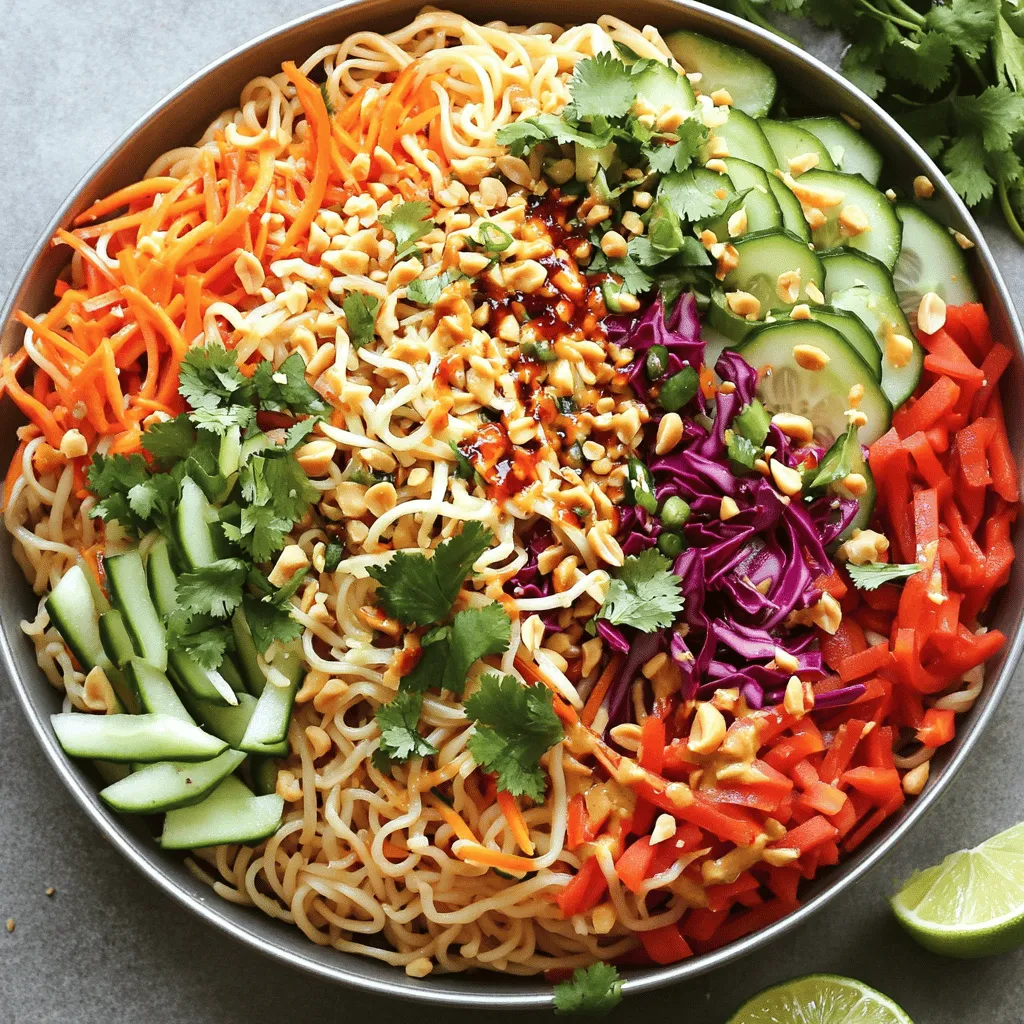
Are you ready to spice up your meals with a burst of flavor? This Spicy Thai Noodle Salad is fresh,
![- 1 cup quinoa, rinsed - 2 cups vegetable broth - 1 cup chickpeas, cooked (canned is fine) - 1 medium sweet potato, peeled and diced - 1 cup broccoli florets - 1 cup cherry tomatoes, halved - 1 avocado, sliced - 1 carrot, grated - 2 tablespoons tahini - 2 tablespoons lemon juice - 1 tablespoon olive oil - 1 teaspoon garlic powder - Salt and pepper to taste - Fresh parsley for garnish (optional) - Other veggies: bell peppers, spinach, or cucumbers - Protein alternatives: tofu or tempeh - Different dressings: sesame, yogurt, or vinaigrette A veggie-packed Buddha bowl is a great way to enjoy fresh flavors and healthy food. The required ingredients create a colorful and tasty dish. Quinoa is the base, providing protein and fiber. Vegetable broth adds flavor while cooking the quinoa. Chickpeas offer protein and heartiness. Sweet potatoes bring sweetness and texture. Broccoli florets add crunch, and cherry tomatoes provide juiciness. Avocado gives creaminess, while the carrot adds color and flavor. You can adjust the recipe with optional ingredients. Bell peppers, spinach, or cucumbers can add freshness. For protein, try tofu or tempeh. You can also experiment with different dressings for variety. I love tahini and lemon juice for a bright taste. For the full recipe, you can refer to the vibrant veggie-packed Buddha bowl recipe mentioned earlier. It’s an easy dish to prepare and customize. Enjoy making your own Buddha bowl! - First, preheat your oven to 425°F (220°C). This makes the sweet potato crispy and tasty. - Next, rinse 1 cup of quinoa in cold water. This helps remove any bitterness. - In a pot, add the rinsed quinoa and 2 cups of vegetable broth. Bring it to a boil, then lower the heat. Cover it and let it simmer for about 15 minutes. - While the quinoa cooks, prepare the sweet potato. Peel and dice it into small cubes. - Toss the sweet potato with olive oil, garlic powder, salt, and pepper. This adds great flavor. - Spread the sweet potato on a baking sheet and roast it for 20-25 minutes. Make sure to toss halfway for even cooking. - For the broccoli, you can steam it or sauté it. Steaming takes about 5-7 minutes. This keeps it bright and crunchy. - Begin with a base of fluffy quinoa. This is your hearty foundation. - Next, layer the roasted sweet potato, steamed broccoli, cherry tomatoes, chickpeas, grated carrot, and sliced avocado artfully on top. - Drizzle the tahini dressing evenly over the layered ingredients. This adds a creamy touch. - For a pop of color, sprinkle fresh parsley on top if you like. - For sweet potatoes, roasting brings out their natural sweetness. Cut them small for quicker cooking. - When cooking broccoli, steaming keeps its bright color and crisp texture. Sautéing can make it softer, depending on your taste. - If you want a more tender bite, you can sauté the broccoli in olive oil for just a few minutes. Enjoy crafting your Veggie-Packed Buddha Bowl with these easy steps! Check out the [Full Recipe] for detailed instructions. To make a great Buddha bowl, balance flavors. Combine sweet, savory, and crunchy elements. Sweet potatoes offer sweetness. Chickpeas provide protein, while avocado adds creaminess. For crunch, include grated carrots or seeds. If your dressing is too thick, add water a little at a time. Stir until you reach a smooth texture. Meal prep saves time and effort. Cook quinoa in advance and store it in the fridge. Roast sweet potatoes ahead of time, too. Keep cooked chickpeas ready for quick use. Store veggies in airtight containers to keep them fresh. Use them within a week for the best taste. A colorful bowl looks inviting. Use contrasting colors like bright orange sweet potatoes and green broccoli. Add cherry tomatoes for a pop of red. For garnish, sprinkle herbs like parsley or seeds for texture. This makes your bowl not only tasty but also beautiful! {{image_2}} You can easily adapt this Buddha bowl to fit different diets. If you want a vegan option, all the ingredients are already plant-based. You can enjoy chickpeas and sweet potatoes without worry. If you are looking for gluten-free substitutes, try quinoa or rice. Both work well in this dish. Using seasonal ingredients makes your Buddha bowl fresh and tasty. In summer, add juicy cucumbers or sweet corn. In winter, consider roasted root vegetables like beets or parsnips. This adds warmth and comfort to your meal. You can also mix in greens like kale or spinach for added nutrition. Spice up your Buddha bowl with global ingredients. For a Korean twist, add kimchi for a spicy kick. If you prefer a Mediterranean flavor, try hummus or feta cheese. These additions bring unique taste profiles to your bowl. You can mix and match flavors to create your perfect meal. To keep your Buddha bowl fresh, use airtight containers. Glass containers work best, as they do not stain and are easy to clean. You can also use BPA-free plastic containers. Make sure to cool the bowl to room temperature before sealing it. The Buddha bowl will stay good in the fridge for about 3 to 5 days. You can freeze many parts of your Buddha bowl. Cooked quinoa and roasted sweet potatoes freeze well. However, avoid freezing fresh veggies like avocado or cherry tomatoes, as they may become mushy. When you want to eat your frozen bowl, move it to the fridge and let it thaw overnight. To reheat, microwave it until warm. Make sure to stir it halfway for even heating. A veggie-packed Buddha bowl is a colorful meal. It has a mix of grains, veggies, and protein. Traditionally, Buddha bowls come from Buddhist culture. They symbolize abundance and balance. They often include fresh, raw, or cooked ingredients. You can get creative with the flavors and textures. To make your Buddha bowl more filling, add grains like quinoa or brown rice. These grains are full of fiber and nutrients. You can also include proteins such as chickpeas, tofu, or beans. These options boost the protein content and keep you full longer. Buddha bowls are healthy due to their variety of ingredients. They include veggies, grains, and proteins, offering many nutrients. You can enjoy vitamins, minerals, and healthy fats in one bowl. Keep portion sizes in check. A balanced bowl helps maintain healthy eating habits. You can find a complete recipe for a veggie-packed Buddha bowl [Full Recipe]. In this post, we explored how to create delicious Buddha bowls. We covered essential ingredients like quinoa, chickpeas, and fresh veggies. You learned about preparing the base, assembling your bowl, and using various cooking techniques. I also shared tips for meal prep and enhancing visual appeal. Remember, you can adapt your bowl for dietary needs and seasonal flavors. With easy storage and reheating methods, you can enjoy these tasty creations anytime. Get creative and make this meal your own!](https://southerndishes.com/wp-content/uploads/2025/06/c30e4bd5-ccb9-48e8-aa0d-090f5c934aba.webp)
Are you ready to create a meal that is both tasty and packed with good stuff? The Veggie-Packed Buddha Bowl
. - Step 1: Combining salad base Start by taking a large bowl. Add 4 cups of chopped romaine lettuce. Next, toss in 1 cup of halved cherry tomatoes. This mix forms the fresh base of your salad. - Step 2: Adding proteins and cheese Now, add 1 cup of crumbled cooked turkey bacon to the bowl. This gives your salad a nice crunch. Then, sprinkle in 1/2 cup of shredded sharp cheddar cheese. This adds creaminess and flavor. - Step 3: Mixing the dressing In a small bowl, combine 1/4 cup of mayonnaise, 1 tablespoon of Dijon mustard, and 2 tablespoons of apple cider vinegar. Mix until smooth. This dressing brings all the flavors together nicely. - Step 4: Drizzling dressing Take the dressing you mixed and drizzle it over the salad. Be sure to coat everything evenly. This step is key for great taste. - Step 5: Tossing the salad Gently toss the salad with your hands or a spoon. Make sure all the ingredients are well-coated with the dressing. This ensures every bite is full of flavor. - Step 6: Garnishing with parsley Finally, sprinkle some fresh parsley over the top. This not only adds color but also a fresh taste. It makes your salad look beautiful. - Tips for crispy bacon Cook your turkey bacon in a skillet until it’s crispy. This adds crunch to your salad. - Ensuring the salad is well-dressed If your salad seems dry, add more dressing. A well-dressed salad is always more enjoyable. - Cooling ingredients before serving If you have time, chill the salad for a few minutes. This makes it refreshing, especially on hot days. For the complete recipe, check out the Full Recipe. To make your Classic BLT Salad shine, consider these tips: - Lightening the recipe: Swap out regular bacon for turkey bacon. This change keeps the flavor while cutting calories. You can also use Greek yogurt instead of mayonnaise for a tangy twist. - Adding extra crunch: Toss in some sliced cucumbers or crispy croutons. They add a nice texture and keep the salad lively. You can even add sunflower seeds for more crunch. - Balancing flavors with seasoning: Don’t be shy with salt and pepper. A sprinkle of each enhances the taste. You can add a pinch of garlic powder for extra flavor. Pair your salad with these ideas: - Ideal pairings with the salad: Serve it with grilled chicken or fish for a full meal. It also goes great with a bowl of soup on a chilly day. - Presentation tips for gatherings: Use a large, colorful platter. Layer the ingredients in sections for a beautiful display. Garnish with extra tomatoes or parsley for a pop of color. - Customizing portion sizes: Adjust the serving size based on your guests. For a small group, keep it simple. For larger gatherings, double the recipe to ensure everyone enjoys. Prepare your salad ahead of time with these tips: - Preparing ingredients in advance: Wash and chop your veggies the night before. This saves time and keeps everything fresh. - Best storage practices: Store salad ingredients in separate containers. Keep the dressing in a small jar. This helps maintain freshness until you're ready to eat. - Using leftovers for other dishes: If you have leftover salad, use it in a wrap or mix it into an omelet. This way, you waste nothing and create new meals with ease. For the full recipe, be sure to check out the details above! {{image_2}} You can switch up the proteins in your Classic BLT Salad to keep things fresh. Use different types of bacon, like crispy pork bacon or even flavored bacon, for a new twist. If you want something heartier, add grilled chicken or shrimp for extra protein. For a vegetarian option, try using tempeh bacon or smoked tofu. These choices still give that savory flavor without meat. The dressing can change the whole taste of your salad. You can try different dressings like ranch, blue cheese, or a tangy vinaigrette. Adding spices such as garlic powder, paprika, or even a pinch of cayenne can enhance the flavor. You can also create a creamy dressing with yogurt or buttermilk for a rich taste, or stick to a light vinaigrette for a fresh lift. You don’t have to stick with just lettuce. Incorporate grains like quinoa for added texture and nutrition. Including beans like chickpeas or black beans can boost protein too. For a fruity twist, add diced apples or berries. These changes make your salad not just tasty, but also unique and fun. If you want to dive deeper into the Classic BLT Salad, check out the [Full Recipe]. To keep your Classic BLT Salad fresh, store it in the fridge. Use an airtight container to seal in the flavors. This will help keep the lettuce crisp and the tomatoes juicy. I recommend using glass containers for easy cleaning and clarity. If you have any leftover dressing, store it separately. This keeps the salad from getting soggy. You may wonder, can you freeze a BLT salad? I do not recommend freezing this salad. The lettuce and tomatoes do not freeze well. They become mushy when thawed. However, you can freeze cooked turkey bacon. Just make sure to cool it first. Store it in a freezer bag to save space. How long does the salad stay fresh? In the fridge, your salad can last about 2 to 3 days. Keep an eye on it. Signs of spoilage include wilting lettuce or slimy tomatoes. If you see these signs, it is best to toss the salad. Enjoy it fresh for the best taste! For the full recipe, check the earlier section. What is the best type of lettuce for a BLT salad? I recommend using romaine lettuce. It stays crisp and adds a great crunch. You can also try iceberg for a lighter bite. Can I use regular bacon instead of turkey bacon? Yes, you can use regular bacon. It will add a richer flavor. Just cook it until crispy for the best texture. How can I make this salad vegan-friendly? To make it vegan, swap turkey bacon for tempeh or coconut bacon. Use a vegan mayo too. How to adjust serving sizes? To change the serving size, multiply or divide each ingredient. For two servings, cut each amount in half. Is the dressing gluten-free? Yes, the dressing is gluten-free. Mayonnaise and apple cider vinegar do not contain gluten. How to make the salad spicier? Add sliced jalapeños or a dash of hot sauce. You can also mix in some cayenne pepper for heat. What can I serve with this salad? This salad pairs well with grilled chicken or fish. You can also add crusty bread for a complete meal. How do I keep my salad fresh for longer? Store the salad in an airtight container. Keep the dressing separate until you serve it. Can I meal prep this salad for the week? Yes, you can prep the salad. Keep the ingredients separate, then mix before eating. This keeps everything fresh. For more detailed instructions, check the Full Recipe. The classic BLT salad combines fresh ingredients and bold flavors to delight every palate. You learned about tasty ingredient options, easy preparation steps, and storage tips to keep it fresh. Try out variations with proteins and dressings to add your twist. Remember, quality matters in every bite. With the right choices, you can elevate this salad for any occasion. Enjoy making this dish and share it with others for a fun meal experience.](https://southerndishes.com/wp-content/uploads/2025/06/9f043d04-88b5-4442-84a0-ee6070e7c3bf.webp)
Looking for a fresh, flavorful twist on a classic favorite? The Classic BLT Salad combines crisp romaine, juicy tomatoes, and
![- Ripe mango - Ripe avocados - Small red onion - Fresh jalapeño - Fresh cilantro - Limes - Seasoning (salt, black pepper, cumin) When making mango avocado salsa, use ripe fruits for the best flavor. A ripe mango should feel soft but not mushy. The same goes for avocados. They should give slightly when you press them gently. If you want more sweetness, try pineapple or peaches. For herbs, you can use parsley or mint. If you want less heat, remove the jalapeño seeds or skip it altogether. Choose ripe mangoes by looking for a slight give when pressed. Their color can vary, so trust your touch. For avocados, check for firmness and dark skin. Use fresh veggies for the best taste. Always look for bright green cilantro and firm onions. To make Mango Avocado Salsa, you need a few tools. Grab a sharp knife, a cutting board, and a mixing bowl. You will also want a citrus juicer to get the juice out of the limes easily. When chopping, keep your fingers tucked in. This helps you avoid cuts. Always chop on a stable surface. If your cutting board slides, place a damp cloth under it for safety. 1. Start by placing your mixing bowl on a clean surface. 2. Dice the ripe mango into small pieces and add it to the bowl. 3. Next, dice the ripe avocados. Carefully add them to the bowl. 4. Chop the small red onion finely. Toss it in with the mango and avocado. 5. Mince the fresh jalapeño and add it for some heat. 6. Chop the fresh cilantro and sprinkle it over the mixture. 7. Squeeze the juice of two limes over everything. This adds flavor and keeps the avocados from browning. 8. Season the salsa with salt, black pepper, and cumin if you like. 9. Gently mix everything together. Be careful not to mash the avocados. 10. Taste the salsa and adjust the seasoning if needed. Let your salsa rest for about 10 minutes at room temperature. This helps the flavors blend well. For even better taste, refrigerate the salsa for 30 minutes before serving. This cools it down and lets the flavors shine. Enjoy your fresh and vibrant Mango Avocado Salsa! To get the best salsa, you need perfect dicing. Use a sharp knife for clean cuts. Cut the mango into strips, then dice into small cubes. For avocados, keep the pit in while you slice. After slicing, scoop the flesh out with a spoon. This helps you keep the shape and size even. To stop avocados from browning, use lime juice. Lime juice keeps the color bright and fresh. Cover the salsa tightly if you plan to store it. Use plastic wrap pressed against the salsa. This reduces air exposure. Adding spices can give your salsa a tasty kick. Try adding a pinch of cayenne pepper for heat. You can also mix in some smoked paprika for a deeper flavor. For customization, think about adding fresh fruits. Pineapple or diced bell peppers can add sweetness. You can also toss in black beans for protein. This makes the salsa heartier and more filling. Mango Avocado Salsa pairs well with grilled chicken or fish. It also tastes great with tacos or burritos. For a fun twist, serve it with tortilla chips in a colorful bowl. To present the salsa creatively, consider using a large lettuce leaf as a bowl. This adds a fresh touch and makes it look appealing. You can also serve it on a platter with a variety of dips and snacks. For the full recipe, check out the detailed steps above. {{image_2}} You can easily switch ingredients in this salsa. Try using different fruits like pineapple or peaches. These fruits add a sweet twist to the mix. They also bring new textures and flavors. You can also add black beans or white beans for protein. Beans make the salsa more filling and hearty. This recipe can fit many diets. It's already vegan and gluten-free, which is great for many people. If you want a low-carb option, skip the mango. Use cucumber instead for a fresh crunch. Your salsa will still taste bright and delicious. Give your salsa a Mexican twist by adding corn or diced tomatoes. These ingredients enhance the flavor and add color. For a tropical flair, mix in some diced kiwi or papaya. These fruits bring unique flavor profiles that surprise your palate. You can also add spices like chili powder or paprika for extra zing. Feel free to explore these variations to make the salsa your own. For the complete recipe, check out the [Full Recipe]. To keep your Mango Avocado Salsa fresh, use airtight containers. Glass or plastic containers work well. They prevent air from getting inside and keep your salsa tasty. For short-term storage, refrigerate the salsa. It lasts up to three days in the fridge. If you want to keep it longer, consider freezing it. Use freezer-safe bags or containers. Just remember that freezing may change the texture of the avocado. Mango Avocado Salsa is best when fresh. It stays good for about three days in the fridge. After that, it may start to spoil. Look for signs like discoloration or an off smell. If the salsa looks brown or smells strange, it's time to toss it. Don't let any leftover salsa go to waste! You can use it in many ways. Here are some ideas: - Tacos: Add it to fish or chicken tacos for a fresh kick. - Salads: Mix it into green salads or grain bowls. - Sandwiches: Spread it on sandwiches or wraps for extra flavor. - Rice Dishes: Stir into rice or quinoa for a zesty touch. These ideas help you enjoy your Mango Avocado Salsa long after you make it. Check out the Full Recipe for more details on making this delicious treat! Can I use frozen mango for this recipe? Yes, you can use frozen mango. Just thaw it first. Fresh mango adds the best flavor, but frozen works in a pinch. How spicy is this salsa? The salsa has a mild kick. Jalapeños give it a nice warmth. You can adjust the spice by adding more or less jalapeño. What's the best way to ripen avocados quickly? Place avocados in a brown paper bag. The bag traps ethylene gas, which helps them ripen faster. You can also add an apple or banana for speed. What to do if the salsa is too bland? If it tastes bland, add more lime juice or salt. You can also mix in more fresh cilantro or jalapeño for extra flavor. Fixing mushy avocado issues If your avocado is mushy, you can balance it with more crunchy ingredients. Try adding more diced onion or adding fresh bell peppers for texture. How many servings does this recipe yield? This recipe yields about 4 to 6 servings. It’s perfect for a small gathering or a family meal. Can I double the recipe for a larger gathering? Yes, you can easily double the recipe. Just keep the same ratios for each ingredient. This way, everyone can enjoy your delicious salsa. Feel free to check out the Full Recipe for more details! In this guide, we explored how to make fresh Mango Avocado Salsa. We covered key ingredients, tips for picking ripe produce, detailed instructions, and clever variations. Quality matters for flavor and freshness. Remember, adjusting spice levels and using different fruits can personalize your salsa. Also, learn to store it properly to keep it fresh longer. Use leftovers creatively in other dishes. Enjoy making this vibrant salsa to brighten meals. It’s a fun way to explore flavors!](https://southerndishes.com/wp-content/uploads/2025/06/a6dc160c-2f41-4037-bc67-84d5f1eac52f.webp)
Looking to add a burst of flavor to your next meal? This Mango Avocado Salsa is your answer! With ripe
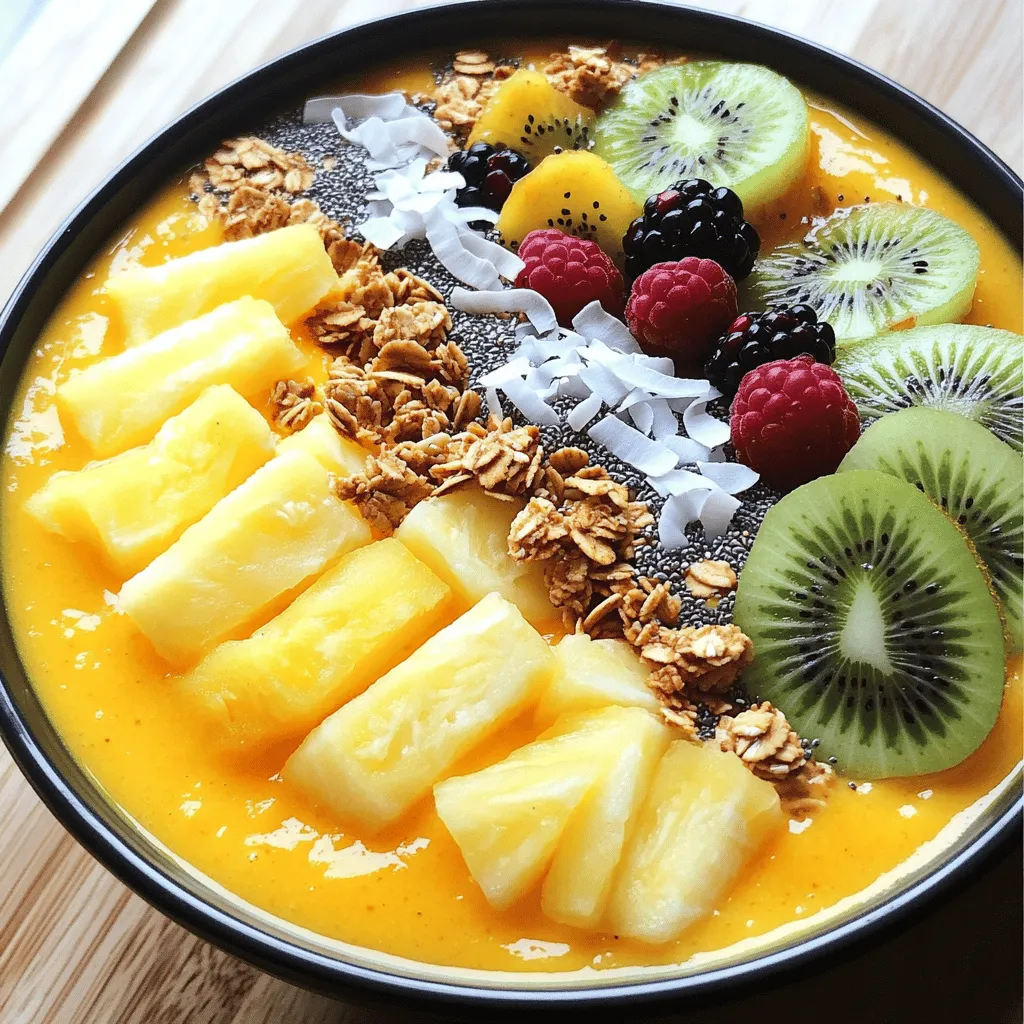
Get ready for a burst of tropical flavor with my Tropical Pineapple Smoothie Bowl! This bowl is quick to make,
