


Latest & Greatest
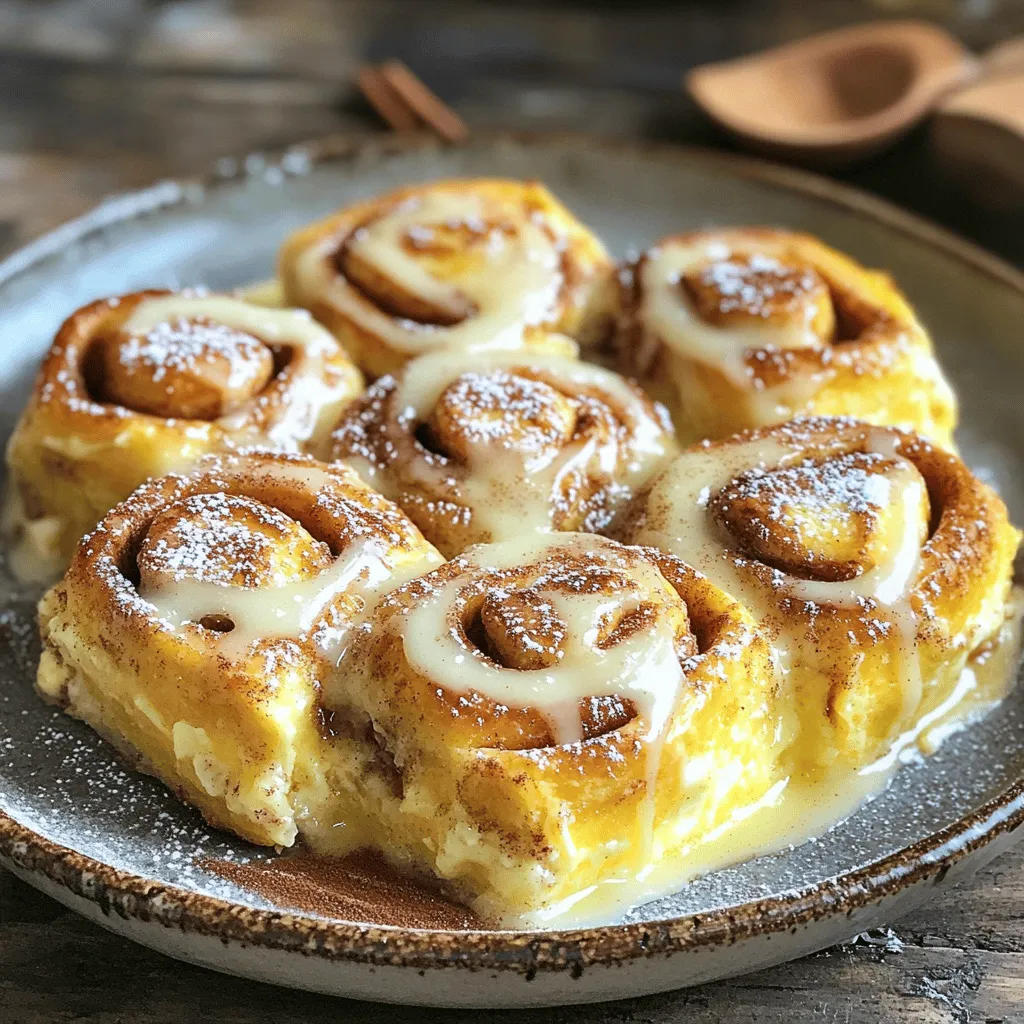
Cinnamon Roll Casserole Delightful and Easy Recipe
Are you ready for a warm and sweet treat? My Cinnamon Roll Casserole is an easy way to enjoy breakfast
Read more…
Sheet Pan Lemon Garlic Herb Chicken Flavorful Delight
Are you ready to impress your family with a simple yet delicious meal? The Sheet Pan Lemon Garlic Herb Chicken
Read more…
Easy No-Bake Tiramisu Delightful and Simple Recipe
If you crave a dessert that is both delicious and easy to make, you’re in the right place! This Easy
Read more…
Mango Sorbet Delightful and Easy Summer Treat
Summer is here, and nothing beats a cool, fruity treat! Mango sorbet is easy to make and perfect for warm
Read more…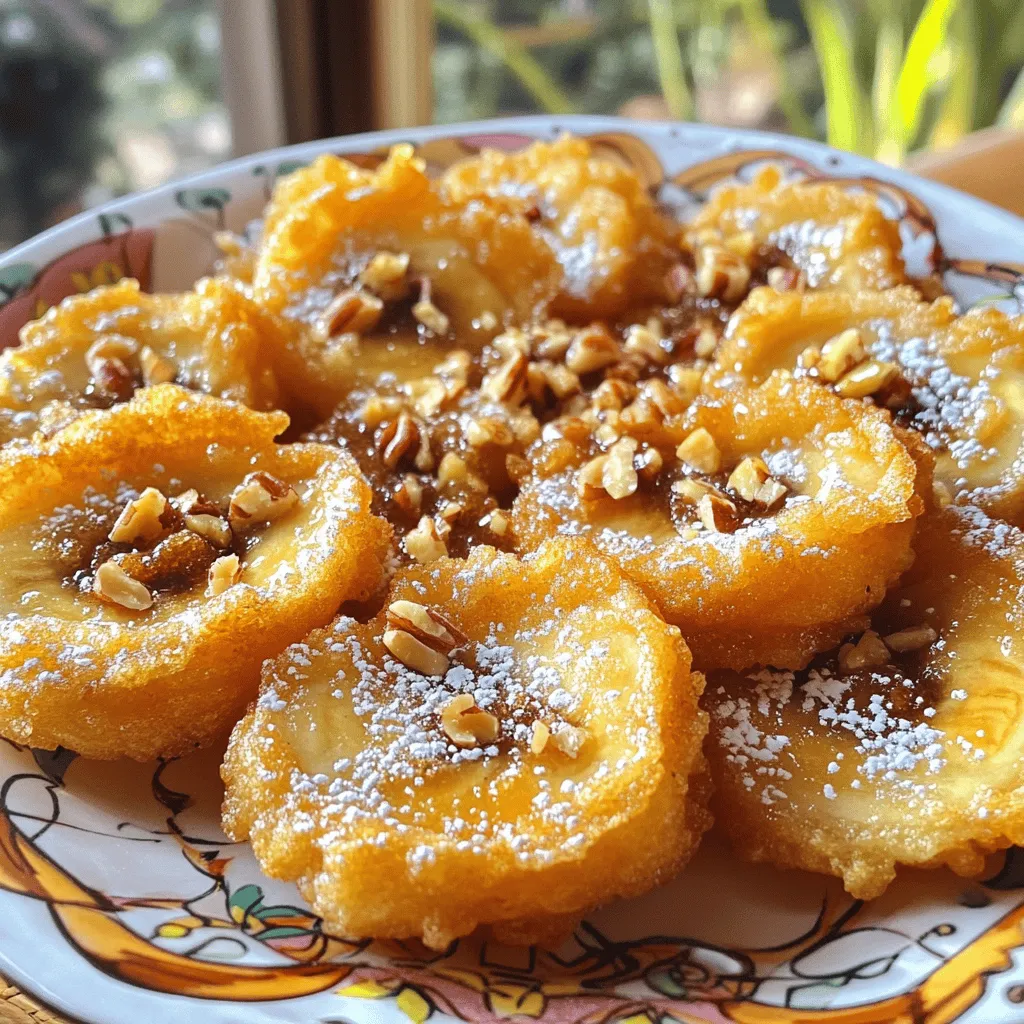
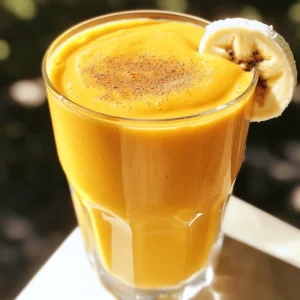
Fried Banana With Brown Sugar Sweet and Simple Delight
If you’re looking for a simple yet sweet treat, you’ve come to the right place. Fried banana with brown sugar
Read more…
Best Pumpkin Cheesecake Rich and Creamy Delight Recipe
If you love the cozy flavors of fall, this Best Pumpkin Cheesecake recipe is for you! With rich cream cheese
Read more…
Easy Banoffee Pie with Caramel and Cream Delight
Are you craving a sweet treat that’s simple and decadent? Look no further! This Easy Banoffee Pie with Caramel and
Read more…
Red Velvet Cake Delight Simple and Tasty Recipe
Red Velvet Cake is a timeless favorite that never fails to impress. This deep red treat is not just beautiful;
Read more…browse recipes


![- 4 bone-in, skin-on chicken thighs - 1/4 cup honey - 1/4 cup Dijon mustard - 2 tablespoons olive oil - 2 cloves garlic, minced - 1 teaspoon smoked paprika - 1 teaspoon dried thyme - Salt and pepper to taste - Fresh parsley for garnish - Baking dish - Medium bowl - Whisk - Zip-top bag When making honey mustard chicken thighs, gathering the right ingredients is key. The main elements are chicken thighs, honey, and Dijon mustard. These three components work together to create a sweet and tangy flavor. The additional ingredients enhance the dish. Olive oil keeps the chicken moist. Garlic adds depth. Smoked paprika gives a nice warmth. Dried thyme brings a subtle earthiness. Salt and pepper elevate the taste. The fresh parsley at the end adds a pop of color and freshness. For tools, you’ll need a baking dish to cook the chicken. A medium bowl helps mix your marinade. A whisk is perfect for blending. Finally, a zip-top bag makes marinating easy and mess-free. Follow the Full Recipe to make this dish a hit at your table! - Step 1: Preheat the oven to 400°F (200°C). - Step 2: Prepare the marinade in a medium bowl. Whisk together 1/4 cup honey, 1/4 cup Dijon mustard, 2 tablespoons olive oil, 2 cloves minced garlic, 1 teaspoon smoked paprika, 1 teaspoon dried thyme, and some salt and pepper. This mix adds a sweet and tangy flavor that pairs perfectly with chicken. - Step 3: Marinate the chicken thighs in a zip-top bag. Place 4 bone-in, skin-on chicken thighs inside, and pour the marinade over them. Seal the bag and toss gently to coat. Refrigerate for at least 30 minutes or up to 4 hours to deepen the flavor. The longer you marinate, the better it tastes. - Step 4: Arrange chicken in the baking dish. Take the chicken thighs out of the marinade and let excess drip off. Place them skin-side up in the dish. - Step 5: Bake until golden and cooked through. Pour the remaining marinade over the chicken thighs. Bake for 35-40 minutes. The chicken should reach an internal temperature of 165°F (75°C) and have crispy skin. - Step 6: Garnish and allow to rest. Once cooked, let the chicken rest for 5 minutes. Garnish with fresh parsley for a pop of color. This step makes your dish look great and allows the juices to settle. Enjoy the delicious flavors of your Honey Mustard Chicken Thighs! For the full recipe, check out the [Full Recipe]. To make your honey mustard chicken thighs shine, adjust the honey and mustard. If you want more sweetness, add extra honey. For more tang, increase the Dijon mustard. Marinating the chicken longer will make the flavor deeper. I often let mine sit for a few hours. This way, the chicken absorbs all the tasty goodness. A meat thermometer is your best friend. It ensures your chicken is cooked just right. Aim for 165°F (75°C) for safe eating. To get crispy skin, broil the chicken for a few minutes at the end. This adds a nice crunch that everyone loves. Pair your honey mustard chicken thighs with roasted vegetables or fluffy rice. These sides balance the sweet and tangy flavors. For drinks, consider pairing it with a light white wine or iced tea. Both refresh and complement the meal well. Enjoy your cooking adventure! {{image_2}} You can easily change the taste of your honey mustard chicken thighs. Here are some ideas: - Add different herbs like rosemary or oregano for a fresh twist. - Incorporate chili flakes for a spicy kick that adds heat. Switch up how you cook the chicken for new flavors: - Grill the chicken instead of baking. This gives it a smoky flavor. - Use a slow cooker for an easy, set-it-and-forget-it method. This is great for busy days. How you serve the chicken can also change the meal: - Make it a sandwich or wrap for a fun lunch option. - Serve over a salad for a light and healthy meal. It’s refreshing and filling. For the complete recipe, you can check the Full Recipe section. Keep your Honey Mustard Chicken Thighs in an airtight container. They last up to 3 days in the fridge. This way, you can enjoy tasty meals without waste. You can freeze cooked chicken thighs for up to 3 months. Make sure they cool down before freezing. For best results, place them in a freezer-safe bag. Thaw safely in the refrigerator before reheating. This keeps the chicken juicy and tender. To get the best texture, reheat in the oven. Set the oven to 350°F (175°C) and bake for about 15 minutes. If you need a quicker option, use the microwave. Just be careful not to overcook it. Enjoy your meal just like it was fresh! Don’t forget to check the Full Recipe for more cooking tips. Marinate for at least 30 minutes or up to 4 hours. This time allows the chicken to soak up the sweet and tangy flavors of the honey mustard marinade. If you have the time, longer marinating will give you even better taste. Chicken should reach an internal temperature of 165°F (75°C). This ensures the chicken is safe to eat and fully cooked. Use a meat thermometer to check this. Yes, adjust cooking time as boneless thighs may cook faster. Keep an eye on them and check for that perfect internal temperature. Boneless thighs can be super juicy and quick to prepare. Consider serving with sides like green beans or potatoes. Roasted vegetables or a fresh salad also pair well. You can even try rice for a complete meal. For a tasty touch, drizzle some extra honey mustard over your sides. This blog post guides you in making tasty honey mustard chicken thighs. You learned what ingredients to gather, how to marinate and cook the chicken, and tips to perfect your dish. Remember to adjust the marinade to fit your taste and try different cooking methods for variety. With careful storage, you can keep your leftovers fresh. Enjoy exploring various ways to serve this dish, making it your own! This recipe is simple, fun, and perfect for any meal. Happy cooking!](https://southerndishes.com/wp-content/uploads/2025/05/63ab8627-d8cb-4cf8-9192-c1e78cf4d33a.webp)
Honey Mustard Chicken Thighs Simple and Tasty Meal
Looking for a quick and delicious dinner idea? Honey Mustard Chicken Thighs are the answer! This simple recipe combines juicy chicken with a sweet…
My Latest Desserts
-
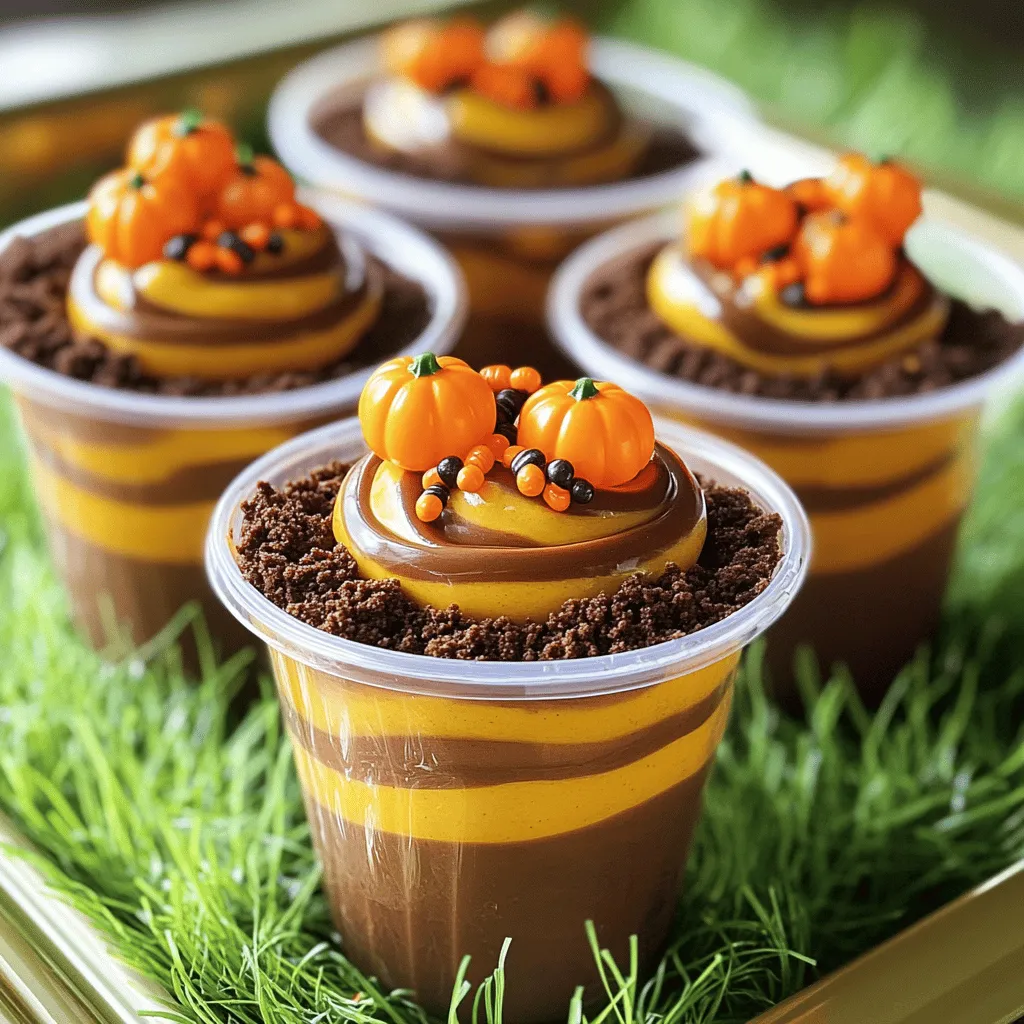
Pumpkin Patch Dirt Cups Tasty Treat for Fall Fun
Fall is here, and it’s time to whip up a fun treat! Pumpkin Patch Dirt Cups are easy to make Read Full Recipe -
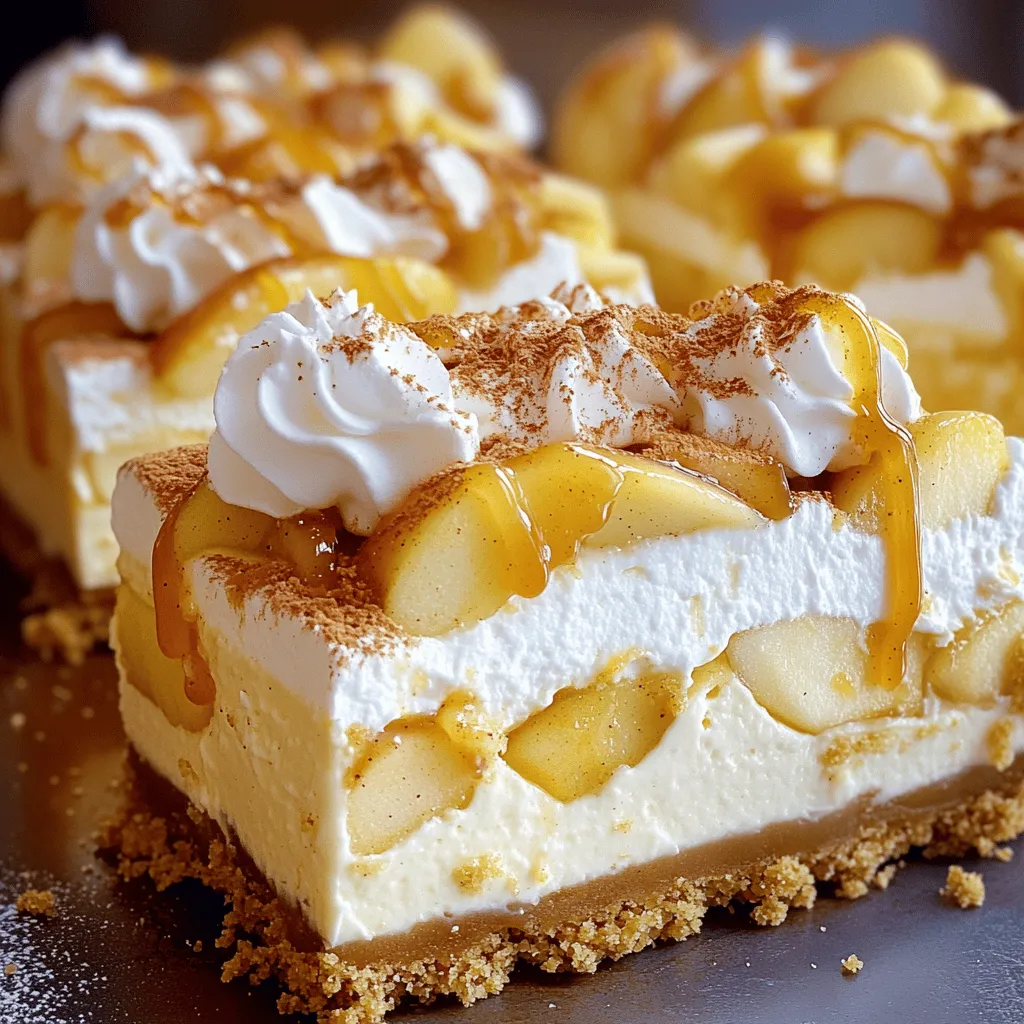
Salted Caramel Apple Pie Cheesecake Delight
Craving a dessert that’s both comforting and indulgent? Let me introduce you to my Salted Caramel Apple Pie Cheesecake Delight! Read Full Recipe -

Minute Reese’s Snack Mix Tasty Treat for Everyone
Craving a sweet and crunchy snack? I’ve got just the treat for you! The Minute Reese’s Snack Mix is quick, Read Full Recipe -

Amish Apple Fritter Bread Irresistible Homemade Treat
Craving a sweet treat that’s both heartwarming and delicious? This Amish Apple Fritter Bread is an easy, homemade delight that Read Full Recipe -

Mini Pumpkin Pies Simple Delightful Dessert Recipe
Are you craving a sweet treat that captures the essence of fall? Look no further! My mini pumpkin pies are Read Full Recipe -

Fruity Pebbles Yogurt Parfait Simple and Tasty Treat
Are you ready to whip up a fun and tasty treat? My Fruity Pebbles Yogurt Parfait is a colorful delight Read Full Recipe -

No-Bake Oreo Cheesecake Bars Delicious and Simple Treat
Looking for a simple and sweet dessert? You’ll love these No-Bake Oreo Cheesecake Bars! They are creamy, rich, and super Read Full Recipe -
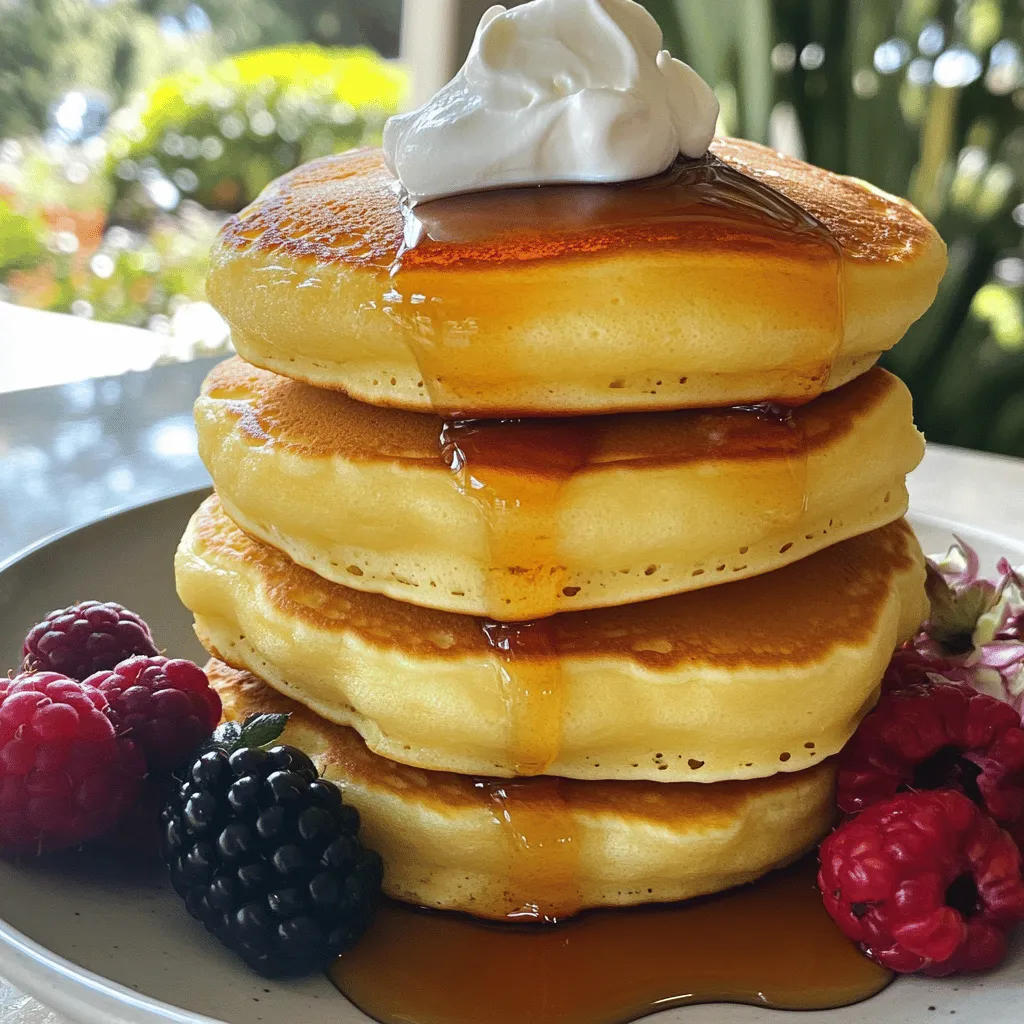
Fluffy Japanese Soufflé Pancakes Simple and Soft Delight
Are you ready to flip your breakfast game? Fluffy Japanese soufflé pancakes are a soft, delightful treat that will impress Read Full Recipe -
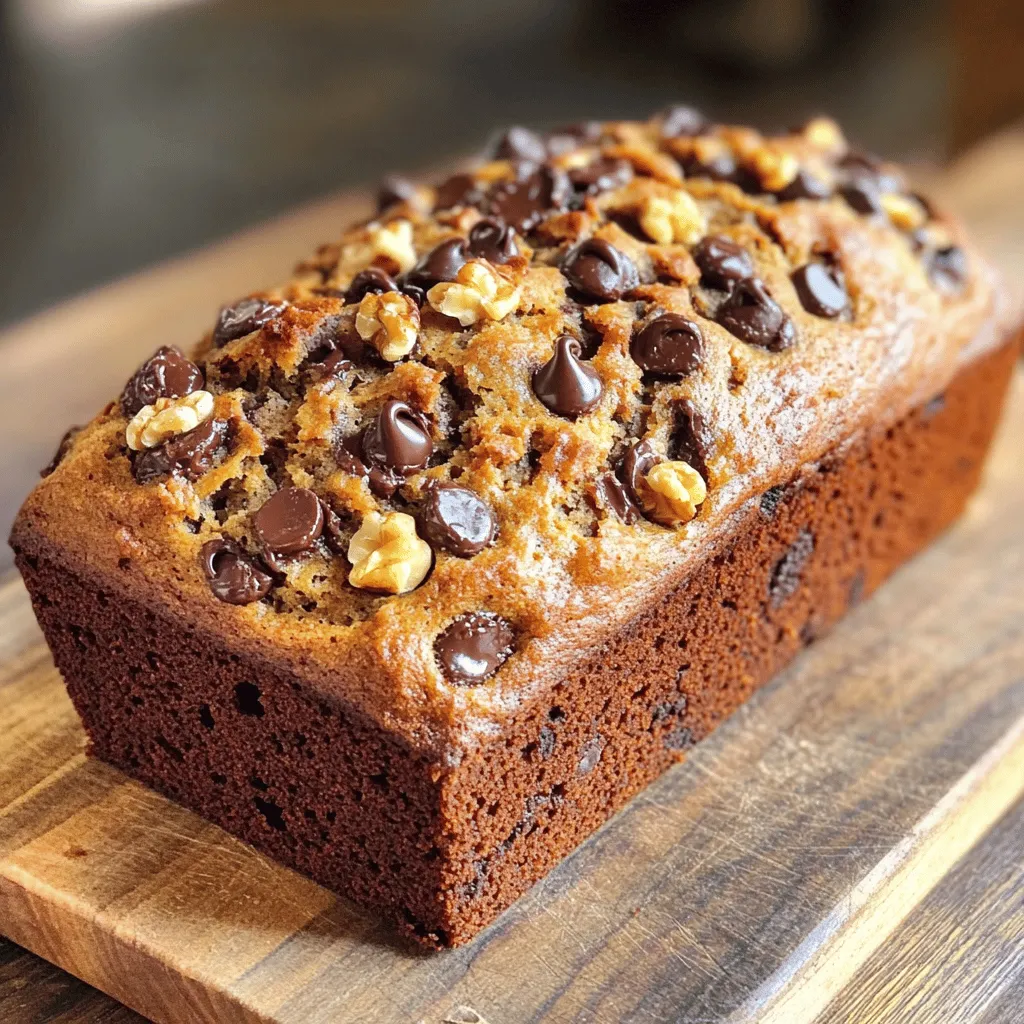
Chocolate Chip Banana Bread Rich and Flavorful Delight
Ready to indulge in a warm, gooey slice of Chocolate Chip Banana Bread? This rich and flavorful delight combines ripe Read Full Recipe -
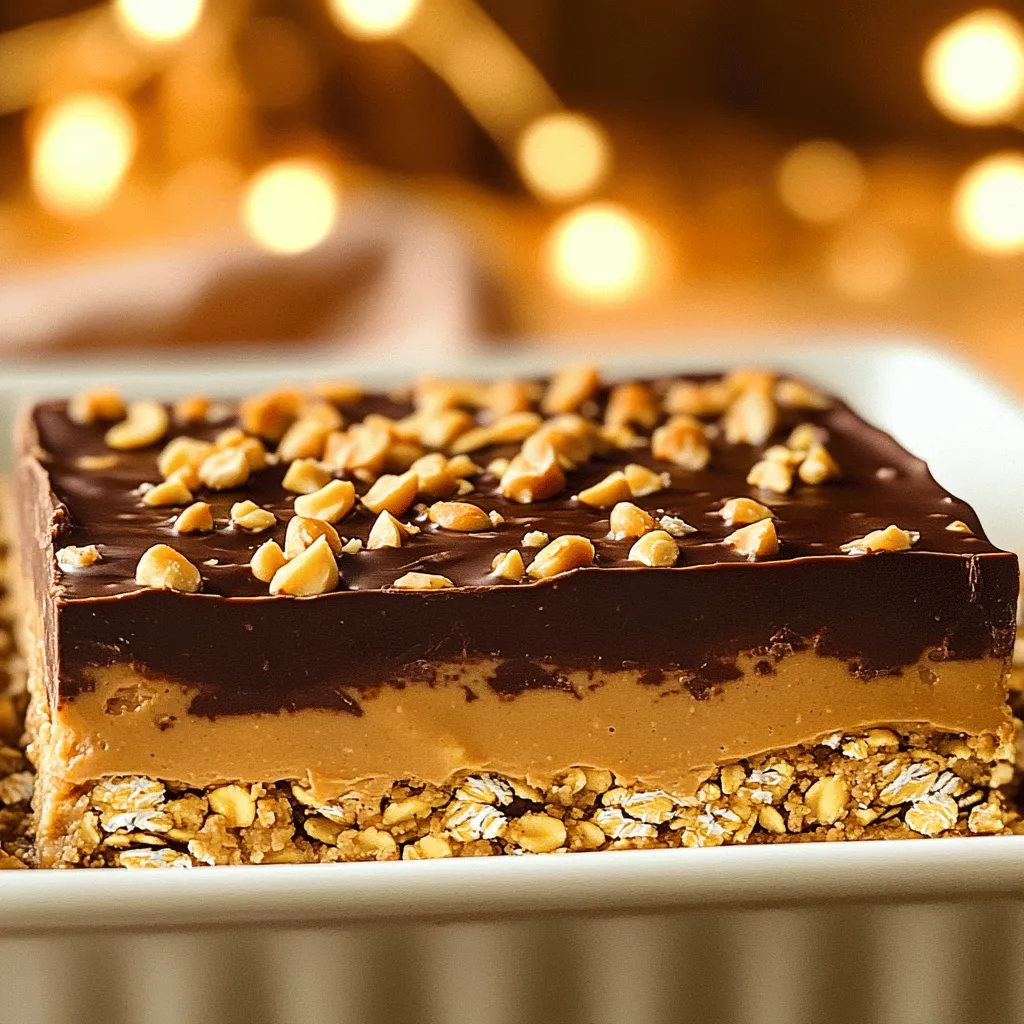
No Bake Peanut Butter Chocolate Bars Simple Delight
Are you craving a sweet treat that’s both simple and delicious? Look no further! I’m excited to share my recipe Read Full Recipe
My Latest Recipes

hey,
i’m !
I’m so happy you’re here!
My kitchen is filled with stories, flavors, and love and I’m so happy to share them with you. Here’s to dishes that feel like home.
![- 1 cup sushi rice - 1 ¼ cups water - 1 tablespoon rice vinegar - 1 teaspoon sugar - ¼ teaspoon salt - 8 oz sushi-grade tuna, diced - 1 tablespoon sriracha (adjust to taste) - 1 tablespoon mayonnaise The main ingredients are essential for a tasty bowl. Sushi rice acts as the base. Use high-quality sushi-grade tuna for the best flavor and safety. The sriracha and mayonnaise mixture adds creaminess with a kick. This blend makes the tuna shine. - 1 avocado, sliced - 1 cucumber, thinly sliced - 2 green onions, chopped - 1 tablespoon sesame seeds - Nori strips for garnish - Soy sauce for drizzling These toppings elevate your bowl. Avocado adds creaminess, while cucumber offers a refreshing crunch. Green onions and sesame seeds give extra flavor and texture. Nori strips bring a fun, crispy touch. Don’t forget a drizzle of soy sauce for depth. - Medium saucepan - Mixing bowls - Serving dishes You need a medium saucepan to cook the rice. Mixing bowls help you combine ingredients easily. Serving dishes make your bowl look appealing. Having the right tools makes cooking more enjoyable. Make sure to gather everything before you start. To start, rinse the sushi rice well. Place it in a bowl and cover it with cold water. Swirl it around and drain. Repeat this about three to four times until the water runs clear. This step removes excess starch, keeping the rice fluffy. Next, cook the rice. Combine one cup of rinsed rice with 1 ¼ cups of water in a medium saucepan. Bring the mixture to a boil over medium-high heat. Once it boils, reduce the heat to low. Cover the pan and let it simmer for 18 minutes. After that, remove the pan from heat and let it sit covered for another 10 minutes. This resting time is key for perfect rice. Now, season your rice. In a small bowl, mix one tablespoon of rice vinegar, one teaspoon of sugar, and ¼ teaspoon of salt. Stir until dissolved. Transfer the cooked rice to a large bowl. Gently fold in the vinegar mixture. Allow the rice to cool to room temperature before using it in the bowl. Now, let’s prepare the spicy tuna. In a separate bowl, combine 8 oz of diced sushi-grade tuna with one tablespoon of sriracha and one tablespoon of mayonnaise. Stir gently to coat the tuna evenly. You can adjust the amount of sriracha based on how spicy you want the dish. This mixture adds a bold flavor to your sushi bowl. Time to assemble your sushi bowl! Start by distributing the cooled sushi rice into serving bowls. Make sure to pack the rice evenly at the bottom. Next, top each bowl with a generous portion of the spicy tuna mixture. Now, arrange your toppings. Place slices of avocado and thin cucumber next to the tuna. This adds freshness and crunch to the dish. Finally, finish with garnishes. Sprinkle chopped green onions and sesame seeds over the bowls. You can also add strips of nori for an extra crunch. Drizzle with soy sauce just before serving for that perfect umami kick. Enjoy your delicious creation! For the complete recipe, check [Full Recipe]. To achieve perfect sushi rice, start by rinsing the rice well. Rinse it under cold water until the water is clear. This step removes excess starch, which helps the rice stay fluffy. You should rinse it about three to four times. Next, cook the rice in a medium saucepan. Combine one cup of rinsed rice with 1 ¼ cups of water. Bring it to a boil, then lower the heat. Cover and simmer for 18 minutes. After cooking, let it sit for an extra 10 minutes. This resting time helps the rice absorb any remaining moisture. To avoid mushy rice, make sure not to overcook it. Keep an eye on the water level while it cooks. If you find the rice too soft, try using less water next time. The goal is to have each grain separate and tender. When making the spicy tuna, you can adjust the spice to suit your taste. Start with one tablespoon of sriracha. If you want more heat, add more sriracha a little at a time until it's perfect for you. Mixing in mayonnaise helps mellow the spice, creating a creamy texture. You can also add a dash of soy sauce for an extra umami kick. To enhance the flavor, consider adding ingredients like lime juice or sesame oil. These add brightness and depth to your tuna mix. A pinch of salt can also elevate the overall taste. Creating an appealing sushi bowl is all about layering. Start with a base of sushi rice. Then, add a generous scoop of spicy tuna on top. Arrange avocado slices and cucumber artfully on the side. This not only looks great, but it also allows each ingredient's flavor to shine. For garnishing, sprinkle chopped green onions and sesame seeds on top. This adds color and crunch. Finally, add nori strips for texture and visual appeal. Drizzling soy sauce just before serving adds a glossy finish. {{image_2}} You can switch out tuna for salmon. Salmon brings a rich flavor and is easy to find. Tofu is a great choice for a plant-based meal. It absorbs flavors well and adds a nice texture. You can also try shrimp or crab for a different taste. These proteins can change the whole vibe of your bowl. Feel free to get creative with your toppings! You can add carrots, radishes, or bell peppers for extra crunch. Try shredded cabbage or baby spinach for more color and nutrients. For sauces, think about adding ponzu or a spicy mayo drizzle. These will add layers of flavor and make your bowl unique. If you need a gluten-free option, use tamari instead of soy sauce. This keeps your bowl safe for those with gluten sensitivity. For a vegan or vegetarian version, skip the fish and use marinated tofu. You can also use chickpeas for added protein. These options let everyone enjoy the delicious flavors of the sushi bowl. For the full recipe, check out the Spicy Tuna Sushi Bowl recipe. To keep your spicy tuna sushi bowl fresh, store leftovers in the fridge. Use an airtight container. This helps prevent odors and keeps the tuna safe. The sushi rice stays fresh for about three days. The spicy tuna mix can last one to two days. Always check for signs of spoilage before eating. Reheating sushi rice can be tricky. The best method is to steam it. This keeps the rice moist. For tuna, avoid reheating. Fish should be eaten cold after cooking. If necessary, use it in a different recipe or toss it if it looks off. Always follow safety rules with refrigerated fish. You can freeze sushi rice, but it may change texture. Wrap it tightly in plastic wrap and place it in a freezer bag. Sushi-grade tuna can also be frozen. Wrap it well and freeze for up to two months. To thaw, place it in the fridge overnight. Never thaw at room temperature to keep it safe. A Spicy Tuna Sushi Bowl is a bright and fresh meal. It features sushi rice topped with spicy tuna. You can also add avocado, cucumber, and green onions. The dish combines textures and flavors. The creamy avocado and crunchy cucumber balance the heat of the tuna. Sushi bowls are easy to customize for any taste. You can control the heat easily. Start with one tablespoon of sriracha. Taste the tuna mixture before adding more. If you prefer less spice, use less sriracha. You can also add a bit of mayonnaise for creaminess. It helps tone down the heat. For more spice, add a pinch of chili flakes or a dash of hot sauce. Yes, you can prepare sushi rice in advance. Cook it a few hours before serving. Let it cool at room temperature. Store it in an airtight container. The rice stays good for up to two days in the fridge. For best results, use the rice within one day. Reheat it gently before serving. To sum up, we explored creating a Spicy Tuna Sushi Bowl. You learned about key ingredients like sushi rice and tuna. We also discussed toppings, tools, and easy step-by-step instructions. Remember to perfect your rice and adjust the spice to your liking. There are endless variations, whether you prefer salmon or tofu. Plus, we covered storage tips to keep your bowl fresh. Enjoy making your sushi bowl and customizing it to your taste. Happy cooking!](https://southerndishes.com/wp-content/uploads/2025/06/dfc7ad20-f510-48bc-a9ec-8907780d8b52-300x300.webp)

![- 1 cup almond milk (or any milk of choice) - 1 cup water - 2 bags of black tea (or 2 tablespoons loose-leaf) - 1 tablespoon pumpkin puree - 1 tablespoon maple syrup - 1/2 teaspoon pumpkin pie spice - 1/4 teaspoon vanilla extract - 1/4 teaspoon ground cinnamon - Whipped cream (optional) You can make this drink your own with easy swaps. For a dairy-free option, use oat or coconut milk instead of almond milk. If you want less sugar, try using stevia or agave syrup instead of maple syrup. These changes keep the drink tasty and cozy. Using fresh pumpkin can enhance the flavor. Fresh pumpkin gives a vibrant taste and bright color. You can roast your pumpkin pieces to add depth to the drink. Canned pumpkin is a time-saver. It still tastes great and is easy to use. Both options work well, depending on your time and taste! For the full recipe, check out the detailed steps in the main article! To start, you need to heat the almond milk and water. In a saucepan, combine 1 cup of almond milk with 1 cup of water. Set the heat to medium. Watch it closely as it simmers. Do not let it boil. This step helps blend the flavors well. Next, steep the black tea. After the almond milk and water mix is warm, add two bags of black tea. Let them steep for about five minutes. This time allows the tea to develop a strong flavor. After steeping, remove the tea bags. Now, you are ready to mix in the good stuff. Start by whisking in the pumpkin and spices. Add 1 tablespoon of pumpkin puree and 1 tablespoon of maple syrup. Then, include 1/2 teaspoon of pumpkin pie spice, 1/4 teaspoon of vanilla extract, and 1/4 teaspoon of ground cinnamon. Whisk everything together until it is smooth. This step creates the rich flavor of the chai latte. You want to achieve the right consistency. Keep heating the mixture gently. Stir occasionally, but do not let it boil. Ensure it is warm and well combined. For a frothy drink, consider blending options. You can use a blender to froth it up. Pour the mixture into the blender and blend until creamy. If you prefer, use an immersion blender directly in the pan. This method is simple and effective. Now, for presentation tips. Pour the pumpkin spice chai latte into mugs. If you like, top it with whipped cream. Finish by sprinkling a bit more pumpkin pie spice or ground cinnamon on top. This adds a lovely touch to your cozy drink. Enjoy your homemade pumpkin spice chai latte! For more details, check the Full Recipe. To make your pumpkin spice chai latte even better, try adding more spices. You can mix in a pinch of nutmeg or cardamom for depth. You can also adjust the sweetness. If you like it sweeter, add more maple syrup or honey. For a different twist, use brown sugar or coconut sugar. Each option gives a unique taste to your latte. If you want a dairy-free drink, almond milk works great. You can also try oat milk or coconut milk. These options will keep your chai latte creamy and rich. For toppings, use coconut whipped cream or almond whipped cream. They add a nice touch while keeping it vegan. Batch preparation is a smart way to save time. You can make a large batch of chai base. Store it in the fridge for up to three days. When you want a latte, just heat it up and add milk. Using ready-made ingredients also helps. You can buy pumpkin puree or pumpkin spice blends to save time. This way, you’ll have a delicious drink in no time. Follow this [Full Recipe] for your perfect pumpkin spice chai latte! {{image_2}} You can use many types of milk for your chai latte. Almond milk is a great start. It adds a nutty flavor. If you want something richer, try coconut milk. It gives a creamy texture with a hint of sweetness. Oat milk is another choice. It froths well and has a mild taste. Soy milk works, too, offering a nice balance. Feel free to mix and match to find your perfect blend. Get creative with add-ins for your pumpkin spice chai latte. You can make a chocolate version by adding cocoa powder or chocolate syrup. This gives your drink a sweet twist. For caramel lovers, drizzle some caramel sauce on top. You can also add a shot of espresso for a caffeinated boost. This will give your latte a nice kick to start your day. If you prefer cold drinks, try an iced pumpkin spice chai latte. Start by brewing your chai as usual. Once it's ready, let it cool. Then, pour it over ice in a tall glass. You can blend it with ice for a refreshing, slushy drink. Add whipped cream on top for an indulgent treat. This version is perfect for warm days, keeping you cool and cozy. For the full recipe, check out the details above! To keep your pumpkin spice chai latte fresh, store it in an airtight container. This helps prevent any strange smells or flavors from getting in. Place it in the fridge and try to use it within three days. If you want to save some for later, you can freeze it. Just remember to leave some space in the container, as liquids expand when frozen. When reheating, use a saucepan over low heat. Stir it often to keep it from sticking. If you want to use the microwave, heat it in short bursts. Start with 30 seconds, then stir and check the temperature. This way, you keep the flavors intact and avoid overheating. Most of the ingredients in your chai latte have a good shelf life. Almond milk lasts about 7-10 days after opening, while canned pumpkin can stay fresh for a year if unopened. Black tea has a long shelf life, too, often lasting up to two years when stored correctly. Always check the labels and store them in a cool, dry place for best results. For the full recipe, check the earlier sections of the article. To make a Pumpkin Spice Chai Latte at home, gather these items: - 1 cup almond milk (or any milk of choice) - 1 cup water - 2 bags of black tea (or 2 tablespoons loose-leaf) - 1 tablespoon pumpkin puree - 1 tablespoon maple syrup (adjust to taste) - 1/2 teaspoon pumpkin pie spice (plus more for garnish) - 1/4 teaspoon vanilla extract - 1/4 teaspoon ground cinnamon - Whipped cream (optional) Start by heating the water and almond milk in a saucepan until it simmers. Add the black tea bags and steep for 5 minutes. Then, take the tea bags out. Mix in the pumpkin puree, maple syrup, pumpkin pie spice, vanilla, and cinnamon. Heat until warm, but don’t boil. You can blend it for a frothy finish. Pour it into mugs, add whipped cream if you like, and sprinkle more spice on top. For the full recipe, check out the details above. Pumpkin spice has many benefits. It contains cinnamon, ginger, nutmeg, and cloves. Each spice offers health perks. - Cinnamon: Helps lower blood sugar and reduces inflammation. - Ginger: Aids digestion and can ease nausea. - Nutmeg: Promotes good sleep and has antioxidant properties. - Cloves: Packed with antioxidants and may support liver health. These spices not only add flavor but also boost your health. Plus, pumpkin itself is full of vitamins A and C. It also provides fiber, which is good for digestion. Yes, you can use decaffeinated tea for your Pumpkin Spice Chai Latte. Many people enjoy chai without caffeine. Look for decaf black tea bags or loose-leaf options. This way, you can enjoy the rich flavors without the caffeine jitters. You may also find herbal chai blends that include spices without any tea leaves. So, you can sip on this cozy drink any time of day. You can find Pumpkin Spice Chai Latte at many grocery stores. Look for popular brands like Tazo or Stash. They often offer tea bags or instant mixes. If you prefer local coffee shops, many serve this drink during the fall season. You can also check online retailers for packaged mixes or specialty teas. This way, you can enjoy the taste of pumpkin spice chai latte wherever you are! This recipe for Pumpkin Spice Chai Latte is easy and fun. We covered ingredients, preparation steps, and tips for flavor. You can swap ingredients to fit your tastes. Making it vegan or finding shortcuts is possible. Try different milks or add chocolate for variety. Store leftovers to enjoy later. Now, it's your turn to create your perfect drink. Enjoy the warm flavors and share it with friends!](https://southerndishes.com/wp-content/uploads/2025/06/f2949343-939c-46b8-9734-4087dca65b2b-300x300.webp)
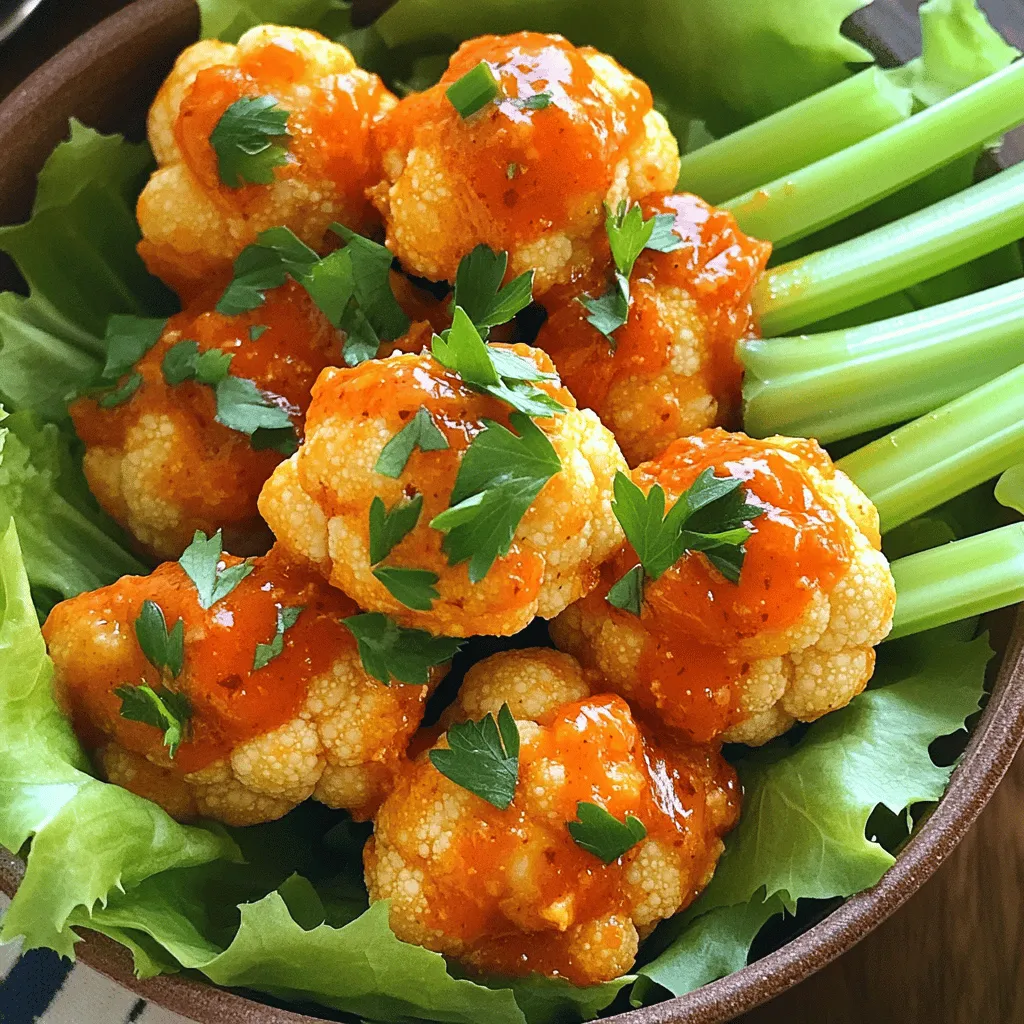
Buffalo Cauliflower Bites Crispy and Flavorful Snack
Are you craving a snack that’s both crispy and packed with flavor? Look no further than my Buffalo Cauliflower Bites! These tasty treats capture…