

Latest & Greatest
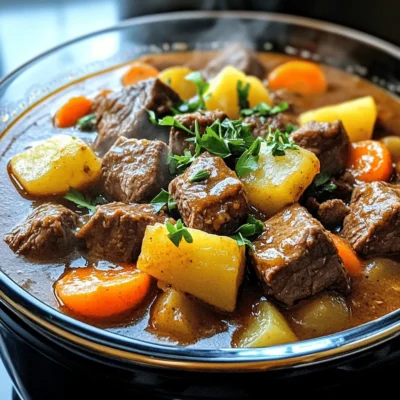
Instant Pot Beef Stew Hearty and Flavorful Delight
If you’re craving a hearty and flavorful dish, look no further than Instant Pot Beef Stew. This meal bursts with
Read more…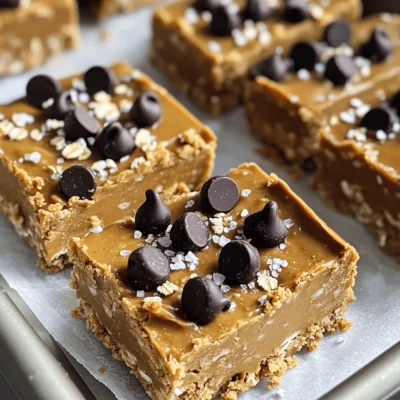
No Bake Peanut Butter Bars Quick and Easy Treat
Looking for a sweet treat that’s quick, easy, and requires no baking? I’ve got you covered with my No Bake
Read more…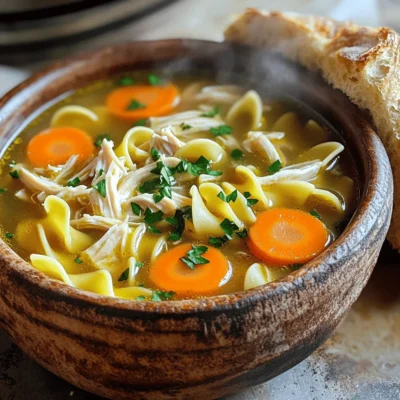
Instant Pot Chicken Noodle Soup Quick and Easy Meal
Are you craving a warm, comforting bowl of chicken noodle soup but short on time? Look no further! In this
Read more…
Slow Cooker Chicken Tortilla Soup Flavorful Dish
Looking for a warm, tasty dish that’s easy to make? Slow Cooker Chicken Tortilla Soup is here to save your
Read more…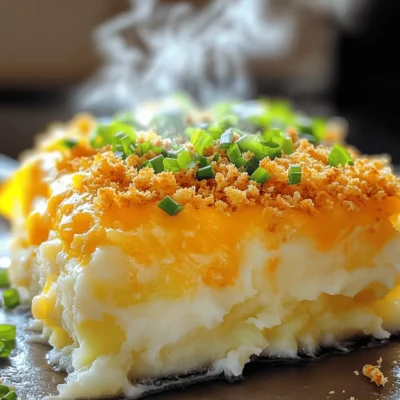
Cheddar Mashed Potato Casserole Savory Comfort Dish
Welcome to the world of Cheddar Mashed Potato Casserole, where comfort meets flavor! This savory dish combines creamy mashed potatoes
Read more…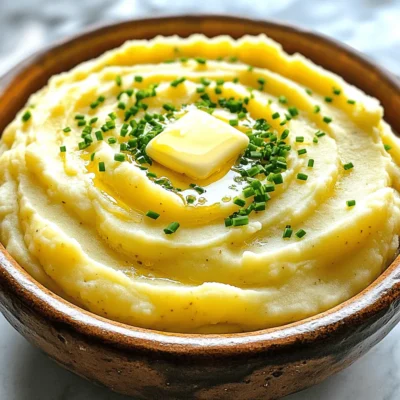
Creamy Garlic Mashed Potatoes Simple and Velvety Dish
Creamy garlic mashed potatoes are a must-have for any meal. They’re simple, velvety, and bursting with flavor. With just a
Read more…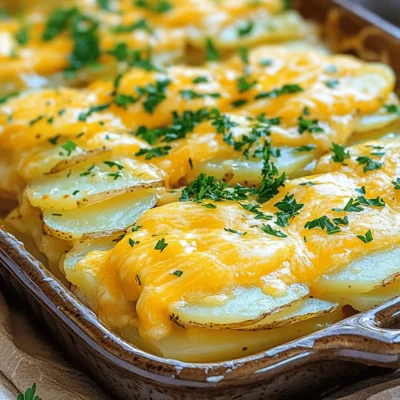
Cheesy Scalloped Potatoes Creamy and Comforting Dish
If you’re craving a dish that’s creamy, cheesy, and downright comforting, look no further than Cheesy Scalloped Potatoes. This classic
Read more…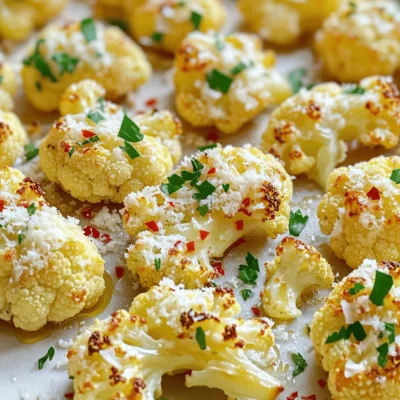
Garlic Parmesan Roasted Cauliflower Tasty Side Dish
Are you looking for a side dish that’s both tasty and easy to make? Garlic Parmesan Roasted Cauliflower is your
Read more…browse recipes


![- 4 boneless, skinless chicken breasts - 3 tablespoons olive oil - Juice of 2 lemons - Zest of 1 lemon - 3 cloves garlic, minced - 2 tablespoons fresh parsley, chopped - 1 tablespoon fresh thyme, chopped (or 1 teaspoon dried thyme) - 1 tablespoon fresh rosemary, chopped (or 1 teaspoon dried rosemary) - 1 teaspoon paprika - Salt and pepper to taste - Lemon slices and parsley for garnish In this recipe, the chicken is the star. I use four boneless, skinless chicken breasts for a tender bite. The chicken gets a burst of flavor from the juice and zest of two lemons. This brings a bright taste that pairs well with the herbs. I add three tablespoons of olive oil for richness. Olive oil also helps the chicken stay moist while cooking. Minced garlic is key for depth. I use three cloves for a nice kick. Fresh herbs add life to this dish. I often use two tablespoons of chopped parsley. It brings a fresh taste. I add one tablespoon each of fresh thyme and rosemary, or you can use dried herbs if fresh is not available. Paprika gives a hint of warmth. Salt and pepper enhance all these flavors. Finally, I like to garnish with lemon slices and parsley. This not only looks nice but adds a fresh touch when serving. For the full recipe, check out the provided details. - Preheat the oven to 400°F (200°C). - In a bowl, whisk together 3 tablespoons of olive oil, juice of 2 lemons, zest of 1 lemon, 3 cloves of minced garlic, 2 tablespoons of chopped parsley, 1 tablespoon of chopped thyme, 1 tablespoon of chopped rosemary, 1 teaspoon of paprika, salt, and pepper. This mix brings bright flavors. The lemon juice adds a tangy taste. The herbs give a fresh and savory touch. - Place 4 boneless, skinless chicken breasts in a large baking dish. Cover them with the marinade. Make sure each piece is well coated. - Let the chicken marinate for at least 30 minutes or up to 2 hours. Marinating is key. It helps the chicken soak up all those delicious flavors. The longer it sits, the better it tastes! - After marinating, place the baking dish in the oven. Bake for 25-30 minutes until the chicken is cooked through (165°F or 75°C). - For a golden finish, you can broil the chicken for an additional 2-3 minutes. This step seals in the juiciness. The chicken will be tender and flavorful. Enjoy the wonderful aroma that fills your kitchen! For the full recipe, check the details above. - Marinate longer for deeper flavor. I suggest marinating for at least 30 minutes. This lets the chicken soak up all the lemon and herb goodness. If you have time, let it sit in the fridge for up to 2 hours. You will taste the difference! - Use fresh herbs for the best results. Fresh parsley, thyme, and rosemary bring bright flavors. Dried herbs can work, but fresh herbs really shine in this dish. - Let chicken rest after baking for juiciness. Once you take the chicken out of the oven, let it sit for about 5 minutes. This helps the juices stay inside, making each bite moist. - Check internal temperature with a meat thermometer. The chicken should reach 165°F (75°C). This ensures it is fully cooked and safe to eat. - Pair with roasted vegetables or a fresh salad. The bright flavors of the chicken work well with colorful veggies. Try carrots, zucchini, or bell peppers for a tasty side. - Serve over rice or quinoa for a complete meal. Both options soak up the juices and add a nice texture. You can also use couscous or a grain of your choice for variety. For the complete recipe, check out the Full Recipe section. {{image_2}} When you cook Baked Lemon Herb Chicken, you can switch things up for fun. Here are some tasty variations to try. You can change the herbs to match your taste. Here are a few ideas: - Use oregano for a more Mediterranean flavor. - Try basil for a sweet twist. - For a quick change, sprinkle on lemon pepper seasoning. It adds a nice zest. Mix up your cooking style for a new experience: - Grilling gives the chicken a smoky flavor. - Pan-searing can create a nice crust. - If you want ease, use a slow cooker. It makes the chicken tender with less fuss. Add more excitement to your dish with these add-ins: - Sun-dried tomatoes bring a rich taste. - Olives add a briny kick. - Want a touch of elegance? Add a splash of white wine into the marinade. It enhances the chicken’s flavor. These small changes can make your Baked Lemon Herb Chicken feel fresh and exciting. Try them out to find your favorite twist! For the full recipe, check out the [Full Recipe]. Store leftovers in an airtight container for up to 3-4 days. This keeps the chicken juicy and tasty. When you reheat, the oven works best. It helps maintain the texture and flavor. You can freeze cooked chicken for up to 3 months. This is great for meal prep. Before you reheat, thaw it in the refrigerator. This way, it stays safe and delicious. You can reheat in a microwave or oven until heated through. If you use the oven, add a splash of water. This keeps the chicken moist during reheating. It makes every bite just as good as fresh! Use a meat thermometer to check for an internal temperature of 165°F (75°C). This step is vital. It ensures that the chicken is safe to eat. Insert the thermometer in the thickest part of the chicken. If it reads 165°F, you are good to go. Yes, marinated chicken can be stored in the fridge for up to 2 hours before baking. This time allows the flavors to soak in. If you want to prep earlier, marinating overnight is also great. Just remember to bring it back to room temp before cooking. It is low in carbs and packed with protein. You can adjust the olive oil for calorie control. Using less oil is an easy way to make it lighter. The fresh herbs add nutrients and flavor, making it a healthy choice. Roasted vegetables, salad, rice, or quinoa are great accompaniments. These sides add color and texture to your meal. Roasted veggies bring out sweetness, while rice or quinoa adds fiber. This combination makes your meal satisfying and balanced. For the full recipe, check out the earlier section. This article provided a simple baked lemon herb chicken recipe. It covered essential ingredients, step-by-step instructions, helpful tips, and variations. You can explore different herbs and cooking methods to make it your own. Remember to store leftovers properly and reheat them with care. This dish is healthy, packed with flavors, and easy to prepare. It’s perfect for any meal. Enjoy creating deliciousness in your kitchen!](https://southerndishes.com/wp-content/uploads/2025/06/84a23d68-4d58-4243-8671-d4ab005c7852.webp)
Baked Lemon Herb Chicken Flavorful and Juicy Delight
Ready for a dish that’s bursting with flavor? Baked Lemon Herb Chicken is not only juicy but also easy to make. With just a…
My Latest Desserts
My Latest Recipes

hey,
i’m !
I’m so happy you’re here!
My kitchen is filled with stories, flavors, and love and I’m so happy to share them with you. Here’s to dishes that feel like home.
![- 4 large bell peppers (red, yellow, or green) - 1 cup quinoa (rinsed) - 2 cups vegetable broth (or water) - 1 can black beans (15 oz, drained and rinsed) - 1 cup corn (frozen or canned) - 1 medium onion (diced) - 2 cloves garlic (minced) - 1 teaspoon cumin - 1 teaspoon smoked paprika - 1 teaspoon chili powder - Salt and pepper to taste - 1 cup diced tomatoes (fresh or canned) - 1 cup shredded cheese (cheddar or pepper jack, optional) - Fresh cilantro or parsley for garnish For this dish, I love using fresh bell peppers. They add color and crunch. You can choose red, yellow, or green peppers based on your taste. Quinoa is a great base for stuffing. It’s full of nutrients and easy to cook. You should rinse it to remove any bitter taste. Black beans and corn bring a nice texture and flavor. They also add protein and fiber. Diced onion and garlic make the dish aromatic and tasty. You can adjust the spices to your liking. Cumin, smoked paprika, and chili powder give it warmth and depth. For a twist, add diced tomatoes and cheese if you like. These ingredients enhance the flavor. Top with fresh herbs for a bright finish. This recipe is simple yet full of flavor. You can find the Full Recipe to guide you through each step. Enjoy your cooking adventure! - Preheat your oven to 375°F (190°C). - Cut the tops off the bell peppers and remove the seeds. Preparing the bell peppers is easy. Just slice off the tops and scoop out the insides. This step helps make room for the tasty filling. I like to lightly brush the outside with olive oil for extra flavor and crispness. - In a medium saucepan, combine quinoa and vegetable broth. - Bring to a boil, then reduce heat to low, cover, and simmer for about 15 minutes. Cooking quinoa is simple. Just mix it with vegetable broth in a pot. Bring it to a boil, then lower the heat. Cover it and let it simmer. After about 15 minutes, you’ll have fluffy quinoa. It’s a great base for the filling. - Heat olive oil in a large skillet over medium heat. - Add diced onion and sauté until translucent, then add minced garlic. Now, let’s sauté some veggies. Heat a bit of olive oil in a skillet. Add diced onion and cook until it turns soft and clear. This usually takes about 3-4 minutes. Then, add minced garlic and stir for another minute. The aroma will fill your kitchen! - Add black beans, corn, diced tomatoes, and spices to the skillet. - Stir until heated through, then mix in the cooked quinoa. Next, it’s time to bring everything together. Add black beans, corn, and diced tomatoes to your skillet. Sprinkle in your spices like cumin and chili powder for flavor. Mix it all well and heat for about 5 minutes. Finally, add the cooked quinoa and stir until combined. - Spoon the quinoa mixture into each prepared bell pepper. - Reserve some cheese for topping, if using. Now comes the fun part: stuffing! Use a spoon to fill each bell pepper with the quinoa mix. Don’t be shy; pack it in! If you like cheese, save some to sprinkle on top later. - Cover with aluminum foil and bake for 30 minutes. - Remove foil and bake an additional 10-15 minutes until tender. Place the stuffed peppers in a baking dish. Cover them with aluminum foil to keep them moist. Bake for 30 minutes. Then, remove the foil and bake for another 10-15 minutes. This will make them tender and delicious. You can find the Full Recipe at the start of this section. Enjoy your cooking! - To avoid soggy bell peppers, pre-bake them for 10 minutes. This helps them stay firm. - Rinse quinoa well before cooking. Use two cups of broth for one cup of quinoa. This keeps it fluffy. - Add cumin and smoked paprika for a warm taste. Fresh herbs like cilantro boost the flavor, too. - For cheese, add it only in the last 10 minutes of baking. This ensures it melts nicely and doesn’t burn. - Serve the stuffed peppers with a side salad for a complete meal. A light vinaigrette works great. - Garnish with fresh cilantro or parsley for color. A sprinkle of lime juice adds a zesty touch. For the full recipe, check out the vibrant quinoa-stuffed bell peppers! {{image_2}} You can make stuffed bell peppers vegan or vegetarian with simple swaps. For cheese, use vegan cheese or nutritional yeast. Instead of meat, add more beans or lentils. This option gives you plant-based protein and keeps the dish hearty. Quinoa is great, but try rice or couscous for a twist. Both options work well and change the texture. You can also mix in different vegetables like zucchini, spinach, or mushrooms. These additions boost flavor and nutrition. Want more heat? Add jalapeños or a dash of hot sauce. For milder flavors, skip the chili powder. You can also play with spices from other cuisines, like Italian herbs or curry powder. This lets you customize the dish to fit your taste. For the full recipe and more details, check out the [Full Recipe]. To keep your stuffed peppers fresh, let them cool first. Place them in a tight container. You can store them in the fridge for up to three days. If you want to keep them longer, freezing is a good option. To freeze your stuffed bell peppers, wrap each one tightly in plastic wrap. Then, place them in a freezer bag or container. They last for up to three months in the freezer. When ready to eat, take them out and thaw in the fridge overnight. For reheating, use the oven for the best taste. Set it to 350°F (175°C). Place the peppers in a baking dish with a little water. Cover with foil and bake for 20-25 minutes. You can also use a microwave. Just heat them for about 2-3 minutes. Make sure they are hot all the way through. Adding a splash of water can help keep them moist. Enjoy your tasty meal! Bake the stuffed peppers for 30 minutes covered with foil. Then, uncover and bake for another 10 to 15 minutes. This helps the peppers become tender and the cheese to melt nicely. Yes, you can prepare the stuffed peppers a day in advance. Just stuff the peppers and place them in the fridge. When you’re ready, bake them straight from the fridge. This saves time and keeps your meal fresh. Stuffed peppers pair well with many sides. Consider serving them with a simple green salad. You can also add some crusty bread or a side of rice. These options will round out your meal nicely. Stuffed peppers are quite healthy! They are packed with nutrients. Quinoa is a great source of protein and fiber. The peppers add vitamins A and C. Beans and corn also boost the nutrition, making this dish a great choice. Absolutely! You can use any bell pepper color: red, yellow, or green. Each adds a unique flavor. If you want to try something different, use poblano or jalapeño peppers for a bit of heat. Stuffed bell peppers are a tasty, healthy meal you can make easily. We covered the main ingredients like quinoa, black beans, and spices. I shared simple steps to prepare, cook, and bake the peppers. You learned tips to avoid soggy peppers and how to store leftovers too. Try different fillings and adjust spices to suit your taste. Cooking is fun, so experiment and enjoy your stuffed peppers.](https://southerndishes.com/wp-content/uploads/2025/06/85208949-c0e2-426a-afab-03706c6a0034-300x300.webp)
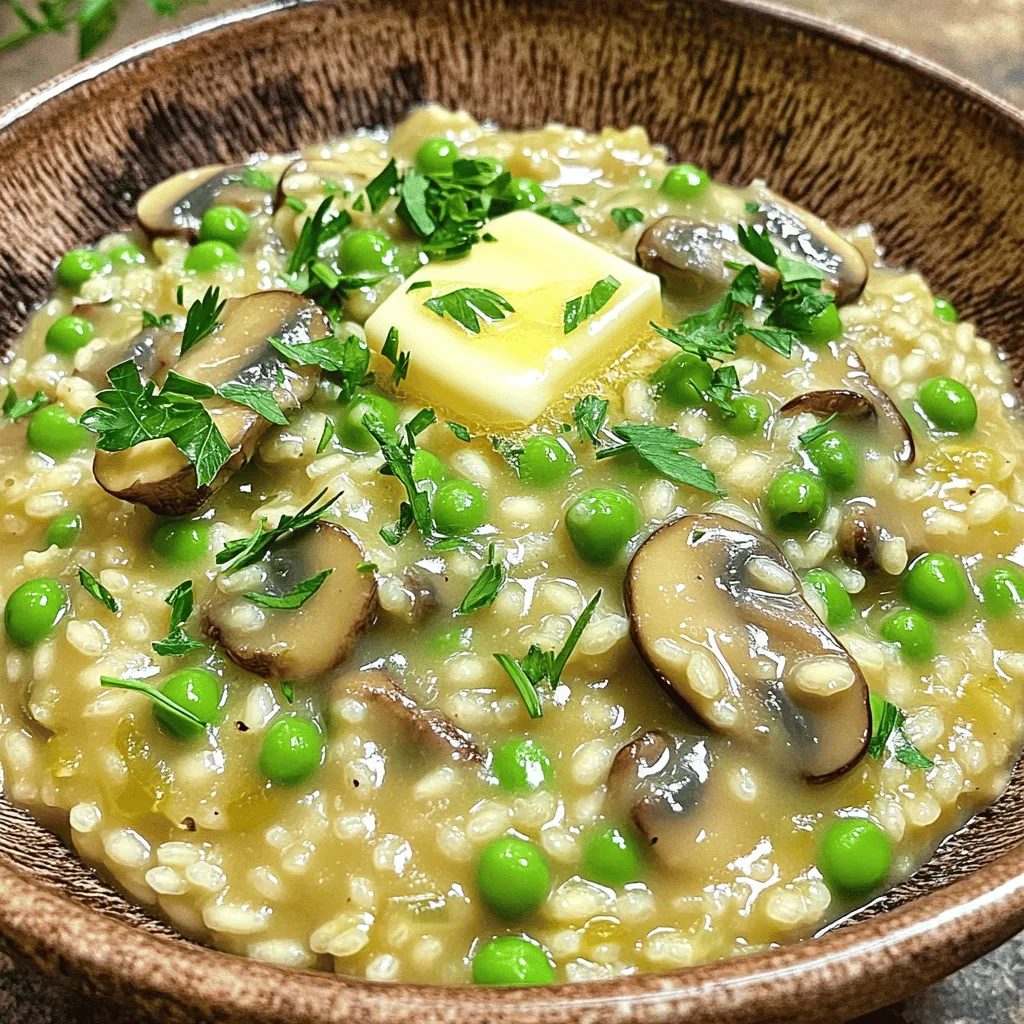
Mushroom Risotto Creamy and Flavorful Comfort Dish
If you’re craving a warm, creamy dish that wraps you in comfort, mushroom risotto is the answer. This classic recipe combines savory mushrooms with…