

Latest & Greatest

No-Bake S’mores Cheesecake Bars Simple and Sweet Delight
Craving a sweet treat that’s easy to make? No-bake s’mores cheesecake bars are your answer! These bars combine creamy cheesecake
Read more…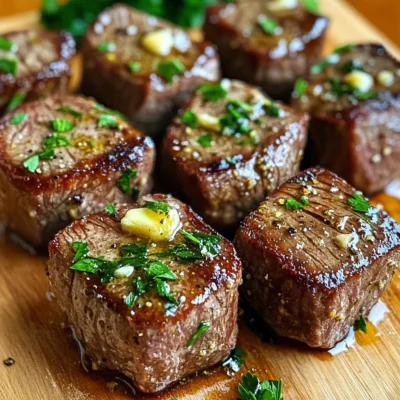
Air Fryer Garlic Butter Steak Bites Easy and Delicious
Are you craving a quick and tasty dinner? Try these Air Fryer Garlic Butter Steak Bites! They’re easy to make
Read more…
Greek Yogurt Pumpkin Parfaits Delicious Fall Delight
Fall is here, and it’s time for a tasty treat! Join me as we whip up Greek Yogurt Pumpkin Parfaits.
Read more…
Chocolate Pumpkin Marble Loaf Delightful and Moist
Are you ready for a treat that blends rich chocolate and cozy pumpkin? This Chocolate Pumpkin Marble Loaf is not
Read more…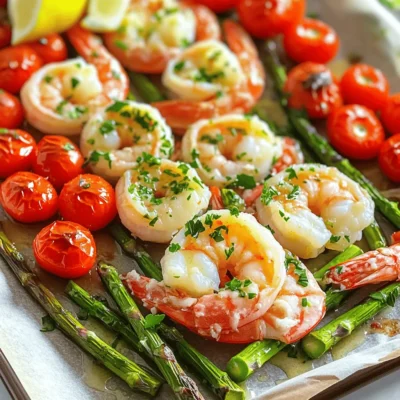
Sheet Pan Garlic Butter Shrimp Flavorful Dinner Delight
Are you ready to impress your family with a quick and tasty meal? This Sheet Pan Garlic Butter Shrimp dish
Read more…
Caramel Pecan Cheesecake Brownies Delightful Dessert
Are you ready to indulge in a sweet treat that combines rich brownies, creamy cheesecake, and crunchy pecans? Caramel Pecan
Read more…
Pumpkin Spice Cinnamon Roll Cookies Indulge in Flavor
Get ready to dive into amazing flavor with Pumpkin Spice Cinnamon Roll Cookies! If you love fall treats, these cookies
Read more…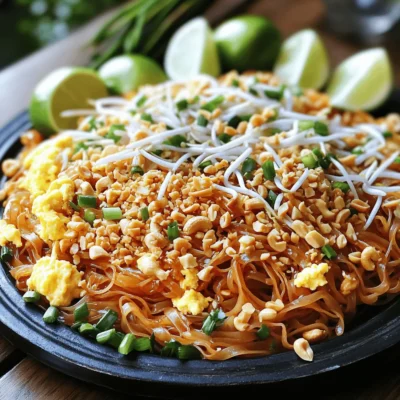
Pad Thai Noodles Simple and Flavorful Delight
If you crave a tasty dish that brings fun to the table, Pad Thai noodles are your answer! This recipe
Read more…browse recipes


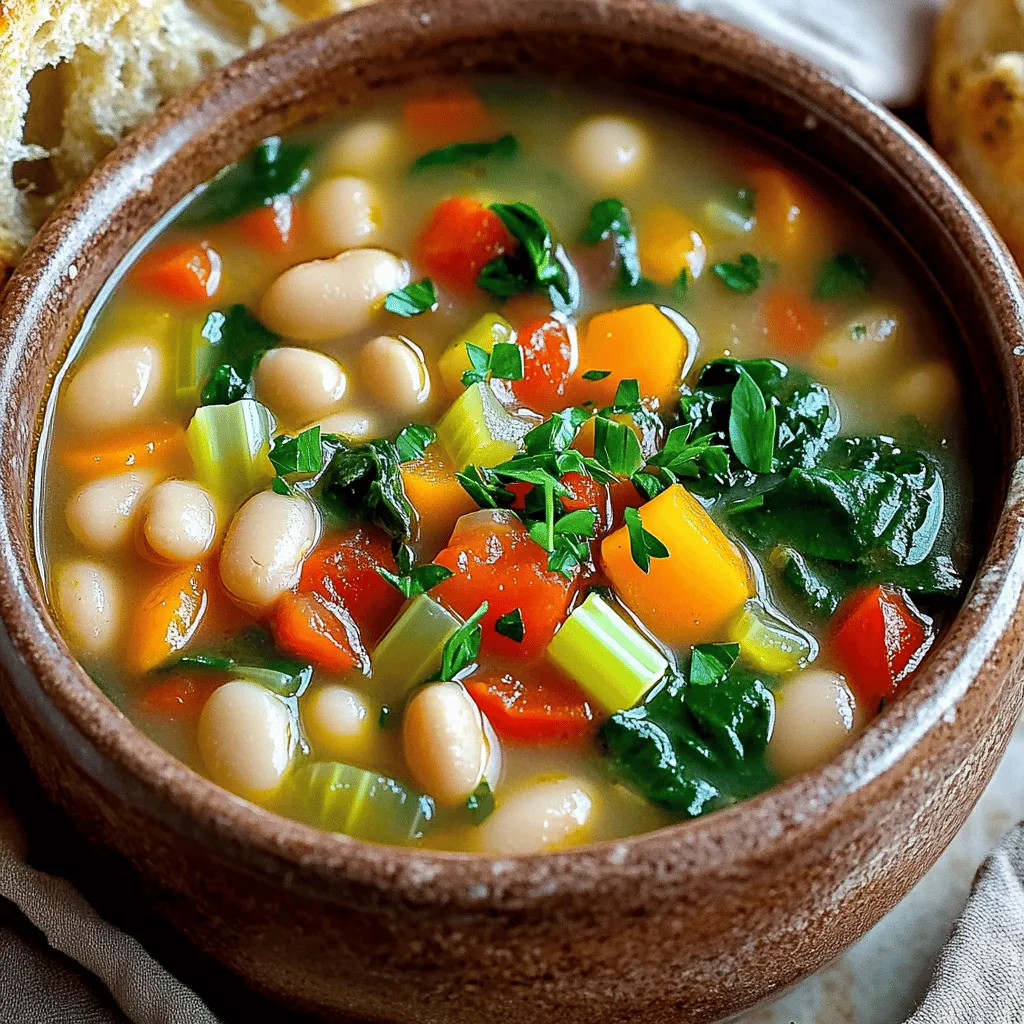
Slow Cooker Tuscan White Bean Soup Comfort Recipe
Looking for a warm, cozy dish to brighten your day? This Slow Cooker Tuscan White Bean Soup Comfort Recipe is just what you need!…
My Latest Desserts
My Latest Recipes

hey,
i’m !
I’m so happy you’re here!
My kitchen is filled with stories, flavors, and love and I’m so happy to share them with you. Here’s to dishes that feel like home.
![For a tasty chicken tikka masala, gather these key ingredients: - 2 pounds boneless, skinless chicken thighs, cut into bite-sized pieces - 1 large onion, finely chopped - 4 cloves garlic, minced - 1 tablespoon fresh ginger, grated - 1 can (14 oz) crushed tomatoes - 1 cup coconut milk - 2 tablespoons garam masala - 2 tablespoons curry powder - 1 teaspoon ground cumin - 1 teaspoon paprika - 1 teaspoon turmeric - 1 teaspoon chili powder (adjust for heat preference) - 1 tablespoon olive oil - Salt and pepper to taste - Fresh cilantro, for garnish - Steamed basmati rice, for serving These ingredients create a rich and creamy dish. The chicken thighs add tenderness. The onion, garlic, and ginger build a strong flavor base. Tomatoes and coconut milk provide a luscious sauce. The spices give the dish its signature taste. You can adjust seasoning to fit your taste: - Use salt and pepper to enhance all flavors. - Control heat by changing the chili powder amount. Add less for mild or more for spicy. These small changes let you make the dish your own. Taste and adjust as you go for the best results. For a beautiful presentation, use fresh cilantro as a garnish. It adds color and freshness. Serve the chicken tikka masala over steamed basmati rice. The rice soaks up the sauce well. You can create a lovely plate by placing rice on one side and the tikka masala next to it. A lime wedge adds a pop of color and a zesty touch. This simple garnish makes your dish stand out. For the full recipe, check out the detailed steps to get your chicken tikka masala just right! - Seasoning the chicken Start by cutting your chicken thighs into bite-sized pieces. Place the chicken in a large bowl. Add salt, pepper, garam masala, curry powder, ground cumin, paprika, turmeric, and chili powder. Mix everything well. This step builds layers of flavor that make your dish special. - Sautéing onions, garlic, and ginger Heat olive oil in a skillet over medium heat. Add the chopped onion and cook until it turns translucent, about 5-7 minutes. Then, add the minced garlic and grated ginger. Cook for one more minute until you smell that wonderful aroma. This combination forms a tasty base for your chicken tikka masala. - Transferring ingredients to the slow cooker Transfer the sautéed onion mixture to the slow cooker. Add your seasoned chicken pieces alongside crushed tomatoes and coconut milk. Stir everything together gently. Make sure all the chicken pieces are well coated with the sauce. - Cooking times on low and high settings Cover the slow cooker with its lid. Cook on low for 6-8 hours or on high for 3-4 hours. The chicken should be tender and cooked through. The slow cooker does all the work for you, allowing the flavors to meld beautifully. - Adjusting seasoning Once your cooking time is up, taste the dish. Adjust the seasoning if needed. You may want a little more salt or spice, depending on your taste. - Thickening the sauce option If you like a thicker sauce, remove the lid. Cook on high for another 30 minutes, stirring occasionally. This step helps the sauce reach that perfect consistency. Enjoy serving your Slow Cooker Chicken Tikka Masala over steamed basmati rice, and don't forget to garnish it with fresh cilantro. For the full recipe, check out [Full Recipe]. Marinating chicken is key. It makes the chicken tender and full of flavor. I recommend marinating for at least one hour, but overnight is best. This helps the spices soak in deep. Using fresh spices is also important. Fresh spices can greatly enhance the taste. Always check your spice jars. If they smell weak, it's time to replace them. Whole spices are ideal. You can grind them just before use for the best taste. Different slow cooker brands can have varying cooking times. Always check your model's manual for guidance. In general, cooking on low takes about 6-8 hours. High settings usually take 3-4 hours. To avoid overcooking chicken, check it early. If it feels tender and pulls apart easily, it's done. Overcooked chicken can become dry, which we want to avoid. Presentation makes a big difference. For plating, try placing the rice in a small mound on one side. Spoon the chicken tikka masala next to it, and sprinkle fresh cilantro on top. For a fun twist, add a lime wedge for color and zest. Pairing is also essential. Steamed basmati rice works great with chicken tikka masala. You might also enjoy a light cucumber salad or naan on the side. For drinks, try a refreshing mango lassi or a chilled glass of white wine. For the complete recipe, check out the Full Recipe. {{image_2}} You can make a tasty vegetarian version of this dish. Just swap the chicken for chickpeas or tofu. Chickpeas add protein and a nice nutty flavor. Tofu will soak up the sauce and become very flavorful. To use chickpeas, use two cans, drained and rinsed. For tofu, press it to remove water and cut it into cubes. Season them just like chicken. Then, follow the same steps in the Full Recipe. If you want a dairy-free meal, use alternative creams instead of coconut milk. Options like cashew cream or almond milk can work well. Cashew cream gives a rich and creamy texture. Almond milk is lighter but still tasty. Just keep an eye on the thickness of your sauce. You might need to adjust the cooking time to get it just right. You can easily change the heat level in your chicken tikka masala. Use different types of chili to switch up the spice. For mild heat, you can use sweet paprika. For more heat, try cayenne pepper or serrano chilies. Start with a small amount, then taste and adjust as needed. This way, everyone can enjoy the dish at their own heat level. To keep chicken tikka masala fresh, store it in an airtight container. Let the dish cool first. This helps prevent steam from building up inside the container. Place it in the fridge. It will stay good for about 3 to 4 days. Make sure to label the container with the date. This way, you won't forget how long it's been in there. If you want to save some for later, freezing is a great option. First, let the dish cool completely. Then, transfer it to a freezer-safe container. You can also use freezer bags. Remove as much air as you can before sealing. Chicken tikka masala can last in the freezer for about 3 months. When you're ready to eat it, thaw it overnight in the fridge. This keeps the flavors intact. To reheat chicken tikka masala without losing texture, use the stovetop. Place the dish in a pot over low heat. Stir it often to heat evenly. You can also add a splash of water or coconut milk if it seems thick. Another option is the microwave. Use a microwave-safe dish, cover it loosely, and heat in short bursts. Stir in between to ensure even warming. Enjoy your delicious meal just like it was fresh! Yes, you can prepare chicken tikka masala ahead of time. Just cook it as normal and let it cool. After that, store it in an airtight container. It will keep in the fridge for about three days. For longer storage, freeze it for up to three months. Thaw it in the fridge overnight before reheating. This makes quick meals during busy days easy and tasty. To thicken the sauce, remove the lid and let it cook for another 30 minutes on high. This will help reduce some liquid. You can also mix in a cornstarch slurry. To make a slurry, mix one tablespoon of cornstarch with two tablespoons of water. Stir this into the sauce and let it cook for a few more minutes. This adds body and richness to your dish. Steamed basmati rice is a classic choice. It soaks up the sauce well. You can also serve warm naan bread for dipping. A simple side salad with cucumber and tomatoes can add freshness. For an extra kick, serve with yogurt or raita. These options balance the spices in the dish and make it a complete meal. This article covered how to make delicious Chicken Tikka Masala. We looked at the key ingredients, seasoning tips, and the slow cooking process. You learned how to adjust flavors and presentation to enhance your dish. Don't forget that options exist for vegetarian and dairy-free versions. Proper storage and reheating can keep leftovers enjoyable. With these steps, you can master Chicken Tikka Masala. Enjoy cooking it, and impress your friends and family with your skills.](https://southerndishes.com/wp-content/uploads/2025/05/5f8467ca-374b-48ab-af07-04d43ac0a94a-300x300.webp)

Fiery Chicken Ramen Bold and Flavorful Recipe Guide
Are you ready to spice up your dinner? This Fiery Chicken Ramen recipe is here to bring bold flavors to your table. I’ll share…