Latest & Greatest

browse recipes

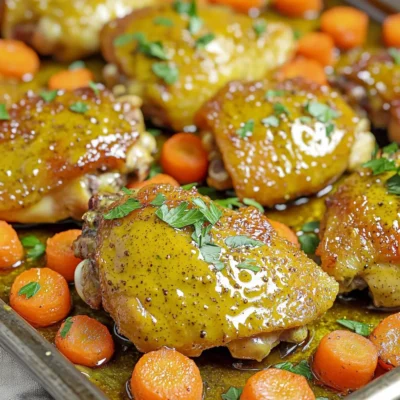
To make this delicious dish, gather the following ingredients: - 1 whole chicken (about 4-5 pounds) - 4 cloves garlic, minced - 2 lemons (one juiced, one sliced) - 1/4 cup olive oil - 2 tablespoons fresh rosemary, chopped (or 1 tablespoon dried) - 1 tablespoon fresh thyme leaves (or 1/2 tablespoon dried) - Salt and pepper to taste - 1 onion, quartered - 2 cups baby carrots (or your choice of vegetables) Each serving of Lemon Garlic Roasted Chicken has around: - Calories: 350 - Protein: 30g - Fat: 20g - Carbohydrates: 10g - Fiber: 2g This meal is not only tasty but also packed with protein and healthy fats. You can easily swap some ingredients if needed: - Chicken: Use chicken parts, like thighs or breasts. - Garlic: Garlic powder can work in a pinch. - Lemon: Use lime juice for a different flavor. - Olive Oil: Avocado oil is a great alternative. - Herbs: Feel free to mix in your favorite herbs like sage or oregano. - Vegetables: Use any veggies you like, such as potatoes or green beans. For more detailed steps, check the Full Recipe. First, gather all your ingredients. You need a whole chicken, garlic, lemons, olive oil, herbs, salt, pepper, onion, and carrots. This makes the dish flavorful and bright. Next, preheat your oven to 425°F (220°C). This step is crucial for the perfect roast. While the oven warms up, prepare your marinade. In a small bowl, mix the olive oil, minced garlic, lemon juice, and chopped herbs. Add salt and pepper for taste. This mixture will bring out the best flavors in your chicken. Now, pat the chicken dry with paper towels. This helps the skin get crispy. Carefully loosen the skin over the chicken breast and thighs. Use your fingers to create space, but be gentle. Rub half of the marinade under the skin. This adds flavor directly to the meat. Next, spread the rest of the marinade all over the chicken's outside. Cover every part, including the wings and legs. Stuff the chicken’s cavity with the quartered onion and lemon slices. This keeps the chicken juicy and adds flavor. Place the baby carrots around the chicken in the roasting pan. They will cook and soak up delicious juices. Finally, tie the chicken legs with kitchen twine. Tuck the wing tips under the body. This helps the chicken cook evenly. Place the chicken in the preheated oven. Roast for about 1 hour and 15 minutes. Use a meat thermometer to check the internal temperature. It should be at least 165°F (75°C) for safety. Halfway through roasting, spoon some juices from the pan over the chicken. This keeps it moist and flavorful. When the chicken is done, take it out of the oven. Let it rest for 10-15 minutes before carving. Resting helps the juices settle back into the meat. To get a golden brown color, keep the oven hot. Avoid opening the oven door too often. This lets heat escape and slows cooking. Using the marinade all over the chicken helps with browning. The oil in the marinade creates a nice crust on the skin. If you want extra crispy skin, try broiling for the last few minutes. Just watch closely so it doesn’t burn. These steps ensure a visually appealing and tasty Lemon Garlic Roasted Chicken. For the full recipe, check the earlier section. To make your chicken juicy, start with a whole bird. A 4-5 pound chicken works best. Before cooking, dry it well with paper towels. This helps the skin crisp up. Use a flavorful marinade made of olive oil, garlic, and lemon juice. Rub the marinade under the skin. This adds flavor directly to the meat. Let the chicken sit for at least 30 minutes before roasting. This allows the flavors to soak in. During roasting, baste the chicken with its juices halfway through. This keeps the meat moist and delicious. One common mistake is not drying the chicken. Wet skin won’t crisp up in the oven. Another mistake is rushing the marinade. If you skip marinating, the chicken lacks flavor. Don’t forget to check the temperature. Use a meat thermometer to ensure the chicken reaches 165°F. Letting the chicken rest before carving is also key. Cutting into it too soon can let all the juices escape. Using the right tools makes cooking easier. A sturdy roasting pan helps the chicken cook evenly. A meat thermometer is essential for checking doneness. Use kitchen twine to tie the legs together. This helps the chicken cook uniformly. I also recommend a sharp knife for carving. A cutting board is important for cutting the chicken safely. For a beautiful presentation, a large platter works best. You can find the full recipe for Lemon Garlic Roasted Chicken in the article. {{image_2}} You can add more flavors by roasting vegetables with the chicken. Use baby carrots, onions, and potatoes. These vegetables soak up the garlic and lemon juices. They add a nice color to your meal too. Just arrange them around the chicken in the roasting pan. This way, they cook in the chicken's juices, making them tasty. You can also try zucchini, bell peppers, or asparagus. Each veggie gives a different taste, so have fun with it! While rosemary and thyme work great, feel free to explore other herbs. Oregano and parsley can add a fresh kick. You might also enjoy adding a pinch of paprika for a bit of heat. For a citrus twist, add some fresh dill or basil. Mix and match these herbs to find your perfect blend. Just remember, fresh herbs yield stronger flavors than dried ones. So adjust your amounts accordingly! You can prepare this dish in different ways. Roasting gives you a crispy skin and juicy meat. It creates a warm, comforting aroma in your kitchen. Grilling, on the other hand, adds a smoky flavor to the chicken. For grilling, marinate the chicken as usual, then cook it on medium heat. This will keep it juicy and tender. Both methods yield delicious results, so choose what fits your mood. Each method has unique flavors and textures, so try them both! After you enjoy your Lemon Garlic Roasted Chicken, let it cool down. Place any leftovers in an airtight container. Make sure to seal it tightly. Store it in the fridge for up to 3 days. This keeps the chicken safe and tasty. If you need more time, consider freezing it. To reheat, use your oven or microwave. If using the oven, preheat it to 350°F (175°C). Place the chicken in a baking dish and cover it with foil. Heat for about 20-25 minutes or until warm. If using a microwave, slice the chicken into smaller pieces. Heat it for 1-2 minutes, checking often. This helps keep it juicy. If you want to freeze the chicken, do it within two days of cooking. Wrap it well in plastic wrap, then place it in a freezer bag. This prevents freezer burn. Label the bag with the date. You can store it in the freezer for up to 3 months. To thaw, move it to the fridge overnight before reheating. For more details, check the Full Recipe. The best way to season chicken is to use a mix of flavors. I love using salt, pepper, and herbs. Fresh herbs like rosemary and thyme work well. You can also add garlic and lemon juice for a bright taste. Rub the seasoning all over the chicken, under the skin, and in the cavity. This allows the flavors to soak in. Remember, the more you season, the better your chicken will taste! Yes, you can use chicken parts! Using thighs, breasts, or drumsticks makes cooking easier. Just adjust the cooking time. Bone-in pieces take longer than boneless ones. You can still use the same marinade from the full recipe. Just coat the chicken parts well and roast them until they are golden and cooked through. This way, you’ll still enjoy that lemon garlic flavor! To know if your chicken is done, check the temperature. Use a meat thermometer to measure. The internal temperature should be at least 165°F (75°C). You can also check the juices. If they run clear, it's a good sign. If the juices are pink, it needs more cooking time. Always let the chicken rest before carving. This helps keep it juicy and tender. You’ve learned how to make a flavorful lemon garlic roasted chicken. We explored ingredients, preparation steps, and ways to keep the chicken juicy. Variations and storage tips can help you serve this dish in many ways. Remember, avoid common mistakes to achieve the best results. With a little practice, you can impress anyone at your table. Enjoy exploring this tasty recipe and make it your own!

Lemon Garlic Roasted Chicken Savory Dinner Delight

Ready to impress your family with a mouthwatering meal? This Lemon Garlic Roasted Chicken is your answer! With just a handful of ingredients, you…

My Latest Desserts

My Latest Recipes

hey,

i’m !

I’m so happy you’re here!

My kitchen is filled with stories, flavors, and love and I’m so happy to share them with you. Here’s to dishes that feel like home.

Quinoa Vegetable Pilaf Simple and Flavorful Recipe

Looking for a quick, tasty, and healthy meal? You’re in the right place! This Quinoa Vegetable Pilaf packs a punch with colorful veggies and…

To make quinoa vegetable pilaf, you need fresh and simple ingredients. Here’s what you will need: - 1 cup quinoa, rinsed - 2 cups vegetable broth - 1 onion, diced - 2 cloves garlic, minced - 1 carrot, diced - 1 bell pepper, chopped (any color) - 1 zucchini, diced - 1 cup green peas (fresh or frozen) - 1 teaspoon cumin - 1 teaspoon smoked paprika - 2 tablespoons olive oil - Salt and pepper to taste - Fresh parsley, chopped, for garnish These ingredients create a tasty and nutritious meal. Quinoa is the star here. It is packed with protein and has a great texture. The broth adds depth, while the veggies give color and crunch. You can switch up the veggies based on what you have. This recipe is all about using what you love. Check out the Full Recipe for the easy steps to cook this dish. To start, heat 2 tablespoons of olive oil in a medium pot over medium heat. Add 1 diced onion and sauté it until it turns translucent. This usually takes about 3-4 minutes. Next, stir in 2 minced garlic cloves, along with 1 diced carrot, 1 chopped bell pepper, and 1 diced zucchini. Cook these vegetables for about 5-7 minutes. You want them to soften and blend well. Once the veggies are ready, stir in 1 teaspoon of cumin and 1 teaspoon of smoked paprika. This step brings out their rich flavors. After 1-2 minutes, add 1 cup of rinsed quinoa to your pot. Make sure the quinoa is well-coated with the vegetable mix. Then, pour in 2 cups of vegetable broth and season with salt and pepper to taste. Bring the mixture to a boil. Once it bubbles, reduce the heat to low. Cover the pot and let it simmer for around 15 minutes. The quinoa will absorb the broth and become fluffy. In the last 5 minutes of cooking, add 1 cup of green peas. Stir them in gently. When the time is up, take the pot off the heat. Let it sit for 5 minutes before fluffing the quinoa with a fork. This dish is perfect as a warm, healthy meal. For the full recipe, check the details above. - Ensuring quinoa is properly rinsed Rinsing quinoa helps remove its natural coating called saponin. This coating can taste bitter. To rinse, place quinoa in a fine mesh strainer. Run cold water over it until the water runs clear. This step is key for a great taste. - Seasoning effectively Seasoning your dish makes all the difference. Use salt and pepper, but also explore herbs and spices. Cumin and smoked paprika add depth. Add these spices early while cooking to release their full flavor. - Alternative vegetables for pilaf You can change the veggies to suit your taste. Try corn, spinach, or broccoli. Each one brings a unique flavor and texture. Mix and match for variety! - Using different herbs and spices Explore different herbs to change the flavor. Fresh basil or cilantro can brighten the dish. You can also try thyme or oregano for a more earthy taste. - Best side dishes to pair with quinoa pilaf Quinoa pilaf pairs well with many side dishes. You can serve it with roasted chicken or grilled fish. A simple green salad also works nicely. - Presentation ideas for serving Make your pilaf pop on the plate! Use a ring mold for a neat shape. Garnish with fresh parsley for a splash of color. Serve in a bowl with a drizzle of olive oil for a charming look. {{image_2}} You can boost your quinoa vegetable pilaf with protein. If you want meat, try chicken or shrimp. For a plant-based option, add beans or lentils. Chickpeas work great, too. Simply rinse and drain canned beans. Stir them in during the last few minutes of cooking. This adds both flavor and texture. To make your pilaf even tastier, play with spices. Try adding turmeric for a warm color. Or, mix in curry powder for a bold twist. You can also use fresh herbs like basil or cilantro. These will brighten the dish. Drizzle a little lemon juice or balsamic dressing before serving. This adds a nice zing. Change your vegetable mix to match the seasons. In spring, add asparagus or fresh peas. Summer calls for corn or tomatoes. In fall, use pumpkin or sweet potatoes. Winter is perfect for root veggies like parsnips or carrots. You can also use seasonal herbs like thyme or rosemary. These choices make your pilaf fresh and exciting. To keep your quinoa vegetable pilaf fresh, store it in an airtight container. This helps prevent drying out. Place it in the fridge if you plan to eat it within a few days. For longer storage, freezing is a good option. When storing in the fridge: - Let it cool completely before sealing. - Use a glass or plastic container with a tight lid. - It can last up to 5 days in the fridge. For freezing: - Divide the pilaf into portions for easy reheating. - Use freezer-safe bags or containers. - Label them with the date for reference. - It can stay good for up to three months in the freezer. How long can you keep it in the fridge? Quinoa vegetable pilaf can last about five days in the fridge. After that, the texture may change, and it may not taste as fresh. Signs of spoilage Look for any off smells or a change in color. If you see mold or the pilaf feels slimy, it’s best to throw it away. Always trust your senses; if it seems off, don’t eat it. Quinoa vegetable pilaf is a tasty dish made with quinoa and vegetables. It is healthy, colorful, and full of flavor. Quinoa is a great source of protein and fiber. The mix of vegetables adds vitamins and minerals. You can use any veggies you like, making it a flexible recipe. This dish is perfect as a side or a main meal. Plus, it's quick to make and easy to enjoy. Cooking quinoa vegetable pilaf takes about 30 minutes in total. You spend about 10 minutes prepping the ingredients. This includes chopping the veggies and rinsing the quinoa. Then, you cook everything for about 20 minutes. The quinoa cooks in the vegetable broth, absorbing all the flavors. You can have a warm, tasty meal ready in no time! Yes, you can make quinoa vegetable pilaf ahead of time. Prepare it and let it cool before storing. Place it in an airtight container in the fridge. It stays fresh for about 3 to 5 days. To reheat, add a splash of water and heat it in the microwave or on the stove. This way, you can enjoy a quick, healthy meal whenever you want! For the full recipe, check out the instructions above. In this blog post, we explored how to make delicious quinoa vegetable pilaf. We covered the key ingredients, cooking steps, and helpful tips for the best results. You can easily customize this dish with various proteins and spices. Don’t forget to store any leftovers properly for later. Quinoa pilaf is a healthy and flexible meal that anyone can enjoy. Give it a try, and you might just discover your new favorite dish!