

Latest & Greatest
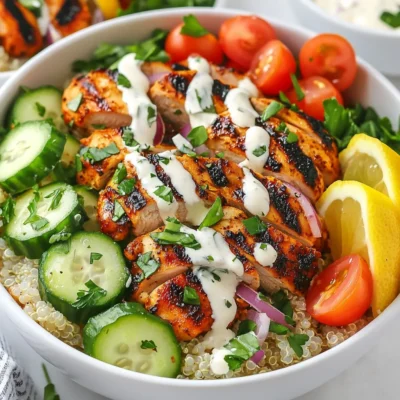
Chicken Shawarma Bowls Flavorful and Wholesome Meal
Are you ready to dive into a delicious and healthy meal? Chicken Shawarma Bowls are flavorful, wholesome, and easy to
Read more…
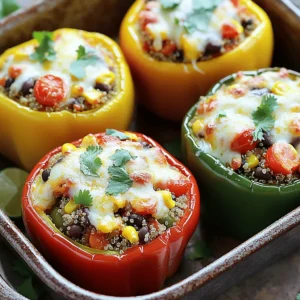
Stuffed Pepper Soup Savory and Flavorful Dish
Looking for a hearty meal that bursts with flavor? Stuffed pepper soup is your answer! This dish combines colorful bell
Read more…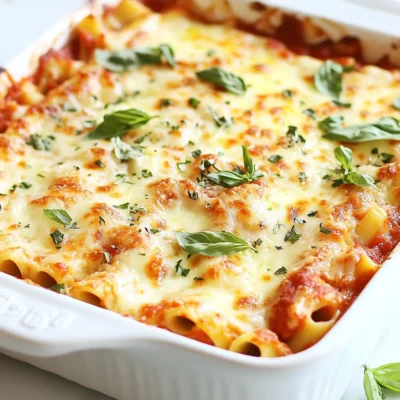
Baked Ziti Dinner Delight Simple and Satisfying Meal
When you crave a hearty meal that everyone loves, baked ziti is the answer. This dish is simple to make
Read more…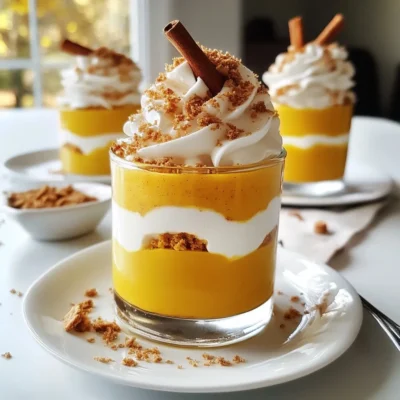
Healthy Pumpkin Mousse Delightful and Simple Recipe
Looking for a sweet treat that won’t derail your healthy eating goals? Try my Healthy Pumpkin Mousse! This delightful recipe
Read more…
Cajun Dirty Rice with Shrimp and Sausage Delight
Welcome to my kitchen! Today, we’re diving into the mouth-watering world of Cajun Dirty Rice with Shrimp and Sausage. This
Read more…
Creamy Sun-Dried Tomato Gnocchi Delightful Recipe
If you love rich flavors and filling meals, you’ll enjoy my Creamy Sun-Dried Tomato Gnocchi. This dish offers a perfect
Read more…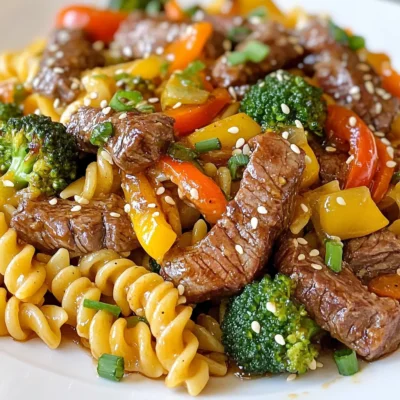
Honey Garlic Steak Rotini Flavorful Pasta Delight
Looking for a dinner that packs a punch in flavor? You’re in the right place! This Honey Garlic Steak Rotini
Read more…
Creamy Taco Soup High Protein Flavorful and Filling
Are you ready to enjoy a delicious, creamy taco soup that’s packed with protein? This flavorful dish combines lean turkey,
Read more…browse recipes

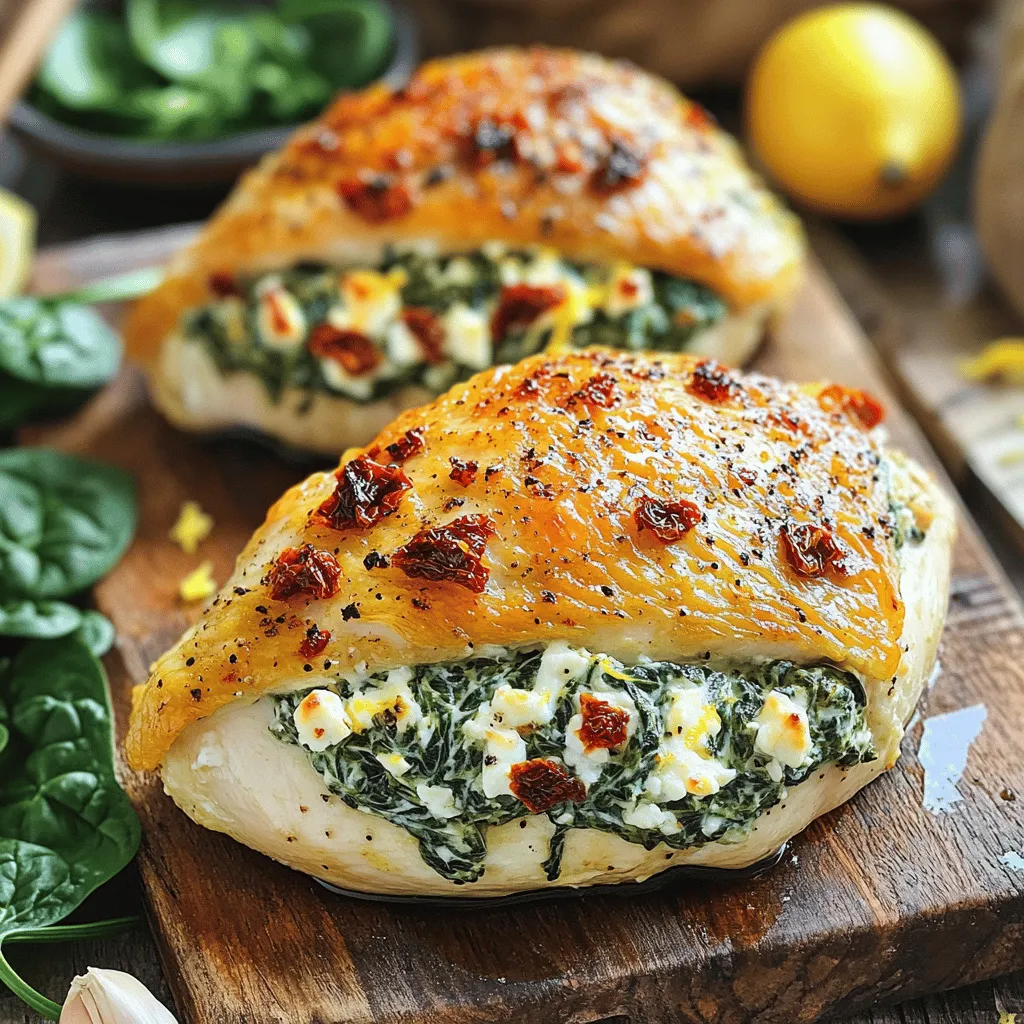
Spinach and Feta Stuffed Chicken Savory Dinner Delight
Get ready to impress your family with a delicious Spinach and Feta Stuffed Chicken! This savory dinner delight is easy to make and packed…
My Latest Desserts
My Latest Recipes

hey,
i’m !
I’m so happy you’re here!
My kitchen is filled with stories, flavors, and love and I’m so happy to share them with you. Here’s to dishes that feel like home.
![To make these no-bake chocolate oatmeal cookies, you will need: - 1 cup rolled oats - 1/2 cup creamy peanut butter - 1/4 cup unsweetened cocoa powder - 1/2 cup honey or maple syrup - 1/2 cup brown sugar - 1/4 cup milk (or dairy-free alternative) - 1 teaspoon vanilla extract - 1/2 cup dark chocolate chips (dairy-free if preferred) - A pinch of salt If you need to convert measurements, here are some quick tips: - 1 cup = 8 fluid ounces - 1/2 cup = 4 fluid ounces - 1/4 cup = 2 fluid ounces - 1 teaspoon = 5 milliliters These conversions help ensure your cookies turn out just right. You can easily adjust this recipe for dietary needs: - Use almond or sunflower butter instead of peanut butter for nut-free options. - Maple syrup can replace honey for a vegan choice. - Swap regular milk for almond or oat milk for a dairy-free version. These substitutions keep the flavor and texture delicious while catering to different diets. To make no-bake chocolate oatmeal cookies, start by gathering your ingredients. You will need rolled oats, peanut butter, cocoa powder, honey (or maple syrup), brown sugar, milk, vanilla extract, dark chocolate chips, and a pinch of salt. 1. First, take a medium saucepan. Over low heat, mix honey, brown sugar, cocoa powder, and milk. Stir it well until it melts and becomes smooth. This should take about 2-3 minutes. 2. Once melted, remove the pan from the heat. Add peanut butter and vanilla extract into the pan. Stir until the peanut butter melts and combines well with the chocolate mix. 3. In a large bowl, put the rolled oats and a pinch of salt. Pour the warm chocolate mixture over the oats. Mix well until every oat is coated. 4. Next, fold in the dark chocolate chips. Make sure they spread evenly through the mixture. 5. Now, line a baking sheet with parchment paper. Use a tablespoon to scoop the mixture and drop it onto the sheet. Flatten each scoop slightly with the back of the spoon. 6. Place the baking sheet in the fridge for at least 30 minutes. This helps the cookies set and become firm. 7. After they are set, take the cookies out and serve! Store any extras in an airtight container in the fridge. When melting chocolate or peanut butter, keep the heat low. High heat can burn them, leading to a gritty texture. Stir slowly to ensure everything melts evenly. If using natural peanut butter, it may be thicker. You can warm it slightly in the microwave for easier mixing. Avoid using quick oats in this recipe; they don’t hold up as well. Always measure ingredients accurately for the best results. If the mix feels too dry, add a splash more milk to reach the right consistency. Lastly, don’t skip the chilling step. This helps the cookies firm up nicely. For the full recipe, check out the [Full Recipe]. To get the best texture in your no-bake chocolate oatmeal cookies, use rolled oats. They give a chewier bite than quick oats. If you want a creamier feel, add more peanut butter. This adds richness and a smooth texture. Balance is key. Too much cocoa can make them dry. Adjust the cocoa powder to suit your taste. For uniform cookies, use a cookie scoop. This tool helps you portion out the dough evenly. If you don’t have a scoop, use a tablespoon. Make sure to flatten each cookie slightly. This helps them set evenly in the fridge. A consistent size ensures they all taste great and look good too! To boost the chocolate flavor, add a splash of espresso. It makes chocolate taste richer without adding a coffee flavor. You can also try different chocolate chips. Use dark, milk, or even white chocolate for fun twists. Another option is to sprinkle some sea salt on top. This contrast makes the chocolate stand out even more. For the full recipe, check out the complete guide. {{image_2}} You can change these cookies with fun add-ins. Try adding: - Chopped nuts (like almonds or walnuts) - Dried fruit (like raisins or cranberries) - Seeds (like chia or flaxseeds) - Coconut flakes These options add flavor and texture. You can mix and match to find your favorite. Want to change the taste? You can swap the peanut butter for other nut butters. Almond butter or cashew butter works well. For sweeteners, use agave syrup or coconut sugar instead of honey or brown sugar. These swaps can give the cookies a new twist. You can make your cookies chewy or crunchy. For chewy cookies, use more oats and let them set less time in the fridge. For crunchier cookies, add more oats or let them sit longer. You can even bake them for a few minutes if you want a different texture. Experiment with these variations to create the perfect no-bake chocolate oatmeal cookies that suit your taste! To keep your no-bake chocolate oatmeal cookies fresh, store them in an airtight container. Place parchment paper between layers if stacking. This prevents sticking and keeps the cookies intact. Store the container in the fridge for the best flavor and texture. Avoid leaving them at room temperature for too long. When stored properly, these cookies last about one week in the fridge. You may notice the texture change slightly over time, but they remain tasty. If you want to enjoy them longer, consider freezing them. Freezing cookies is simple. First, let them cool completely. Then, place them in a freezer-safe bag or container. They can last for up to three months in the freezer. When you want to eat some, take them out and let them thaw in the fridge. For a quick treat, you can also enjoy them straight from the freezer! Yes, you can use quick oats. They will change the texture. Quick oats create a softer, chewier cookie. For more bite, stick with rolled oats. Rolled oats give cookies a heartier feel. To make these cookies vegan, swap honey for maple syrup. Use dairy-free chocolate chips and nut milk. This way, you enjoy a tasty treat that fits a vegan diet. To soften hardened peanut butter, microwave it for a few seconds. Stir it well to mix the heat. You can also add a splash of warm water. This helps smooth it out for easier mixing. Yes! Almond or cashew butter works great. Each nut butter gives a unique taste. Choose one that you like best for your cookies. These cookies take about 30 minutes to set in the fridge. Make sure they are firm before serving. This helps them hold their shape and adds to the texture. Absolutely! Chopped nuts or seeds add crunch and flavor. Walnuts or sunflower seeds are great options. Just mix them in with the oats for an extra boost. Store your cookies in an airtight container. Keep them in the fridge for freshness. They will last up to a week if stored properly. Yes, you can freeze them! Place cookies in a single layer in a freezer bag. They last up to three months in the freezer. Just thaw before enjoying again! If you prefer a sweeter cookie, add more honey or maple syrup. You can also sprinkle some sugar on top before chilling. This gives a nice touch of sweetness. Yes! Use gluten-free oats to make them gluten-free. Check the label to ensure they are certified gluten-free. This way, everyone can enjoy your cookies! We covered the key ingredients, cooking steps, and helpful tips for making cookies. Knowing the right measurements and substitutions helps everyone enjoy baking, no matter their needs. Use my tips to avoid common mistakes and create perfect cookies. Explore variations to keep your recipes fresh and exciting. Finally, remember the best ways to store your treats for later enjoyment. With these insights, you can confidently bake delicious cookies every time. Enjoy your baking journey!](https://southerndishes.com/wp-content/uploads/2025/04/bdc3a8b3-e808-48e8-81dc-b90a5ebe4587-300x300.webp)
![- 1 cup fresh or frozen raspberries - 1 cup milk (dairy or non-dairy) - ½ cup white chocolate chips - 1 cup ice cubes - 1 tablespoon honey or maple syrup - Whipped cream for topping - Fresh raspberries and white chocolate shavings for garnish When measuring, use a set of dry and liquid measuring cups. For sticky items like honey, use a liquid measuring cup for easy pouring. For dry ingredients, fill the cup and level it off with a knife. This method keeps your measurements accurate. You can switch out white chocolate chips for dark chocolate or even milk chocolate. If you want a vegan option, use almond, oat, or coconut milk. Maple syrup works great but feel free to use agave nectar if you prefer. Fresh raspberries can be swapped for strawberries or blueberries, bringing a new twist to your frappe. This is the [Full Recipe] for the Raspberry White Chocolate Frappe, where you can find all details for making this sweet treat. Enjoy! First, gather all your ingredients for the Raspberry White Chocolate Frappe. You will need: - 1 cup fresh or frozen raspberries - 1 cup milk (dairy or non-dairy) - ½ cup white chocolate chips - 1 cup ice cubes - 1 tablespoon honey or maple syrup - Whipped cream for topping - Fresh raspberries and white chocolate shavings for garnish Make sure your raspberries are washed if they are fresh. If you use frozen ones, there's no need to thaw them. Measure out the milk and white chocolate chips. Keep everything close by for easy access. Now it’s time to blend your ingredients. In a blender, combine the raspberries, milk, white chocolate chips, ice cubes, and honey or maple syrup. Blend on high until the mixture is smooth and creamy. If you like a thicker frappe, add more ice and blend again. Next, taste your frappe. If you want it sweeter, add a bit more honey or syrup. Blend again briefly to mix. This step is key. You want the perfect balance of flavors. Pour the frappe into tall glasses, leaving some space at the top. This space is for the whipped cream. Add a generous dollop of whipped cream on each glass. It makes the drink look fancy and taste even better! Finally, add a few fresh raspberries on top. Sprinkle white chocolate shavings for that extra touch. Trust me, this makes your frappe even more delightful. Enjoy your homemade Raspberry White Chocolate Frappe! For full details, check the Full Recipe. To get the right texture for your Raspberry White Chocolate Frappe, start with the ice. Use one cup of ice cubes. If you want it thicker, add more ice. Blend the ingredients until smooth. If it’s too thick, add a little milk. Blend again until you reach your desired creaminess. You can add more flavors to this frappe. Try a splash of vanilla extract for warmth. A few mint leaves can bring a fresh twist. If you like extra sweetness, add more honey or maple syrup. Just blend it all together. Always taste your mixture before serving. Adjusting flavors helps you create your perfect drink. Serving your frappe can be fun! Use tall glasses to show off the colors. Top with whipped cream for a creamy layer. Add fresh raspberries on top for a pop of color. White chocolate shavings are a great final touch. They add an elegant look and flavor. Use a straw or a spoon for easy sipping. Enjoy your beautiful drink! {{image_2}} You can easily make a dairy-free or vegan version of this frappe. Use almond, soy, or oat milk instead of regular milk. The white chocolate chips can be swapped for dairy-free chips. This change keeps the creamy taste and sweetness while making it suitable for those who avoid dairy. You can switch the raspberries for other fruits based on the season. Strawberries, blueberries, or even peaches work well. Each fruit brings its own unique flavor. For a tropical twist, try mango or pineapple. Just remember to adjust the sweetness if needed! Want to add a little more flavor? Try adding a touch of mint or vanilla extract. A few mint leaves in the blender can give it a fresh taste. A splash of vanilla can enhance the sweet notes from the white chocolate. These simple additions can transform your frappe into a new delight. If you have some Raspberry White Chocolate Frappe left over, store it in the fridge. Use an airtight container to keep it fresh. It will stay good for about one day. After that, the texture may change. When you are ready to enjoy it again, give it a good shake or stir. You can freeze the frappe if you want to save it longer. Pour the leftover frappe into ice cube trays or freezer-safe bags. This way, you can use it later in smoothies or other drinks. It can last up to three months in the freezer. When you’re ready to use it, just blend the cubes with a bit of milk for a quick treat. Reheating is not the best option for this drink. If you try it, use a low heat setting. Heat it slowly in a pot or microwave. Be careful not to boil it, as this can change the flavor. If you want it cold again, blend it with some ice instead. This will bring back its refreshing taste and texture. If you want to skip white chocolate, try using yogurt. Greek yogurt adds creaminess and tang. You can also use vanilla bean paste. This gives a sweet flavor without the chocolate. If you like dark chocolate, use dark chocolate chips instead. They add a rich taste and a fun twist. Yes, you can make the frappe ahead of time! Blend the ingredients and store it in the fridge for up to two hours. If you want to keep it longer, freeze it. Pour it into ice cube trays. When ready, blend the frozen cubes with a little milk. This makes a great quick treat! You can easily change how sweet your frappe is. Add more honey or maple syrup for extra sweetness. If it’s too sweet, balance it with a splash of lemon juice. This will brighten the flavors. Taste as you go to get it just right! For more ideas, check the Full Recipe. This blog post shared how to make a delicious raspberry frappe. You learned about key ingredients, measurement tips, and substitutions. We covered step-by-step instructions for preparing, blending, and serving your drink. Tips for perfect consistency and flavor enhancements will help you along the way. Explore the variations for dietary needs and seasonal tastes. Finally, remember proper storage and reheating tips. Enjoy your frappe and get creative with it!](https://southerndishes.com/wp-content/uploads/2025/06/40ee600f-cc24-49d5-a294-44e9ad467d74-300x300.webp)


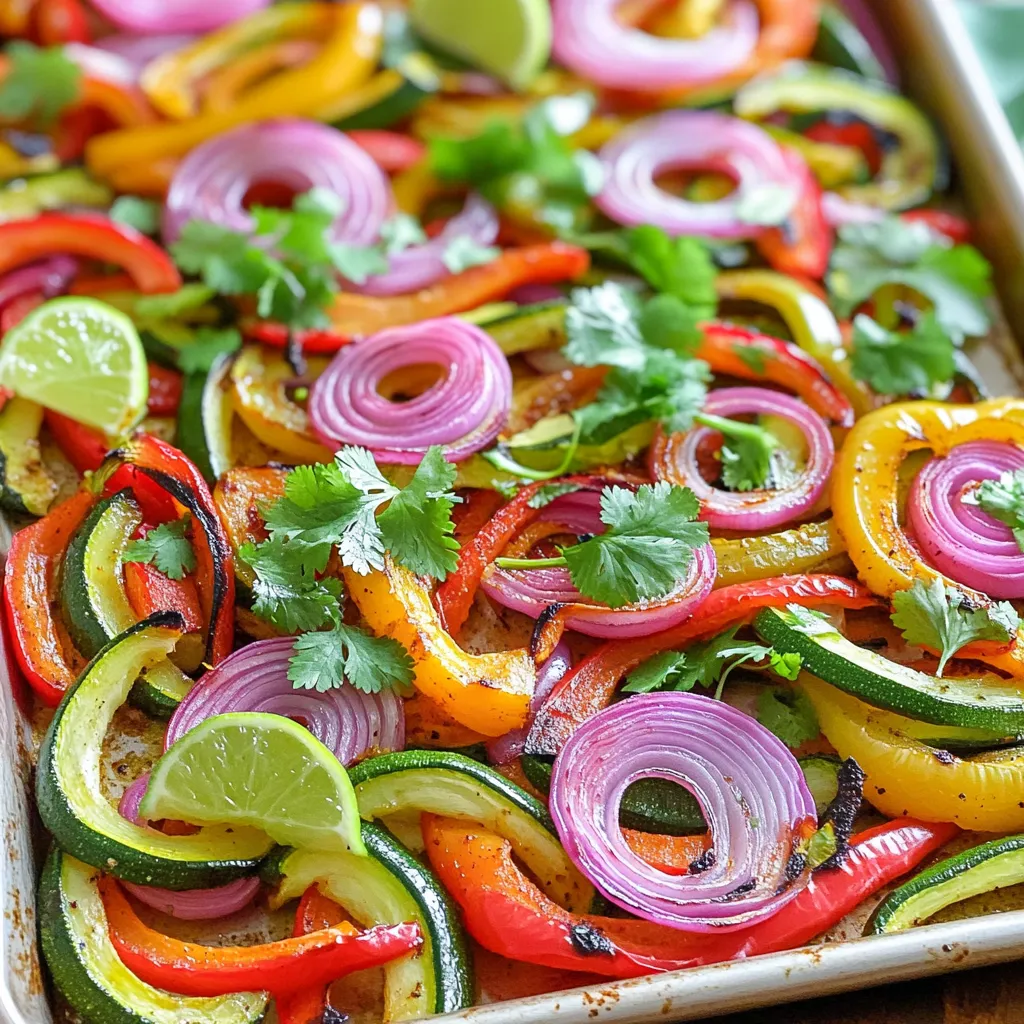
Sheet Pan Fajita Vegetables Flavorful and Easy Dish
Looking to add a burst of flavor to your dinner routine without the fuss? Sheet Pan Fajita Vegetables are here to save the day!…