Latest & Greatest

Apple Cider Mocktail Delightful Drink for Every Occasion
Are you ready to sip on something delicious? The Apple Cider Mocktail is your perfect drink for any event. Packed
Read more…
Air Fryer Parmesan Garlic Broccoli Simple and Tasty
Looking for a simple and tasty way to enjoy broccoli? Try my Air Fryer Parmesan Garlic Broccoli! This quick recipe
Read more…
Air Fryer Garlic Parmesan Brussels Sprouts Delight
Craving a tasty side dish that’s easy and quick? Let me introduce you to Air Fryer Garlic Parmesan Brussels Sprouts!
Read more…
No Bake Pumpkin Spice Protein Balls Easy Snack Idea
Looking for a quick and tasty snack? These No Bake Pumpkin Spice Protein Balls are perfect! In just a few
Read more…
Honey Garlic Tofu Stir Fry Flavorful and Easy Dish
Are you ready to savor a tasty and easy meal? This Honey Garlic Tofu Stir Fry will quickly become your
Read more…
Lemon Poppy Seed Loaf Irresistible Moist Delight
Indulge in the zesty goodness of Lemon Poppy Seed Loaf, a moist delight that will brighten your day! This simple
Read more…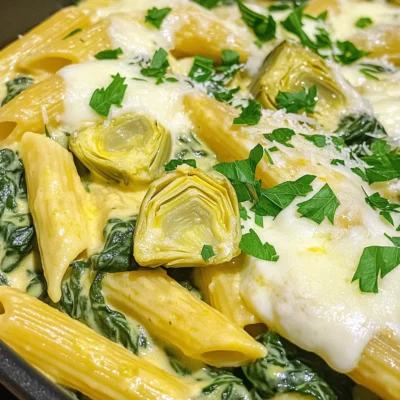
One Pot Spinach Artichoke Pasta Creamy Delight Recipe
Craving a creamy, rich dish that’s easy to make? Look no further! My One Pot Spinach Artichoke Pasta is both
Read more…
Chocolate Chip Protein Donuts Delightful and Healthy
Are you craving something sweet that won’t derail your health goals? You’re in luck! These Chocolate Chip Protein Donuts are
Read more…browse recipes

No Bake Chocolate Chip Cookie Dough Delight Recipe
Craving a sweet treat but don’t want to bake? I’ve got you covered! My No Bake Chocolate Chip Cookie Dough Delight Recipe is a…
My Latest Desserts
My Latest Recipes
hey,
i’m !
I’m so happy you’re here!
My kitchen is filled with stories, flavors, and love and I’m so happy to share them with you. Here’s to dishes that feel like home.
Cauliflower Fried Rice Simple and Tasty Meal Option
Looking for a quick and healthy meal? Cauliflower fried rice is your answer! This dish is simple to make and tastes great, plus it’s…
![To make a tasty cauliflower fried rice, you will need the following main ingredients: - 1 medium head of cauliflower, grated or processed into rice-sized pieces - 1 cup of mixed vegetables (peas, carrots, corn) - 1 cup fresh spinach, roughly chopped - 2 eggs, lightly beaten (or 1/4 cup tofu for a vegan option) - 3 green onions, sliced - 2 cloves garlic, minced - 1 tablespoon fresh ginger, grated - 3 tablespoons soy sauce or tamari (for gluten-free) - 1 tablespoon sesame oil - 1 tablespoon olive oil - Salt and pepper to taste These ingredients come together to create a colorful and nutritious dish. The cauliflower acts as the base, giving you a satisfying texture. The mixed vegetables add color and nutrients, while the eggs or tofu provide protein. You can enhance the taste of your cauliflower fried rice with a few optional ingredients: - Sesame seeds for garnish - Red pepper flakes for heat - Bell peppers for sweetness - Mushrooms for umami - Peanuts for crunch Adding these optional items can make your dish more exciting. Don’t hesitate to get creative! If you have specific dietary needs, here are some substitutions: - Use quinoa or brown rice instead of cauliflower for a grain option. - Swap soy sauce for coconut aminos if avoiding soy. - Replace eggs with chickpea flour to maintain a vegan dish. - Use any veggies you like, such as zucchini or broccoli. These substitutions allow everyone to enjoy delicious cauliflower fried rice. Feel free to mix and match ingredients based on what you have at home or your dietary restrictions. For the full recipe, refer to the cooking instructions above! To start, grab a medium head of cauliflower. Remove the leaves and core. Cut the cauliflower into small florets. Next, use a food processor to pulse the florets until they look like rice grains. If you do not have a food processor, you can also use a box grater. This step is key for a great texture in your dish. Heat one tablespoon of olive oil in a large skillet over medium heat. Add two cloves of minced garlic and one tablespoon of grated ginger. Sauté for about one minute until they smell good. Next, toss in one cup of mixed vegetables. Stir-fry these for about three to four minutes until they soften. Now, push the veggies to one side of the pan. Pour in two beaten eggs, or you can use tofu for a vegan option. Scramble the eggs until they are fully cooked, then mix them with the veggies. Add the processed cauliflower rice and three tablespoons of soy sauce. Stir everything well to coat it evenly. Cook for another five to seven minutes. Keep stirring until the cauliflower gets tender but stays firm. In the last minute, add one cup of roughly chopped spinach, stirring until it wilts. Season with salt and pepper to taste. Drizzle one tablespoon of sesame oil before you finish cooking. To get the best texture, do not overcook the cauliflower. It should be tender yet not mushy. Using fresh ingredients gives more flavor. You can also add sesame seeds as a nice touch for garnish. Enjoy your delicious cauliflower fried rice! For the complete recipe, check out the Full Recipe section. To prepare cauliflower for fried rice, you can grate or process it. If you have a food processor, this task becomes quick. Cut the cauliflower into small florets. Place them in the processor and pulse until it resembles rice. If you lack a food processor, grab a box grater. Hold the cauliflower steady and grate it until it looks like rice. Both methods work well, so choose what you have on hand. For perfect cauliflower fried rice, the right tools matter. A large non-stick skillet or wok helps prevent sticking. A spatula is great for mixing and flipping the ingredients. If you want even cooking, a lid can trap steam. Using a lid can also help the cauliflower cook through without becoming mushy. This setup leads to a tasty and well-cooked meal. Making cauliflower fried rice is easy, but some mistakes can ruin it. Here are a few to watch out for: - Overcooking the Cauliflower: This can lead to mushy rice. Cook it just until tender. - Using Too Much Sauce: Adding too much soy sauce can make the dish salty. Start with a small amount and adjust to taste. - Not Prepping Ingredients First: Cut and prepare all your ingredients before cooking. This makes cooking smoother and quicker. - Skipping the Seasoning: Don’t forget salt and pepper! They enhance the flavor of the dish. Following these tips ensures your cauliflower fried rice is simple and tasty. For the full recipe, see above. {{image_2}} You can change up the veggies in your cauliflower fried rice. Try using bell peppers, broccoli, or snap peas. Each adds a unique taste and crunch. You can even toss in some zucchini or mushrooms for a savory kick. Be creative! Use any vegetables you like or have on hand. This dish is a great way to use up leftovers. Cauliflower fried rice fits well into many diets. For a vegan option, swap the eggs for tofu. Just crumble it and let it cook with the veggies. If you avoid animal products, this dish remains hearty and filling. You can also add more plant-based protein, like chickpeas or edamame. To boost flavor, consider adding different sauces or spices. You can use hoisin sauce or sriracha for some heat. Fresh herbs like cilantro or basil can brighten each bite. A squeeze of lime juice adds a zesty touch. Don't forget sesame seeds for a nice crunch! These enhancements make every bite exciting and unique. For the full recipe, check the main section above! Store leftover cauliflower fried rice in an airtight container. Keep it in the fridge for up to three days. Make sure it cools down before sealing. This will help it stay fresh longer. To reheat, use a skillet on medium heat. Add a splash of water or oil to prevent sticking. Stir it often for even heating. You can also use a microwave. Heat in short bursts, stirring in between. This keeps the rice from getting soggy. Yes, you can freeze cauliflower fried rice! Place it in a freezer-safe bag or container. Remove as much air as possible to prevent freezer burn. It will stay good for up to three months. To enjoy, simply thaw in the fridge overnight and reheat as mentioned above. Yes, cauliflower fried rice is naturally gluten-free. You can use gluten-free soy sauce or tamari for flavor. This option makes it safe for those with gluten allergies. Many people enjoy this dish without any gluten-related issues. Absolutely! Frozen cauliflower works well in this recipe. Just remember to thaw and drain it first. This step ensures that your dish does not become too watery. It saves time and still gives you a tasty meal. You can boost the flavor of cauliflower fried rice easily. Here are some tips: - Add more spices like chili flakes or black pepper. - Include a splash of rice vinegar for tang. - Mix in fresh herbs like cilantro or basil. - Experiment with different sauces, such as sriracha or hoisin. These additions help you create a dish that excites your taste buds. For the full recipe, check out the [Full Recipe]. Cauliflower fried rice is simple yet versatile. We discussed key ingredients, step-by-step cooking, and tips for the best outcome. You can use different veggies and flavor boosts to suit your taste. Lastly, proper storage is vital for freshness. With these insights, you can create a delicious and healthy dish that fits your needs. Enjoy your cooking, and remember, practice makes perfect!](https://southerndishes.com/wp-content/uploads/2025/05/4e7168f4-e462-4aff-ad4a-4fadd2b5ab10.webp)






![To make skillet creamed spinach, you need fresh, simple ingredients that create a creamy, flavorful dish. Here’s what you will need: - 1 lb fresh spinach, rinsed and roughly chopped - 2 tablespoons olive oil - 3 cloves garlic, minced - 1 small onion, finely chopped - 1 cup heavy cream - ½ cup cream cheese, softened - ½ cup grated Parmesan cheese - ¼ teaspoon nutmeg - Salt and pepper to taste - ¼ cup toasted pine nuts (for garnish) Each ingredient plays a key role in making this dish delicious. The fresh spinach brings a green, vibrant flavor. Olive oil adds richness and helps cook the garlic and onion. Garlic and onion provide a savory base that enhances the overall taste. Heavy cream and cream cheese create a smooth, creamy texture. Parmesan cheese adds a salty, umami kick. Nutmeg brings warmth and depth. Finally, toasted pine nuts give a delightful crunch when you serve it. For the full recipe, refer to the section above. First, heat the olive oil in a large skillet over medium heat. This will create a nice base for your dish. Next, add the minced garlic and finely chopped onion. Sauté them for about 3-4 minutes. You want the onion to turn translucent and fragrant. Now it’s time to cook the spinach. Gradually add the chopped spinach to the skillet. Stir often as the spinach wilts down. This step takes about 5 minutes. You’ll notice the volume decreases as it cooks. Once the spinach is wilted, reduce the heat to low. Stir in the heavy cream and cream cheese. Allow the cream cheese to melt fully. This creates a smooth, creamy texture that enriches the spinach. Next, mix in the grated Parmesan cheese and nutmeg. Stir until everything is well combined and creamy. Taste your dish and season with salt and pepper as needed. Adjust it to your liking. Let the mixture simmer gently for an additional 3-4 minutes. This allows all the flavors to meld together. Once done, remove from the heat. Top it off with toasted pine nuts for a crunchy finish before serving. For the full recipe, refer to the list above. Enjoy your creamy and flavorful delight! - Optimal heat settings: Start with medium heat. This helps the garlic and onion cook evenly. Too high a heat can burn the garlic. - Timing tips for aromatics: Sauté the garlic and onion for 3-4 minutes. Wait until the onion turns translucent. This brings out their best flavors. - Tricks to prevent curdling: Always lower the heat before adding cream. This helps keep it smooth. Stir slowly to ensure even mixing. - Choosing the right cream: Use heavy cream for the best results. It adds richness and helps the sauce stay creamy. - Adding herbs or spices: Nutmeg adds warmth and depth. You can also try adding thyme or basil for fresh flavor. - Adjusting for dietary preferences: For a lighter option, use half-and-half instead of heavy cream. This keeps it tasty while cutting calories. {{image_2}} You can switch up the greens in this dish. Instead of spinach, try kale or Swiss chard. These greens offer a similar texture and flavor. You can even use a mix of greens for a fun twist. For a dairy-free version, replace cream and cheese with nut-based alternatives. Coconut cream works great and adds a unique flavor. Adding bacon or ham can give your creamed spinach a savory kick. Cook the meat first, then mix it in. You could also use different cheeses for added depth. Try gouda or feta instead of Parmesan. Each cheese brings its own flavor, making the dish exciting. Skillet creamed spinach pairs well with many proteins. Serve it alongside grilled chicken or steak for a complete meal. You can also enjoy it as a side dish with roasted fish. For a more casual meal, serve it with crusty bread for dipping. This creamy delight fits any occasion! Don’t forget to check out the Full Recipe for more details! To keep your skillet creamed spinach fresh, store it in an airtight container. Place it in the fridge right after it cools down. It should stay good for about three to five days. If you want to keep it longer, consider freezing it. Use a freezer-safe bag or container. It can last up to three months in the freezer. When you reheat creamed spinach, the goal is to keep it creamy. For stovetop reheating, use a medium-low heat. Stir often to prevent sticking. Add a splash of cream if it seems thick. If you use a microwave, heat it in short bursts of 30 seconds. Stir in between to ensure even heating. The shelf life of creamed spinach varies by storage method. In the fridge, expect it to last about three to five days. In the freezer, it can last up to three months. Always check for signs of spoilage. If it smells off or has an unusual texture, it’s best to toss it. Creamed spinach is a rich side dish made with cooked spinach, cream, and cheese. People often serve it with steak or chicken. It has a creamy texture and a savory flavor. This dish is classic in American cuisine, especially during holidays and family dinners. Many enjoy its smoothness paired with meats or as part of a larger spread. Yes, you can use frozen spinach! Frozen spinach is convenient and saves time. It is often pre-washed and chopped. However, it has some downsides. Frozen spinach can be a bit watery when thawed. This extra moisture may change the dish's texture. You must squeeze out the water after thawing. Fresh spinach has a brighter taste and better texture, but frozen can work well in a pinch. To make creamed spinach gluten-free, you need to check your ingredients. Most of the main ingredients are gluten-free, which is great! Just ensure any added seasonings or cheeses are gluten-free. You can use cornstarch or rice flour to thicken the dish, if needed. This way, you can enjoy the creamy goodness without worry! For the full recipe, check out the [Full Recipe]. This blog post covered how to make a tasty creamed spinach dish. We started with the key ingredients and detailed steps for cooking. I shared tips to ensure creaminess and flavor, along with creative variations for more fun. Proper storage and reheating techniques help maintain quality. Remember, cooking should be enjoyable. Experiment with flavors and find what you love. A dish simple in nature can easily wow your guests! Enjoy making your own creamed spinach and feel free to customize it to your tastes.](https://southerndishes.com/wp-content/uploads/2025/05/764a9977-9c3a-4591-ab48-c900021f0b11-300x300.webp)


