

Latest & Greatest
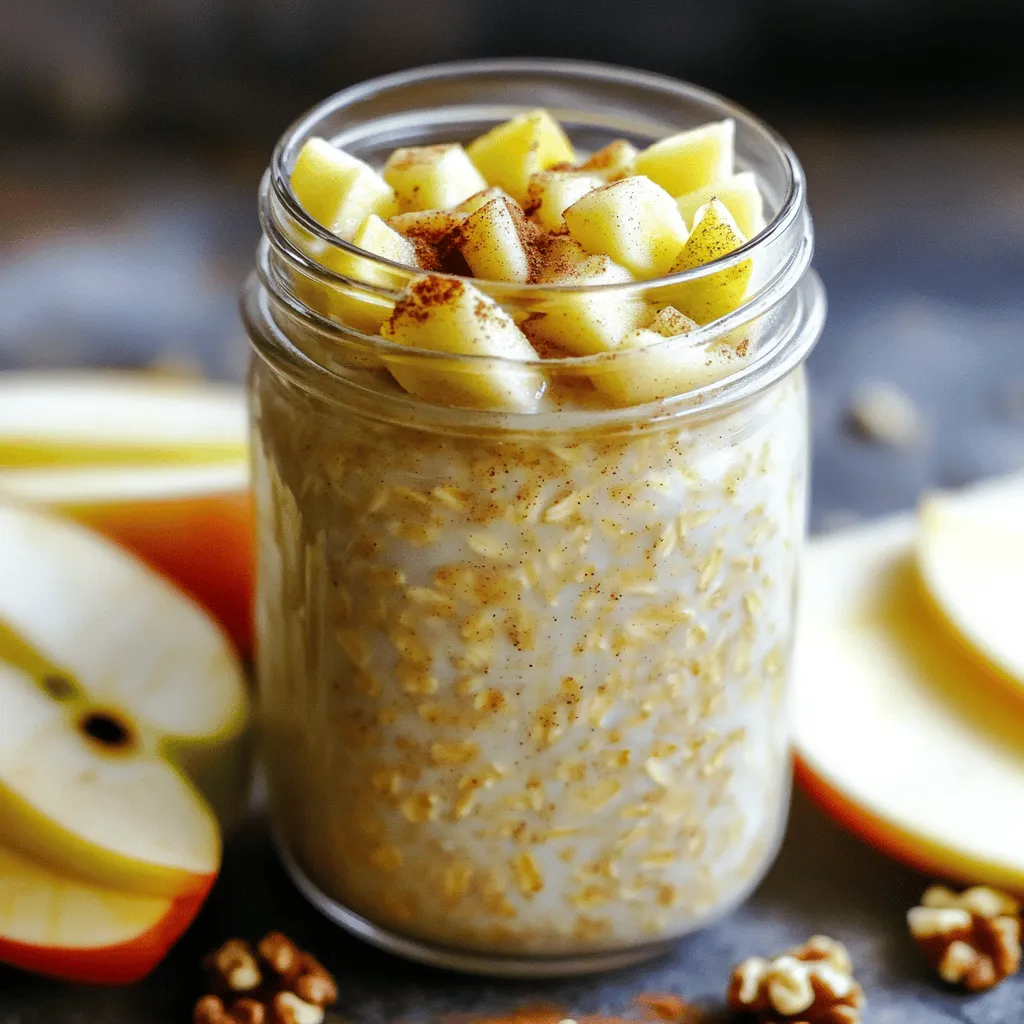
Apple Cinnamon Overnight Oats Simple and Healthy Meal
Start your day right with Apple Cinnamon Overnight Oats! This simple and healthy meal is quick to make and packed
Read more…
No-Bake Nutella Cheesecake Rich and Creamy Delight
If you love rich and creamy desserts, this No-Bake Nutella Cheesecake is for you! I’ll show you how to create
Read more…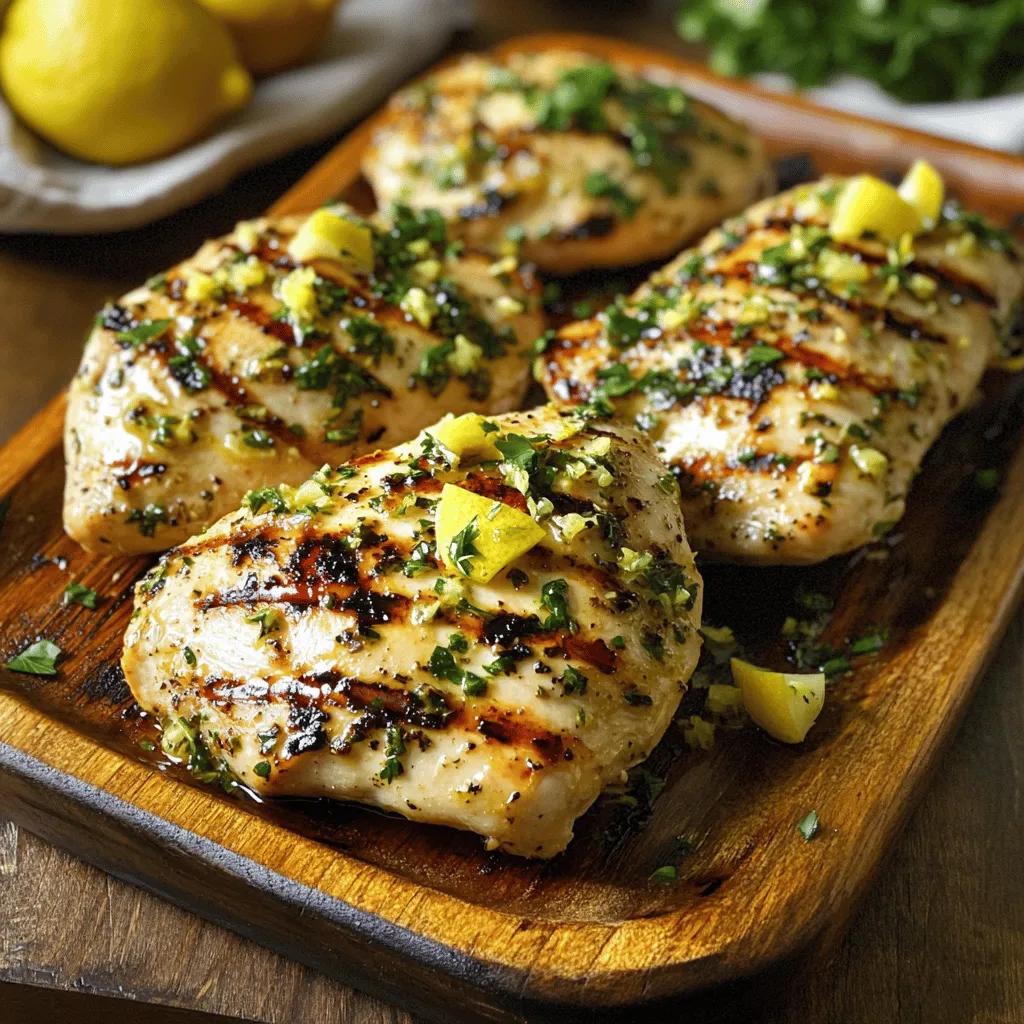
Lemon Garlic Herb Grilled Chicken Simple and Tasty
When you’re craving a juicy, flavorful meal, my Lemon Garlic Herb Grilled Chicken hits the spot. This simple recipe brings
Read more…
Chocolate Chip Cookie Dough Bites Tasty and Simple Treat
If you love the taste of chocolate chip cookie dough but want a safe and easy treat, you’ve come to
Read more…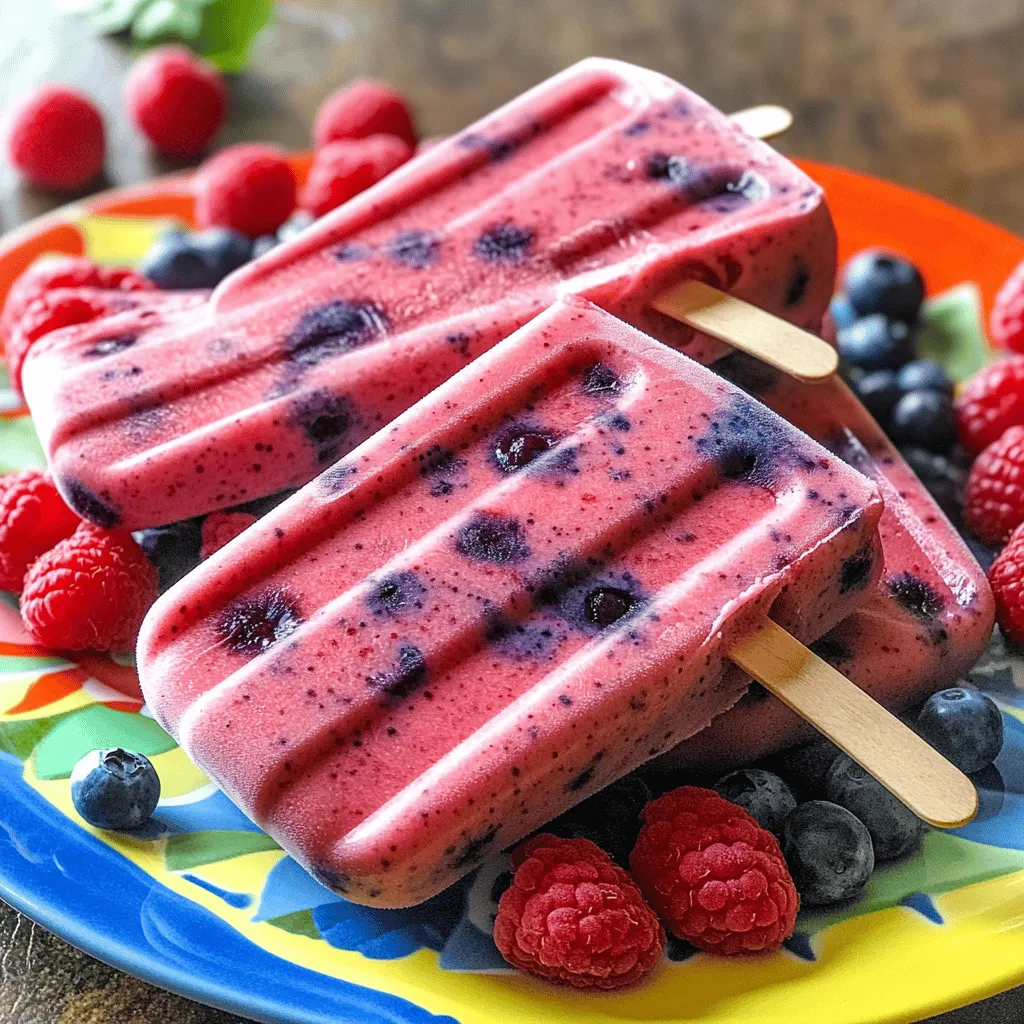
Berry Smoothie Popsicles Refreshing Summer Treat
Looking for a cool way to beat the summer heat? Try these Berry Smoothie Popsicles! Made with fresh fruit and
Read more…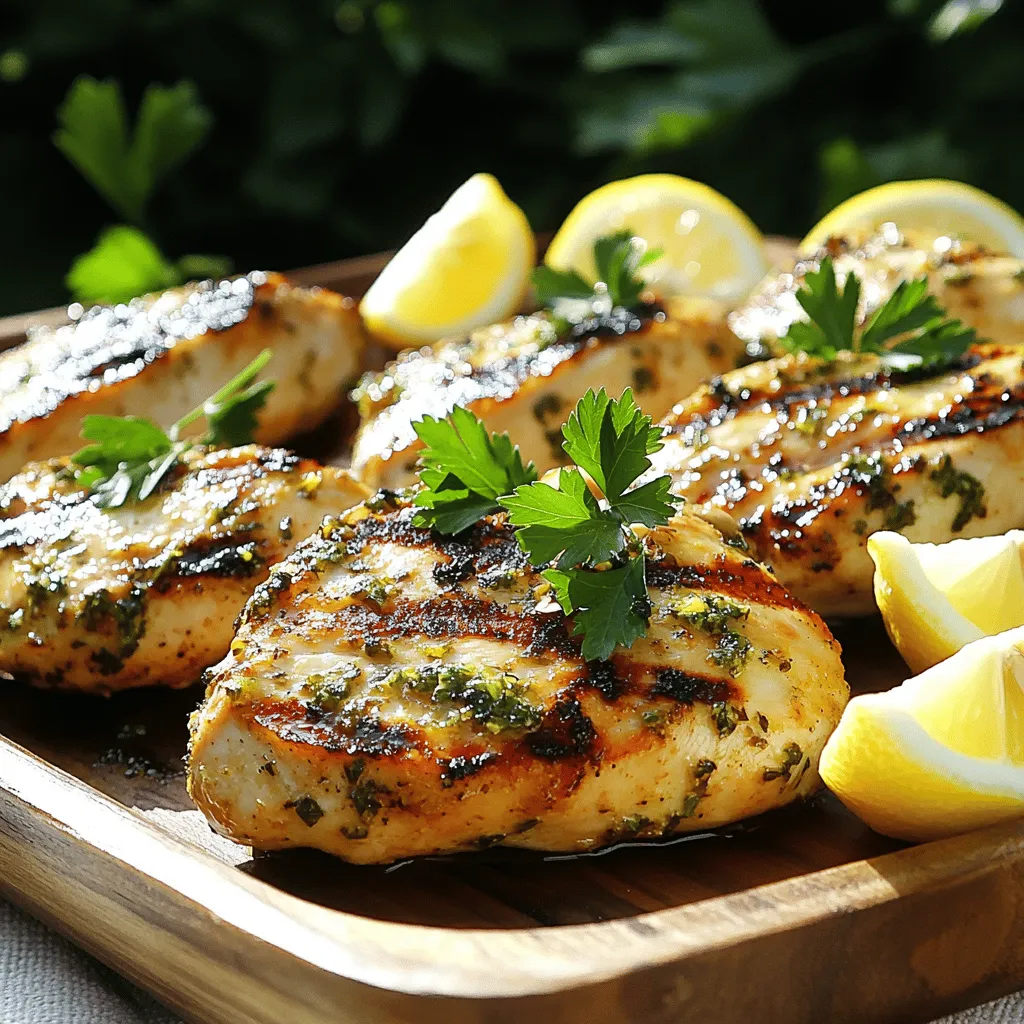
Herbed Lemon Grilled Chicken Tasty Flavorful Delight
Are you ready to fire up the grill? Herbed Lemon Grilled Chicken is a tasty and simple dish that everyone
Read more…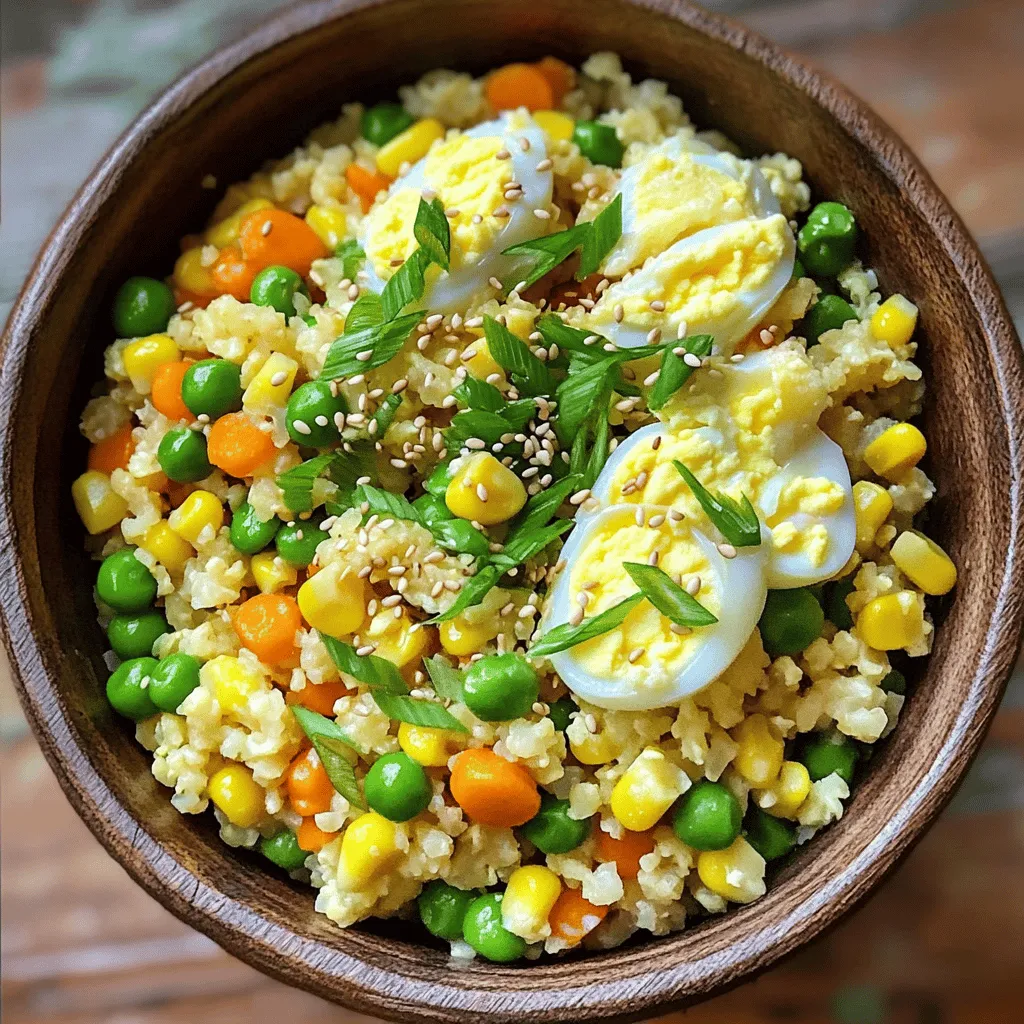
Cauliflower Fried Rice Flavorful and Healthy Dish
If you’re searching for a tasty, healthy dish, cauliflower fried rice is a winner! This flavorful meal swaps out white
Read more…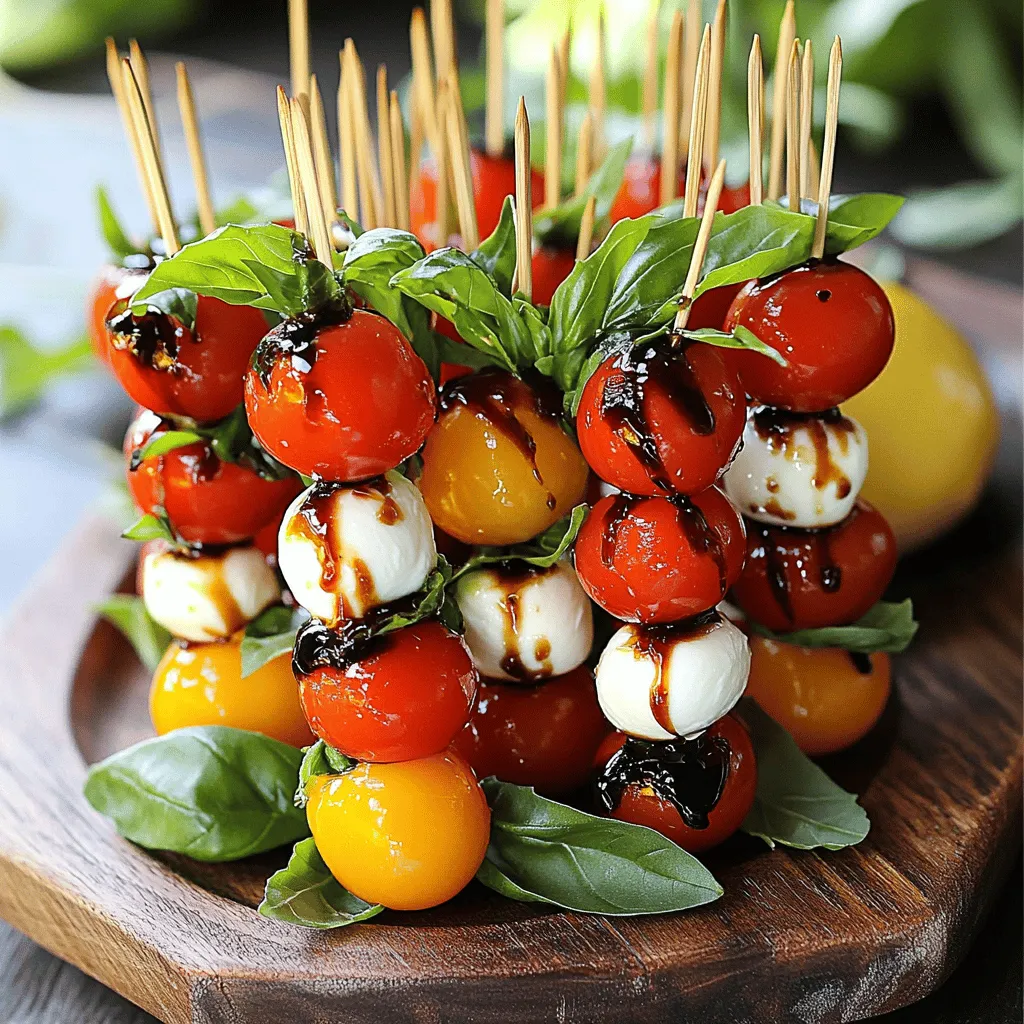
Caprese Salad Skewers Fresh and Tasty Appetizer
Looking for a fresh and tasty appetizer that impresses? You’ve come to the right place! Caprese Salad Skewers are easy
Read more…browse recipes


Tuscan White Bean Soup Slow Cooker Easy and Tasty
If you’re seeking a comforting, hearty meal that’s easy to make, look no further! My Tuscan White Bean Soup, cooked to perfection in a…
My Latest Desserts
My Latest Recipes

hey,
i’m !
I’m so happy you’re here!
My kitchen is filled with stories, flavors, and love and I’m so happy to share them with you. Here’s to dishes that feel like home.


Crispy Tofu Buddha Bowl Flavorful and Healthy Recipe
Looking to spice up your meals with something healthy and delicious? My Crispy Tofu Buddha Bowl is just what you need! This vibrant dish…
![- 1 block firm tofu, pressed and cubed - 1 cup cooked quinoa - 1 cup kale, chopped - 1 cup cherry tomatoes, halved - 1 avocado, sliced - 1/2 cucumber, thinly sliced - 1/4 cup shredded carrots For this Buddha bowl, firm tofu is key. It holds its shape and gets crispy. Quinoa serves as a great base. It adds protein and fiber. Fresh vegetables bring color and crunch. You can mix and match veggies based on what you like. - 1/4 cup tahini - 2 tablespoons lemon juice - 1 tablespoon maple syrup This dressing is creamy and tangy. Tahini adds richness, while lemon juice gives it a bright taste. A touch of maple syrup balances the flavors. You can adjust the lemon juice for more zing. - Salt and pepper to taste - Sesame seeds for garnish Salt and pepper enhance all the flavors. Sesame seeds add a nice crunch. They also look pretty on top of your bowl. These simple seasonings make a big difference. You can find the full recipe for this tasty dish below. First, you need to press the tofu. This removes extra moisture. Use a clean towel or paper towel. Place a heavy object on top for about 15 minutes. After pressing, cut the tofu into bite-sized cubes. Now, coat the tofu with cornstarch. Put the cubed tofu in a bowl. Sprinkle the cornstarch over it. Toss gently until all the pieces are coated. This helps to make the tofu crispy when cooked. Next, heat the oil in a skillet. Use medium heat for the oil. Once hot, add the tofu cubes to the pan. Cook them for about 5 to 7 minutes. Turn them occasionally. You want them to be golden brown on all sides. This step is key for that perfect crispy texture. Now, it's time to assemble your Buddha bowl. Start by adding a base of cooked quinoa in each bowl. Then, layer the sautéed kale, crispy tofu, cherry tomatoes, avocado slices, cucumber, and shredded carrots on top. Finally, drizzle the tahini dressing over the whole bowl. Sprinkle sesame seeds for a nice finish. Enjoy this delicious and healthy meal! You can find the Full Recipe to help guide you through every step. To make your tofu crispy, start by pressing it. This gets rid of extra water. More water means less crispiness. After pressing, cut the tofu into bite-sized cubes. Next, coat the cubes with cornstarch. This makes a crunchy outer layer when cooked. You can choose to cook your tofu on the stovetop or bake it. Stovetop cooking gives you quick results. Fry the tofu in a hot skillet with oil until golden. If you bake it, spread the cubes on a tray and roast them. This method uses less oil. You can also cook in batches. It helps each piece cook evenly and stay crispy. Spices can really enhance your tofu's taste. Try adding garlic powder, paprika, or cayenne for a kick. You can also season the tofu with salt and pepper. For the dressing, whisk in some dried herbs or a splash of hot sauce. This makes your tahini dressing more flavorful. For the full recipe, check out the Crispy Tofu Buddha Bowl details. {{image_2}} You can switch up the protein in your Buddha bowl. Instead of tofu, try chickpeas or tempeh. Both options add flavor and texture. If you want a heartier dish, shredded jackfruit works well too. For vegetables, you can mix and match. Use spinach, bell peppers, or roasted sweet potatoes. Get creative with your choices! Each vegetable adds unique taste and nutrition to your bowl. If you want something different, try making peanut sauce. Mix peanut butter, soy sauce, and a bit of lime juice. This sauce adds a rich, nutty flavor. Another option is a vegan yogurt dressing. Use plain vegan yogurt, garlic, and dill for a fresh taste. Both dressings pair well with the crispy tofu. Quinoa is great, but you can also use brown rice or farro. Both grains provide fiber and keep you full. Brown rice has a nutty taste, while farro offers a chewy texture. For gluten-free options, try millet or cauliflower rice. Both are healthy, light choices. They work well as a base for your Buddha bowl. Explore these variations to make your Crispy Tofu Buddha Bowl truly your own! For the full recipe, check out the detailed instructions above. Store leftovers in an airtight container. This keeps the tofu and veggies fresh. You can refrigerate them for up to three days. Make sure the bowl is sealed well to lock in moisture and flavor. You can freeze the tofu and veggies if you want to keep them longer. Cut the tofu into cubes before freezing. For vegetables, blanch them first to maintain their color and taste. When you're ready to eat, thaw the tofu and veggies overnight in the fridge. To keep the tofu crispy, reheat it in a skillet. This method helps it stay crunchy. You can also use an air fryer for extra crispiness. Avoid microwaving, as it can make the tofu soggy. Heat until warm, and enjoy your delicious Buddha bowl! For the [Full Recipe], check the complete instructions. Yes, this dish is already vegan! All the ingredients are plant-based. The main component is firm tofu, which is rich in protein. You also have fresh veggies like kale, cherry tomatoes, and avocado. The dressing uses tahini, lemon juice, and maple syrup, all vegan-friendly. If you want to add more flavor, try using herbs or spices that fit a vegan diet. To get crispy tofu, start by pressing it well. Remove as much water as you can. Cut the tofu into cubes, then toss it with cornstarch. This step is key! Heat oil in a skillet over medium heat. Add the coated tofu cubes and cook them for about 5-7 minutes. Turn them often to get an even golden color. This method locks in the crunch while keeping the inside soft. If you don’t have quinoa, there are great substitutes! Brown rice is a popular choice. It has a nutty flavor and good texture. Farro is another option; it adds a chewy bite. If you need something gluten-free, try using millet or even cauliflower rice for a lighter base. Each option still makes a tasty Buddha bowl. This blog post covered how to create a tasty Buddha bowl. You learned about key ingredients like firm tofu, quinoa, and fresh vegetables. I shared step-by-step instructions for preparing, cooking, and assembling your bowl. You also got tips for achieving extra crispy tofu and making tasty variations. Remember, storing leftovers is crucial for quality. Experiment with different ingredients and dressings to suit your taste. Now, it’s time to enjoy your creation and share your delicious meals with others!](https://southerndishes.com/wp-content/uploads/2025/05/5b919c24-e31d-4917-980e-af7d0f0eed2b.webp)
