

Latest & Greatest

Cinnamon Roll Casserole Delightful and Easy Recipe
Are you ready for a warm and sweet treat? My Cinnamon Roll Casserole is an easy way to enjoy breakfast
Read more…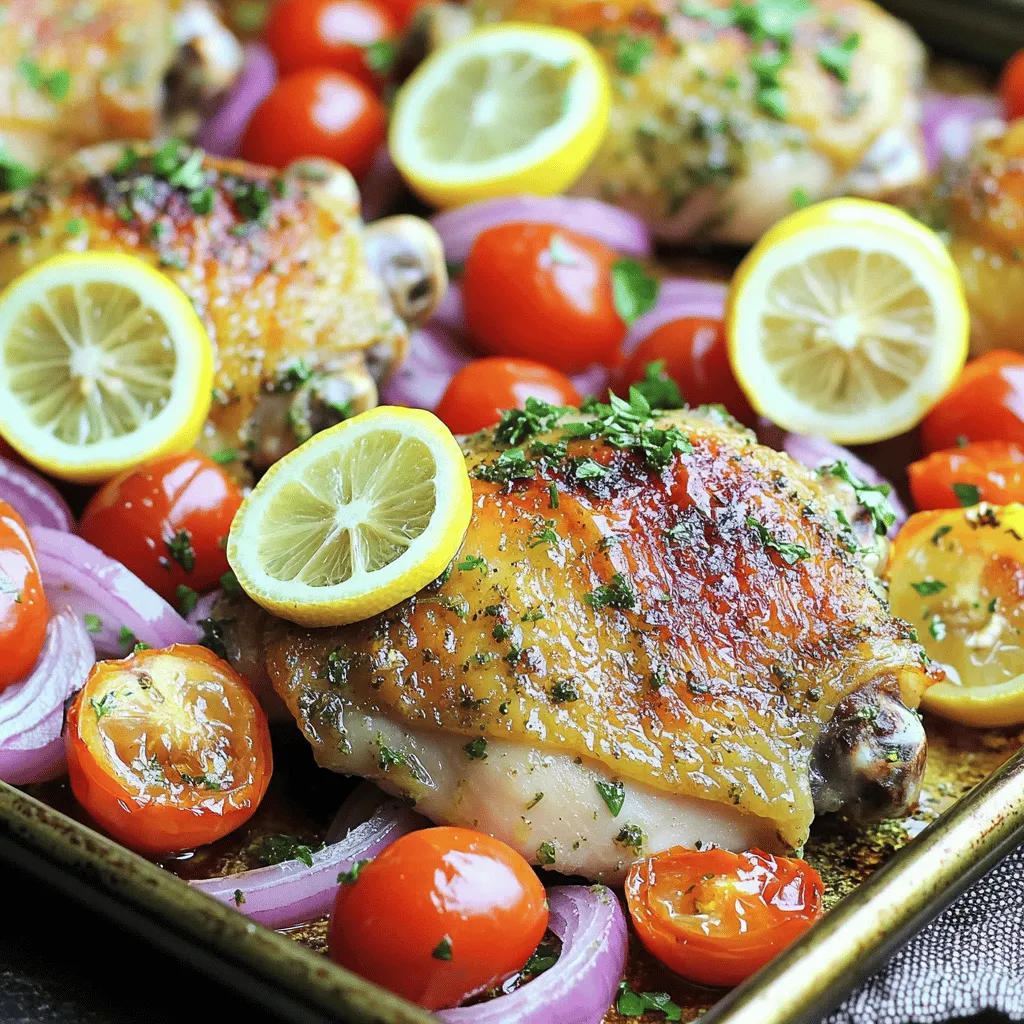
Sheet Pan Lemon Garlic Herb Chicken Flavorful Delight
Are you ready to impress your family with a simple yet delicious meal? The Sheet Pan Lemon Garlic Herb Chicken
Read more…
Easy No-Bake Tiramisu Delightful and Simple Recipe
If you crave a dessert that is both delicious and easy to make, you’re in the right place! This Easy
Read more…
Mango Sorbet Delightful and Easy Summer Treat
Summer is here, and nothing beats a cool, fruity treat! Mango sorbet is easy to make and perfect for warm
Read more…
Fried Banana With Brown Sugar Sweet and Simple Delight
If you’re looking for a simple yet sweet treat, you’ve come to the right place. Fried banana with brown sugar
Read more…
Best Pumpkin Cheesecake Rich and Creamy Delight Recipe
If you love the cozy flavors of fall, this Best Pumpkin Cheesecake recipe is for you! With rich cream cheese
Read more…
Easy Banoffee Pie with Caramel and Cream Delight
Are you craving a sweet treat that’s simple and decadent? Look no further! This Easy Banoffee Pie with Caramel and
Read more…
Red Velvet Cake Delight Simple and Tasty Recipe
Red Velvet Cake is a timeless favorite that never fails to impress. This deep red treat is not just beautiful;
Read more…browse recipes


![- 3 ripe bananas, mashed - 1/2 cup unsalted butter, melted - 1/2 cup brown sugar - 1/4 cup granulated sugar - 2 large eggs - 1 teaspoon vanilla extract - 1 teaspoon baking soda - 1/4 teaspoon salt - 1 1/2 cups all-purpose flour - 1 cup semi-sweet chocolate chips - 1/2 teaspoon cinnamon (optional) You need ripe bananas for this recipe. The riper they are, the sweeter your bread will be. I like to mash them with a fork until smooth. Melt your butter to blend nicely with the sugars. Brown sugar adds moisture and deep flavor. Granulated sugar gives a light texture. The eggs add richness and help the bread rise. Vanilla extract brings a lovely aroma. Baking soda is key for leavening. Salt balances the sweetness. All-purpose flour forms the base of the bread. Chocolate chips are the star! They make every bite a treat. You can add a pinch of cinnamon for warmth and spice. - Nuts (e.g., walnuts or pecans) - Different types of chocolate (e.g., dark chocolate, white chocolate) Feel free to mix in nuts for a crunch. Walnuts or pecans work great. You can also use dark chocolate or white chocolate chips for fun variations. - Mixing bowls - 9x5 inch loaf pan - Oven - Whisk or spatula Gather your tools before you start. You will need mixing bowls for combining ingredients. A 9x5 inch loaf pan is perfect for baking. Preheat your oven to 350°F (175°C) while you prepare your batter. A whisk or spatula helps mix everything smoothly. For the complete recipe, check out the Full Recipe link. - Preheat the oven to 350°F (175°C). - Grease the loaf pan with butter or cooking spray. - In a large bowl, mash the ripe bananas. Mix in the melted butter until smooth. - Add the brown and granulated sugars to the banana mix. Stir until well combined. - Crack in the eggs one at a time, mixing well after each. Add the vanilla extract and mix again. - Sprinkle the baking soda and salt over the banana mix. Stir to combine all the ingredients. - Gradually add the all-purpose flour, mixing gently until just combined. Do not overmix! - Carefully fold in the chocolate chips, ensuring they spread evenly throughout the batter. - Pour the batter into the prepared loaf pan. Smooth the top with a spatula. - Bake in the preheated oven for 60 minutes. Check doneness with a toothpick. - Once done, let the bread cool in the pan for 10 minutes. Then, transfer it to a wire rack to cool completely. For the complete recipe, refer to the [Full Recipe]. To bake perfect banana bread, use a toothpick to check for doneness. Insert it in the center. It should come out clean when the bread is done. If it has batter on it, bake a bit longer. This simple test helps you avoid undercooked bread. Also, avoid overmixing the batter. Overmixing makes the bread dense and tough. Stir just until the ingredients blend together. It’s okay if there are some lumps. They will bake out, and you will have a light texture. Use fresh, ripe bananas for the best sweetness. The riper the bananas, the sweeter your bread will be. Look for bananas with brown spots. They add great flavor! You might also want to enhance the taste by adding a pinch of nutmeg. Nutmeg gives a warm, cozy feel to the bread. Another option is to replace some sugar with honey. Honey adds moisture and a unique flavor. Slice and serve your banana bread warm or at room temperature. Warm bread is delightful and brings out the chocolate chips’ flavor. For a nice touch, drizzle melted chocolate on top. It looks great and tastes amazing! You can also sprinkle powdered sugar over the slices. This adds a sweet, decorative finish. Serve the bread with fresh fruit or a dollop of whipped cream. It makes the dish even more special. For the full recipe, refer to the Choco-Banana Delight Bread section. {{image_2}} You can make your chocolate chip banana bread a bit healthier. - Substitute whole wheat flour for all-purpose flour. - Use less sugar or a sugar alternative like honey or agave. These changes add more fiber and reduce sugar. Whole wheat flour gives a nutty taste. You still get a tasty result. Want to mix things up? You can add different flavors to your bread. - Incorporate spices like nutmeg or cardamom for warmth. - Add zests of citrus like lemon or orange for a fresh twist. These flavors can brighten your banana bread. They make each bite a new adventure! You can change your recipe with the seasons. - Include pumpkin puree for a fall-inspired treat. - Mix in dried fruits like cranberries for a holiday edition. These options keep your bread exciting all year. You can enjoy banana bread in many ways! For the full recipe, check out [Full Recipe]. Store banana bread at room temperature in an airtight container for up to 3 days. This keeps it fresh and soft. If you have a lot left, it’s best to save some for later. You can refrigerate your banana bread for up to a week. If you want to keep it longer, freeze it. Wrap it in plastic wrap or foil before freezing. This helps it stay moist and tasty. To enjoy your banana bread again, thaw it in the refrigerator or at room temperature. If you want it warm, pop slices in the microwave for a few seconds. This brings back that fresh-baked taste. You can use flaxseed meal or applesauce as an egg substitute. For flaxseed meal, mix one tablespoon with three tablespoons of water. Let it sit for five minutes to thicken. This mix binds ingredients like eggs do. For applesauce, use one-fourth cup in place of each egg. This keeps your banana bread moist and sweet. Yes, thawed frozen bananas work well. They are often softer and easier to mash. Just be sure to drain any excess moisture before mixing them into your batter. This helps to keep the right texture in your banana bread. To ripen bananas quickly, place them in a paper bag with an apple. The apple gives off ethylene gas, which speeds up the ripening process. In just one to two days, your bananas will be soft and ready for baking. To check if your banana bread is done, insert a toothpick into the center. If it comes out clean, your bread is ready. If it has batter on it, give it a few more minutes in the oven. This simple test helps ensure your banana bread is baked just right. You now have all you need to bake delicious banana bread. Remember to use ripe bananas for natural sweetness. Experiment with add-ins and flavors to find your favorite twist. Store your bread properly to keep it fresh longer. Whether it's for snacks or sharing with friends, homemade banana bread is always a hit. Enjoy your baking journey, and make it your own!](https://southerndishes.com/wp-content/uploads/2025/05/1b58be79-3895-4b08-9f6b-fc92c36dde35.webp)
Chocolate Chip Banana Bread Delightful and Easy Recipe
If you’re craving something sweet and comforting, you have to try my Chocolate Chip Banana Bread! This easy recipe combines ripe bananas and rich…
My Latest Desserts
My Latest Recipes

hey,
i’m !
I’m so happy you’re here!
My kitchen is filled with stories, flavors, and love and I’m so happy to share them with you. Here’s to dishes that feel like home.


![To whip up a delightful Zucchini Noodle Pad Thai, you will need the following ingredients: - 3 medium zucchinis, spiralized - 1 cup bean sprouts - 1 red bell pepper, thinly sliced - 1 large carrot, julienned - 3 green onions, chopped - 1/4 cup roasted peanuts, roughly chopped - 2 tablespoons vegetable oil - 3 cloves garlic, minced - 2 eggs, lightly beaten - 4 tablespoons soy sauce (or tamari) - 1 tablespoon lime juice - 1 teaspoon brown sugar - 1/2 teaspoon red chili flakes - Fresh cilantro leaves for garnish Each ingredient plays a role in creating a tasty and colorful dish. Zucchinis serve as the base, replacing traditional noodles. They add a fresh crunch and a lovely green color. The bean sprouts contribute a crisp texture, while the bell pepper and carrot bring sweetness and color. The peanuts add a satisfying crunch and nutty flavor. Oil and garlic form the flavor foundation, enhancing all other ingredients. The eggs add protein, making this meal balanced. Finally, the sauce, made from soy sauce, lime juice, brown sugar, and chili flakes, ties everything together with a sweet and tangy kick. For a complete guide on preparing this dish, check out the Full Recipe. To start, you need to spiralize the zucchinis. Use a spiralizer, which is a handy tool for this. Place a zucchini in the spiralizer and turn it. Keep going until you reach the core. You should end up with long noodles. After spiralizing, place the noodles on a paper towel. This step is key. Zucchinis have a lot of water. The paper towel helps soak up the extra moisture. This way, your dish won’t be soggy. Now it’s time to make the sauce. Gather these ingredients: - 4 tablespoons soy sauce (or tamari) - 1 tablespoon lime juice - 1 teaspoon brown sugar - 1/2 teaspoon red chili flakes In a small bowl, whisk all these together. Mix until the sugar dissolves. This sauce adds a great flavor to your dish. Set it aside for later. Next, heat the vegetable oil in a skillet over medium heat. Add 3 cloves of minced garlic and stir-fry for about 30 seconds. You want it fragrant but not burnt. Then, add the sliced red bell pepper and julienned carrot. Stir-fry these for about 3-4 minutes. You want them tender-crisp, which means they should still have a bit of crunch. This brings a nice texture to your meal. Push the veggies to one side of the skillet. Pour the 2 beaten eggs into the cleared area. Scramble them for about 1 minute until just set. Then mix the eggs into the veggies. Now, add the zucchini noodles to the skillet. Pour the sauce over everything. Toss well to combine. Cook for 3-4 minutes until the noodles soften a bit but still have some crunch. Finally, stir in the cup of bean sprouts and chopped green onions. Cook for another minute to warm them through. Your Zucchini Noodle Pad Thai is almost ready! Enjoy this flavorful and healthy meal. For the full recipe, check the earlier section. Pick medium zucchinis for the best taste. They should feel firm and heavy. Look for bright colors with no soft spots. Fresh zucchinis have a sweet, mild flavor. For spiralizing, use a good spiralizer. I suggest a handheld model or a countertop style for ease. Both work well to create long, thin noodles. For a gluten-free option, use tamari instead of soy sauce. This swap keeps the flavor while making it safe for gluten-sensitive diets. You can also adjust the spice level. Add more red chili flakes for heat or skip them for a milder dish. Taste the sauce before adding it to the noodles. This way, you can find your perfect balance. Stir-frying is key to a great Pad Thai. Use high heat to cook the veggies quickly. This helps them stay crunchy and bright. Start with garlic, as it adds a lovely aroma. Keep the veggies moving in the pan to avoid burning. Don’t overcrowd the pan; this can trap steam and make them soggy. Follow these tips, and you'll create a delicious Zucchini Noodle Pad Thai! For the complete recipe, check out the [Full Recipe]. {{image_2}} For a vegan version of zucchini noodle Pad Thai, you can skip the eggs. Instead of eggs, use tofu or chickpea flour. Tofu adds protein and a nice texture. You can scramble it just like the eggs. For chickpea flour, mix it with water to create a batter and cook it in the pan. Protein alternatives can include tempeh or seitan. Both give a hearty bite. They soak up flavors well, making your dish rich and filling. You can also add edamame for extra protein. To make this dish low-carb, you can swap out the sugar. Use a sugar substitute like stevia or erythritol. This keeps it sweet without the carbs. You can also reduce the amount of soy sauce. Use a low-sodium version to keep the salt level in check. For keto followers, focus on adding more fats. You can add avocado slices or a sprinkle of sesame seeds. They boost flavors and give healthy fats. Adding more veggies can enhance the dish's flavor and health benefits. Try adding bell peppers, snap peas, or mushrooms. Each adds a different texture and taste. You can also balance flavors by adding fresh herbs. Fresh basil or mint can brighten the dish. They add a refreshing taste that pairs well with the noodles. For the full recipe, check out the details above. To store your Zucchini Noodle Pad Thai, let it cool first. Place it in an airtight container. This helps keep the dish fresh. You can refrigerate it for up to three days. For longer storage, consider freezing it. However, note that texture may change when thawed. To reheat, you have two good options: microwave or stove. If you use the microwave, heat in short bursts. This helps keep the zucchini noodles from getting mushy. Stir in between to ensure even heating. If you choose the stove, warm it on low heat. Add a splash of water if needed to maintain moisture. This way, you keep the texture nice and tasty. For the best flavor, enjoy it warm! Yes, you can prepare Zucchini Noodle Pad Thai ahead of time. To store it, follow these steps: - Cook the dish but leave out the zucchini noodles. - Store the noodles separately in an airtight container. - Store the cooked sauce and veggies in another container. Keep both in the fridge for up to three days. When ready to eat, sauté the noodles briefly with the veggies and sauce. This keeps the noodles fresh and prevents them from becoming mushy. Making zucchini noodles is easy and fun. You can use a spiralizer or a vegetable peeler. Here’s how: - Spiralizing: Cut off both ends of the zucchini. Secure it in the spiralizer and twist to create noodles. - Peeler Method: Using a vegetable peeler, shave long strips off the zucchini. Continue until you reach the core. After making the noodles, place them on a paper towel to absorb excess moisture. This step is key to avoid sogginess in your dish. Zucchini Noodle Pad Thai can stand alone, but pairing it can enhance your meal. Here are some ideas: - Complete Meal Ideas: Serve with grilled chicken or shrimp for extra protein. Tofu is a great plant-based option, too. - Side Dish Recommendations: Consider a light salad or fresh spring rolls. These add crunch and freshness to your meal. For a fun twist, serve it with lime wedges and extra peanuts on the side. This adds a burst of flavor and texture. For the full recipe of Zucchini Noodle Pad Thai, check out the Full Recipe section. You now have a tasty and healthy Zucchini Noodle Pad Thai recipe. We covered the key ingredients, step-by-step cooking methods, and helpful tips. Remember, you can customize this dish with different sauces and veggies to fit your taste. Storing and reheating leftovers is simple, making this meal convenient. Enjoy your cooking journey and create delicious options for you and your family!](https://southerndishes.com/wp-content/uploads/2025/05/78e7a995-1680-4ce3-926e-f047a69768f9-300x300.webp)

Coconut Curry Ramen Bold and Flavorful Delight
If you’re craving a meal that’s both bold and comforting, look no further than Coconut Curry Ramen. This soup is a vibrant mix of…
![- 200g ramen noodles - 1 can (400ml) coconut milk - 1 tablespoon red curry paste - 1 medium onion, sliced - 3 cloves garlic, minced - 1 tablespoon ginger, grated - 1 medium carrot, julienned - 1 red bell pepper, sliced - 1 cup baby spinach - Fresh cilantro - Sliced chili - Sesame seeds - Lime wedges Coconut curry ramen uses simple yet bold ingredients. You start with ramen noodles. They create a hearty base. Coconut milk adds creaminess and a tropical twist. Red curry paste brings heat and flavor. Next, you have the veggies. Onion, garlic, and ginger form a fragrant trio. They wake up your senses. Carrots and red bell peppers add color and crunch. Baby spinach offers a fresh touch and bright green hue. For optional toppings, fresh cilantro adds a burst of flavor. Sliced chili gives extra heat. Sesame seeds bring a nice crunch. Lime wedges finish the dish with a zing. This recipe blends flavors for a warm and tasty meal. You can find the full recipe at the beginning. Enjoy crafting your coconut curry ramen! To start, bring a pot of water to a boil. Add the ramen noodles and cook them for about 3 to 4 minutes. Make sure to check the package for exact times. Once cooked, drain the noodles and set them aside. This helps keep them firm and ready for your coconut curry. In a large pan, heat 1 tablespoon of olive oil over medium heat. Add 1 sliced onion and sauté until it turns translucent, which takes about 5 minutes. Next, stir in 3 minced garlic cloves and 1 tablespoon of grated ginger. Cook them for 1 to 2 minutes until they become fragrant. After that, mix in 1 tablespoon of red curry paste. Stir well for another minute. This step is crucial to developing rich flavors. Now, slowly pour in 1 can of coconut milk and 2 cups of vegetable broth. Stir until everything blends nicely. Toss in 1 cup of julienned carrots and 1 sliced red bell pepper. Bring the mix to a gentle simmer and cook for about 5 to 7 minutes. You want the veggies to be tender but still crisp. After that, add 1 cup of baby spinach, 1 teaspoon of soy sauce, and 1 tablespoon of lime juice. Cook for another minute until the spinach wilts. Finally, gently fold in the cooked ramen noodles. Make sure they are well coated in the delicious coconut curry broth. You can find the full recipe in the earlier section. To make your coconut curry ramen shine, you can adjust the spice levels. Start with one tablespoon of red curry paste. Taste it, then add more if you like it spicier. You can also add a pinch of chili flakes for extra heat. Adding acidity brightens the dish. Lime juice is perfect for this. A tablespoon adds a zesty kick. If you want more, squeeze in extra lime juice. This balances the creaminess of the coconut milk. The broth should be rich and smooth. If it feels too thin, you can thicken it. A cornstarch slurry works well for this. Mix one tablespoon of cornstarch with two tablespoons of water. Stir it into the broth and simmer until it thickens. You might need to adjust the broth with extra liquid. If it gets too thick, add more vegetable broth or water. This keeps the ramen from being dry. Garnishing makes your dish look inviting. Fresh cilantro adds color and flavor. Scatter it on top just before serving. Consider serving the ramen in deep bowls. This helps hold the broth and toppings. You can also add optional toppings. Sliced chili gives heat, while sesame seeds add crunch. Lime wedges on the side make it easy to add more zing. For the full recipe, check out the [Full Recipe]. {{image_2}} You can add protein to your Coconut Curry Ramen to make it heartier. Adding chicken is a great choice. Simply cook diced chicken in the pan before adding the curry paste. This will help infuse the chicken with flavor. If you prefer plant-based options, tofu works well too. Just cube the tofu and sauté it until golden. Shrimp or fish can also elevate your dish. For shrimp, add them after the vegetables. They cook quickly and add a nice touch. If you want to use fish, choose a firm type like salmon. Cook it gently to keep it flaky and tender. Coconut Curry Ramen can easily fit into vegan and gluten-free diets. To make it vegan, simply skip any animal proteins. Use tofu or just focus on the vibrant veggies. You can also swap out the soy sauce for a gluten-free alternative. Tamari is a good choice here. When it comes to noodles, traditional ramen includes wheat. You can use rice noodles instead. They work well with the coconut curry and keep the dish gluten-free. Always check the labels to ensure your noodles meet your dietary needs. Exploring different flavors is part of the fun with Coconut Curry Ramen. You can try various curry pastes to change the taste. Green curry paste offers a fresh and herbaceous note, while yellow curry paste is milder and sweeter. Switching up the vegetables adds new flavors too. Try adding bok choy, mushrooms, or even sweet potatoes. These vegetables not only provide great taste but also add color and nutrition. With these variations, you can make this dish your own. For the complete Coconut Curry Ramen experience, check out the Full Recipe. After you enjoy your Coconut Curry Ramen, store any leftovers in an airtight container. This keeps the dish fresh and prevents odors. It's best to eat the leftovers within three days. This way, you can enjoy the flavors without losing quality. When you want to warm up your ramen, use a pot on low heat. Stir gently to avoid breaking the noodles. You can also use the microwave, but cover the bowl to prevent splatters. Heat for a minute, then stir and check. Be careful not to overcook the noodles. Overcooked noodles turn mushy, and that ruins the dish. If you want to freeze your ramen, portion it into small containers. This makes it easy to thaw just what you need later. To thaw, place the container in the fridge overnight. When you're ready to enjoy it, reheat in a pot, adding a bit of broth if needed. This helps bring back the creamy texture of the sauce. Enjoy your meal again with that bold flavor! For the full recipe, check the recipe section. Coconut curry ramen is a warm, comforting bowl of noodles. It combines classic ramen with rich coconut milk and spicy red curry. The dish blends traditional Japanese ramen with Thai flavors. This fusion creates a unique taste that excites your palate. Making coconut curry ramen is quick and easy. The prep time is about 15 minutes. Cooking takes around 15 minutes, bringing the total to about 30 minutes. You can enjoy a delicious meal in no time. Yes, you can prepare coconut curry ramen ahead of time. Store the broth and noodles separately. This keeps the noodles from getting soggy. When you're ready to eat, just heat the broth and add the noodles. Enjoy the same great taste later! Coconut Curry Ramen is a simple yet flavorful dish. You learned about the main ingredients, steps to cook, and how to add your twist. Remember to experiment with proteins and spices to find your perfect flavor. Store leftovers well to enjoy this dish later. Making it ahead of time can save you effort on busy days. Now you have all the tools to create a delicious bowl. Enjoy your cooking adventure!](https://southerndishes.com/wp-content/uploads/2025/07/dbcbee01-aced-4e65-81e8-c26d334c6e0d.webp)
