
Latest & Greatest
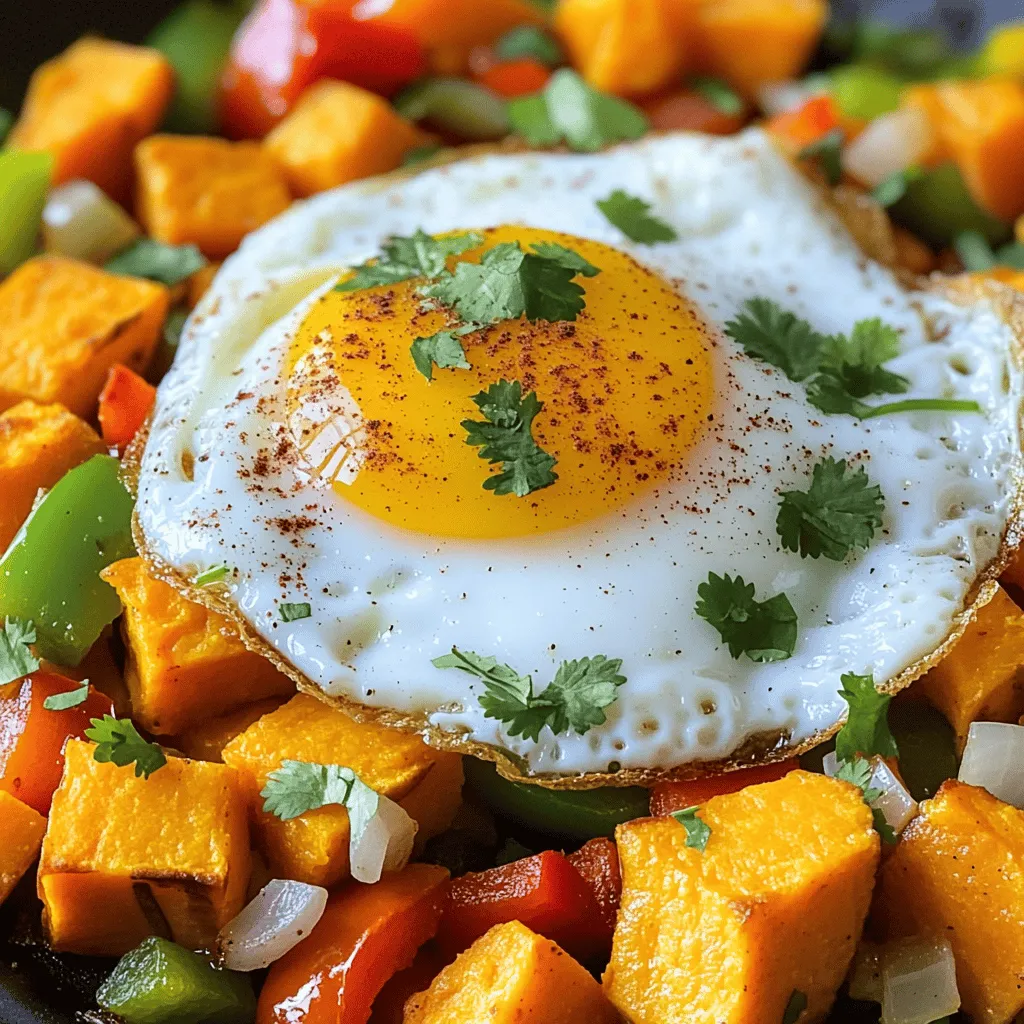
Sweet Potato Hash Flavorful and Hearty Breakfast Dish
Looking for a tasty breakfast that warms you up and fuels your day? Sweet potato hash might be your best
Read more…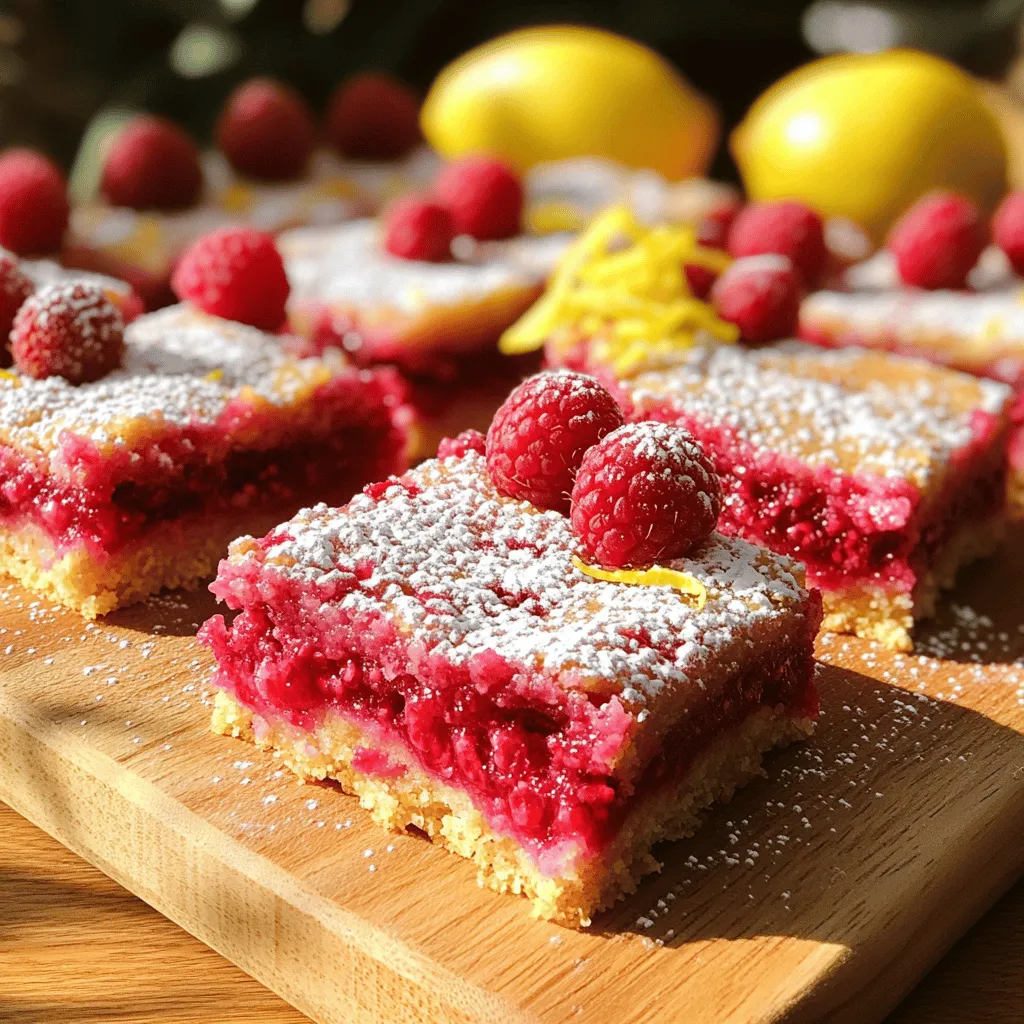
Raspberry Lemon Bars Tasty and Fresh Dessert Delight
Looking for a dessert that’s both sweet and tangy? Raspberry lemon bars are the answer! This treat blends juicy raspberries
Read more…
Buffalo Cauliflower Tacos Flavorful and Simple Recipe
Are you ready to spice up your taco night with a delicious twist? Buffalo Cauliflower Tacos are not just flavorful;
Read more…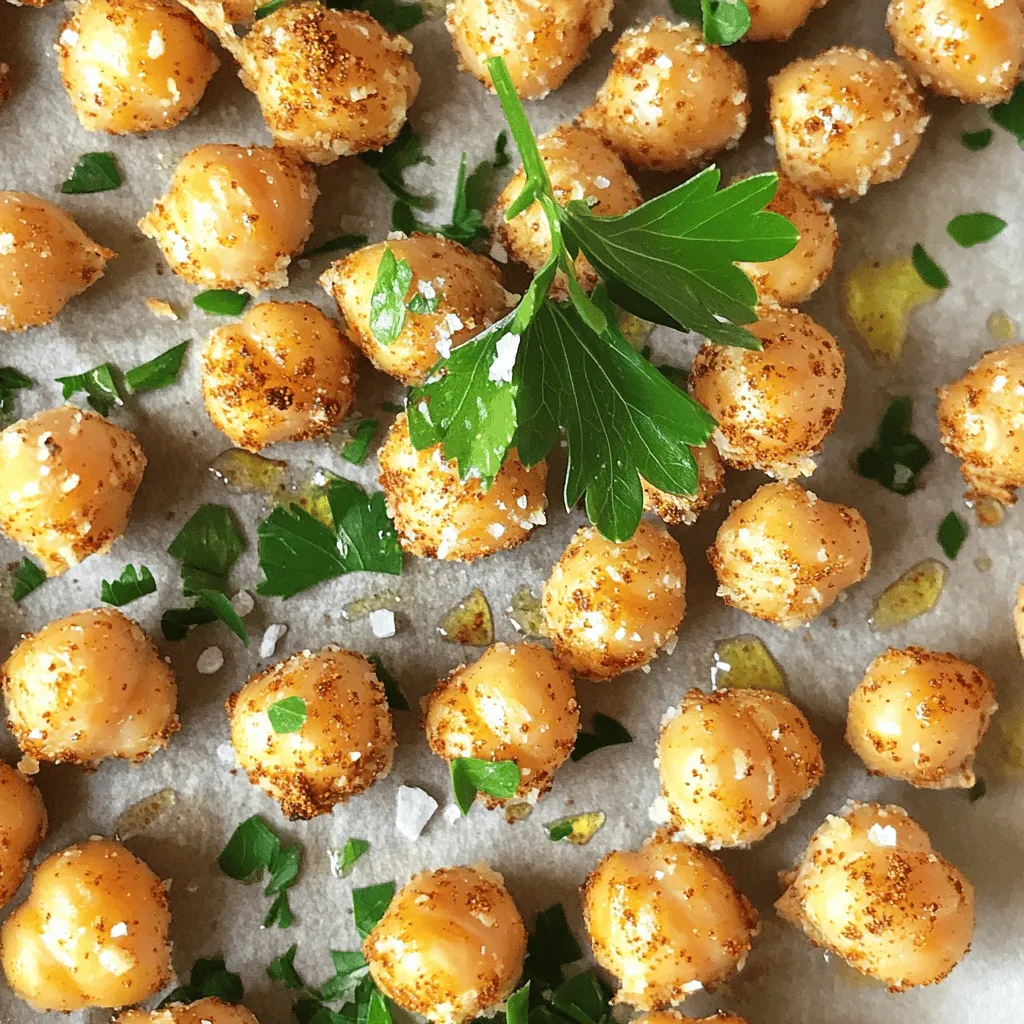
Crispy Baked Chickpeas Simple and Flavorful Snack
Looking for a snack that’s easy and tasty? Crispy baked chickpeas are your answer! With just a few simple ingredients,
Read more…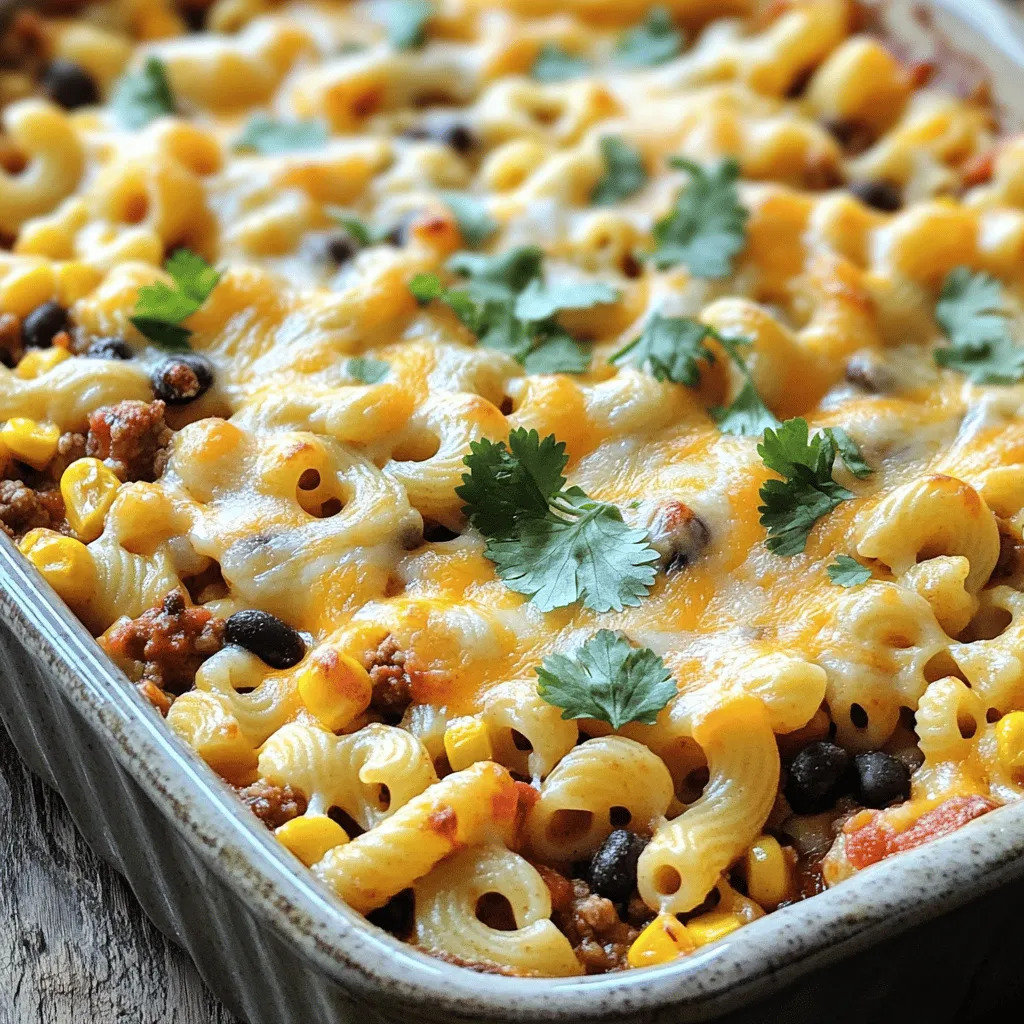
Cheesy Taco Pasta Bake Simple and Tasty Dish
Ready for a dish that’s simple, tasty, and fills you up? Meet the Cheesy Taco Pasta Bake! This recipe combines
Read more…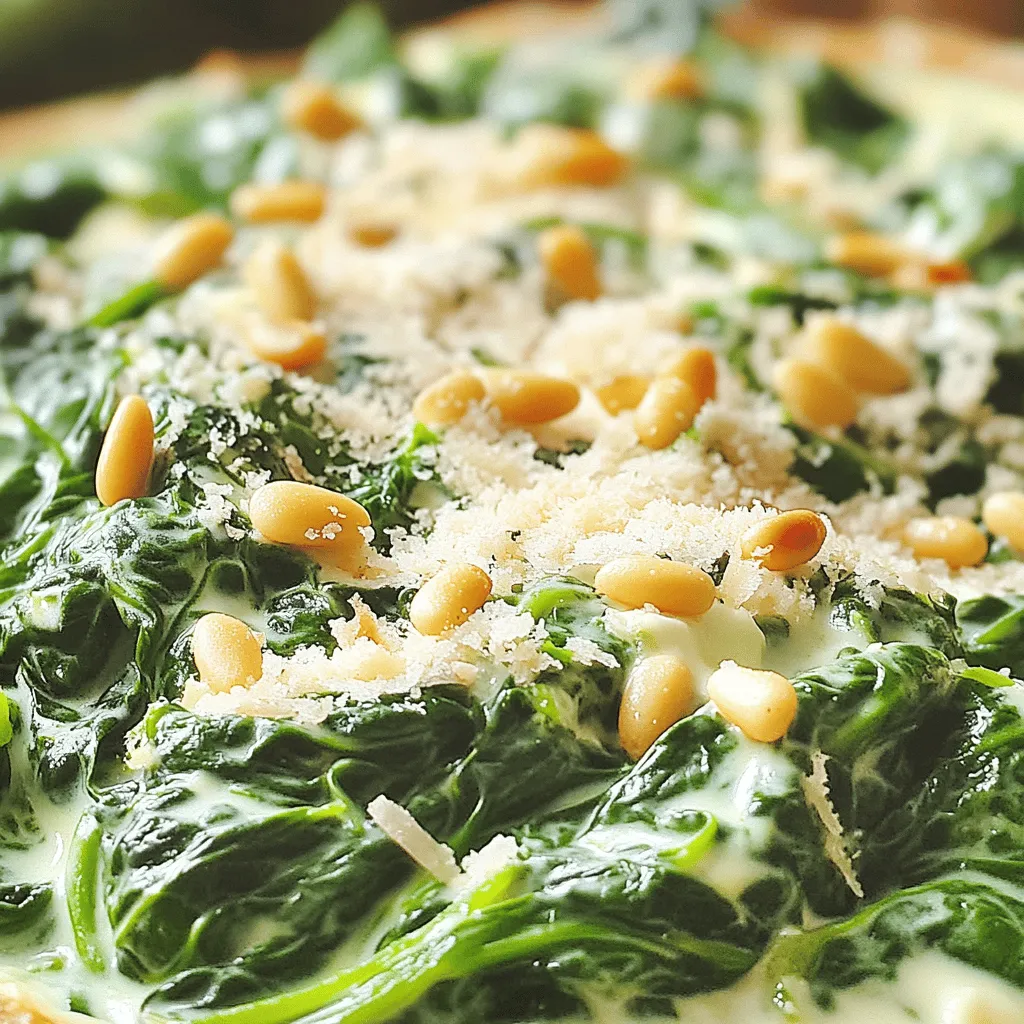
Skillet Creamed Spinach Creamy and Flavorful Delight
Are you ready to elevate your next meal? My Skillet Creamed Spinach recipe combines fresh spinach, rich cream, and savory
Read more…
Sweet and Spicy Chicken Wings Flavorful and Easy Dish
Are you ready to spice up your mealtime? These Sweet and Spicy Chicken Wings are the perfect dish for any
Read more…
Chocolate Peanut Butter Energy Bites Powerful Snack
Are you looking for a quick and tasty snack? These Chocolate Peanut Butter Energy Bites are just what you need!
Read more…browse recipes


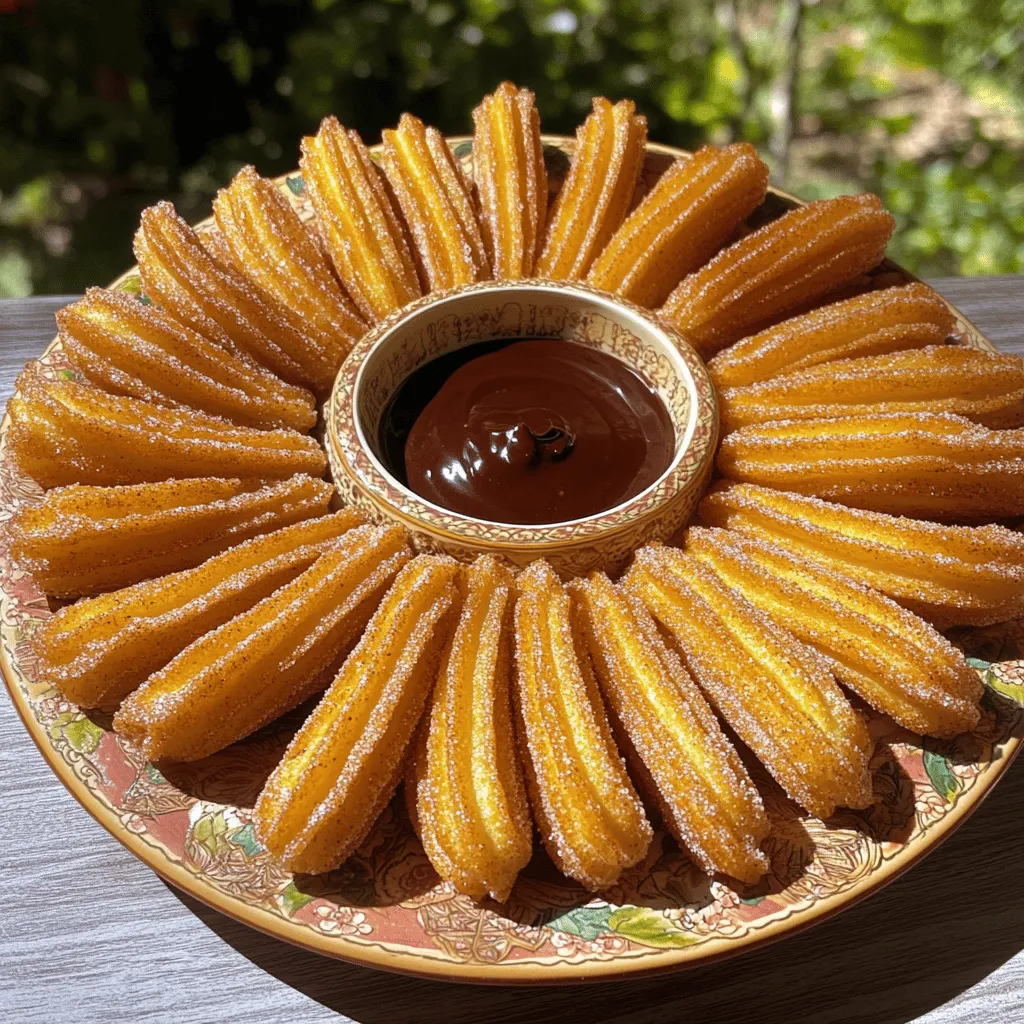
Cinnamon Sugar Churros Irresistible Crispy Delight
Cinnamon sugar churros are the ultimate treat, and you can make them at home! Imagine crispy, warm churros rolled in sweet cinnamon sugar. With…
My Latest Desserts
My Latest Recipes

hey,
i’m !
I’m so happy you’re here!
My kitchen is filled with stories, flavors, and love and I’m so happy to share them with you. Here’s to dishes that feel like home.
![To make these tasty hand pies, you need simple ingredients. Here is what you need: - 2 medium apples, peeled and diced - 1 tablespoon lemon juice - 1 tablespoon brown sugar - 1 teaspoon ground cinnamon - 1 tablespoon butter, melted - 1 package of refrigerated pie crusts (2 crusts) - 1 egg, beaten (for egg wash) - 1 tablespoon granulated sugar (for sprinkling) These ingredients blend well together. They create a sweet and tart filling that everyone loves. The type of apple you choose matters. I suggest using Granny Smith apples. They are tart and hold their shape well when cooked. Honeycrisp apples are also a great choice. Their sweet flavor makes the pies even yummier. You can mix different apples for a unique taste. If you want to jazz up your hand pies, try these options: - Nuts: Chopped walnuts or pecans add a nice crunch. - Raisins: These add a chewy sweetness. - Vanilla extract: Just a splash can enhance the flavor. - Nutmeg: A pinch gives a warm, spiced taste. Feel free to experiment with these extras. Each addition makes the pies special, and you can find your perfect mix. For the full recipe, check out [Full Recipe]. To make the filling, start by peeling and dicing two medium apples. I love using Granny Smith apples for their tart flavor. Place the diced apples in a medium bowl. Add one tablespoon of lemon juice, one tablespoon of brown sugar, and one teaspoon of ground cinnamon. Pour in one tablespoon of melted butter. Mix all the ingredients well. Let it sit for about ten minutes. This step helps the apples soften and soak in the flavors. Unroll a package of refrigerated pie crusts on a clean surface. Cut each crust into four equal circles using a large round cutter or the rim of a glass. Next, take half of the circles and place about one tablespoon of the apple mixture in the center. Be careful not to overfill them. Moisten the edges of the circles with a little water. Fold the dough over to create a half-moon shape. Use a fork to press the edges firmly and seal them well. Preheat your air fryer to 350°F (175°C) for five minutes. Brush the top of each hand pie with a beaten egg for a shiny finish. Sprinkle a little granulated sugar on top for extra sweetness. Place the hand pies in a single layer in the air fryer basket, making sure they aren't touching. Air fry them for ten to twelve minutes until they are golden brown and crisp. Depending on your air fryer size, you might need to cook in batches. Once cooked, let them cool slightly on a wire rack before enjoying your delicious air fryer apple hand pies. For the full recipe, check the details above. To get a great crust, keep your pie crust cold. Cold dough makes the crust flaky. When you roll out the dough, do it on a lightly floured surface. Don't use too much flour or it will change the texture. Press the edges well to seal. This keeps the filling inside while cooking. When brushing the egg wash, cover the crust but avoid the edges. This helps the crust turn golden brown. One mistake is overfilling the hand pies. If you add too much filling, they may burst open. Also, don't skip the egg wash. It gives the pies a nice shine and crunch. Make sure your air fryer is preheated. If it's not hot enough, the pies won't cook evenly. Lastly, let them cool for a few minutes before eating. They are very hot right out of the air fryer. Serve these hand pies warm for the best taste. They pair well with vanilla ice cream or whipped cream. For a fun twist, drizzle caramel sauce on top. You can also dust them with powdered sugar for a sweet touch. If you want to make them more special, try serving them with a side of warm apple cider or tea. These hand pies are not just a snack; they can be a delightful dessert too! For the complete recipe, check out the Full Recipe. {{image_2}} You can change the fruit in your hand pies. Try using pears, peaches, or cherries. These fruits work well with similar spices. Each fruit adds its own sweet touch. You can mix fruits too! A mix of apples and berries tastes great. Remember to adjust sugar based on the fruit's sweetness. Spices can make your hand pies special. Besides cinnamon, consider nutmeg or ginger for warmth. You can even add cardamom for a unique taste. Just a little spice can change the whole pie. Don’t be shy to experiment! A pinch can go a long way in flavor. You can make these hand pies gluten-free. Use gluten-free pie crusts found at stores. Many brands offer tasty options that work well. For a vegan version, swap the butter for coconut oil. You can also replace the egg wash with almond milk. These changes keep the pies delicious and friendly for all diets. Check the full recipe for tips on making these options work. Store leftover hand pies in an airtight container. Place parchment paper between layers to keep them from sticking. They will stay fresh for up to three days at room temperature. If you want to keep them longer, consider freezing. To reheat hand pies, use your air fryer for the best results. Preheat the air fryer to 350°F (175°C). Place the pies in the basket and heat for about 5 minutes. This method keeps the crust crispy and the filling warm. You can also use a microwave, but it may make the crust soggy. To freeze, wrap each hand pie in plastic wrap. Then, place them in a freezer bag or container. They can be frozen for up to three months. When ready to eat, you can cook them straight from the freezer. Just add a few extra minutes to the cooking time in your air fryer. For the full recipe, check out the steps above. Yes, you can make these hand pies ahead of time. Prepare the filling and assemble the pies. Cover them and store them in the fridge for up to 24 hours. This saves time when you want a quick snack. Just remember to brush them with egg wash before cooking. If you want to substitute for pie crust, try using phyllo dough or puff pastry. These options give a nice flaky texture. You can also use biscuit dough for a different taste. Just roll it out thinly and cut it into circles. Yes, you can use an oven! Preheat your oven to 375°F (190°C). Place the hand pies on a baking sheet lined with parchment paper. Bake for 15-20 minutes, or until golden brown. This method works well if you don’t have an air fryer. Check them often to avoid overcooking. Air fryer apple hand pies are a tasty treat. We covered essential ingredients, filling choices, and cooking steps. I shared tips for a perfect crust and showed you how to avoid common mistakes. You can explore different fruit fillings and even make gluten-free versions. Store leftovers properly to enjoy them later. Reheating tips keep them fresh and yummy. With these simple steps, you can impress anyone with your baking skills. Enjoy making these delightful pastries!](https://southerndishes.com/wp-content/uploads/2025/07/ca614fd6-c24d-4b10-a427-0f72ef3d9d37-300x300.webp)

. This link has all the steps and tips you need for perfect muffins. In this post, we explored how to make delicious pumpkin streusel muffins. We covered main ingredients, spices, and the perfect streusel topping. After sharing step-by-step instructions, I offered tips to ensure your muffins turn out great. We also discussed variations to suit different diets and how to store and enjoy them later. These muffins are tasty, simple, and can fit many preferences. Enjoy the baking process and share your creations!](https://southerndishes.com/wp-content/uploads/2025/08/15668586-9763-4cc4-9a74-c18ad73bddde-300x300.webp)
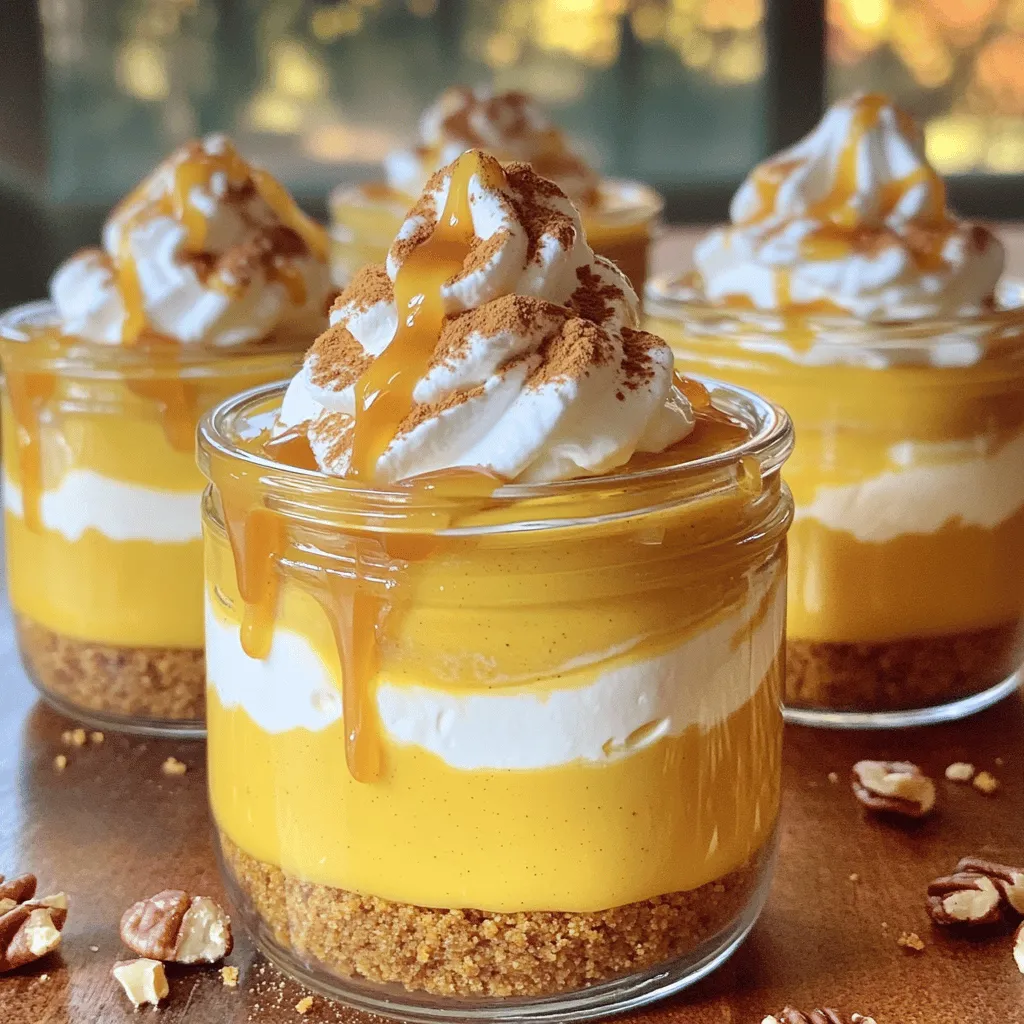
No-Bake Pumpkin Spice Cheesecake Jars Delightful Treat
Fall is here, and so is the craving for something sweet and creamy! Our No-Bake Pumpkin Spice Cheesecake Jars are the perfect treat to…