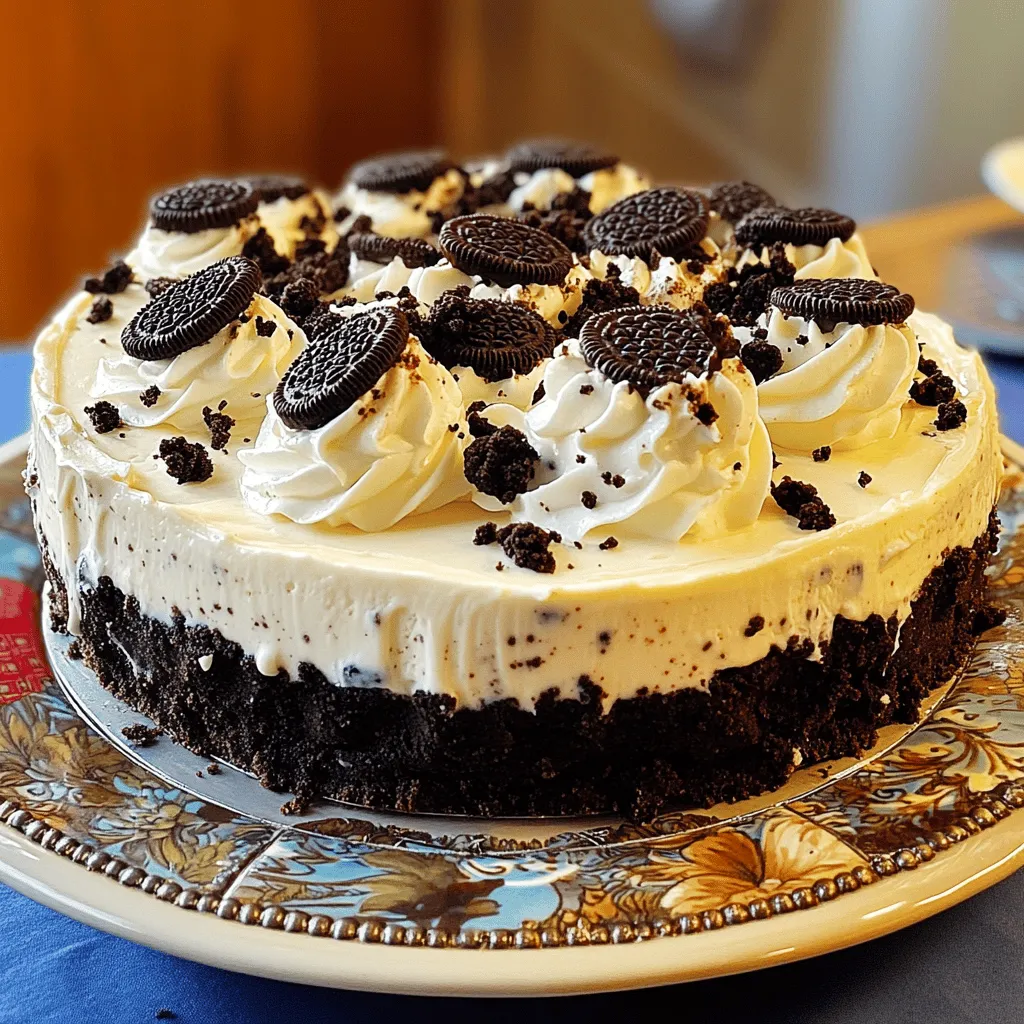
Looking for a dessert that’s both easy and delicious? This No-Bake Oreo Cheesecake is the answer! With just a handful of simple ingredients, you can whip up a creamy treat that will wow your friends and family. No baking required means you can focus on enjoying more time with your loved ones. Keep reading for the recipe and tips to make your cheesecake effortless and delightful!
Ingredients
Main Ingredients
– 24 Oreo cookies, crushed
– 1/4 cup unsalted butter, melted
– 16 oz cream cheese, softened
– 1 cup powdered sugar
– 1 teaspoon vanilla extract
– 1 cup heavy whipping cream
– 1/4 cup cocoa powder (optional)
You need just a few basic items to create this no-bake Oreo cheesecake. First, you will use 24 Oreo cookies, which give this dessert its rich flavor and crunchy texture. Crush these cookies into fine crumbs for the crust. Next, combine the crumbs with 1/4 cup of unsalted butter that you have melted. This mixture forms the base of your cheesecake.
For the filling, gather 16 oz of softened cream cheese. It’s important to let it sit out for a bit so it mixes well. Then, you’ll sprinkle in 1 cup of powdered sugar for sweetness. Don’t forget to add 1 teaspoon of vanilla extract for that lovely flavor boost.
For a bit of extra fluffiness, you will need 1 cup of heavy whipping cream. Whip this until it forms stiff peaks. If you want to add a chocolate twist, include 1/4 cup of cocoa powder. This step is optional but highly recommended for chocolate lovers.
Tools Needed
– 9-inch springform pan
– Electric mixer
– Mixing bowls
– Spatula
To make your cheesecake, you will need a few tools. A 9-inch springform pan is best for easy removal. An electric mixer helps blend the cream cheese and other ingredients smoothly. You will also need mixing bowls for combining the ingredients. Lastly, a spatula is perfect for spreading the cheesecake filling evenly.
This recipe offers a fun way to enjoy a classic dessert. Get ready to impress your family and friends with this delightful treat!
Step-by-Step Instructions
Prepare the Crust
– Combine 24 crushed Oreo cookies and 1/4 cup melted unsalted butter.
– Press the mixture into the bottom of your 9-inch springform pan.
Start by crushing the Oreo cookies. You can use a food processor or place them in a bag and crush them with a rolling pin. Mix the crumbs with melted butter until they look like wet sand. This mixture forms a great, flavorful crust. Press it firmly into the pan. This helps it hold together when you slice the cheesecake later. After pressing down, place the pan in the freezer for about 10-15 minutes to set.
Make the Cheesecake Filling
– Beat 16 oz softened cream cheese until smooth.
– Add 1 cup powdered sugar and 1 teaspoon vanilla extract.
– Optionally, mix in 1/4 cup cocoa powder for a chocolate flavor.
In a large bowl, beat the softened cream cheese using an electric mixer. It should be creamy and smooth. Gradually add the powdered sugar and vanilla extract. Keep mixing until you don’t see any lumps. If you want a richer taste, you can add cocoa powder. It gives an extra chocolatey kick.
Whip the Cream
– Whip 1 cup heavy whipping cream until stiff peaks form.
– Fold the whipped cream into the cheesecake filling.
In another bowl, whip the heavy cream. Use an electric mixer and make sure your bowl and beaters are cold. This helps the cream whip better. Beat until stiff peaks form; this means the cream should stand up on its own. Gently fold the whipped cream into the cream cheese mixture. Be careful not to deflate it. This folding keeps the filling light and airy.
Assemble and Chill
– Pour the filling over the chilled crust.
– Refrigerate for at least 4 hours or overnight.
After mixing, pour the filling over your chilled crust. Use a spatula to spread it evenly. Cover the springform pan with plastic wrap. Place it in the fridge for at least 4 hours. For the best results, let it chill overnight. This allows the flavors to meld and the cheesecake to set perfectly.
Follow these steps, and you will create a No-Bake Oreo Cheesecake that is both easy to make and simply delightful.
Tips & Tricks
Making a Smooth Filling
To make your filling smooth, start with softened cream cheese. Cold cream cheese will not blend well. Leave it at room temperature for about 30 minutes before use. Next, when adding powdered sugar, do it gradually. This helps to avoid lumps and gives you a creamy texture.
Achieving Perfect Whipped Cream
For perfect whipped cream, chill your bowl and beaters. Cold tools help the cream whip up quickly. As you whip, pay attention to the peaks. Stop mixing right when stiff peaks form. Overmixing can lead to a grainy texture, so be gentle.
Serving Suggestions
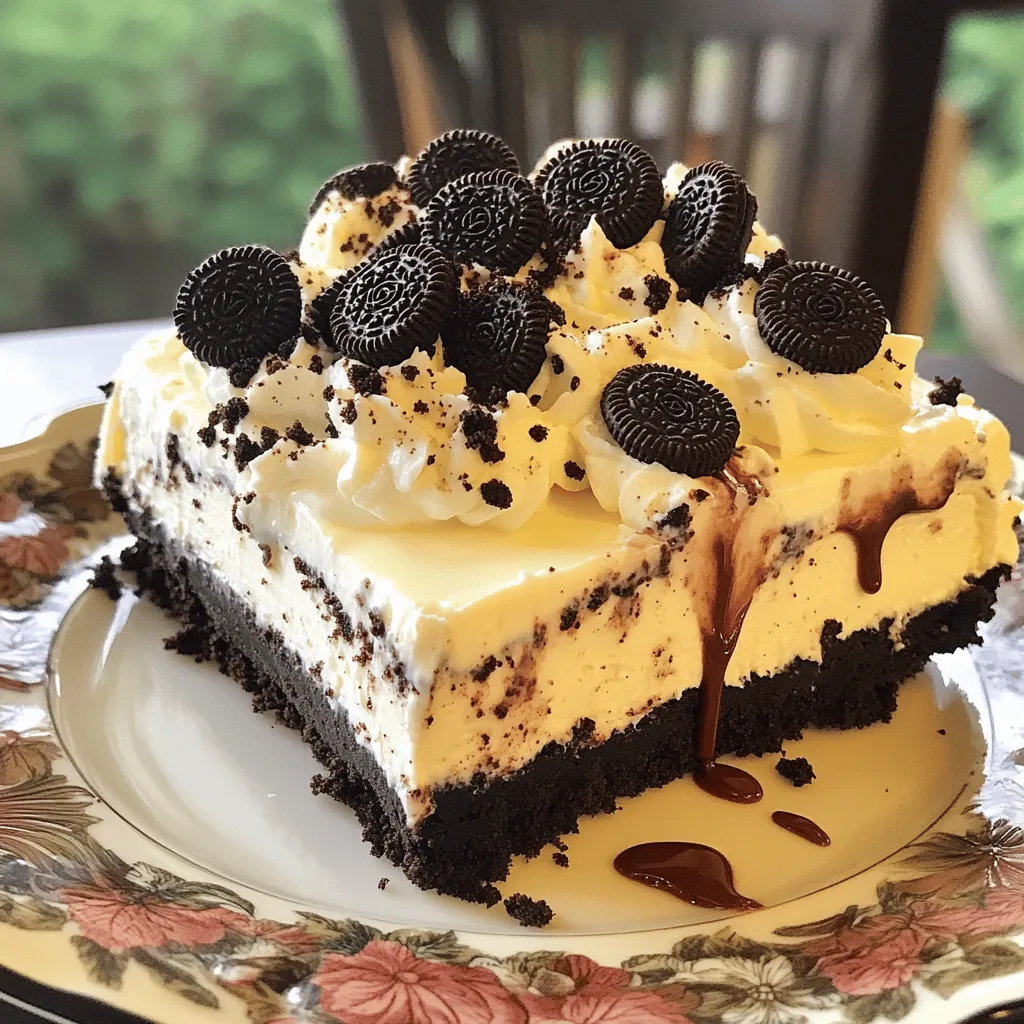
Garnish your cheesecake with crushed Oreos or a drizzle of chocolate sauce. It adds flair and flavor. A dollop of whipped cream on top makes it look even more tempting. These simple touches make your dessert pop and impress your guests. Enjoy this easy and delightful No-Bake Oreo Cheesecake!
Variations
For a fun twist on the classic No-Bake Oreo Cheesecake, you can try different flavors. Here are some tasty ideas:
Chocolate Oreo Cheesecake
Want more chocolate? Just add more cocoa powder to the filling. This will make the cheesecake richer and give it a deep chocolate flavor. You can start with an extra 1/4 cup of cocoa powder. Mix it in with the cream cheese and sugar. This simple step will take your cheesecake to the next level!
Mint Oreo Cheesecake
If you love mint, this variation is for you. Just add a teaspoon of mint extract to your filling. It gives a cool, refreshing taste. The mint pairs well with the chocolate from the Oreos. This cheesecake is perfect for summer parties or any time you want a fresh flavor.
Healthier Options
You can enjoy this dessert while being mindful of health. Use low-fat cream cheese and light whipped topping. This way, you cut some calories but keep the creamy texture. You still get the delicious Oreo taste without feeling guilty. It’s a win-win!
Explore these variations to enjoy a No-Bake Oreo Cheesecake that fits your taste.
Storage Info
Refrigeration Tips
Store your No-Bake Oreo Cheesecake covered in the fridge. It stays fresh for up to 5 days. Make sure it is in an airtight container or well-wrapped. This keeps it from absorbing other fridge smells.
Freezing Instructions
You can freeze this cheesecake for up to 2 months. To do this, slice it first. Wrap each slice in plastic wrap. Then place the slices in a freezer bag. This way, you can enjoy a piece whenever you want!
Thawing Recommendations
When you’re ready to serve, thaw the cheesecake in the fridge overnight. This helps it maintain its creamy texture. Avoid thawing at room temperature to keep it safe and tasty.
FAQs
Can I make No-Bake Oreo Cheesecake ahead of time?
Yes, it can be made up to 2 days in advance. This makes it great for parties. Just store it in the fridge until you are ready to serve.
How long does No-Bake Oreo Cheesecake last?
It lasts for about 5 days in the fridge. Keep it covered to keep it fresh. After five days, the taste and texture may change.
Is No-Bake Oreo Cheesecake gluten-free?
It depends on the Oreo cookies used; check the packaging. Some Oreo varieties contain gluten. If you need a gluten-free option, look for the gluten-free label.
Can I use different cookies for the crust?
Yes, you can substitute with any similar cookies, such as chocolate wafers. This lets you create different flavors and textures. Experiment with what you like!
Do I need to use a springform pan?
A springform pan is recommended for easy removal, but a regular pan can be used with careful serving. Using a springform pan makes it easier to slice and serve.
How to serve No-Bake Oreo Cheesecake?
Slice and serve chilled, garnished with whipped cream or additional Oreos. You can also drizzle chocolate sauce on top for extra flair. Enjoy every bite!
You can create a delicious No-Bake Oreo Cheesecake with simple steps. We covered the main ingredients and tools needed. Remember to chill the cheesecake to get the best flavor and texture. Use the tips to make a smooth filling and perfect whipped cream. You can customize the recipe to fit your taste. Enjoy this easy treat, whether as a fun dessert or a special occasion cake. Store it well to keep it fresh. This cheesecake is sure to impress everyone!