Skip to content
DisclaimerTerms Of UseGDPR PolicyCookie Policy

Southern Dishes

  • Home
  • Drinks
  • Appetizers
  • Dinner
  • Dessert
  • About
  • Contact
  • Privacy Policy
DisclaimerTerms Of UseGDPR PolicyCookie Policy

Isabella

To make a classic Key Lime Pie, you need simple and fresh ingredients. Here’s what you will need: - 1 ½ cups graham cracker crumbs - ½ cup unsweetened coconut flakes - ½ cup granulated sugar - ½ cup unsalted butter, melted - 4 large egg yolks - 1 can (14 oz) sweetened condensed milk - ½ cup fresh key lime juice (or regular lime juice) - Zest of 2 key limes - 1 cup heavy whipping cream - 2 tablespoons powdered sugar - Optional garnishes: Lime slices and mint leaves Each ingredient plays a key role. The graham cracker crumbs give the crust a crunchy texture. Coconut flakes add a sweet twist. Granulated sugar sweetens the filling, while unsalted butter binds the crust. Egg yolks and sweetened condensed milk create a rich filling. Fresh key lime juice gives that zesty flavor. Lime zest adds brightness. Heavy whipping cream makes a fluffy topping. Powdered sugar sweetens the cream, making it smooth. Lime slices and mint leaves add a beautiful touch when serving. For the full recipe, check out the details on how to combine these ingredients perfectly! To start, preheat your oven to 350°F (175°C). In a mixing bowl, I combine 1 ½ cups of graham cracker crumbs, ½ cup of unsweetened coconut flakes, ½ cup of granulated sugar, and ½ cup of melted unsalted butter. Mix it well until the crumbs look like wet sand. Next, I press the mixture firmly into a 9-inch pie dish. Make sure to cover the bottom and the sides evenly. Now it’s time to bake! Place the crust in the preheated oven for about 8 to 10 minutes. Look for a light golden color on the edges. Once done, take it out and let it cool. A good crust sets a great base for our pie. In another bowl, I whisk 4 large egg yolks until smooth and creamy. Then, I add 1 can of sweetened condensed milk, ½ cup of fresh key lime juice, and the zest from 2 key limes. I stir this mixture until it thickens a bit and all the ingredients blend well. This filling brings that zesty flavor to the pie. Now, pour the filling into the cooled crust. Bake it for 10 to 12 minutes. The filling should be set but still slightly jiggly in the center. Once done, I take it out and let it cool completely. While the pie cools, I prepare the whipped cream. In a bowl, I beat 1 cup of heavy whipping cream with 2 tablespoons of powdered sugar. I mix until soft peaks form. Once the pie is cool, I spread the whipped cream on top evenly. To finish, I garnish with lime slices and mint leaves. This adds a nice touch and looks pretty too. For the full recipe, check out the details above. Happy baking! To get a smooth filling, whisk the egg yolks well. This helps blend them with the sweetened condensed milk and lime juice. You want a creamy consistency. After baking, let the pie chill in the fridge for at least two hours. Chilling helps the pie set and makes each slice clean and neat. For an extra kick, add more lime zest or juice. This brightens the flavor and enhances the pie's tartness. You can also experiment with other citrus fruits. A mix of lemon and lime can bring a fun twist to your pie. Serve slices on chilled dessert plates for a stunning look. Drizzle a bit of extra key lime juice on top for an added zesty touch. Garnish with lime slices and fresh mint leaves. These small details make your pie not only tasty but also beautiful. {{image_2}} You can use regular limes instead of key limes. The taste will be a bit different. Regular limes are tart and bright, making a tasty pie. You can also try lemon juice for a fresh twist. Each citrus adds its own unique flavor. Feel free to mix them up for fun! To make a key lime cheesecake, add cream cheese to your filling. Whip 8 oz of softened cream cheese into the egg yolks. This will create a rich, creamy texture. Bake it the same way as the classic pie. You can serve it chilled, topped with whipped cream. For a vegan key lime pie, replace the egg yolks and cream. Use silken tofu blended until smooth as a base. Swap the sweetened condensed milk for coconut cream. This keeps the pie rich and creamy. You can also use agave syrup for sweetness. Enjoy this plant-based twist! For the full recipe, check out the Zesty Key Lime Dream Pie. To keep your Key Lime Pie fresh, store any leftovers in the fridge. Wrap it tightly in plastic wrap or place it in an airtight container. This way, it stays moist and tasty. The pie can last for about 3 to 4 days in the refrigerator. Always let it cool completely before wrapping to avoid sogginess. Want to save some pie for later? Freezing is a great option! First, cut the pie into slices. Wrap each slice in plastic wrap, then place them in a freezer-safe bag or container. This helps prevent freezer burn. You can store the pie in the freezer for up to 2 months. When you're ready to enjoy, thaw it in the fridge overnight. This keeps it creamy and delicious. For an easy treat, try the Full Recipe for a delightful twist on this classic! You can tell when your key lime pie is done by looking for a few signs. The filling should be set but still slightly jiggly in the center. This means it will firm up as it cools. The edges might look a bit puffed up, but the center should not be too firm. Keep an eye on the time; it usually takes about 10-12 minutes for the second bake. Yes, you can make key lime pie ahead of time. In fact, it tastes better after chilling for a few hours. Make the pie, let it cool, and then refrigerate it. You can even make it the day before serving. Just cover it well to keep it fresh. Before serving, top it with whipped cream for a nice touch. Key limes are smaller and rounder than regular limes. They have a thinner skin and are more aromatic. The taste is also different; key limes are sweeter and more tart. They add a unique flavor to your pie. Regular limes can work too, but the taste won't be the same. For the best key lime pie, use fresh key limes if you can! This blog post guides you through making a delicious key lime pie. It covers ingredients, detailed steps, and tips for texture and flavor. You now have the tools to create a delightful dessert that impresses everyone. Remember, practice makes perfect. Enjoy experimenting with variations and presentation ideas. Your key lime pie can be a hit at any gathering. Keep these tips in mind for great results every time. Happy baking!

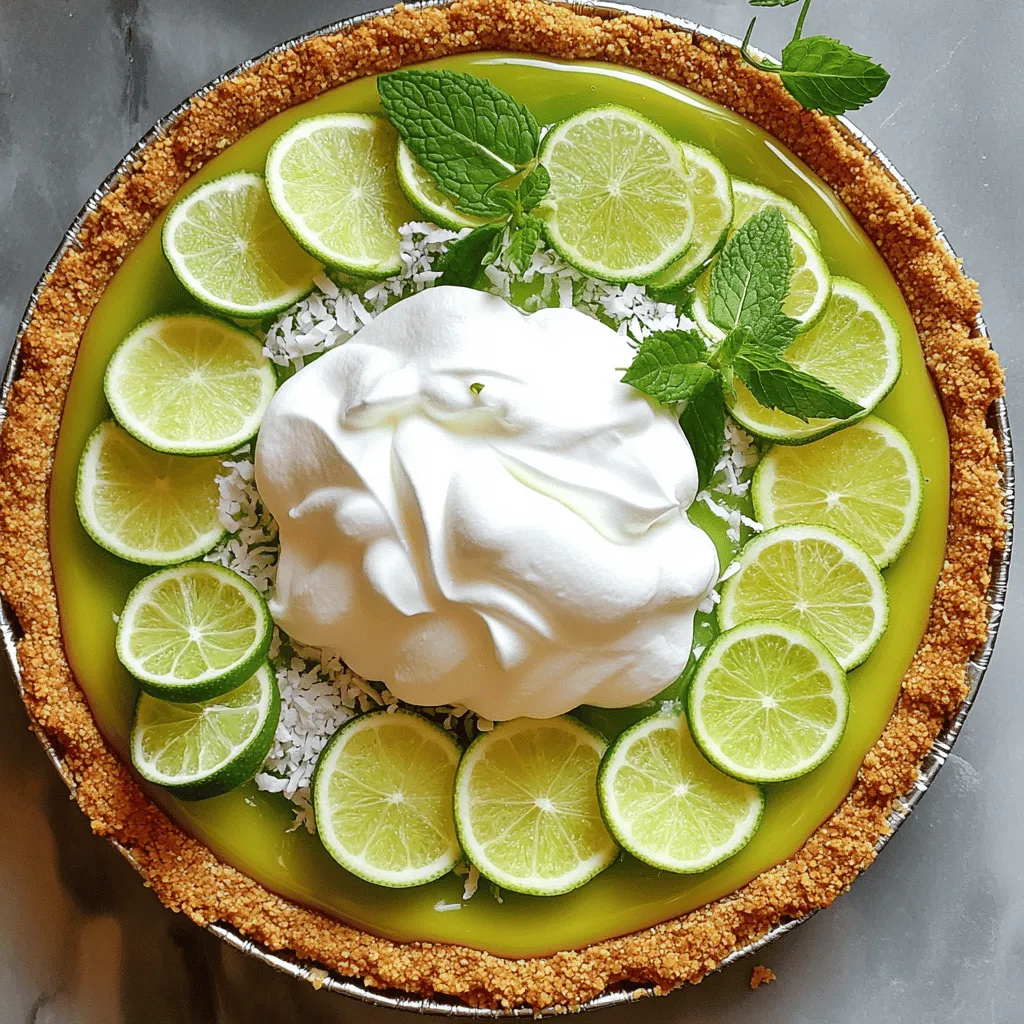
Classic Key Lime Pie Simple and Refreshing Recipe

Get ready to indulge in a sweet and tangy treat with my Classic Key Lime Pie recipe! This simple, refreshing

- 2 pounds baby potatoes, halved - 5 cloves garlic, minced - 1 tablespoon fresh rosemary, chopped - 1 tablespoon fresh thyme, chopped - 1 tablespoon fresh parsley, chopped - 3 tablespoons olive oil - 1 teaspoon paprika - Salt and pepper to taste Best types of potatoes for roasting I love using baby potatoes for this dish. Their small size makes them tender and sweet when roasted. You can also use Yukon Gold or red potatoes. They hold their shape well and have a nice flavor. Fresh vs. dried herbs Fresh herbs bring a bright taste to the dish. I prefer fresh rosemary, thyme, and parsley for their strong flavors. Dried herbs work too, but use less. Dried herbs are more potent than fresh. Selecting quality garlic Choose firm, plump garlic bulbs. Avoid any with soft spots or green shoots. Fresh garlic adds a strong, rich flavor to the potatoes. Mince it finely to spread the taste evenly. Great garlic makes all the difference in this dish. For the full recipe, check out Garlic Herb Roasted Potatoes. 1. Preheat the oven Set your oven to 425°F (220°C). This high heat helps to get crispy edges. 2. Preparing the potatoes and garlic Grab 2 pounds of baby potatoes and cut them in half. Then, take 5 cloves of garlic and mince them finely. You want to make sure all the flavors blend well. 3. Combining herbs and seasonings In a big bowl, mix the halved potatoes with the minced garlic. Add 1 tablespoon each of chopped rosemary, thyme, and parsley. Drizzle in 3 tablespoons of olive oil, and then sprinkle 1 teaspoon of paprika, along with salt and pepper to taste. Toss it all together until every potato is coated. 1. Spreading potatoes on the baking sheet Take a large baking sheet and spread the seasoned potatoes in a single layer. This step helps them cook evenly. 2. Roasting time and temperature Place the baking sheet in your preheated oven. Roast the potatoes for about 30-35 minutes. Make sure they become golden brown and crispy. 3. Flipping for even cooking At the halfway mark, take the sheet out and flip the potatoes. This ensures all sides get that nice, roasted texture. 1. How to check for doneness After roasting, check if the potatoes are done. They should be golden brown and easily pierced with a fork. 2. Cooling and serving tips Once cooked, take them out of the oven. Let them cool for a few minutes before serving. For a special touch, serve the potatoes in a rustic bowl and add more fresh herbs on top. For the complete process, refer to the Full Recipe. To achieve crispy edges on your Garlic Herb Roasted Potatoes, start by cutting the potatoes into equal sizes. This helps them cook evenly. Use a hot oven at 425°F (220°C) to get that nice crunch. Flip the potatoes halfway through cooking. This promotes an even golden color. Balancing flavors is key. Use fresh garlic and herbs like rosemary, thyme, and parsley for a bright taste. Don’t skip the salt and pepper; they enhance the natural flavors. A touch of paprika adds a warm kick that complements the dish. Olive oil plays a vital role in roasting. It helps the potatoes brown and adds a rich flavor. Use a good quality oil for the best taste. Drizzling it evenly over the potatoes ensures they cook well and don’t stick to the pan. For roasting, choose a heavy-duty baking sheet. Look for one with a rim to catch any juices. A non-stick or well-seasoned pan works wonders for easy cleanup. Use simple kitchen tools for this recipe. A large bowl helps mix the potatoes and seasonings well. A sharp knife eases cutting the potatoes, and a spatula is perfect for flipping them during cooking. Garlic Herb Roasted Potatoes pair well with many side dishes. They complement fresh salads or steamed veggies perfectly. Try serving them with grilled chicken or steak for a complete meal. For a fun twist, add a side of sour cream or yogurt. This adds a cool contrast to the warm, crispy potatoes. You can also sprinkle some extra herbs on top for a colorful finish. For the full recipe, check out the detailed steps to make this dish shine! {{image_2}} You can easily change the taste of garlic herb roasted potatoes. Adding fresh dill or basil gives a fresh twist. Both herbs add a unique flavor that brightens the dish. You can also mix in cheese, like Parmesan, for a creamy touch. A sprinkle of lemon zest brings in a citrus kick. This adds brightness and balances the garlic's richness. If you're looking for vegan options, you can swap olive oil with avocado oil. This keeps it plant-based while adding healthy fats. For gluten-free needs, this recipe is already gluten-free. Just ensure any added ingredients also meet this requirement, like cheese alternatives. For a Mediterranean style, add olives and capers. This creates a tangy flavor that pairs well. You can also try a spicy version. Add chili flakes or cayenne for a kick. This makes the dish exciting and perfect for those who love heat. Explore these variations to find your favorite flavor profile! To store your leftover Garlic Herb Roasted Potatoes, place them in an airtight container. This keeps them fresh and safe. You can put them in the fridge right after they cool down. They will last about 3 to 5 days in the refrigerator. Make sure to check them for any signs of spoilage before eating. If you want to keep your roasted potatoes longer, freezing works well. Spread the cooled potatoes on a baking sheet in a single layer. Freeze them for about 1 to 2 hours. Once frozen, transfer them to a freezer bag. This helps prevent them from sticking together. When you're ready to eat them, reheat them in the oven. This keeps them crispy and delicious. You can add leftover potatoes to many dishes. Try mixing them into a breakfast hash or a savory frittata. They also work well in soups or salads. To reheat, use the oven or a skillet. This helps keep their tasty crunch. For the best results, heat them at a low temperature to warm them through. To keep roasted potatoes crispy, choose smaller potatoes and cut them evenly. Always dry the potatoes well before cooking. Use enough olive oil to coat them, but avoid overdoing it. Spread them out on the baking sheet. This keeps them from steaming. Roasting at a high temperature, like 425°F, helps a lot. Flip the potatoes halfway through cooking for even browning. Yes, you can use other types of potatoes. Yukon Gold and red potatoes work well too. They have a creamy texture and hold their shape well. You can even try fingerling potatoes for a fun twist. Just make sure they are cut to a similar size. This helps them cook evenly. If you don't have fresh herbs, dried herbs work too. Use one-third the amount of dried herbs as fresh. For example, if a recipe calls for 1 tablespoon of fresh rosemary, use 1 teaspoon of dried. You can also use herb blends like Italian seasoning. This adds a nice flavor without needing fresh herbs. Garlic Herb Roasted Potatoes take about 30-35 minutes to cook. Preheat your oven to 425°F. Spread the potatoes in a single layer. Bake until they are golden brown and crispy. Make sure to flip them halfway through for even cooking. Check for doneness by poking with a fork; they should be tender inside. Yes, roasted potatoes can be healthy. They are a great source of fiber and vitamins. Using olive oil instead of butter adds healthy fats. Keep the seasonings light to avoid extra calories. Pair with veggies or a salad for a balanced meal. Enjoying them in moderation is key to a healthy diet. For the full recipe, check out the Garlic Herb Roasted Potatoes section. In this article, we explored how to make tasty Garlic Herb Roasted Potatoes. We covered key ingredients, tips for the best results, and step-by-step instructions. I shared ideas for variations, storage methods, and answered common questions. Overall, roasting potatoes can be simple and fun. Use fresh herbs and quality ingredients for the best flavor. Enjoy making this dish for your friends or family; it's sure to impress!

Garlic Herb Roasted Potatoes Savory and Simple Dish

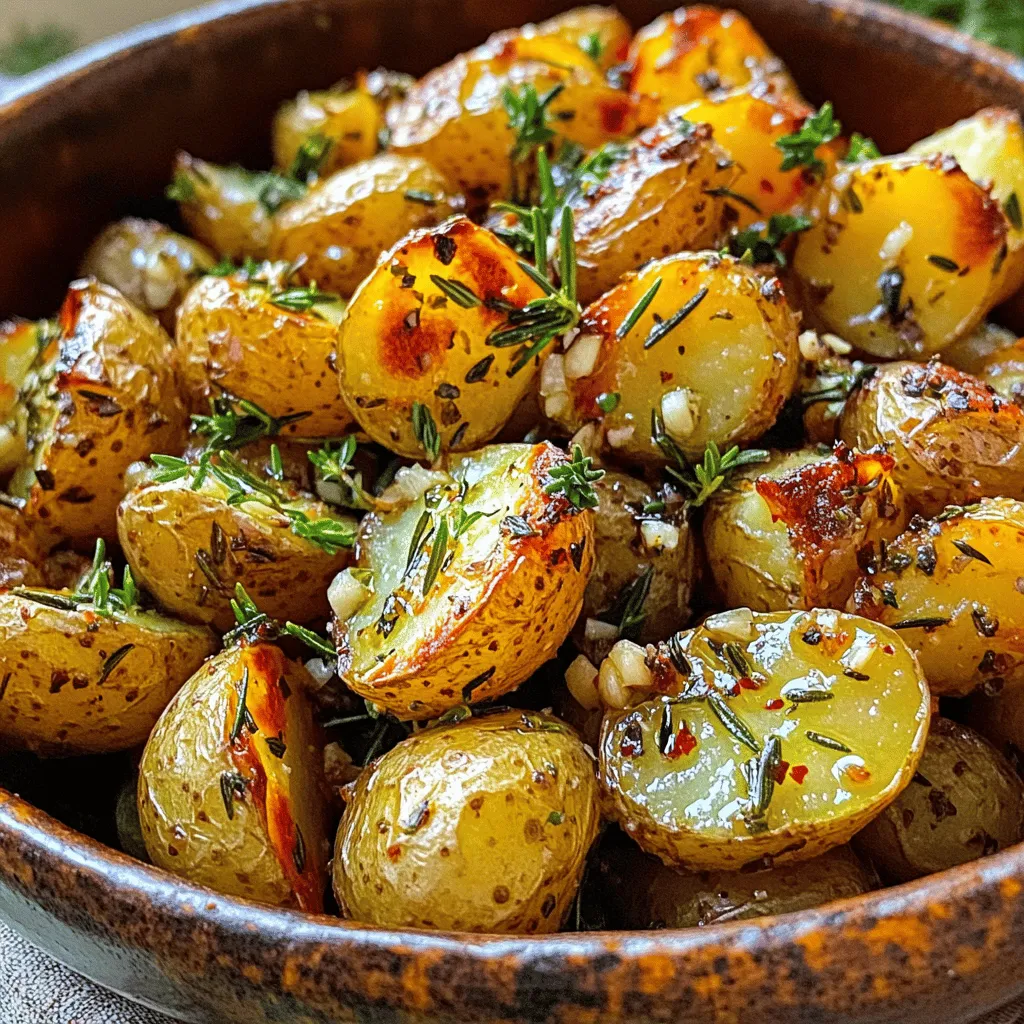
Looking for a simple yet delicious side dish? Garlic Herb Roasted Potatoes are your answer! With just a few fresh

- Fresh strawberries - Granulated sugar - Vanilla extract - Pound cake - Whipped cream - Vanilla pudding The main ingredients are simple yet offer a burst of flavor. Fresh strawberries are the star, bringing sweetness and color. Granulated sugar enhances the strawberry taste. Vanilla extract adds depth and warmth to the dish. Pound cake provides a soft base, while whipped cream gives it a light and airy feel. Vanilla pudding adds creaminess and richness, making every bite delightful. - Fresh mint leaves for garnish - Variations in fruit types You can add fresh mint leaves for a pop of color and flavor. Feel free to switch out the strawberries for other fruits like peaches or blueberries. This lets you customize your trifle based on what you love or have on hand. - Mixing bowls - Trifle dish or serving glasses - Whisk or mixer Using the right tools makes a big difference. Mixing bowls are essential for combining ingredients. A trifle dish or serving glasses showcase your layers beautifully. A whisk or mixer helps you whip cream to the perfect texture. These tools make your trifle easy and fun to create. For the full recipe, you can refer to the earlier section. To start, you need to prepare the strawberries. Slice 2 cups of fresh strawberries and place them in a medium bowl. Add 1/4 cup of granulated sugar. Stir gently to coat the strawberries. The sugar will help the strawberries release their juices. Let the strawberries sit for about 15 minutes. This process is called macerating. You'll notice a sweet syrup forming, which adds flavor to your trifle. Next, let's make the whipped cream and pudding. You can use store-bought whipped cream for ease. If you want, you can make it from scratch. To make it, whip heavy cream until it forms stiff peaks. Add 1 teaspoon of vanilla extract for flavor. Now, for the vanilla pudding, you have two options. You can prepare instant pudding by following the package instructions. Alternatively, you can make homemade vanilla pudding. If you choose homemade, let it cool before using. Now comes the fun part—assembling your trifle! Grab a large trifle dish or individual serving glasses. Start by layering pound cake cubes at the bottom. Use about 1 pound of pound cake, cut into cubes. Next, spoon a layer of your macerated strawberries over the cake. Don’t forget to drizzle some of the sweet strawberry juice on top! Then, add a layer of vanilla pudding over the strawberries. Follow that with a generous layer of whipped cream. Repeat these layers until you use all the ingredients. Finish with whipped cream on top. For a beautiful touch, garnish with extra sliced strawberries and fresh mint leaves. Finally, chill the trifle in the refrigerator for at least 1 hour. This waiting time allows the flavors to meld beautifully. Enjoy your delightful dessert! For the full recipe, check out the [Full Recipe]. To create a stunning trifle, layer your ingredients with care. Start with a layer of pound cake cubes at the bottom. This gives a solid base. Next, add strawberries evenly. Spread them out so every bite has fruit. Follow with pudding and whipped cream. Repeat these layers until you reach the top. Always finish with whipped cream. This helps keep the dessert fresh. To avoid soggy layers, let the strawberries sit with sugar first. This draws out juice but keeps the fruit firm. Drizzle some juice over the cake, but not too much. You want moist cake, not mush. You can brighten the trifle with lemon zest. Add a teaspoon to your whipped cream for a fresh taste. This small change makes a big difference. You can also use almond extract instead of vanilla for a nutty twist. Chilling your trifle is key. Allow it to sit in the fridge for at least one hour. This lets flavors meld together, making every bite taste better. Make your trifle pop with fresh mint leaves. Place a few on top for color and aroma. You can also add extra sliced strawberries on the cream. This creates a beautiful finish. For serving, use individual glasses. They are fun and easy to handle. Each guest gets their own treat, perfect for small gatherings. Plus, it looks fancy! If you want, you can find the full recipe for more details. {{image_2}} You can change up your trifle with different fruits. Think blueberries, peaches, or raspberries. Just chop them up and layer them like you do with strawberries. You can also add a drizzle of chocolate or caramel sauce between layers. This adds a fun twist and extra sweetness. If you need to make this dessert gluten-free, use gluten-free pound cake. Many brands offer this option now. For those who are dairy-free, try using whipped coconut cream or a non-dairy pudding. Both are great swaps and keep the trifle creamy. You can easily scale the recipe for larger gatherings. Just double or triple the ingredients. For smaller events, make individual servings in glasses. This makes it easy for guests to enjoy and adds a nice touch to your presentation. For the full recipe, check the beginning of this article! To keep your trifle fresh, cover it well with plastic wrap. This keeps air out and moisture in. Store it in the fridge for up to three days. If you see any liquid forming at the bottom, just stir it gently. This will help keep the layers nice. Can you freeze strawberry shortcake trifle? You can, but it is best to freeze the parts separately. Freezing the whole trifle can change its texture. For the best results, freeze the pound cake and pudding. Then, store the strawberries and whipped cream in the fridge. To restore texture and flavor if refrigerated, take the trifle out. Let it sit at room temperature for about 30 minutes. This helps bring back the fresh taste. You can also add a bit more whipped cream or fresh strawberries on top before serving. For the full recipe, check the earlier section. You can store your strawberry shortcake trifle in the fridge for up to three days. Make sure to cover it tightly with plastic wrap or a lid. This keeps the trifle fresh and prevents it from absorbing other fridge smells. However, the layers may begin to soften over time, so enjoy it sooner for the best texture. Yes, you can prepare the trifle a day ahead! This actually helps the flavors blend better. Just assemble the layers, cover it, and chill it in the fridge. The longer it sits, the more the flavors mingle. Just be careful not to let it sit too long, as the cake may become soggy. If you want a different cake base, there are plenty of tasty options! - Angel food cake: This cake is light and fluffy. - Sponge cake: It has a soft texture and absorbs flavors well. - Biscuit: For a denser, buttery flavor, a biscuit works great. - Shortbread cookies: Crumble them for a crunchy layer. These alternatives offer unique textures and flavors, making your trifle special. Strawberry shortcake trifle combines fresh strawberries, creamy pudding, and fluffy whipped cream. You learned the steps to prepare and assemble this dessert. Adding tips can enhance flavor and presentation. Remember the options for variation and dietary needs when making your trifle. Store leftovers properly to keep it fresh. With these simple steps, you can create a delightful treat that impresses everyone. Enjoy making this sweet dessert and customizing it to your taste.

Strawberry Shortcake Trifle Easy and Delightful Recipe

Are you ready to enjoy a sweet treat that’s both simple and delightful? In this article, I’ll show you how

- 2 pounds chicken wings - ¼ cup gochujang (Korean red chili paste) - 1 tablespoon sesame oil - 1 tablespoon vegetable oil - 4 cloves garlic, minced - 1 tablespoon fresh ginger, grated - 2 tablespoons soy sauce - 2 tablespoons honey - 1 tablespoon rice vinegar - 1 tablespoon sesame seeds (for garnish) - 2 green onions, sliced (for garnish) - Baking sheet and wire rack - Mixing bowls and measuring spoons - Tongs for flipping wings When you gather your ingredients, ensure they are fresh. The chicken wings are the star, so choose good quality ones. Gochujang adds that spicy kick. The sesame oil and vegetable oil help with the cooking and flavor. Don't skip the garlic and ginger; they add depth to each bite. For garnishing, sesame seeds and green onions make your dish pop visually. They also enhance the flavors. To cook these wings perfectly, you'll need a baking sheet and a wire rack. This setup allows hot air to circulate. Mixing bowls and measuring spoons help in combining your ingredients. Lastly, tongs are key for flipping the wings during cooking. For the full recipe, check out the detailed instructions. Enjoy the process of creating these spicy delights! To start, you need to preheat your oven. Set it to 425°F (220°C). This helps the wings cook evenly and get crispy. Next, prepare your baking sheet. Line it with aluminum foil for easy cleanup. Place a wire rack on top of the sheet. This lets air flow around the wings. Now, let's mix the marinade ingredients. In a large bowl, add the chicken wings, sesame oil, and vegetable oil. Then, toss in the minced garlic and grated ginger. Stir until the wings are well coated. In another bowl, mix gochujang, soy sauce, honey, rice vinegar, salt, and pepper. This creates a spicy, sweet sauce. Pour this marinade over the chicken wings. Toss again to ensure each wing gets a good coat. Arrange the marinated wings on the wire rack. Make sure they are in a single layer. Leave space between each wing for proper cooking. Bake the wings in your preheated oven for 30 to 35 minutes. Flip them halfway through cooking. This helps them get crispy and golden brown. Once done, remove them from the oven. Let them rest for 5 minutes. Before you serve, garnish with sesame seeds and sliced green onions. For the full recipe, check the section above. To get the best crispy wings, space them well on the rack. If the wings touch, they will steam instead of crisp up. Make sure they sit in a single layer. Adjust the cooking time if your wings are larger. Bigger wings may need a few extra minutes to cook. Keep an eye on them to avoid burning. You can adjust the heat by adding more or less gochujang. If you want a mild spice, start small. You can always add more later. Consider adding extra garlic or ginger to the marinade. These add depth and flavor, making your wings even tastier. Serve the wings on a large platter for a great look. Add fresh vegetable sticks like cucumber and carrot for color. Pair your wings with a small bowl of extra gochujang for dipping. This adds an extra kick and keeps things fun. {{image_2}} You can mix up the flavors of your spicy Korean chicken wings. One great option is honey garlic. Simply add honey and minced garlic to your marinade. This gives the wings a sweet and savory taste. Another fun twist is a sweet and spicy mix. Combine gochujang with some brown sugar or maple syrup. This balances the heat and adds a nice sweetness. You can cook your wings in different ways. An air fryer is a quick and easy method. This makes the wings crispy without much oil. Just cook them for about 25 minutes at 400°F (200°C). If you prefer more flavor, try grilling. Cooking on a grill gives the wings a smoky taste. Grill them for 20-25 minutes, turning often. For those needing gluten-free options, swap soy sauce for tamari. It has a similar taste without gluten. If you want low-sugar or keto variations, use a sugar substitute, like erythritol. You can also skip the honey or reduce the amount in the marinade. This keeps the wings tasty without all the sugar. For the full recipe, check out the detailed steps above! After enjoying your spicy Korean chicken wings, store any leftovers right away. Place the wings in an airtight container. This helps keep them fresh and tasty. You can also use a resealable plastic bag. Just make sure to remove as much air as possible. Store them in the fridge for up to three days. When it comes to reheating, the oven works best. Preheat it to 350°F (175°C). Place the wings on a baking sheet. Heat for about 10-15 minutes. This method helps keep them crispy. If you use a microwave, the wings may become soggy. If you want to restore crispiness, try using a toaster oven. It heats and crisps them more evenly. If you want to keep your wings longer, freezing is a great option. First, let the wings cool completely. You can place them in a single layer on a baking sheet. Freeze until solid, then transfer them to a freezer bag. This helps prevent freezer burn. When you’re ready to eat, don’t forget to thaw them in the fridge overnight. You can also use the microwave for quick thawing, but be careful not to cook them. Gochujang is a thick, red chili paste from Korea. It has a sweet and spicy flavor. You can find it in most Asian grocery stores. Many large supermarkets also carry it in their international aisle. Look for it in jars or squeeze bottles. Yes, you can use chicken drumsticks or thighs. If you use drumsticks, cook them for about 40-45 minutes. Thighs may need 35-40 minutes. Adjust the cooking time based on the size of the pieces. The best way is to check the internal temperature. Chicken wings need to reach 165°F (75°C). You can use a meat thermometer to check this. Also, look for visual cues. The skin should be crispy and golden brown. The juices should run clear when pierced. If both these signs are present, your wings are ready to enjoy! In this blog post, I detailed how to make spicy Korean chicken wings. We covered the ingredients, including chicken wings, gochujang, and other seasonings. I shared step-by-step instructions for prepping, marinating, and baking the wings. You also learned handy tips for achieving crispy wings and suggestions for variations. Don’t forget the best ways to store and reheat leftovers. Enjoy these tasty wings at your next gathering, and make them your way!

Spicy Korean Chicken Wings Flavorful and Easy Recipe

Are you ready to spice up your next meal? This Spicy Korean Chicken Wings recipe brings bold flavors and crispy

- 1 ½ cups graham cracker crumbs - ½ cup unsalted butter, melted - ⅓ cup granulated sugar - 1 can (14 oz) sweetened condensed milk - ½ cup fresh lemon juice (about 3-4 lemons) - Zest of 1 lemon - 1 cup heavy whipping cream - 2 tablespoons powdered sugar - Lemon slices and mint leaves for garnish When choosing graham cracker crumbs, pick a brand without added sugar. This helps balance the pie’s sweetness. For the butter, unsalted is key. This way, you control the saltiness of the crust. Fresh lemons are best for flavor. They make the pie taste bright and zesty. Zest adds an extra punch, so don’t skip that! If you need a gluten-free pie, use gluten-free graham crackers. You can also swap sweetened condensed milk with coconut milk for a dairy-free option. For the cream, try using coconut cream for a lighter twist. If you like less sweet, reduce the sugar in the filling or crust. Each swap can change the taste, so feel free to experiment! For the full recipe, check out the instructions provided. Start by mixing graham cracker crumbs, melted butter, and granulated sugar in a bowl. Use your hands or a fork to blend them until it looks like wet sand. This step is key for a tasty base. Next, press the mixture into a 9-inch pie dish. Make sure to cover the bottom and sides evenly. You can use your fingers or a measuring cup to pack it down. Once done, chill the crust in the fridge while you make the filling. In a large bowl, whisk together sweetened condensed milk, fresh lemon juice, and lemon zest. This mix brings bright flavors to the pie. Whisk until the mixture is smooth. In another bowl, whip the heavy cream with an electric mixer. Beat it until you see soft peaks. Then, add powdered sugar and keep beating until stiff peaks form. Now, gently fold the whipped cream into the lemon mixture. This folding is important; it keeps the filling light and airy. Once your filling is ready, it's time to fill the crust. Pour the lemon filling into your graham cracker crust. Spread it out evenly with a spatula. After that, cover the pie with plastic wrap. Place it in the fridge for at least 4 hours. For the best taste, let it chill overnight. When you're ready to serve, slice the pie and add lemon slices and mint leaves on top for garnish. This adds a fresh touch and makes it look beautiful. Enjoy your No Bake Lemon Icebox Pie, a perfect dessert for any occasion! For the complete process, check the Full Recipe. To make the best No Bake Lemon Icebox Pie, start with fresh lemons. Fresh juice gives a bright taste. Use a fine grater for the zest. This adds a lovely aroma. Make sure your heavy cream is cold before whipping. Cold cream whips better and faster. When you fold the cream into the lemon mix, be gentle. This keeps the filling light and fluffy. One mistake is not chilling the crust. A warm crust can make the pie soggy. Another issue is over-mixing the filling. This can make it dense. Always check the cream's peaks. Soft peaks are great for folding. If you beat it too long, it turns into butter. Lastly, use a sharp knife to slice the pie. A dull knife can squish the filling. Serve the pie cold for the best flavor. Add lemon slices and mint leaves on top for color. You can also serve it with a dollop of extra whipped cream. Pair it with a light tea or sparkling water. This enhances the citrus taste. For a fun twist, try a scoop of lemon sorbet on the side. Enjoy your dessert with friends and family for a refreshing treat! For the complete recipe, check out the Full Recipe. {{image_2}} Want to change up the taste? You can easily add flavors to your lemon pie. Try mixing in lime juice for a twist. It adds a zesty punch. You can also use orange juice for a sweeter, citrus flavor. For a berry twist, add pureed strawberries or blueberries into the filling. Just fold them in gently. This keeps the filling nice and fluffy. If you want a different crust, try these ideas. Use crushed vanilla wafers instead of graham crackers. This gives a sweet and creamy base. You can also use a chocolate cookie crust for a rich flavor. If you're looking for a gluten-free option, use almond flour mixed with coconut oil. Just press it into the pie dish like you would with graham crackers. Garnishing adds beauty to your pie. You can use lemon slices for a fresh look. Place them on top just before serving. Fresh mint leaves add a nice pop of color and flavor. For a fun touch, sprinkle some crushed cookies on top. It gives a nice crunch. You can also drizzle some lemon glaze on top for extra sweetness. These small touches make your pie stand out. For the complete recipe, check the Full Recipe above. To keep your No Bake Lemon Icebox Pie fresh, cover it with plastic wrap. Place the pie in the fridge. It can stay fresh for up to three days. If you want to keep it longer, freezing is a great option. To freeze the pie, slice it into pieces first. Wrap each slice in plastic wrap. Then, place the slices in a freezer bag. Seal the bag well to prevent freezer burn. The pie can stay frozen for up to two months. When ready to eat, thaw it in the fridge overnight before serving. Always store the pie in an airtight container to keep it tasting great. Avoid cutting into the pie until you are ready to serve. This helps maintain its texture and flavor. If you notice any leftover slices, use them within a few days for the best taste. Enjoy every bite of this refreshing dessert! To make No Bake Lemon Icebox Pie from scratch, you will need a few simple steps. First, prepare the crust by mixing graham cracker crumbs, melted butter, and sugar until it looks like wet sand. Press this mixture into a pie dish and chill it. Next, whip the heavy cream until it forms soft peaks. In another bowl, mix sweetened condensed milk, fresh lemon juice, and lemon zest together until smooth. Fold the whipped cream into this lemon mixture. Pour it into your chilled crust and let it set in the fridge for a few hours. For the full recipe, check the details above. Yes, you can use bottled lemon juice if you want. However, fresh lemon juice gives the pie a brighter taste. Bottled juice may contain preservatives that can change the flavor slightly. If you are in a hurry, using bottled juice can save time, but I always prefer the fresh taste. No Bake Lemon Icebox Pie lasts about 3 to 4 days in the fridge. Make sure to cover it well with plastic wrap or foil. This keeps the pie fresh and safe from other odors in the fridge. After 4 days, the pie may start to lose its taste and texture. Enjoy it while it’s fresh for the best flavor! We explored the key ingredients for a delicious No Bake Lemon Icebox Pie. You learned how to prepare the crust, make the filling, and assemble your pie. I shared tips to perfect your pie, avoid common mistakes, and storage instructions to keep it fresh. Plus, we discussed unique variations and serving ideas to delight your guests. Remember, pie-making is simple and fun. With these steps, you’ll create a treat everyone loves. Enjoy your baking!

No Bake Lemon Icebox Pie Fresh and Simple Dessert

Looking for a quick and tasty dessert? Try my No Bake Lemon Icebox Pie! It’s fresh, simple, and perfect for

To make fluffy Japanese souffle pancakes, you will need the following ingredients: - 2 large eggs, separated - 2 tablespoons granulated sugar - 1 tablespoon milk - 1/2 teaspoon vanilla extract - 1/4 cup all-purpose flour - 1/2 teaspoon baking powder - Pinch of salt - Butter for cooking - Maple syrup and fresh fruit (for serving) These ingredients work together to create the airy texture and sweet flavor. The egg whites and yolks play a big role in fluffiness. You can customize your pancakes with some fun add-ins. Consider these options: - Lemon zest for a fresh taste - Matcha powder for a unique flavor - Cocoa powder for a chocolate twist - Cinnamon for warmth These add-ins can elevate the taste and make your pancakes even more special. You can mix them into the batter for a delightful surprise. To prepare your souffle pancakes, gather these essential tools: - Mixing bowls - Electric mixer (or whisk) - Non-stick skillet or griddle - Ring molds (for thicker pancakes) - Spatula Having the right tools makes cooking easier and helps you achieve the best results. With these ingredients and tools, you’re ready to make fluffy Japanese souffle pancakes that will impress everyone! Before you start, gather your tools. You need a non-stick skillet or griddle. Preheat it over low heat. If you have a ring mold, prepare that too. This helps the pancakes hold their shape. If not, large cookie cutters work. You can also form the pancakes with a spoon. In a bowl, separate the egg yolks from the whites. Whisk the yolks with milk and vanilla extract. Mix until smooth. In another bowl, sift the flour, baking powder, and salt together. Gradually add this dry mix to the egg yolk mix. Stir gently until just combined. Set this mixture aside for later. In a clean bowl, beat the egg whites with an electric mixer. Start at medium speed. When soft peaks form, add the sugar slowly. Keep mixing until you see stiff peaks. The whites should look glossy. This step is key for fluffy pancakes. Lightly grease your skillet with butter. If using a ring mold, place it on the skillet. Pour in about 1/4 of the batter. If you aren't using a mold, scoop the batter directly onto the skillet. Cover it with a lid. Cook for 4-5 minutes until the bottom turns golden brown. Then, carefully flip the pancake. If using a mold, keep it on while flipping. Cook the other side for another 4-5 minutes. Your pancakes should be fluffy and fully cooked. Enjoy your Fluffy Japanese Souffle Pancakes! For detailed steps, check the Full Recipe. To get the perfect fluffy texture, focus on your egg whites. Whip them until they form stiff peaks. This airiness is key! Gently fold the whites into the yolk mixture. Be careful not to deflate them. The batter should look light and airy. Also, use a low heat setting when cooking. This allows the pancakes to rise slowly and evenly. One common mistake is overmixing the batter. This can make your pancakes dense. Remember, mix until just combined. Another mistake is cooking on too high heat. This can cause the outside to burn while the inside remains raw. Also, avoid flipping too early. Wait until the edges look firm and the bottom is golden brown. When cooking, always preheat your skillet over low heat. Use a non-stick pan or add a little butter to prevent sticking. If you have a ring mold, use it! This helps the pancakes hold their shape. Cover the skillet with a lid while cooking. This traps heat and helps the pancakes rise. Check the pancakes after 4-5 minutes, then flip carefully. Cook the other side until golden. {{image_2}} You can switch up the flavor of your souffle pancakes easily. Here are some fun ideas: - Matcha: Add 1-2 teaspoons of matcha powder to your dry mix. - Cocoa: Mix in 1-2 tablespoons of cocoa powder for a chocolate twist. - Citrus: Add a bit of lemon or orange zest for a fresh taste. - Chocolate Chips: Fold in a handful of mini chocolate chips before cooking. - Fruit Purees: Swirl in some fruit puree like strawberry or mango to your batter. These variations keep your pancakes exciting and tasty. You can match them to your mood or season. How you serve your souffle pancakes makes a big difference. Here are some ideas: - Classic: Stack them high and drizzle with maple syrup. - Fruits: Top with fresh berries, bananas, or peaches for added flavor. - Whipped Cream: A dollop of whipped cream gives a nice touch. - Ice Cream: For a treat, serve with a scoop of vanilla or green tea ice cream. - Nuts: Sprinkle with chopped nuts for a crunchy twist. These serving ideas can transform a simple pancake into a lovely dish. If you have dietary needs, you can still enjoy these pancakes. Here are some alternatives: - Gluten-Free: Use almond flour or a gluten-free flour blend. - Dairy-Free: Substitute milk with almond or oat milk. - Sugar-Free: Replace granulated sugar with a sugar alternative like agave syrup. - Vegan: Use flax eggs instead of egg yolks and egg whites. These changes help everyone enjoy fluffy pancakes without worry. Just remember to adjust cooking times as needed. For the complete recipe, check the Full Recipe section. After enjoying your pancakes, let them cool. Place the pancakes in an airtight container. If you have multiple layers, add parchment paper between them. This keeps them from sticking together. Store the container in the fridge for up to three days. To reheat, use the stovetop for the best taste. Heat a non-stick skillet over low heat. Add a bit of butter to the pan. Place the pancakes in the skillet and cover with a lid. Heat for about two to three minutes on each side. This warms them through and keeps them fluffy. You can also use a microwave, but they may lose some fluffiness. Heat in 15-second bursts, checking often. For longer storage, you can freeze the pancakes. First, let them cool completely. Wrap each pancake in plastic wrap. Then, place them in a freezer-safe bag. Be sure to remove as much air as possible. These pancakes can last up to two months in the freezer. To enjoy, thaw in the fridge overnight before reheating. For quick thawing, you can use the microwave on low power. For more details, check out the Full Recipe for Fluffy Japanese Souffle Pancakes. Japanese souffle pancakes get their fluffiness from whipped egg whites. When you beat egg whites, they trap air. This air creates bubbles in the batter, which expands while cooking, making the pancakes rise. The key is to fold the egg whites gently into the yolk mixture. This helps keep the air inside. Using whole eggs gives you a denser pancake. The egg whites add air, while the yolks provide richness. If you want fluffy pancakes, stick with separated eggs. The texture will be much lighter and more souffle-like. Look for a golden brown color on both sides. You can gently press the pancake with a spatula. If it springs back, it's done. If it leaves an indent, it needs more time. Cooking with a lid helps steam the pancakes, making them fluffy. You can top your pancakes with many delicious things. Here are some ideas: - Maple syrup - Fresh berries - Sliced bananas - Whipped cream - Honey - Chocolate sauce Experiment with these toppings to find your favorite! These pancakes began in Japan. They gained fame in cafes and became popular on social media. Their fluffy texture and cute appearance caught people's attention. Now, they are loved worldwide for their unique style. For the full recipe, check out Fluffy Japanese Souffle Pancakes. It includes all the steps and tips you need to make these delightful treats! Fluffy souffle pancakes need the right ingredients and tools. We covered how to prepare and cook them step by step. Remember to avoid common mistakes for the best texture. Don't hesitate to try different flavors and serving ideas. Proper storage keeps leftovers fresh, so you can enjoy them later. I hope these tips help you create delicious pancakes every time. Happy cooking!

Fluffy Japanese Souffle Pancakes Easy and Delicious Recipe

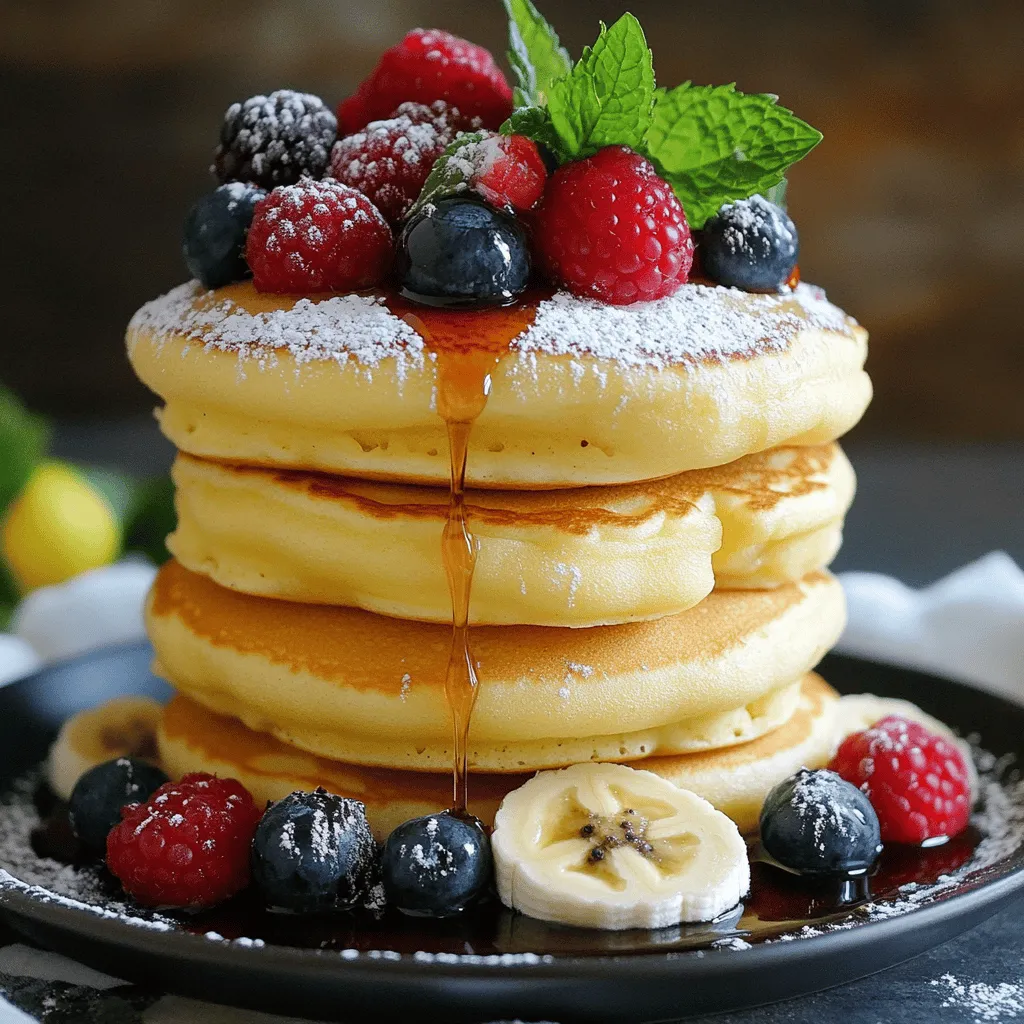
If you’ve ever craved pancakes that are light and airy, you’re in for a treat! Fluffy Japanese Souffle Pancakes are

To make Classic French Toast, you need a few key items. Here’s what to gather: - 4 slices of thick brioche or challah bread - 2 large eggs - 1/2 cup milk (whole or almond) - 1 teaspoon vanilla extract - 1/2 teaspoon ground cinnamon - 1 tablespoon sugar (optional) - Butter, for frying - Maple syrup, for serving - Fresh berries or banana slices, for garnish These ingredients create a rich flavor and soft texture. The bread choice makes a big difference. Thick bread holds the egg mix well. Want to mix things up? You can add fun flavors! Try these options: - A pinch of nutmeg for warmth - Chocolate chips for sweetness - A splash of orange juice for zest - Fresh herbs like mint for a twist These add-ins can change the taste and make your French toast special. Feel free to experiment! Serving French toast is part of the fun. Here are some ideas: - Stack the slices high on a plate - Drizzle warm maple syrup on top - Dust with powdered sugar for a sweet touch - Add fresh berries or banana slices for color You can also serve it with whipped cream or yogurt. These toppings make your dish look great and taste even better! You can find the full recipe above for more details. To start, gather all your ingredients. You will need: - 4 slices of thick brioche or challah bread - 2 large eggs - 1/2 cup milk (whole or almond) - 1 teaspoon vanilla extract - 1/2 teaspoon ground cinnamon - 1 tablespoon sugar (optional) - Butter, for frying - Maple syrup, for serving - Fresh berries or banana slices, for garnish In a large bowl, whisk the eggs and milk together. Add the vanilla, cinnamon, and sugar if desired. Mix until smooth. Make sure there are no lumps. Preheat your skillet or griddle over medium heat. Add a pat of butter to coat the surface. Dip each slice of bread into the egg mixture. Ensure both sides are soaked but not too soggy. Let any excess drip off. Place the soaked bread onto the skillet. Cook each slice for 2-3 minutes. Look for a golden brown color. Flip and cook the other side until crispy. Add more butter to the skillet if needed. This helps prevent sticking. When done, remove the French toast from the skillet. Keep it warm while you finish cooking the rest of the slices. To plate your French toast, stack the slices neatly on a plate. Drizzle warm maple syrup over the top. Garnish with fresh berries or banana slices. A sprinkle of powdered sugar gives a nice touch too. For added flair, add a few mint leaves. This makes your dish pop and look inviting. For the full recipe, check the details above. Enjoy your delightful breakfast! For the best French toast, use thick bread. Brioche and challah are top picks. They soak up the egg mixture well and stay soft. Sourdough adds a nice tang. Whole grain bread offers a health boost. Avoid thin or dry bread. It won't hold up during cooking. Spices make a big difference. Ground cinnamon adds warmth. Nutmeg gives a cozy touch. You can also try cardamom for something unique. For toppings, think fresh fruit. Berries or banana slices work great. Drizzle warm maple syrup for sweetness. A sprinkle of powdered sugar looks nice too. Don’t rush the soaking! Ensure each slice is well soaked but not soggy. If the heat is too high, the outside burns while the inside stays raw. Use medium heat for even cooking. Also, don’t skip the butter. It helps achieve that perfect golden crust. Lastly, serve it fresh. It’s best when warm and crisp. For a full recipe, check the Golden Delight French Toast above. {{image_2}} You can play with flavors when making sweet French toast. Here are some ideas: - Nutella Swirl: Spread Nutella on one side of the bread before dipping it in the egg mix. - Fruit Stuffed: Add cream cheese and berries between two slices for a fruity surprise. - Pumpkin Spice: Mix in pumpkin puree and pumpkin spice into your egg mixture for a fall twist. - Chocolate Chip: Sprinkle chocolate chips on the bread while it cooks for a sweet treat. These sweet twists make your breakfast even more fun! Savory French toast is a great way to change things up. Here are some options: - Cheesy Spinach: Add shredded cheese and fresh spinach to the egg mix. - Herbed Tomato: Mix in chopped herbs like basil and tomatoes for a fresh flavor. - Bacon and Egg: Top your French toast with crispy bacon and a fried egg for a hearty meal. - Avocado Toast: Serve with smashed avocado and a sprinkle of salt for a healthy spin. Savory options can be just as delightful as sweet ones! Many cultures have their own versions of French toast. Here are a few to explore: - Spanish Torrija: Made with milk and cinnamon, then soaked and fried. Often served during Easter. - Italian Pane Dolce: Sweetened with sugar and flavored with citrus zest, served with syrup. - Mexican Caprese: Topped with cheese and fresh salsa for a spicy kick. - Korean French Toast: Stuffed with sweet red bean paste, offering a unique flavor. These variations show how French toast can fit into any meal! Once you finish your meal, it's key to store any leftover French toast properly. Place the cooled slices in an airtight container. This keeps them fresh and prevents them from drying out. You can store them in the fridge for up to three days. If you want to keep them longer, consider freezing. When it's time to enjoy your leftover French toast, reheating is simple. You can use a toaster, oven, or skillet. For the toaster, pop in a slice until it’s warm. If you use the oven, preheat it to 350°F. Place the slices on a baking sheet and heat for about 10 minutes. This method keeps the toast crispy. If you choose the skillet, heat it on low and flip the slices to warm them evenly. Freezing French toast is a great way to save food. After cooking, let the slices cool completely. Then, lay them flat on a baking sheet and freeze for about an hour. Once frozen, stack the slices in a freezer bag or container. Make sure to remove as much air as possible. You can freeze them for up to two months. When you’re ready to eat, just reheat as mentioned above for a quick meal. For the full recipe, see the earlier section! The best bread for French toast is thick brioche or challah. These breads soak up the egg mix well. They also get a nice crispy outside while staying soft inside. You can use other breads, like sourdough or Texas toast, but brioche and challah give the best results. Yes, you can make Classic French Toast dairy-free. Use almond milk or oat milk instead of regular milk. This keeps the taste great while making it safe for those who cannot have dairy. Just follow the same steps in the recipe for the best results. You can prepare French toast in advance by making it the night before. Cook the French toast, then let it cool. Place it in a container and store it in the fridge. In the morning, you can heat it up in the oven or on a skillet. This makes breakfast easy and quick. For full recipe details, check out the Golden Delight French Toast section. You now have a complete guide to making classic French toast. We covered the main ingredients, including fun variations and serving ideas. The step-by-step instructions make cooking easy. Remember to choose the best bread and avoid common mistakes for the best results. From sweet to savory, French toast can fit any taste. And don’t forget about how to store or reheat leftovers for later. Enjoy creating your perfect French toast dish that will delight everyone!

Classic French Toast Delightful and Easy Recipe

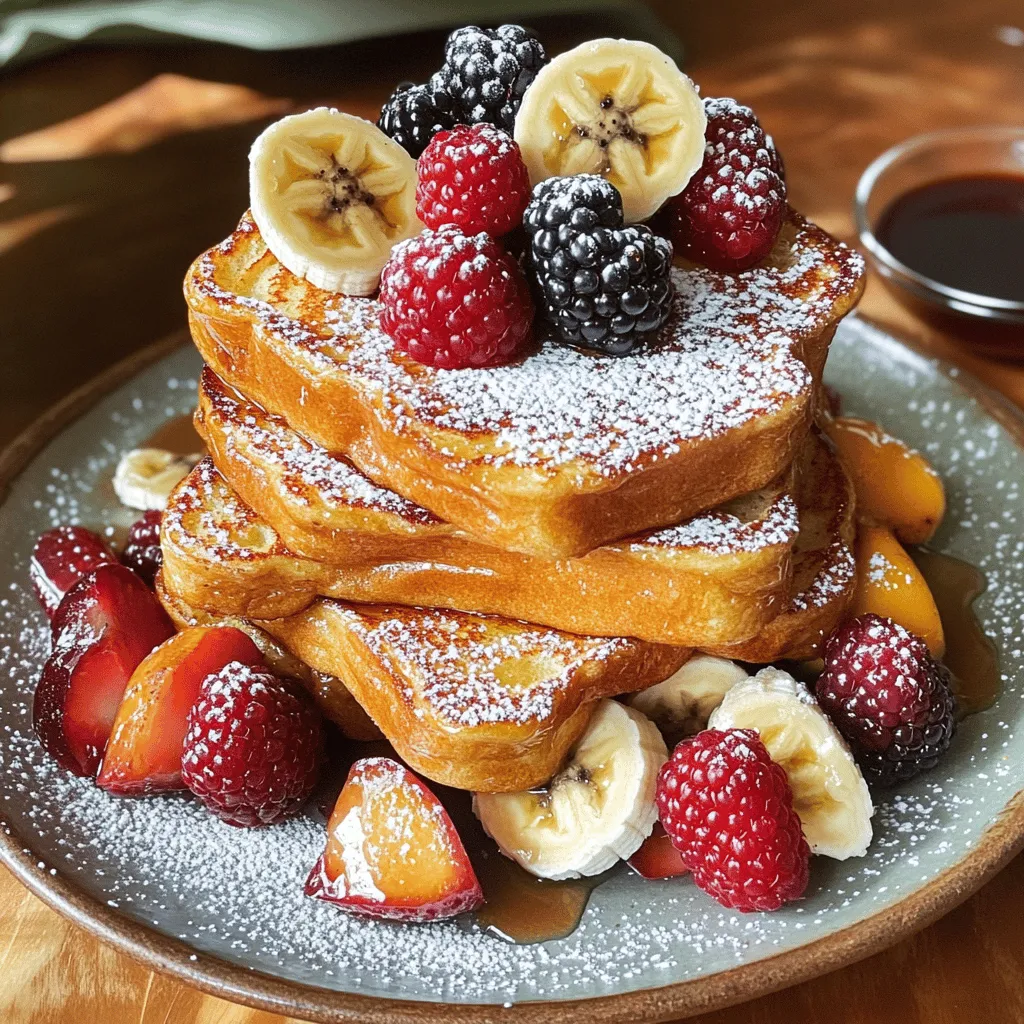
Craving a delicious breakfast that’s easy to make? You’re in the right place! My Classic French Toast recipe is simple,

- 2 cans of refrigerated cinnamon rolls (8 rolls each), cut into quarters - 6 large eggs - 1 cup milk - 1 teaspoon vanilla extract - 1 teaspoon ground cinnamon - 1/4 teaspoon nutmeg - 1/2 cup maple syrup (plus more for serving) - 1/2 cup chopped pecans (optional) - Powdered sugar for dusting This dish starts with the main ingredients that make it special. The cinnamon rolls give it a sweet base, while the eggs and milk create a fluffy texture. For flavor, I add vanilla extract, ground cinnamon, and nutmeg. These spices really bring warmth and depth to the dish. Optional toppings add a fun twist. Maple syrup drizzled on top is a must. Chopped pecans give a nice crunch, and a sprinkle of powdered sugar adds a touch of sweetness. I always recommend using fresh ingredients for the best taste. If you can, try to get high-quality cinnamon rolls. They make a big difference in flavor and texture. For more details on how to prepare this dish, check the full recipe. It’s easy and perfect for any meal. - Preheat your oven to 350°F (175°C). - Grease a 9x13 inch baking dish with non-stick spray or butter. - In a large mixing bowl, whisk together eggs, milk, vanilla extract, ground cinnamon, nutmeg, and maple syrup. - Spread quartered cinnamon roll pieces in the baking dish. - Pour the egg mixture over the cinnamon roll pieces and let it sit. This helps the rolls soak up the egg mixture, making them fluffy and tasty. - Bake for 25-30 minutes until golden brown. Keep an eye on it as it bakes. - Drizzle with icing and dust with powdered sugar for a sweet finish. This is how you make a delicious Cinnamon Roll French Toast Casserole. For the complete recipe, refer to the full recipe section. - Let it sit for a few minutes after baking to enhance flavor. - Use stale bread for a different texture. These small steps can make a big difference. When you let the casserole rest, it allows the flavors to meld. Stale bread absorbs the egg mix better, giving a unique taste. - Serve warm with extra maple syrup on the side. - Add fresh fruit for a colorful garnish. Serving warm makes each bite even more enjoyable. A drizzle of extra maple syrup adds sweetness. Fresh fruit not only looks great but also adds flavor and nutrition. - Don't skip the soaking time for the rolls. - Ensure the oven temperature is accurate. Soaking the rolls is key for a soft texture. If the oven is too hot or too cold, your casserole won’t bake evenly. Use an oven thermometer to check the temperature. {{image_2}} You can mix up the flavors in your casserole. Adding chocolate chips gives it a sweet twist. The rich taste of chocolate pairs well with cinnamon. You can also use fruit like berries or bananas. Fresh fruit adds a nice burst of flavor and color. It makes the dish feel fresh and bright. If you need a gluten-free option, swap the regular cinnamon rolls for gluten-free ones. This way, everyone can enjoy this dish. For a dairy-free version, use almond milk instead of regular milk. This keeps the dish creamy while being friendly for dairy-free diets. To make breakfast heartier, pair the casserole with crispy bacon or savory sausage. This combo provides a nice balance of flavors. If you're hosting brunch, serve it with mimosas. The bubbly drink complements the sweet casserole perfectly. Store leftovers in an airtight container in the fridge for 3-4 days. This keeps the casserole fresh and tasty. Make sure to let it cool before sealing. You can freeze this delight in individual portions for up to 3 months. This way, you can enjoy it later! When ready to eat, reheat in the oven or microwave. If it seems dry, add a splash of milk for moisture. To reheat, place the casserole in a preheated oven or microwave until warm. This will help restore the fluffy texture. Enjoy your warm and cozy Cinnamon Roll French Toast Casserole! To make this yummy casserole, follow these steps: 1. Preheat your oven to 350°F (175°C). 2. Grease a 9x13 inch baking dish with non-stick spray or butter. 3. In a large bowl, whisk together 6 large eggs, 1 cup milk, 1 teaspoon vanilla extract, 1 teaspoon ground cinnamon, 1/4 teaspoon nutmeg, and 1/2 cup maple syrup. 4. Cut 2 cans of refrigerated cinnamon rolls into quarters and spread them evenly in the dish. 5. If you like, add 1/2 cup chopped pecans on top. 6. Pour the egg mixture all over the cinnamon roll pieces. 7. Let it sit for about 10 minutes to soak well. 8. Bake for 25-30 minutes until golden brown. 9. Drizzle with icing and dust with powdered sugar before serving. Yes, you can prepare this casserole the night before. Just assemble it, cover it, and put it in the fridge. In the morning, bake it as usual. This makes breakfast easy and fun! Serve this casserole warm. It tastes great with maple syrup, icing, or fresh fruit on top. You can even add whipped cream for extra joy! Absolutely! If you want to use homemade cinnamon rolls, just cut them into small pieces. This will keep the texture just right for the casserole. Enjoy your yummy creation! This cinnamon roll casserole combines simple ingredients for a tasty dish. You start with refrigerated cinnamon rolls, eggs, and milk. Flavor enhancers like vanilla, cinnamon, and nutmeg boost the taste. Baking transforms it into a delightful treat. Remember to let it sit after baking to deepen flavors. You can customize it with toppings and store leftovers easily. Experimenting with variations lets you enjoy this dish in many ways. Give it a try; you won't be disappointed!

Cinnamon Roll French Toast Casserole Fluffy Delight

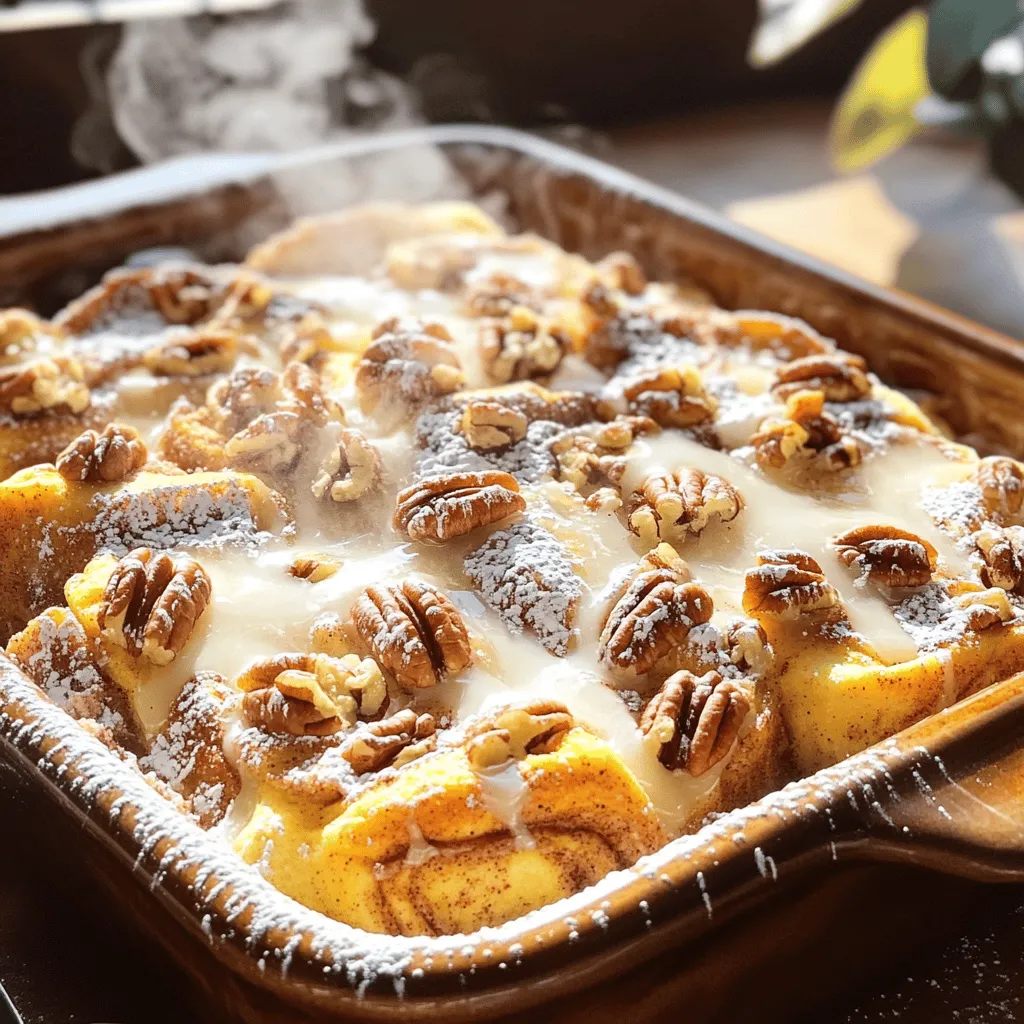
Are you ready to wake up your taste buds? This Cinnamon Roll French Toast Casserole is the perfect blend of

To create the perfect pumpkin spice bread, you need a few key ingredients. Here is what you'll need: - 1 ½ cups all-purpose flour - 1 teaspoon baking powder - ½ teaspoon baking soda - 1 teaspoon ground cinnamon - ½ teaspoon ground nutmeg - ½ teaspoon ground ginger - ½ teaspoon salt - ½ cup granulated sugar - ½ cup brown sugar, packed - 1 cup canned pure pumpkin puree (not pumpkin pie filling) - ½ cup vegetable oil - 2 large eggs - 1 teaspoon vanilla extract These ingredients blend together to create a soft, moist loaf. The spices give it that warm fall flavor we all love. You can make this bread even more special with some add-ins. Here are a couple of my favorites: - ½ cup chopped walnuts or pecans - ½ cup raisins or cranberries These add-ins add texture and extra flavor, making each bite exciting. Choosing the right ingredients makes a big difference. Here are some tips: - Flour: Use fresh all-purpose flour for the best rise. - Pumpkin: Always select pure pumpkin puree. Check the label to avoid pie filling. - Spices: Fresh spices pack more flavor. Check their dates for freshness. - Sugars: Use brown sugar that feels moist. This keeps your bread tender. These tips ensure your pumpkin spice bread tastes amazing. For the full recipe, don't forget to check out the details above! Start by gathering all your ingredients. This helps make the process easy. Here’s what you need: - 1 ½ cups all-purpose flour - 1 teaspoon baking powder - ½ teaspoon baking soda - 1 teaspoon ground cinnamon - ½ teaspoon ground nutmeg - ½ teaspoon ground ginger - ½ teaspoon salt - ½ cup granulated sugar - ½ cup brown sugar, packed - 1 cup canned pure pumpkin puree (not pumpkin pie filling) - ½ cup vegetable oil - 2 large eggs - 1 teaspoon vanilla extract - ½ cup chopped walnuts or pecans (optional) - ½ cup raisins or cranberries (optional) Once you have everything, measure each ingredient. It’s key to be precise. Preheat your oven to 350°F (175°C). Grease your 9x5-inch loaf pan or line it with parchment paper. This helps the bread slide out easily after baking. In a medium bowl, whisk together the dry ingredients: flour, baking powder, baking soda, cinnamon, nutmeg, ginger, and salt. Mix them well to ensure even flavor. In a large bowl, combine the granulated sugar, brown sugar, pumpkin puree, vegetable oil, eggs, and vanilla extract. Stir until the mixture is smooth and creamy. Now, slowly add the dry mix to the wet ingredients. Stir just until combined. Be careful not to overmix. If you want added texture, fold in the chopped nuts and dried fruit. This step adds fun bites to your bread. Pour the batter into your prepared loaf pan. Use a spatula to smooth the top. Bake in your preheated oven for 60-70 minutes. Check if it’s done by inserting a toothpick in the center. If it comes out clean, your bread is ready. After baking, let the bread cool in the pan for about 10 minutes. Then, transfer it to a wire rack to cool completely. This step is important to keep the bread from getting soggy. Enjoy the delightful fall aroma that fills your kitchen! You can find the full recipe for more details. To make perfect pumpkin spice bread, avoid overmixing the batter. Overmixing leads to dense bread. Mix just until the flour disappears. Also, ensure you measure your flour correctly. Too much flour makes the bread dry. Tap your measuring cup to settle the flour before leveling it off. For a moist texture, use canned pure pumpkin puree. This keeps the bread soft and flavorful. Adding a bit more oil can also help. If you want a lighter bread, fold in whipped egg whites gently. This adds air and fluffiness to your loaf. Serve your pumpkin spice bread warm. A pat of butter enhances the flavor. You can sprinkle powdered sugar for a sweet touch. Pair it with a hot cup of coffee or tea. This makes for a cozy fall snack. Try adding cream cheese spread for a creamy twist. It’s an easy way to elevate this delicious treat. For the full recipe, check out the Pumpkin Spice Delight Bread. {{image_2}} You can easily make a gluten-free version of pumpkin spice bread. Just swap regular flour with gluten-free flour. I recommend using a blend that includes xanthan gum. This helps give your bread a good texture. The taste remains rich and delicious, just like the original. You can follow the full recipe and just make that one change. To make this recipe vegan, use flax eggs instead of regular eggs. Mix one tablespoon of ground flaxseed with three tablespoons of water. Let it sit for about five minutes to thicken. Use a plant-based oil, like coconut or canola oil, in place of vegetable oil. This keeps the flavor intact while making it vegan-friendly. You can mix and match flavors to make your bread even more special. Try adding chocolate chips for a sweet twist. You could also add a teaspoon of orange zest for a bright, citrus note. If you love nuts, use pecans or walnuts. Dried fruits like cranberries or dates can add a chewy texture. Experimenting with these flavors will keep your pumpkin spice bread exciting! To keep your pumpkin spice bread fresh, wrap it tightly in plastic wrap. You can also place it in an airtight container. Store it at room temperature for up to 3 days. If you want to keep it longer, refrigeration is a good option. However, this may change the texture slightly. Freezing is a great way to save your pumpkin spice bread. First, let the bread cool completely. Then, wrap it in plastic wrap and aluminum foil. This prevents freezer burn. You can freeze it for up to 3 months. When you’re ready to eat it, let it thaw in the fridge overnight. To enjoy your bread warm, preheat your oven to 350°F (175°C). Place the slices on a baking sheet. Heat for about 10 minutes or until warm. You can also use a microwave. Heat each slice for 15 to 20 seconds, but this may make it a bit softer. For best results, enjoy it fresh! Yes, you can use fresh pumpkin. First, cook the pumpkin by roasting or boiling it. After cooking, mash it until smooth. You need about one cup of pumpkin puree for this recipe. Fresh pumpkin adds a nice flavor and makes it feel homemade. Just make sure it is cooked and not too watery. Canned pumpkin is convenient and works well too. To check if your bread is done, insert a toothpick into the center. If it comes out clean, the bread is ready. You can also gently press the top; it should spring back. Baking time can vary, so keep an eye on it. Generally, it takes about 60 to 70 minutes at 350°F. If you need an egg substitute, try using applesauce. Use ¼ cup of unsweetened applesauce for each egg. Mashed bananas also work well. If you want a different option, mix one tablespoon of ground flaxseed with three tablespoons of water. Let it sit for a few minutes until it thickens. Each substitute keeps the bread moist and tasty. For the best results, follow the Full Recipe. This post covered the main steps to make Pumpkin Spice Bread. We discussed key ingredients, optional add-ins, and tips to choose quality items. I provided clear steps for mixing and baking the bread, along with tips to avoid mistakes. We also explored variations like gluten-free and vegan options. Finally, I shared storage tips and answered common questions. Enjoy making this warm, delicious bread. You can impress your friends and family with your baking skills!

Pumpkin Spice Bread Irresistible Fall Flavor Treat

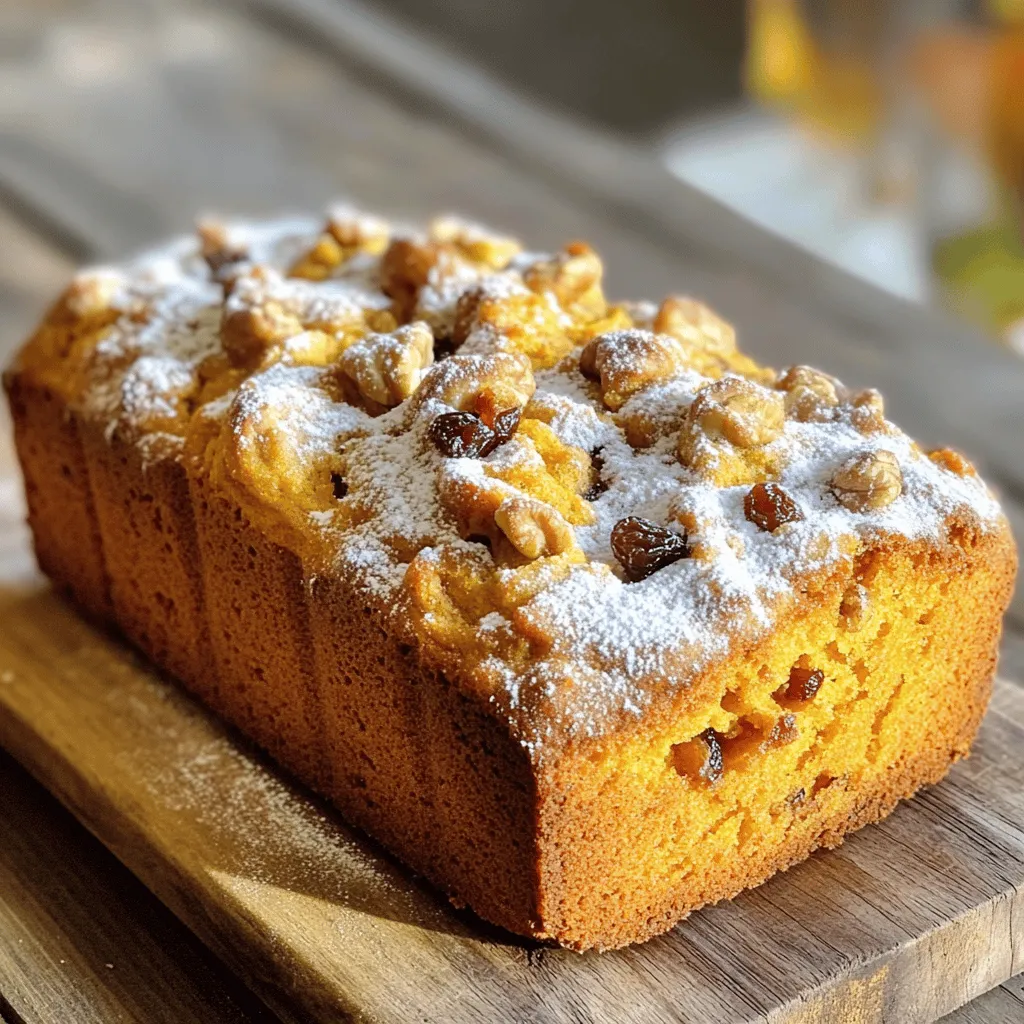
Get ready to savor the season with my irresistible Pumpkin Spice Bread. This warm, spiced treat will fill your kitchen

- 6 medium apples (Granny Smith and Honeycrisp mix) - 1 tablespoon lemon juice - 1 teaspoon ground cinnamon - 1/4 teaspoon nutmeg - 1 cup rolled oats - 3/4 cup all-purpose flour - 1/2 cup brown sugar, packed - 1/2 cup granulated sugar - 1/2 cup unsalted butter, melted - 1/4 teaspoon salt - 1/2 cup chopped walnuts or pecans (optional) Gathering the right ingredients is key for a great apple crisp. I love using a mix of Granny Smith and Honeycrisp apples. This mix gives the dish a nice balance of tart and sweet flavors. The lemon juice brightens the taste and keeps the apples fresh. Cinnamon and nutmeg add warmth and depth. The oats and flour create a crunchy topping that everyone loves. Brown sugar adds a rich flavor, while granulated sugar balances the sweetness. Melted butter brings it all together, making the topping crispy and golden. If you want some crunch, add walnuts or pecans. They give a nice texture and nutty taste. With these ingredients, you’re ready to make a delicious apple crisp. Check the Full Recipe for more details on how to bring these flavors together! Start by peeling the apples. Use a sharp peeler for this task. Next, core each apple to remove the seeds. Slice the apples into thin pieces. Aim for about 1/4-inch thickness. This helps them cook evenly. In a large bowl, toss the apple slices with lemon juice. This keeps them fresh and adds flavor. Next, sprinkle in the ground cinnamon and nutmeg. Toss everything well until the apples are fully coated. This mix brings out the best in your apples. In a separate bowl, combine rolled oats, flour, brown sugar, granulated sugar, and salt. Stir until all the dry ingredients blend well. Now, pour in the melted butter. Mix until the mixture looks like coarse crumbs. If you like nuts, fold in the chopped walnuts or pecans for a nice crunch. This topping adds texture and richness to your dessert. Grab your greased baking dish. First, spread the apple mixture evenly in the bottom. Then, take the oat topping and sprinkle it over the apples. Make sure to cover them well for a nice, golden crust. Preheat your oven to 350°F (175°C). Bake the dish for 35-40 minutes. The top should be golden brown. You’ll see the apples bubbling up around the edges. This is when you know it’s done. Let it cool for about 10 minutes before serving. Enjoy the warm, sweet aroma filling your kitchen! To make the best apple crisp, start with the right apples. I love using a mix of Granny Smith and Honeycrisp apples. Granny Smith adds a tart flavor, while Honeycrisp brings sweetness. This blend creates a great balance in your dessert. You want apples that hold their shape when baked, so avoid soft varieties. Next, focus on the oat topping. For the perfect texture, mix rolled oats with flour, sugars, and melted butter. Aim for a crumbly texture, not too wet or dry. If it feels too wet, add a bit more flour. If it's too dry, drizzle in a bit more melted butter. Serving your apple crisp warm is a must. I recommend adding a scoop of vanilla ice cream on top. The cold ice cream melts slightly, creating a creamy contrast to the warm apples. Whipped cream is also a fantastic choice if you prefer that texture. For a flavor boost, sprinkle a bit of cinnamon over the top before serving. This simple touch enhances the aroma and taste. Plating matters! Use a shallow bowl to show off the layers of your apple crisp. Serve it warm and topped with ice cream or whipped cream. For dishware, opt for white plates or bowls. They highlight the golden brown topping and the vibrant apple color. This creates a beautiful visual appeal. You can also garnish with a few apple slices or a sprinkle of nuts for a polished look. {{image_2}} You can change the taste of your apple crisp by adding new spices. Try ginger for a warm kick or allspice for depth. Both give your dessert a special twist. You can also swap out sugar for honey or maple syrup. These sweeteners bring a unique flavor that pairs well with apples. If you follow a gluten-free diet, you can still enjoy this dish. Use gluten-free oats instead of rolled oats. Make sure your other ingredients are also gluten-free. For those who avoid dairy, substitute butter with coconut oil or a vegan butter. These options keep your crisp tasty and friendly for all diets. You can mix up your fruit choices based on the season. In fall, add pears for a sweet touch. In summer, toss in berries for a fresh burst. Adjust your spices as well; use pumpkin spice in autumn or citrus zest in spring. This keeps your apple crisp exciting and in tune with the seasons. For the full recipe, check out the Apple Crisp Delight. To keep your apple crisp fresh, cool it completely first. Cover it with plastic wrap or foil. Place it in the fridge. It will stay good for about 3 to 5 days. If it lasts that long, it must be tasty! You can freeze apple crisp if you want to save some for later. First, let it cool down. Then, wrap it well in plastic wrap and then in foil. This helps keep it fresh. Apple crisp can last for about 3 months in the freezer. When you’re ready to eat it, thaw it overnight in the fridge. Reheat it in the oven at 350°F (175°C) for about 20 minutes. This will bring back its crunchy topping. When storing, think about how much you want to eat at once. You can cut it into squares. Place each square in a small container. This makes it easy to grab a quick dessert. For fun, you can change the toppings when serving later. Try adding ice cream or whipped cream. You can even sprinkle some extra cinnamon on top! How do I prevent a soggy apple crisp? To keep your apple crisp from getting soggy, use a mix of tart and sweet apples. Granny Smith and Honeycrisp work well together. Make sure to slice the apples thinly and toss them with lemon juice and spices. This helps keep them firm. Also, avoid overcooking the apples. The topping should be crisp and crunchy for the best texture. Can I use frozen apples for this recipe? Yes, you can use frozen apples! Just thaw them first and drain off the extra liquid. This helps keep your apple crisp from becoming too wet. You may want to add a bit more flour or oats to absorb any extra moisture. What temperature should I bake my apple crisp at? Bake your apple crisp at 350°F (175°C). This temperature helps the apples cook evenly while giving the topping a nice golden color. Preheating the oven ensures even cooking from the start. How can I tell when the apple crisp is done? You can tell your apple crisp is done when the top is golden brown and the apples are bubbly. Look for a nice crisp texture on top. You can also check the apples with a fork; they should be tender but not mushy. What goes well with apple crisp? Apple crisp pairs perfectly with vanilla ice cream or whipped cream. A drizzle of caramel sauce adds a nice touch. You can also sprinkle extra cinnamon on top for added flavor. Can I make apple crisp ahead of time? Yes, you can prepare the apple crisp ahead of time. Just assemble it, cover it, and store it in the fridge. Bake it just before serving. This way, your crisp stays fresh and warm. For the full recipe, check the section on ingredients and instructions. This blog covered the ingredients, steps, and tips for making the best apple crisp. We explored how to prep apples, create a tasty oat topping, and bake it to perfection. Remember to choose fresh apples and adjust your toppings for a personal touch. With these tips, you can share a warm dessert that delights everyone. Enjoy experimenting with flavors and serving options. A great apple crisp is about balance and care. I hope you make this recipe soon!

Apple Crisp with Oat Topping Irresistible Dessert Idea

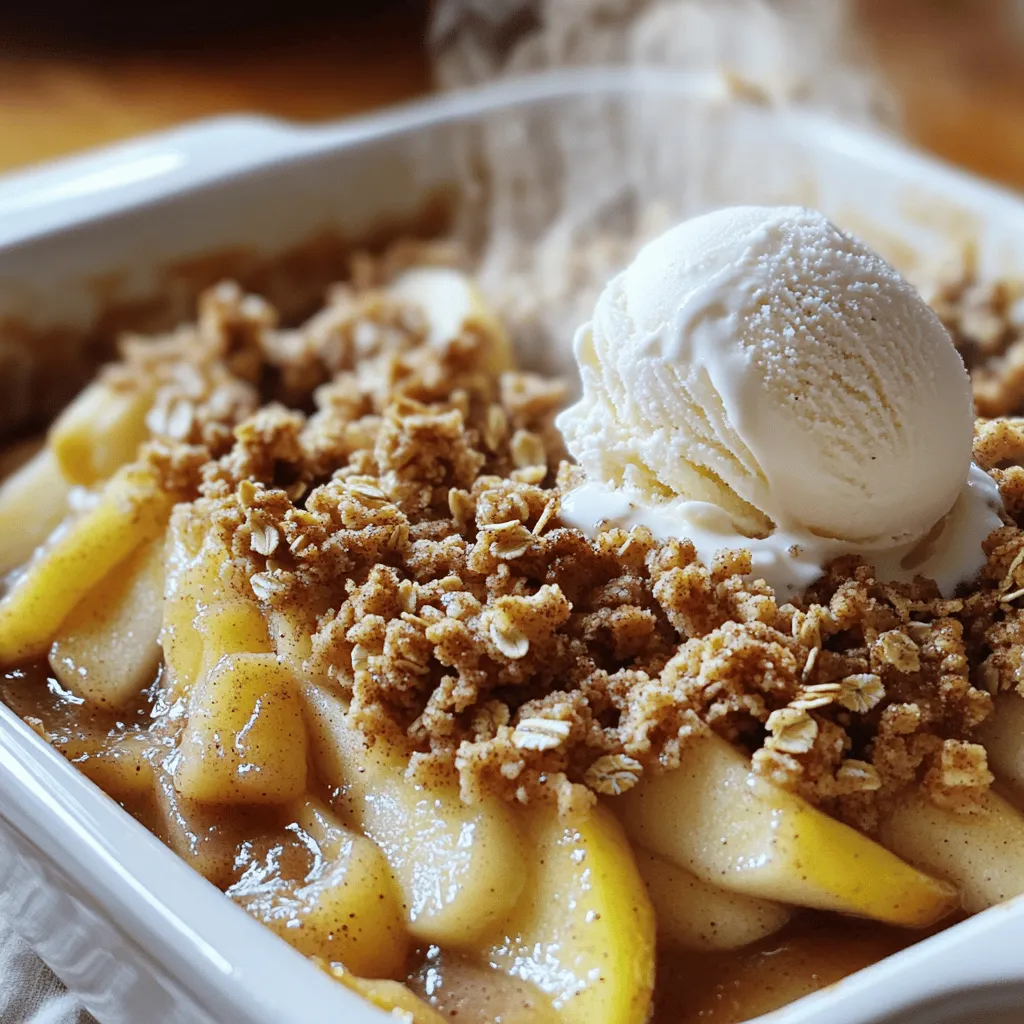
Craving a warm, sweet treat? Let’s dive into the world of Apple Crisp with Oat Topping. This classic dessert combines

Older posts
Newer posts
← Previous Page1 … Page75 Page76 Page77 … Page125 Next →

dsad

© 2025 Southern Dishes • Built with GeneratePress

Our Policies

  • Copyright Policy
  • Cookie Policy
  • GDPR Policy
  • Privacy Policy
  • Disclaimer
  • Terms Of Use

More Information

  • Home
  • About
  • Contact
  • Appetizers
  • Dessert
  • Dinner
  • Drinks
©2025, Southern Dishes About Back To Top