Skip to content
DisclaimerTerms Of UseGDPR PolicyCookie Policy

Southern Dishes

  • Home
  • Drinks
  • Appetizers
  • Dinner
  • Dessert
  • About
  • Contact
  • Privacy Policy
DisclaimerTerms Of UseGDPR PolicyCookie Policy

Isabella

For my Easy Greek Pasta Salad, I use these main ingredients: - 2 cups rotini pasta - 1 cup cherry tomatoes, halved - 1 cup cucumber, diced - 1/2 red onion, finely chopped - 1/2 cup Kalamata olives, pitted and sliced - 1/2 cup feta cheese, crumbled I recommend rotini pasta because its shape holds the dressing well. Cherry tomatoes add sweetness, and diced cucumber gives a refreshing crunch. The red onion adds a bit of zing, while Kalamata olives bring a salty bite. Finally, feta cheese adds creaminess and tang. For the dressing, I use: - 1/4 cup extra-virgin olive oil - 2 tablespoons red wine vinegar (or apple cider vinegar) - 1 tablespoon lemon juice - 1 teaspoon dried oregano - Salt and pepper to taste I prefer extra-virgin olive oil for its rich flavor. Red wine vinegar adds acidity, while lemon juice brightens the taste. Dried oregano gives it that classic Greek flavor. When seasoning, remember to taste as you go. This helps achieve the perfect balance. For the full recipe, check out the details above. To make Easy Greek Pasta Salad, start by cooking the rotini pasta. Boil a pot of water. Add a pinch of salt and the pasta. Cook according to the package instructions, usually about 8-10 minutes. You want the pasta to be al dente, which means it should have a slight bite. To check if the pasta is done, taste a piece. If it’s firm but not hard, it’s ready. Once cooked, drain the pasta in a colander and rinse it under cold water. This stops the cooking process and cools the pasta down quickly. Now it’s time to mix the salad. In a large bowl, combine the cooled pasta with the other solid ingredients. Add the halved cherry tomatoes, diced cucumber, finely chopped red onion, sliced Kalamata olives, and crumbled feta cheese. This colorful mix makes your salad look great and taste fresh. For the best mix, gently toss the ingredients. Use a spatula or spoon and lift the pasta from the bottom. This way, everything gets well combined without breaking the pasta or other veggies. Next, we’ll prepare the dressing. In a small bowl, whisk together the olive oil, red wine vinegar, lemon juice, dried oregano, salt, and pepper. Whisking helps blend all the flavors together. Make sure it’s well combined and smooth. When it’s time to mix the dressing with the salad, pour it over your pasta mixture. Gently toss again to coat everything evenly. This helps each bite be full of flavor. For the best taste, let the salad chill in the fridge for 30 minutes before serving. This resting time allows the flavors to meld beautifully. For more details, check the Full Recipe. To make your Greek pasta salad really shine, focus on simplicity and freshness. Use ripe tomatoes and crunchy cucumbers. This will boost the flavor. Fresh herbs also add a bright taste. Try adding chopped parsley or mint for a fresh twist. For texture, cook the pasta just until it is al dente. This keeps it firm and prevents mushiness. Rinse the pasta under cold water to stop the cooking process. This also helps it stay separate. Pair your Greek pasta salad with grilled chicken or fish for a complete meal. You can also serve it with warm pita bread or hummus. For a fun twist, try serving it in a hollowed-out cucumber or tomato. This makes it look great on a platter. Feel free to enjoy it as a light lunch or a side at a barbecue. This salad is also perfect for potlucks. It’s always a hit! One common mistake is overcooking the pasta. This can lead to a mushy texture. Always keep an eye on the cooking time. Another mistake is not letting the salad rest. After mixing, let it chill for at least 30 minutes. This helps the flavors blend well together. If you skip this, the salad may taste flat. For the full recipe, check out the Easy Greek Pasta Salad section. {{image_2}} You can change ingredients in this Greek pasta salad to make it your own. Here are some ideas: - Swap-ins for different ingredients: - Instead of rotini, use penne or fusilli. - Try sun-dried tomatoes instead of fresh ones for a richer flavor. - Use bell peppers or spinach for extra color and crunch. - Substitutions for dietary restrictions: - For gluten-free, use gluten-free pasta. - If you avoid dairy, swap feta for vegan cheese or skip it entirely. - To make it low-carb, substitute pasta with zucchini noodles or cauliflower rice. Change your salad based on the seasons. This keeps it fresh and exciting: - Adapting the salad for different seasons: - In spring, add fresh peas or asparagus. - In summer, use ripe heirloom tomatoes and basil. - In fall, mix in roasted butternut squash and arugula. - Using seasonal vegetables and herbs: - Use what’s fresh at the market. Look for local produce. - Fresh herbs like dill in spring or rosemary in winter can add great flavor. You may want to make more or less salad. Here’s how to adjust: - Scaling the recipe for larger groups: - Simply double or triple the recipe for parties. - Keep the same ratios for all ingredients. - Storage considerations for leftovers: - Store any leftovers in an airtight container. - It stays fresh in the fridge for 3-4 days. To keep your Greek pasta salad fresh, use an airtight container. Glass or plastic containers work well. Make sure to seal it tightly. This helps prevent odors from other foods in your fridge. If you have a big batch, divide it into smaller portions. This way, you can enjoy it easily later. You can freeze Greek pasta salad, but it may change in texture. To freeze, place it in a freezer-safe container. Leave some space at the top for expansion. When you are ready to eat it, thaw it in the fridge overnight. In the fridge, your Greek pasta salad lasts about 3 to 5 days. It’s best to eat it fresh for the best taste. Look for signs of spoilage, like a sour smell or slimy texture. If you see mold or anything odd, throw it away. Enjoy your delicious salad while it's fresh! For Greek pasta salad, rotini pasta is ideal. Its spirals hold the dressing well. You can also try penne or farfalle. Both options give a nice bite and texture. Avoid thin pasta, like spaghetti, as it won’t hold up as well with the ingredients. The goal is to have pasta that complements the fresh vegetables and feta. Yes, you can make this salad ahead of time. I recommend prepping it a few hours before serving. This gives the flavors time to mix and meld. If you want to make it even earlier, store the dressing separately. Add it just before serving to keep the pasta fresh and not soggy. Chilling in the fridge for at least 30 minutes helps enhance the taste. To make this Greek pasta salad vegan, simply skip the feta cheese. You can replace it with tofu or vegan feta. For the dressing, use a vegan-friendly option for the olive oil and vinegar. Keep the lemon juice and dried oregano for great flavor. This way, you keep all the taste while making it plant-based. For a creamy twist, consider adding avocado for richness. In this blog post, we explored how to make a delicious Greek pasta salad. We covered key ingredients like pasta, vegetables, cheese, and dressing. I shared step-by-step instructions for cooking the pasta, mixing the salad, and preparing the dressing. We discussed tips for perfecting the dish, variations to suit your taste, and storage information for leftovers. Understanding these details helps you create a tasty salad every time. Enjoy your cooking, and remember to experiment with flavors that excite you!

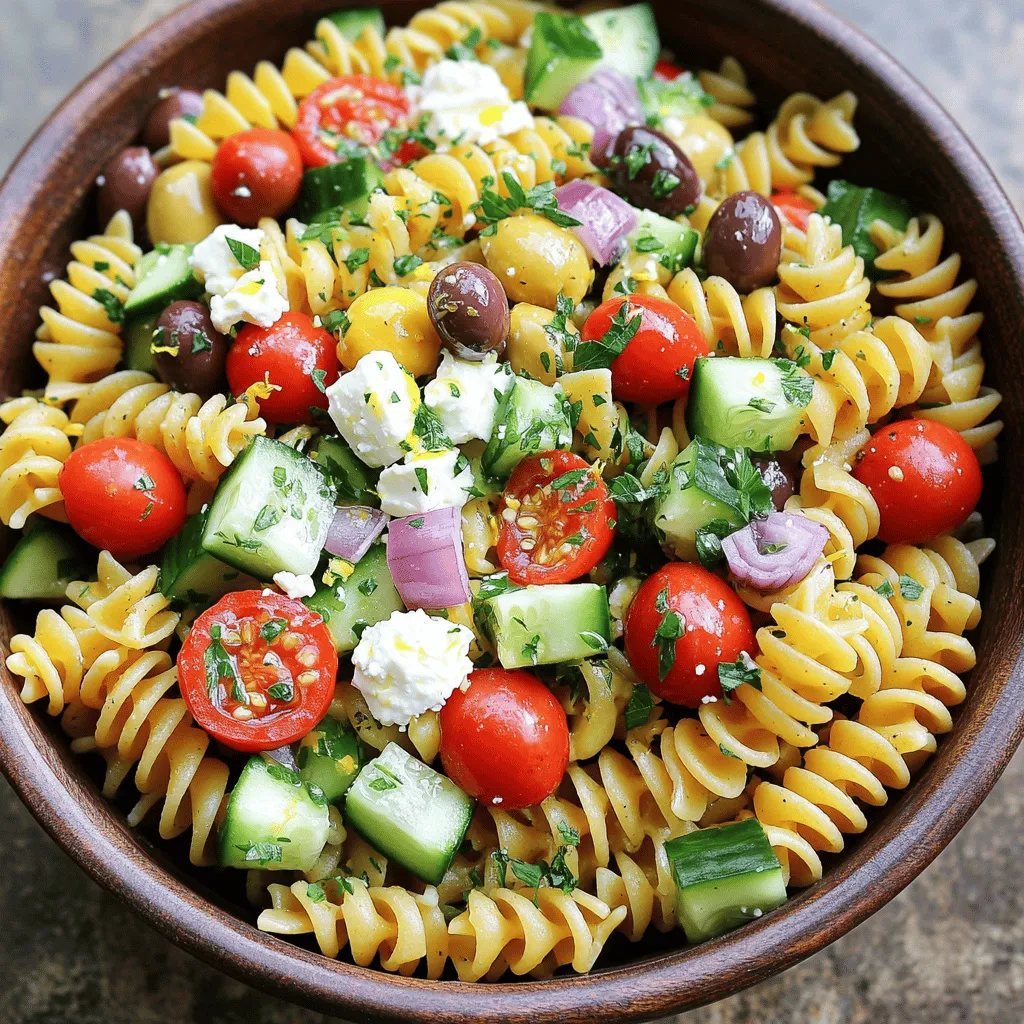
Easy Greek Pasta Salad Fresh and Flavorful Delight

Looking for a quick, fresh dish that bursts with flavor? You’ve come to the right place! My Easy Greek Pasta

- 1 medium cauliflower, cut into bite-sized florets - 1 cup all-purpose flour - 1 cup water - 1 teaspoon garlic powder - 1 teaspoon onion powder - 1 teaspoon smoked paprika - Salt and pepper to taste Cauliflower is the star here. It gives us that great texture. Choose a medium-sized cauliflower. Cut it into bite-sized florets for easy eating. The flour helps create a crispy coating when we bake it. Mixing it with water makes a batter. Spices make these bites special. Garlic powder adds depth, while onion powder enhances flavor. Smoked paprika brings a nice smoky taste. Season with salt and pepper to balance everything. - 1 cup buffalo sauce (store-bought or homemade) - 2 tablespoons olive oil - Fresh parsley, chopped (for garnish) Buffalo sauce adds heat and tang. You can use store-bought sauce for ease. If you prefer, make your own for a personal touch. Olive oil helps the sauce stick to the cauliflower. Garnishing with fresh parsley not only adds color but also freshness. It brightens the dish and gives it a nice look. For the Full Recipe, follow the steps outlined, and enjoy your crispy delight! Preheating and Setting up Start by preheating your oven to 450°F (232°C). This high heat helps the cauliflower get crispy. Line a baking sheet with parchment paper. This will keep the bites from sticking and make clean-up easy. Creating the Batter In a large bowl, mix the flour, water, garlic powder, onion powder, smoked paprika, salt, and pepper. Whisk until the batter is smooth. It should be thick enough to coat the cauliflower. If it is too thin, add a bit more flour. Coating and Baking Take each cauliflower floret and dip it into the batter. Make sure each piece is fully coated. Place the coated florets on the baking sheet. Bake the cauliflower for 20-25 minutes, flipping halfway. You want them golden brown and crispy. Tossing in Buffalo Sauce While the cauliflower bakes, mix the buffalo sauce and olive oil in a bowl. Once the cauliflower is done, take it out of the oven. Gently toss the hot cauliflower in the buffalo sauce mixture. Make sure every piece is covered. Final Baking Put the tossed cauliflower back on the baking sheet. Bake for another 10-15 minutes. This helps the sauce get sticky and crispy. Garnishing Once baked, remove the cauliflower from the oven. Let it cool for a few minutes. Then, sprinkle with chopped parsley for a fresh touch. These bites are now ready to serve! For the full recipe, check out the section above. Baking Tips To get that perfect crunch, preheat your oven to 450°F (232°C). This high heat helps the batter crisp up well. Line your baking sheet with parchment paper. It keeps the bites from sticking and promotes even cooking. Don't forget to flip the cauliflower halfway through. This ensures all sides get golden brown. If you want an extra crunch, bake them a bit longer. Just keep an eye on them so they don't burn. Frying Alternatives If you prefer frying, heat oil in a large pan. Make sure the oil is hot before adding the cauliflower. Fry them in batches. This keeps them from overcrowding and helps with even cooking. Fry until they turn a beautiful golden color, about 3-4 minutes per side. Drain on paper towels to remove excess oil. This gives a lovely crunch while keeping the bites flavorful. Homemade vs Store-bought Sauce Using store-bought buffalo sauce is quick and easy. It saves time when you're busy. However, making your own sauce lets you control the spice and flavor. Combine hot sauce, butter, and a splash of vinegar for a great homemade option. Adjust the heat level based on your taste. You can make it as mild or spicy as you like. Flavor Enhancements Add some extra flavor by mixing in garlic powder or cayenne pepper into your sauce. A drizzle of honey can add a sweet touch to balance the heat. For a tangy twist, try adding a splash of lime juice. You can also toss in some fresh herbs for freshness. These small changes make your buffalo cauliflower bites even more delicious. {{image_2}} You can change the flavor of your Buffalo cauliflower bites easily. Different sauces can add a twist. Try a honey mustard sauce for sweetness. A tangy barbecue sauce can also work well. For a kick, use a spicy sriracha sauce. You can even mix buffalo sauce with ranch dressing for a creamy taste. Adjusting the spice level is simple. If you want less heat, use mild buffalo sauce. For more heat, add cayenne pepper to the batter. You can also sprinkle some red pepper flakes on top for extra spice. If you need gluten-free options, swap the all-purpose flour for gluten-free flour. This change keeps the bites tasty and safe for those with gluten issues. You can also use chickpea flour for added nutrition. For vegan alternatives, use a plant-based milk instead of water in the batter. This keeps the recipe vegan-friendly. Make sure to check the buffalo sauce too. Many brands offer vegan options without dairy. This way, everyone can enjoy Buffalo cauliflower bites! For the full recipe, refer to the section above. Refrigeration Tips After you enjoy your Buffalo Cauliflower Bites, let them cool down. Once cool, place them in an airtight container. Store them in the fridge for up to three days. This keeps them fresh and tasty. Make sure to separate layers with parchment paper to avoid sticking. Freezing Instructions If you want to save some for later, freezing is a great option. First, cool the bites completely. Then, place them on a baking sheet in a single layer. Freeze them for about an hour. After they are frozen, transfer them to a freezer bag. You can keep them in the freezer for up to three months. Oven vs Microwave When it’s time to reheat, I recommend using the oven. Preheat your oven to 375°F (190°C). Place the cauliflower bites on a baking sheet. Bake for about 10-15 minutes until they're hot and crispy. The microwave is faster but can make them soggy. If you use the microwave, heat them in short bursts to avoid overcooking. Maintaining Crispiness To keep your bites crispy, avoid covering them while they reheat. This allows steam to escape. If you have a toaster oven, that works well too! Just remember, the key is to get them hot without losing that perfect crunch. Can I make Buffalo Cauliflower Bites in advance? Yes, you can prepare Buffalo Cauliflower Bites ahead of time. After cooking, let them cool. Store them in an airtight container in the fridge. When you are ready to enjoy them, reheat in the oven. This helps keep them crispy. Can I use frozen cauliflower? You can use frozen cauliflower for this recipe. Just thaw and drain it well. This helps remove excess moisture. It may not be as crispy as fresh, but it will still taste great. Caloric Breakdown One serving of Buffalo Cauliflower Bites has about 150-200 calories. The exact count can vary based on the sauce and oil you use. Keep this in mind if you are watching your calorie intake. Health Benefits of Cauliflower Cauliflower is low in calories and high in nutrients. It is a great source of vitamins C and K. It also has fiber, which helps with digestion. Eating cauliflower can support heart health and may help with weight management. Pairing Ideas Buffalo Cauliflower Bites pair well with dips like ranch or blue cheese. You can also serve them with celery and carrot sticks for crunch. These flavors balance the heat from the buffalo sauce. Serving as an Appetizer or Main Dish You can serve these bites as an appetizer or a main dish. For a meal, try adding a side salad or some rice. This makes a filling and tasty option for lunch or dinner. For the full recipe, check out the section above. This blog post highlights how to make delicious Buffalo Cauliflower Bites. We explored key ingredients, like cauliflower and spices. You also learned step-by-step preparation, cooking tips, and variations to suit different diets. Remember, you can store leftovers easily and bring them back to life with simple reheating methods. Buffalo Cauliflower Bites are tasty, healthy, and fun to make. Try them at your next meal or snack time. Enjoy the flavors and creativity you bring to your kitchen!

Buffalo Cauliflower Bites Perfectly Crispy Delight

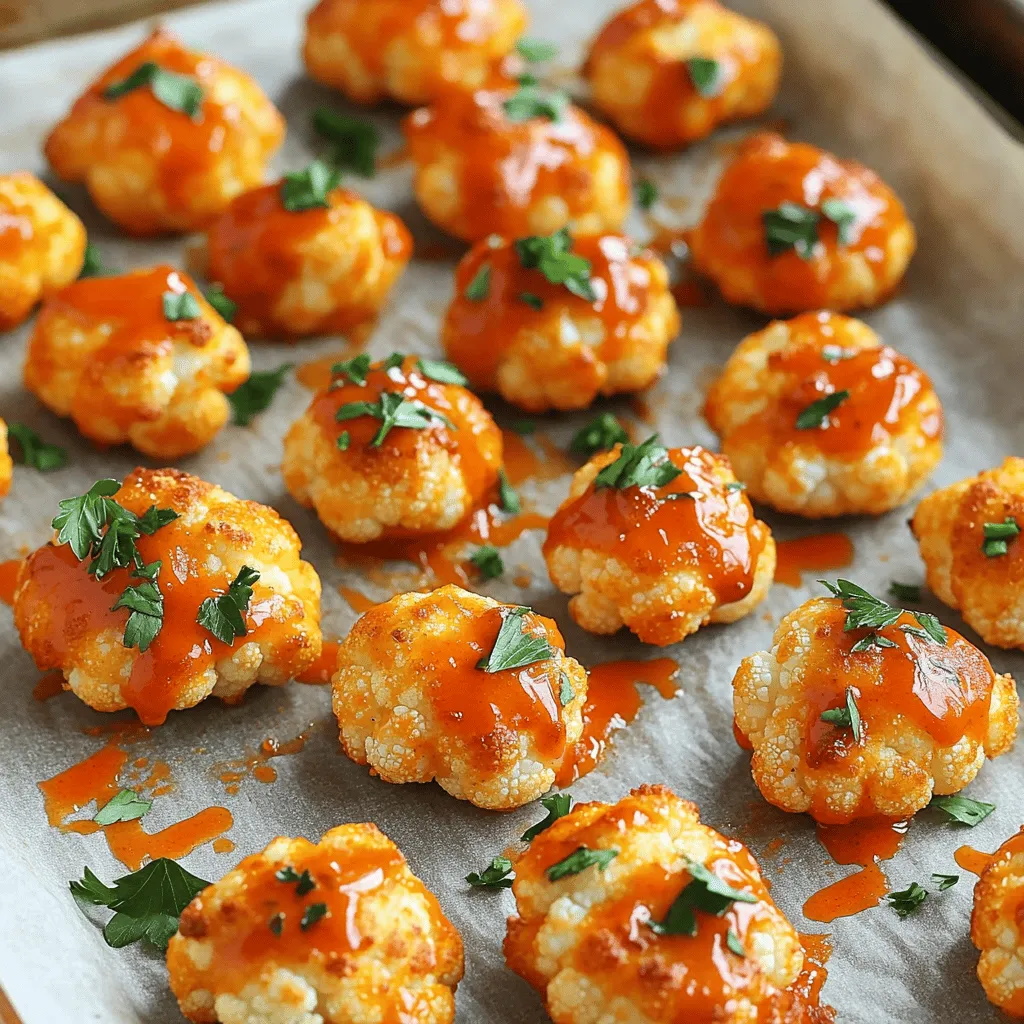
If you crave crunchy, spicy snacks, you’ll love these Buffalo Cauliflower Bites! They pack a punch of flavor and are

To make this dish, you need a few key items: - 4 salmon fillets - 3 tablespoons honey - 2 tablespoons soy sauce (or tamari for gluten-free) - 3 cloves garlic, minced - 1 tablespoon fresh ginger, grated - 1 tablespoon olive oil - 1 teaspoon sesame oil - Salt and pepper to taste - 1 tablespoon sesame seeds (for garnish) - 2 green onions, sliced (for garnish) These ingredients create the sweet and savory glaze that makes the salmon shine. The honey adds sweetness, while the soy sauce gives depth. You can add some optional items for more taste: - Red pepper flakes for heat - Fresh herbs like cilantro or parsley - Lemon juice for brightness These can enhance the dish and make it your own. A hint of spice or a splash of citrus can elevate the flavors. You can switch some ingredients if needed: - Use maple syrup instead of honey for a vegan option. - Coconut aminos can replace soy sauce for a soy-free choice. - Garlic powder can work if you don’t have fresh garlic. These swaps keep the dish tasty while catering to your needs. You can find the full recipe [here](#). To start, gather your ingredients. You need honey, soy sauce, garlic, and ginger. In a small bowl, whisk together these items. Mix until they blend well. This marinade gives the salmon its sweet and savory taste. Next, take the salmon fillets. Place them in a resealable bag or a shallow dish. Pour the marinade over the salmon. Make sure each piece is coated well. Seal the bag or cover the dish. Let it sit in the fridge for at least 30 minutes. If you have more time, marinate for up to 2 hours. This helps the flavors soak in better. Now, preheat your oven to 400°F (200°C). Line a baking sheet with parchment paper or grease it lightly. Remove the salmon from the marinade and put it skin-side down on the baking sheet. Drizzle with olive oil and sesame oil. Sprinkle some salt and pepper on top. You will bake the salmon for 12-15 minutes. It’s done when it flakes easily with a fork. While it bakes, take the leftover marinade and pour it into a small saucepan. Bring it to a boil over medium heat. Let it simmer for about 5 minutes to thicken. Once the salmon is out of the oven, brush it with the thickened marinade. You can garnish it with sesame seeds and sliced green onions for extra flair. For the full recipe, check out the detailed instructions. Enjoy your delicious honey garlic glazed salmon! To get the best salmon, timing is key. Bake the salmon for 12-15 minutes at 400°F (200°C). The fish should flake easily with a fork when it's done. If you want it juicier, take it out right at 12 minutes. For a firmer texture, go closer to 15 minutes. Keep an eye on it. Every oven is a bit different. For crispy skin, start with dry salmon. Pat it with paper towels before cooking. Use a hot oven, around 400°F (200°C). Drizzle some olive oil on the skin side. This helps it crisp up nicely. When you bake, don’t cover the salmon. Let the heat do its magic. If you want extra crispiness, broil it for the last minute. Serve your honey garlic glazed salmon with fresh sides. Steamed rice or quinoa pairs well. You can add some sautéed veggies for color and crunch. Try broccoli, snap peas, or carrots. For a fresh twist, top with a squeeze of lemon. It brightens the dish and adds a nice zing. Check out the full recipe for more ideas on how to enjoy this dish! {{image_2}} You can add vegetables to your honey garlic salmon for a complete meal. Choose veggies like broccoli, bell peppers, or zucchini. Just chop them into bite-sized pieces. Toss the veggies in a little olive oil and salt. Place them on the baking sheet with your salmon. Bake everything together for about 12-15 minutes. This way, your meal has color, taste, and nutrition. For a fun twist, try salmon bowls. Cook rice or quinoa as your base. Once the salmon is done, flake it into pieces. Place the salmon on top of the rice. Add colorful toppings like sliced cucumbers, shredded carrots, and avocado. Drizzle with extra honey garlic sauce for more flavor. This dish is filling and looks great on a plate. Grilling gives salmon a smoky flavor. Preheat your grill to medium heat. Use the same marinade from the recipe. After marinating, place the salmon on the grill, skin-side down. Grill for about 6-8 minutes per side. Keep an eye on it to avoid overcooking. Brush with the reserved marinade while grilling for extra taste. This method adds crispiness and a nice char to the fish. These variations keep things fresh and exciting. You can change the flavors and styles based on your mood and what you have at home. Try them out for a delightful dining experience! For the full recipe, refer to the Honey Garlic Glazed Salmon section. If you have leftover salmon, cool it to room temperature. Wrap the salmon tightly in plastic wrap or place it in an airtight container. Store it in the fridge. It will last for up to three days. Make sure to label it with the date. This helps you remember when you cooked it. To reheat your salmon, preheat your oven to 350°F (175°C). Place the salmon on a baking sheet. Cover it loosely with foil to keep it moist. Heat for about 10 to 15 minutes. You can also use a microwave. Place the salmon on a microwave-safe plate. Heat for about 30 seconds to one minute. Check it often to avoid overcooking. If you want to freeze the salmon, wrap it well in plastic wrap. Use a freezer bag to keep out the air. It can last for up to three months in the freezer. When you're ready to use it, thaw it in the fridge overnight. This helps maintain the best texture. After thawing, reheat it as mentioned above. You can enjoy your honey garlic salmon later without losing flavor. You can find the full recipe for honey garlic glazed salmon above. You can serve honey garlic glazed salmon with many sides. Some great choices are: - Steamed broccoli - Rice or quinoa - Mashed potatoes - Mixed green salad - Roasted vegetables These sides add color and flavor. They also balance the sweet and savory taste of the salmon. To check if your salmon is cooked, look for a few signs. The flesh should be opaque and flake easily with a fork. You can also use a meat thermometer. The center should reach 145°F (63°C). If it’s not done, return it to the oven for a few more minutes. Yes, you can use frozen salmon. Just make sure to thaw it first. Place the salmon in the fridge overnight or run it under cold water. Once thawed, you can follow the same steps in the full recipe. This will keep your dish tasty and fresh. This guide covered essential ingredients, step-by-step instructions, and tips for honey garlic glazed salmon. I shared variations to keep meals fun and offered storage tips to save food. Remember, cooking should be easy and enjoyable. With the right ingredients and techniques, you can create delicious meals. Try this recipe, explore variations, and enjoy every bite. Happy cooking!

Honey Garlic Glazed Salmon Simple and Flavorful Dish

Do you want a dish that’s simple yet packed with flavor? Honey Garlic Glazed Salmon is the answer! This recipe

- 1 cup rolled oats - 1 cup natural peanut butter (smooth or crunchy) - 1/2 cup honey or maple syrup These key ingredients form the tasty base of the no-bake peanut butter bars. The oats provide a nice texture. The peanut butter adds creaminess and flavor. Honey or maple syrup brings sweetness and binds everything together. - 1/2 cup chocolate chips (milk or dark) - 1/4 cup unsweetened cocoa powder - Extra chocolate chips for topping (optional) You can enhance these bars with optional ingredients. Chocolate chips add indulgence, while cocoa powder gives a rich taste. Topping with extra chocolate chips makes them look pretty and even tastier. - Alternative sweeteners - Gluten-free options - Nut-free variations You can easily change some ingredients. Use agave or coconut sugar for sweeteners. If you need gluten-free bars, choose gluten-free oats. For nut-free options, you can substitute sunflower seed butter. These swaps help everyone enjoy this treat! 1. Mixing the dry ingredients: Start by placing rolled oats, cocoa powder, and a pinch of salt in a large mixing bowl. Stir them together until they blend well. This step helps create a solid base for your bars. 2. Combining wet ingredients with dry: Next, add natural peanut butter and honey (or maple syrup) to the bowl. Use a spatula or your hands to mix everything until it forms a sticky dough. Ensure all dry ingredients are coated well. 3. Preparing the pan: Line an 8x8 inch pan with parchment paper. Leave some paper hanging over the edges. This helps you lift the bars out easily later. 1. Transferring the mixture to the pan: Scoop the mixture into the lined pan. Use your hands or a spatula to press it down firmly. Make sure it is even and compact. 2. Adding toppings: If you want extra flavor, sprinkle some chocolate chips on top. Gently press them into the mixture to keep them in place. 3. Refrigeration process: Place the pan in the fridge for at least 2 hours. This helps the bars set and become firm enough to cut. 1. How to cut bars evenly: Once set, lift the bars out of the pan using the parchment paper. Use a sharp knife to cut them into even squares. This makes serving easier. 2. Presentation ideas: Arrange the bars on a nice plate. You can add some fresh fruit or a drizzle of chocolate on top for a pop of color. 3. Serving suggestions: Serve these bars chilled. They make a great snack or dessert. You can also pack them for lunch or take them on the go. For the full recipe, check out the No-Bake Peanut Butter Chocolate Dream Bars. - Achieving the perfect consistency: The key is to mix well. When you combine the rolled oats and peanut butter with the sweetener, aim for a sticky dough. It should hold together without being too dry or too wet. - How to avoid stickiness: Lightly grease your hands or use a spatula when pressing the mixture into the pan. This helps keep everything from sticking to you. - Timing for refrigeration: Allow the bars to chill for at least two hours. This gives them time to set properly and makes them easier to cut. - Overmixing the ingredients: Mix just until the oats and peanut butter blend well. Overmixing can make the bars tough. - Using the wrong type of nut butter: Stick to natural peanut butter. Avoid brands with added sugars or oils, as they change the texture and flavor. - Not packing the mixture firmly enough: Press down firmly when spreading the mixture in the pan. This helps create a dense bar that holds its shape. - Adding spices like cinnamon or sea salt: A pinch of these can elevate the taste. Cinnamon adds warmth, and sea salt enhances the sweetness. - Using flavored nut butters: Try almond or cashew butter for a fun twist. These can add unique flavors to your bars. - Mixing in fruits or seeds: Dried fruits like cranberries or seeds like chia can add texture and extra nutrition. Just make sure to chop them small to mix well. For the full recipe, check the details above. {{image_2}} You can add a fun twist to your no-bake peanut butter bars. Here are some ideas: - Chocolate-peanut butter twist: Mix in more cocoa powder or chocolate chips for a rich flavor. - Nut and seed additions: Add chopped nuts or seeds like sunflower or chia for crunch and health. - Swapping different nut butters: Try almond or cashew butter instead of peanut butter for a new taste. These bars can fit many diets. Here are some options: - Vegan adaptations: Use maple syrup instead of honey and ensure your chocolate chips are dairy-free. - Keto-friendly options: Swap honey for a low-carb sweetener like erythritol or stevia. - Allergy-friendly substitutions: Use seed butter if you need a nut-free option. How you serve these bars can make them even better. Consider these ideas: - Layering with yogurt: Serve the bars with a layer of yogurt on top for creaminess. - Drizzles or sauces: Top them with melted chocolate or caramel for extra flavor. - Serving styles (bars vs. bites): Cut them into bite-sized pieces for a fun snack or keep them as larger bars for a filling treat. For the full recipe, refer to the previous section. Enjoy making these tasty treats! To keep your no-bake peanut butter bars fresh, store them in an airtight container. This prevents moisture and air from getting in. If you don't have a container, wrap the bars tightly in plastic wrap. Storing them in the fridge keeps them firm and tasty. You can also freeze them for longer storage. Just make sure to use freezer-safe containers. How long do these bars last? If stored in the fridge, they can last up to one week. In the freezer, they can stay good for about three months. Check for signs of spoilage like an off smell or a change in texture. If they feel too soft or sticky, it’s best to toss them. Can you refreeze these bars? Yes, but it's best to avoid refreezing if possible. Each time you thaw and refreeze, the texture can change. To maintain quality, let the bars thaw in the fridge rather than at room temperature. This helps keep them firm and fresh. Always check for any signs of spoilage before eating. For the best taste, enjoy them fresh! To make No-Bake Peanut Butter Bars, follow these steps: 1. Mix the dry ingredients: In a bowl, combine rolled oats and cocoa powder. 2. Combine wet ingredients: Add peanut butter, honey, and vanilla to the dry mix. Stir well. 3. Fold in chocolate chips: Gently mix in chocolate chips until evenly spread. 4. Prepare the pan: Line an 8x8 inch pan with parchment paper. 5. Transfer and press: Put the mixture into the pan and press down firmly. 6. Refrigerate: Chill the bars for at least 2 hours until firm. 7. Cut and serve: Use the parchment paper to lift out the bars and cut into squares. This simple process creates a tasty treat. You can find the Full Recipe [here](#). Yes, you can use crunchy peanut butter. It adds a nice texture. The bars will have bits of peanuts, making them even more enjoyable. Just make sure to mix it well so all ingredients blend nicely. If you prefer a smooth texture, stick with creamy peanut butter. These bars can be a healthy snack. They contain: - Rolled oats: Great source of fiber. - Peanut butter: Packed with protein and healthy fats. - Honey or maple syrup: Natural sweeteners with some nutrients. However, keep in mind that they are still a treat. Moderation is key. They provide energy, but watch portion sizes if you're counting calories. You can customize these bars in many ways: - Add nuts or seeds: Mix in almonds or chia seeds for extra crunch. - Use different sweeteners: Try agave syrup or stevia for a lower-calorie option. - Experiment with flavors: Add a pinch of cinnamon or chocolate protein powder for a twist. Feel free to get creative! For clean cuts, follow these tips: - Use a sharp knife: A sharp knife makes smooth cuts without tearing the bars. - Warm the knife: Dip the knife in hot water before cutting. Wipe it dry and cut through. - Cut when chilled: Make sure the bars are firm from refrigeration. This helps with clean edges. These techniques will give you neat, beautiful bars for serving. This blog post shared a simple recipe for no-bake peanut butter bars. We covered key ingredients, optional additions, and substitutions. The step-by-step instructions make it easy to follow, ensuring great results. I shared tips to avoid common mistakes and enhance flavors. You can also explore variations for different diets. Finally, I provided storage tips to keep your bars fresh. Enjoy making this treat and customizing it to your taste!

No-Bake Peanut Butter Bars Simple and Tasty Treat

Craving a sweet treat without turning on the oven? You’re in the right place! These No-Bake Peanut Butter Bars are

- 2 teaspoons matcha green tea powder - 1 cup milk (dairy or plant-based) - 1 tablespoon honey or maple syrup (adjust for sweetness) To make a great iced matcha latte, you need three key ingredients. First, get high-quality matcha green tea powder. This provides the vibrant green color and earthy flavor. Next, choose your milk. You can use dairy milk or any plant-based milk like almond or oat. Finally, pick a sweetener. Honey or maple syrup works well, but you can adjust the amount to suit your taste. - Ice cubes - Whipped coconut cream - Matcha powder (for garnish) While ice cubes are a must, the other ingredients are optional. Ice cubes chill your drink and keep it refreshing. Whipped coconut cream adds a creamy touch on top. You can also sprinkle a bit of matcha powder as a garnish. This makes your drink look even more appealing. If you want to learn how to make this drink, check the Full Recipe for all the details! To start, I sift the matcha green tea powder. This step helps remove any clumps. Sifting makes the matcha smooth and easy to mix. I use a small bowl for this. It takes just a minute, but it's worth it. Next, I whisk the matcha to create the perfect froth. I add ½ cup of cold water to the sifted matcha. Using a matcha whisk or a frother, I whisk vigorously. I want it to be frothy and fully dissolved. This gives the drink a light and airy texture. Now, I combine the milk and sweetener. In a separate jar, I pour in 1 cup of milk. This can be dairy or plant-based. Then, I add 1 tablespoon of honey or maple syrup. I stir it well to mix everything together. Next, I fill a tall glass with ice cubes. This keeps the drink cold and refreshing. I pour the sweetened milk mixture over the ice. Then comes the fun part! I gently pour the whisked matcha over the milk. This creates a beautiful layered look. If I feel fancy, I top it with whipped coconut cream. A sprinkle of matcha powder on top makes it look perfect. I serve it with a straw or a spoon. This way, you can mix it before enjoying. You can find the full recipe at the end of this section. Enjoy your chilled Zen Iced Matcha Latte! Choosing high-quality matcha is key. Look for bright green powder. The brighter the color, the fresher and better the matcha. This type offers a rich, smooth taste. Avoid dull or yellowish powders, as they can taste bitter. When it comes to milk, you have options. Dairy milk gives a rich creaminess. Plant-based milk, like almond or oat, can also work well. Each type adds its own flavor. Try different kinds to see what you like best. The creamier the milk, the better the texture. Layering your drink makes it look special. Pour the whisked matcha slowly over the milk. This way, it sits on top. The colors will contrast beautifully, making it eye-catching. For garnishes, think simple and fun. A sprinkle of matcha powder on top adds flair. You can also use whipped coconut cream for a treat. Add a mint leaf or a slice of lime for a refreshing touch. These small details make your Iced Matcha Latte stand out. For the full recipe, you can check out the complete steps. Enjoy creating your iced matcha latte! {{image_2}} You can make your iced matcha latte sweet or not. If you like it sweet, add honey or maple syrup. Adjust the amount based on your taste. For a lighter touch, try just a bit. If you want to skip sugar, go unsweetened. The matcha's natural taste shines through this way. You can also use natural sweeteners like agave or stevia. These options can give you sweetness with fewer calories. They mix well in the drink. Play around with different levels until you find your perfect balance. Want to spice it up? Add flavors like vanilla or chocolate. A drop of vanilla extract can make it cozy. If you love chocolate, try cocoa powder for a rich twist. Just mix it in before adding the milk. You can also change the milk. Almond milk adds a nutty taste. Oat milk gives a creamy feel. Coconut milk can bring a tropical vibe. Each type of milk offers a new flavor adventure. Experiment with these options to find your favorite! To keep your matcha powder fresh, store it in a cool, dark place. A sealed container works best. Light and heat can spoil its flavor. If you want to keep it even fresher, place it in the fridge. Just remember to let it warm up before you use it. This helps keep the taste strong. For your prepared iced matcha latte, keep it in the fridge. Use a sealed jar or container. This will help it stay fresh for longer. Try to drink it within 24 hours for the best taste. Once you open matcha powder, it can last about 3 to 6 months. After this time, it may lose its rich flavor and color. Always check for any off smell or taste before using. You can store your iced latte for about 1 to 2 days in the fridge. However, the ice will melt and dilute the drink. For the best flavor, enjoy your iced matcha latte right after making it. If you want to make a batch, consider the Full Recipe for a quick guide. An iced matcha latte is a refreshing drink made with matcha green tea. It blends matcha, milk, and sweetener, served over ice. The drink has a rich green color and a creamy texture. You can enjoy it hot or cold, but the iced version is perfect for warm days. The key components are: - Matcha green tea powder - Milk (dairy or plant-based) - Sweetener (honey or maple syrup) - Ice cubes This drink gives a nice energy boost and a calm feeling, thanks to the unique properties of matcha. Matcha is very healthy. It is packed with antioxidants called catechins. These help fight free radicals that can harm your body. Matcha may boost your metabolism, aiding in weight loss. It also supports heart health and can improve focus. Drinking matcha can help lower stress levels. It contains L-theanine, which promotes relaxation without making you sleepy. Overall, matcha is a great addition to your diet. You can find iced matcha lattes in many places. Most coffee shops offer them on their menu. Look for cafes that focus on tea or specialty drinks. Some popular chains also serve delicious iced matcha lattes. For pre-made options, check grocery stores. Many brands sell bottled iced matcha drinks. These can be a quick and tasty choice when you’re in a hurry. Yes, you can easily make a larger batch of iced matcha lattes. Just follow these simple steps: 1. Adjust the Ingredients: Multiply the ingredients by the number of servings you need. For example, if you want to make 4 servings, use 8 teaspoons of matcha powder, 4 cups of milk, and 4 tablespoons of sweetener. 2. Whisk the Matcha: For each serving, whisk the matcha with cold water in a large bowl. You can use a bigger whisk or a frother to save time. 3. Combine and Serve: In a large pitcher, mix the milk and sweetener. Pour this mixture into glasses filled with ice. Then, add the whisked matcha on top. 4. Garnish: If you like, top with whipped coconut cream and a sprinkle of matcha. Making a larger batch is great for parties or group gatherings. Enjoy sharing this delightful drink with friends! In this post, we explored how to make a delicious iced matcha latte. We covered essential ingredients like matcha powder and milk options, along with tips for achieving the best flavor. You learned about unique variations and how to store matcha properly. Remember, the key lies in using high-quality matcha and getting creative with flavors and presentations. Enjoy crafting your iced matcha latte, and let your taste buds guide you!

Iced Matcha Latte Refreshing Green Tea Delight

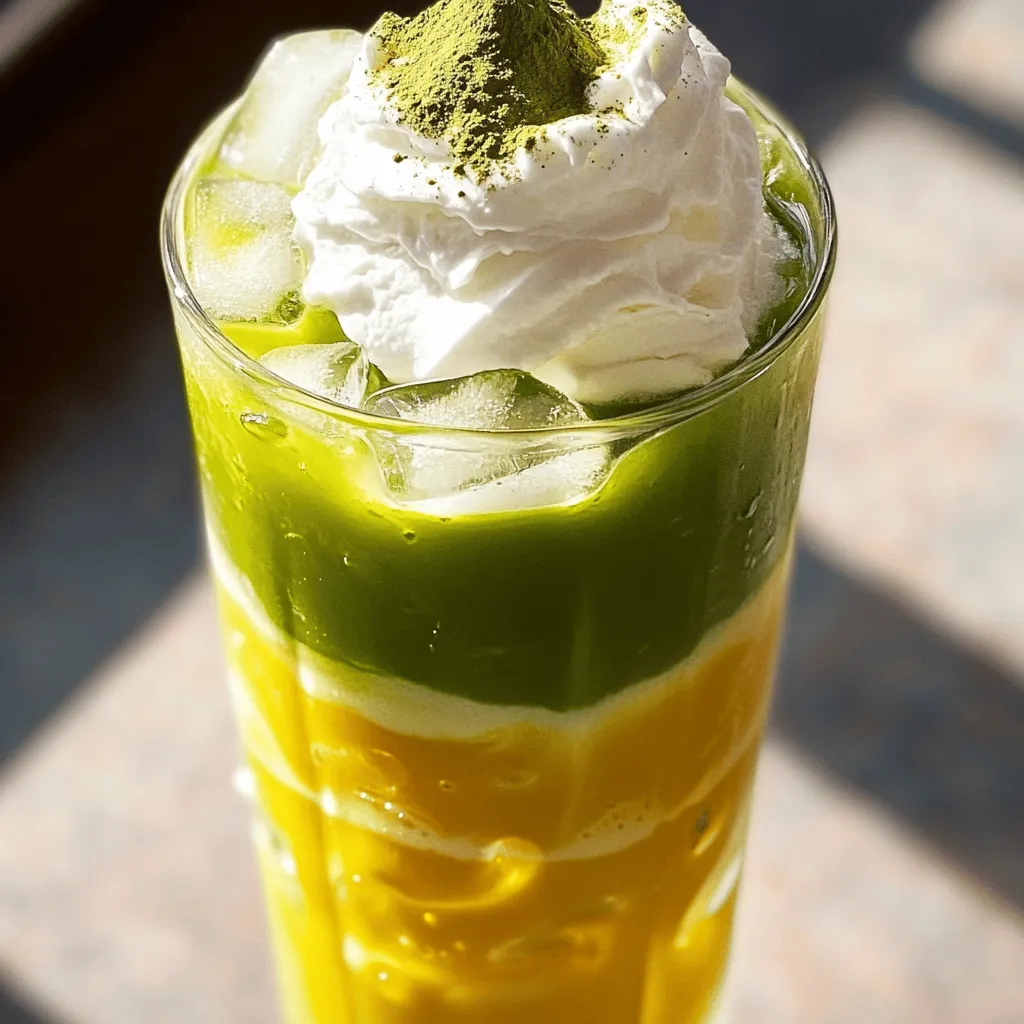
If you’re looking for a refreshing drink that’s full of flavor, I’ve got you covered. An Iced Matcha Latte is

- Canned Chickpeas: You need one can (15 oz) of chickpeas, drained and rinsed. Chickpeas are the star of this dish. They add protein and fiber to your meal. - Spices and Seasonings: Use two tablespoons of olive oil, one tablespoon of smoked paprika, one teaspoon of cumin, one teaspoon of garlic powder, and half a teaspoon of cayenne pepper. Adjust the cayenne for your spice level. Don't forget salt and pepper to taste. These spices give the chickpeas a rich, bold flavor. - Fresh Vegetables: Gather one cup of shredded lettuce, one diced tomato, half a diced cucumber, and half a sliced red onion. These fresh veggies add crunch and color. They balance the heat from the chickpeas and make your gyros more appealing. - Whole Wheat Pita Bread: You will need four whole wheat pita breads. They are great for wrapping up all the tasty fillings. Whole wheat adds fiber, making them a healthier choice. - Tahini Sauce or Yogurt: Choose between half a cup of tahini sauce or yogurt. Either option adds creaminess and ties all the flavors together. - Garnishes: Fresh parsley, chopped, works well as a garnish. It adds a pop of color and fresh taste. You can also use other herbs if you prefer. This collection of ingredients makes your Spicy Chickpea Gyros flavorful and nutritious. For the full recipe, check the detailed instructions to bring this dish to life! Preheating the Oven Start by preheating your oven to 400°F (200°C). This step ensures the chickpeas roast evenly and get nice and crispy. Tossing Chickpeas with Spices Next, take a can of chickpeas, drain and rinse them. In a bowl, mix the chickpeas with olive oil, smoked paprika, cumin, garlic powder, cayenne pepper, salt, and pepper. Toss them well until every chickpea is coated in the spice mix. Spread them on a baking sheet in a single layer. Baking Time and Temperature Roast the chickpeas in the oven for about 20 to 25 minutes. Shake the pan halfway through to help them cook evenly. You want them golden brown and crisp. Ensuring Crispy Texture To achieve that perfect crunch, keep an eye on them in the last few minutes. If they start to brown too much, take them out early. Let them cool slightly after roasting; they will crisp up more as they cool. Preparing the Vegetables While your chickpeas roast, chop your veggies. In a bowl, mix shredded lettuce, diced tomato, diced cucumber, and sliced red onion. Toss gently and set them aside to let the flavors blend. Filling the Pita Bread Take a whole wheat pita and fill it with a generous scoop of your roasted spicy chickpeas. Top it with the prepared veggies and drizzle tahini sauce or yogurt on top. Garnish with chopped parsley for extra color and taste. Wrap the pita, and it’s ready to eat! For a detailed guide, check out the Full Recipe. Achieving Optimal Crispiness To get the best crunch, drain and rinse the chickpeas well. Then, dry them with a towel. This step helps them roast evenly. Toss the chickpeas with olive oil and spices before baking. Spread them in a single layer on the baking sheet, so they cook well. Bake at 400°F for 20 to 25 minutes. Shake the pan halfway through to ensure they crisp up all over. Adjusting Spice Levels You can change the spice level to fit your taste. If you want more heat, add more cayenne pepper. If you prefer less spice, cut back on it. Taste the chickpeas after roasting. You can sprinkle more spices on them if needed. Prepping Ingredients in Advance Before you start, wash and chop your veggies. This includes your lettuce, tomatoes, cucumbers, and onions. Place them in a bowl and toss them together. Having everything ready speeds up the assembly. You can also roast the chickpeas ahead of time and store them. Serving Suggestions for Best Flavor Serve your gyros with fresh tahini sauce or yogurt. This adds a creamy touch. Top with chopped parsley for a fresh taste. You can also squeeze lemon juice over the gyros for a little zing. Serve with a side of sweet potato fries or a Greek salad for a complete meal. Nutritional Advantages Chickpeas are packed with nutrients. They are high in fiber, which helps digestion. They also contain vitamins and minerals like iron and magnesium. This makes them a great choice for a balanced diet. Vegetarian Protein Source Chickpeas are an excellent source of plant-based protein. They are perfect for vegetarians and vegans. Adding chickpeas to your diet can help you meet your protein needs without meat. Plus, they keep you feeling full, which is great for snacking. For the full recipe details, you can check out the [Full Recipe]. {{image_2}} You can change the flavor of your spicy chickpea gyros by using different spices. Here are two great options: - Southwest Spice Mix: Blend smoked paprika, chili powder, cumin, and garlic powder. This mix gives a warm, smoky taste. - Mediterranean Herb Blend: Use oregano, thyme, and lemon zest. This blend brings a fresh, zesty flavor to your gyros. Experimenting with spices lets you create your perfect dish! Sauces can really change the taste of your gyros. Here are two alternatives: - Hummus as a Spread: Spread hummus in your pita for a creamy texture. Hummus adds protein and flavor. - Avocado Sauce: Blend ripe avocado with lime juice and salt. This sauce adds a rich, creamy taste that pairs well with chickpeas. These choices make your gyros even more delicious! You can boost the protein in your gyros. Here are two tasty ways to do this: - Grilled Chicken or Tofu: Add sliced grilled chicken or firm tofu for more protein. Both options add a nice texture. - Feta Cheese for Topping: Crumble feta cheese on top for a salty kick. It enhances the flavor and adds creaminess. These additions help you customize your meal for your taste! For the full recipe, check out the details above. To keep your Spicy Chickpea Gyros fresh, store them correctly. Place any extra gyros in an airtight container. This helps keep them from drying out. You can also store the chickpeas and veggies separately. For reheating, use an oven or a skillet. Heat the chickpeas at 350°F (175°C) for about 10 minutes. This keeps them crispy. You can also warm the pita in the skillet for a minute on each side. Chickpeas and vegetables can last a few days. Keep them in the fridge for up to three days. They might lose some crispness but remain tasty. Tahini sauce lasts longer. You can store it in the fridge for up to two weeks. Always check for any signs of spoilage before using. You can find the full recipe for Spicy Chickpea Gyros to try this dish at home! You can make Spicy Chickpea Gyros gluten-free by using gluten-free pita bread. Many brands offer this option at stores. You can also use lettuce wraps instead of pita. This way, you keep the yummy flavors while making it safe for gluten-free diets. Yes, you can freeze the leftovers. Here are the steps: - Let the gyros cool down completely. - Wrap each gyro in foil or plastic wrap. - Place the wrapped gyros in a freezer bag or container. - Label and date the bag. - Freeze for up to three months. To eat, just thaw in the fridge overnight. Reheat in the oven or microwave for best taste. For side dishes, consider: - Greek salad with cucumbers and olives - Roasted vegetables like zucchini or bell peppers - A simple yogurt dip for extra flavor For drinks, try: - A refreshing mint lemonade - Sparkling water with a slice of lemon - A light white wine for a nice touch For the complete details on preparing these delightful Spicy Chickpea Gyros, check the [Full Recipe]. Spicy chickpea gyros are a tasty and healthy meal. We covered ingredients, cooking steps, and tips. You can customize these gyros with spices and sauces. They offer great nutrition and flavor. Remember to store any leftovers properly to enjoy later. Homemade meals like this bring joy and good health. Experiment and find your best version! Enjoy making this delicious dish.

Spicy Chickpea Gyros Flavorful and Healthy Delight

Looking for a tasty, healthy meal? You’ll love these Spicy Chickpea Gyros! They pack bold flavors and are easy to

- 1 can (15 oz) chickpeas, drained and rinsed - 1 tablespoon olive oil - 1 teaspoon smoked paprika - 1 teaspoon garlic powder - 1/2 teaspoon cumin - 1/2 teaspoon sea salt - 1/4 teaspoon black pepper Chickpeas are the star of this dish. They become crunchy and tasty in the air fryer. Rinsing them is key. It removes the canning liquid and helps with crisping. Olive oil adds flavor and helps the seasonings stick. You can choose your seasonings. Smoked paprika gives a nice depth. Garlic powder adds a savory note, while cumin brings warmth. Sea salt and black pepper balance the flavors. - Cayenne pepper for heat - Fresh parsley or cilantro for garnish If you want some spice, add cayenne pepper. Just a pinch will do. It gives the chickpeas a kick. Fresh herbs like parsley or cilantro can make your dish pop. They add color and freshness. For the full recipe, check out the details above. This snack is simple yet satisfying. - Preheat the air fryer to 400°F (200°C). This takes about 5 minutes. - Pat the chickpeas dry with a paper towel. This step helps remove extra moisture. - In a large bowl, combine the chickpeas with 1 tablespoon of olive oil. - Add the seasonings: 1 teaspoon smoked paprika, 1 teaspoon garlic powder, 1/2 teaspoon cumin, 1/2 teaspoon sea salt, and 1/4 teaspoon black pepper. - If you like spice, add a pinch of cayenne pepper. - Toss everything well to coat the chickpeas evenly. - Arrange the seasoned chickpeas in a single layer in the air fryer basket. Do not overcrowd them. - Air fry for 15-20 minutes. Shake the basket halfway through. This helps them cook evenly. - Chickpeas are ready when they are golden and crispy. - Once cooked, let them cool for a few minutes. They will get crispier as they cool. - Serve in a bowl and garnish with fresh parsley or cilantro. You can find the full recipe above. Enjoy this crunchy snack! To make your chickpeas crispy, start by drying them well. Moisture on the chickpeas makes them soggy. Use a paper towel to pat them dry after rinsing. This step is key for getting that perfect crunch you want. Next, avoid overcrowding the air fryer basket. If you pack too many chickpeas in, they won’t cook evenly. A single layer is best. This way, hot air circulates around each chickpea. You’ll achieve an even crispiness that will make your snack delicious. Different air fryers can cook at different speeds. Check your air fryer’s manual for specific settings. As a guide, set the temperature to 400°F (200°C). Cook the chickpeas for about 15 to 20 minutes. Shake the basket halfway through cooking. This helps them crisp up evenly. Watch for signs that your chickpeas are ready. They should turn golden brown and feel firm. If they look pale or soft, give them more time. You want that satisfying crunch that makes these chickpeas a delightful snack. {{image_2}} You can mix up the flavor of your crispy air fryer chickpeas in fun ways. Try adding Italian herbs like oregano and basil for a fresh taste. Curry powder brings a warm, spicy kick that is delightful. If you want something sweet, sprinkle cinnamon and a touch of sugar. This sweet version can be a tasty treat for kids and adults alike. Experiment with these seasonings to find your favorite blend! Crispy air fryer chickpeas are versatile and fun to serve. Pair them with dips like hummus or guacamole for a tasty snack. The crunchy texture goes well with creamy dips. You can also use these chickpeas as a salad topping. They add crunch and protein to any salad. Whether you snack on them or use them in meals, they are sure to please! For the full recipe, check out the Crispy Air Fryer Chickpeas. To keep your cooked crispy chickpeas fresh, store them in an airtight container. This method helps lock in their crunch. You can keep them at room temperature for about 2 to 3 days. If you want them to last longer, place them in the fridge. They can stay fresh for up to a week when chilled. If your chickpeas lose their crunch, the air fryer can help. Re-crisp them by placing them back in the fryer at 400°F (200°C) for about 5 to 10 minutes. This will bring back that delightful crunch. You can also use leftover chickpeas in other recipes. Toss them in salads for added texture. Blend them into dips like hummus for a creamy treat. Or sprinkle them over soups for a nice crunch. For the full recipe and more ideas, check out the Crispy Air Fryer Chickpeas. Yes, you can use dried chickpeas. First, soak them overnight in water. This helps them soften. After soaking, boil them for about 1-2 hours until tender. Drain and rinse them well. Dried chickpeas need more time to cook than canned ones. So, adjust your cooking time accordingly in the air fryer. If your chickpeas aren't crispy, check a few things. First, did you dry them well? Moisture can make them soggy. Pat them dry with a paper towel. Second, did you overcrowd the air fryer? This can trap steam and affect crispiness. Always place them in a single layer. Lastly, try air frying them a bit longer. Keep an eye on them to avoid burning. Yes, crispy air fryer chickpeas are quite healthy! They are high in protein and fiber. This makes them a great snack. Plus, they are low in fat, especially if you use less oil. Chickpeas also contain vitamins and minerals like iron and magnesium. Enjoy them as a guilt-free snack or add them to salads for extra crunch. For a full recipe, check out the Crispy Air Fryer Chickpeas section above. Crispy air fryer chickpeas are an easy, tasty snack that anyone can make. You learned the key ingredients, step-by-step cooking methods, and tips for the best crunch. Plus, I offered fun variations and storage advice. Remember, dried chickpeas need extra prep but can still be used. Enjoy experimenting with flavors and share your creations! Crispy chickpeas make a great healthy snack or topping. With these tips, you can achieve the perfect crispiness every time.

Crispy Air Fryer Chickpeas Flavorful Snack Delight

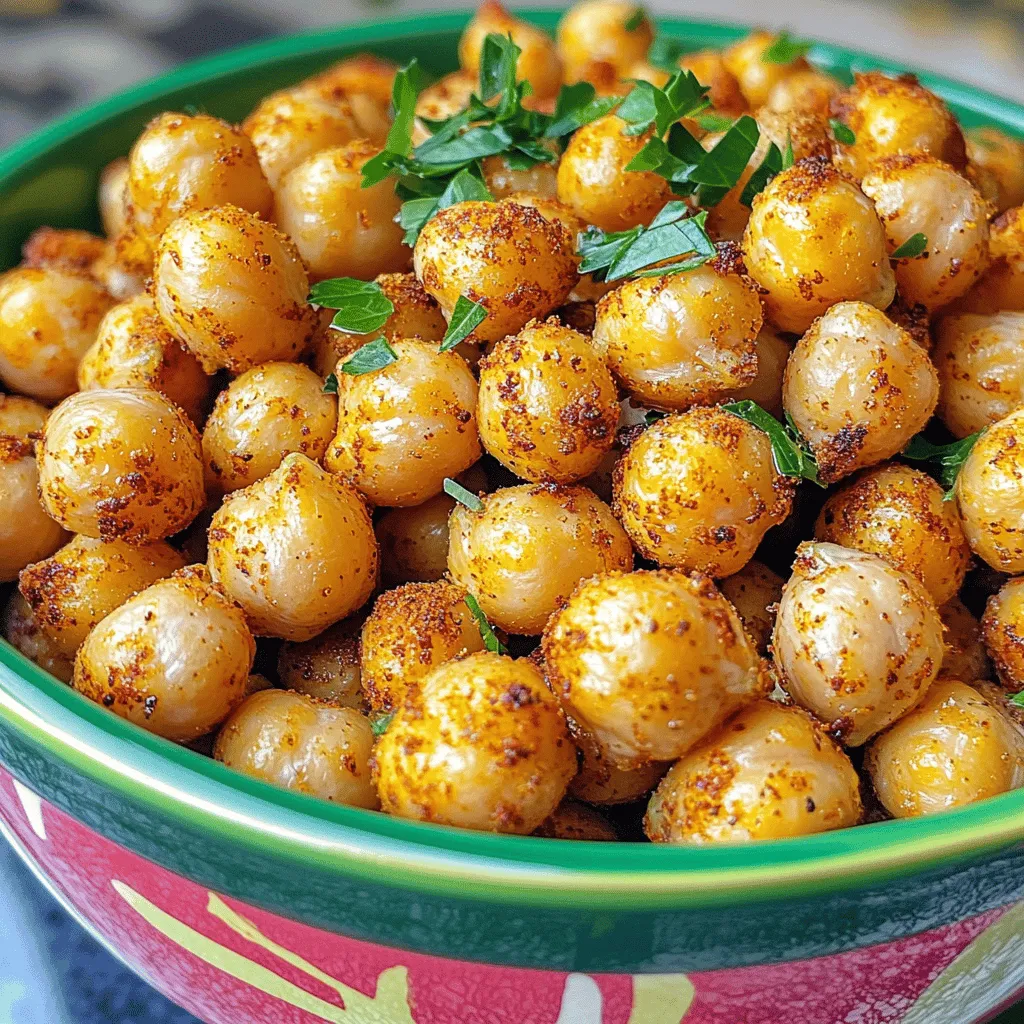
Craving a tasty, healthy snack? Crispy air fryer chickpeas are your answer! This easy recipe transforms simple canned chickpeas into

To make a great avocado toast, you need fresh ingredients. Here are the main items: - 2 ripe avocados - 4 slices of whole grain bread - 1 medium lemon, juiced - 1/2 teaspoon garlic powder - Salt and pepper to taste These ingredients create a tasty base. Ripe avocados are key for creaminess. Fresh lemon juice adds brightness. Garlic powder gives a nice flavor boost. Salt and pepper enhance all the taste. You can make your toast special with toppings. Here are some fun options: - 1 small red chili, finely chopped (for heat) - 1/4 cup feta cheese, crumbled (for creaminess) - Fresh herbs like cilantro or parsley (for freshness) - Extra virgin olive oil (for richness) These add-ins bring different flavors. The chili adds spice, while feta gives a salty kick. Fresh herbs can make your dish pop with color and taste. The bread choice is important. It affects the toast's texture and flavor. Here are some great options: - Whole grain bread (for a nutty taste) - Sourdough (for a tangy bite) - Rye bread (for a hearty option) Choose bread that you love. Each type will give your avocado toast a unique twist. Toast your bread until it is golden and crisp for the best experience. Check out the Full Recipe for details on making this dish! Start by gathering your ingredients. You will need: - 2 ripe avocados - 4 slices of whole grain bread - 1 medium lemon, juiced - 1/2 teaspoon garlic powder - Salt and pepper to taste - 1 small red chili, finely chopped (optional) - 1/4 cup feta cheese, crumbled (optional) - Fresh herbs for garnish - Extra virgin olive oil for drizzling Cut the avocados in half. Remove the pit carefully. Scoop the green flesh into a bowl. This is where the magic begins. While prepping the avocados, toast the bread. Use a toaster or an oven. Aim for a golden, crispy finish. This crunch will add texture to your dish. Now for the fun part! Mash the scooped avocado with a fork. You want it creamy, but not too smooth. Add the lemon juice, garlic powder, salt, and pepper. Mix until all flavors blend well. For a spicy kick, add the chopped red chili. Stir it in gently. If you love cheese, sprinkle in feta for extra flavor. Spread the avocado mixture generously on each slice. Drizzle with olive oil for richness. Finally, add fresh herbs for a pop of color and taste. Enjoy your delicious creation! For the full recipe, refer to the section above. To make great avocado toast, you need ripe avocados. Look for avocados that are dark green and slightly soft. Press gently; they should give a little but not be mushy. If they are hard, leave them on the counter for a few days. If they are too soft, they may be overripe. A perfect avocado is creamy and easy to mash. When you mash avocados, aim for a spreadable mix. Use a fork to mash them in a bowl. If you want it smooth, mash more. For a chunkier texture, mash less. Adding lemon juice helps keep the color bright and adds flavor. Mix in garlic powder, salt, and pepper for a tasty kick. If you like heat, add finely chopped red chili. Serving adds joy to your avocado toast. Use a wooden board or a rustic plate for a nice look. After spreading the avocado, sprinkle crumbled feta on top for saltiness. Drizzle with extra virgin olive oil for richness. Garnish with fresh herbs, like cilantro or parsley, for color. A sprinkle of chili flakes can add extra flair. Check the full recipe for more tips! {{image_2}} For a Mediterranean twist, add some sun-dried tomatoes and olives. Spread the avocado mixture on toasted bread. Top it with crumbled feta cheese and fresh basil. The salty cheese and herbs bring a fresh taste. You can also drizzle balsamic glaze for a sweet touch. This combo really excites the palate! If you like heat, add red pepper flakes or hot sauce. You can also mix diced jalapeños into the avocado. This will give your toast a spicy kick. For a fun twist, try sriracha or harissa. These sauces add depth and flavor. You can balance the heat with a drizzle of honey or agave syrup. To make a vegan version, skip the feta cheese. You can use nutritional yeast for a cheesy flavor. For gluten-free options, choose gluten-free bread. There are many tasty varieties available. You can also use lettuce wraps for a low-carb choice. This keeps the dish light and refreshing. These options make avocado toast more inclusive for everyone. If you have leftover avocado toast, eat it soon. The longer it sits, the worse it tastes. Wrap it tightly in plastic wrap. You can store it in the fridge for one day. The avocado may turn brown, but it's still safe to eat. Just scrape off the top layer if needed. To keep avocados fresh, store them at room temperature if not ripe. Once ripe, place them in the fridge. This slows down the ripening process. If you cut an avocado, squeeze lemon juice on the flesh. Then wrap it tightly in plastic wrap. This helps keep it green and tasty. For storing toast, keep it in a paper bag at room temperature. Avoid plastic bags as they trap moisture. This can make the toast soggy. If you want to save toasted bread, freeze it. Just place slices in a freezer bag. When ready to eat, toast them straight from the freezer. For a complete guide to making delicious avocado toast, check out the Full Recipe. Yes, you can prepare some parts in advance. Toast the bread and store it in an airtight container. The bread stays fresh that way. You can also prepare the avocado mixture. However, store it in a bowl with plastic wrap pressed against the surface to limit air. This helps keep the avocado green longer. Assemble the toast just before serving. It tastes best fresh. Avocados are packed with good nutrients. They have healthy fats, which help your heart. They also contain fiber, good for digestion. Avocados are high in vitamins like E and K, which support skin and bone health. Plus, they have potassium, which helps control blood pressure. Eating avocados can keep you feeling full, making them a smart choice for meals. You can add a variety of toppings to your avocado toast. Here are some ideas: - Spread hummus or cream cheese for a creamy base. - Top with sliced tomatoes or radishes for freshness. - Add a poached egg for extra protein. - Use spices like paprika or everything bagel seasoning for more flavor. - Sprinkle seeds like sunflower or pumpkin for crunch. You can mix and match these toppings to create your perfect dish. Each addition brings a new taste and vibe to your avocado toast. Check out the Full Recipe for more ideas! You now know how to make delicious avocado toast. We explored key ingredients, preparation steps, and extras like Mediterranean variations. You learned how to choose the right avocado and keep it fresh. Don't forget the creative toppings and storage tips to enjoy your toast longer. Keep experimenting with flavors and styles. Avocado toast is fun, tasty, and simple to make, so go ahead and enjoy it often!

Classic Avocado Toast Flavorful and Simple Recipe

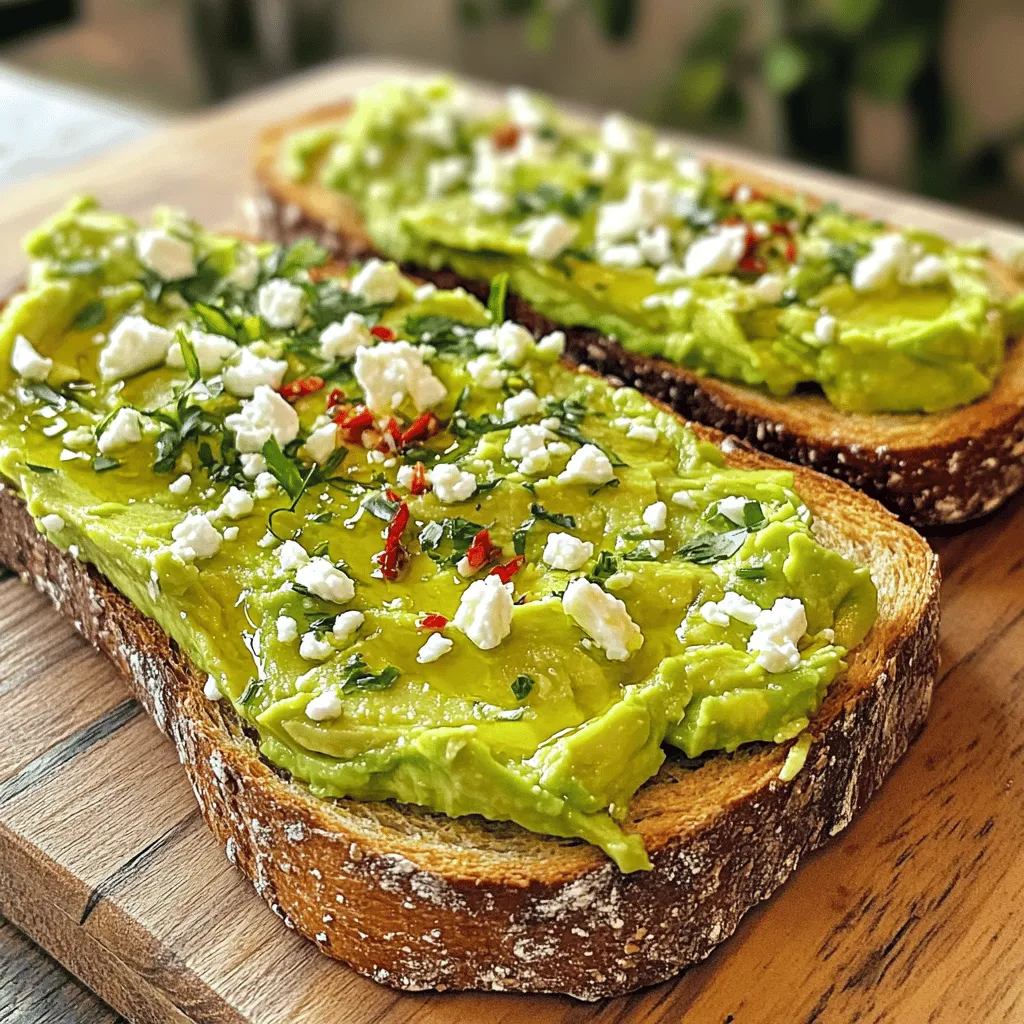
Avocado toast is a fan favorite for good reason—it’s tasty and simple! In this article, I’ll share my classic avocado

To make Salted Caramel Iced Coffee, gather these key items: - 2 cups brewed coffee, cooled - 1/2 cup milk (dairy or plant-based) - 1/4 cup caramel sauce, plus extra for drizzling - 1/4 teaspoon sea salt, plus more for garnish - Ice cubes - Whipped cream (optional) These ingredients create a creamy, sweet drink. If you want to change things up, try using cold brew coffee instead of regular coffee. It gives a smooth taste. For the milk, almond or oat milk works great too. You can also add more or less caramel sauce based on your taste. You can add fun flavors to your iced coffee. Here are some ideas: - A splash of vanilla extract for warmth - A sprinkle of cocoa powder for a chocolatey twist - A dash of cinnamon for a warm spice If you want a richer taste, consider adding flavored syrups. They can enhance your drink without much work. If you prefer not to use whipped cream, try coconut cream as a lighter option. It adds a nice flavor and keeps it creamy. To start, brew your coffee. Use your favorite method. Let it cool to room temperature. You can chill it in the fridge for faster results. Next, grab a mixing bowl or jar. Combine the cooled coffee, milk, caramel sauce, and sea salt. Stir well. Make sure the caramel mixes in fully. This gives your drink that sweet and salty flavor. Now, it’s time for some fun! Fill two tall glasses with ice cubes. Pour your salted caramel coffee mixture over the ice. Fill each glass to your desired level. If you want a little extra treat, top each glass with whipped cream. Drizzle some caramel sauce over the whipped cream. Finish with a sprinkle of sea salt. This adds a nice touch to your drink. To serve, present your iced coffee right away. Use a straw or a long spoon for stirring. This makes it easy to mix in the whipped cream and caramel. For garnish, you can add a few chocolate shavings or a sprig of mint if you like. These small touches can make your drink look fancy. Enjoy this delicious treat with your family or friends. You can find the Full Recipe for detailed instructions if needed. To make a great salted caramel iced coffee, focus on brewing methods that bring out the flavor. Here are some tips for you: - Use a French press: This method gives a rich, full taste. Just steep the coffee for four minutes, then press. - Try cold brew: It’s smooth and less bitter. Mix coarsely ground coffee with cold water. Let it steep for 12 to 24 hours in the fridge. - Opt for medium to dark roast: These beans have bold flavors that pair well with caramel. When choosing coffee beans, look for fresh, high-quality options. Here are some details: - Single-origin beans: These come from one place and have unique flavors. They can enhance your drink. - Check roast dates: Fresh beans taste better. Avoid beans more than two weeks old. - Grind size matters: For a French press, use a coarse grind. For cold brew, a coarse grind also works best. Homemade caramel sauce gives your iced coffee a special touch. Here’s how to make it right: - Start with sugar: Use granulated sugar in a pan over medium heat. Stir until it melts into a golden color. - Add butter: Once the sugar melts, add butter. Stir constantly to mix it in well. - Pour in cream: After the butter melts, slowly add heavy cream. Be careful; it may bubble. - Season with salt: A pinch of sea salt enhances the flavor. Stir well and let it cool before using. To achieve the perfect consistency, keep these tips in mind: - Too thick? Add a little water or cream to loosen it up. Heat gently if needed. - Too thin? Simmer it longer to thicken the sauce. Watch it closely to prevent burning. - Store properly: Keep your caramel in a jar in the fridge. It lasts for up to two weeks. With these tips, your salted caramel iced coffee will shine. Enjoy the rich flavors and smooth texture! For the complete recipe, check out the Full Recipe section. {{image_2}} You can have fun with flavors in your salted caramel iced coffee. Try adding a splash of vanilla extract for a sweet twist. If you love chocolate, mix in some mocha syrup. This gives your drink a rich taste. Seasonal flavors can also spice things up. During fall, add some pumpkin spice for a cozy feel. In summer, a hint of mint can refresh your drink. These variations make your iced coffee unique every time. If you follow a vegan diet, use plant-based milk. Almond, oat, or coconut milk works great. You can also make this drink dairy-free. Just stick to the plant-based options and leave out the whipped cream. For those watching sugar intake, try using sugar-free caramel sauce. This way, you can enjoy the sweet taste without the extra calories. You can still savor every sip of your iced coffee while keeping it healthy. For the full recipe, check out the Salted Caramel Iced Coffee. To keep your salted caramel iced coffee fresh, store it in a sealed container. Glass jars work well, as they do not absorb odors. Make sure the coffee is cold before sealing it. This helps maintain its rich flavor. You can store it in the fridge for up to three days. After that, the taste may fade, and it could lose its charm. You can make iced coffee ahead of time for busy days. Brew a larger batch of coffee and let it cool. Then, divide it into portions and store them in the fridge. This way, you have coffee ready to use! When you want to enjoy your drink, just mix in the milk and caramel sauce. For convenience, you can prep all your ingredients in advance. Measure out the caramel sauce and salt, so they are ready to go. This makes assembling your drink quick and easy! How do I make a stronger iced coffee? To make a stronger iced coffee, use more coffee grounds when brewing. You can also brew your coffee as a cold brew. This method brings out rich flavors. If you want a quick fix, try adding an extra shot of espresso. Can I use instant coffee for this recipe? Yes, you can use instant coffee! Just mix the instant coffee with hot water to dissolve it. Then, let it cool before adding it to your drink. Instant coffee works well when you’re short on time. Is iced coffee bad for you? No, iced coffee is not bad for you if enjoyed in moderation. It contains caffeine, which can boost your energy. However, too much caffeine can lead to jitters or trouble sleeping. It’s best to keep your intake to a moderate level. What are the health benefits of coffee? Coffee has many health benefits! It can improve focus and boost your mood. It also has antioxidants that help fight free radicals. Studies suggest coffee drinkers may have a lower risk of certain diseases. Where to buy premade salted caramel iced coffee You can find premade salted caramel iced coffee at many grocery stores. Look in the beverage aisle or the refrigerated section. Some coffee shops also offer this tasty drink, especially during summer months. Recommended brands to try Some great brands to try include Starbucks, Dunkin', and Califia Farms. They offer quality iced coffee with salted caramel flavor. Always check the label for ingredients if you have dietary needs. For a homemade touch, try the full recipe to make your own! You now have a full guide on making salted caramel iced coffee. We covered required and optional ingredients, plus helpful substitutions. The step-by-step instructions simplify brewing and serving. I shared tips for the best flavors and techniques to make caramel sauce. You explored fun variations and dietary options too. Finally, I explained storage methods and answered common questions. Enjoy making your perfect iced coffee creation!

Salted Caramel Iced Coffee Delicious and Easy Recipe

Are you ready to enjoy a delightful twist on your coffee? This Salted Caramel Iced Coffee recipe is both delicious

To make a delicious creamy coconut mango smoothie, you need a few simple ingredients. Here’s what you will need: - Ripe mango (peeled and diced) - Coconut milk (canned or fresh) - Banana (sliced) - Sweetener options (honey or maple syrup) - Greek yogurt (optional for creaminess) - Vanilla extract - Ice cubes - Pinch of salt Each of these ingredients plays an important role in creating a smoothie that is both tasty and refreshing. The ripe mango adds a sweet, fruity flavor and a vibrant color. Coconut milk gives a rich creaminess, while the banana adds smoothness and a touch of sweetness. If you want an even creamier texture, you can add Greek yogurt. It also packs in some protein, making your smoothie more filling. The vanilla extract adds a lovely aroma and enhances all the flavors. Don't forget the ice cubes! They chill your drink and make it a perfect treat on a hot day. Finally, a pinch of salt helps to balance the sweetness and brings out the flavors. Now that you know what you need, let’s blend these ingredients together for a delightful drink. For the full recipe, check out the complete details above. To start, grab your blender. First, combine the following ingredients: - 1 ripe mango, peeled and diced - 1 cup coconut milk (canned or fresh) - 1 banana, sliced - 1 tablespoon honey or maple syrup (adjust to taste) - 1/2 cup Greek yogurt (optional) - 1/4 teaspoon vanilla extract - A pinch of salt Blend these until they mix well. Next, add the ice cubes. This gives the smoothie a refreshing chill. Blend again until smooth. You want a silky texture with no lumps. After blending, check the thickness. If it seems too thick, pour in a little more coconut milk. Blend again until it reaches your desired consistency. Now, taste your smoothie. If you want it sweeter, add more honey or maple syrup. Blend once more to mix in the sweetness. Once your smoothie is perfectly blended, pour it into chilled glasses. This keeps it cool for longer. For a lovely presentation, garnish with a slice of fresh mango or a sprinkle of shredded coconut. Colorful straws can add a fun touch. Enjoy this delicious creamy coconut mango smoothie with friends or family! For the full recipe, check out the details above. To make your smoothie creamy, start with a ripe mango. Ripe mangoes are sweet and soft, adding smoothness. If you can, pick one that gives slightly when you press it. Adding Greek yogurt is another way to boost creaminess. It has a thick texture and adds protein, making your smoothie more filling. Use a high-speed blender for the best results. It blends everything evenly and quickly. If your blender has settings, use the high-speed option for a smoother blend. If you want to avoid chunks, blend for longer. Stop and scrape down the sides if needed. You can add more coconut milk if it gets too thick. You can make your smoothie even better by adding extras. Try a little ginger for a kick or some spinach for added nutrients. Both add a new taste without overpowering the mango flavor. You can also sprinkle in spices like cinnamon or nutmeg for a unique twist. These small changes make a big difference in taste. If you want the full recipe, check out the Full Recipe. {{image_2}} If you want a dairy-free smoothie, you have great choices. You can use plant-based yogurt, like almond or coconut yogurt, instead of Greek yogurt. This keeps the creaminess while making it suitable for those who avoid dairy. For milk, consider using almond milk, oat milk, or soy milk. These options provide a similar texture and flavor without any dairy. To boost nutrition, add protein powder. Whey or plant-based protein works well. You can also mix in other fruits. Pineapple adds a sweet tartness. Berries like strawberries or blueberries can enhance the flavor. They also bring extra vitamins and antioxidants. For a tropical twist, include fruits like passion fruit or kiwi. These fruits add bright colors and flavors. During the holidays, think about adding spices. A pinch of cinnamon or nutmeg can create a festive touch. This variation can make your smoothie feel special and seasonal. For the full recipe, check out the Creamy Coconut Mango Smoothie section. To keep your smoothie fresh, store it in the fridge. Use an airtight container to prevent air from spoiling it. Glass jars or plastic bottles work well. Make sure to drink it within 24 hours for the best taste. Freezing is a great option if you want to save some for later. Pour the smoothie into ice cube trays or freezer-safe bags. It can last up to three months in the freezer. When you're ready to enjoy it, thaw it in the fridge overnight or blend it straight from the freezer for a thicker drink. To keep your mangos and coconuts fresh, store them in a cool, dry place. For best flavor, buy ripe fruits. Prepping ingredients ahead of time helps too. You can cut and freeze mango or store coconut milk in the fridge to use later. This way, you can whip up your creamy coconut mango smoothie anytime! For the full recipe, check the earlier section. To make this smoothie vegan, you can swap out a few ingredients. Use plant-based yogurt instead of Greek yogurt. For the milk, choose coconut milk or almond milk. Instead of honey, try maple syrup or agave nectar for sweetness. These simple swaps keep the creamy texture while making it vegan-friendly. Yes, you can use frozen mango! Frozen mango gives your smoothie a thicker and colder texture. It may also add a slight sweetness. If you use frozen mango, you can skip the ice cubes or add less. This keeps your smoothie smooth and creamy. Coconut and mango smoothies offer many health benefits. Mango is rich in vitamins A and C. It supports your immune system and skin health. Coconut milk provides healthy fats for energy. It may also aid digestion. A typical serving of this smoothie has around 300-400 calories, depending on the added ingredients. Enjoying this refreshing drink not only satisfies your sweet tooth but also boosts your nutrition. This blog post covered everything you need to make a delicious mango smoothie. We listed the main ingredients, detailed the steps, and shared tips for perfecting texture and flavor. Remember to try different fruits and spices to find your favorite twist. Store leftovers properly and enjoy this healthy drink whenever you want. With these insights, you're ready to blend a delightful mango smoothie that can fit your taste and dietary needs. Enjoy every sip and get creative in the kitchen!

Creamy Coconut Mango Smoothie Refreshing and Sweet Blend

Ready to indulge in a delicious treat that’s both refreshing and nutritious? My Creamy Coconut Mango Smoothie is the perfect

Older posts
Newer posts
← Previous Page1 … Page66 Page67 Page68 … Page127 Next →

dsad

© 2025 Southern Dishes • Built with GeneratePress

Our Policies

  • Copyright Policy
  • Cookie Policy
  • GDPR Policy
  • Privacy Policy
  • Disclaimer
  • Terms Of Use

More Information

  • Home
  • About
  • Contact
  • Appetizers
  • Dessert
  • Dinner
  • Drinks
©2025, Southern Dishes About Back To Top