Skip to content
DisclaimerTerms Of UseGDPR PolicyCookie Policy

Southern Dishes

  • Home
  • Drinks
  • Appetizers
  • Dinner
  • Dessert
  • About
  • Contact
  • Privacy Policy
DisclaimerTerms Of UseGDPR PolicyCookie Policy

Isabella

To make easy chicken Caesar salad wraps, you need these main ingredients: - 2 cups cooked chicken breast, shredded or diced - 1 cup romaine lettuce, chopped - 1/2 cup cherry tomatoes, halved - 1/4 cup grated Parmesan cheese - 1/4 cup Caesar dressing - 4 large whole wheat tortillas - Salt and pepper to taste These ingredients come together to create a tasty and healthy meal. You can use leftover chicken or rotisserie chicken to save time. Want to boost the taste? Here are some optional ingredients: - Fresh basil or parsley for garnish - Sliced avocado for creaminess - Croutons for crunch - Extra Parmesan for richness Adding these options can make your wraps even more exciting. They add texture and flavor, making each bite enjoyable. To prepare your wraps, you will need a few simple tools: - A large mixing bowl - A cutting board - A sharp knife - Measuring cups and spoons - A clean surface for wrapping These tools help you mix and wrap your ingredients easily. Having the right tools makes cooking fun and efficient. For the full recipe, check out the recipe section. Start by taking a large bowl. Add 2 cups of cooked chicken. You can use shredded or diced chicken. Next, add 1 cup of chopped romaine lettuce. Toss in 1/2 cup of halved cherry tomatoes. Then, sprinkle in 1/4 cup of grated Parmesan cheese. Pour 1/4 cup of Caesar dressing over the top. Mix it all together gently. Make sure everything gets coated. Finally, season with salt and pepper to taste. Grab a large whole wheat tortilla. Lay it flat on your clean counter. Spoon some of the chicken Caesar salad mix into the center. Be careful not to overfill it. Fold in the sides of the tortilla first. Then, start rolling it from the bottom up. Keep it tight but not too tight. Repeat this for each tortilla until you have four wraps. For a nice touch, slice each wrap in half diagonally. This makes them easy to eat. Arrange the wraps on a serving platter. You can add some fresh basil or parsley for color. It makes the dish look more inviting. You can find the full recipe above for more details on making these tasty wraps. To make the best Chicken Caesar salad wrap, start with warm chicken. It adds flavor and makes the wrap extra tasty. Use fresh romaine for a crunchy bite. Feel free to add more cherry tomatoes if you like. They offer sweetness and color. When mixing, be gentle. You want to keep the chicken in nice pieces. If you want to prep ahead, store the salad mix and wraps separately. This keeps the wraps from getting soggy. You can make the salad mix a day in advance. Just cover it and place it in the fridge. When ready, fill the tortillas and roll them up. They take only a few minutes to make. Pair your wraps with a fresh side salad or some crunchy chips. You can also serve them with a fruit salad for a sweet touch. For drinks, iced tea or a fizzy lemonade works well. These sides make the meal fun and colorful. Enjoy your wraps and feel great about the meal! {{image_2}} You can swap out chicken for other proteins. Try grilled shrimp or turkey for a twist. For a beefy option, use steak strips. You can also add bacon bits for extra flavor. If you want to go lighter, use tofu or tempeh. To make a vegetarian wrap, skip the chicken. Use chickpeas or black beans instead. They add protein and taste great with the Caesar dressing. You can also add avocado for creaminess. Toss in some extra veggies like bell peppers or cucumbers for crunch. You can change the flavor of your wraps by adding different herbs and spices. Try a sprinkle of paprika or garlic powder for a kick. You can also mix in some hot sauce if you like heat. For a unique taste, add sun-dried tomatoes or olives. Don't forget to use the Full Recipe for the basic steps! You can keep leftover wraps in the fridge. Wrap them tightly in plastic wrap or foil. This keeps them fresh and prevents them from drying out. Store them in an airtight container for best results. They will last for up to three days in the fridge. Freezing wraps is a great way to save them for later. First, wrap each one in plastic wrap. Then, place them in a freezer bag. Remove as much air as you can before sealing. You can freeze them for up to three months. Label the bag with the date for easy tracking. To reheat your wraps, you can use a microwave or a skillet. If using a microwave, unwrap the wrap and place it on a plate. Heat for about 30 seconds to 1 minute. Check if it's warm throughout. If using a skillet, place the wrap in a heated pan. Cook each side for about 2-3 minutes until warm. This keeps the tortilla nice and soft. Enjoy your Easy Chicken Caesar Salad Wraps with the Full Recipe for a quick and tasty meal! Yes, you can use store-bought rotisserie chicken. It saves time and adds great flavor. Just shred or chop the chicken. This way, you can focus on making the wraps quickly. Plus, rotisserie chicken is already cooked, so it's perfect for a fast meal. You can try several dressings if you want a change. Ranch dressing works well and adds creaminess. A balsamic vinaigrette gives a tangy taste. You could also use Greek yogurt dressing for a healthy twist. Each choice brings a new flavor to your wraps. You can keep your wraps in the fridge for up to three days. Make sure to store them in an airtight container. This keeps them fresh and safe to eat. If you want to enjoy them later, wrap them tightly in plastic wrap. You now have a clear guide to making tasty Chicken Caesar Salad Wraps. We touched on ingredients, steps, and tips to make your wraps shine. You learned how to store leftovers and even create fun variations. Remember, these wraps are quick and fun to make. They can fit your taste and style. Enjoy experimenting with flavors and textures. You can make them your own! Keep it simple, and happy wrapping!

Easy Chicken Caesar Salad Wraps Quick and Tasty Meal

Looking for a quick and tasty meal idea? You’ve come to the right place! My Easy Chicken Caesar Salad Wraps

To make savory avocado toast with poached egg, you need fresh, quality ingredients. Here’s what you will need: - 2 slices of whole-grain or sourdough bread - 1 ripe avocado - 2 large eggs - 1 tablespoon olive oil - 1 teaspoon lemon juice - Salt and pepper to taste - 1/4 teaspoon red pepper flakes (optional) - Fresh herbs (like cilantro or chives) for garnish For the best flavor, I recommend using organic eggs and ripe avocados. Look for bread that is fresh and has no added sugars for a healthier choice. Avocados are rich in healthy fats, fiber, and vitamins. They support heart health and help keep you full. Eggs provide high-quality protein and essential nutrients like vitamin D and choline. Together, they make a nutritious meal. A typical serving size of this dish is one slice of toast topped with one poached egg. This serves two people, making it perfect for brunch or breakfast. Enjoy the balanced nutrients and flavors in each bite. To start, toast your bread until it turns golden brown and crispy. You can use a toaster or an oven. If you're using an oven, set it to 400°F and place the bread on a baking sheet. Toast for about 5-7 minutes, flipping halfway through. Now, let’s move on to poaching the eggs. Fill a small saucepan with about 3 inches of water. Heat it to a gentle simmer over medium heat. Cracking each egg into a small bowl makes it easier to slide into the water. Once the water simmers, you can add a dash of vinegar. This helps the egg whites set better. Stir the water gently to create a whirlpool. Carefully slide one egg into the center of the whirlpool. Cook for 3-4 minutes for a runny yolk. If you prefer a firmer yolk, cook a minute or two longer. After cooking, use a slotted spoon to lift the eggs out. Drain them on paper towels to remove excess water. Next, prepare the avocado. Slice it in half and remove the pit. Scoop out the flesh into a bowl. Add olive oil, lemon juice, and season with salt and pepper. Smash the avocado with a fork until it reaches your desired creaminess. Now it's time to assemble the dish. Spread the smashed avocado evenly over the toasted bread. Place one poached egg on top of each slice. For a little kick, sprinkle red pepper flakes on top. Finish with fresh herbs like cilantro or chives for garnish. For the full recipe, check out the details to create this delicious dish! To make a perfect poached egg, avoid common mistakes. First, use fresh eggs. Fresh eggs hold their shape better when cooked. Also, do not overcrowd the pot. Cook one or two eggs at a time. This keeps the eggs from sticking together. Lastly, do not let the water boil vigorously. A gentle simmer is best to keep the eggs intact. Adjust the cooking time for your yolk firmness. For a runny yolk, cook the egg for about 3-4 minutes. If you want a firmer yolk, let it cook for 5-6 minutes. Keep an eye on the eggs to hit your preference. Spices and toppings can make your dish shine. Try adding smoked paprika or garlic powder to the avocado mix. A sprinkle of these spices brings out rich flavors. You can also top your toast with feta cheese or cherry tomatoes for a burst of freshness. Pair additional ingredients with your avocado toast. Sliced radishes or arugula add crunch and spice. For a protein boost, consider adding bacon or smoked salmon. These toppings create a tasty contrast with the creamy avocado. For the full recipe, check the details above. {{image_2}} Choosing the right bread makes a big difference in avocado toast. You can use different types to suit your taste. - Gluten-free alternatives: If you need gluten-free bread, try using rice bread or almond flour bread. These options are still delicious and will hold up well under the toppings. - Flavorful bread recommendations: Sourdough and whole-grain bread are classic choices. Their crusty texture adds a nice crunch to every bite. For a twist, try rye or ciabatta. These breads bring unique flavors that pair well with avocado. Once you master the basic recipe, you can get creative with toppings. This keeps every breakfast fresh and exciting. - Unique garnishes to try: Add sliced tomatoes or radishes for crunch. You can also sprinkle feta cheese or goat cheese on top for a creamy touch. A drizzle of balsamic glaze can add a sweet and tangy flavor. - Seasonal variations based on local produce: Use fresh herbs like basil in summer or roasted squash in fall. During winter, try adding steamed kale or sautéed mushrooms. This way, you can enjoy the best produce all year round. For the full recipe, check out the [Full Recipe]. To keep your smashed avocado fresh, store it in an airtight container. Add a layer of plastic wrap directly on the surface of the avocado to limit air exposure. This helps prevent browning. Use the avocado within one day for the best flavor and texture. For poached eggs, store them in a bowl of cold water in the fridge. Cover the bowl with plastic wrap to keep them fresh. Use poached eggs within two days to enjoy their best quality. To reheat poached eggs, gently warm them in a bowl of hot water for about 5 minutes. This keeps the texture right. Avoid using a microwave, as it can make the eggs rubbery. When reheating smashed avocado, place it in a bowl and let it sit at room temperature for a few minutes. Stir lightly before serving. Always check for any off smells before eating leftovers. If unsure, it's best to toss it out. For the full recipe, check the earlier sections of this article. How do I make vegan avocado toast? To make vegan avocado toast, skip the egg. Just smash the avocado with lemon juice, salt, and pepper. Add toppings like sliced tomatoes or radishes for extra flavor. You can also use hemp seeds or nutritional yeast for added nutrition and taste. What is the best way to ripen an avocado quickly? To ripen an avocado fast, place it in a brown paper bag. The bag traps ethylene gas, speeding up the ripening process. You can also add an apple or banana to the bag for an extra boost. Check the avocado daily to see when it’s soft. What is the secret to a perfectly runny poached egg? The secret to a runny poached egg is gentle heat and timing. Use fresh eggs, as they hold their shape better. Bring water to a simmer, not a boil. Stir the water to create a whirlpool. This helps the egg white wrap around the yolk. Cook the egg for 3-4 minutes for a runny yolk. Can I prepare this dish in advance? You can prepare some parts of this dish in advance. Toast the bread and smash the avocado ahead of time. Store the avocado in an airtight container with a bit of lemon juice to prevent browning. Poached eggs are best made fresh but can be reheated gently in warm water. Enjoy your savory avocado toast with poached egg! For more details, check out the Full Recipe. In this post, we covered how to create a tasty avocado toast. We explored fresh ingredients, from avocados to eggs. You learned preparation steps for perfect toast and poached eggs. We shared tips for flawless cooking and ways to enhance flavor. Plus, we highlighted variations for breads and toppings. Remember, each step counts for that delicious meal you want. Now, go ahead and make your perfect avocado toast with confidence!

Savory Avocado Toast with Poached Egg Recipe

If you’re craving a hearty and healthy breakfast, indulge in my Savory Avocado Toast with Poached Egg recipe. It’s simple

To make this comforting dish, gather these key items: - 1 tablespoon olive oil - 1 medium onion, diced - 2 cloves garlic, minced - 3 medium carrots, sliced - 2 celery stalks, diced - 1 pound boneless, skinless chicken breasts - 6 cups chicken broth - 1 cup orzo pasta - 1 tablespoon fresh thyme leaves (or 1 teaspoon dried thyme) - 1 bay leaf - Juice of 1 large lemon - Salt and pepper to taste - 2 cups fresh spinach - Zest of 1 lemon - Chopped parsley for garnish These ingredients form the base of our soup, giving it depth and flavor. The chicken provides protein, while the veggies add texture and nutrients. Orzo pasta helps make the soup hearty and filling. You can add more fun and taste with these options: - 1 teaspoon red pepper flakes for heat - 1 cup diced tomatoes for a richer broth - Fresh herbs like dill or basil for a twist These extras can spice up the soup. Adjust based on your taste. If you lack some ingredients, don’t worry! Here are a few swaps: - Use vegetable broth instead of chicken broth for a vegetarian version. - Swap chicken breasts for rotisserie chicken for a quick option. - Try quinoa or rice if you’re out of orzo. These substitutions keep the soup tasty while fitting your pantry. Feel free to mix and match based on what you have at home. For the full recipe, check out the details and enjoy your cooking adventure! Start by gathering all your ingredients. It makes cooking easier. Heat one tablespoon of olive oil in a large pot over medium heat. Add one diced onion and sauté it for about 3-4 minutes until it turns clear. This step builds a nice base for your soup. Next, stir in two minced garlic cloves, three sliced carrots, and two diced celery stalks. Cook these for about five minutes until they soften. Now, it’s time to add the chicken. Season one pound of boneless, skinless chicken breasts with salt and pepper. Place them in the pot with the veggies. Pour in six cups of chicken broth and add a tablespoon of fresh thyme leaves and one bay leaf. Bring this mix to a boil. Once it starts boiling, lower the heat to a simmer. Cover your pot and let it cook for about 15-20 minutes. The chicken should be fully cooked by then. After cooking, remove the chicken from the pot. Use two forks to shred it into bite-sized pieces. Return the shredded chicken to the pot. Add one cup of orzo pasta and let it simmer for another 8-10 minutes. This will make the orzo tender. Finally, stir in two cups of fresh spinach, the juice of one large lemon, and the zest of one lemon. Mix until the spinach wilts. Taste your soup and adjust the salt and pepper if needed. Don't forget to remove the bay leaf before serving. For a lovely touch, serve this soup in warm bowls, garnished with chopped parsley and a lemon wedge on the side. For the complete guide, check the Full Recipe. To get the best taste in your One-Pot Lemon Chicken Orzo Soup, start with fresh ingredients. Use fresh herbs like thyme and parsley. They add a bright flavor. Sauté the onions and garlic until soft. This step builds a good base for your soup. Don’t skip the lemon juice and zest. They bring a lively taste that brightens the whole dish. Taste as you go. Adjust salt and pepper to your liking. Cooking the orzo just right is key. Add the orzo after the chicken cooks and you shred it. This keeps the orzo from getting too mushy. Simmer it for 8-10 minutes. Check if it’s tender but still firm. If you cook it too long, it will turn sticky. Stir occasionally to prevent clumping. Remember, your orzo should soak up the soup’s flavor. One common mistake is not seasoning enough. Always taste your soup as you cook. If it lacks flavor, add more salt or herbs. Another mistake is overcooking the chicken. Remove it when it’s just done, then shred it. If you leave it too long, it can dry out. Lastly, don’t forget to remove the bay leaf before serving. It’s not meant to be eaten and can spoil the taste. Follow these tips for a comforting delight in every bowl. For the full recipe, check out the complete guide above. {{image_2}} You can switch up the chicken in this soup. Try turkey or diced tofu for a fun twist. Shrimp can add a nice flavor if you're feeling adventurous. Just cook the shrimp until pink, then add them in at the end. For a vegetarian option, use chickpeas. They will give you protein without meat. Feel free to add more veggies. Zucchini and bell peppers work well. You can also toss in some peas for a sweet pop and extra color. If you like greens, kale can be a great addition. Simply chop it and add it in with the spinach. The more veggies, the better! To keep this soup dairy-free, skip any cheese and cream. You can still enjoy the soup's flavors. For gluten-free options, swap the orzo with rice or quinoa. Both will absorb the broth well and keep the soup hearty. Just adjust the cooking time to make sure they cook through. Check out the Full Recipe for more tips! To keep your lemon chicken orzo soup fresh, let it cool first. Use airtight containers for storage. You can store it in the fridge for up to three days. Make sure to label the containers with the date. This way, you know when to use it. If you want to save your soup for later, freezing is a great option. Pour the cooled soup into freezer-safe bags or containers. Leave some space at the top for expansion. It can stay in the freezer for up to three months. When you’re ready to eat, just thaw it in the fridge overnight. Reheating soup is easy and quick. You can use the stove or microwave. If using the stove, heat it on medium low until warm. Stir it often to avoid sticking. If using the microwave, heat it in 1-minute intervals. Stir in between each interval for even heating. Add a splash of water or broth if it seems thick. Enjoy your soup just like freshly made! For the full recipe, check the earlier section. Making One-Pot Lemon Chicken Orzo Soup takes about 40 minutes. You spend 15 minutes prepping and 25 minutes cooking. This quick time makes it perfect for a busy day. You can enjoy a warm bowl in no time. Yes, you can use homemade broth! Homemade broth adds a unique flavor to the soup. It can make the dish even more special. Just ensure it is well-seasoned. This way, it will blend nicely with the other flavors. To make it heartier, consider adding more veggies or beans. Diced potatoes or zucchini work well. You can also add chickpeas for protein. If you want extra flavor, toss in some diced tomatoes. These additions make the soup filling and tasty. For more ideas, check the Full Recipe for inspiration. You can easily make One-Pot Lemon Chicken Orzo Soup with the right ingredients and steps. Start with essential items like chicken, orzo, and lemon. Optional ingredients can add more taste. Follow simple steps to sauté, cook, and finish. Use helpful tips to avoid common mistakes. You can change proteins or veggies for fun variations. Store leftovers well, and use my freezing tips for later meals. Enjoy making this soup! It's tasty, easy, and perfect for any meal.

One-Pot Lemon Chicken Orzo Soup Comforting Delight

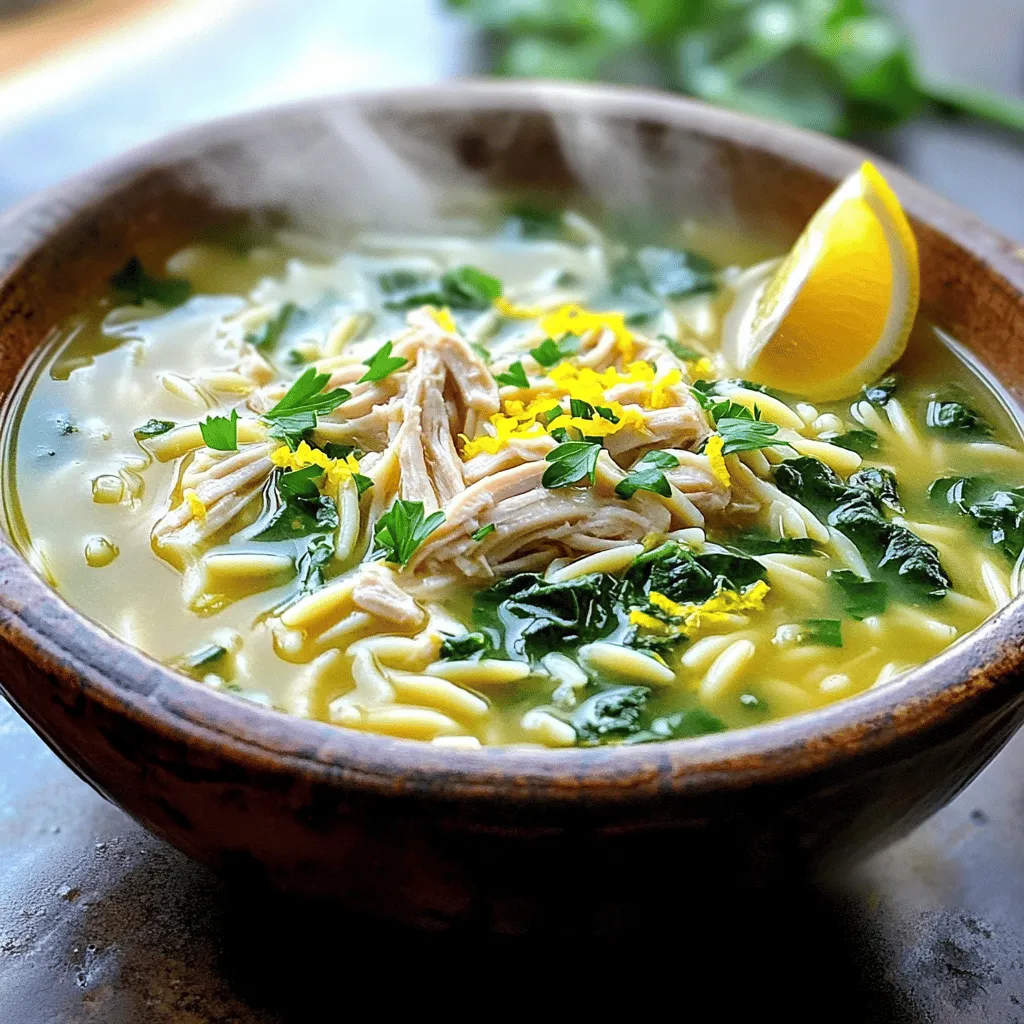
Craving a warm, tasty meal that’s easy to make? Let me introduce you to my One-Pot Lemon Chicken Orzo Soup.

- Chicken: 2 chicken breasts, thinly sliced - Vegetables: 4 cups green cabbage, 1 red bell pepper, 1 cup carrots, 3 green onions - Aromatics: 3 cloves garlic, 1 tablespoon ginger - Sauces and Oils: 3 tablespoons low-sodium soy sauce, 1 tablespoon sesame oil, 1 tablespoon olive oil, 1 tablespoon rice vinegar - Seasoning: Salt, pepper, sesame seeds for garnish Gathering your ingredients is key to a great stir fry. I love to use fresh chicken. Thin slices cook quickly and stay juicy. The green cabbage adds a nice crunch. I find red bell pepper adds a sweet touch. Carrots give color and a bit of sweetness, too. Green onions bring a fresh taste. Don't forget the aromatics! Garlic and ginger make this dish smell amazing. They add depth and flavor. For sauces, I always use low-sodium soy sauce. It gives that savory flavor without too much salt. Sesame oil adds richness, while rice vinegar gives a hint of tang. Finally, I like to season with salt and pepper. A sprinkle of sesame seeds finishes it off nicely. These ingredients come together to create a quick and tasty meal. {{ingredient_image_1}} 1. Heating the oil and cooking the chicken Start by heating the olive oil in a large skillet over medium-high heat. Let it shimmer, then add the thinly sliced chicken. Season it with salt and pepper. Cook the chicken for about 5-7 minutes until it turns golden and is no longer pink. Remove the chicken and set it aside. 2. Adding garlic and ginger In the same skillet, add the minced garlic and grated ginger. Stir quickly for about 30 seconds. This helps to bring out their lovely flavors. Be careful not to let them burn. 3. Stir-frying the vegetables Next, toss in the shredded cabbage, red bell pepper slices, and julienned carrots. Stir-fry these colorful veggies for 5-6 minutes. You want them to be tender, but still crisp. This adds a nice texture to your dish. 1. Returning chicken to skillet Now it’s time to bring back the cooked chicken. Add it back into the skillet with the veggies. 2. Adding sauces and mixing Pour in the low-sodium soy sauce, sesame oil, and rice vinegar. Toss everything together until well-coated. Cook for about 2-3 more minutes to heat everything through. This is where the magic happens! 1. Garnishing with green onions and sesame seeds Once everything is well-mixed and heated, remove the skillet from the heat. Sprinkle the chopped green onions and sesame seeds on top. This gives your Chicken Cabbage Stir Fry a fresh look and extra crunch. Enjoy your meal! To achieve perfectly sautéed chicken in your stir fry, follow these steps: - Use thinly sliced chicken breasts for quick cooking. - Heat olive oil until it shimmers before adding the chicken. - Season your chicken with salt and pepper for added flavor. - Cook the chicken for about 5-7 minutes, ensuring it turns golden brown. For crisp vegetables, remember these points: - Stir-fry on high heat for quick cooking. - Add the vegetables after the chicken is cooked. - Cook cabbage, bell pepper, and carrots for about 5-6 minutes. - Stir constantly to keep them tender yet crisp. To boost the flavors in your Chicken Cabbage Stir Fry, consider these spices and ingredients: - Add red pepper flakes for heat. - Toss in a splash of oyster sauce for depth. - Use fresh herbs like cilantro for a fresh kick. Experiment with different oils for varied flavors: - Try avocado oil for a mild taste. - Peanut oil adds a nice nutty aroma. - Coconut oil brings a tropical twist. For side dishes, pair your stir fry with: - Steamed jasmine rice for a classic touch. - Quinoa for a healthy twist. - Noodles for a heartier meal. For garnishes, consider these options: - Chopped green onions for a fresh crunch. - Sesame seeds for a nutty finish. - A squeeze of lime for brightness. Pro Tips Cut Chicken Evenly: For even cooking, ensure the chicken breasts are sliced uniformly. This helps them cook at the same rate, preventing some pieces from being overcooked while others are undercooked. Don’t Overcrowd the Pan: When sautéing, avoid overcrowding the skillet. This can cause the chicken to steam rather than brown, resulting in less flavorful meat. Use Fresh Veggies: For the best texture and flavor, use fresh vegetables. They will maintain their crunch and vibrant color during the stir-fry process. Customize Your Sauce: Feel free to adjust the sauce ingredients according to your taste. Add a dash of chili sauce for heat or a touch of honey for sweetness to enhance the flavor profile. {{image_2}} If you want to change up the protein, shrimp or tofu are great choices. Shrimp cooks fast and adds a nice flavor. Just sauté it until it’s pink, then add the veggies. Tofu is a great plant-based option. Press it first to remove extra water. Then, cut it into cubes and sauté until golden. Both options work well with the same sauces. Stir fries are super flexible with veggies. You can use broccoli, snap peas, or bell peppers. Try adding zucchini or mushrooms for more texture. Carrots and cabbage give sweetness and crunch, but mix it up! Use whatever you have on hand. Just make sure to cut them into bite-sized pieces for even cooking. If you need gluten-free options, use tamari sauce instead of soy sauce. It has a similar taste without the gluten. For a low-carb version, skip the rice vinegar and use more fresh veggies. You can also add cauliflower rice instead of regular rice. This keeps the dish light but still full of flavor. To store Chicken Cabbage Stir Fry, let it cool first. Place it in an airtight container. This keeps the dish fresh and tasty. You can store it in the fridge for up to three days. If you want to keep it longer, freezing is a good option. To reheat, use a skillet over medium heat. Add a splash of water or broth. This helps keep the dish moist. Stir it often until heated through. You can also use the microwave. Heat in short bursts, stirring in between. This keeps the flavor intact and avoids overcooking. Yes, you can freeze Chicken Cabbage Stir Fry. It’s best to freeze it in portions. Use freezer-safe bags or containers. Remove as much air as possible to prevent freezer burn. To thaw, place it in the fridge overnight. You can also use the microwave for a quick thaw. Can I make Chicken Cabbage Stir Fry ahead of time? Yes, you can prepare Chicken Cabbage Stir Fry ahead of time. Cook it fully, let it cool, and store it in an airtight container in the fridge. It stays fresh for up to 3 days. When you're ready to eat, just reheat it in a pan or microwave. Is Chicken Cabbage Stir Fry healthy? Absolutely! This dish is packed with lean protein and fresh veggies. Chicken provides protein, while cabbage, bell peppers, and carrots offer vitamins and fiber. Using low-sodium soy sauce and healthy oils makes it even better for you. How can I make this recipe spicier? To add some heat, mix in red pepper flakes or sliced jalapeños. You can also use sriracha or chili paste in the sauce. Start with a small amount, then increase based on your spice preference. What can I use instead of soy sauce? If you need a soy sauce substitute, try tamari or coconut aminos. Both options are lower in sodium and gluten-free. You can also use a mix of balsamic vinegar and water for a different flavor. Can I use pre-packaged coleslaw mix? Yes, using pre-packaged coleslaw mix is a great time-saver. It usually contains shredded cabbage and carrots, making it a quick swap for the fresh veggies in the recipe. Just make sure to check for any added sauces or preservatives. What type of pan is best for stir frying? A wok is ideal for stir frying. It allows even heat and quick cooking. If you don’t have one, a large skillet works too. Make sure it has high sides to prevent spills. Can I cook this dish in a slow cooker? While stir fry is best on high heat, you can adapt it for a slow cooker. Cook the chicken and veggies on low for 4-6 hours. However, your veggies will be softer than in a stir fry. For a quicker method, I recommend using a stovetop for that crisp texture. This blog post shared a simple yet flavorful Chicken Cabbage Stir Fry recipe. You learned about all the key ingredients, the easy steps for cooking, and tips to enhance the dish. I also covered how to store leftovers, variations, and answered common questions. Remember, you can switch up the proteins or veggies to suit your taste. Cooking can be fun and simple, so get creative in the kitchen! Enjoy your delicious stir fry and share your experience with others.

Chicken Cabbage Stir Fry Flavorful and Simple Meal

If you’re looking for a quick, yummy meal, let me introduce you to Chicken Cabbage Stir Fry. This tasty dish

To make my lemon poppy seed muffins, gather these simple ingredients: - 1 ½ cups all-purpose flour - ½ cup granulated sugar - 2 teaspoons baking powder - ½ teaspoon baking soda - ½ teaspoon salt - Zest of 2 lemons - ½ cup buttermilk (or milk + 1 teaspoon vinegar) - 1/3 cup vegetable oil - 2 large eggs - 2 tablespoons fresh lemon juice - 2 tablespoons poppy seeds - Optional: Glaze (1 cup powdered sugar + 2 tablespoons lemon juice) These ingredients create a bright and zesty flavor. The lemon zest adds freshness, while the poppy seeds give a fun crunch. Using buttermilk helps keep the muffins moist and fluffy. If you want a sweeter treat, consider making the optional glaze. It adds a lovely finish and extra flavor. Each ingredient plays a role in making these muffins a delightful snack or breakfast treat. You can find the full recipe details to help guide you through the process. 1. Preheat your oven and prepare the muffin tin Start by preheating your oven to 350°F (175°C). This helps the muffins bake evenly. While the oven warms, take a muffin tin and line it with paper liners or lightly grease each cup. This keeps the muffins from sticking. 2. Mixing dry ingredients In a large bowl, combine 1 ½ cups of all-purpose flour, ½ cup of granulated sugar, 2 teaspoons of baking powder, ½ teaspoon of baking soda, ½ teaspoon of salt, and the zest of 2 lemons. Whisk these together until everything is well mixed. This creates a base for your muffins. 3. Combining wet ingredients In another bowl, mix ½ cup of buttermilk, 1/3 cup of vegetable oil, 2 large eggs, 2 tablespoons of fresh lemon juice, and 2 tablespoons of poppy seeds. Stir until smooth. These ingredients add moisture and flavor to your muffins. 1. Combining wet and dry mixtures Pour the wet ingredients into the dry mixture. Gently stir until just combined. The batter will be a bit lumpy, which is perfectly fine. Avoid overmixing; this keeps your muffins light and fluffy. 2. Filling muffin cups Fill each muffin cup about 2/3 full with the batter. This gives them room to rise while baking. 3. Baking time and checking for doneness Place the muffin tin in the preheated oven. Bake for 15-18 minutes. To check if they are done, insert a toothpick into the center of a muffin. If it comes out clean, they are ready. 1. Cooling muffins in the tin Once baked, let the muffins cool in the tin for about 5 minutes. This step helps them firm up and makes them easier to remove. 2. Optional glaze preparation For a sweet touch, mix 1 cup of powdered sugar with 2 tablespoons of lemon juice. Drizzle this glaze over the cooled muffins. It adds a lovely shine and extra flavor! Try this full recipe to enjoy these tasty treats. To ensure your muffins are perfect, avoid overmixing. When you mix the wet and dry ingredients, stir gently. Stop as soon as you see no dry flour. This keeps your muffins light and fluffy. Overmixing can make them tough. For the muffins to rise well, fill each cup about two-thirds full. This gives them space to grow without overflowing. Always preheat your oven to 350°F (175°C). A hot oven helps the muffins rise quickly. If you don't have buttermilk, you can use regular milk. Just add one teaspoon of vinegar to the milk and let it sit for five minutes. This will mimic buttermilk's tangy flavor. Choose fresh lemons for the best taste. Look for lemons that are firm and heavy for their size. Quality poppy seeds matter too. Fresh seeds have a nutty flavor that enhances the muffins. Pair these muffins with tea or coffee for a delightful treat. They also go well with yogurt or fresh fruit. To keep your muffins fresh, store them in an airtight container. They last up to three days at room temperature. If you want them to last longer, freeze them. Just make sure they cool completely before freezing. For a quick snack, warm them in the microwave for a few seconds. For the full recipe, check the details in the article. {{image_2}} For those who need gluten-free options, you can use gluten-free flour blends. These blends often have a mix of rice flour, tapioca starch, and potato starch. They can replace all-purpose flour in equal amounts. Just check that your blend contains xanthan gum or add a teaspoon for better texture. You can make these muffins vegan by swapping eggs and dairy. Use flaxseed meal mixed with water as an egg substitute. For each egg, mix 1 tablespoon of flaxseed meal with 2.5 tablespoons of water. Let it sit for a few minutes to thicken. Replace buttermilk with almond milk mixed with a teaspoon of lemon juice for a tangy taste. If you want extra flavor, consider adding blueberries or raspberries. These fruits pair well with lemon and add nice color. Try adding a teaspoon of vanilla extract or a pinch of cardamom for a unique twist. You could also mix in some chopped nuts for added crunch. Each of these options can elevate your muffins to a new level. For the full recipe, check out the Sunny Lemon Poppy Seed Muffins section. Store your lemon poppy seed muffins at room temperature. Keep them in an airtight container for up to three days. This helps maintain their soft texture. If you want to keep them longer, refrigeration is an option. However, it may change their texture. You can also wrap them in plastic wrap before placing them in the fridge. Freezing is a great way to keep muffins fresh. Wrap each muffin in plastic wrap tightly. Then, place them in a freezer-safe bag or container. Make sure to remove as much air as possible. This helps prevent freezer burn. You can freeze them for up to three months. When you’re ready to enjoy one, simply take it out and let it thaw at room temperature. To reheat muffins, use your oven for the best taste. Preheat it to 350°F (175°C). Place the muffins on a baking sheet. Heat them for about 10 minutes. If you're in a hurry, you can use the microwave. Heat each muffin for about 15-20 seconds. This warms them up without drying them out. Enjoy your fresh and flavorful treat! For the full recipe, check the previous sections. Yes, you can use whole wheat flour. However, it will change the texture. Whole wheat flour makes the muffins denser and adds a nutty flavor. To keep them light, try using half all-purpose flour and half whole wheat flour. This mix gives you the best of both worlds. Homemade muffins can last about 3 to 5 days at room temperature. Keep them in an airtight container to maintain freshness. If you want them to last longer, store them in the fridge. This can extend their life to about a week. Buttermilk adds moisture and a slight tang to the muffins. It helps activate the baking soda, creating a lighter texture. If you don’t have buttermilk, you can make a substitute. Mix regular milk with a teaspoon of vinegar. This makes a great stand-in for buttermilk. In this blog post, I covered the essential ingredients for lemon poppy seed muffins, step-by-step baking instructions, and helpful tips for success. I also explored variations for different diets and how to store your muffins. Remember, baking is fun and creative. With the right ingredients and techniques, your muffins can shine. Enjoy your baking journey, and don't hesitate to experiment with flavors and forms! Your perfect lemon poppy seed muffin awaits.

Lemon Poppy Seed Muffins Fresh and Flavorful Treat

Looking for a bright and tasty snack? Lemon Poppy Seed Muffins are the perfect treat! These muffins burst with fresh

To make these salted caramel pretzel bars, you'll need some simple yet delicious ingredients. Here’s what you’ll need: - 2 cups crushed pretzels - 1 cup unsalted butter, melted - 3/4 cup brown sugar, packed - 1 cup granulated sugar - 1 cup sweetened condensed milk - 2 cups chocolate chips (semi-sweet or dark) - 1 teaspoon vanilla extract - Sea salt for sprinkling Each ingredient plays a key role in creating that perfect blend of sweet and salty. The crushed pretzels give a lovely crunch. The melted butter binds everything together. Brown sugar adds deep flavor and sweetness. Granulated sugar helps the caramel layer shine. Sweetened condensed milk ensures a creamy texture. Chocolate chips bring richness, while vanilla enhances the overall taste. Finally, a sprinkle of sea salt ties it all together. You can find the full recipe to see how these ingredients work together to make a delightful treat. First, preheat your oven to 350°F (175°C). This helps the bars bake evenly. Next, prepare an 8x8-inch baking dish by lining it with parchment paper. Leave some paper hanging over the edges. This makes it easy to lift the bars out later. Now, take a large bowl. Mix 2 cups of crushed pretzels with 1 cup of melted butter. Make sure the pretzels are fully coated. Once mixed, press this mixture firmly into the bottom of the dish. This forms a solid crust for your bars. In a medium saucepan, combine 3/4 cup of brown sugar, 1 cup of granulated sugar, and 1 cup of sweetened condensed milk. Cook this mixture over medium heat. Stir it constantly until the sugars dissolve. Bring the mixture to a gentle boil. Let it boil for about 3-4 minutes without stirring. After boiling, remove the pan from heat. Stir in 1 teaspoon of vanilla extract until it’s well mixed. Now, pour this caramel sauce over the pretzel crust. Spread it evenly to cover the crust completely. In the same saucepan, or another if needed, melt 2 cups of chocolate chips over low heat. Stir continuously for about 2-3 minutes until smooth. Be careful not to burn the chocolate. Once melted, pour the chocolate over the caramel layer. Spread it evenly with a spatula. To finish, sprinkle sea salt over the top. This adds a nice salty flavor. Let the bars cool for 10-15 minutes at room temperature. Then, transfer them to the fridge for at least 1 hour to set completely. For the full recipe, refer to the instructions above. Enjoy making your salted caramel pretzel bars! To make these salted caramel pretzel bars great, mix the pretzels and melted butter well. You want each pretzel piece coated. This helps form a nice crust. Press the mixture firmly into the dish. A firm base keeps your bars from falling apart. For the caramel sauce, stir continuously while it cooks. This prevents burning and helps it become smooth. Cook until it bubbles gently for 3-4 minutes. This time is key for getting that rich flavor. Adjust the sea salt to match your taste. I love a good sprinkle. It brings out the sweet flavor of the caramel and chocolate. Start with a little and add more if you like it saltier. Use quality chocolate for the topping. Good chocolate melts better and tastes richer. I recommend semi-sweet or dark chocolate chips. They blend well with the caramel and pretzel crunch. For a stunning look, drizzle more melted chocolate on top after cooling. This adds a nice touch and makes them look fancy. Arrange the bars on a decorative platter. A pretty plate makes them more inviting. Serve them at parties or for special occasions. You can even add a sprinkle of sea salt on top for extra flair. For the full recipe, check the earlier section. Enjoy your baking! {{image_2}} You can elevate your salted caramel pretzel bars in many ways. One fun option is to add nuts. Chopped pecans or walnuts give a nice crunch and extra flavor. You can also drizzle caramel sauce on top for more sweetness. Experiment with different types of chocolate, too. Dark chocolate adds richness, while milk chocolate offers a sweeter taste. Each choice changes the overall flavor. If you need gluten-free options, use gluten-free pretzels. They taste just as good and keep the texture. For those who prefer vegan items, swap regular chocolate with vegan chocolate options. These swaps help everyone enjoy the bars without worry. Make your bars special for the seasons! For holidays, add festive toppings like colored sprinkles or crushed candy canes. You can also infuse the caramel with seasonal spices. For fall, a pinch of cinnamon or nutmeg warms the flavor. This makes your bars festive and fun to share. To keep your salted caramel pretzel bars fresh, store them in airtight containers. This prevents air from making them stale. I suggest cutting the bars into squares first. This makes it easy to grab a treat whenever you want one. Keep the bars in the refrigerator. This helps maintain their soft texture and flavor longer. The cool air keeps the caramel from getting too gooey. Enjoy them cold or let them sit at room temperature for a bit. These bars stay fresh for about five days at room temperature. If you don’t eat them all, you can freeze them. Wrap each bar tightly in plastic wrap, then place them in a freezer bag. This method keeps them tasty for up to three months. When you're ready to enjoy a bar, just thaw it in the fridge overnight. This keeps the texture just right. For the full recipe, check out the link. Yes, you can make these bars ahead of time. They store well in the fridge. I suggest making them a day or two in advance. Just keep them in an airtight container to keep them fresh. They taste great after chilling. You can also freeze them for up to three months. Just wrap them tightly in plastic wrap and foil. When you want to enjoy them, thaw them in the fridge overnight. If your chocolate layer breaks, don’t worry! You can fix it easily. Start by melting more chocolate chips in a saucepan over low heat. Stir gently until smooth. Pour this melted chocolate over the broken layer. Use a spatula to spread it evenly. Let it cool and set again. This should cover up any cracks and make it look good as new! Yes, you can use other sweeteners if needed. For a lower-calorie option, try using stevia or monk fruit sweetener. If you prefer natural sugars, consider maple syrup or honey. Just remember that these sweeteners may change the texture slightly. Adjust the amounts based on your taste. Always taste as you go! In this post, we covered how to make delicious pretzel bars. We outlined key ingredients like crushed pretzels and chocolate chips. You learned easy steps to create the crust, caramel, and chocolate layers. Helpful tips showed you how to perfect flavor and texture. We also explored fun variations and storage tips to keep your treat fresh. In my view, these bars are both simple and enjoyable to make. Try them out and share your own twists!

Salted Caramel Pretzel Bars Irresistible Treat Recipe

Get ready to indulge in a sweet and salty delight with my Salted Caramel Pretzel Bars! This easy treat hits

For a tasty berry chia pudding parfait, you need simple, healthy ingredients. Here’s what you will need: - 1 cup almond milk (or any milk of choice) - 1/4 cup chia seeds - 2 tablespoons maple syrup (or honey) - 1 teaspoon vanilla extract - 1 cup mixed berries (strawberries, blueberries, raspberries) - 1/2 cup granola - Fresh mint leaves for garnish These ingredients combine to create a creamy and fruity treat. The chia seeds soak up the almond milk, making a thick pudding. The maple syrup adds just the right sweetness. You can make this parfait your own by adding optional ingredients. Here are some ideas: - Yogurt for extra creaminess - Coconut flakes for a tropical twist - Nuts for crunch - Other fruits like bananas or peaches Feel free to mix and match. Your parfait can be as unique as you are. Berry chia pudding parfaits are not just delicious; they are also healthy. Here are some key points: - Chia seeds are high in fiber and omega-3 fatty acids. - Berries are packed with vitamins and antioxidants. - Almond milk is low in calories and dairy-free. This treat not only satisfies your sweet tooth but also fuels your body. Eating this parfait can help you feel good inside and out. For the full recipe, check out the instructions above. To make the chia pudding, start by mixing the almond milk, chia seeds, maple syrup, and vanilla extract in a bowl. Whisk it all together until it is smooth. Cover the bowl and place it in the fridge. Let it chill for at least four hours or overnight. This allows the chia seeds to soak up the milk and thicken. After chilling, stir the pudding well to break any clumps. Your chia pudding is now ready! Grab some clear serving glasses or bowls. Start by adding a layer of chia pudding to each glass. Then, add a handful of mixed berries on top. Next, sprinkle a layer of granola. Repeat the layers until you fill the glass. Finish with a bright layer of berries on top. This creates a beautiful and tasty treat. For a lovely touch, garnish each parfait with fresh mint leaves. This adds color and a fresh flavor. Serve the parfaits right away for the best taste. If you want, you can also serve them with a side of extra granola. It adds a nice crunch. For the full recipe, check the section above! To get the best texture for your berry chia pudding, use the right ratio of chia seeds and liquid. I recommend 1/4 cup of chia seeds to 1 cup of almond milk. This mix creates a thick, creamy pudding. Stir well right after mixing. After chilling, give it another stir to break up clumps. This step ensures smoothness in every bite. One common mistake is not letting the pudding sit long enough. Chia seeds need time to absorb liquid. I suggest at least four hours or overnight for the best results. Another mistake is using too much sweetener. Start with two tablespoons of maple syrup, then adjust if needed. Lastly, avoid using the wrong type of milk. Almond milk works well, but you can use any milk you like. To enhance the flavor, try adding spices like cinnamon or nutmeg to your pudding mix. You can also layer in yogurt for creaminess. For presentation, use clear glasses to show off the layers. Add fresh mint on top for a pop of color. You can also drizzle honey or maple syrup over the top to make it look even more inviting. For the full recipe, check out the instructions above. {{image_2}} You can switch almond milk for any milk you enjoy. Options include oat milk, coconut milk, or soy milk. Each type brings its own flavor and texture. If you want a creamier pudding, try full-fat coconut milk. If you prefer a lighter choice, go with oat milk. Maple syrup is great, but you can use other sweeteners too. Honey adds a nice touch, but you can also try agave syrup. If you want a no-calorie option, use stevia or monk fruit. Just remember, the sweetness level can change based on what you choose. Mixed berries are always a hit, but feel free to get creative! You can use strawberries, blueberries, or raspberries alone. Try blackberries for a deeper taste or even sliced peaches for a summer vibe. The more variety, the more fun your parfaits become! Each fruit adds unique flavors and colors, making your dish even more appealing. You can find the full recipe for Berry Chia Pudding Parfaits to explore these fun variations. To keep your chia pudding fresh, store it in airtight containers. This will prevent it from absorbing unwanted smells. Glass jars work well, as they are easy to clean and don’t stain. Always label your containers with the date. This way, you’ll know when you made it. Berry chia pudding can last in the fridge for about 5 days. After that, the texture may change, and it might not taste as fresh. If you notice any odd smells or colors, it’s best to toss it. You can freeze chia pudding for up to 3 months. Portion it into smaller containers or ice cube trays for easy thawing. When you’re ready to eat, move it to the fridge overnight. This will help it thaw slowly. Remember, the texture may change slightly after freezing, but the taste will still be great. Enjoy your berry chia pudding parfaits from the [Full Recipe] anytime! To make Berry Chia Pudding Parfaits vegan, swap the milk. Use almond milk or coconut milk instead of dairy milk. For sweetening, choose maple syrup instead of honey. This keeps your dessert plant-based and tasty. Yes, you can use frozen berries. They work well in the parfaits. Just thaw them before adding. This makes the berries softer and easier to layer. Frozen berries are also a great option when fresh ones aren't available. Serve chia pudding in clear glasses or jars. This shows off the pretty layers. You can use a spoon to scoop it out easily. Add fresh berries and granola on top for a nice crunch. You can prepare these parfaits a day ahead. Just layer the pudding, berries, and granola in jars. Store them in the fridge until you're ready to serve. This saves time and makes for a quick treat. Check the [Full Recipe] for more tips! Berry chia pudding parfaits are a fun and healthy treat. We covered the main ingredients, how to prepare them, and tips for a perfect texture. Customization allows you to fit your taste. Remember to store your parfaits well for freshness. Avoid common mistakes to enjoy them fully. You can make them vegan or use frozen berries if you like. Try all the variations to keep things interesting. Enjoy your healthy dessert!

Berry Chia Pudding Parfaits Simple and Tasty Treat

Looking for a tasty and healthy treat? You’re in the right place! Berry Chia Pudding Parfaits are easy to make

To create your Easy Caprese Skewers, you'll need a few simple, fresh ingredients. Here’s what to gather: - 1 pint cherry tomatoes - 8 oz fresh mozzarella balls (bocconcini) - Fresh basil leaves - 2 tablespoons balsamic glaze - 1 tablespoon extra virgin olive oil - Salt and pepper to taste - Skewers (4 to 6 inches in length) Each ingredient plays a key role in this dish. The cherry tomatoes bring a sweet burst of flavor, while the mozzarella adds creaminess. Fresh basil gives a bright, aromatic note. Balsamic glaze adds a tangy finish, and the olive oil enriches the overall taste. Salt and pepper enhance the flavors, making them pop. Using fresh ingredients is vital for the best taste. I always choose ripe tomatoes and high-quality mozzarella. This ensures your skewers are not just easy to make but also delicious. You can find all these items at your local market or grocery store. For the complete preparation, check out the Full Recipe. Enjoy making these delightful skewers! 1. Washing and drying the ingredients: Start with fresh cherry tomatoes and basil. Rinse them under cold water to remove any dirt. Use a paper towel to pat them dry. This step is key for taste and texture. 2. Assembling the skewers: order of ingredients: Grab your skewers. Thread one cherry tomato on the skewer first. Next, add a basil leaf. Follow that with a mozzarella ball. Repeat this pattern until the skewer is full. Leave some space at each end for easy handling. Aim for two to three sets per skewer for balance. 3. Drizzling with olive oil and balsamic glaze: Once your skewers are ready, place them on a nice serving platter. Drizzle with extra virgin olive oil. Add balsamic glaze for a sweet touch. This adds flavor and makes them look beautiful. Sprinkle salt and pepper to enhance the taste. - Plating techniques for presentation: To impress your guests, stand the skewers in a tall glass or a small jar filled with fresh basil. This creates a stunning display. You can also drizzle more balsamic glaze on the plate for extra flair. - Ideal serving temperature: Serve your skewers right away for the best taste. They can sit in the fridge for an hour if needed. The flavors will blend nicely, but they taste best fresh! Enjoy these Easy Caprese Skewers as a quick and tasty appetizer that everyone will love. For the complete recipe, check out the Full Recipe. - Choosing the right mozzarella and tomatoes: Use fresh, high-quality mozzarella balls, like bocconcini. Select ripe cherry tomatoes for the best flavor. Look for tomatoes that are firm but slightly soft to touch. - Optimal seasoning suggestions: A drizzle of extra virgin olive oil adds richness. Use balsamic glaze for sweetness and acidity. Don’t forget a pinch of salt and pepper to enhance the flavors. - How to avoid common assembly mistakes: Make sure to thread the ingredients tightly but leave space at each end. This helps when serving. Don’t overcrowd the skewer; aim for 2-3 sets of each item. - Creative serving ideas: Place skewers in a tall glass or jar filled with fresh basil. This not only looks nice but also keeps them upright. You can also lay them across a platter for a casual setting. - Garnishing for a polished look: Drizzle extra balsamic glaze on the plate to create a beautiful design. You can add a few fresh basil leaves around the skewers for a pop of color. Enjoy these tips as you prepare your Easy Caprese Skewers! For a detailed guide, check out the Full Recipe. {{image_2}} You can play with the Easy Caprese Skewers by using different cheeses. Instead of mozzarella balls, try feta or goat cheese. These cheeses add a unique flavor that pairs well with tomatoes and basil. You can also add seasonal vegetables to the skewers. Cherry peppers, zucchini, or even grilled eggplant work great. These veggies add color and taste. They make the skewers more filling and fun. If you need vegetarian options, rest easy. The basic recipe is already vegetarian. Just skip the cheese if you're dairy-free. For gluten-free eaters, these skewers are perfect! They have no bread or grains. If you're avoiding dairy, choose vegan cheese or skip it entirely. Feel free to explore and make these skewers your own! For the full recipe, check out the Easy Caprese Skewers section. To keep your Easy Caprese Skewers fresh, store them in the fridge. Place them in a sealed container to avoid moisture loss. You can also cover them with plastic wrap. This keeps the flavors intact and the ingredients fresh. I don’t recommend freezing these skewers. The moisture in the tomatoes and cheese can change their texture. Freezing might make them mushy when thawed. It’s best to enjoy them fresh! In the fridge, these skewers last about 2 days. After that, the ingredients lose their crispness and flavor. Watch for signs of spoilage. If the tomatoes look wrinkled or the cheese feels slimy, it’s time to toss them. Fresh basil will also turn brown and wilt. Always trust your senses when checking food! How long do Easy Caprese Skewers take to make? Easy Caprese skewers take just 10 minutes to make. You can wash, assemble, and serve them in no time. This quick prep makes them perfect for busy days or last-minute guests. Can I make them ahead of time? Yes, you can make these skewers ahead of time. Assemble them an hour before your event. Just keep them in the fridge. This gives the flavors a chance to mix nicely. What can I pair with Caprese skewers for a party? Caprese skewers pair well with a variety of foods. Try serving them with crusty bread or charcuterie. You can also add dips like pesto or hummus for more flavor. Fresh fruit, like melon or berries, makes a nice contrast too. Check out the Full Recipe for more ideas! Easy Caprese Skewers are simple to make and tasty to enjoy. You start with fresh ingredients like cherry tomatoes and mozzarella, then follow easy steps to put them together. Remember to choose the best produce and add your favorite seasonings. These skewers are versatile. You can customize them for different diets and store any leftovers properly. Enjoy making them for any occasion. With these tips and ideas, your Caprese skewers will impress everyone!

Easy Caprese Skewers Quick and Tasty Appetizer

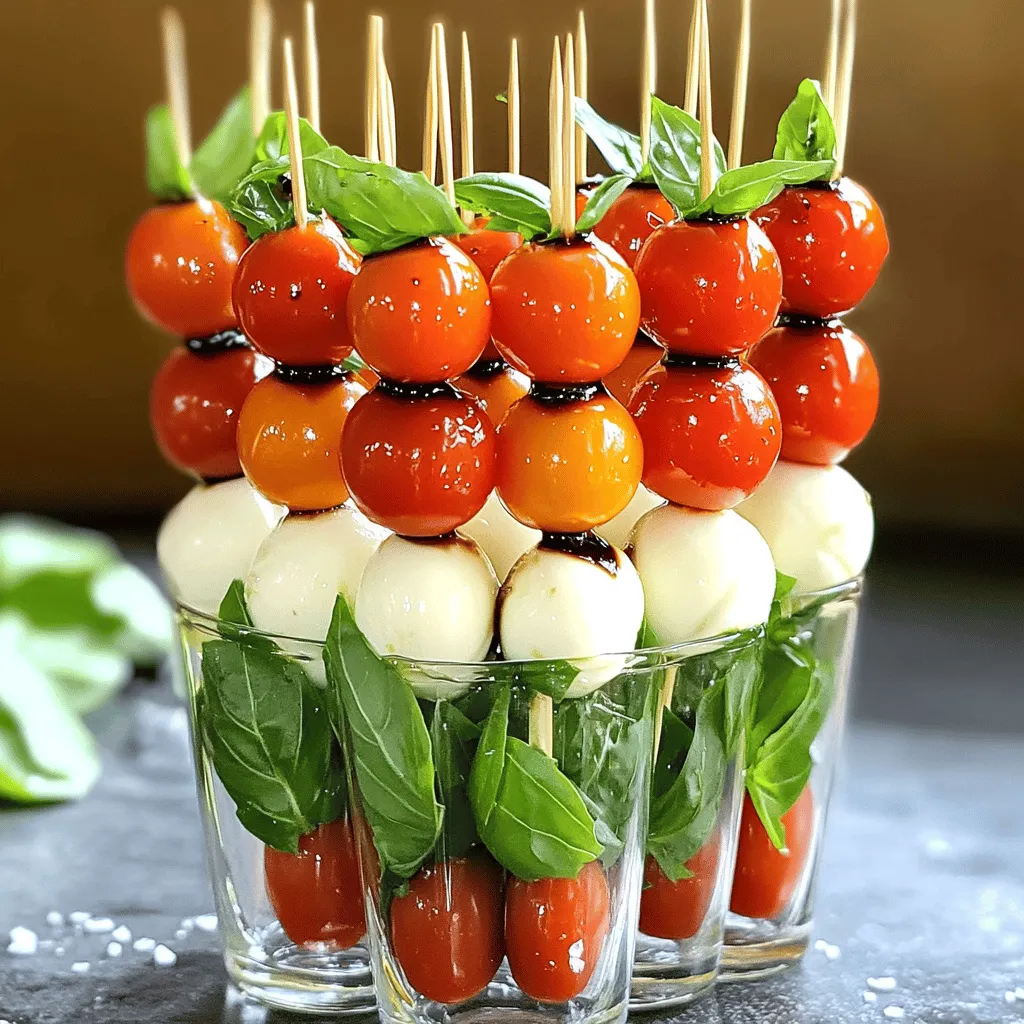
Looking for a quick appetizer that impresses? Easy Caprese Skewers are your answer! This fresh, tasty dish combines cherry tomatoes,

- 1 large head of cauliflower - 1 cup all-purpose flour - 1 cup water or plant-based milk - 1 teaspoon garlic powder - 1 teaspoon smoked paprika - 1/2 teaspoon salt - 1 cup buffalo sauce - 1 tablespoon olive oil To create Buffalo cauliflower bites, you need a few main ingredients. Start with a large head of cauliflower. Cut it into small florets. This helps the bites cook evenly and get crispy. Next, mix flour and water or plant-based milk. This makes a batter that sticks to the cauliflower. Garlic powder, smoked paprika, and salt add great flavor. Finally, you need buffalo sauce and olive oil to coat the bites and give them that spicy kick. - Celery sticks for serving - Ranch dressing for dipping While not required, celery sticks are great for serving. They add crunch and freshness. Ranch dressing is a popular dip for these bites. It cools the heat from the buffalo sauce. You can serve these bites with both for a fun snack experience. For the full recipe, follow the steps carefully for the best results. 1. Preheat your oven to 450°F (230°C). This high heat helps get those bites crispy. 2. Line a baking sheet with parchment paper. This makes for easy cleanup. 3. In a large bowl, mix together: - 1 cup all-purpose flour - 1 cup water or plant-based milk - 1 teaspoon garlic powder - 1 teaspoon smoked paprika - 1/2 teaspoon salt Whisk until smooth and well combined. 4. Take each cauliflower floret and dip it into the batter. Shake off any extra batter. This ensures an even coating. 5. Place the coated florets on the prepared baking sheet. Spread them out so they bake evenly. 6. Bake the cauliflower for 20 minutes. They should look crispy and golden brown when done. 7. While the cauliflower bakes, grab a large bowl. Combine: - 1 cup buffalo sauce - 1 tablespoon olive oil Mix well until combined. 8. Once the cauliflower bites are baked, take them out of the oven. Toss them in the buffalo sauce mixture until fully coated. 9. Return the sauced cauliflower bites to the baking sheet. Bake for another 10 minutes. This step helps set the sauce. 10. Remove from the oven and let them cool for a minute before serving. For the full recipe, check out the earlier section. Enjoy these crispy and flavorful Buffalo Cauliflower Bites! You can prepare Buffalo Cauliflower Bites in three ways: baking, frying, or air frying. - Baking is my go-to method. It gives a nice crunch without added oil. - Frying yields a crispy texture but adds more calories. It’s great for a special treat. - Air frying is a fantastic option if you want a crispy bite with less oil. Each method has its perks, so choose what works best for you. Achieving crispy bites is key to enjoying Buffalo Cauliflower Bites. Here are my tips: - Ensure your batter is thick enough to coat the florets well. If it's too runny, they won’t crisp up. - Bake until the batter is golden brown. This step is crucial for that perfect crunch. A good texture makes all the difference in every bite. To boost the flavor, I love adding extra herbs or spices to the batter. Here are a few ideas: - Garlic powder adds warmth. - Smoked paprika gives a nice depth. For heat, adjust the buffalo sauce. You can use mild sauce for a lighter kick or extra hot for a fiery bite. Remember, you control the spice! For the full recipe, check out the detailed instructions and enjoy your cooking adventure! {{image_2}} You can change up the coating for your Buffalo Cauliflower Bites. If you want a gluten-free option, use almond flour or chickpea flour. For a dairy-free choice, stick with plant-based milk for the batter. You can also swap buffalo sauce for BBQ sauce for a sweet twist. For a rich flavor, try garlic butter instead of buffalo sauce. To make a cheesy version, sprinkle shredded cheese over the bites before the final bake. You can also mix in other veggies, like broccoli or bell peppers, with the cauliflower. This gives a nice crunch and more nutrients. Pair your bites with celery sticks and ranch dressing, which adds coolness to the heat. You can also serve them with a yogurt dip for a fresh taste. If you have leftovers, think about making wraps or salads. Just toss the bites into a tortilla or over greens for an easy meal. For the full recipe, check out the complete guide. To keep your Buffalo Cauliflower Bites fresh, store them in the fridge. Place them in an airtight container. This way, they will last up to three days. If you want to keep them longer, freezing is a great option. Just make sure they are fully cooled. Spread them out on a baking sheet first. Freeze them for about an hour. Then, transfer them to a freezer-safe bag. They can last for about three months in the freezer. For the best texture, reheat your Buffalo Cauliflower Bites in the oven. Preheat your oven to 350°F (175°C). Place the bites on a baking tray and cover them with foil. Heat for about 10 to 15 minutes. This method helps them stay crisp. If you want to avoid sogginess, skip the microwave. Microwaving can make them soft and mushy. Stick to the oven for a nice crunch! Buffalo Cauliflower Bites stay fresh in the fridge for about 3 to 5 days. Store them in an airtight container. This keeps them crispy and tasty for longer. If you want to keep them even longer, consider freezing them. Just remember that freezing may change their texture a bit. Yes, you can prep these bites ahead of time. You can make the batter and coat the cauliflower earlier in the day. Store them in the fridge until you are ready to bake. This way, your snack is quick to finish. You can also bake them fully and reheat before serving. Just make sure to store them properly in an airtight container. Buffalo Cauliflower Bites can be spicy, but you can adjust the heat. For milder bites, use less buffalo sauce or mix it with a little honey. If you want more kick, add more sauce or use a hotter sauce. This way, you can make them just right for your taste! Buffalo cauliflower bites are a tasty, fun snack that anyone can enjoy. We covered the main ingredients, steps to prepare, and tips for cooking. You can customize flavors or even serve them in wraps. Remember, storage is easy, with options for both the fridge and freezer. Enjoy experimenting with this dish, and don’t hesitate to try different sauces or spices. These bites are sure to please your palate and make any meal special. Get cooking and savor this delicious treat!

Buffalo Cauliflower Bites Crispy and Flavorful Snack

Are you craving a tasty snack that packs a punch? Buffalo Cauliflower Bites are the perfect combination of crispy and

- 1 pound sirloin steak, cut into bite-sized cubes - 4 tablespoons unsalted butter - 4 cloves garlic, minced - 1 tablespoon fresh rosemary, chopped - 1 tablespoon fresh parsley, chopped - Salt and pepper to taste - 1 teaspoon crushed red pepper flakes (optional for heat) The main ingredients are simple and delicious. Sirloin steak offers great flavor and tenderness. The unsalted butter adds a rich, creamy touch. Garlic gives you that aromatic kick. Fresh rosemary and parsley bring a burst of color and zest. You can adjust salt, pepper, and red pepper flakes to suit your taste. Choosing the right cut of steak is key. Sirloin is a great choice because it is tender yet affordable. It cooks quickly, making it perfect for steak bites. You can also try ribeye or tenderloin for a richer flavor. If you want a leaner option, flank steak works well too. Each cut adds its own unique taste and texture. You'll need a few essential tools to cook these steak bites. A heavy skillet or cast iron pan is best for searing. This helps create a nice crust on the steak. A good pair of tongs is helpful for turning the meat. You’ll also need a sharp knife for cutting the steak. Make sure to have a cutting board and measuring spoons ready. For the full recipe, check out the details above. To prepare the steak for searing, start by cutting the sirloin into bite-sized cubes. Make sure the pieces are even. This helps them cook at the same time. Next, pat the steak dry with paper towels. This step is very important. A dry surface allows the steak to sear better. If the steak is wet, it will steam instead of sear. Now, it’s time to sear the steak. Heat 2 tablespoons of butter in a large skillet over medium-high heat. Once the butter is melted and bubbling, add the steak cubes in a single layer. Avoid overcrowding the pan. If you add too many pieces, they won’t brown well. Sear the steak for about 2-3 minutes on each side. You want a nice brown crust. Once done, remove the steak from the pan and set it aside. Lower the heat to medium after removing the steak. Add the remaining 2 tablespoons of butter and minced garlic to the same skillet. Sauté the garlic for about 1 minute. You want it fragrant, but not browned. After that, return the steak bites to the skillet. Toss them in the garlic butter for 1-2 minutes. This adds great flavor. Finally, mix in chopped rosemary, parsley, and crushed red pepper flakes if you like some heat. Taste the dish and adjust seasoning with salt and pepper if needed. For the full recipe, check out the Full Recipe section. To cook steak bites well, start with dry meat. Drying helps create a nice crust. Season the steak with salt and pepper for flavor. Use high heat to sear the meat quickly. Avoid cooking too many pieces at once. This lets each piece brown nicely. Overcrowding the pan causes steaming, which you want to avoid. Cook in batches if needed. For a great presentation, serve the garlic butter steak bites on a wooden board. Add fresh herbs on top for color. You can also use toothpicks for easy eating. Pair the steak bites with garlic-mashed potatoes or a simple salad. These sides balance the rich flavor of the steak. You can also serve them with crusty bread to soak up the garlic butter. To elevate your steak bites, consider adding some blue cheese crumbles. They add a rich, tangy flavor. Sautéed mushrooms also work well with garlic butter. For dipping sauces, try a spicy aioli or a classic horseradish sauce. These add a fun twist to the dish. You can also sprinkle some Worcestershire sauce for extra depth. For the full recipe, check the link provided. {{image_2}} You can use many cuts of steak for garlic butter steak bites. Sirloin is great, but you can also try filet mignon or ribeye. Each cut brings its own flavor and texture. If you want a leaner option, flank steak works well too. For those who prefer chicken, you can adapt this recipe. Simply cut chicken breast into bite-sized pieces and follow the same steps. The garlic butter sauce will still shine! If you like heat, there are easy ways to spice things up. You can add crushed red pepper flakes for warmth, or try cayenne pepper for extra kick. Want more flavor? Consider adding chili powder or smoked paprika. If you enjoy heat, you can also use spicy herbs like fresh jalapeños or serrano peppers. Just remember to taste as you go! Herbs can change the flavor of your garlic butter steak bites. While rosemary and parsley are classic, you can try fresh thyme or oregano for a twist. If you want a bolder taste, fresh basil works great too. You can also use dried herbs if fresh ones are not available. Just remember to use less dried herbs, as they are stronger in flavor. Experiment to find your favorite mix! For the detailed cooking steps, check out the Full Recipe. After you make garlic butter steak bites, let them cool down. Store them in an airtight container. This keeps the flavor fresh. You can enjoy the leftovers for up to three days. If you don’t finish them, it’s best to refrigerate soon after serving. To freeze garlic butter steak bites, first, let them cool completely. Place the bites in a single layer on a baking sheet. Freeze for about an hour, then transfer them to a freezer-safe bag. Make sure to remove as much air as possible. For the best taste, use them within three months. To reheat frozen steak bites, thaw them overnight in the fridge. Heat a skillet over medium heat. Add a little butter or oil, then cook the bites for about 5-7 minutes. This helps them regain their juicy texture. For the best storage, use glass or BPA-free plastic containers. These keep the steak bites fresh and tasty. Vacuum sealing is also a great option. It removes air and prevents freezer burn. If you don’t have a vacuum sealer, regular airtight containers work fine too. Just ensure they are tightly closed. To check if your steak bites are done, use a meat thermometer. Aim for 130°F for medium-rare and 140°F for medium. If you don't have a thermometer, look for browning on the outside. The inside should still be pink but warm. - Insert the thermometer into the thickest part of a piece. - Cut one steak bite in half to check the color. - Remember, steak will continue to cook after you remove it from the heat. Yes, you can prepare garlic butter steak bites ahead of time. Cook them fully, then let them cool. Store in an airtight container in the fridge for up to three days. To reheat, warm them in a skillet over low heat. Add a bit of butter to keep them juicy. - Cook, cool, and store in an airtight container. - Reheat in a skillet with a little butter. - Enjoy within three days for the best taste. Garlic butter steak bites pair well with many sides. Try garlic mashed potatoes or a fresh salad. You can also serve them with rice or roasted vegetables. For a fun twist, use toothpicks and serve as appetizers. - Garlic mashed potatoes for creaminess. - Fresh salad for a light crunch. - Rice or roasted veggies for balance. To get a great crust, pat the steak bites dry before cooking. This helps them sear better. Use high heat and don’t overcrowd the pan. Sear each side for 2-3 minutes until brown. - Dry the steak well with paper towels. - Use a hot pan and do not crowd. - Sear each side to develop a crust. In this blog post, I covered how to make delicious garlic butter steak bites. We explored essential ingredients and tools needed to prepare the dish. I shared detailed steps for preparing, searing, and making the garlic butter sauce. You learned tips for the best texture, along with variations and storage options. Remember, great steak bites start with quality meat and good techniques. Enjoy experimenting with flavors and serving ideas. Your cooking can impress anyone at the table!

Garlic Butter Steak Bites Flavorful and Simple Recipe

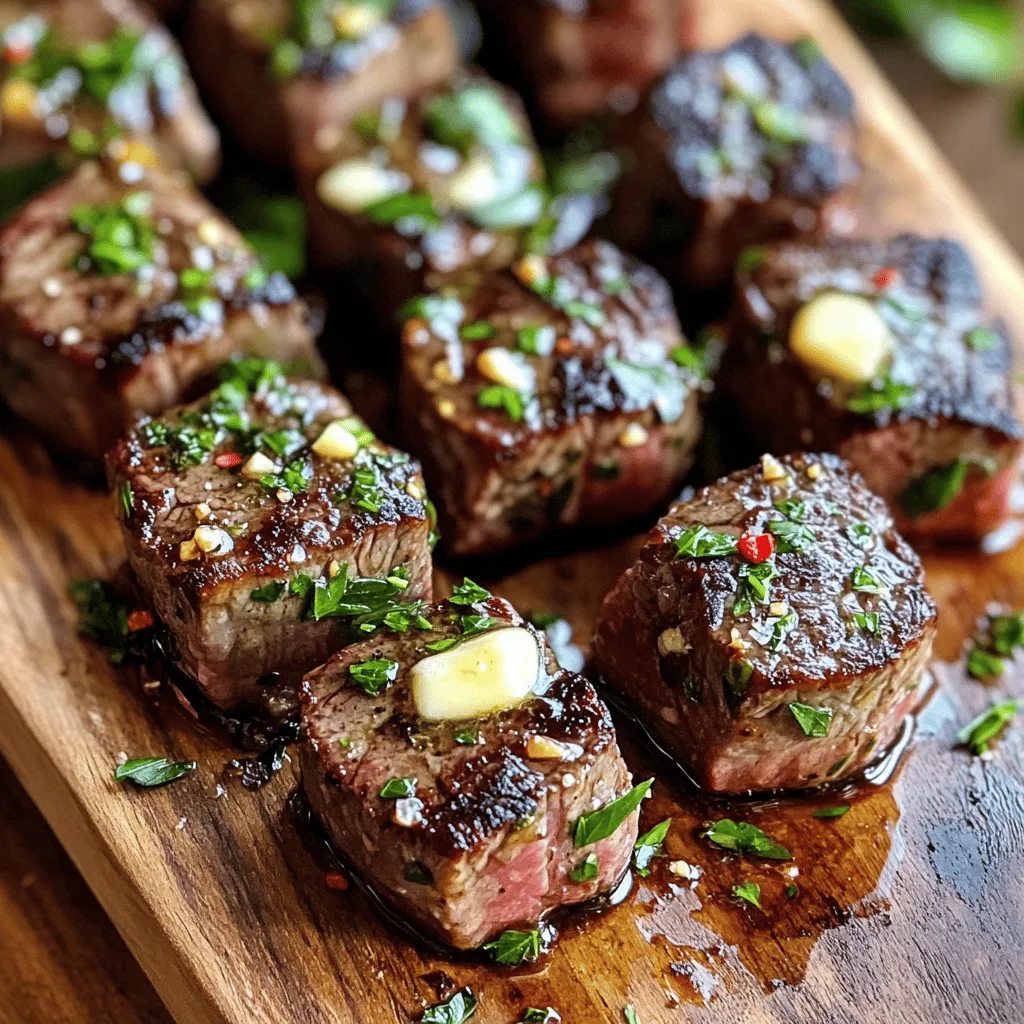
If you’re craving something delicious and quick, you’re in for a treat! Garlic Butter Steak Bites offer mouth-watering flavor in

Older posts
Newer posts
← Previous Page1 … Page62 Page63 Page64 … Page127 Next →

dsad

© 2025 Southern Dishes • Built with GeneratePress

Our Policies

  • Copyright Policy
  • Cookie Policy
  • GDPR Policy
  • Privacy Policy
  • Disclaimer
  • Terms Of Use

More Information

  • Home
  • About
  • Contact
  • Appetizers
  • Dessert
  • Dinner
  • Drinks
©2025, Southern Dishes About Back To Top