Cottage Cheese Brownie Batter Dip Simple and Tasty
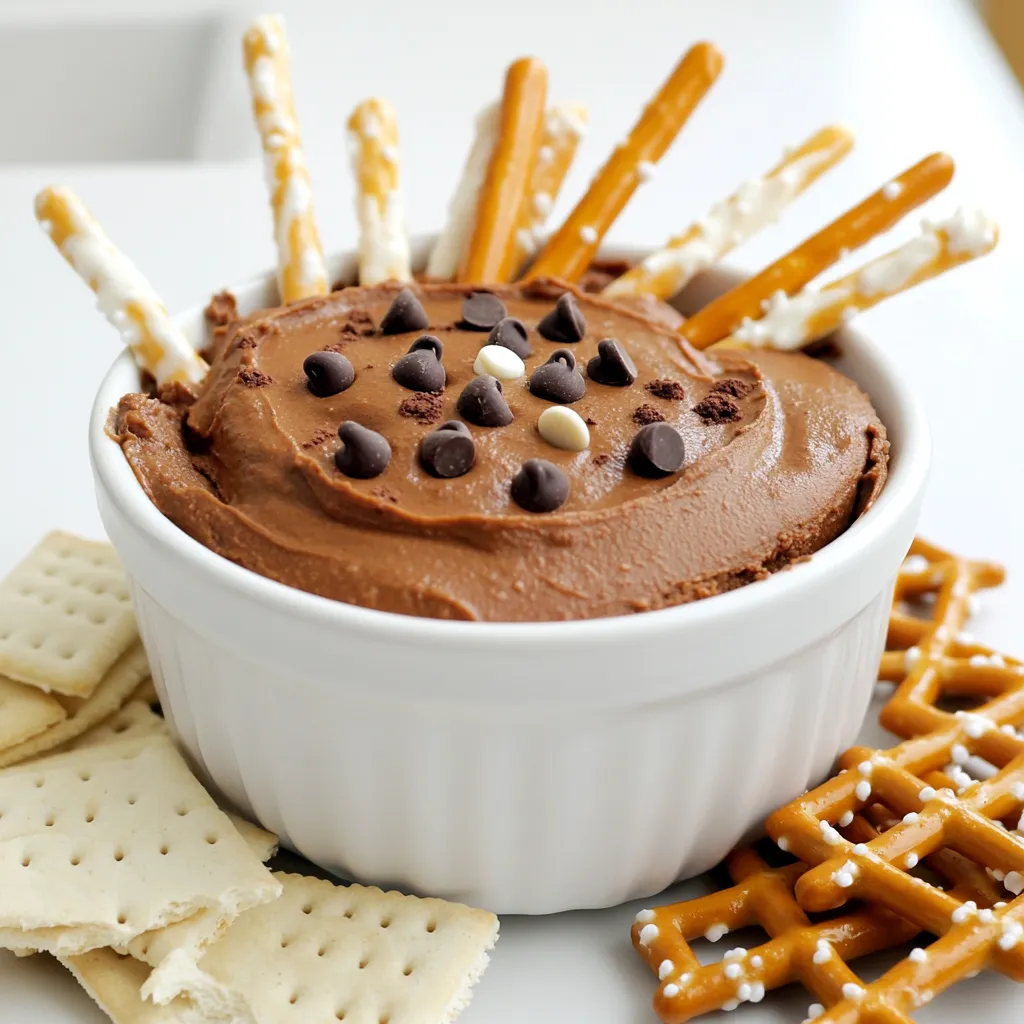
If you’re craving a sweet treat that’s simple to make, I’ve got the perfect recipe for you! This Cottage Cheese
If you’re craving a sweet treat that’s simple to make, I’ve got the perfect recipe for you! This Cottage Cheese

Are you ready for a meal that’s quick, tasty, and easy to make? My Garlic Butter Gnocchi Skillet is just

Get ready to transform your dinner game with Slow Cooker Beef Barbacoa Tacos! This dish packs bold flavors into every
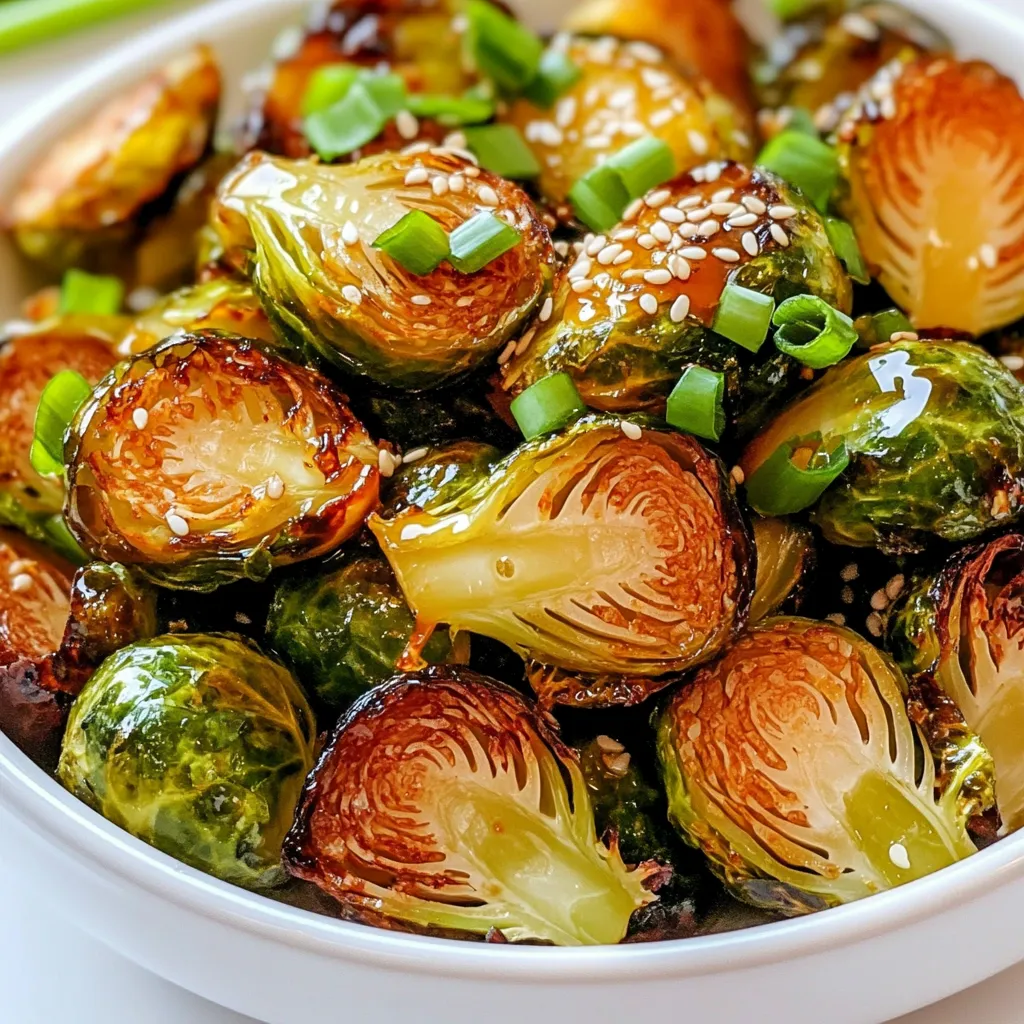
Ready to transform your Brussels sprouts? This Air Fryer Honey Garlic Brussels Sprouts Delight is here to impress! You’ll get
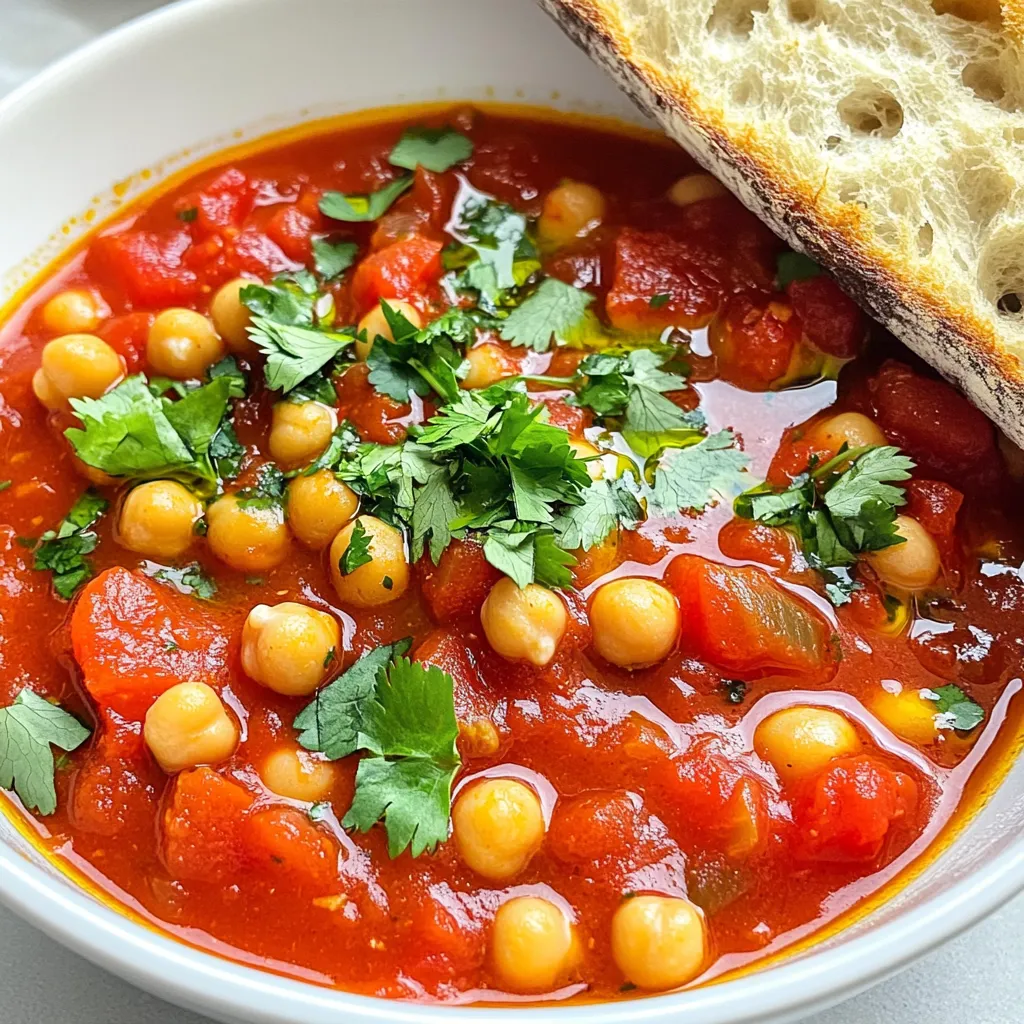
Are you ready to heat up your dinner routine with a hearty, flavorful dish? My Spicy Tomato Chickpea Stew is

Cranberry Orange Scones with Glaze are a delightful treat that brightens any morning. With fresh cranberries and zesty orange, they
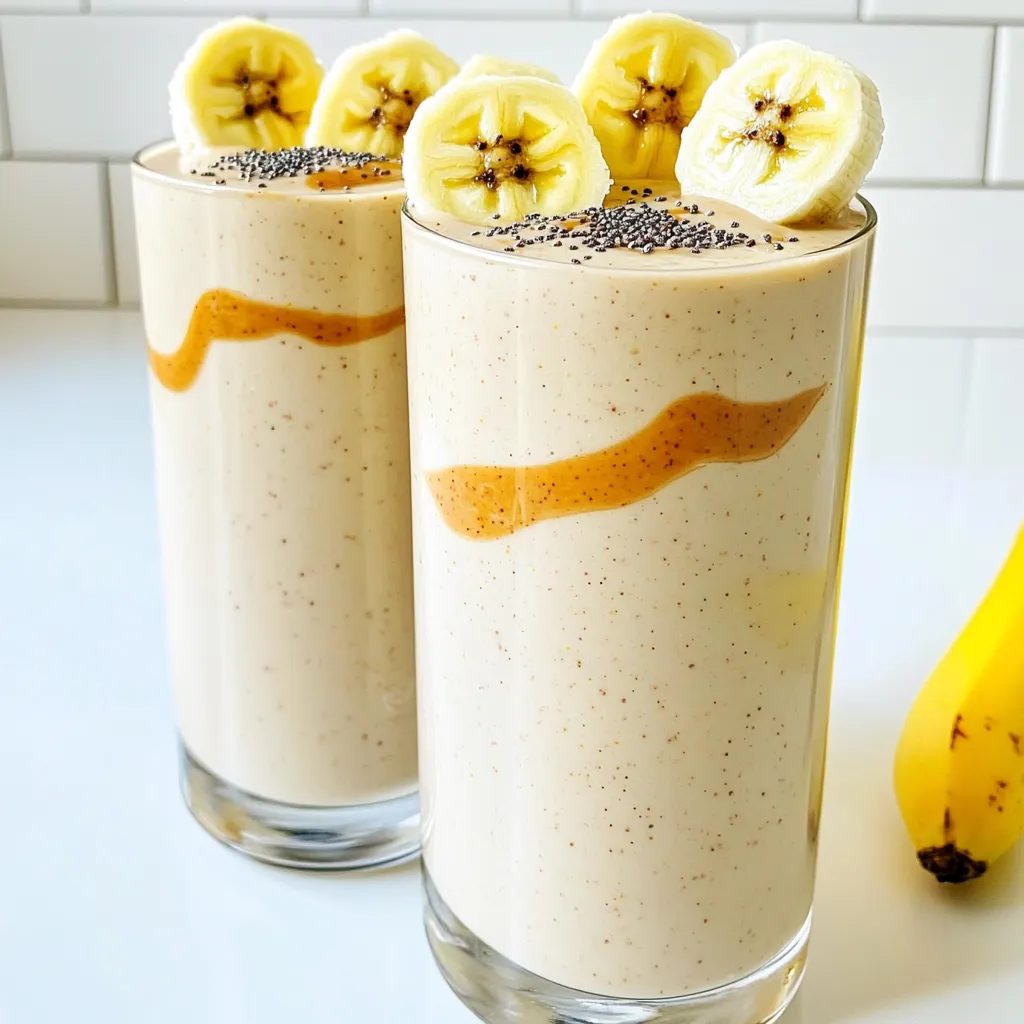
Are you ready to start your day with a burst of energy? My Protein Peanut Butter Banana Smoothie is a
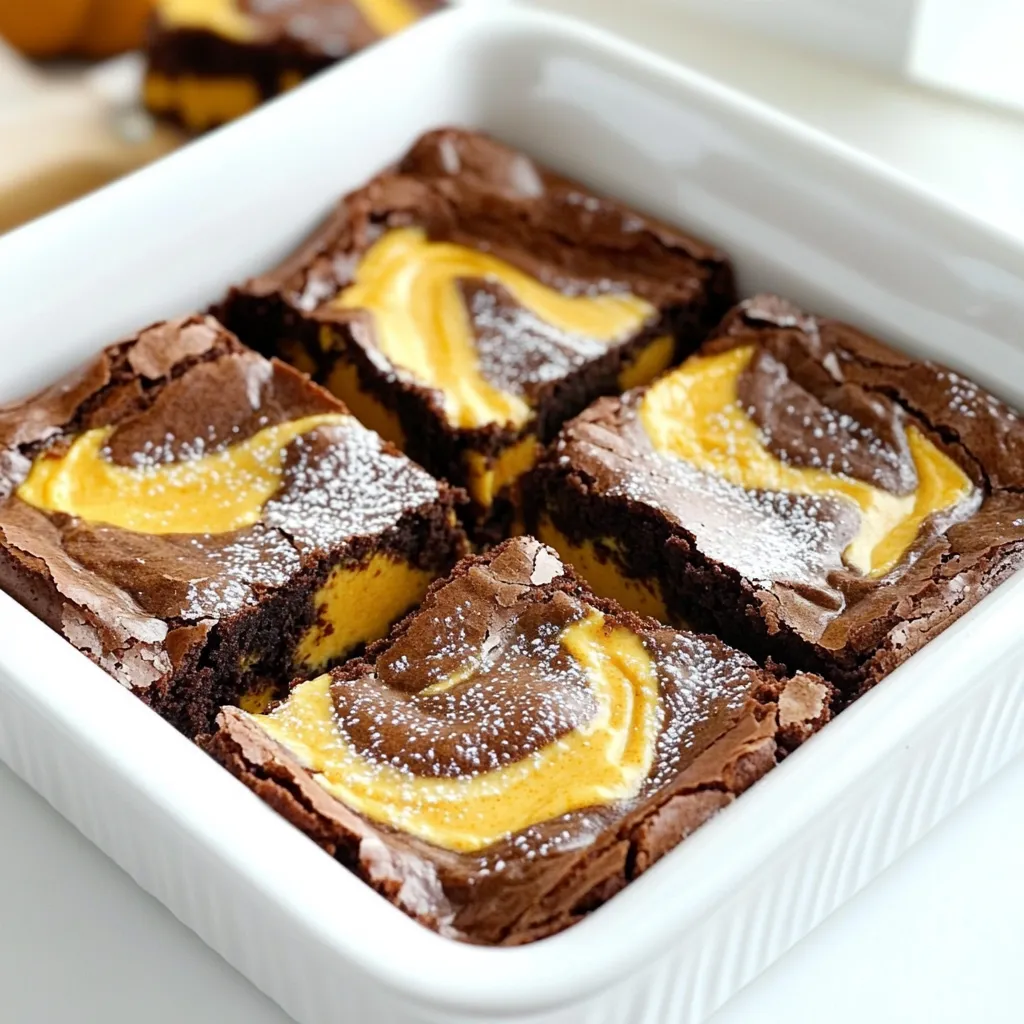
Craving a fall treat that combines rich chocolate with creamy pumpkin? You’re in for a delight! These Pumpkin Cheesecake Swirl
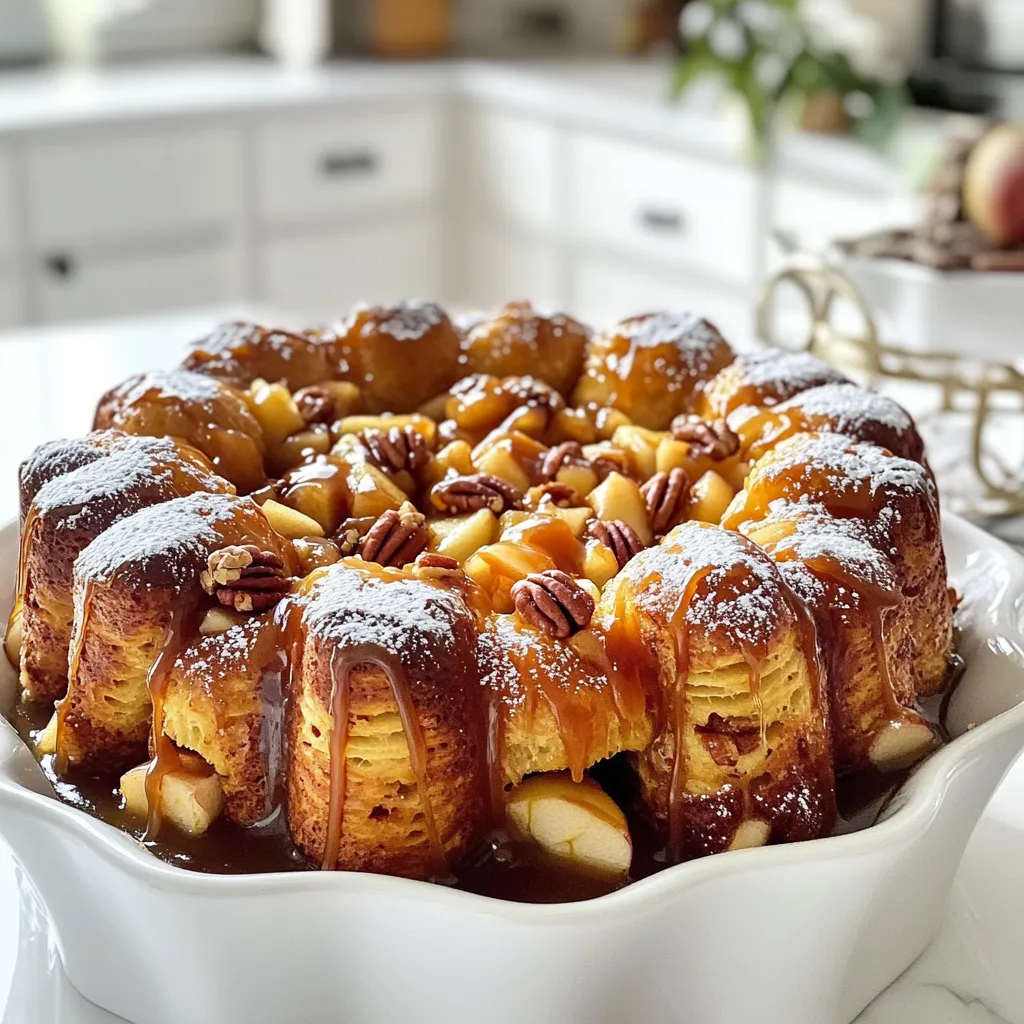
Fall is here, and that means it’s time for a sweet treat! My Caramel Apple Monkey Bread combines warm, gooey
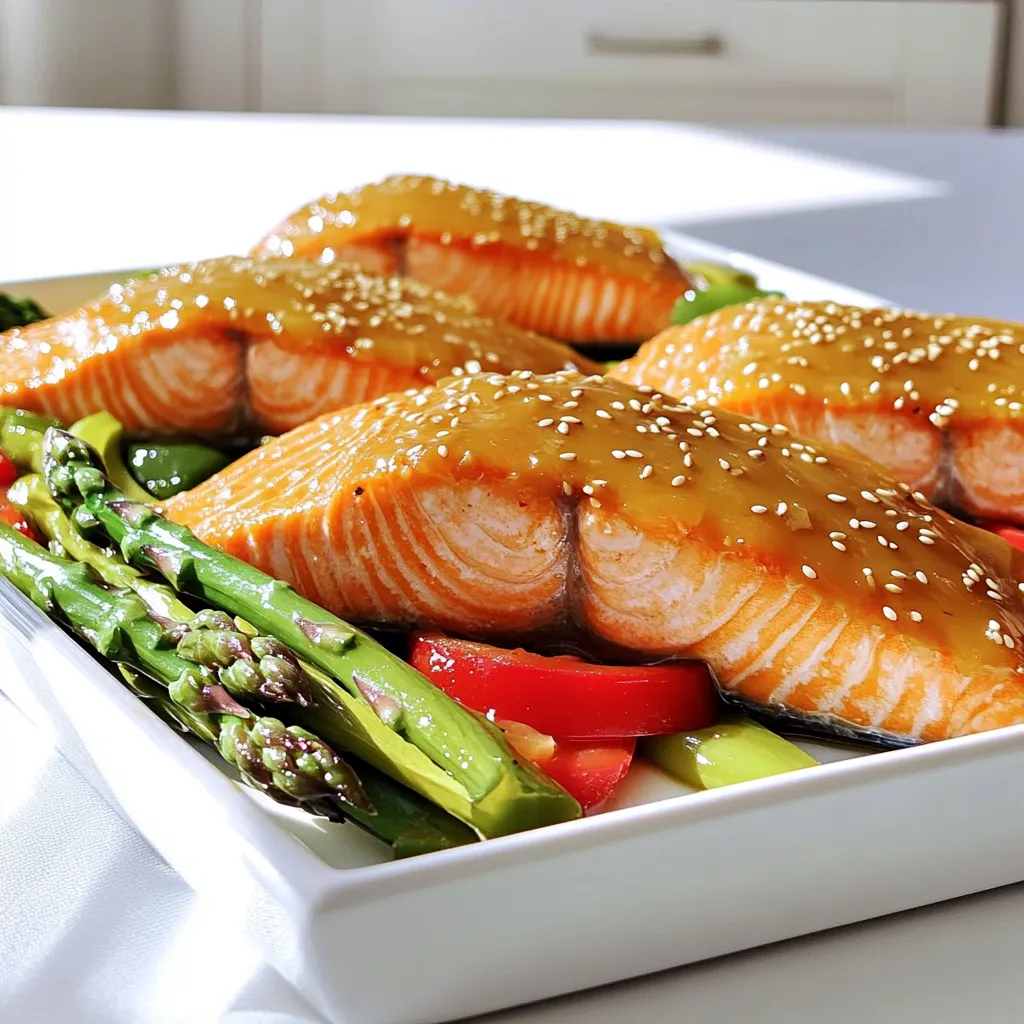
Looking for a quick and tasty dinner? Try my Maple Glazed Salmon Sheet-Pan recipe! This dish is not just easy
