
Chocolate Peanut Butter Protein Smoothie Power Boost
Looking for a quick, tasty way to fuel your day? The Chocolate Peanut Butter Protein Smoothie Power Boost is your
Looking for a quick, tasty way to fuel your day? The Chocolate Peanut Butter Protein Smoothie Power Boost is your
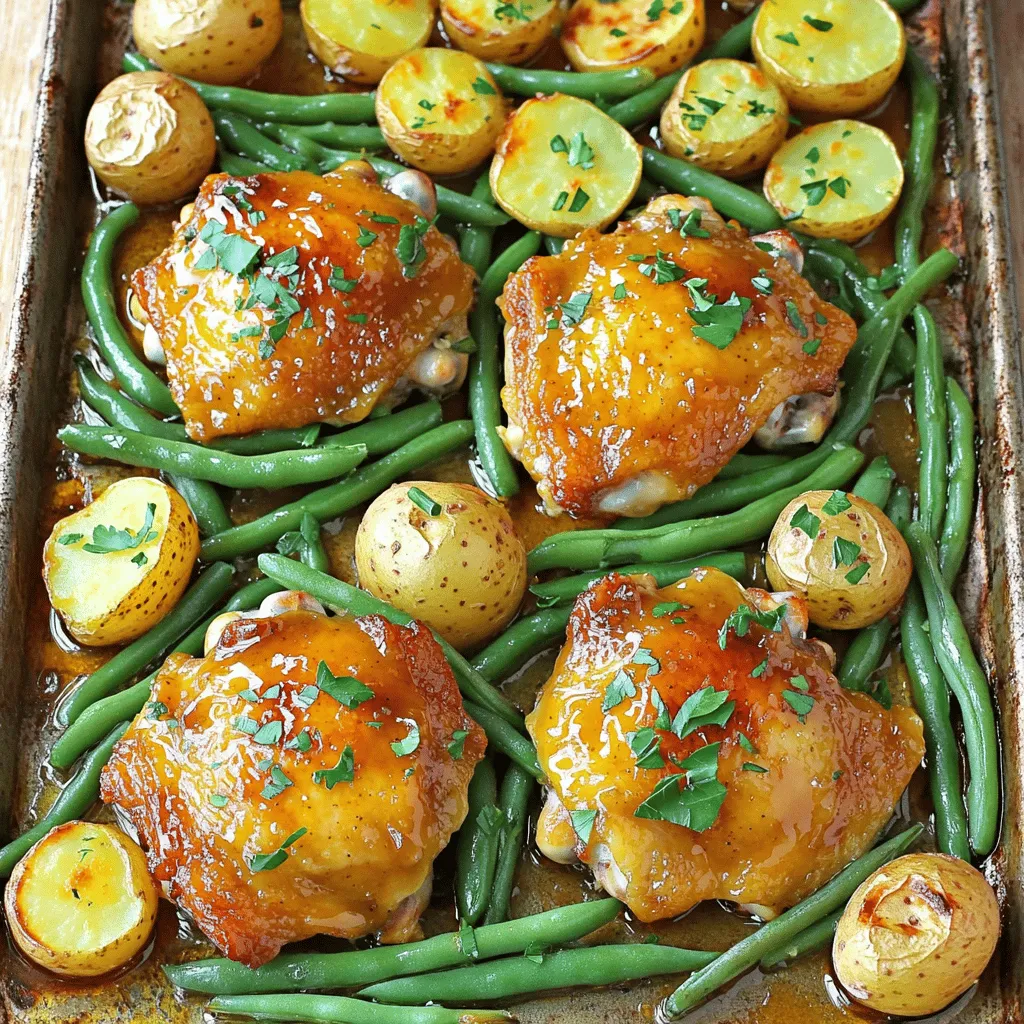
Are you ready to impress with a simple yet tasty dinner? This Savory Sheet Pan Honey Mustard Chicken Thighs Recipe
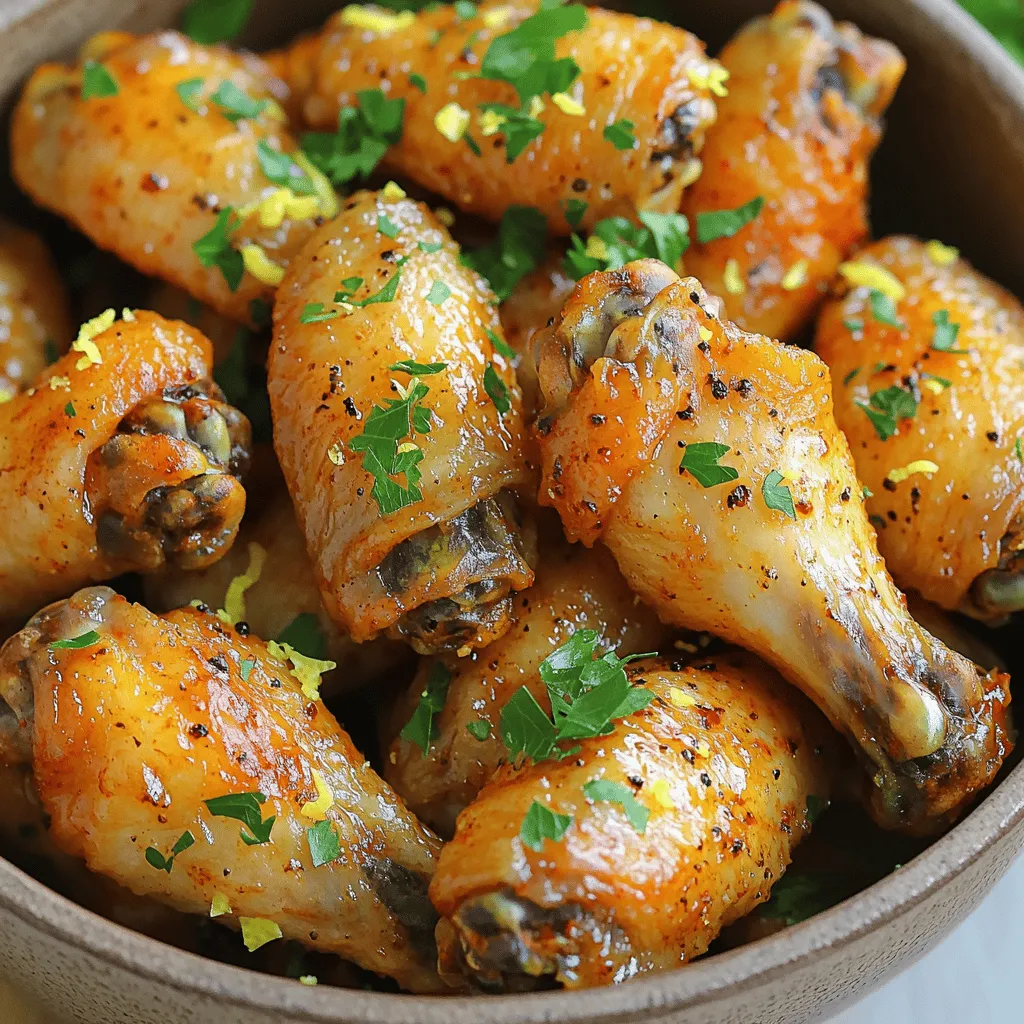
If you’re craving a snack that’s both crispy and packed with flavor, you’ve hit the jackpot! Today, I’m excited to
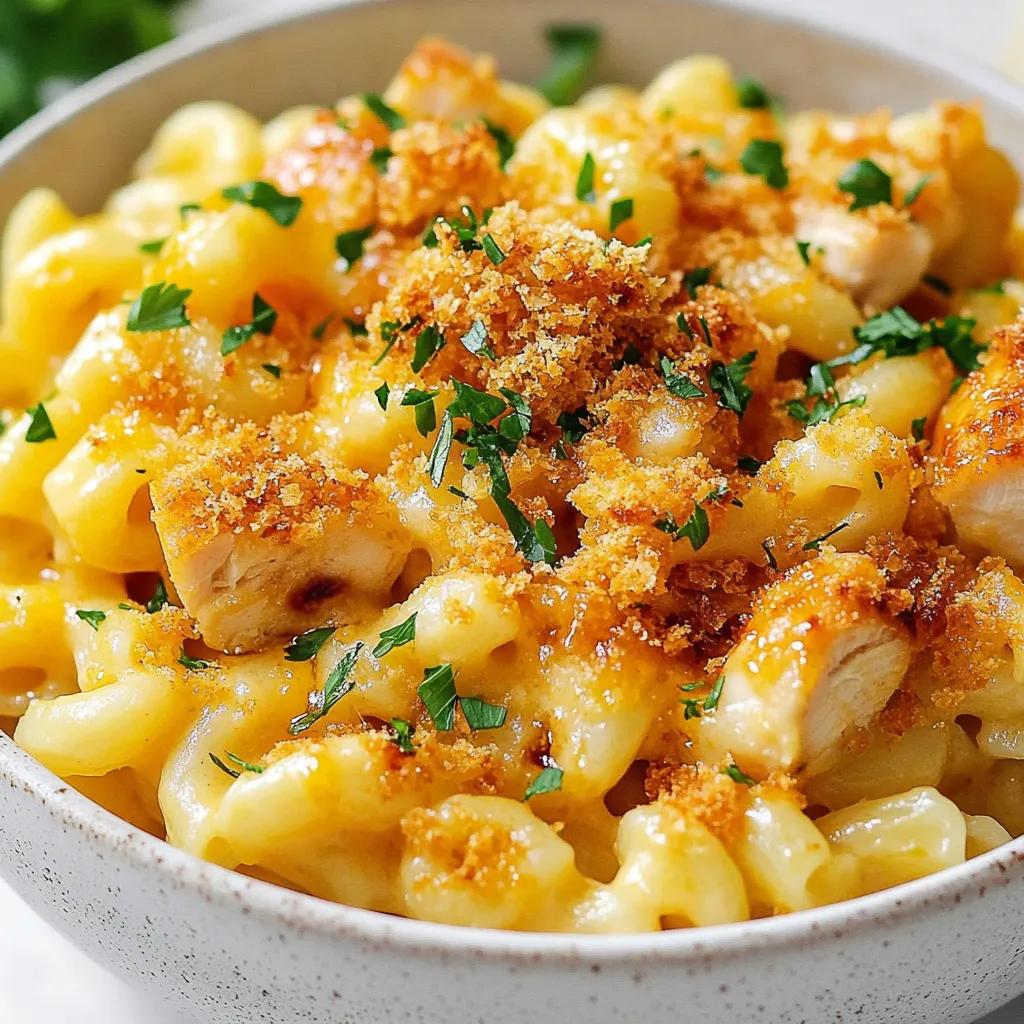
Are you ready to take your mac and cheese game to a whole new level? This Spicy Honey Chicken Mac
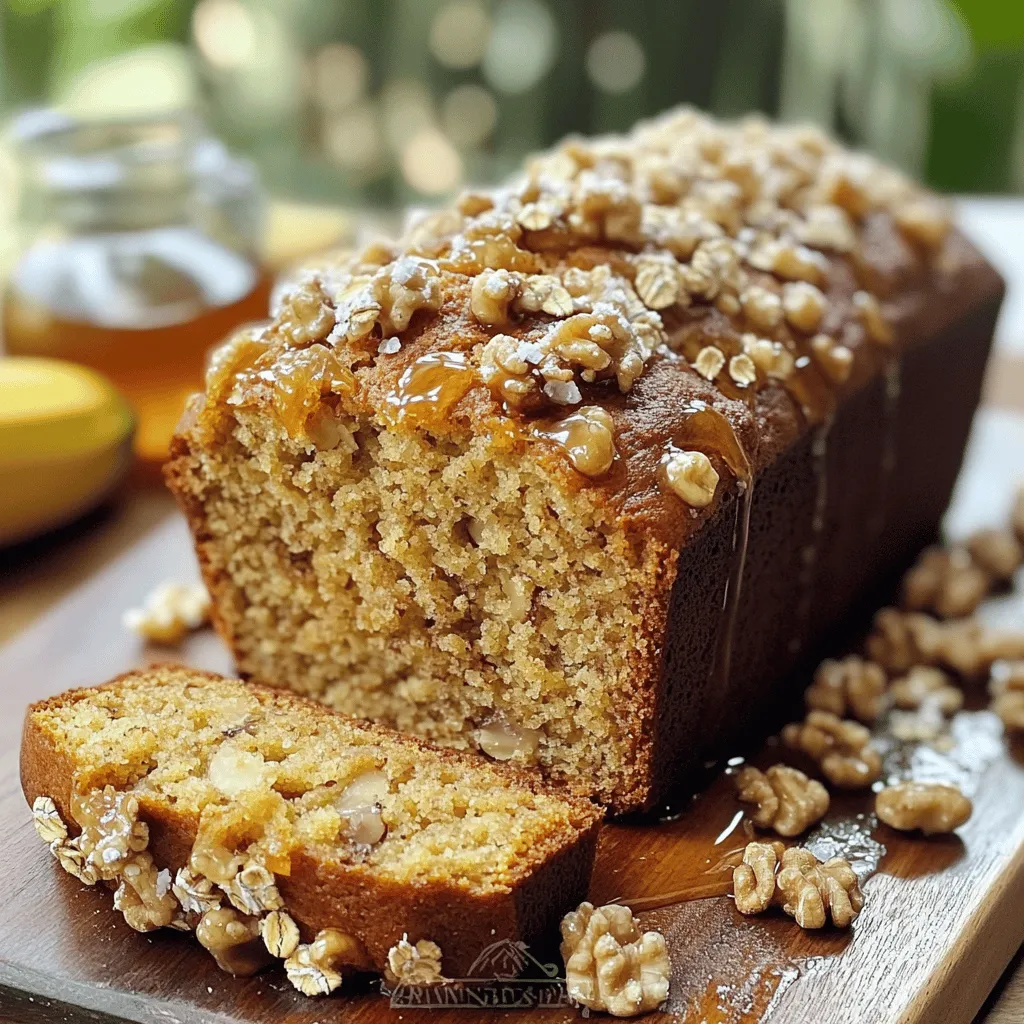
Welcome to the sweet world of baking! Today, I’m excited to share my Maple Walnut Banana Bread with a Crunchy
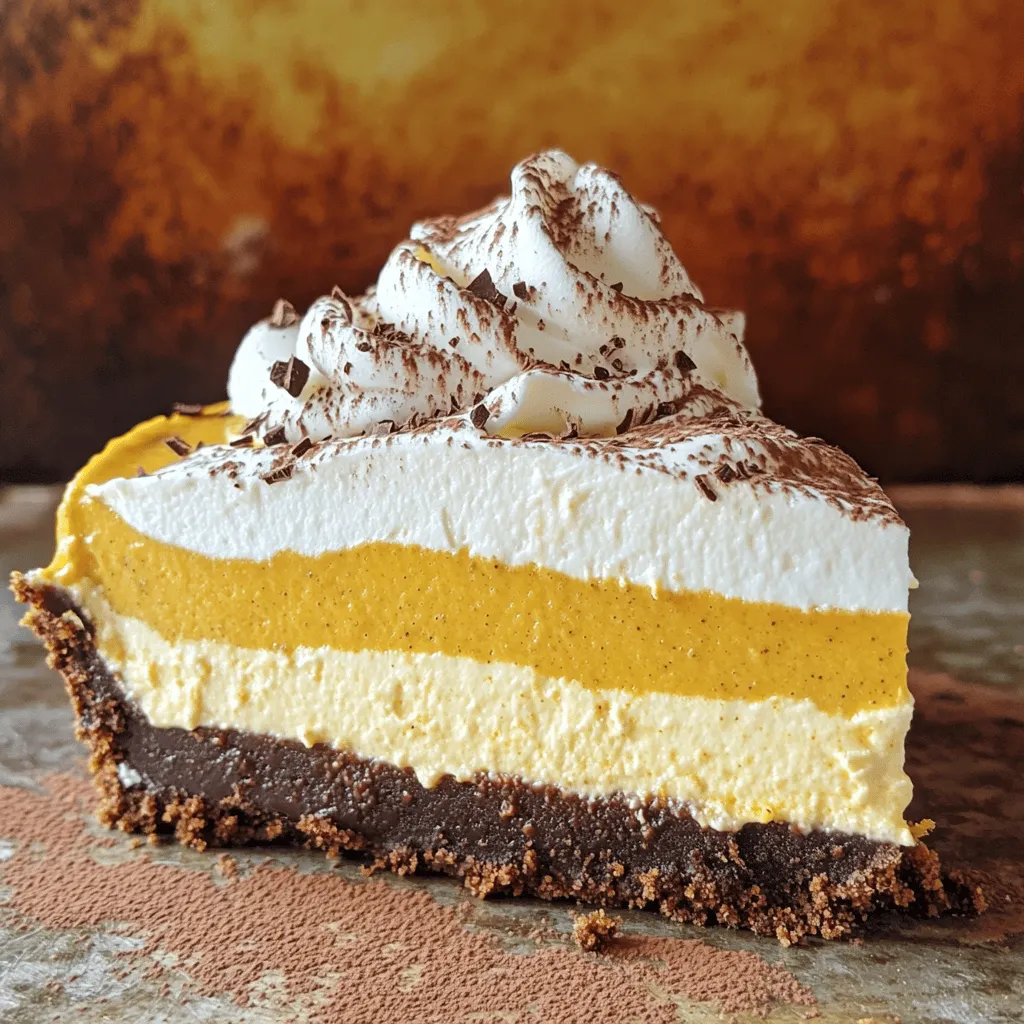
Are you ready to impress your friends with an easy, no-bake dessert? My No-Bake Pumpkin Spice Latte Cheesecake Delight is
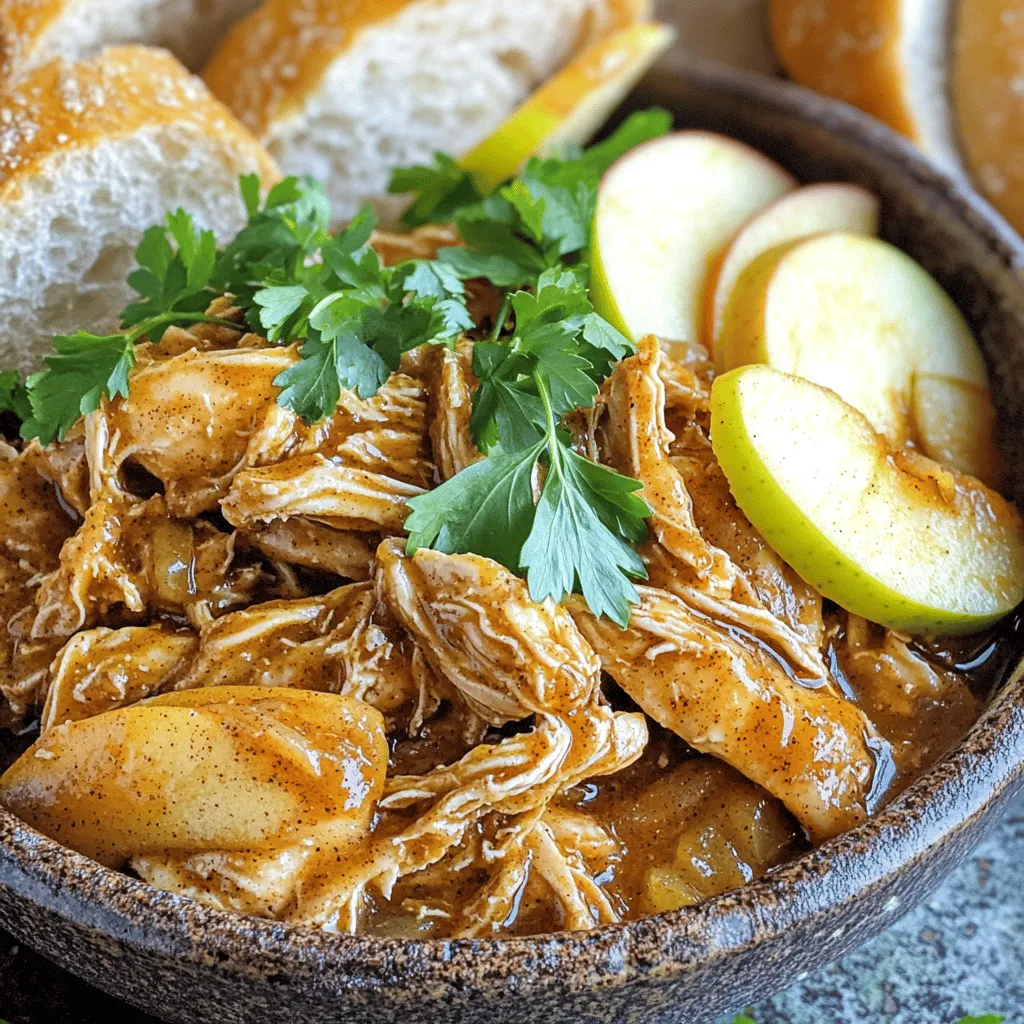
Get ready to enjoy a cozy twist on a classic dish! In this blog, I’ll show you how to make
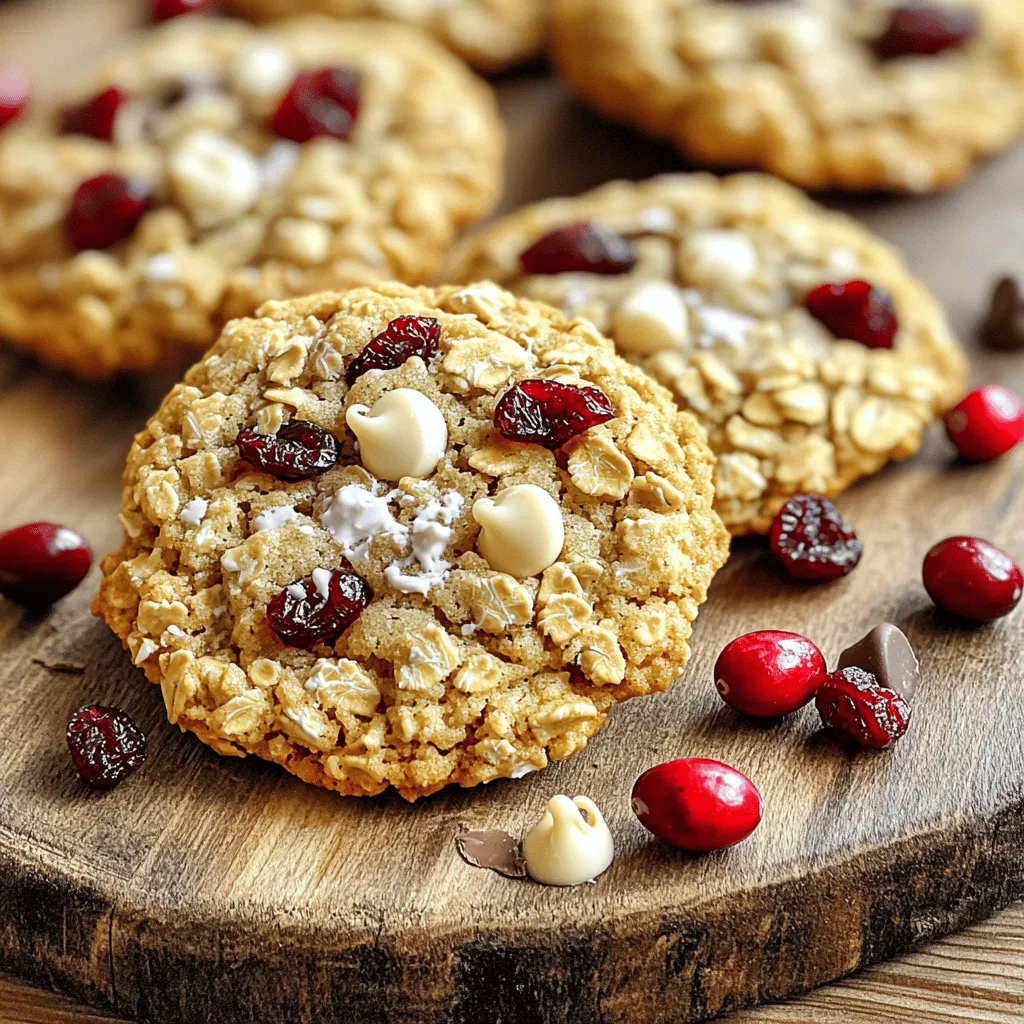
Are you ready for a cookie experience that delights your taste buds? My Cranberry White Chocolate Oatmeal Cookies are a
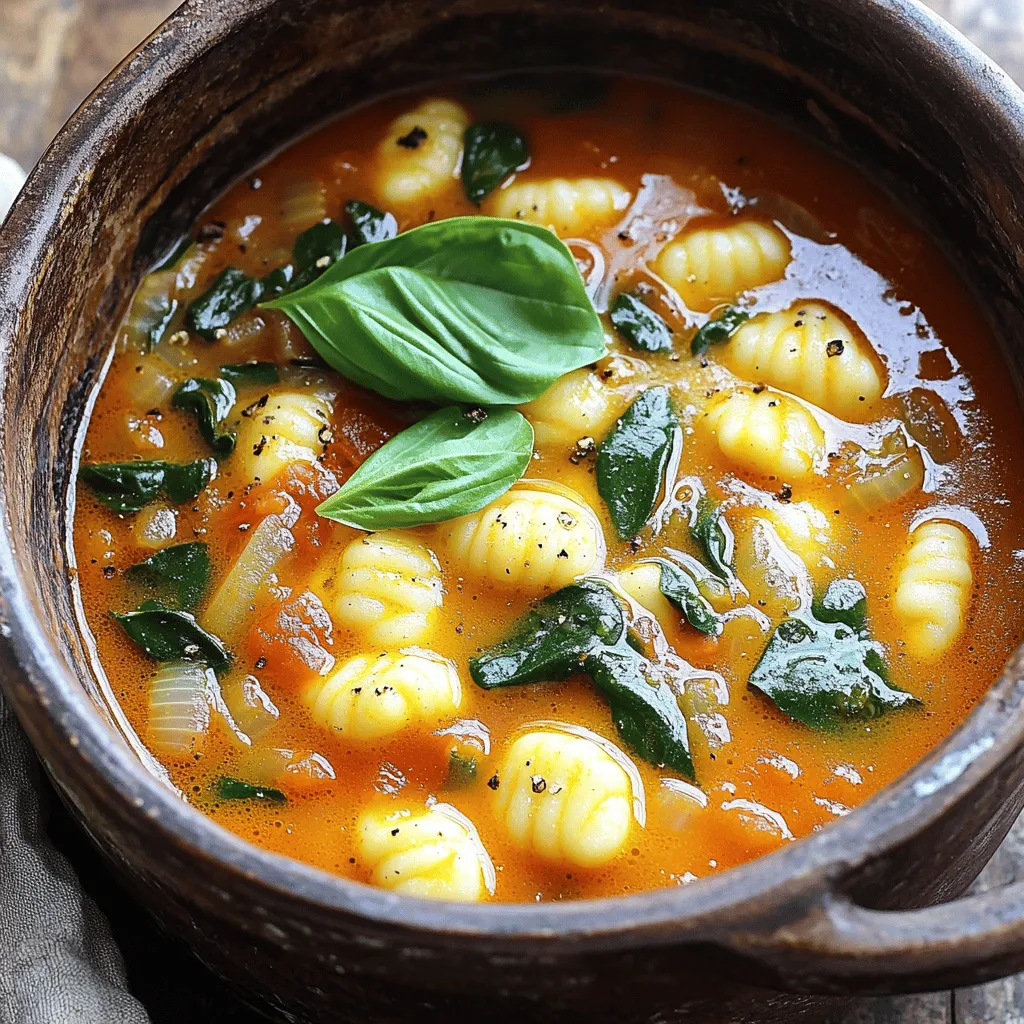
Looking for a comforting meal that’s easy to make? You’ve come to the right place! My One-Pot Tomato Basil Gnocchi
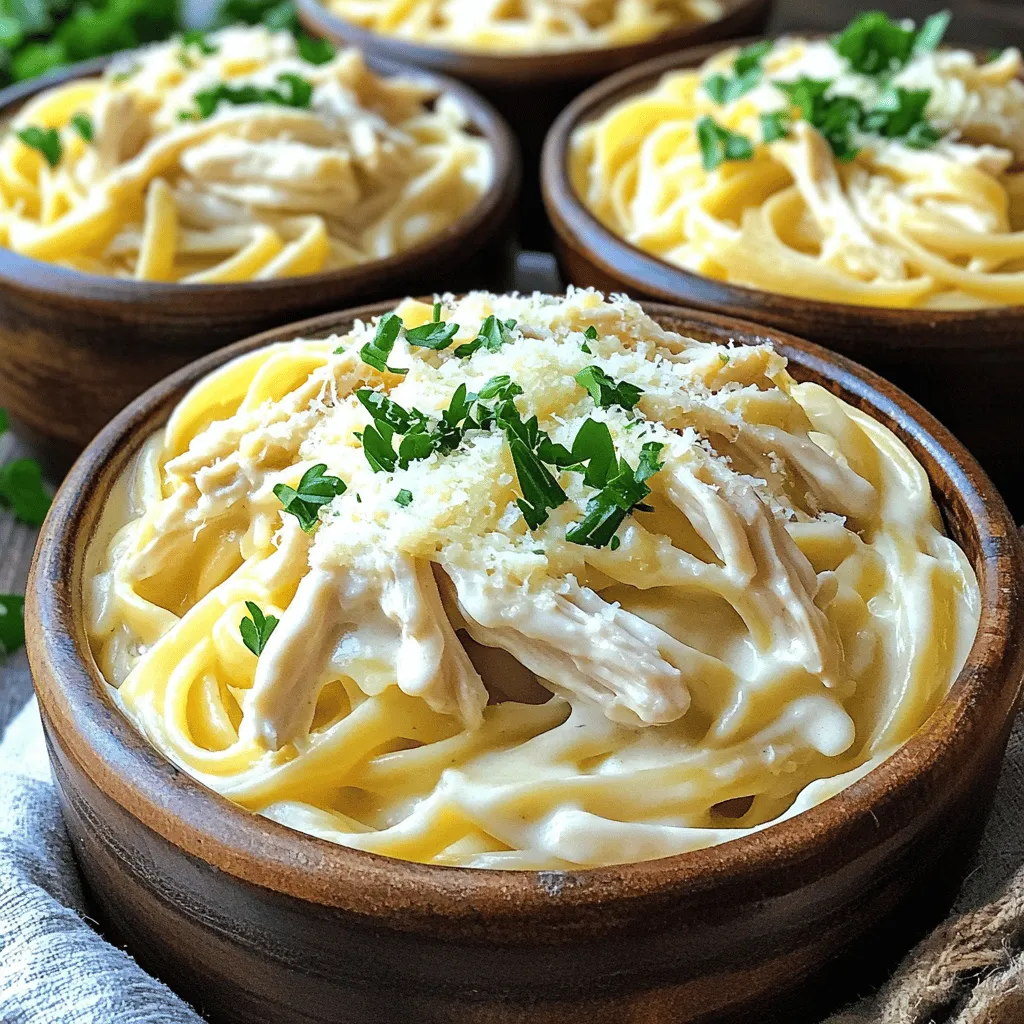
Are you ready to enjoy a creamy, dreamy dish that’s easy to make? My Slow Cooker Creamy Chicken Alfredo is
