
Garlic Butter Shrimp Tacos Easy and Flavorful Delight
Looking for a quick and tasty dinner? Garlic Butter Shrimp Tacos are your answer! This easy recipe brings bold flavors
Looking for a quick and tasty dinner? Garlic Butter Shrimp Tacos are your answer! This easy recipe brings bold flavors
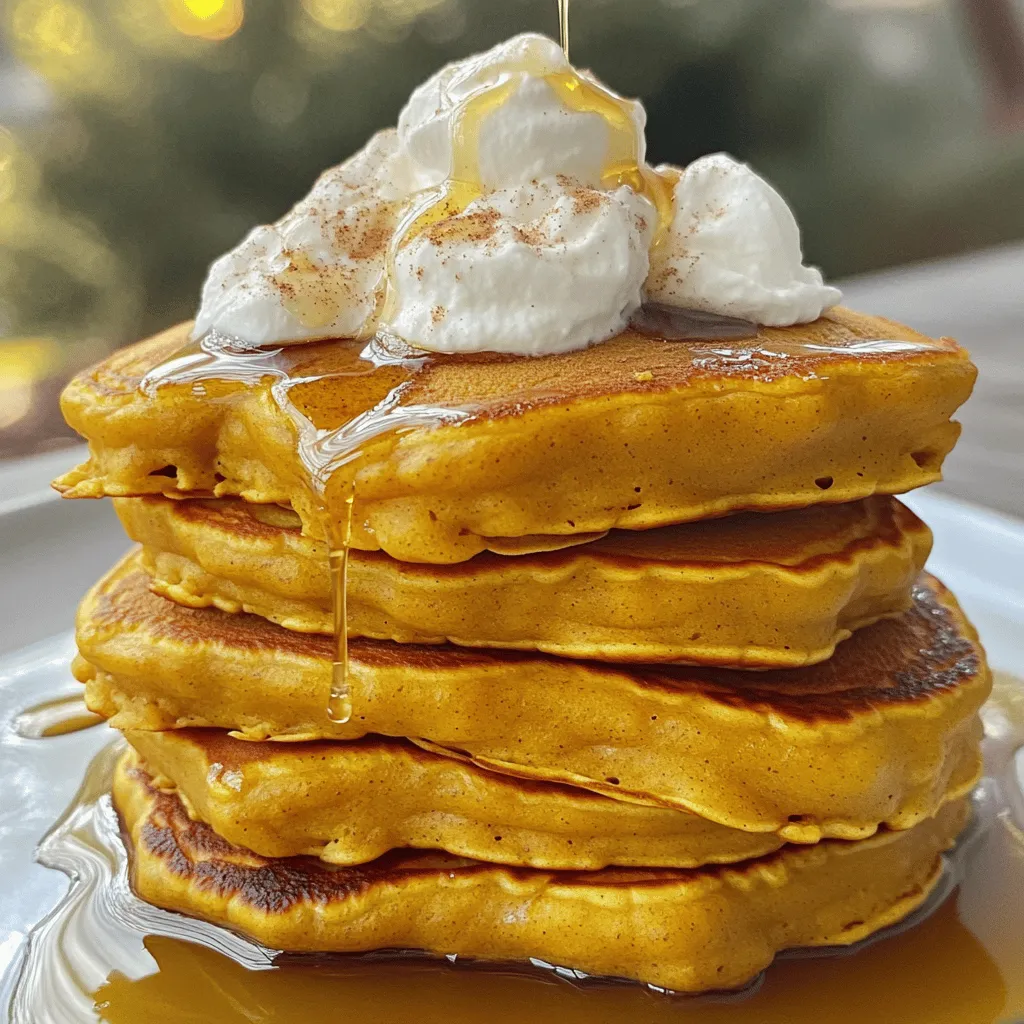
Are you ready to elevate your breakfast game? These Pumpkin Cream Cheese Pancakes are fluffy and delightful, perfect for autumn
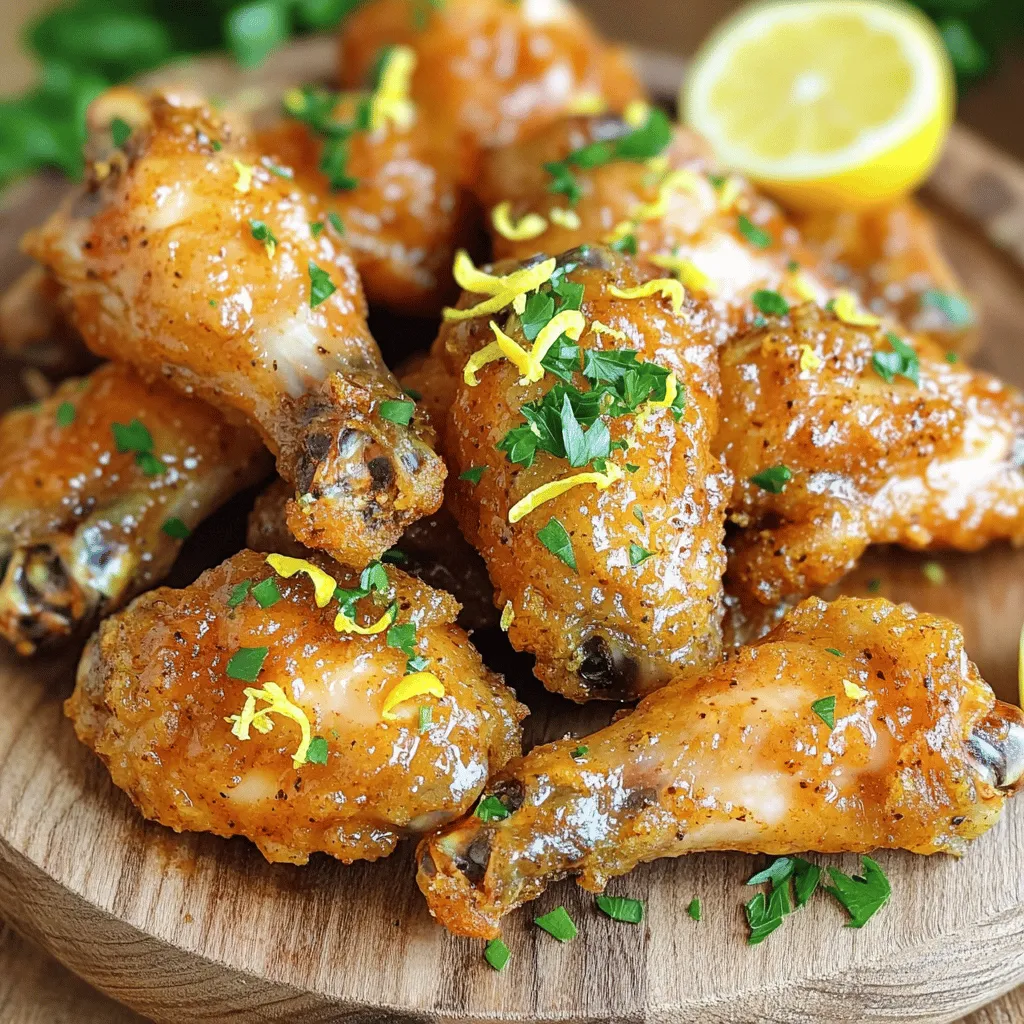
Get ready to delight your taste buds with my Air Fryer Lemon Pepper Wings! This crispy and flavorful dish is
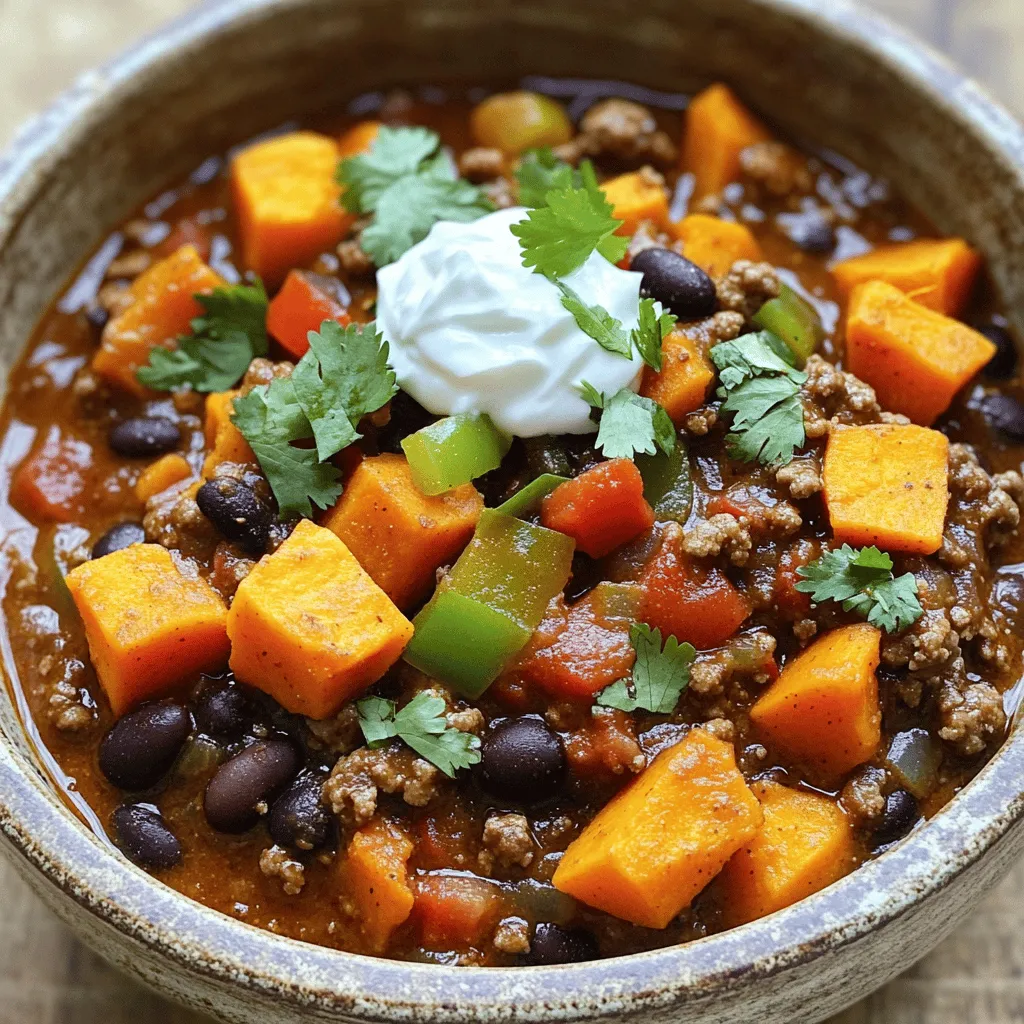
Are you ready for a cozy meal that warms the heart? This Savory Slow Cooker Beef & Sweet Potato Chili

Get ready for a holiday treat that’s easy to make and delicious! My No Bake White Chocolate Peppermint Bark Bars
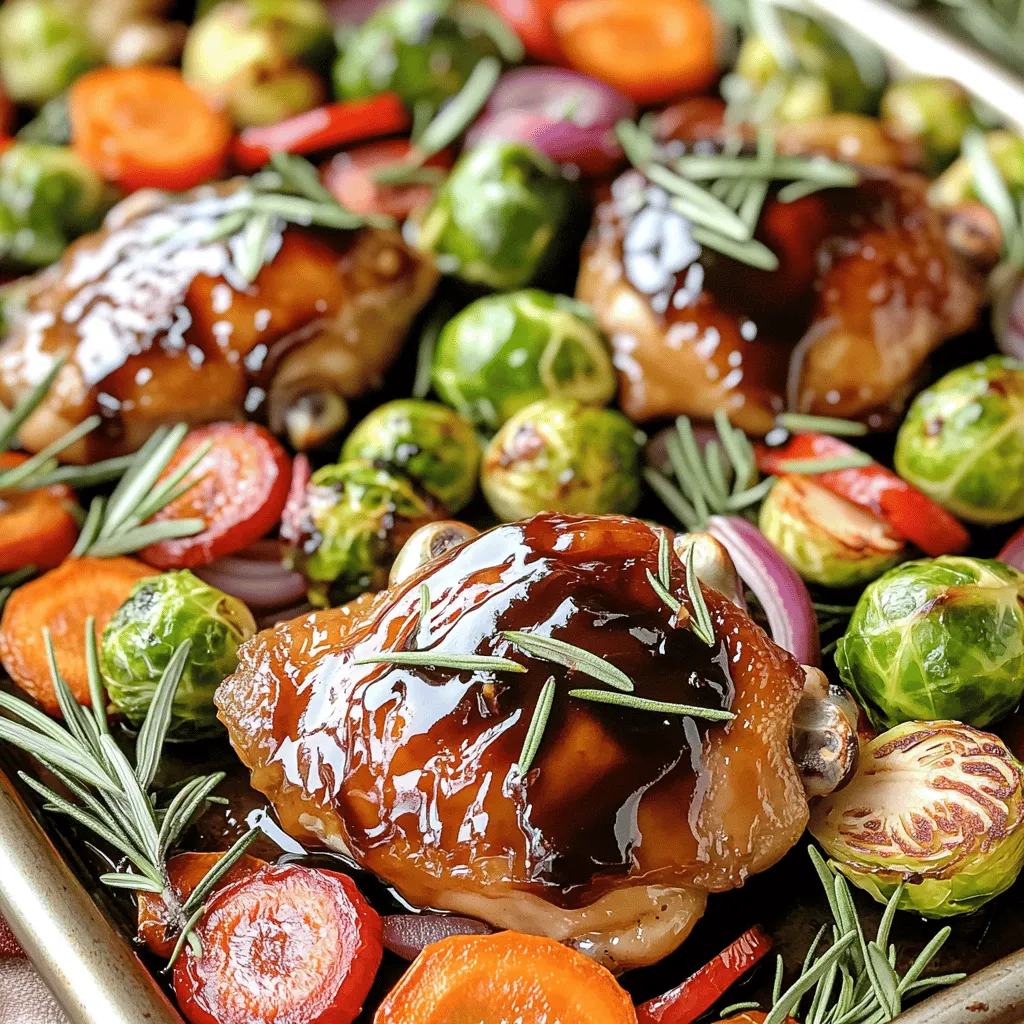
Looking for a simple yet satisfying meal? You’ve come to the right place! In Sheet Pan Balsamic Glazed Chicken &
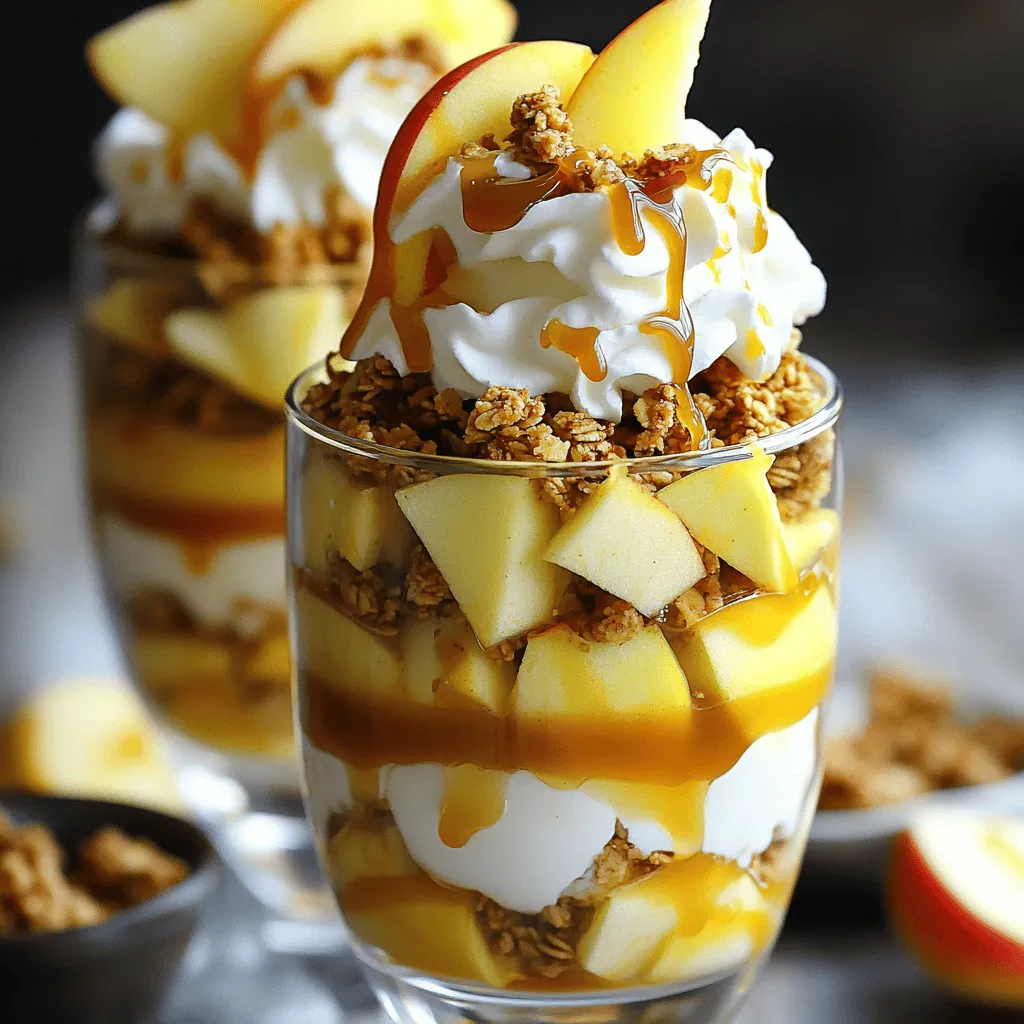
Fall has arrived, and there’s no better way to celebrate than with Caramel Apple Crisp Parfaits! This delightful dessert combines
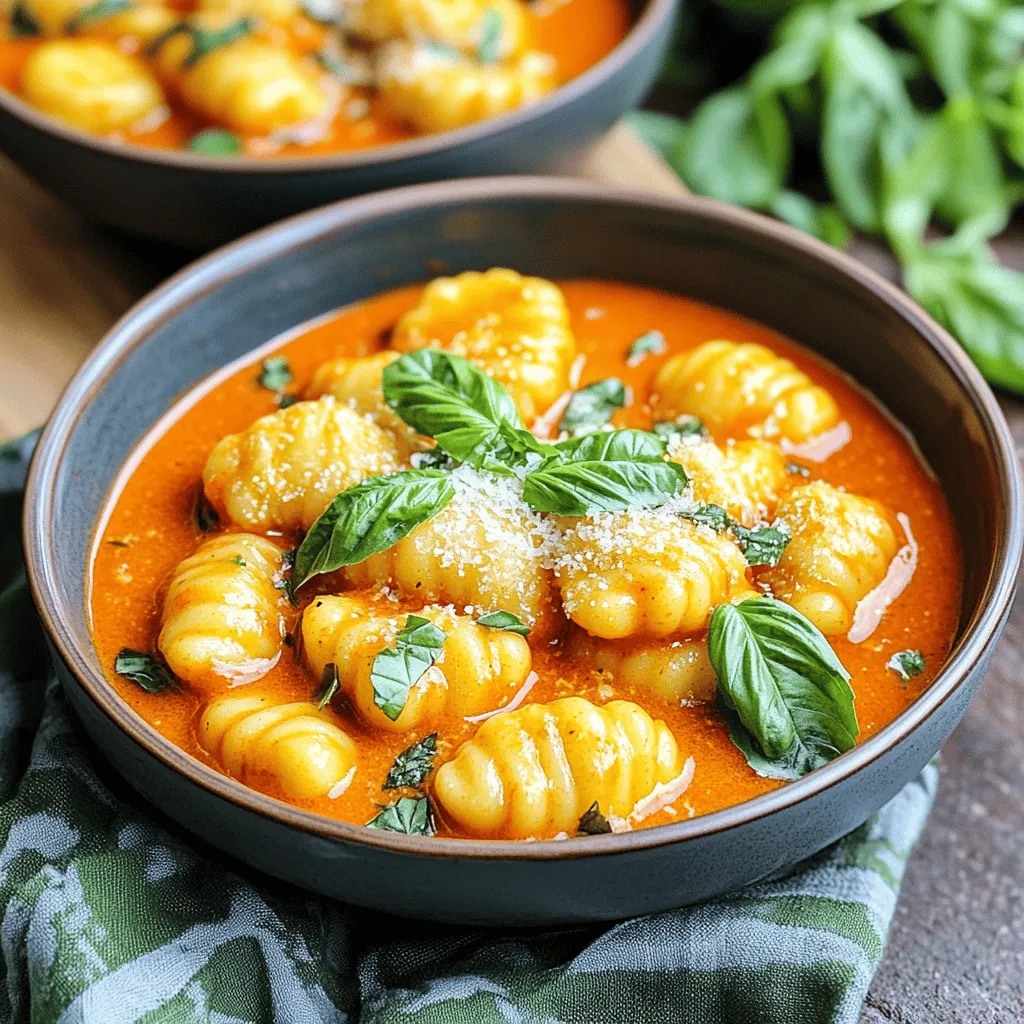
Are you ready for a comforting meal that’s both easy and delicious? In this post, I’ll show you how to

Looking for a quick and tasty meal that’s also healthy? Try making crispy falafel patties in your air fryer! With
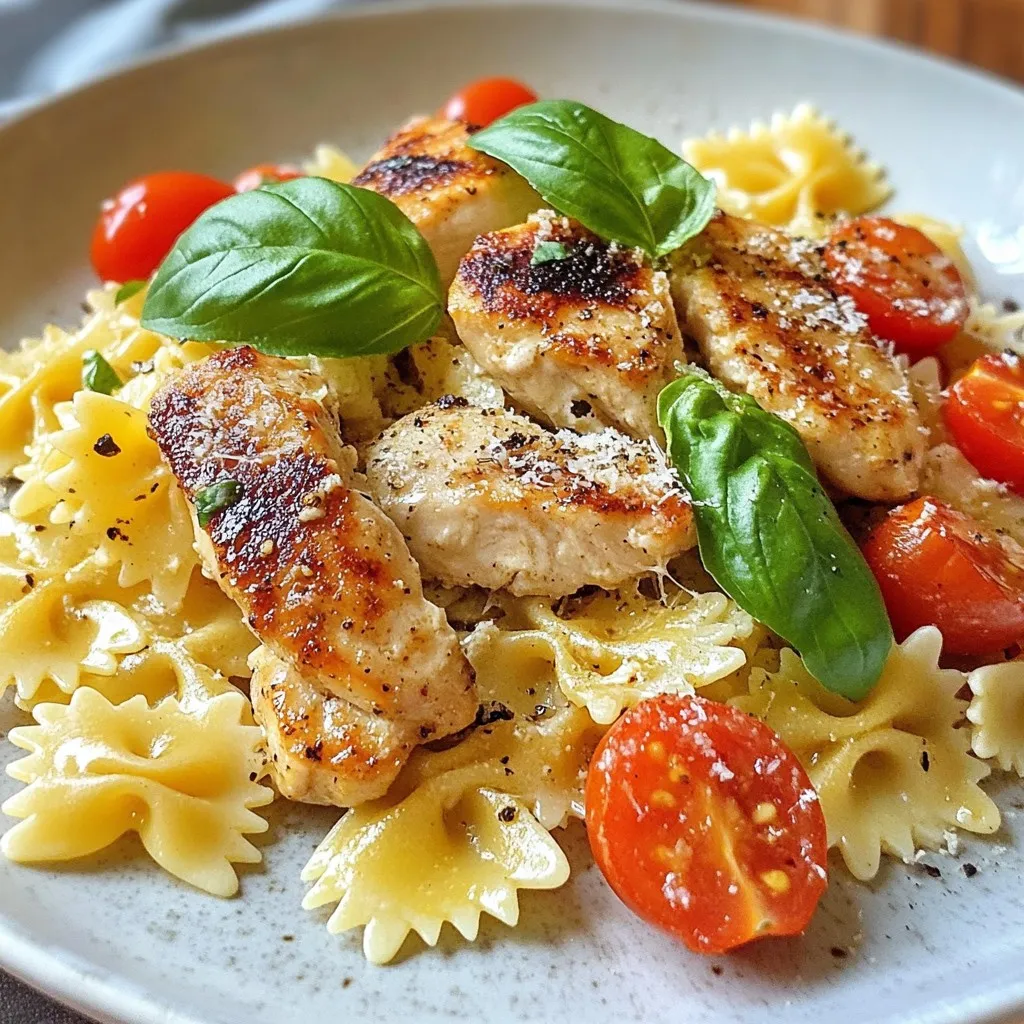
If you’re craving a quick and tasty meal, Parmesan Chicken Pasta is the answer. This dish combines creamy Parmesan sauce
