
Pumpkin Cheesecake Swirl Brownies Irresistible Treat
Who can resist the rich, creamy delight of Pumpkin Cheesecake Swirl Brownies? This treat combines two favorite desserts into one
Who can resist the rich, creamy delight of Pumpkin Cheesecake Swirl Brownies? This treat combines two favorite desserts into one
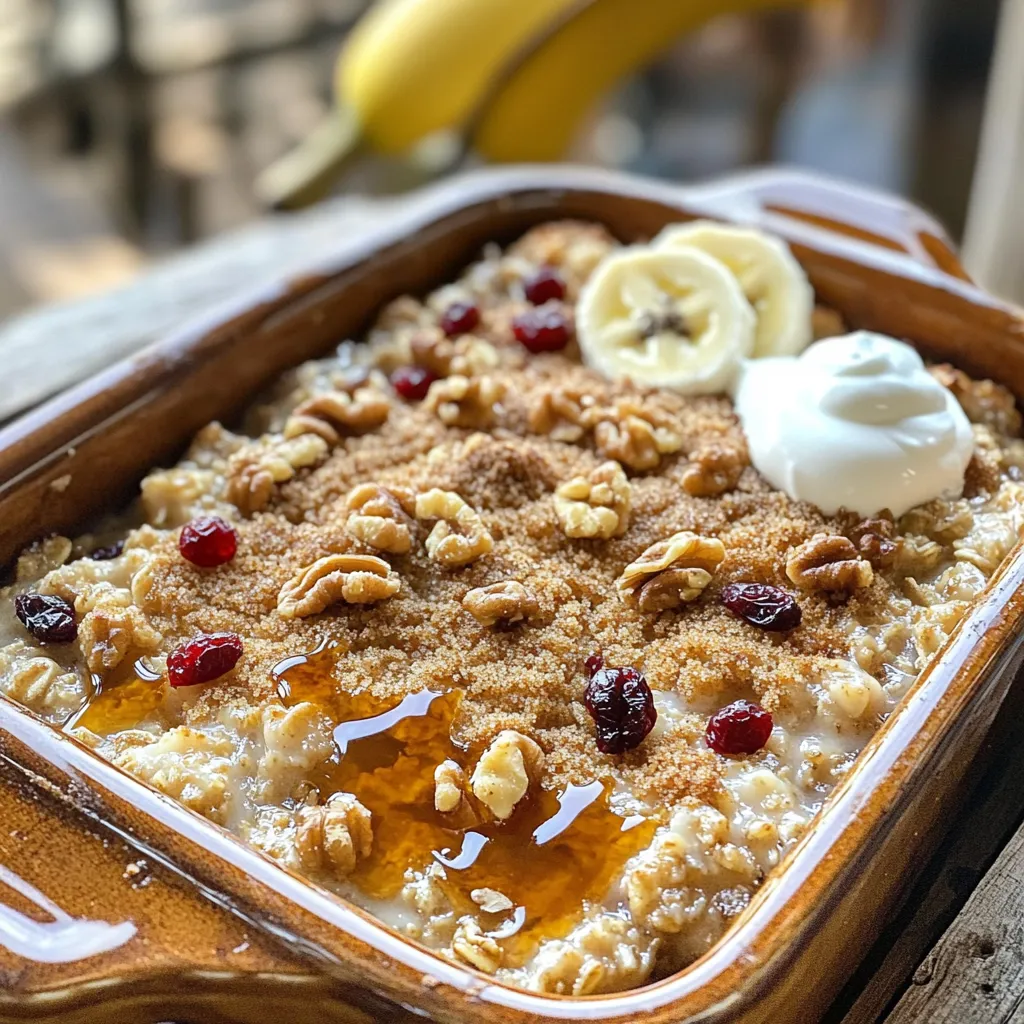
Are you ready to enjoy a warm and comforting breakfast? I’m excited to share my Maple Brown Sugar Baked Oatmeal

Welcome to my delicious world of creamy broccoli cheddar soup served in warm, crusty bread bowls! If you’re craving comfort
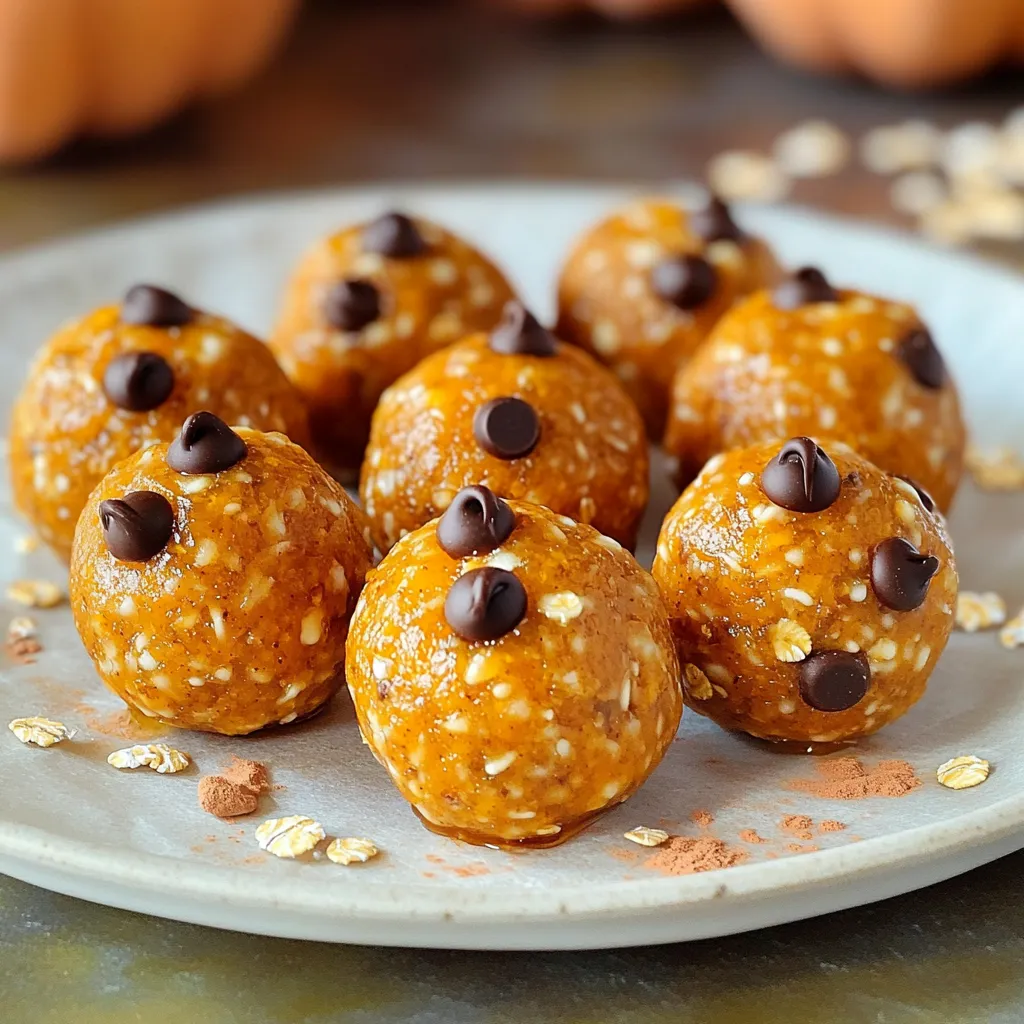
Looking for a quick and healthy snack? These No-Bake Pumpkin Spice Energy Balls are just what you need! Packed with
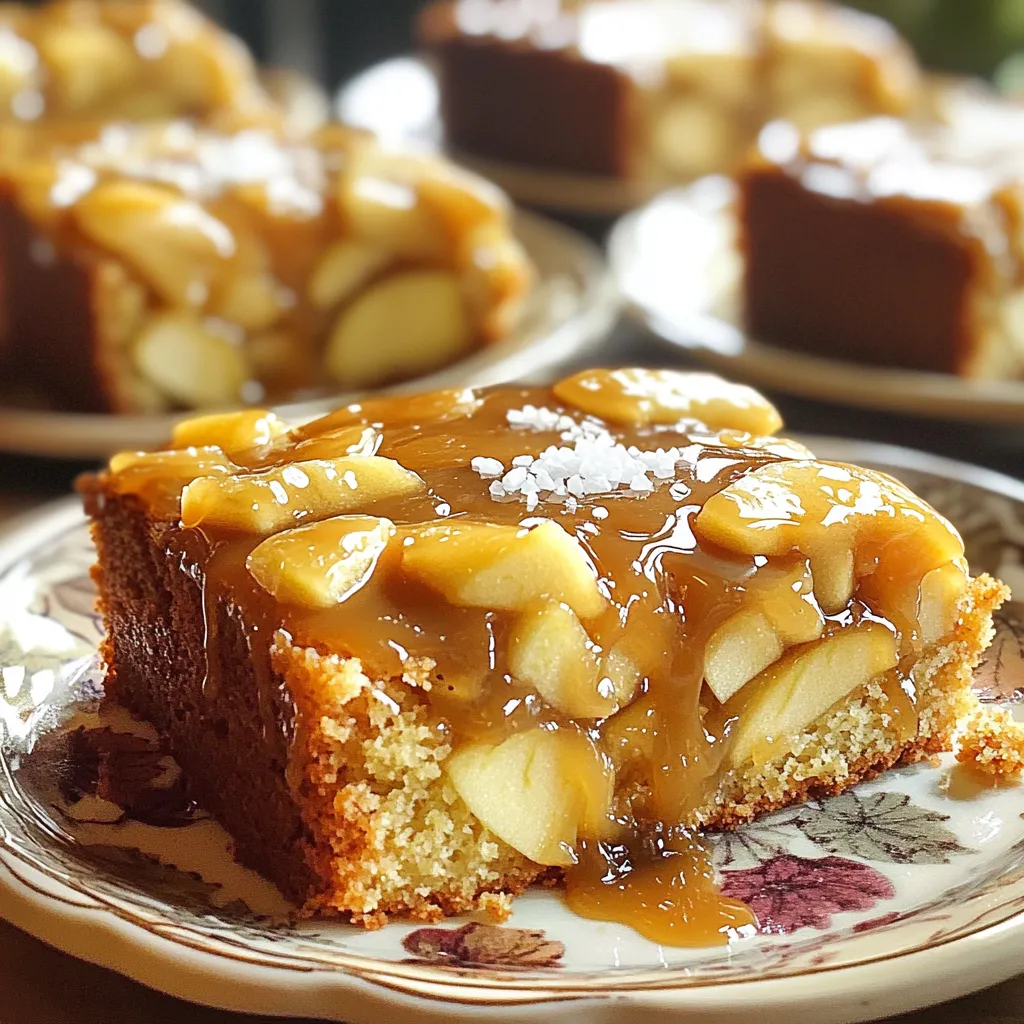
Welcome to a sweet adventure! Today, I’ll show you how to make a Bakery-Style Salted Caramel Apple Cake that tastes
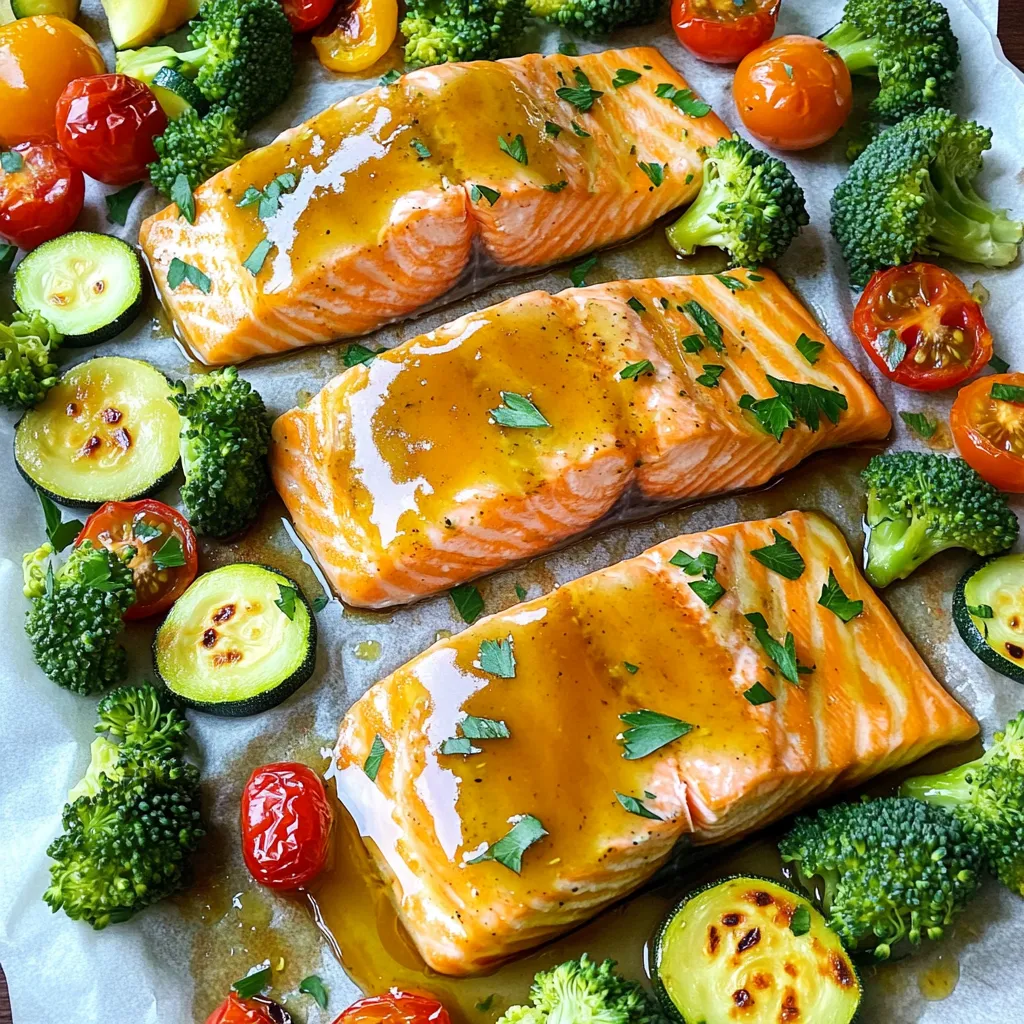
Looking to impress at dinner with minimal fuss? You can create a delicious meal in just one pan! In Sheet-Pan

Get ready to indulge in the warm flavors of fall with my Pumpkin Cream Cheese Frosted Cookies! These soft and

Warm, comforting, and bursting with flavor, this Slow Cooker Creamy Tomato Basil Soup is a must-try! I’ll guide you through
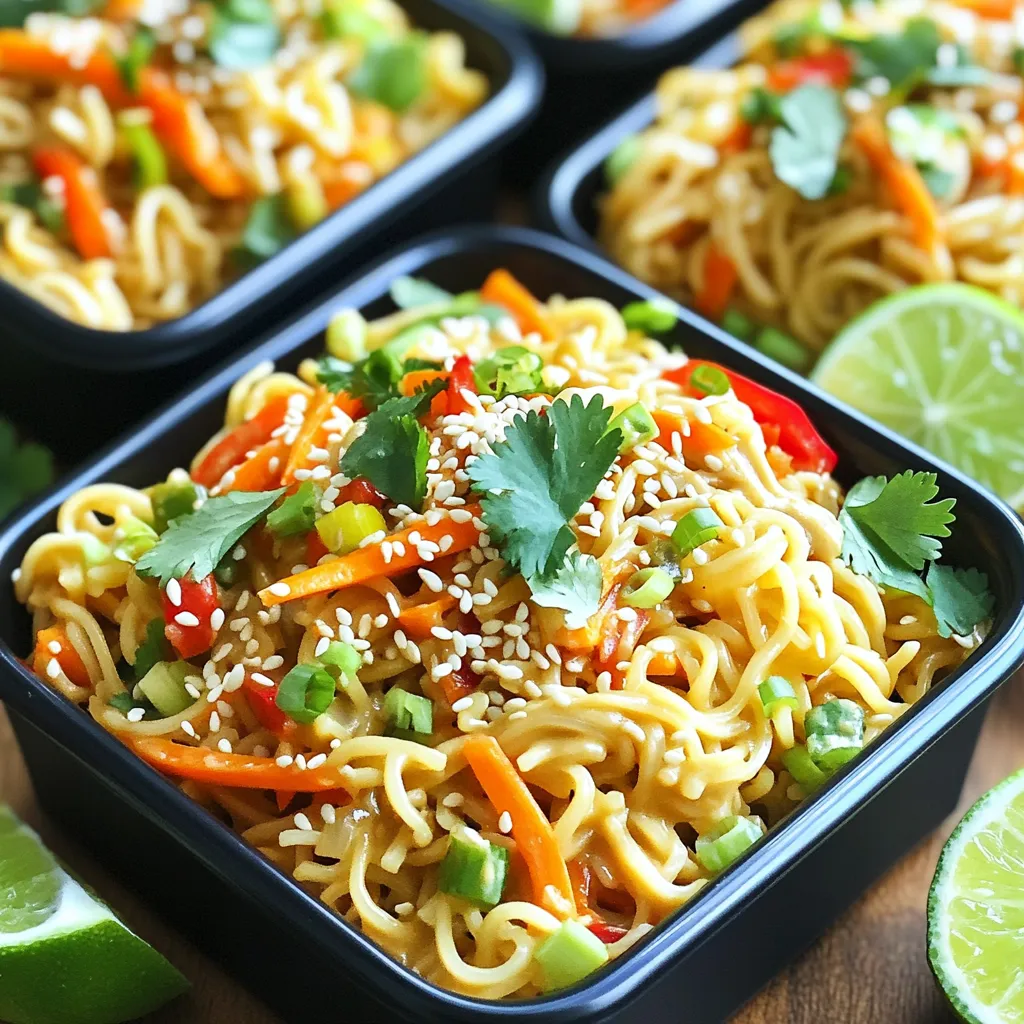
Looking for a quick and tasty meal that packs a punch? This Minute Sesame Peanut Noodle Salad is your answer!

Craving a warm, cozy meal for fall? Try my Sheet-Pan Roasted Fall Veggie Bowls! Packed with tasty butternut squash, Brussels
