Fall is here, and nothing says autumn like No Bake Pumpkin Oreo Bars! If you crave a sweet treat without turning on the oven, you’re in luck. In just a few simple steps, you can bring together creamy pumpkin goodness and crunchy Oreo crust. Join me as I share this easy recipe that’s perfect for any fall gathering. Get ready to impress your friends and family with this delightful dessert!
Ingredients
List of Ingredients
– 24 Oreo cookies (regular or double stuffed)
– 1/4 cup unsalted butter, melted
– 1 cup pumpkin puree
– 1/2 cup cream cheese, softened
– 1/2 cup powdered sugar
– 1 teaspoon vanilla extract
– 1 teaspoon pumpkin pie spice
– 1 cup whipped topping (like Cool Whip)
– Additional crushed Oreos for topping
Notes on Ingredient Quality
Quality matters when making these bars. Fresh pumpkin puree gives a rich flavor. Look for pure pumpkin, not pie filling. Use full-fat cream cheese for a creamy texture. It makes mixing easier and tastes better. Always use unsalted butter. This way, you control the salt in your dessert. The Oreos should be fresh for the best texture and taste.
Suggested Brand Recommendations
For Oreos, go with the classic brand. They have the best flavor and texture. Any regular or double-stuffed Oreo works well. For pumpkin puree, Libby’s is a top choice. Their pumpkin is smooth and rich. For cream cheese, Philadelphia is reliable. It blends well and gives a nice taste. Use Cool Whip or any brand of whipped topping that you like.
Step-by-Step Instructions
Preparation of the Crust
To start, grab 24 Oreo cookies. You can use regular or double stuffed, depending on your taste. Place the cookies in a food processor. Crush them until they turn into fine crumbs. Next, melt 1/4 cup of unsalted butter. In a mixing bowl, combine the cookie crumbs and melted butter. Stir until they blend well and look crumbly. Now, take a 9×9 inch square pan and press this mixture into the bottom. Use the back of a measuring cup to pack it tightly. This forms a solid crust and sets the stage for the filling.
Making the Pumpkin Filling
In a clean bowl, add 1 cup of pumpkin puree. Then, mix in 1/2 cup of softened cream cheese. Next, add 1/2 cup of powdered sugar and 1 teaspoon of vanilla extract. Sprinkle in 1 teaspoon of pumpkin pie spice. Beat these ingredients until they become smooth and well mixed. This step gives your bars that rich pumpkin flavor. Now, take 1 cup of whipped topping, like Cool Whip, and gently fold it into the pumpkin mix. This makes the filling light and fluffy.
Assembling and Chilling the Bars
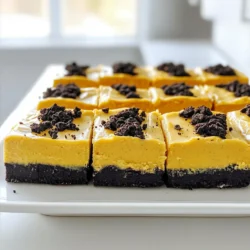
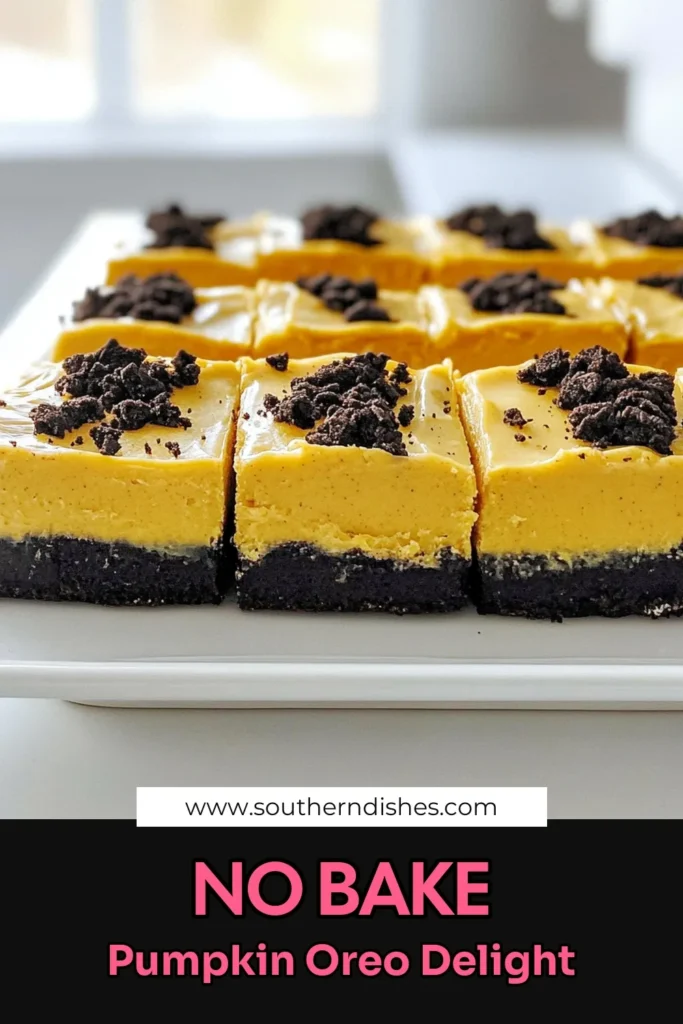
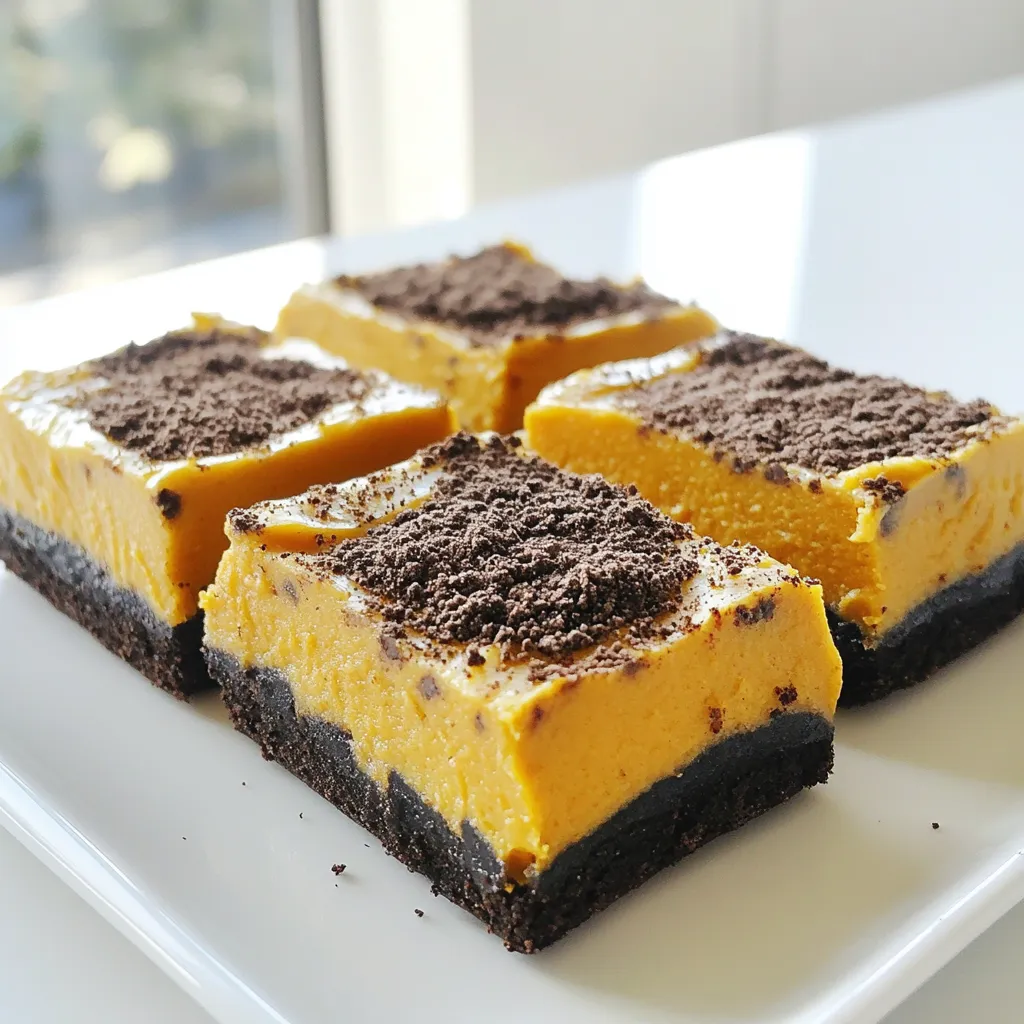
Carefully spread the pumpkin filling over the crust in the pan. Use a spatula to smooth the top. Ensure it is even for the best presentation. Next, cover the pan with plastic wrap. Place it in the refrigerator for at least 4 hours. Chilling helps the bars set firmly. Once they are chilled, cut the dessert into squares. For a nice touch, sprinkle some crushed Oreos on top before serving. Your No Bake Pumpkin Oreo Bars are now ready to enjoy!
Tips & Tricks
Best Practices for Crushing Oreos
To crush Oreos well, use a food processor. This tool makes it quick and easy. If you don’t have one, place the cookies in a zip-top bag. Use a rolling pin to crush them. Aim for fine crumbs, not big chunks. This helps the crust hold together.
How to Achieve the Perfect Cream Cheese Mixture
Start with room temperature cream cheese. Cold cream cheese doesn’t mix well. Beat it alone first until it’s smooth. Then, add the pumpkin puree and sugar. Mix until everything is well combined. The mixture should be creamy and fluffy. Avoid over-mixing, as it can become too soft.
Serving and Presentation Suggestions
Cut the bars into squares for easy serving. Use a sharp knife for clean edges. Place them on a decorative plate for a nice look. For extra flair, drizzle caramel sauce on top. Add crushed Oreos as a final touch. It makes the dessert pop and adds crunch. Enjoying it chilled makes each bite refreshing.
Variations
Flavor Enhancements
You can change up the spices in your bars for a new twist. Instead of pumpkin pie spice, try adding cinnamon or nutmeg. You can also mix in a splash of maple extract for sweetness. This will bring a warm flavor to your dessert. Experimenting with flavors makes each batch unique.
Alternative Toppings Ideas
Toppings can make your bars even better. You can add chopped nuts, like walnuts or pecans, for a crunchy texture. Drizzling melted chocolate or caramel sauce on top adds sweetness. You can also sprinkle some sea salt for a nice contrast. These toppings will make your dessert stand out.
Dietary Adjustments
If you need gluten-free options, use gluten-free Oreos instead. For a vegan twist, swap the cream cheese for a vegan cream cheese. Use coconut whipped cream in place of the whipped topping. These adjustments let everyone enjoy the bars, no matter their diet.
Storage Info
Proper Refrigeration Techniques
To keep your No Bake Pumpkin Oreo Bars fresh, store them in the fridge. Use an airtight container. This helps prevent the bars from drying out or picking up other odors. Make sure they are fully chilled before covering them.
Shelf Life of No Bake Pumpkin Oreo Bars
These bars can last in the fridge for up to 5 days. After that, they may lose some taste and texture. If you notice any changes in smell or appearance, it’s best to toss them.
How to Freeze for Longer Storage
You can freeze these bars for up to 3 months. Cut them into squares before freezing for easy serving. Wrap each square tightly in plastic wrap, then place them in a freezer-safe bag. When you’re ready to eat, let them thaw in the fridge overnight. Enjoy your tasty treat!
FAQs
Can I use sugar-free Oreos?
Yes, you can use sugar-free Oreos. They work just like regular Oreos. The taste might change a bit, but the texture stays the same. These bars will still be creamy and tasty. If you are cutting back on sugar, this is a good option.
How long do these bars need to chill?
These bars need to chill for at least 4 hours. This time helps the filling set up well. If you want them firmer, you can chill them longer. Just be sure to cover the pan with plastic wrap. This keeps them fresh and ready to serve.
Can I make these bars ahead of time?
Yes, you can make these bars ahead of time. They store well in the fridge. You can prepare them a day or two before your event. This makes it easy to enjoy your time with friends and family. Just remember to add the crushed Oreos on top right before serving for a nice crunch.
This blog post covers how to make no-bake pumpkin Oreo bars. You learned about the best ingredients, preparation steps, and tips for great taste. I also shared how to store these treats. You can enjoy different flavors, toppings, and dietary options. Keep it simple and have fun creating your own version. No-bake pumpkin Oreo bars are perfect for any occasion. I hope you feel inspired to try them!