Looking for a simple and sweet dessert? You’ll love these No-Bake Oreo Cheesecake Bars! They are creamy, rich, and super easy to make. In just a few steps, you can create a treat that will wow your friends and family. I’ll guide you through the must-have ingredients, step-by-step instructions, and helpful tips. Get ready to satisfy your sweet tooth with this delicious no-bake delight!
Ingredients
Essential Ingredients
The No-Bake Oreo Cheesecake Bars need only a few key items. Here’s what you will need:
– 20 Oreo cookies, crushed
– 4 tablespoons unsalted butter, melted
– 16 oz cream cheese, softened
– 1 cup powdered sugar
– 1 teaspoon vanilla extract
– 1 cup whipped cream (or Cool Whip)
– 10 Oreo cookies, roughly chopped (for the filling)
– 2-3 whole Oreo cookies (for topping)
Each ingredient plays a vital role in creating a tasty treat. The crushed Oreo cookies and melted butter form the crust. This gives the bars a rich, chocolatey base. Cream cheese adds a creamy texture and tangy flavor to the filling. Powdered sugar sweetens the mix, making it delightful. Vanilla extract adds warmth and depth to the flavor. Whipped cream makes the filling light and fluffy, ensuring a smooth bite. The chopped Oreos in the filling add chunks of cookie goodness, and the whole Oreos on top create a beautiful finish.
Optional Enhancements
You can take these bars to the next level with some fun add-ins. Here are a few ideas:
– Chocolate chips
– Caramel sauce
– Peanut butter swirls
Using homemade whipped cream adds a fresh touch. Store-bought whipped cream works great if you’re short on time. You can also try other cookies for the crust, like chocolate graham crackers. These small changes can make a big difference and let you customize your dessert. Whether you stick to the classic or try something new, your No-Bake Oreo Cheesecake Bars will shine.
Step-by-Step Instructions
Preparation Guide
To make the Oreo crust, start by crushing 20 Oreo cookies in a medium bowl. You can use a food processor or place them in a zip-top bag and crush them with a rolling pin. After crushing, add 4 tablespoons of melted butter to the bowl. Mix them until it looks like wet sand.
Next, press this mixture into the bottom of a greased 9×9 inch baking dish. Make sure to create an even layer. This will form your crust. Once you finish, place it in the fridge for about 10 minutes to chill.
Now, let’s make the cheesecake filling. In a large bowl, beat 16 oz of softened cream cheese until it’s smooth and creamy. Slowly add in 1 cup of powdered sugar and 1 teaspoon of vanilla extract. Mix well until everything is combined.
Once mixed, gently fold in 1 cup of whipped cream. This makes your filling light and fluffy. Finally, fold in 10 roughly chopped Oreo cookies. This adds texture and flavor to your cheesecake.
Assembly
Take your chilled Oreo crust from the fridge. Pour the cheesecake filling over the crust. Use a spatula to smooth it out evenly. Make sure it covers the crust completely.
Now, it’s time to chill again. Cover the dish with plastic wrap and refrigerate for at least 4 hours. This helps the bars firm up. The longer you chill, the better the texture.
Serving Suggestions
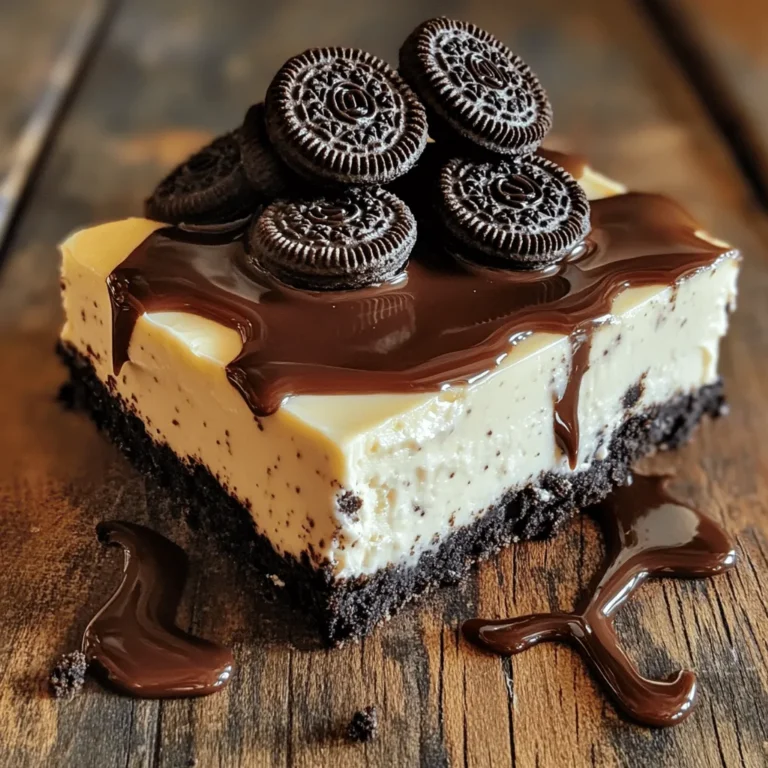
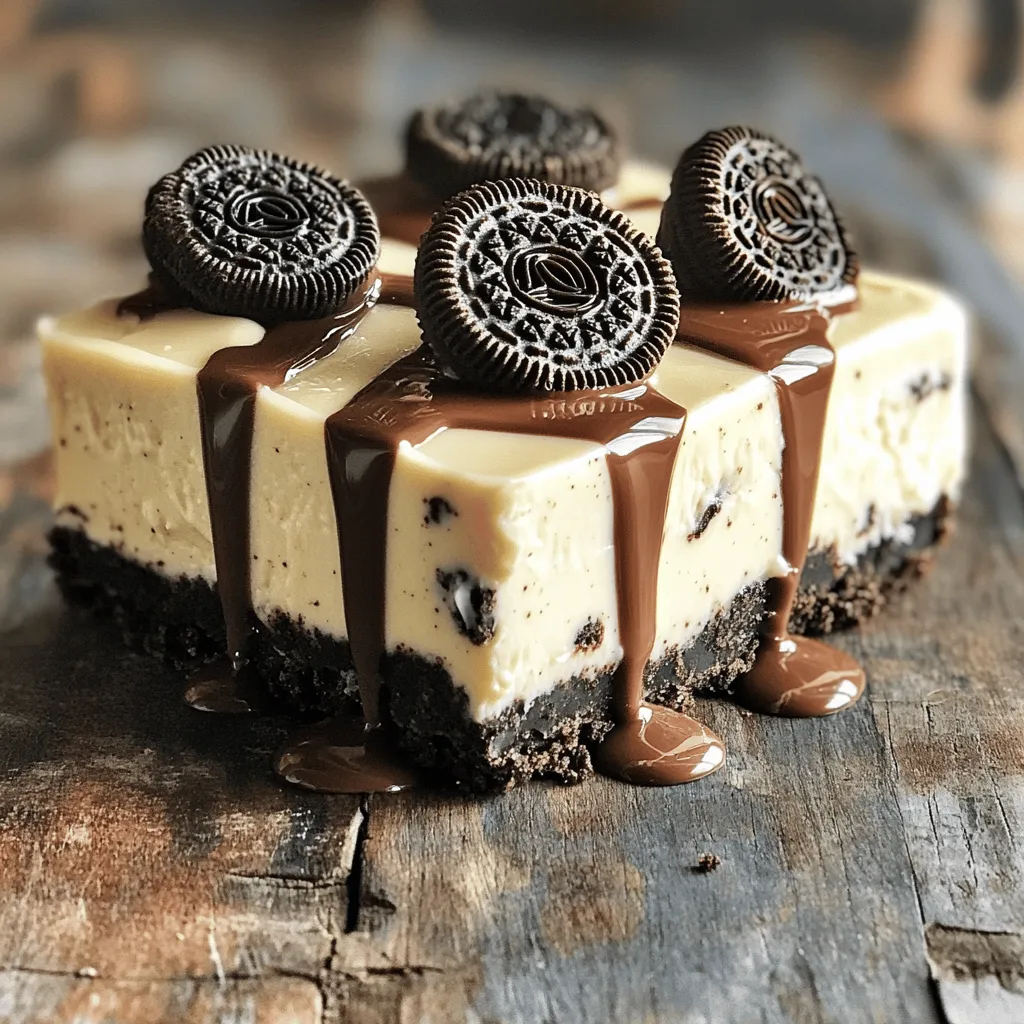
When ready to serve, take the bars out of the fridge. You can top them with 2-3 whole Oreo cookies for a nice look. Cut the bars into squares for a pretty presentation.
For extra flair, drizzle some chocolate sauce over the top or add a dollop of whipped cream. Each portion should be about 1 square. This recipe makes 12 servings. Enjoy your delicious No-Bake Oreo Cheesecake Bars!
Tips & Tricks
Achieving the Perfect Texture
To mix the cheesecake filling well, start with softened cream cheese. Use a hand mixer or stand mixer to beat it until smooth. This helps avoid lumps.
When adding powdered sugar, do it slowly. Mix until everything is combined. Then, fold in the whipped cream gently. This keeps the mix airy and light.
To avoid a runny filling, make sure the cream cheese is fully softened. Cold cream cheese does not mix well. Also, chill the bars long enough. Four hours is best for a firm texture.
Dealing with Common Issues
If your crust is weak, check the butter amount. You need enough butter to hold the crust together. If it crumbles, add a bit more melted butter.
For the filling, if it seems too soft, try chilling it longer. A longer chill helps it set better.
When cutting the bars, use a sharp knife. Clean the knife between cuts to keep edges neat. You can also warm the knife slightly to help with cutting.
These tips will help you make perfect no-bake Oreo cheesecake bars every time.
Variations
Flavor Twists
You can easily change the flavor of your Oreo cheesecake bars. Instead of classic Oreos, try using mint Oreos for a fresh twist or peanut butter Oreos for a nutty touch. You can also switch up the whipped cream flavor. Add a splash of almond extract or a hint of hazelnut to your cream. This small change makes a big impact on taste.
Dietary Adjustments
If you need a gluten-free option, use gluten-free Oreos. They taste just as good. For a dairy-free version, swap cream cheese with a dairy-free cream cheese. Almond milk or coconut cream can work well too. Want to cut down on sugar? Use a sugar substitute like Stevia. It helps keep your bars sweet without the extra calories.
With these variations, your no-bake Oreo cheesecake bars can fit different diets and please all guests. Get creative and enjoy the process!
Storage Info
Proper Storage Methods
After making your No-Bake Oreo Cheesecake Bars, store any leftovers in the fridge. Use an airtight container to keep them fresh. This prevents them from drying out and picking up other odors. If you want to freeze them, cut the bars into squares first. Wrap each square in plastic wrap, then place them in a freezer bag. This helps keep them safe from freezer burn. When you’re ready to eat, take out a square and let it thaw in the fridge for a few hours.
Shelf Life
These delicious cheesecake bars last about 5 days in the fridge. You can tell they are still good if they smell fresh and look firm. Check for any signs of mold or changes in texture. If they feel too soft or runny, it’s best to throw them away. Enjoy your treat while it’s fresh for the best taste!
FAQs
Common Questions
Can I use a different cookie for the crust?
Yes, you can use other cookies. Graham crackers work well. You can also try chocolate wafers or even homemade cookies. Just crush them up like you would with Oreos.
How long do I need to chill the bars before serving?
Chill the bars for at least 4 hours. This helps the filling set properly. If you can wait longer, they will taste even better!
Recipe Adjustments
Can I make this recipe without cream cheese?
You can use Greek yogurt as a substitute. It gives a nice tangy flavor. Silken tofu is another option for a dairy-free choice.
What can I substitute for powdered sugar?
If you need a swap, use granulated sugar. Just blend it in a blender until it’s fine. You can also make a simple syrup with regular sugar and water.
Serving and Enjoying
Do these bars need to be served chilled?
Yes, these bars taste best when chilled. The cool texture makes them more refreshing. I recommend serving them straight from the fridge.
Can I make these bars in advance for a party?
Absolutely! These bars are perfect for making ahead. Just store them in the fridge until you are ready to serve. They taste even better after a day or two!
You now know how to make No-Bake Oreo Cheesecake Bars. We covered ingredients, steps, tips, variations, and storage. Experiment with flavors and adapt the recipe to your taste. Don’t hesitate to add your favorite toppings or swaps. Remember, these bars are fun and easy to make ahead. They can wow your friends at any gathering. Enjoy sharing them as a delightful treat, just as I do. Now, go and create some delicious bars!

