Are you craving a sweet treat without the fuss of ice cream machines? Let me introduce you to my No-Churn Oreo Ice Cream! This creamy delight is simple to make and uses just a few ingredients. With heavy whipping cream, sweetened condensed milk, and crumbled Oreos, you’ll whip up a delicious dessert in no time. Trust me, once you try this recipe, you won’t want store-bought again!
Ingredients
Main Ingredients Required
– 2 cups heavy whipping cream
– 1 can (14 oz) sweetened condensed milk
– 1 teaspoon vanilla extract
– 1 ½ cups Oreo cookies, crushed (plus extra for topping)
To make this no-churn Oreo ice cream, you need a few simple ingredients. The heavy whipping cream gives it a rich, creamy texture. Sweetened condensed milk adds sweetness and creaminess without the need for an ice cream maker. The vanilla extract enhances the flavor, while crushed Oreo cookies add that classic cookie crunch.
Optional Ingredients
– ¼ cup chocolate syrup (for swirls)
– Pinch of salt
You can also use chocolate syrup for a fun swirl inside the ice cream. A pinch of salt helps to balance the sweetness. These optional ingredients can take your ice cream to the next level, but the main four are enough for a delicious treat.
Step-by-Step Instructions
Preparation Steps
1. Start by whipping the heavy cream. Use an electric mixer for about 3-5 minutes. You want soft peaks to form.
2. In another bowl, mix the sweetened condensed milk with vanilla extract and a pinch of salt. Blend them well until smooth.
3. Next, fold the whipped cream into the condensed milk mixture. Do this in two parts. Use a spatula to carefully combine them without losing air.
4. Once mixed, add the crushed Oreo cookies. Gently fold them in until they are evenly spread throughout the mixture.
Finalizing the Ice Cream
1. Now, drizzle the chocolate syrup into the mixture. Lightly swirl it with your spatula for a fun marbled effect. Don’t over-mix; you want to see ribbons of chocolate.
2. Transfer the entire mixture into an airtight container. Smooth out the top. Sprinkle some extra crushed Oreos on top for a nice touch.
3. Cover the container with a lid or plastic wrap. Freeze it for at least 6 hours or overnight until it is firm.Enjoy your homemade no-churn Oreo ice cream!
Tips & Tricks
Achieving the Perfect Texture
To make your no-churn Oreo ice cream creamy, start by whipping your heavy cream until it forms soft peaks. Soft peaks mean that the cream holds its shape but bends at the tip. This is key for a light texture. It usually takes about 3-5 minutes with an electric mixer.
Next, use the folding technique when combining your whipped cream with the sweetened condensed milk. Take a spatula and gently fold the whipped cream into the condensed milk mixture. Do this in two parts. This keeps air in the mix and makes your ice cream fluffy. Be careful not to stir too hard, or you’ll lose that airy texture.
Serving Tips
When it’s time to serve, allow the ice cream to sit out for a few minutes. This makes it easier to scoop. You’ll want it soft but not melted.
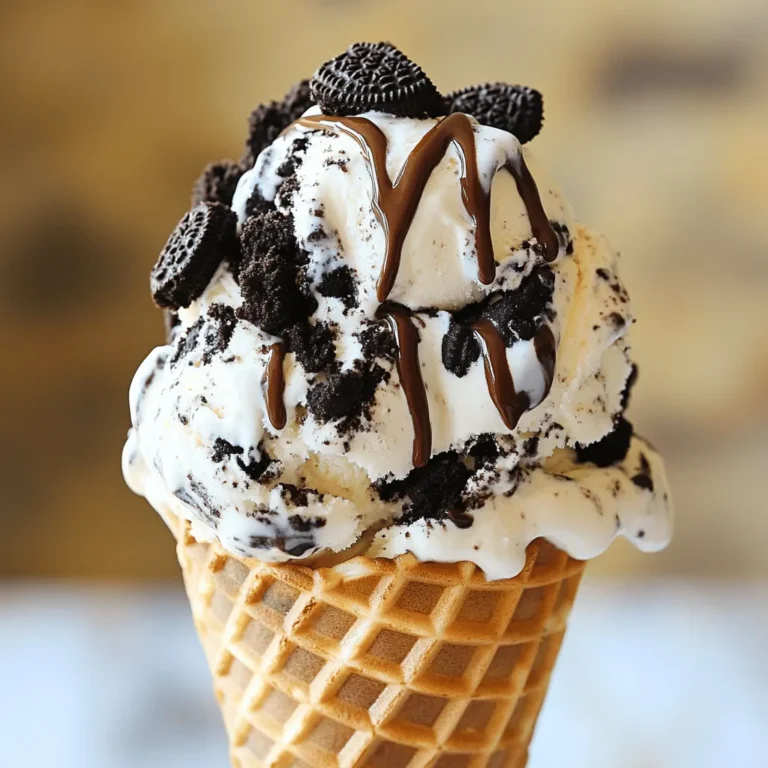
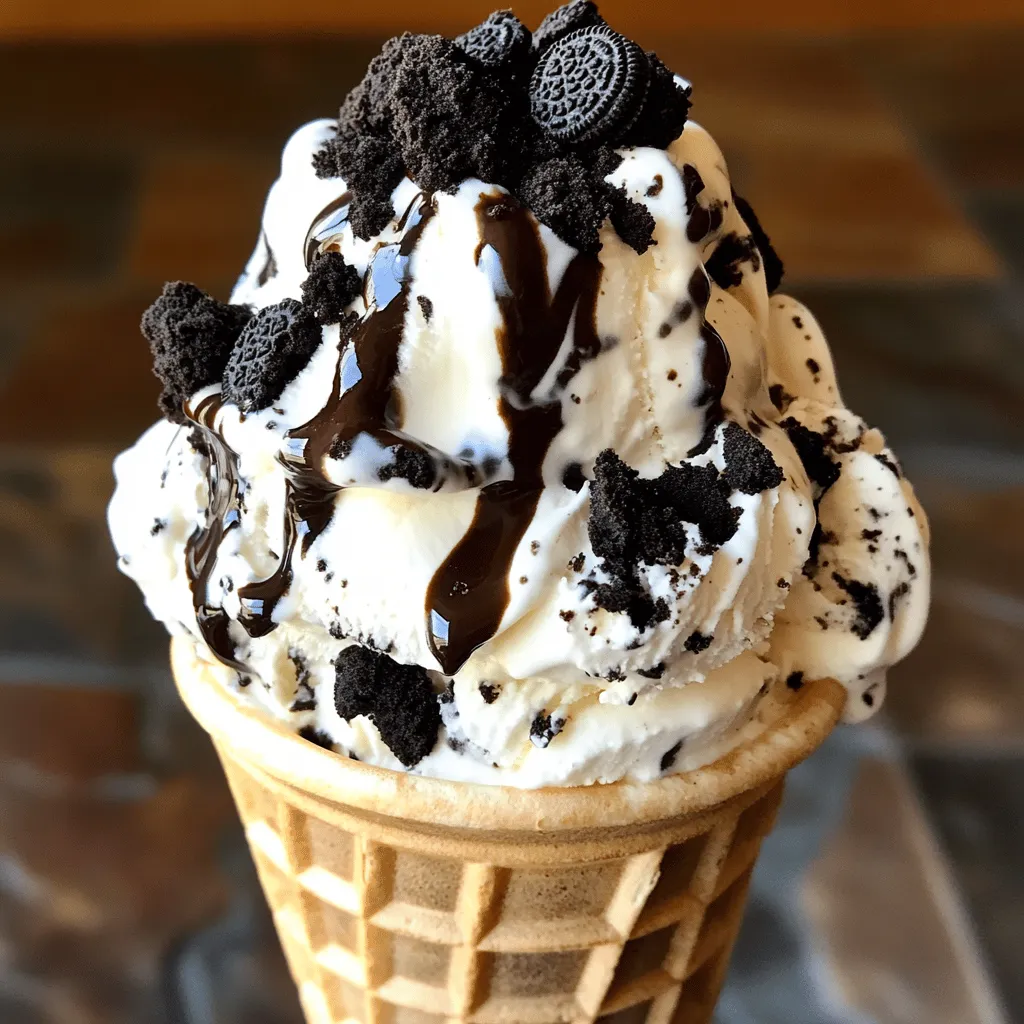
For a fun touch, serve your ice cream in waffle cones or bowls. Drizzle extra chocolate syrup on top and sprinkle some crushed Oreos for added crunch. You can even add a dollop of whipped cream for extra flair. Enjoy your creamy and simple delight straight from your kitchen!
Variations
Flavor Additions
You can make your No-Churn Oreo Ice Cream even more fun by adding flavors.
– Mint chocolate Oreo: Mix in some mint extract. This gives a fresh taste. Try adding crushed mint Oreos for extra minty flavor.
– Peanut butter Oreo blend: Swirl in peanut butter for a rich, nutty twist. You can also mix in chopped peanut butter cups for a crunch.
Toppings Suggestions
Toppings can take your ice cream to the next level.
– Additional cookie crumbles: Sprinkle more crushed Oreos on top. This adds great texture and flavor.
– Whipped cream or chocolate shavings: Top with whipped cream for a creamy touch. You can also add chocolate shavings for a fancy look.
Explore these variations to make your ice cream unique.
Storage Info
How to Store
To keep your no-churn Oreo ice cream fresh, use an airtight container. This helps stop ice crystals from forming. Make sure the container seals tightly. Store the ice cream in the coldest part of your freezer. This keeps it creamy and smooth.
Freezing Duration
Enjoy your ice cream within two weeks for the best taste. After that, it may lose flavor and texture. If you see ice crystals on top, it’s time to toss it out. Also, if it has a strange smell or taste, don’t risk it. Always trust your senses when it comes to food safety.
FAQs
Common Questions
Can I use low-fat cream?
Yes, you can use low-fat cream. However, the ice cream may not be as rich and creamy. Heavy cream gives the best texture.
How long does it take to freeze?
It takes at least 6 hours to freeze. For the best results, freeze overnight. This ensures your ice cream is fully set.
Can I make this without Oreos?
Absolutely! You can swap Oreos for other cookies, like chocolate chip or vanilla wafers. This gives you new flavors to enjoy.
Troubleshooting
What if the ice cream is too hard?
If the ice cream is too hard, let it sit out for a few minutes. This helps soften it before you scoop.
How to avoid ice crystals in no-churn ice cream?
To avoid ice crystals, whip the cream until soft peaks form. Also, make sure to store it in an airtight container. This keeps the texture smooth and creamy.
You learned about making delicious no-churn Oreo ice cream with simple steps. Use heavy cream, sweetened condensed milk, and crushed Oreos for a tasty treat. I shared tips for getting the best texture and serving ideas. Don’t forget to explore flavor and topping variations. Store your ice cream right to keep it fresh. Enjoy making this easy dessert that brings smiles to everyone! Now, grab your ingredients and start creating your own tasty ice cream adventure.

