Latest & Greatest

Creamy Garlic Tuscan Chicken Flavorful Family Meal
Want to impress your family with a delicious meal? Creamy Garlic Tuscan Chicken is your answer! This dish packs rich
Read more…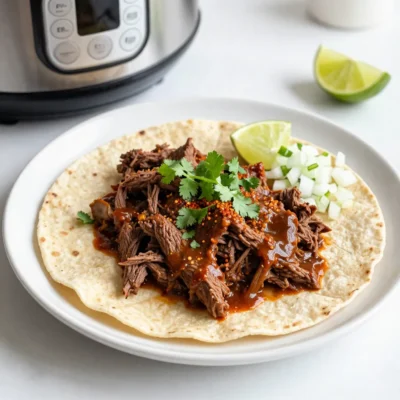
Instant Pot Beef Barbacoa Flavorful and Easy Recipe
Are you ready to transform your dinner with a burst of flavor? This Instant Pot Beef Barbacoa recipe is simple,
Read more…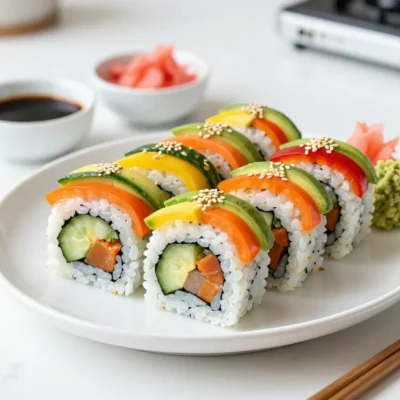
Rainbow Veggie Sushi Rolls Simple and Flavorful Treat
Looking for a fun and healthy way to enjoy sushi at home? Rainbow Veggie Sushi Rolls are simple, vibrant, and
Read more…
Maple Glazed Donut Holes Irresistible Sweet Treat
Get ready for a sweet adventure! Maple glazed donut holes are the ultimate treat for your taste buds. These little
Read more…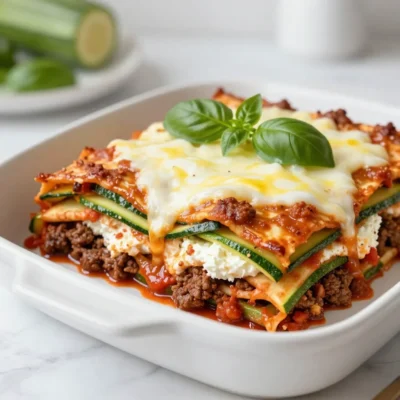
Keto Zucchini Lasagna Flavorful and Healthy Option
Are you craving a satisfying, guilt-free meal? Look no further than my Keto Zucchini Lasagna! This flavorful dish swaps noodles
Read more…
Triple Chocolate Chip Muffins Delightful and Easy Recipe
Are you ready to treat yourself to a rich and chocolaty delight? These Triple Chocolate Chip Muffins are not just
Read more…
Cranberry Brie Chicken Flavorful and Easy Dinner Recipe
Looking for a delicious and simple dinner idea? Try my Cranberry Brie Chicken recipe! This dish combines juicy chicken with
Read more…
Maple Glazed Carrots Flavorful Side Dish Recipe
Looking for a vibrant side dish that will elevate your meals? Try my Maple Glazed Carrots! Sweet, tender, and easy
Read more…browse recipes

Triple Chocolate Chip Muffins Delightful and Easy Recipe
Are you ready to treat yourself to a rich and chocolaty delight? These Triple Chocolate Chip Muffins are not just easy to make, but…
My Latest Desserts
My Latest Recipes
hey,
i’m !
I’m so happy you’re here!
My kitchen is filled with stories, flavors, and love and I’m so happy to share them with you. Here’s to dishes that feel like home.
S’mores Dip Irresistible Dessert for Any Occasion
Are you ready to indulge in a treat that blends nostalgia and ease? This S’mores Dip is the perfect dessert for any occasion. Its…






![To make a tasty cauliflower fried rice, you will need the following main ingredients: - 1 medium head of cauliflower, grated or processed into rice-sized pieces - 1 cup of mixed vegetables (peas, carrots, corn) - 1 cup fresh spinach, roughly chopped - 2 eggs, lightly beaten (or 1/4 cup tofu for a vegan option) - 3 green onions, sliced - 2 cloves garlic, minced - 1 tablespoon fresh ginger, grated - 3 tablespoons soy sauce or tamari (for gluten-free) - 1 tablespoon sesame oil - 1 tablespoon olive oil - Salt and pepper to taste These ingredients come together to create a colorful and nutritious dish. The cauliflower acts as the base, giving you a satisfying texture. The mixed vegetables add color and nutrients, while the eggs or tofu provide protein. You can enhance the taste of your cauliflower fried rice with a few optional ingredients: - Sesame seeds for garnish - Red pepper flakes for heat - Bell peppers for sweetness - Mushrooms for umami - Peanuts for crunch Adding these optional items can make your dish more exciting. Don’t hesitate to get creative! If you have specific dietary needs, here are some substitutions: - Use quinoa or brown rice instead of cauliflower for a grain option. - Swap soy sauce for coconut aminos if avoiding soy. - Replace eggs with chickpea flour to maintain a vegan dish. - Use any veggies you like, such as zucchini or broccoli. These substitutions allow everyone to enjoy delicious cauliflower fried rice. Feel free to mix and match ingredients based on what you have at home or your dietary restrictions. For the full recipe, refer to the cooking instructions above! To start, grab a medium head of cauliflower. Remove the leaves and core. Cut the cauliflower into small florets. Next, use a food processor to pulse the florets until they look like rice grains. If you do not have a food processor, you can also use a box grater. This step is key for a great texture in your dish. Heat one tablespoon of olive oil in a large skillet over medium heat. Add two cloves of minced garlic and one tablespoon of grated ginger. Sauté for about one minute until they smell good. Next, toss in one cup of mixed vegetables. Stir-fry these for about three to four minutes until they soften. Now, push the veggies to one side of the pan. Pour in two beaten eggs, or you can use tofu for a vegan option. Scramble the eggs until they are fully cooked, then mix them with the veggies. Add the processed cauliflower rice and three tablespoons of soy sauce. Stir everything well to coat it evenly. Cook for another five to seven minutes. Keep stirring until the cauliflower gets tender but stays firm. In the last minute, add one cup of roughly chopped spinach, stirring until it wilts. Season with salt and pepper to taste. Drizzle one tablespoon of sesame oil before you finish cooking. To get the best texture, do not overcook the cauliflower. It should be tender yet not mushy. Using fresh ingredients gives more flavor. You can also add sesame seeds as a nice touch for garnish. Enjoy your delicious cauliflower fried rice! For the complete recipe, check out the Full Recipe section. To prepare cauliflower for fried rice, you can grate or process it. If you have a food processor, this task becomes quick. Cut the cauliflower into small florets. Place them in the processor and pulse until it resembles rice. If you lack a food processor, grab a box grater. Hold the cauliflower steady and grate it until it looks like rice. Both methods work well, so choose what you have on hand. For perfect cauliflower fried rice, the right tools matter. A large non-stick skillet or wok helps prevent sticking. A spatula is great for mixing and flipping the ingredients. If you want even cooking, a lid can trap steam. Using a lid can also help the cauliflower cook through without becoming mushy. This setup leads to a tasty and well-cooked meal. Making cauliflower fried rice is easy, but some mistakes can ruin it. Here are a few to watch out for: - Overcooking the Cauliflower: This can lead to mushy rice. Cook it just until tender. - Using Too Much Sauce: Adding too much soy sauce can make the dish salty. Start with a small amount and adjust to taste. - Not Prepping Ingredients First: Cut and prepare all your ingredients before cooking. This makes cooking smoother and quicker. - Skipping the Seasoning: Don’t forget salt and pepper! They enhance the flavor of the dish. Following these tips ensures your cauliflower fried rice is simple and tasty. For the full recipe, see above. {{image_2}} You can change up the veggies in your cauliflower fried rice. Try using bell peppers, broccoli, or snap peas. Each adds a unique taste and crunch. You can even toss in some zucchini or mushrooms for a savory kick. Be creative! Use any vegetables you like or have on hand. This dish is a great way to use up leftovers. Cauliflower fried rice fits well into many diets. For a vegan option, swap the eggs for tofu. Just crumble it and let it cook with the veggies. If you avoid animal products, this dish remains hearty and filling. You can also add more plant-based protein, like chickpeas or edamame. To boost flavor, consider adding different sauces or spices. You can use hoisin sauce or sriracha for some heat. Fresh herbs like cilantro or basil can brighten each bite. A squeeze of lime juice adds a zesty touch. Don't forget sesame seeds for a nice crunch! These enhancements make every bite exciting and unique. For the full recipe, check the main section above! Store leftover cauliflower fried rice in an airtight container. Keep it in the fridge for up to three days. Make sure it cools down before sealing. This will help it stay fresh longer. To reheat, use a skillet on medium heat. Add a splash of water or oil to prevent sticking. Stir it often for even heating. You can also use a microwave. Heat in short bursts, stirring in between. This keeps the rice from getting soggy. Yes, you can freeze cauliflower fried rice! Place it in a freezer-safe bag or container. Remove as much air as possible to prevent freezer burn. It will stay good for up to three months. To enjoy, simply thaw in the fridge overnight and reheat as mentioned above. Yes, cauliflower fried rice is naturally gluten-free. You can use gluten-free soy sauce or tamari for flavor. This option makes it safe for those with gluten allergies. Many people enjoy this dish without any gluten-related issues. Absolutely! Frozen cauliflower works well in this recipe. Just remember to thaw and drain it first. This step ensures that your dish does not become too watery. It saves time and still gives you a tasty meal. You can boost the flavor of cauliflower fried rice easily. Here are some tips: - Add more spices like chili flakes or black pepper. - Include a splash of rice vinegar for tang. - Mix in fresh herbs like cilantro or basil. - Experiment with different sauces, such as sriracha or hoisin. These additions help you create a dish that excites your taste buds. For the full recipe, check out the [Full Recipe]. Cauliflower fried rice is simple yet versatile. We discussed key ingredients, step-by-step cooking, and tips for the best outcome. You can use different veggies and flavor boosts to suit your taste. Lastly, proper storage is vital for freshness. With these insights, you can create a delicious and healthy dish that fits your needs. Enjoy your cooking, and remember, practice makes perfect!](https://southerndishes.com/wp-content/uploads/2025/05/4e7168f4-e462-4aff-ad4a-4fadd2b5ab10-300x300.webp)
![- 4 large russet potatoes, cut into wedges - 1 cup dill pickle juice - 1 tablespoon olive oil - 1 teaspoon garlic powder - 1 teaspoon onion powder - 1 teaspoon smoked paprika - 1 teaspoon dried dill - Salt and pepper to taste - ½ cup ranch dressing (store-bought or homemade) - Fresh dill fronds for garnish When making Pickle Ranch Potato Wedges, start with fresh ingredients. Russet potatoes are the best choice. They give a fluffy inside and a crispy outside. You can soak them in dill pickle juice for a tangy flavor. This step is key to making your wedges special. If you want to switch up the potatoes, try Yukon Gold or sweet potatoes. They add unique flavors and textures. For ranch dressing, you can make your own with yogurt and herbs. This option allows you to control the flavors. If you need a lower-sodium choice, look for low-sodium ranch or pickle juice. These changes can help fit your diet while still enjoying delicious wedges. For the full recipe, check out the recipe section above. To start, you need to coat the potato wedges in pickle juice. Take your large russet potatoes and cut them into wedges. Place the wedges in a large bowl. Pour the dill pickle juice over them. Make sure every wedge gets a good soak. Cover the bowl with plastic wrap. You want to refrigerate them for at least 30 minutes. This time helps the potatoes absorb all the zesty flavor. Next, let’s prep your oven. Preheat it to 425°F (220°C). This high temperature is key for getting those crispy edges. While the oven heats up, line a baking sheet with parchment paper. This step makes cleaning up easy later. You don’t want to scrub stuck-on potato pieces! After marinating, drain the potato wedges. Now, you’ll want to toss them in a separate bowl with olive oil, garlic powder, onion powder, smoked paprika, dried dill, salt, and pepper. Mix them well until each wedge is evenly coated. This step is important for flavor. Spread the seasoned wedges on the lined baking sheet. Make sure they are in a single layer. This helps them cook evenly. Bake them in your preheated oven for 30-35 minutes. Flip them halfway through cooking. This will give you that golden brown, crispy finish. Try not to open the oven door too often, as it can drop the temperature. Enjoy the delicious smell while they bake! To get that perfect crisp, flip the wedges halfway through baking. This ensures even cooking and browning. Bake the wedges for 30-35 minutes at 425°F (220°C) for that golden finish. If you prefer extra crunch, add a few more minutes to the timer. Spicing up your wedges can lead to exciting flavors. You might try adding cayenne for heat or paprika for smokiness. After baking, top your wedges with extra ranch dressing, parmesan cheese, or even crumbled bacon for added taste. One common mistake is not letting the potatoes marinate long enough. A solid 30 minutes in pickle juice boosts flavor. Also, avoid overcrowding the baking sheet. This can lead to soggy wedges. Make sure to leave space for hot air to circulate around each wedge. For the full recipe, check out the main section. {{image_2}} To add a kick, mix in cayenne pepper or your favorite hot sauce. This will give your wedges a nice heat. You can also try a zesty ranch dressing. Look for options that add bold flavors, like chipotle or sriracha. These changes take your snack to the next level. If you love cheese, sprinkle shredded cheese on the wedges before baking. It melts beautifully and adds a rich flavor. For an even cheesier treat, top with cheese after baking. Let it melt under the broiler for a few minutes. This step brings a gooey, delicious finish to your wedges. To make this dish vegetarian or vegan, use dairy-free ranch dressing. Many brands offer great options that taste just as good. Instead of olive oil, try using avocado oil. It has a mild flavor and works well with these wedges. These simple swaps enable everyone to enjoy this tasty snack. For the full recipe, check out [Full Recipe]. To store leftover potato wedges, place them in an airtight container. This keeps them fresh and prevents them from drying out. Wedges will last in the fridge for up to three days. Be sure to let them cool before sealing the container. You can reheat your potato wedges in the oven or microwave. For the oven, preheat it to 400°F (200°C). Spread the wedges on a baking sheet and heat for 10 to 15 minutes. This method helps keep them crispy. If using a microwave, place wedges on a microwave-safe plate and heat for one to two minutes. Note that the microwave may make them a bit soggy. To restore crispiness, you can briefly place them back in the oven after microwaving. To freeze cooked potato wedges, let them cool completely first. Place the wedges in a single layer on a baking sheet and freeze until solid. Once frozen, transfer them to a freezer bag. They can last up to three months in the freezer. To thaw, place them in the fridge overnight or microwave them on low for a few minutes. Reheat in the oven to regain their crunch. Enjoy these tasty snacks anytime with the full recipe! Yes, you can use other potatoes. Yukon gold potatoes add a creamy texture. Sweet potatoes give a hint of sweetness. Red potatoes hold their shape well but may not get as crispy. Each type has its own flavor and texture. Experimenting can lead to fun results. Just remember to adjust cooking times if needed. Making ranch dressing is simple and quick. Here’s a basic recipe: - 1 cup sour cream - ½ cup mayonnaise - 1 tablespoon lemon juice - 1 teaspoon garlic powder - 1 teaspoon onion powder - 1 teaspoon dried dill - Salt and pepper to taste Mix all these ingredients in a bowl until smooth. You can adjust the spices for your taste. This creamy dressing pairs perfectly with the potato wedges. Pickle Ranch Potato Wedges are great with many sides. Here are some tasty options: - A fresh garden salad for crunch - Grilled chicken or fish for protein - Buffalo wings for a spicy kick - Veggie sticks and dip for a health boost These sides balance the savory flavor of the wedges. Enjoy creating a fun meal! In this article, I shared how to make delicious Pickle Ranch Potato Wedges. We covered essential ingredients, marinating techniques, and cooking steps for crispy results. I also included tips to help you avoid common mistakes and variations to try. Remember, take time to marinate and avoid overcrowding your baking sheet for the best flavor. These wedges can be stored, reheated, or even frozen. Enjoy experimenting with substitutions and different flavors in your cooking! Trust me, these wedges will be a hit!](https://southerndishes.com/wp-content/uploads/2025/07/a88d1175-8736-49f7-aefc-1f05696dce55-300x300.webp)
