Strawberry Cheesecake Icebox Cake Delightful Dessert

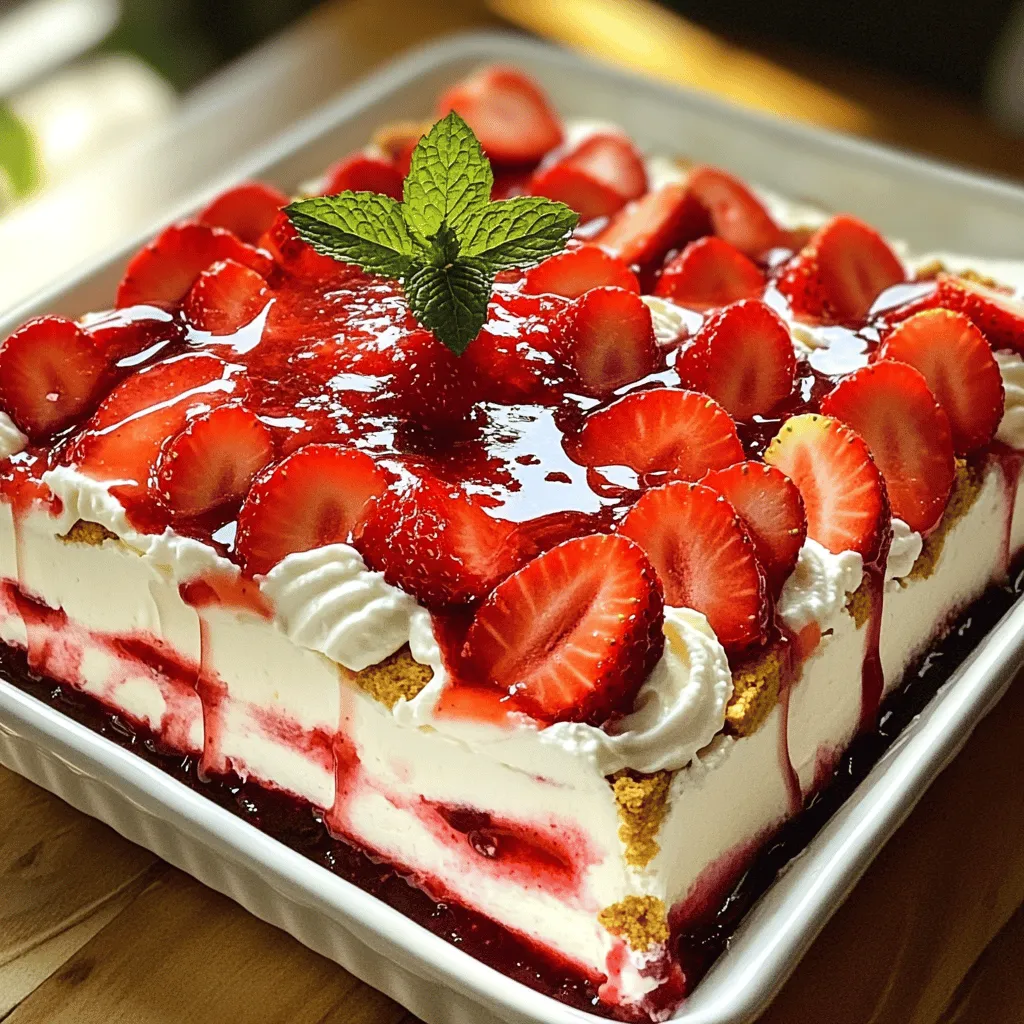
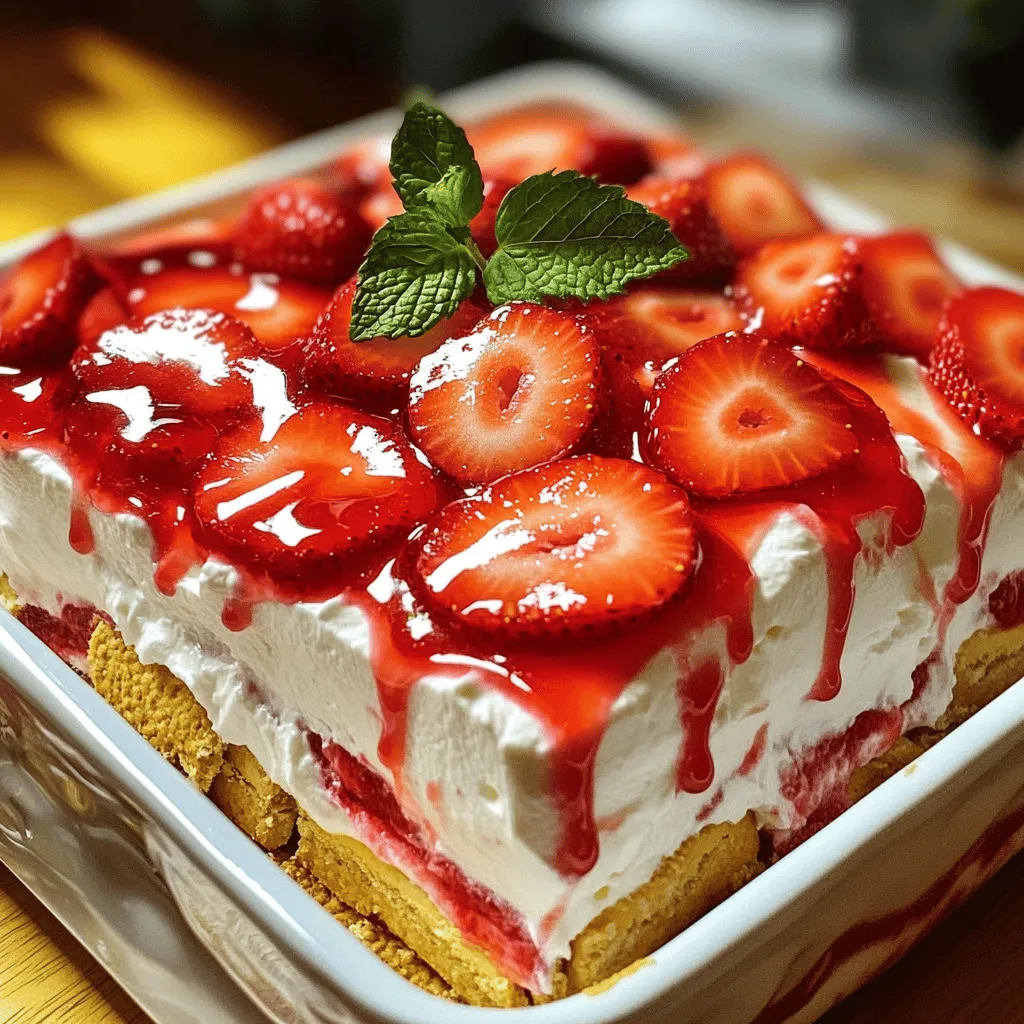
Craving a cool, creamy dessert that’s as easy to make as it is delicious? Look no further than this Strawberry Cheesecake Icebox Cake! With layers of sweet strawberries, fluffy cream cheese, and crunchy graham crackers, each bite delivers pure bliss. Plus, it’s perfect for warm days and gatherings. Let me guide you through the simple steps to create this delightful treat that everyone will love!

Ingredients

List of Ingredients

– 2 cups fresh strawberries, hulled and sliced

– 1 cup heavy whipping cream

– 8 oz cream cheese, softened

– 1 cup powdered sugar

– 1 teaspoon vanilla extract

– 8 oz graham crackers

– 1 cup strawberry preserves

– Fresh mint leaves for garnish (optional)

Ingredient Substitutions

You can use coconut cream instead of heavy whipping cream. This option is great for a lighter taste. If you need a vegan choice for cream cheese, look for brands made with nuts or tofu. They offer a creamy texture and taste.

Measuring Tips

To measure strawberries, use a dry measuring cup. Fill it with sliced berries, but don’t pack them down. Accurate measurements are key. They help keep your cake balanced and tasty. Too much or too little can change the flavor. Always level off dry ingredients to avoid surprises in your dessert.

Step-by-Step Instructions

Preparation Steps

Start by whipping the cream. Pour the heavy whipping cream into a bowl. Use a mixer on high speed until you see stiff peaks. This step is crucial for a fluffy texture. Set the whipped cream aside.

Next, take another bowl and add the softened cream cheese. Beat it until it’s smooth. Slowly mix in the powdered sugar and vanilla extract. Blend well until everything is creamy and combined. Now, gently fold in the whipped cream. This step makes your mixture light and airy.

Layering Process

Now it’s time to assemble your cake! Take a 9×13 inch baking dish. Spread a layer of cream cheese mixture at the bottom. Place a layer of graham crackers over this. If some crackers are too big, break them into smaller pieces to fit.

Then, spread a layer of strawberry preserves on top of the graham crackers. Follow this with a layer of fresh strawberries. Repeat this process: cream cheese mixture, graham crackers, strawberry preserves, and strawberries. Finish with a layer of the cream cheese mixture on top.

Chilling the Cake

After you layer everything, cover the dish with plastic wrap. Refrigerate the cake for at least 4 hours. For best results, chill it overnight. This time allows the flavors to mix and the cake to set perfectly.

Refrigeration is key for flavor. It helps the ingredients blend well and makes each bite delicious. Enjoy this delightful treat! For the complete guide, check out the Full Recipe.

Tips & Tricks

Achieving the Best Texture

To get the best texture for your Strawberry Cheesecake Icebox Cake, you need to fold the whipped cream properly. Start by gently adding the whipped cream to the cream cheese mixture. Use a spatula to scoop from the bottom and fold over the top. Repeat this until mixed, but don’t stir too hard. This keeps the air in and makes the cake light.

Also, make sure your cream cheese is at room temperature. Cold cream cheese can clump up. Leave it out for about 30 minutes before you start. This step helps create a smooth, lump-free filling that blends well with the whipped cream.

Presentation Enhancements

Garnishing your cake can take it from simple to stunning. Use fresh mint leaves for a pop of color. Place a mint leaf on top of each slice. You can also add an extra strawberry on each piece. This makes the dish look fresh and inviting.

For plating, use a clean white plate to showcase the colors of the cake. You could drizzle extra strawberry preserves around the cake slice. This adds color and a hint of sweetness.

Common Mistakes to Avoid

One common mistake is over-whipping the cream. If you whip it too much, it can turn into butter. Stop when you see stiff peaks. This gives the cake its airy texture.

Another mistake is skipping the chilling step. Chilling helps the flavors mix and the cake set. Be patient and let it chill for at least four hours, or better yet, overnight. This step is key for a creamy, delicious dessert.

For the full recipe, check out the complete guide on making your Strawberry Cheesecake Icebox Cake.

Variations

Alternate Flavors

You can change up the flavor of your strawberry cheesecake icebox cake. Try using chocolate or lemon. For a chocolate twist, mix cocoa powder into your cream cheese blend. You can also use chocolate graham crackers for added flavor. If you prefer lemon, add fresh lemon juice and zest to the cream cheese. It gives a bright, zesty taste.

You can swap out strawberries for other berries too. Blueberries, raspberries, or blackberries work well. Each berry adds its unique flavor. Mix and match to find your favorite combo!

Dietary Adjustments

If you need a gluten-free option, look for gluten-free graham crackers. They are widely available in stores. This keeps your cake safe for those with gluten issues.

For a dairy-free version, use coconut cream instead of heavy cream. You can also find dairy-free cream cheese at many grocery stores. This way, everyone can enjoy this dessert!

Serving Suggestions

Pair your cake with other desserts for a fun dessert spread. It goes well with lighter treats like sorbet or fruit salad. You can also serve it alongside chocolate mousse for a rich contrast.

When it comes to drinks, fresh lemonade or iced tea is perfect. Their acidity balances the creamy sweetness of the cake. You can also serve it with coffee for a cozy touch. Each sip enhances the cake’s flavor!

Storage Info

Refrigerator Storage

Store your leftover strawberry cheesecake icebox cake in an airtight container. This keeps it fresh. You can also cover the dish with plastic wrap. The cake stays good for up to five days in the fridge. Just make sure to check it before serving.

Freezing Instructions

Yes, you can freeze this cake! To freeze, wrap individual slices in plastic wrap. Place them in a freezer-safe bag or container. This helps prevent freezer burn. The cake can last up to three months in the freezer. When you want to eat it, let it thaw in the fridge overnight. This keeps the texture nice.

Signs of Spoilage

Look for a few signs to check if the cake has gone bad. If it has an off smell or shows mold, it’s time to toss it. Also, if the texture feels slimy, don’t eat it. Checking for freshness is key to enjoying this dessert safely.

FAQs

Can I make Strawberry Cheesecake Icebox Cake ahead of time?

Yes, you can make this cake a day or two in advance. Just follow these tips:

– Prepare the cake and layer it in your dish.

– Cover it tightly with plastic wrap.

– Refrigerate for at least four hours or overnight.

This allows the flavors to mix well and makes slicing easier.

Is it safe to eat if left out for a few hours?

It’s best to keep the cake chilled. If left out, the cream cheese and whipped cream can spoil.

– Serve the cake right from the fridge.

– If it sits out for more than two hours, it’s safer to discard it.

Always prioritize food safety to keep your guests happy and healthy.

What can I use if I don’t have strawberry preserves?

You can use other fruit spreads or make your own. Here are some ideas:

– Raspberry or blueberry preserves work well.

– For a homemade option, mash fresh berries with a bit of sugar.

This gives you a fresh taste and keeps the cake delicious.

Where can I find the full recipe?

You can find the full Strawberry Cheesecake Icebox Cake recipe [here](#). It has all the steps and tips you need to create this delightful dessert!

This blog post covered all the key steps for making a Strawberry Cheesecake Icebox Cake. We discussed the ingredients, measuring tips, and substitutes, ensuring you have options to fit your needs. I shared detailed preparation and layering instructions, plus tricks for the best texture and presentation. You learned about variations and storage, making sure your cake stays fresh and delicious. This dessert is simple to make and perfect for any occasion. Enjoy making your cake, and let your creativity shine!

- 2 cups fresh strawberries, hulled and sliced - 1 cup heavy whipping cream - 8 oz cream cheese, softened - 1 cup powdered sugar - 1 teaspoon vanilla extract - 8 oz graham crackers - 1 cup strawberry preserves - Fresh mint leaves for garnish (optional) You can use coconut cream instead of heavy whipping cream. This option is great for a lighter taste. If you need a vegan choice for cream cheese, look for brands made with nuts or tofu. They offer a creamy texture and taste. To measure strawberries, use a dry measuring cup. Fill it with sliced berries, but don’t pack them down. Accurate measurements are key. They help keep your cake balanced and tasty. Too much or too little can change the flavor. Always level off dry ingredients to avoid surprises in your dessert. Start by whipping the cream. Pour the heavy whipping cream into a bowl. Use a mixer on high speed until you see stiff peaks. This step is crucial for a fluffy texture. Set the whipped cream aside. Next, take another bowl and add the softened cream cheese. Beat it until it's smooth. Slowly mix in the powdered sugar and vanilla extract. Blend well until everything is creamy and combined. Now, gently fold in the whipped cream. This step makes your mixture light and airy. Now it’s time to assemble your cake! Take a 9x13 inch baking dish. Spread a layer of cream cheese mixture at the bottom. Place a layer of graham crackers over this. If some crackers are too big, break them into smaller pieces to fit. Then, spread a layer of strawberry preserves on top of the graham crackers. Follow this with a layer of fresh strawberries. Repeat this process: cream cheese mixture, graham crackers, strawberry preserves, and strawberries. Finish with a layer of the cream cheese mixture on top. After you layer everything, cover the dish with plastic wrap. Refrigerate the cake for at least 4 hours. For best results, chill it overnight. This time allows the flavors to mix and the cake to set perfectly. Refrigeration is key for flavor. It helps the ingredients blend well and makes each bite delicious. Enjoy this delightful treat! For the complete guide, check out the Full Recipe. To get the best texture for your Strawberry Cheesecake Icebox Cake, you need to fold the whipped cream properly. Start by gently adding the whipped cream to the cream cheese mixture. Use a spatula to scoop from the bottom and fold over the top. Repeat this until mixed, but don’t stir too hard. This keeps the air in and makes the cake light. Also, make sure your cream cheese is at room temperature. Cold cream cheese can clump up. Leave it out for about 30 minutes before you start. This step helps create a smooth, lump-free filling that blends well with the whipped cream. Garnishing your cake can take it from simple to stunning. Use fresh mint leaves for a pop of color. Place a mint leaf on top of each slice. You can also add an extra strawberry on each piece. This makes the dish look fresh and inviting. For plating, use a clean white plate to showcase the colors of the cake. You could drizzle extra strawberry preserves around the cake slice. This adds color and a hint of sweetness. One common mistake is over-whipping the cream. If you whip it too much, it can turn into butter. Stop when you see stiff peaks. This gives the cake its airy texture. Another mistake is skipping the chilling step. Chilling helps the flavors mix and the cake set. Be patient and let it chill for at least four hours, or better yet, overnight. This step is key for a creamy, delicious dessert. For the full recipe, check out the complete guide on making your Strawberry Cheesecake Icebox Cake. {{image_2}} You can change up the flavor of your strawberry cheesecake icebox cake. Try using chocolate or lemon. For a chocolate twist, mix cocoa powder into your cream cheese blend. You can also use chocolate graham crackers for added flavor. If you prefer lemon, add fresh lemon juice and zest to the cream cheese. It gives a bright, zesty taste. You can swap out strawberries for other berries too. Blueberries, raspberries, or blackberries work well. Each berry adds its unique flavor. Mix and match to find your favorite combo! If you need a gluten-free option, look for gluten-free graham crackers. They are widely available in stores. This keeps your cake safe for those with gluten issues. For a dairy-free version, use coconut cream instead of heavy cream. You can also find dairy-free cream cheese at many grocery stores. This way, everyone can enjoy this dessert! Pair your cake with other desserts for a fun dessert spread. It goes well with lighter treats like sorbet or fruit salad. You can also serve it alongside chocolate mousse for a rich contrast. When it comes to drinks, fresh lemonade or iced tea is perfect. Their acidity balances the creamy sweetness of the cake. You can also serve it with coffee for a cozy touch. Each sip enhances the cake's flavor! Store your leftover strawberry cheesecake icebox cake in an airtight container. This keeps it fresh. You can also cover the dish with plastic wrap. The cake stays good for up to five days in the fridge. Just make sure to check it before serving. Yes, you can freeze this cake! To freeze, wrap individual slices in plastic wrap. Place them in a freezer-safe bag or container. This helps prevent freezer burn. The cake can last up to three months in the freezer. When you want to eat it, let it thaw in the fridge overnight. This keeps the texture nice. Look for a few signs to check if the cake has gone bad. If it has an off smell or shows mold, it’s time to toss it. Also, if the texture feels slimy, don’t eat it. Checking for freshness is key to enjoying this dessert safely. Yes, you can make this cake a day or two in advance. Just follow these tips: - Prepare the cake and layer it in your dish. - Cover it tightly with plastic wrap. - Refrigerate for at least four hours or overnight. This allows the flavors to mix well and makes slicing easier. It's best to keep the cake chilled. If left out, the cream cheese and whipped cream can spoil. - Serve the cake right from the fridge. - If it sits out for more than two hours, it’s safer to discard it. Always prioritize food safety to keep your guests happy and healthy. You can use other fruit spreads or make your own. Here are some ideas: - Raspberry or blueberry preserves work well. - For a homemade option, mash fresh berries with a bit of sugar. This gives you a fresh taste and keeps the cake delicious. You can find the full Strawberry Cheesecake Icebox Cake recipe [here](#). It has all the steps and tips you need to create this delightful dessert! This blog post covered all the key steps for making a Strawberry Cheesecake Icebox Cake. We discussed the ingredients, measuring tips, and substitutes, ensuring you have options to fit your needs. I shared detailed preparation and layering instructions, plus tricks for the best texture and presentation. You learned about variations and storage, making sure your cake stays fresh and delicious. This dessert is simple to make and perfect for any occasion. Enjoy making your cake, and let your creativity shine!

Strawberry Cheesecake Icebox Cake

Indulge in the sweet goodness of this Strawberry Cheesecake Icebox Cake, a delightful dessert that's perfect for any occasion! With layers of creamy cheesecake, fresh strawberries, and crunchy graham crackers, this no-bake treat is both simple and impressive. Discover how easy it is to whip up this refreshing dessert that will leave everyone craving more. Click through to explore the full recipe and impress your guests!

Ingredients
  

2 cups fresh strawberries, hulled and sliced

1 cup heavy whipping cream

8 oz cream cheese, softened

1 cup powdered sugar

1 teaspoon vanilla extract

8 oz graham crackers

1 cup strawberry preserves

Fresh mint leaves for garnish (optional)

Instructions
 

In a medium bowl, whip the heavy cream until stiff peaks form. Set aside.

    In another bowl, beat the softened cream cheese until smooth and creamy.

      Gradually add the powdered sugar and vanilla extract to the cream cheese, mixing until well combined.

        Gently fold the whipped cream into the cream cheese mixture until fully incorporated, ensuring a light and fluffy texture.

          To assemble the cake, spread a layer of the cream cheese mixture in the bottom of a 9x13 inch baking dish.

            Place a layer of graham crackers over the cream cheese layer, breaking them if necessary to fit.

              Spread a layer of strawberry preserves over the graham cracker layer, followed by a layer of sliced strawberries.

                Repeat the layers—cream cheese mixture, graham crackers, strawberry preserves, and strawberries—until all ingredients are used, finishing with the cream cheese mixture on top.

                  Cover the dish with plastic wrap and refrigerate for at least 4 hours, preferably overnight, to allow the flavors to meld and the cake to set.

                    Once set, slice the cake into squares and serve chilled.

                      Prep Time: 30 minutes | Total Time: 4 hours (plus chilling) | Servings: 12

                        - Presentation Tips: Garnish each slice with a fresh mint leaf and an extra strawberry on top for a pop of color and freshness. Enjoy this delightful no-bake dessert!

                          Leave a Comment

                          Recipe Rating