Spicy Garlic Pickled Okra Flavorful and Easy Recipe

Do you love bold flavors and crunchy snacks? Then you’ll adore making Spicy Garlic Pickled Okra! This easy recipe packs a punch and adds zing to any meal. With simple steps and fresh ingredients, you’ll impress friends and family in no time. Join me as I share everything you need to create this tasty treat, from preparation to storage tips. Let’s dive into the world of pickling and elevate your tastebuds!

Ingredients

Fresh Ingredients for Spicy Garlic Pickled Okra

To make the best spicy garlic pickled okra, you need fresh ingredients. Here’s what you will need:

– 1 pound fresh okra, trimmed

– 4 cloves garlic, smashed

These fresh ingredients give your pickled okra a vibrant taste. Always choose firm okra. It should be bright green and free from blemishes.

Essential Spices and Seasonings

The right spices make this recipe pop. Here are the key spices:

– 1 teaspoon red pepper flakes (adjust to taste)

– 1 tablespoon pickling salt

– 1 tablespoon sugar

– 1 teaspoon mustard seeds

– 1 teaspoon black peppercorns

Red pepper flakes add heat. Pickling salt helps preserve the okra. The sugar balances the flavors, while mustard seeds and black peppercorns add depth.

Equipment Needed for Pickling

Pickling requires some simple equipment. Make sure you have:

– Medium saucepan

– Sterilized jars with lids

– Measuring cups and spoons

The saucepan is for heating the brine. You need the jars to store your pickles. Sterilizing the jars keeps your pickled okra safe and tasty. For the full recipe, check out the detailed steps!

Step-by-Step Instructions

Preparing the Okra

First, wash the okra under cold water. This step is key to removing dirt. Next, trim the stems to keep the okra whole. Leaving the okra whole helps it stay crunchy. This texture is perfect for pickles.

Making the Pickling Brine

In a medium saucepan, combine the vinegar, water, sugar, and pickling salt. Heat the mix over medium heat. Stir until the salt and sugar dissolve. Bring it to a boil, and then remove it from heat. Let the brine cool for about 10 minutes. This cooling step is important for flavor.

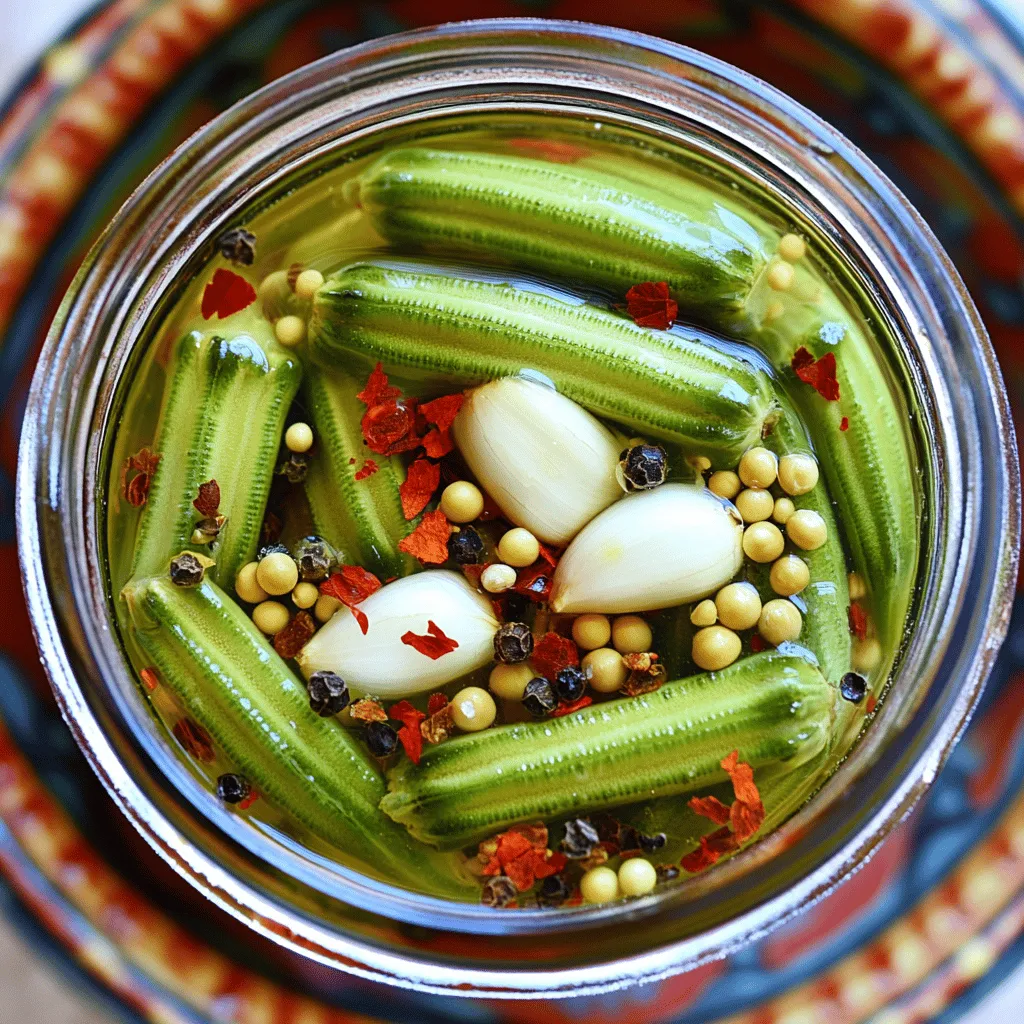
Packing the Jars and Storing

Grab some sterilized jars for packing. Place the smashed garlic, red pepper flakes, mustard seeds, and black peppercorns at the bottom. Pack the okra tightly into the jars. Leave some space at the top for brine. Carefully pour the cooled brine over the okra. Make sure all pieces are submerged. If needed, add more vinegar or water to cover the okra. Seal the jars with lids and let them cool to room temperature. Once cooled, refrigerate for at least 24 hours. This waiting lets the flavors mix well. For the best taste, let them sit longer. Enjoy your spicy garlic pickled okra! For the Full Recipe, refer to the earlier section.

Tips & Tricks

Best Practices for Pickling Okra

To make the best spicy garlic pickled okra, use fresh okra. Look for firm, vibrant pods. Trim the stems carefully, but leave the pods whole. This helps keep them crunchy. Sterilize your jars by boiling them in water for ten minutes. This step keeps your pickles safe and fresh.

Flavor Enhancements and Adjustments

You can adjust the heat level by changing the red pepper flakes. Use less for milder pickles. For more zing, add sliced jalapeños to the jars. You can also try adding fresh herbs like dill or thyme. They add a new layer of flavor. If you want a sweeter taste, increase the sugar in the brine.

Common Mistakes to Avoid

Don’t skip the brine cooling step. Pouring hot brine over the okra can make them mushy. Ensure all okra is fully submerged in the brine. This helps them pickle evenly. Avoid using table salt; it can make the brine cloudy. Stick to pickling salt for the best results. Follow the Full Recipe for more detailed guidance on making this dish.

Variations

Additions for Extra Flavor

You can easily spice up your pickled okra. Add slices of fresh jalapeños for heat. A few sprigs of dill can give a nice herbal note. For a sweet twist, try adding slices of carrot or bell pepper. They add color and crunch. You can also add a tablespoon of coriander seeds for a unique flavor. Each addition brings a new layer to your dish.

Alternative Ingredients for Different Tastes

If you want a milder version, use less red pepper flakes. You can swap apple cider vinegar for a sweeter taste. Instead of pickling salt, kosher salt works well too. Want to experiment? Try using different types of okra, like baby okra for a tender bite. Each change helps you create a flavor that suits your taste buds.

Serving Suggestions

Spicy garlic pickled okra shines as a snack or side dish. Serve it in a colorful bowl for a pretty display. Pair it with sandwiches or burgers for a crunchy contrast. You can also use it in salads for extra zest. For a fun twist, add it to your next cheese board. The bright flavors will impress your guests. If you want to learn more, check the Full Recipe for tips on presentation.

Storage Info

Refrigeration Guidelines

After making your spicy garlic pickled okra, store it in the fridge. Keep the jars sealed tight. This keeps the okra fresh and tasty. Always use a clean utensil to take out okra. This prevents unwanted germs.

Shelf Life of Pickled Okra

Your pickled okra lasts about 2 months in the fridge. It may stay safe to eat longer, but the taste may change. You want the crunch and flavor to stay fresh. Trust your taste buds; if it smells or looks off, toss it.

Tips for Long-term Storage

For long-term storage, consider canning. Sterilize jars and lids before use. Fill the jars with your pickled okra, leaving some space at the top. Process them in a boiling water bath for about 10 minutes. Let them cool, then store in a cool, dark place. Properly canned okra can last for a year or more, keeping that spicy garlic flavor intact. For extra fun, label the jars with the date. This way, you’ll know just how long they’ve been stored.

For the full recipe, check out the section above.

FAQs

How long does it take for pickled okra to develop flavor?

Pickled okra takes about 24 hours to start tasting great. After that, the flavors grow deeper over time. I recommend waiting at least 48 hours for the best taste. The longer you wait, the more the garlic and spices blend into the okra.

Can I use frozen okra for this recipe?

Using frozen okra is not the best choice for pickling. Frozen okra can become mushy when thawed. Fresh okra gives you that perfect crunch you want in pickles. Always go for fresh for the best results.

Where can I buy ready-made spicy garlic pickled okra?

You can find ready-made spicy garlic pickled okra at specialty food stores or online. Many local farmers’ markets also sell homemade versions. Look for jars with clear labels to find quality products.

What can I do with leftover pickling brine?

Leftover pickling brine is versatile and can be used in many ways. You can use it as a salad dressing or marinade. It adds great flavor to roasted vegetables or meats. You can even pickle other veggies, like carrots or cucumbers, using the same brine. Just make sure to refrigerate the brine if you plan to reuse it.

We explored how to make spicy garlic pickled okra. Fresh ingredients and essential spices are key. I guided you through preparing the okra and making the brine. Remember the best practices and adjustments for perfect pickling. You can add unique flavors and serve it in fun ways. For storage, keep your pickled okra in the fridge to enjoy longer. I hope these tips help you create delicious pickled okra. Dive into pickling and make this tasty treat your own!

To make the best spicy garlic pickled okra, you need fresh ingredients. Here’s what you will need: - 1 pound fresh okra, trimmed - 4 cloves garlic, smashed These fresh ingredients give your pickled okra a vibrant taste. Always choose firm okra. It should be bright green and free from blemishes. The right spices make this recipe pop. Here are the key spices: - 1 teaspoon red pepper flakes (adjust to taste) - 1 tablespoon pickling salt - 1 tablespoon sugar - 1 teaspoon mustard seeds - 1 teaspoon black peppercorns Red pepper flakes add heat. Pickling salt helps preserve the okra. The sugar balances the flavors, while mustard seeds and black peppercorns add depth. Pickling requires some simple equipment. Make sure you have: - Medium saucepan - Sterilized jars with lids - Measuring cups and spoons The saucepan is for heating the brine. You need the jars to store your pickles. Sterilizing the jars keeps your pickled okra safe and tasty. For the full recipe, check out the detailed steps! First, wash the okra under cold water. This step is key to removing dirt. Next, trim the stems to keep the okra whole. Leaving the okra whole helps it stay crunchy. This texture is perfect for pickles. In a medium saucepan, combine the vinegar, water, sugar, and pickling salt. Heat the mix over medium heat. Stir until the salt and sugar dissolve. Bring it to a boil, and then remove it from heat. Let the brine cool for about 10 minutes. This cooling step is important for flavor. Grab some sterilized jars for packing. Place the smashed garlic, red pepper flakes, mustard seeds, and black peppercorns at the bottom. Pack the okra tightly into the jars. Leave some space at the top for brine. Carefully pour the cooled brine over the okra. Make sure all pieces are submerged. If needed, add more vinegar or water to cover the okra. Seal the jars with lids and let them cool to room temperature. Once cooled, refrigerate for at least 24 hours. This waiting lets the flavors mix well. For the best taste, let them sit longer. Enjoy your spicy garlic pickled okra! For the Full Recipe, refer to the earlier section. To make the best spicy garlic pickled okra, use fresh okra. Look for firm, vibrant pods. Trim the stems carefully, but leave the pods whole. This helps keep them crunchy. Sterilize your jars by boiling them in water for ten minutes. This step keeps your pickles safe and fresh. You can adjust the heat level by changing the red pepper flakes. Use less for milder pickles. For more zing, add sliced jalapeños to the jars. You can also try adding fresh herbs like dill or thyme. They add a new layer of flavor. If you want a sweeter taste, increase the sugar in the brine. Don't skip the brine cooling step. Pouring hot brine over the okra can make them mushy. Ensure all okra is fully submerged in the brine. This helps them pickle evenly. Avoid using table salt; it can make the brine cloudy. Stick to pickling salt for the best results. Follow the Full Recipe for more detailed guidance on making this dish. {{image_2}} You can easily spice up your pickled okra. Add slices of fresh jalapeños for heat. A few sprigs of dill can give a nice herbal note. For a sweet twist, try adding slices of carrot or bell pepper. They add color and crunch. You can also add a tablespoon of coriander seeds for a unique flavor. Each addition brings a new layer to your dish. If you want a milder version, use less red pepper flakes. You can swap apple cider vinegar for a sweeter taste. Instead of pickling salt, kosher salt works well too. Want to experiment? Try using different types of okra, like baby okra for a tender bite. Each change helps you create a flavor that suits your taste buds. Spicy garlic pickled okra shines as a snack or side dish. Serve it in a colorful bowl for a pretty display. Pair it with sandwiches or burgers for a crunchy contrast. You can also use it in salads for extra zest. For a fun twist, add it to your next cheese board. The bright flavors will impress your guests. If you want to learn more, check the Full Recipe for tips on presentation. After making your spicy garlic pickled okra, store it in the fridge. Keep the jars sealed tight. This keeps the okra fresh and tasty. Always use a clean utensil to take out okra. This prevents unwanted germs. Your pickled okra lasts about 2 months in the fridge. It may stay safe to eat longer, but the taste may change. You want the crunch and flavor to stay fresh. Trust your taste buds; if it smells or looks off, toss it. For long-term storage, consider canning. Sterilize jars and lids before use. Fill the jars with your pickled okra, leaving some space at the top. Process them in a boiling water bath for about 10 minutes. Let them cool, then store in a cool, dark place. Properly canned okra can last for a year or more, keeping that spicy garlic flavor intact. For extra fun, label the jars with the date. This way, you’ll know just how long they’ve been stored. For the full recipe, check out the section above. Pickled okra takes about 24 hours to start tasting great. After that, the flavors grow deeper over time. I recommend waiting at least 48 hours for the best taste. The longer you wait, the more the garlic and spices blend into the okra. Using frozen okra is not the best choice for pickling. Frozen okra can become mushy when thawed. Fresh okra gives you that perfect crunch you want in pickles. Always go for fresh for the best results. You can find ready-made spicy garlic pickled okra at specialty food stores or online. Many local farmers' markets also sell homemade versions. Look for jars with clear labels to find quality products. Leftover pickling brine is versatile and can be used in many ways. You can use it as a salad dressing or marinade. It adds great flavor to roasted vegetables or meats. You can even pickle other veggies, like carrots or cucumbers, using the same brine. Just make sure to refrigerate the brine if you plan to reuse it. We explored how to make spicy garlic pickled okra. Fresh ingredients and essential spices are key. I guided you through preparing the okra and making the brine. Remember the best practices and adjustments for perfect pickling. You can add unique flavors and serve it in fun ways. For storage, keep your pickled okra in the fridge to enjoy longer. I hope these tips help you create delicious pickled okra. Dive into pickling and make this tasty treat your own!

Spicy Garlic Pickled Okra

Spicy Garlic Pickled Okra is the perfect tangy snack to elevate your taste buds! Made with fresh okra, garlic, and a kick of red pepper, this easy recipe packs flavor and crunch. Discover how to create your own jars of delicious pickled okra with simple ingredients and step-by-step instructions. Click through for tips, serving ideas, and more ways to enjoy this zesty treat today!

Ingredients
  

1 pound fresh okra, trimmed

4 cloves garlic, smashed

1 teaspoon red pepper flakes (adjust to taste)

1 tablespoon pickling salt

1 cup distilled white vinegar

1 cup water

1 tablespoon sugar

1 teaspoon mustard seeds

1 teaspoon black peppercorns

Instructions
 

Start by washing the okra under cold water and trimming the stems if necessary. Leave the okra whole for a crunchy texture.

    In a medium saucepan, combine the vinegar, water, sugar, and pickling salt. Bring the mixture to a boil over medium heat, stirring occasionally until the salt and sugar dissolve completely.

      Once the brine is boiling, remove it from the heat and let it cool for about 10 minutes.

        In sterilized jars, place the smashed garlic cloves, red pepper flakes, mustard seeds, and black peppercorns evenly.

          Pack the okra into the jars tightly, making sure to leave some space at the top.

            Carefully pour the cooled brine over the okra, ensuring all pieces are submerged. If necessary, add more vinegar or water in equal parts to cover the okra completely.

              Seal the jars with lids and let them cool to room temperature.

                Once cooled, refrigerate the jars for at least 24 hours before enjoying for the best flavor. The pickles will develop more complexity over time.

                  Prep Time: 15 minutes | Total Time: 2 days | Servings: 4-6

                    - Presentation Tips: Serve the pickled okra in a decorative bowl or alongside a charcuterie board for an inviting, colorful display. Enjoy as a tangy snack or accompaniment to sandwiches!

                      Leave a Comment

                      Recipe Rating