
Latest & Greatest

Bakery-Style Cinnamon Sugar Pretzel Knots Delight
Do you crave a warm, sweet treat that feels like a visit to your favorite bakery? Try my Bakery-Style Cinnamon
Read more…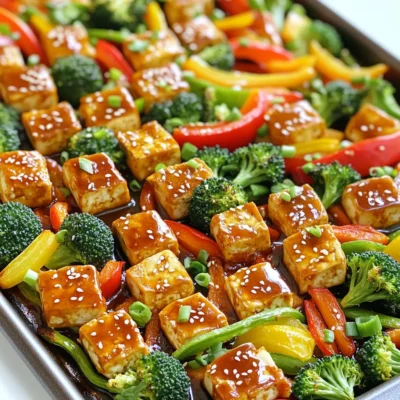
Sheet-Pan Sweet Chili Tofu with Veggies Delight
Looking for a quick and tasty dinner? My Sheet-Pan Sweet Chili Tofu with Veggies might be just what you need!
Read more…
Air Fryer Spicy Garlic Parmesan Wings Crispy Delight
Are you ready to elevate your snack game? These Air Fryer Spicy Garlic Parmesan Wings are an absolute must-try. Crisp
Read more…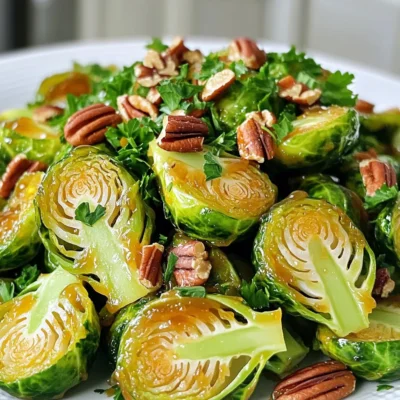
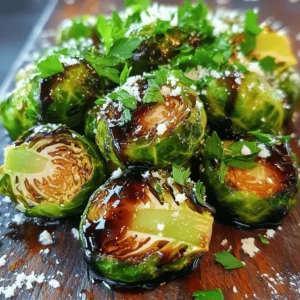
Caramelized Maple Glazed Brussels Sprouts Delight
If you think Brussels sprouts can’t be delicious, think again! My Caramelized Maple Glazed Brussels Sprouts Delight will change your
Read more…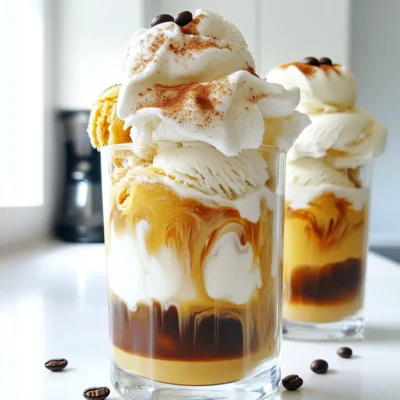
Pumpkin Spice Latte Ice Cream Floats Delightful Treat
Fall is the perfect time to enjoy a cozy treat that combines two favorites: pumpkin spice lattes and ice cream.
Read more…
Savory Sausage and Spinach Breakfast Strata Recipe
Start your day with a burst of flavor! This Savory Sausage and Spinach Breakfast Strata is your new go-to recipe.
Read more…
Savory Brown Butter Apple Cider Sugar Cookies Recipe
Get ready for a fall treat you won’t forget! My Savory Brown Butter Apple Cider Sugar Cookies blend rich, nutty
Read more…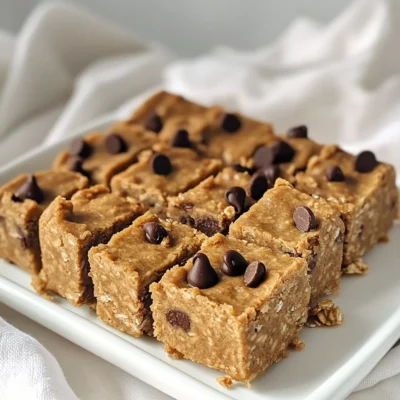
Cookie Dough Protein Bars No Bake Easy Delight
Are you craving a sweet treat that’s also healthy? I get it! These No-Bake Cookie Dough Protein Bars are perfect
Read more…browse recipes

![- 4 large bell peppers - 1 cup quinoa - 2 cups vegetable broth or water - 1 can (15 oz) black beans - 1 cup corn - 1 cup diced tomatoes - 1 teaspoon cumin - 1 teaspoon smoked paprika - 1 cup shredded cheese - Fresh cilantro or parsley for garnish When preparing stuffed bell peppers, I always choose large, ripe bell peppers. They hold the filling well and add great flavor. Quinoa is my go-to grain for stuffing. It cooks quickly and is packed with protein. I prefer using vegetable broth for cooking quinoa. It gives the dish more depth. Next, I add black beans, corn, and diced tomatoes to my filling. They add texture and taste. Black beans are rich in protein and fiber. Corn adds a sweet crunch, while tomatoes bring juiciness. For seasonings, I love cumin and smoked paprika. They enhance the flavor profile. I usually sprinkle shredded cheese on top. It melts beautifully and adds a nice finish. Fresh cilantro or parsley makes for a lovely garnish. It adds color and freshness to the dish. For the full recipe, check out the detailed instructions. - Rinse the quinoa to remove the bitter coating. - In a pot, cook the rinsed quinoa with vegetable broth. Bring it to a boil, then lower the heat. Cover the pot and simmer for about 15 minutes. The quinoa should be fluffy and absorb all the liquid. - Cut off the tops of the bell peppers and remove the seeds. This step is key to making room for the tasty filling. - Place the bell peppers upright in a baking dish. This helps them stay standing while baking. - In a large bowl, mix the cooked quinoa, black beans, corn, diced tomatoes, cumin, smoked paprika, salt, and pepper. Stir well to combine all the flavors. - Carefully fill each bell pepper with the quinoa mixture, packing it in generously. - Top each stuffed bell pepper with shredded cheese. This adds a nice melty layer. - Add a splash of water to the bottom of the baking dish. This helps steam the peppers while they bake. Cover the dish with aluminum foil. - Bake in the preheated oven for 25 minutes. After that, remove the foil and bake for another 10-15 minutes. This makes the peppers tender and the cheese bubbly. - Once done, take them out of the oven and let them cool for a few minutes. - For a finishing touch, garnish with fresh cilantro or parsley before serving. This is how you make nutritious stuffed bell peppers with quinoa, perfect for any meal. For the full recipe, check out the details above. To make sure your quinoa is fluffy, rinse it well first. This removes the bitter coating called saponin. Then, cook it in vegetable broth for added taste. Bring it to a boil, cover, and simmer for about 15 minutes. Check if the liquid is absorbed and the quinoa is soft. If not, give it a few more minutes. When baking the stuffed peppers, timing matters. Bake them for 25 minutes covered with foil. This helps steam the peppers. Then, remove the foil and bake for another 10 to 15 minutes. This step makes the cheese bubbly and the peppers tender. Spices make your dish pop! I suggest using cumin and smoked paprika. They add depth and warmth. You can also play with herbs like oregano or basil for extra flavor. For cheese, I love using sharp cheddar. It melts beautifully and adds a nice tang. You can also try mozzarella or a blend for a different taste. Just sprinkle it on top for that melty goodness. Garnish is key to a lovely dish. Use fresh cilantro or parsley for a pop of green. It brightens the plate and adds freshness. When serving, place each stuffed pepper upright on a plate. This looks stunning and keeps the filling inside. You can serve them with a side salad or some crusty bread for a complete meal. {{image_2}} You can change the protein in your stuffed peppers. Ground turkey or beef adds a hearty texture. Simply brown it before mixing with other ingredients. For a vegetarian option, try lentils or chickpeas. Both add great flavor and protein. Mixing up the beans can enhance taste. Black beans are popular, but kidney or pinto beans work well too. You can also add more vegetables. Chopped zucchini, spinach, or mushrooms boost nutrition and flavor. Feel free to get creative! Cheese brings a creamy touch to your dish. If you want a vegan option, use cashew cheese or nutritional yeast. They melt well and add flavor. For a different twist, try blending mozzarella with pepper jack for a spicy kick. For the full recipe of these nutritious stuffed bell peppers, check out the [Full Recipe]. To keep your stuffed peppers fresh, use airtight containers. Glass containers work best. You can also use plastic containers, but glass is safer. Stored this way, your leftovers last for about three to five days in the fridge. The best way to reheat stuffed peppers is in the oven. Preheat your oven to 350°F (175°C). Place the peppers in a baking dish, cover them with foil, and heat for about 20 minutes. This method keeps the texture nice and the flavor intact. You can also use a microwave for quicker reheating, but the oven gives better results. To freeze stuffed peppers, let them cool completely first. Wrap each pepper tightly in plastic wrap, then place them in a freezer bag. They can stay in the freezer for up to three months. When you’re ready to eat, thaw them in the fridge overnight. Reheat them in the oven for the best taste. Yes, you can make stuffed bell peppers ahead of time. They are great for weekend meal prep. Cook the quinoa and mix your filling. Stuff the peppers and place them in a baking dish. Cover with foil and store in the fridge for up to three days. When ready to eat, just bake them. This saves time and effort on busy weeknights. Yes, you can use brown rice. However, quinoa and rice differ in texture and nutrition. Quinoa cooks faster and has more protein. It also has a nutty flavor that pairs well with spices. Brown rice is chewy and more filling. If you use brown rice, cook it longer and add more liquid. To adjust for more servings, simply double or halve the ingredient amounts. For example, if you want to serve eight people, use eight large bell peppers and two cups of quinoa. Keep the other ingredients in proportion. This method keeps the flavors balanced and delicious. Yes, stuffed bell peppers are very healthy. They are low in calories and high in nutrients. Quinoa is a complete protein, which means it has all nine essential amino acids. Black beans add fiber, while bell peppers are rich in vitamins A and C. This dish is a great way to enjoy a balanced meal. Stuffed bell peppers are a tasty, flexible dish. We covered key ingredients, such as quinoa, beans, and spices. You learned how to prepare and bake them perfectly. I shared useful tips for flavor and presentation. In summary, feel free to customize these peppers to fit your taste. Experiment with proteins and veggies. Store leftovers properly, and enjoy them later. Keep this recipe handy for a quick, healthy meal option. Happy cooking!](https://southerndishes.com/wp-content/uploads/2025/05/109dabe5-992c-409d-acbb-8e04f068f234.webp)
Nutritious Stuffed Bell Peppers with Quinoa Recipe
Looking for a healthy, tasty meal? My Nutritious Stuffed Bell Peppers with Quinoa recipe is perfect for you! Packed with flavor and vibrant colors,…
My Latest Desserts
My Latest Recipes

hey,
i’m !
I’m so happy you’re here!
My kitchen is filled with stories, flavors, and love and I’m so happy to share them with you. Here’s to dishes that feel like home.
![- 1 cup silken tofu, drained - 1/2 cup dairy-free dark chocolate chips - 1/4 cup maple syrup - 1 tablespoon vanilla extract - 1 pinch of sea salt - 1 tablespoon cocoa powder (optional) - Fresh berries and mint leaves for garnishing 1. Silken Tofu: This soft tofu is rich in protein and low in calories. It helps create a smooth texture. 2. Dairy-Free Dark Chocolate Chips: These chips add antioxidants and healthy fats. They also provide a rich chocolate flavor. 3. Maple Syrup: A natural sweetener that contains minerals like manganese and zinc. It gives the mousse a nice sweetness. 4. Vanilla Extract: Adds flavor and may have antioxidant properties. It enhances the taste of chocolate. 5. Sea Salt: A pinch of salt helps balance sweetness and brings out the chocolate flavor. 6. Cocoa Powder: This optional ingredient boosts chocolate flavor and adds fiber. It may also provide antioxidants. 7. Fresh Berries and Mint: These toppings add vitamins, minerals, and freshness to your dessert. - Tofu: Use avocado for a creamy texture if you cannot have soy. - Chocolate Chips: Look for carob chips if you have a chocolate allergy. - Maple Syrup: Agave syrup or brown rice syrup can replace maple syrup. - Vanilla Extract: If allergic, try using an equal amount of almond extract. - Cocoa Powder: Unsweetened carob powder can be a good substitute for cocoa. For the full recipe, check out the [Full Recipe]. To make vegan chocolate mousse, start with melting the dairy-free dark chocolate chips. You can use a microwave or a double boiler. If using the microwave, heat the chips in short bursts of 30 seconds. Stir between heats to prevent burning. For the double boiler, fill a pot with water and place a bowl on top. Heat until the chocolate melts slowly. Once the chocolate is melted, let it cool a bit. In a blender, add the drained silken tofu, melted chocolate, maple syrup, vanilla extract, sea salt, and cocoa powder if you want more depth. Blend on high for 1-2 minutes. Scrape the sides of the bowl to mix well. The goal is a smooth, creamy texture. After blending, taste the mousse. If you want it sweeter, add more maple syrup, then blend briefly to mix. Spoon the mousse into serving glasses. Chill these in the fridge for at least 30 minutes. It will set better the longer it chills. When melting chocolate, the key is low heat. Too much heat can burn the chocolate. If using the microwave, stir often. This helps distribute the heat evenly. If you see any lumps, keep stirring. For the double boiler, keep the water simmering, not boiling. Boiling can splash water into the chocolate, which ruins its texture. For the best mousse, blend until smooth. If your blender struggles, add a splash of plant milk to help it along. This will make it easier to blend. Scrape down the sides often to ensure even mixing. The mousse should be light and fluffy at the end. If you want to make it extra creamy, blend a little longer. To get that perfect, creamy texture, start with silken tofu. It blends smoothly and gives the mousse a rich mouthfeel. After melting the chocolate, let it cool slightly before adding it to the blender. If the chocolate is too hot, it can cook the tofu, leading to a grainy texture. Blend the mixture until it is silky and lump-free. If it seems too thick, add a splash of plant milk for a lighter mousse. One common mistake is not draining the tofu well. Extra water can make the mousse runny. Always press the tofu gently to remove excess liquid. Another mistake is overheating the chocolate. If you melt it too quickly, it can burn and lose flavor. Stir often during melting to keep it smooth. Lastly, remember to taste your mousse before chilling it. You can adjust the sweetness with more maple syrup if needed. You can make this mousse even more exciting! Try adding a spoonful of espresso or a dash of cinnamon for depth. Want more chocolate flavor? Add cocoa powder to the mix. Fresh fruit like raspberries or strawberries can brighten the taste. Use vanilla bean for a richer aroma. Don't forget to top your mousse with berries or mint for a beautiful finish. For the full recipe, check the earlier section. {{image_2}} You can swap maple syrup with other sweeteners. Agave syrup works well and is light. Coconut sugar offers a caramel-like taste. Both options blend in easily for sweetness. Get creative with flavors in your mousse. Adding a shot of espresso boosts the chocolate taste. Vanilla bean brings a warm, rich flavor. You can also try a hint of almond extract for a nutty twist. The type of chocolate changes your mousse. Dairy-free dark chocolate gives a rich taste. White chocolate offers a sweeter, creamier option. You can even mix dark and milk chocolate for balance. For the full recipe, check out the complete guide to Vegan Chocolate Mousse. To keep your vegan chocolate mousse fresh, store it in an airtight container. This helps prevent any odors from the fridge from affecting the taste. Make sure to chill it right after you prepare it. Avoid leaving it out at room temperature for too long. Your mousse will last about 3 to 5 days in the fridge. The longer it sits, the firmer it may get. I recommend checking the texture each day. If it seems too firm, you can give it a quick stir before serving. You can freeze vegan chocolate mousse for up to 2 months. Use a freezer-safe container for storage. When you want to eat it, thaw it in the fridge overnight. Avoid using a microwave, as it can change the texture. For best results, enjoy the mousse fresh! For the full recipe, check out the section above. Vegan chocolate mousse is made from simple, plant-based ingredients. The main ingredient is silken tofu, which gives the mousse its creamy texture. You will also need dairy-free dark chocolate chips for rich flavor. Maple syrup adds sweetness, while vanilla extract enhances the taste. A pinch of sea salt balances the flavors, and cocoa powder adds extra richness if you like. Yes, vegan chocolate mousse can be a healthy dessert option. It uses whole ingredients, which provide nutrients. Silken tofu is high in protein and low in calories. Dark chocolate contains antioxidants, which are good for your heart. Maple syrup has some vitamins and minerals, making it a better option than refined sugar. While it's still a treat, it offers some health benefits compared to traditional mousse. You can make vegan chocolate mousse without tofu by using avocados instead. Avocados provide creaminess and healthy fats. Simply blend ripe avocados with melted dark chocolate, maple syrup, and vanilla extract. Adjust the sweetness to your taste. This version is rich and creamy, just like the original. Yes, you can definitely make vegan chocolate mousse ahead of time. It needs to chill for at least 30 minutes to set properly. You can prepare it the day before and store it in the fridge. Just cover the serving glasses or bowls with plastic wrap to keep them fresh. You can serve vegan chocolate mousse with a variety of toppings. Fresh berries like raspberries or strawberries add a nice burst of flavor. Mint leaves also provide a refreshing touch. Whipped coconut cream can add extra creaminess. You can even add crushed nuts for a bit of crunch. Check the Full Recipe for more ideas! This blog post covers everything you need for vegan chocolate mousse. You learned about the key ingredients and their health benefits. You also found tips for cooking, blending, and avoiding common mistakes. We explored variations with sweeteners and flavors, plus how to store your mousse properly. In the end, enjoy experimenting with this creamy treat. Its flexibility allows you to tailor it to your taste. Get ready to impress with your delicious and healthy dessert!](https://southerndishes.com/wp-content/uploads/2025/07/bb18acba-6e4f-433b-b214-bb060cb9d9c6-300x300.webp)
Creamy Tuscan Salmon Skillet Delightful Dinner Recipe
Are you ready to impress your family at dinner? This Creamy Tuscan Salmon Skillet is your new go-to recipe. With fresh spinach, juicy cherry…
![- 4 salmon fillets - 2 cups fresh spinach - 1 cup cherry tomatoes, halved - 1/2 cup heavy cream - 1/4 cup chicken broth - 3 cloves garlic, minced - 1 teaspoon Italian seasoning - Salt and pepper to taste - Grated Parmesan cheese, for garnish When I make Creamy Tuscan Salmon Skillet, I love using fresh and simple ingredients. The salmon fillets are the star of the dish. I prefer wild-caught salmon for its rich flavor and health benefits. Fresh spinach adds a lovely green touch and packs in nutrients. Cherry tomatoes give a burst of sweetness that balances the creaminess. For the sauce, heavy cream is key. It makes the dish rich and dreamy. Chicken broth adds depth to the sauce. Fresh garlic brings a punch of flavor that I can’t resist. When it comes to seasoning, Italian seasoning is my go-to. It combines herbs like basil and oregano, which complement the salmon and veggies. I always add salt and pepper to enhance the flavors. Finally, I sprinkle grated Parmesan cheese on top. It melts slightly, adding a savory finish to the dish. You can find the full recipe [Full Recipe]. - Season the salmon fillets with salt and pepper. - Heat olive oil in a skillet over medium-high heat. To prepare the salmon, I start by seasoning the fillets. Salt and pepper enhance the flavor. Next, I heat olive oil in my skillet. I aim for medium-high heat. The oil should shimmer to know it's ready. - Cook salmon fillets skin-side down for 4-5 minutes. - Flip and cook for an additional 3-4 minutes. Once the oil is hot, I add the salmon skin-side down. I cook it for about 4-5 minutes. The skin should turn crispy and golden. After that, I flip the salmon carefully. I cook it for another 3-4 minutes until it is fully cooked. - Sauté garlic and add cherry tomatoes. - Stir in chicken broth, heavy cream, and Italian seasoning. - Add fresh spinach and simmer. Now, I make the sauce. First, I sauté minced garlic in the same skillet. I cook it for about 30 seconds until it smells great. Then, I add the halved cherry tomatoes. I let them cook for 2-3 minutes until they soften. Next, I pour in chicken broth and bring it to a gentle simmer. I stir in heavy cream and Italian seasoning. Finally, I add fresh spinach. I let it cook until the spinach wilts, which takes about 2-3 minutes. Once the sauce is ready, I return the salmon to the skillet. I spoon the creamy sauce over the salmon. I let everything simmer together for an extra 2 minutes. This dish comes together beautifully! For the full recipe, check the details above. How do I check for doneness? To check for doneness, look at the color. The salmon should be opaque and flake easily with a fork. You can also use a meat thermometer to check. Aim for 145°F in the thickest part. What are tips for achieving crispy skin? For crispy skin, start with dry salmon. Pat it with paper towels. Heat the oil before adding salmon skin-side down. Don't move it too much. Let it cook for 4-5 minutes before flipping to achieve that golden-brown crust. What are ideas for adding flavor? You can add fresh herbs like basil or parsley. Lemon zest gives a nice zing. For more spice, sprinkle in some red pepper flakes. These add depth and make the dish pop. How do I adjust creaminess to preference? To adjust creaminess, start with less cream. Add more if needed. You can also mix in some Greek yogurt for tanginess. It keeps the dish rich without being too heavy. What are garnishing techniques with Parmesan cheese? Sprinkle grated Parmesan cheese right before serving. Use a microplane for fine shavings. This gives a nice touch and melts slightly on the warm salmon. What are serving ideas alongside the dish? Serve the creamy salmon with pasta or rice. A side salad with fresh greens works well, too. Roasted vegetables can add color and nutrition to the plate. Feel free to dive into the Full Recipe for all the steps! {{image_2}} You can easily switch ingredients in this dish. If you prefer chicken, use chicken breasts instead of salmon. Simply cook them in the same way. Shrimp is another great option. It cooks quickly and adds a nice touch. For a vegetarian twist, try tofu. Just press it to remove excess water and sauté it until golden. You can also add more veggies like bell peppers or zucchini to enhance the dish. This keeps it colorful and nutritious. Want to mix up the flavors? You can add sun-dried tomatoes for a burst of tanginess. They pair well with the cream sauce and add depth. Artichokes also work great in this dish. They bring a unique taste that complements the salmon. If you like a kick, adjust the spice level. Red pepper flakes can add heat without overpowering the dish. Just sprinkle them in to suit your taste. You can change the cooking method too. If you prefer oven-baked salmon, preheat your oven to 375°F. Place the seasoned salmon on a baking sheet and bake for 12-15 minutes. This method will keep the salmon moist and tender. Grilling is another fun option. Heat your grill to medium-high and cook the salmon for about 5-6 minutes on each side. The grill adds a smoky flavor that elevates the dish. For more details, check the Full Recipe. When you have leftovers, store them in an airtight container. This helps keep the salmon fresh. Place it in the fridge right away. You can keep it there for up to three days. Always check for signs of spoilage before eating. If you need to freeze the salmon, wrap each piece tightly in plastic wrap. Then, place the wrapped salmon in a freezer bag. Remove as much air as you can. This method helps keep the texture nice. You can freeze it for up to three months. When you are ready to eat, thaw it in the fridge overnight. To reheat salmon, use a skillet for the best results. Heat it on low and add a splash of broth. This keeps the salmon moist. You can also use the microwave, but be careful. Heat it in short bursts to avoid drying it out. Skillet reheating gives better flavor and texture. For detailed cooking steps, refer to the Full Recipe. Can I use frozen salmon for this recipe? Yes, you can use frozen salmon. Just thaw it first. This helps it cook evenly. What can I substitute for heavy cream? You can use half-and-half or coconut milk as a lighter option. It will still taste great! Is the salmon skin edible? Yes, the salmon skin is edible. It adds a nice crunch if cooked well. What sides pair well with Creamy Tuscan Salmon Skillet? Good sides include rice, pasta, or steamed vegetables. A fresh salad also works nicely. Is this recipe healthy? Yes, this recipe is healthy. Salmon offers omega-3 fatty acids, which are good for your heart. What’s the calorie count per serving? Each serving has about 350 calories. This varies with portion sizes and sides you choose. For the full recipe, check out the detailed instructions above! This blog post covered a delicious recipe for Creamy Tuscan Salmon. You learned about ingredients, cooking steps, and helpful tips. We discussed how to store and reheat leftovers, along with tasty variations. The options for swaps and flavor changes are endless. Embrace your kitchen skills and try this recipe soon. It’s simple, tasty, and sure to impress. Cooking can be fun, so enjoy every bite you create!](https://southerndishes.com/wp-content/uploads/2025/07/b9ff8fb7-66cf-47b5-8860-5599a17b79ce.webp)
