
Latest & Greatest
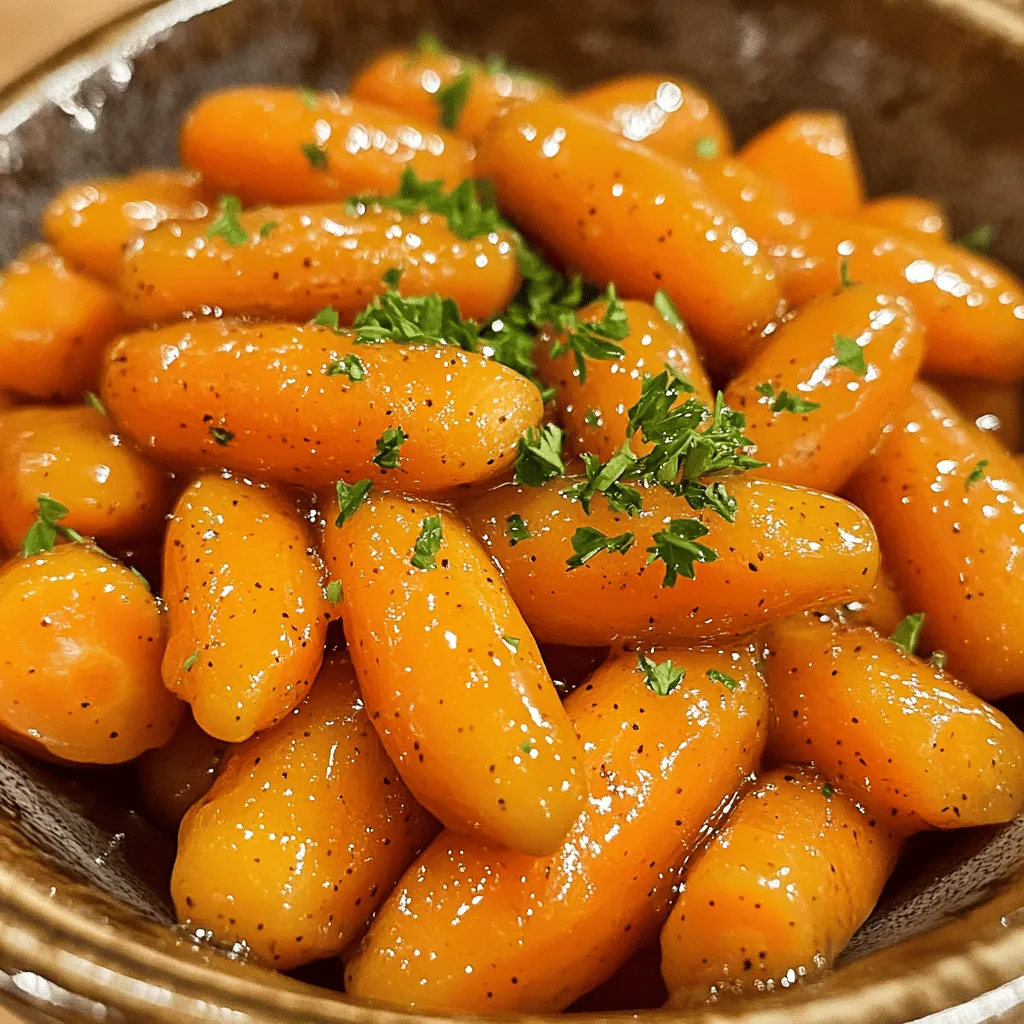
Honey Mustard Glazed Carrots Tasty Side Dish Recipe
Looking for a new side dish that adds flavor to your meal? Honey mustard glazed carrots are your answer! This
Read more…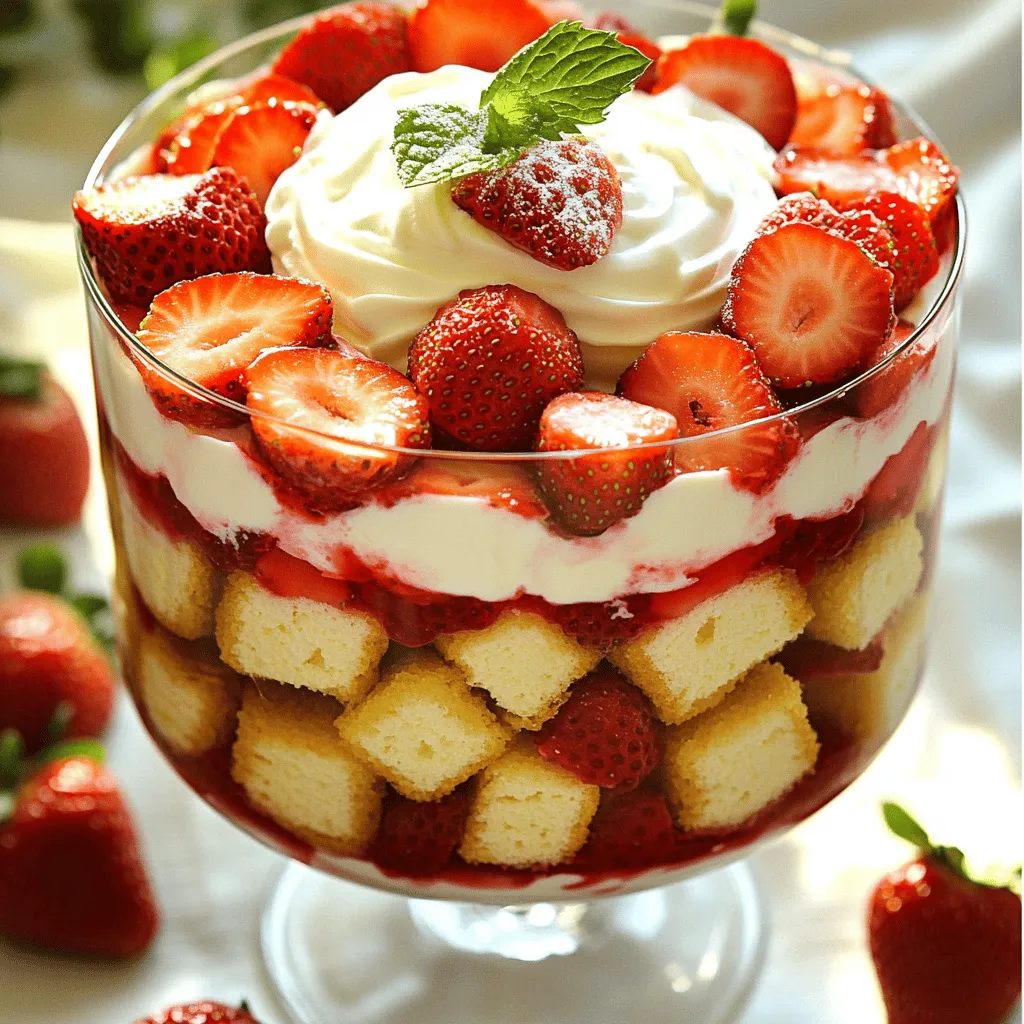
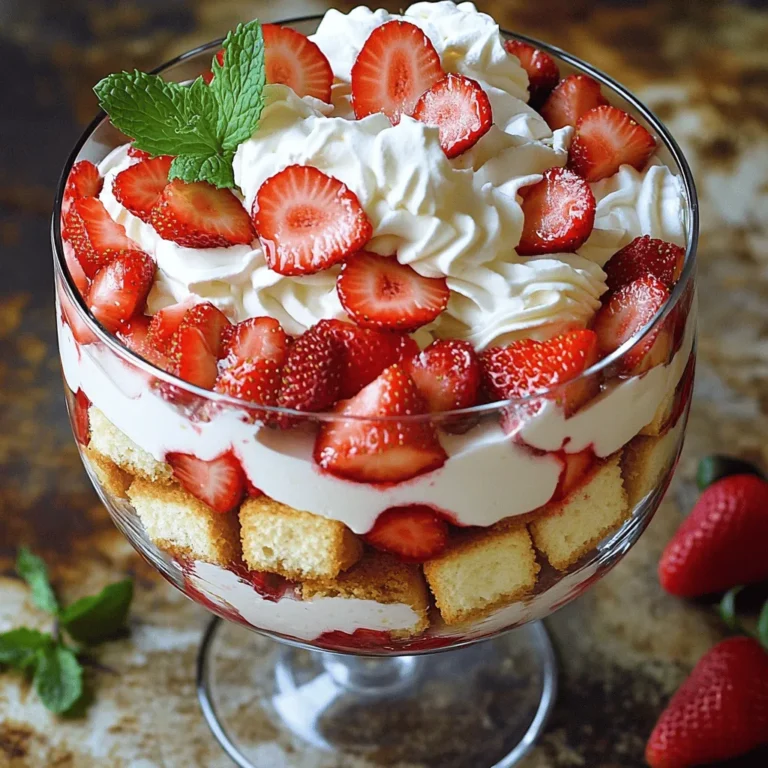
Strawberry Shortcake Trifle Delightful Layered Dessert
Are you ready to make a dessert that will leave everyone wanting more? Strawberry Shortcake Trifle combines fresh strawberries, soft
Read more…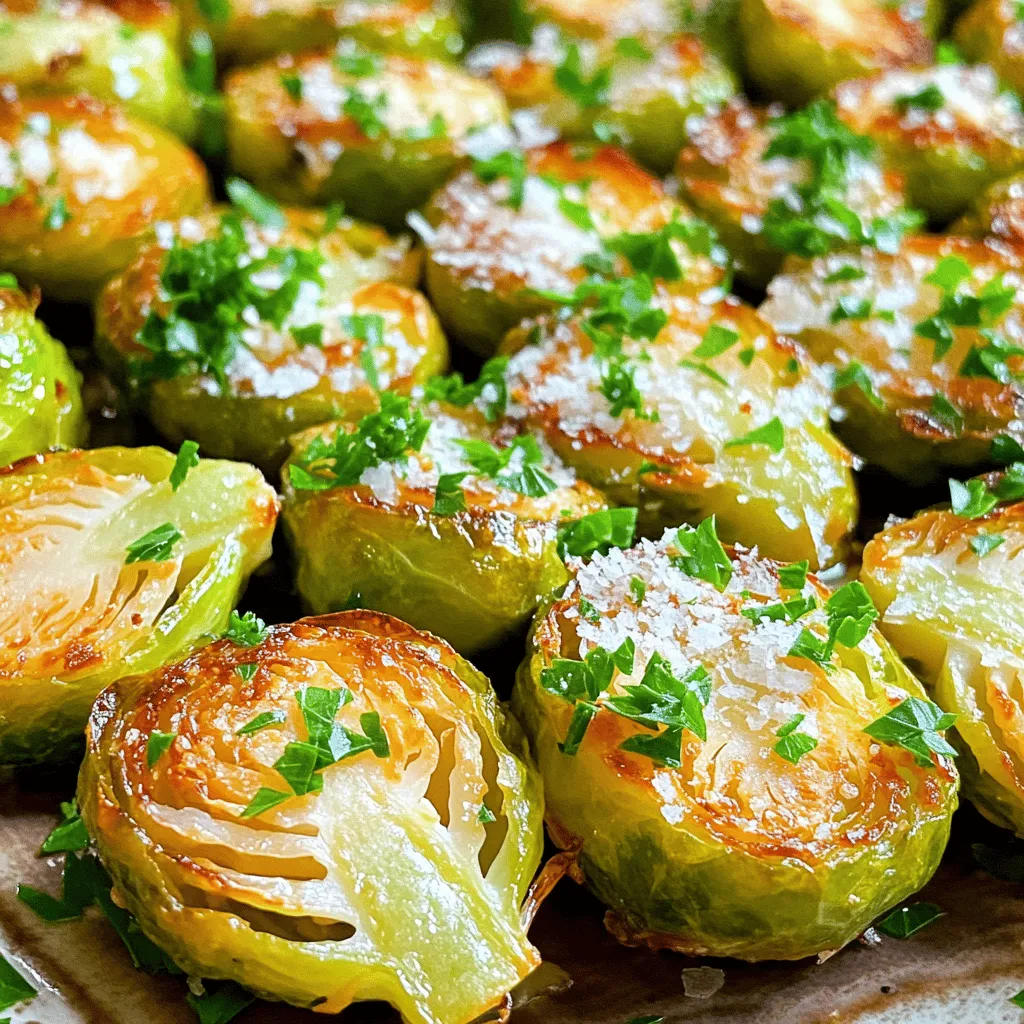
Garlic Parmesan Roasted Brussels Sprouts Savory Treat
Get ready to fall in love with a new side dish! These Garlic Parmesan Roasted Brussels Sprouts will change how
Read more…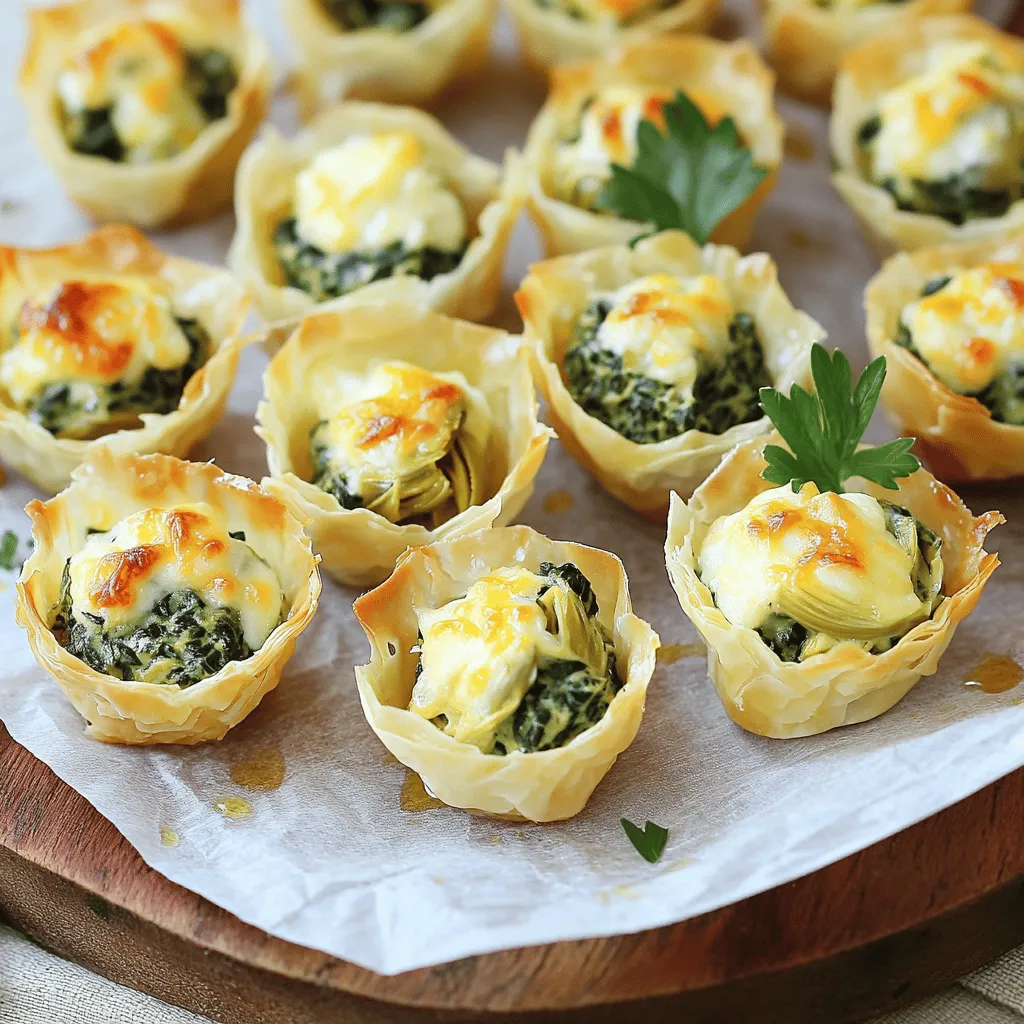
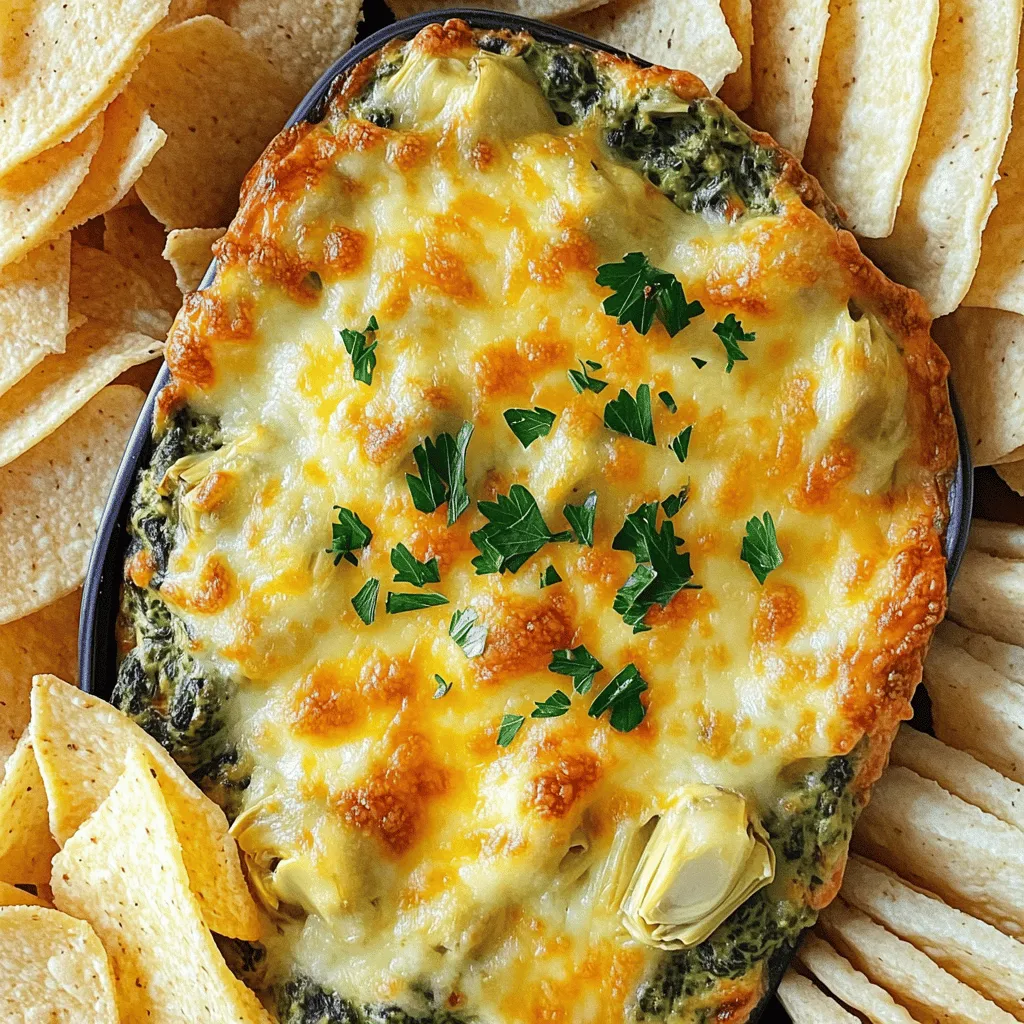
Spinach Artichoke Dip Bites Tasty and Simple Appetizer
Looking for a crowd-pleasing appetizer that is both tasty and simple? These Spinach Artichoke Dip Bites are just what you
Read more…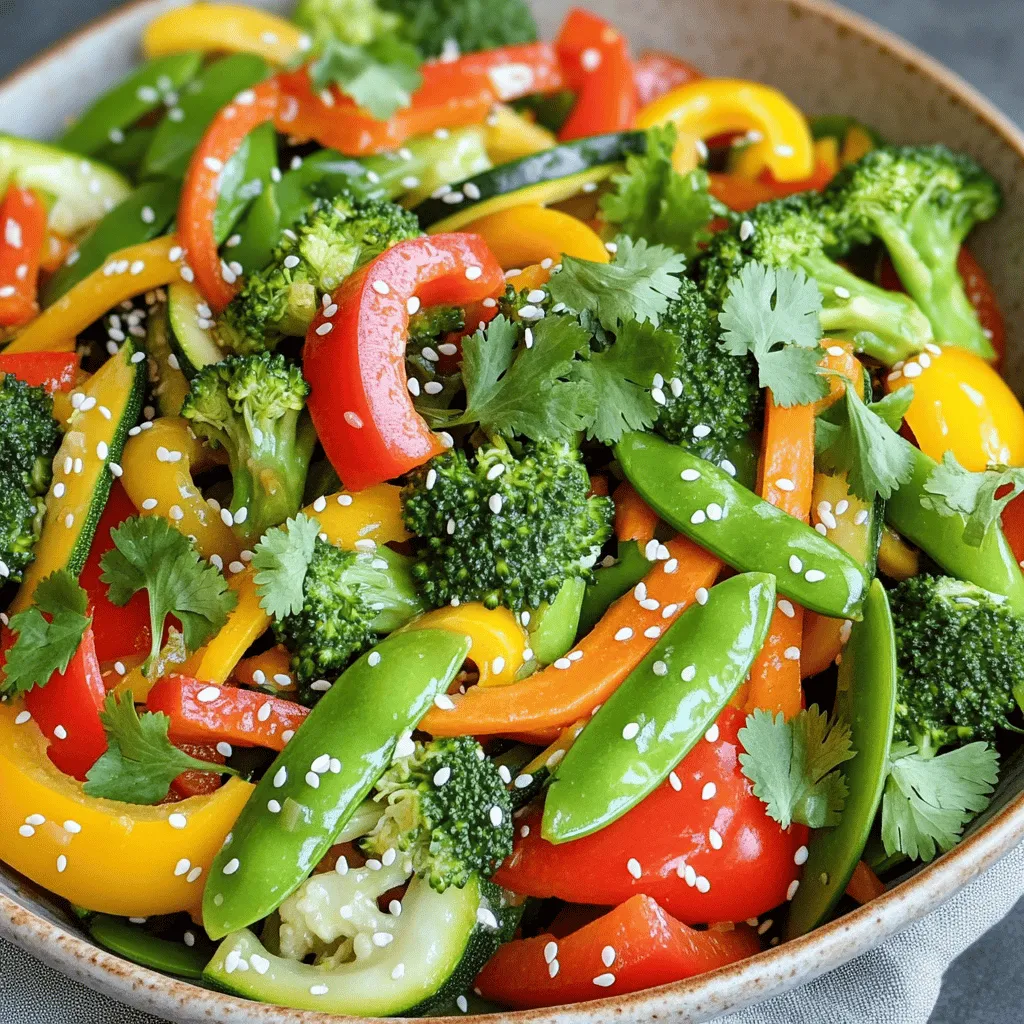
Quick and Easy Vegetable Stir Fry Tasty and Healthy Meal
Looking for a quick and tasty meal? You’re in the right place! My Quick and Easy Vegetable Stir Fry is
Read more…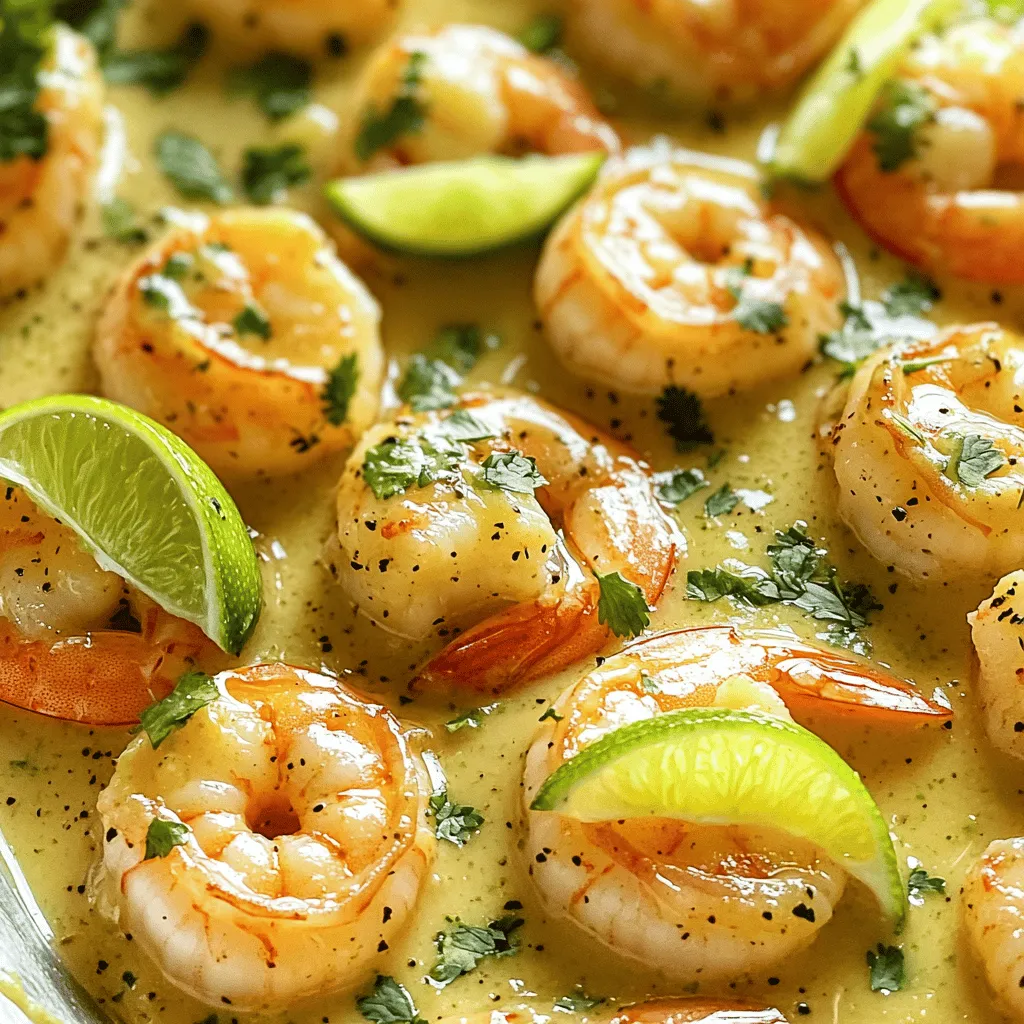
Coconut Lime Shrimp Flavorful Dish with Fresh Ingredients
If you crave a burst of flavor, you’re in for a treat! This Coconut Lime Shrimp dish combines juicy shrimp
Read more…
Cinnamon Roll Casserole Delightful and Easy Recipe
Are you ready for a warm and sweet treat? My Cinnamon Roll Casserole is an easy way to enjoy breakfast
Read more…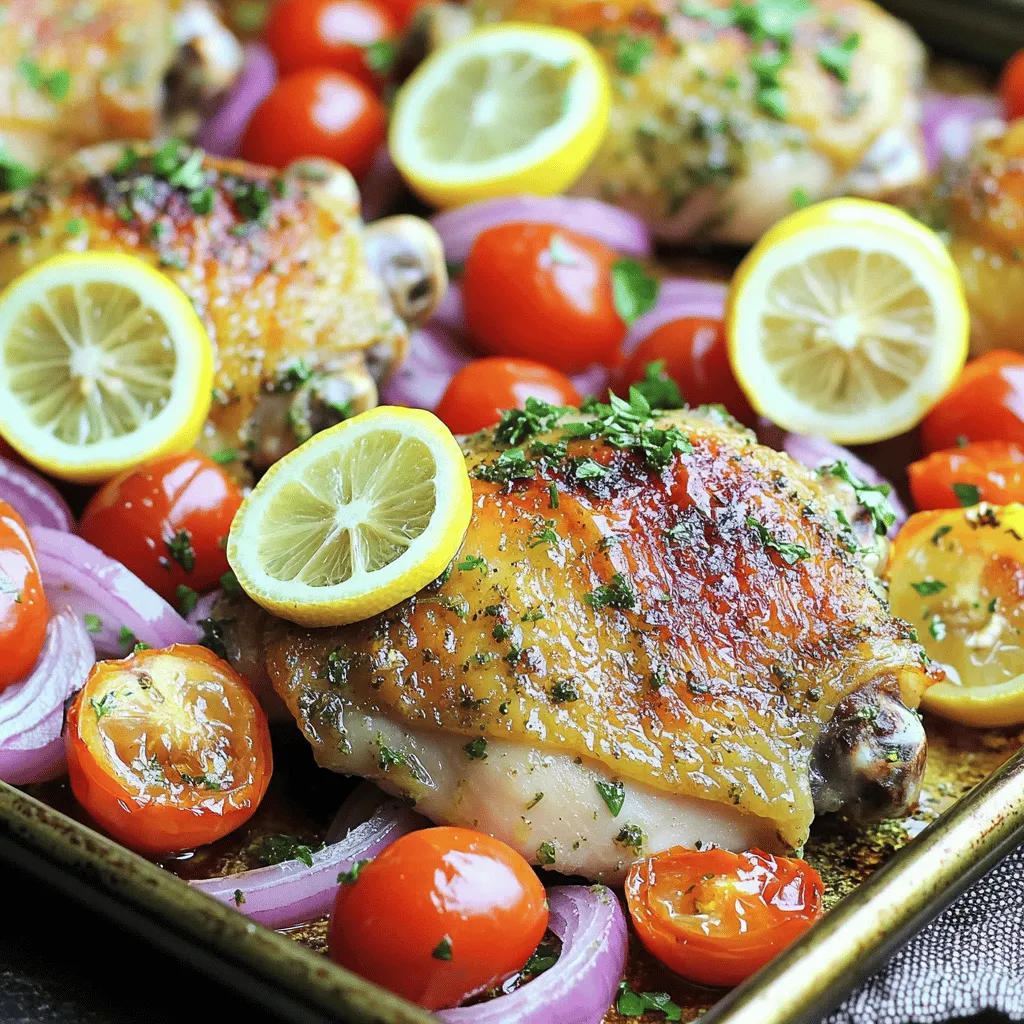
Sheet Pan Lemon Garlic Herb Chicken Flavorful Delight
Are you ready to impress your family with a simple yet delicious meal? The Sheet Pan Lemon Garlic Herb Chicken
Read more…browse recipes


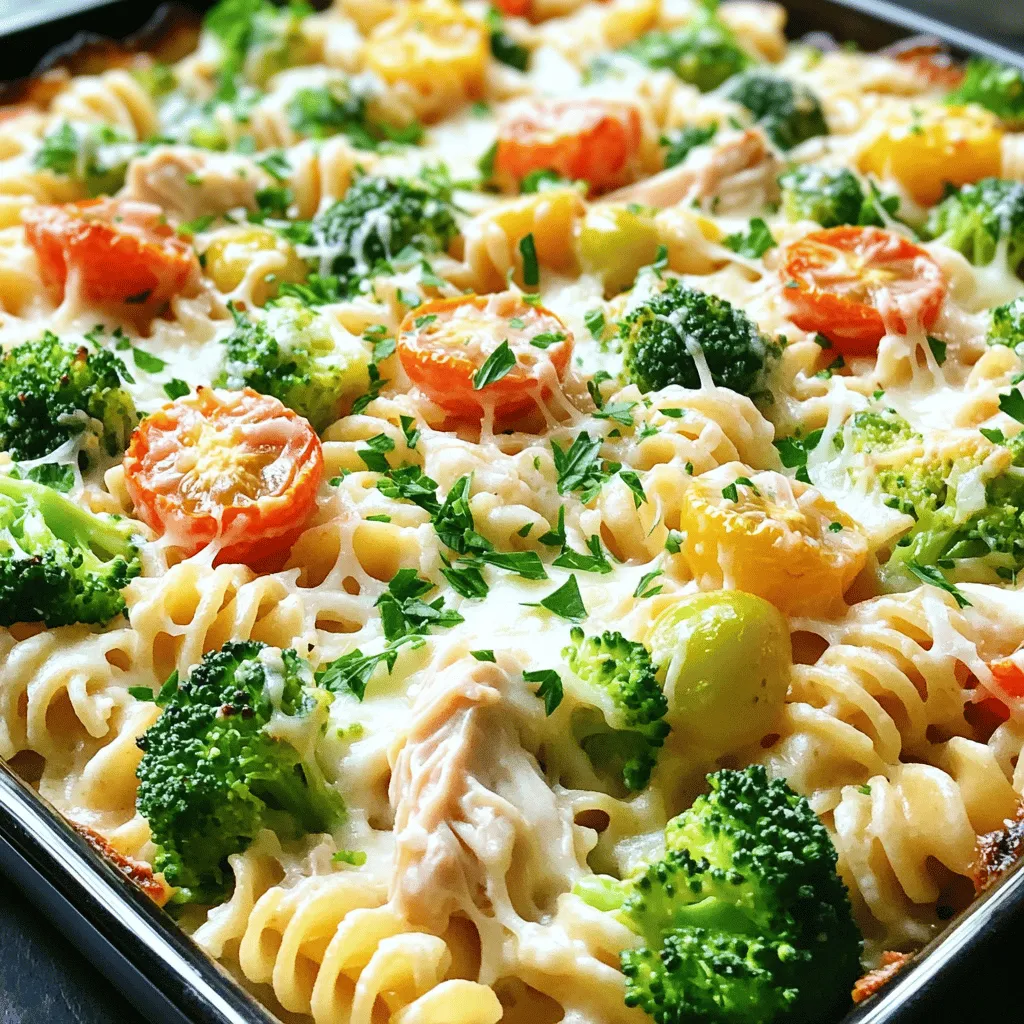
Easy Chicken Alfredo Bake Comforting Family Meal
Looking for a cozy family meal that’s quick to make? My Easy Chicken Alfredo Bake is a winner! With tender pasta, savory chicken, and…
My Latest Desserts
-

Cherry Chocolate Chip Muffins Irresistible and Easy Recipe
Get ready to bake some magic with my Cherry Chocolate Chip Muffins! This easy recipe combines tart cherries and rich Read Full Recipe -

Cherry Lemonade Popsicles Refreshing Summer Treat
Looking for a cool treat this summer? Try my Cherry Lemonade Popsicles! They combine tart lemon and sweet cherries, making Read Full Recipe -

Cream Soda Milkshake Pie Tasty and Simple Recipe
Are you ready to impress your friends with a sweet treat? This Cream Soda Milkshake Pie is not just tasty; Read Full Recipe -

Cherry Swirl Frozen Yogurt Bark Easy and Delicious Treat
Craving a sweet yet healthy treat? You’ll love this Cherry Swirl Frozen Yogurt Bark! It’s easy to make and packed Read Full Recipe -

Brownies with Pretzel Crown Delightful and Sweet Treat
Looking for a sweet treat that’s packed with flavor? Try my Brownies with Pretzel Crown! This recipe combines soft, chewy Read Full Recipe -
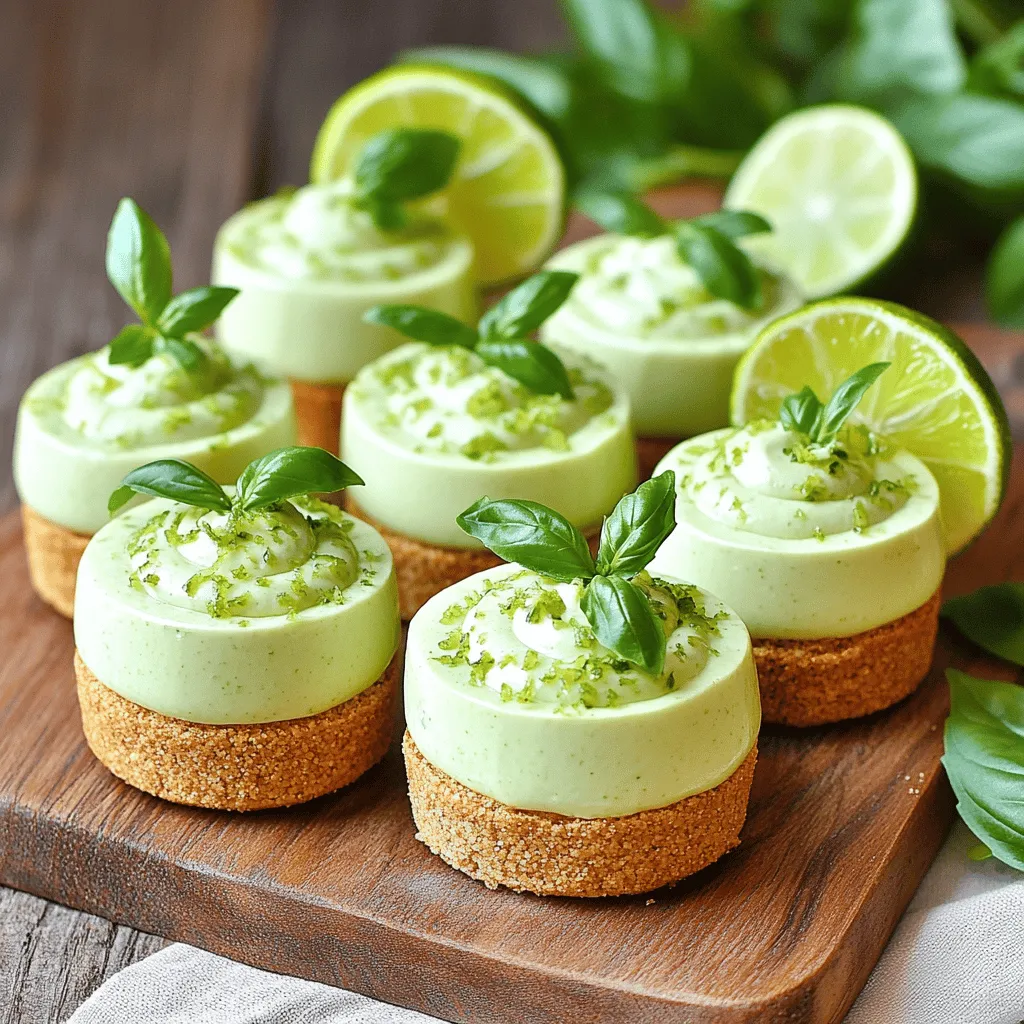
No Bake Basil Lime Cheesecake Cups Delightful Treat
Are you ready to treat yourself to something unique and delicious? These No Bake Basil Lime Cheesecake Cups are here Read Full Recipe -

No-Bake Oreo Cheesecake Easy Dessert Treat Idea
Are you craving a sweet treat that requires no oven? I’ve got just the recipe for you: No-Bake Oreo Cheesecake! Read Full Recipe -

Savory Mini Cheesecake Bites Easy and Delicious Treat
If you’re looking for a quick and tasty dessert, these savory mini cheesecake bites are perfect! With their creamy texture Read Full Recipe -

Blueberry Lemon Scones Fresh and Flavorful Delight
If you’re craving a burst of flavor, you’ll love these Blueberry Lemon Scones! These delightful treats blend fresh blueberries and Read Full Recipe -

Vegan Chocolate Mug Cake Quick and Easy Dessert
Craving something sweet but short on time? This Vegan Chocolate Mug Cake is your answer! In just minutes, you can Read Full Recipe
My Latest Recipes

hey,
i’m !
I’m so happy you’re here!
My kitchen is filled with stories, flavors, and love and I’m so happy to share them with you. Here’s to dishes that feel like home.


![- 1 lb chicken breast - Fresh Thai basil leaves - Vegetable oil - Garlic and Thai bird's eye chilies - Soy sauce - Oyster sauce - Fish sauce - Sugar, salt, and pepper - Cooked jasmine rice - Optional garnishes Spicy Thai Basil Chicken is a delight to make. You need simple, fresh ingredients. Start with tender chicken breast, about 1 pound. Cut it into thin slices. Next, fresh Thai basil leaves add a fragrant twist. You will want to use a good amount, so grab a couple of cups. The more, the better! Garlic and Thai bird's eye chilies bring heat and bold flavor. Use about three cloves of garlic, minced. For the chilies, two to three will do. Adjust these based on your spice level. For cooking, use vegetable oil. It helps the chicken brown nicely. Next, gather your sauces and seasonings. You'll need soy sauce and oyster sauce for depth. Fish sauce adds a unique umami punch. A tablespoon of sugar balances the flavors, along with a sprinkle of salt and pepper. To serve, you will want cooked jasmine rice. It makes a perfect base for the savory chicken. You can also add some garnishes like lime wedges or extra basil leaves for color. For the full recipe, check out the [Full Recipe]. - Slice the chicken breast into thin strips. - Mince the garlic and chop the chilies finely. Getting these ready makes cooking quick and easy. The chicken should be thin so it cooks fast. The garlic and chilies add great flavor and spice. - Heat oil in a large skillet over medium-high heat. - Sauté the minced garlic and chopped chilies for about 30 seconds. - Stir-fry the sliced chicken until cooked through, about 5-7 minutes. - Add the sliced red bell pepper and cook for 2-3 minutes. This process is key for a delicious meal. The oil helps the garlic and chilies release their oils and aroma. Next, cook the chicken until it turns white and is no longer pink. The bell peppers add color and crunch. - Pour a mix of soy sauce, oyster sauce, fish sauce, and sugar over the chicken. - Stir well and let it cook for another 2 minutes. - Remove from heat and gently fold in the fresh Thai basil until it wilts. - Season with salt and pepper to taste. These final touches bring everything together. The sauces create a tasty glaze that coats the chicken. Adding basil at the end keeps its fresh flavor. You can serve this over jasmine rice for a complete meal. For the full recipe, check out the main article. To make tender chicken, start with thin slices. This helps the meat cook evenly. Cook it fast over high heat. This keeps the chicken juicy and soft. For spice levels, taste as you go. If you want it hot, add more chilies. If you prefer mild, use fewer. You can always add more later. Adding lime juice brightens the dish. Squeeze some over the chicken before serving. Fresh herbs like cilantro or mint can also boost flavor. Balancing sweetness and heat is key. The sugar in the sauce helps. Adjust it based on your taste. If it's too sweet, add a bit more soy sauce. For eye appeal, serve Spicy Thai Basil Chicken over fluffy jasmine rice. The white rice contrasts nicely with the colorful dish. Use garnishes like fresh basil leaves. They add color and freshness. Slices of chili can spice up the look. Lime wedges on the side add a zesty touch. For the full recipe, check out the link. {{image_2}} You can switch out chicken for tofu or beef. Tofu absorbs flavors well. It's a great choice for a vegetarian meal. If you like beef, use thin slices of flank steak. Both options keep the dish tasty and satisfying. You can also try shrimp for a seafood twist. Shrimp cooks fast and adds a nice flavor. Just toss them in after the garlic and chilies. Add more veggies for extra nutrition. Good options are snap peas, broccoli, or carrots. These veggies add color and crunch. You can also use seasonal ingredients. In summer, zucchini or bell peppers work great. In winter, try bok choy or spinach. Mixing in these veggies makes the dish even better. You can play with different sauces for new flavors. Try adding hoisin sauce for a sweet touch. Or, use sriracha for more heat. If gluten is a concern, make it gluten-free. Just switch soy sauce for tamari or coconut aminos. These small changes can make a big difference in taste. To store leftover Spicy Thai Basil Chicken, place it in an airtight container. Make sure it cools down before sealing. You can keep it in the fridge for up to three days. The chicken stays tasty, but you may notice the basil wilts a bit. When reheating, use a skillet on medium heat. Add a splash of water to keep it moist. Stir often to ensure it heats evenly. This method helps keep the flavors bright and the chicken tender. Avoid using the microwave, as it may make the chicken tough. Yes, you can freeze Spicy Thai Basil Chicken! Just make sure it cools down. Place it in a freezer-safe container or bag. It lasts up to three months in the freezer. To thaw, move it to the fridge overnight. Reheat it in a skillet, adding a bit of water for moisture. This keeps the dish flavorful and delicious. For the complete cooking process, check out the Full Recipe. This dish takes about 25 minutes to make. You will spend about 15 minutes prepping the ingredients. Cooking takes around 10 minutes. You can have dinner ready quickly! Yes, you can make this dish in advance. Cook the chicken and sauces, then store them in the fridge. Reheat when you are ready to eat. To keep it fresh, store it for only 2-3 days. This dish pairs well with jasmine rice. You can also serve it with fresh vegetables like cucumber or a simple salad. For extra flavor, add lime wedges on the side. Enjoy the mix of tastes and textures! For the full recipe, you can refer to the detailed steps above. In this blog post, we covered how to make Spicy Thai Basil Chicken. I shared the main ingredients, sauces, and serving ideas. You learned step-by-step instructions to prepare and cook the dish. Tips on cooking techniques and variations helped you get creative. Finally, I explained storage methods for leftovers and answered common questions. Now, you have everything you need to enjoy this tasty meal. Dive in and start cooking!](https://southerndishes.com/wp-content/uploads/2025/05/a5d0289a-3022-488d-ab7b-53552126e8b7-300x300.webp)
Cheesy Spinach Artichoke Dip Irresistible Party Snack
If you’re searching for the perfect party snack, look no further! My Cheesy Spinach Artichoke Dip is creamy, tangy, and sure to be a…