Latest & Greatest
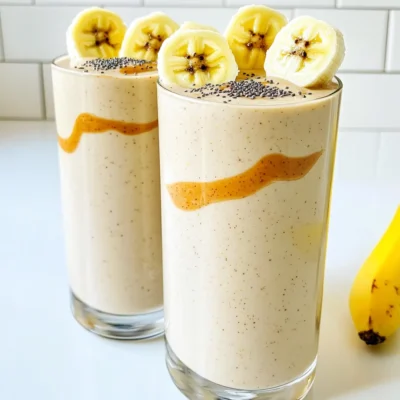
Protein Peanut Butter Banana Smoothie Delicious Recipe
Are you ready to start your day with a burst of energy? My Protein Peanut Butter Banana Smoothie is a
Read more…
Pumpkin Cheesecake Swirl Brownies Irresistible Treat
Craving a fall treat that combines rich chocolate with creamy pumpkin? You’re in for a delight! These Pumpkin Cheesecake Swirl
Read more…
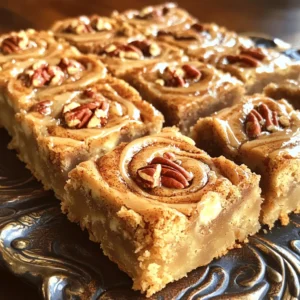
Caramel Apple Monkey Bread Tasty Fall Dessert
Fall is here, and that means it’s time for a sweet treat! My Caramel Apple Monkey Bread combines warm, gooey
Read more…
Maple Glazed Salmon Sheet-Pan Delightful Recipe
Looking for a quick and tasty dinner? Try my Maple Glazed Salmon Sheet-Pan recipe! This dish is not just easy
Read more…
Cheesy Baja Chicken Pepper Skillet Zesty Weeknight Meal
Looking for a quick and tasty weeknight meal? Let me introduce you to my Cheesy Baja Chicken Pepper Skillet! This
Read more…
Minute Garlic Butter Scallops Flavorful and Quick Dish
Do you crave a dish that’s both tasty and quick? Minute Garlic Butter Scallops are your answer! In just a
Read more…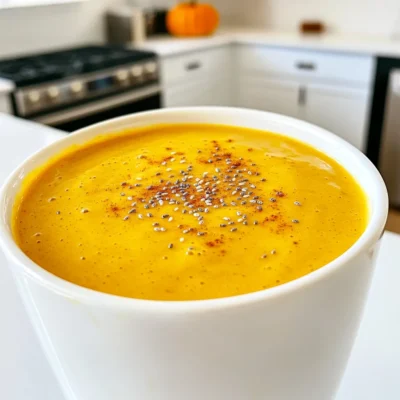
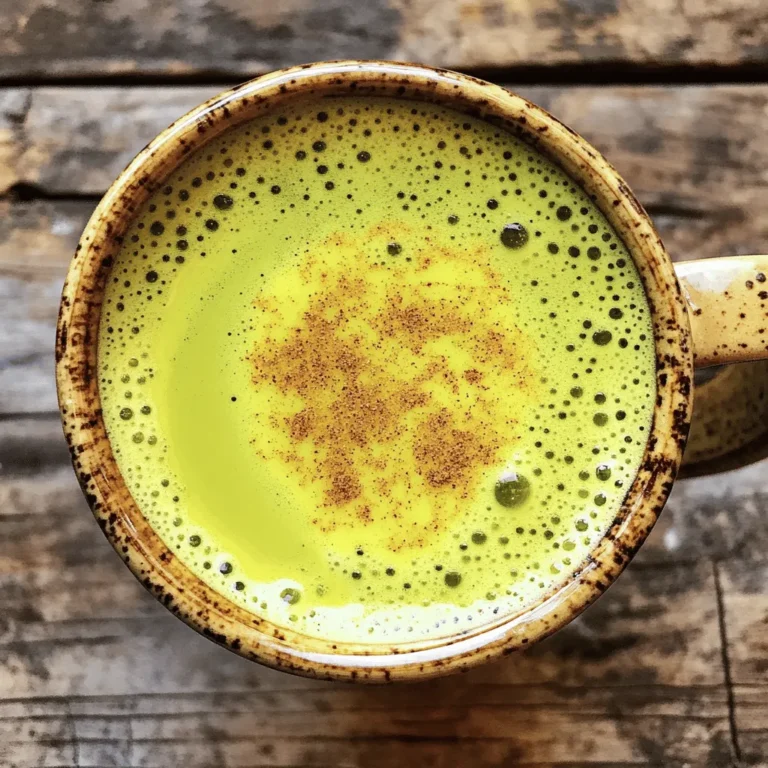
Cozy Pumpkin Chai Smoothie Delightfully Creamy Recipe
Fall is here, and so is the time for cozy, warm drinks! I’m excited to share my recipe for a
Read more…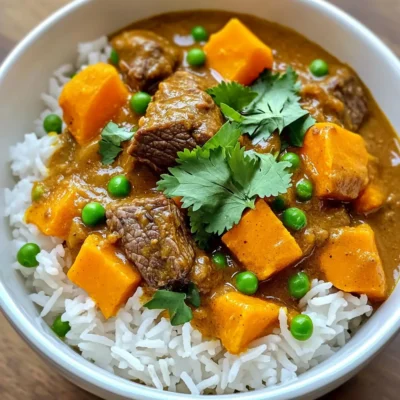
Slow Cooker Beef and Sweet Potato Curry Delight
Are you ready to dive into a dish that’s both comforting and bursting with flavor? My Slow Cooker Beef and
Read more…browse recipes


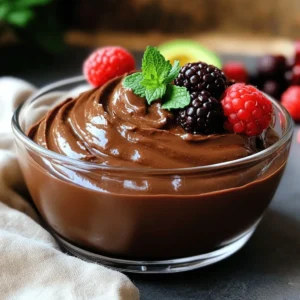
![For a rich and creamy chocolate avocado mousse, gather these main ingredients: - 2 ripe avocados - 1/2 cup unsweetened cocoa powder - 1/4 cup maple syrup (or honey) - 1/4 cup almond milk (or any non-dairy milk) - 1 teaspoon vanilla extract - A pinch of sea salt These ingredients work together to create a smooth and velvety texture. Ripe avocados are key because they provide creaminess. Cocoa powder gives the mousse its rich chocolate flavor. Maple syrup or honey offers natural sweetness, while almond milk keeps it light. Vanilla adds depth, and sea salt enhances all the flavors. After you blend the mousse, you can add fun toppings to make it even better. Consider these options: - Shredded coconut - Cacao nibs - Fresh berries These toppings not only add flavor but also a nice crunch or freshness. Shredded coconut gives a tropical touch. Cacao nibs add a bit of bitterness and crunch. Fresh berries, like raspberries or strawberries, bring a pop of color and a burst of sweetness. This mousse is not just tasty; it's also good for you. Here’s a quick look at its nutrition: - Calories: About 150 per serving - Fats: 10g (mostly healthy fats from avocados) - Carbs: 15g - Protein: 2g Enjoying this mousse can be a guilt-free treat. The healthy fats from avocados help keep you full. The natural sweeteners add flavor without refined sugars. Overall, this dessert fits well into many diets while still satisfying your sweet tooth. To make a great chocolate avocado mousse, start with ripe avocados. Here’s how to peel and pit them: - Cut the avocado in half lengthwise. - Twist the two halves to separate them. - Carefully use a spoon to scoop out the flesh. Next, measure your dry ingredients. You will need: - 1/2 cup unsweetened cocoa powder. - A pinch of sea salt. For blending, use a food processor. Here are the steps: 1. Add the avocado flesh, cocoa powder, maple syrup, almond milk, vanilla extract, and sea salt into the processor. 2. Blend on high speed. Stop to scrape down the sides as needed. You want a smooth consistency. This should take about 1-2 minutes. If needed, blend longer until creamy. Chill the mousse in the refrigerator for at least 30 minutes. This helps it firm up. For serving, scoop the mousse into bowls or glasses. Here are some garnishing tips: - Top with shredded coconut for crunch. - Add cacao nibs for a chocolatey bite. - Fresh berries give a nice pop of color. This mousse is not just tasty; it also looks beautiful! Enjoy your rich and creamy treat. To get the best mousse, start with ripe avocados. Ripe avocados are soft, creamy, and blend easily. They give the mousse a rich texture. If your avocados are hard, let them sit on the counter for a few days until they soften. When blending, remember to scrape down the sides of the food processor. This helps mix all the ingredients well. If you don't scrape, you may end up with lumps. Smoothness is key to a perfect mousse. Sweetness is important in this recipe. You can use natural sweeteners like maple syrup or honey. Start with the amount in the recipe, then taste. If it needs more sweetness, add a bit more syrup or honey. Blend again until smooth. Always taste as you go to get it just right. The way you serve your mousse matters. Layer it in clear glass cups for a beautiful look. You can see the rich color and texture. Top with shredded coconut, cacao nibs, or fresh berries for added flair. A sprig of mint on top adds a nice green touch. This makes your dessert not only tasty but also visually appealing. For the full recipe and more tips, check out the [Full Recipe]. {{image_2}} You can make this mousse even more exciting! First, try adding espresso or coffee. This gives a rich flavor that pairs well with chocolate. Just add one shot of espresso to the blending step. Blend until smooth. It adds depth and warmth to every bite. Another fun twist is using peanut butter. Just a few tablespoons can change the taste to a nutty delight. Mix it in with the other ingredients. This gives a creamy texture and adds healthy fats. Your mousse will have a unique twist that everyone will love! If you need a nut-free version, it’s easy to adjust. Simply swap out almond milk for oat milk or coconut milk. Both work great and keep your mousse creamy. Always check labels to avoid any hidden nuts. For those with allergies, you can also use agave syrup instead of maple syrup. This makes it safe for those allergic to certain sweeteners. You can adjust to fit your needs and still enjoy the rich taste. Serving styles can change your mousse experience! Try layering the mousse in parfait glasses. This makes it look fancy and fun. Add layers of fresh berries or granola for crunch. Your guests will be impressed! You can also use the mousse as a filling for desserts. It works well in cakes or as a topping for brownies. The creamy texture adds a rich layer to any dessert. Just spread it between layers or on top. The options are endless! For the full recipe, don’t forget to check the details! To keep your Chocolate Avocado Mousse fresh, place it in airtight containers. Cover the mousse tightly with plastic wrap before sealing. This helps avoid exposure to air and keeps it creamy. Remember, air can cause the mousse to brown. When stored in the fridge, your mousse lasts about three days. Check for any changes in color or smell. If it smells sour or looks darker, it’s time to toss it. Fresh mousse should have a rich chocolate scent and a smooth texture. Yes, you can freeze Chocolate Avocado Mousse! Use freezer-safe containers for storage. Just remember to leave some space at the top, as the mousse expands when frozen. To serve, thaw it in the fridge overnight. Stir it well before serving to restore its creamy texture. Enjoy your delicious mousse again! For the full recipe, refer to the earlier section. Chocolate avocado mousse has a rich, chocolatey flavor. It tastes creamy and smooth. The cocoa brings deep chocolate notes. Unlike traditional mousse, this version lacks eggs. It feels light yet satisfying. You won’t taste the avocado at all. The texture is velvety and thick, perfect for a dessert. Yes, this recipe is great for vegans. It uses simple, plant-based ingredients. The ripe avocados serve as the creamy base. Cocoa powder adds the rich chocolate flavor. Maple syrup provides natural sweetness. Almond milk keeps it dairy-free. This mousse has no animal products, making it vegan-friendly. You can use other sweeteners like honey or agave. Each sweetener changes the mousse's flavor. Honey adds a floral note, while agave is milder. You could also try coconut sugar for a deeper taste. Just remember to adjust the amount to your liking. Always taste as you go to find your perfect match. In this blog post, we explored how to make a rich chocolate avocado mousse. We covered key ingredients, step-by-step instructions, and helpful tips. You learned about variations and storage methods to keep your mousse fresh. This dessert is simple, tasty, and healthy. It offers a fun way to enjoy chocolate while sneaking in good fats from avocados. Try it out, impress your friends, and enjoy a sweet treat without the guilt.](https://southerndishes.com/wp-content/uploads/2025/04/dc40f1c0-c16b-4cab-8910-e43e7e0e3bac.webp)
Chocolate Avocado Mousse Rich and Creamy Delight
Are you ready to indulge in a dessert that’s both rich and healthy? Chocolate Avocado Mousse combines creamy avocados with rich cocoa, creating a…
My Latest Desserts
My Latest Recipes

hey,
i’m !
I’m so happy you’re here!
My kitchen is filled with stories, flavors, and love and I’m so happy to share them with you. Here’s to dishes that feel like home.

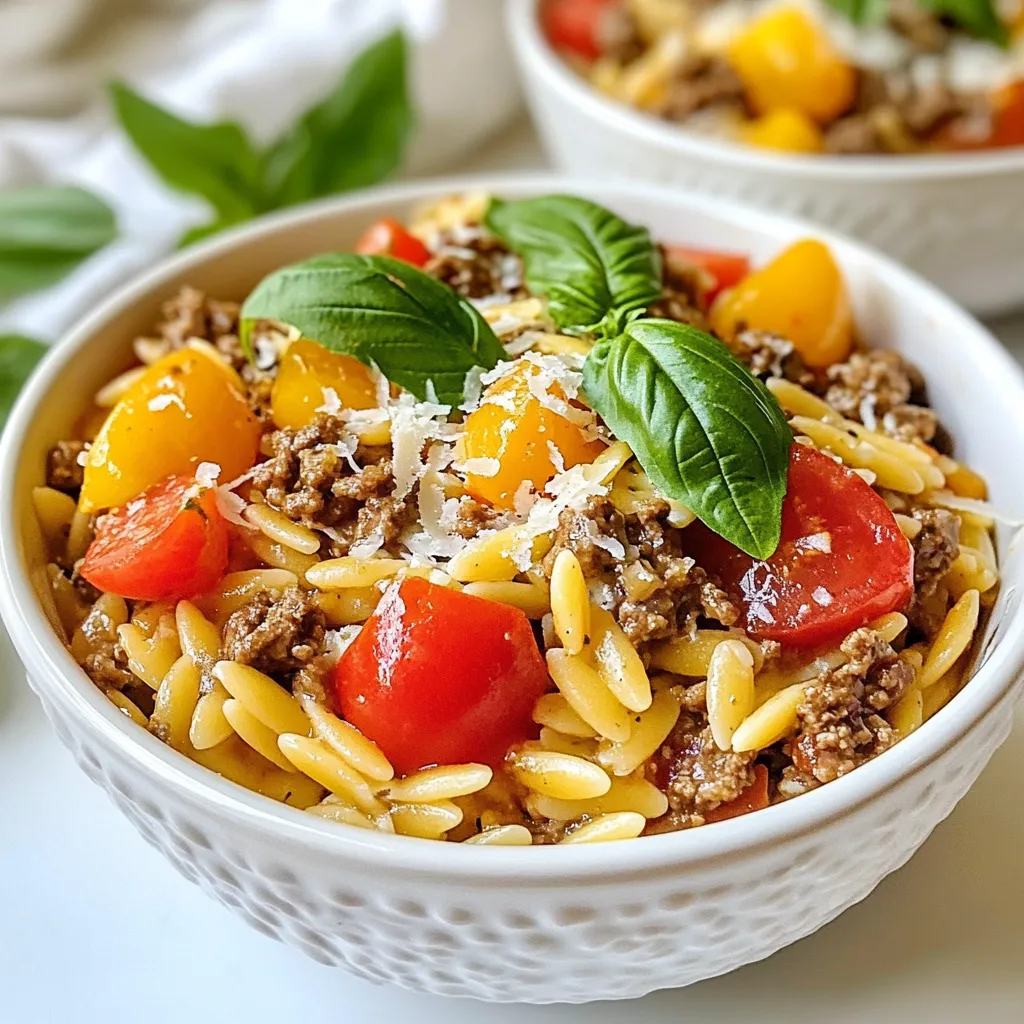
Ground Beef Orzo with Tomato Cream Rich Dish Recipe
Are you ready for a cozy meal that warms the heart? Ground Beef Orzo with Tomato Cream is the perfect dish for busy nights.…