Latest & Greatest

browse recipes

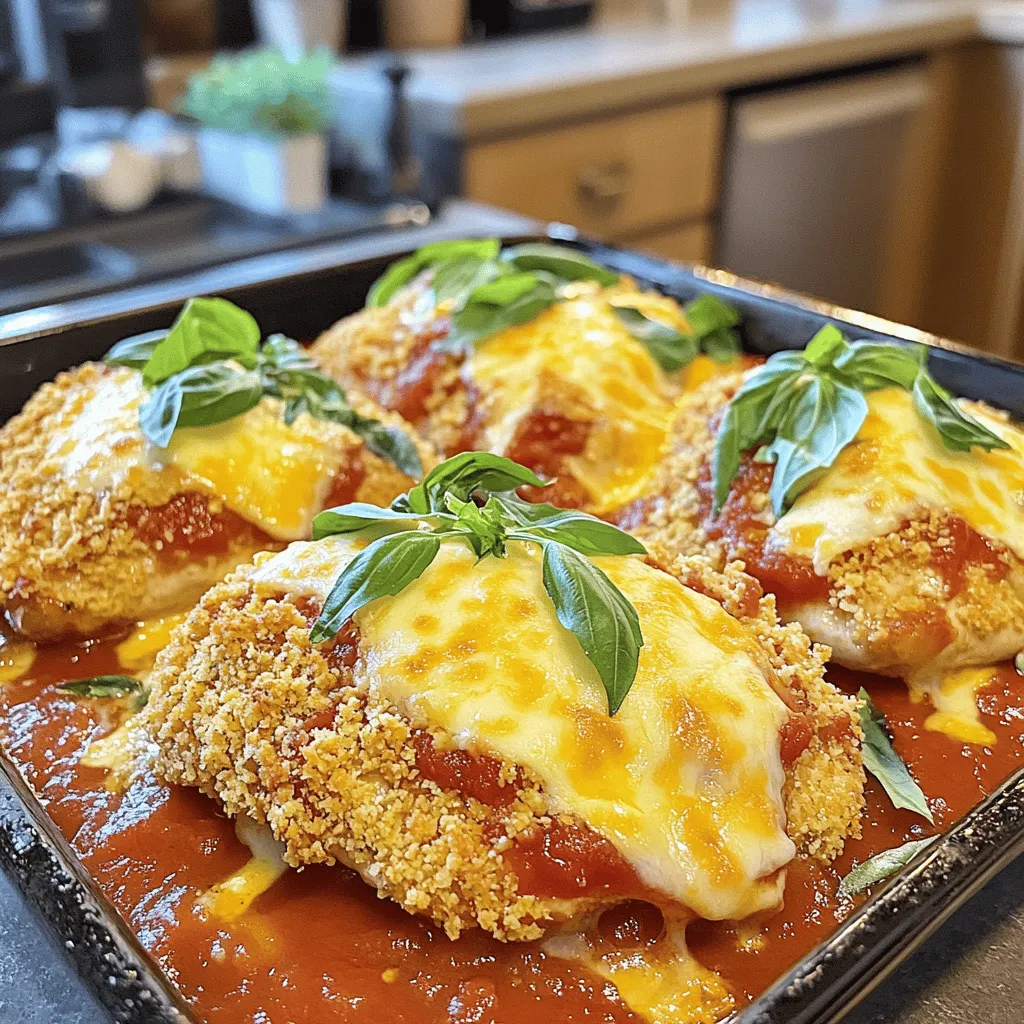
To make baked chicken parmesan, you need fresh, simple ingredients. Here is a list of what you'll need: - 4 boneless, skinless chicken breasts - 1 cup all-purpose flour - 2 large eggs - 1 cup bread crumbs (preferably Italian-seasoned) - 1 cup marinara sauce - 2 cups shredded mozzarella cheese - 1/2 cup grated Parmesan cheese - 2 tablespoons fresh basil, chopped (plus more for garnish) These ingredients come together to create a tasty dish. The chicken gives the meal its base, while the cheese and sauce add rich flavors. Seasonings make a key difference in taste. The essential seasonings for this recipe include: - 1 teaspoon garlic powder - 1 teaspoon onion powder - Salt and pepper to taste - Olive oil spray These seasonings enhance the chicken’s flavor. Fresh basil not only adds taste but also brightens up the dish. You can sprinkle some on top for a nice, fresh touch. Baked chicken parmesan pairs well with various side dishes. Here are some great options: - Spaghetti or any pasta - Garlic bread or toasted baguette - Steamed vegetables like broccoli or green beans - A fresh garden salad These sides complete the meal and balance the flavors of the chicken parmesan. For the full recipe, you can check the details above. First, you need to preheat your oven to 375°F (190°C). This helps cook the chicken evenly. Next, take a baking dish and spray it lightly with olive oil. This step stops the chicken from sticking. Now, pat the chicken breasts dry with a paper towel. This helps the seasoning stick better. Season both sides with salt, pepper, garlic powder, and onion powder. These spices add great flavor to the chicken. Set up your breading station. You will need three shallow dishes. In the first dish, place the flour. In the second, beat the eggs. In the third dish, mix the bread crumbs with 1/4 cup of grated Parmesan cheese. Take each chicken breast and dredge it in the flour. Make sure to shake off any extra flour. Now, dip it in the beaten eggs. Let the extra egg drip off, then coat it in the bread crumbs. Press lightly to make the crumbs stick well. Place the breaded chicken breasts in the prepared baking dish. Lightly spray the tops with olive oil. This helps them get nice and crispy while baking. Now, it's time to bake the chicken. Place the dish in the preheated oven for 25-30 minutes. The chicken is done when it reaches an internal temperature of 165°F (75°C). Once cooked, remove the chicken from the oven. Spoon marinara sauce generously over each piece. Make sure to cover them evenly for the best taste. Then, sprinkle the mozzarella cheese over the sauce, adding the remaining Parmesan cheese on top. Return the dish to the oven. Bake for an additional 10-15 minutes. You want the cheese to be bubbly and golden brown. After that, take it out of the oven and let it rest for a few minutes. Garnish with fresh basil before serving. Enjoy your cheesy baked chicken parmesan! For the full recipe, check the complete guide. To make sure your chicken is perfect, start with even thickness. You can pound the chicken breasts to a uniform thickness. This helps them cook evenly. Use a meat mallet or a rolling pin. Season the chicken well with salt and pepper. This adds flavor throughout. Always check the internal temperature using a meat thermometer. It should reach 165°F (75°C) for safe eating. Letting the chicken rest for a few minutes after baking keeps it juicy. For a crispy crust, use Italian-seasoned bread crumbs. They add flavor and texture. Spraying the breaded chicken with olive oil helps it brown nicely. You can also bake the chicken on a wire rack. This allows hot air to circulate around the chicken. If you want an extra crunch, add some grated Parmesan to the bread crumbs. Press the crumbs firmly onto the chicken to help them stick. You can make this dish lighter by using skinless chicken breasts. Replace regular bread crumbs with whole wheat or almond flour. Use low-fat cheese options to cut down on calories. You can also add more veggies by serving it with a side salad. To boost flavor, use fresh herbs like basil or parsley. This adds freshness without adding many calories. For a lighter sauce, make a homemade marinara with crushed tomatoes and herbs. For the full recipe, check out the details above. {{image_2}} You can make a gluten-free version of Baked Chicken Parmesan. Start by using gluten-free flour and gluten-free breadcrumbs. This swap keeps the dish tasty while catering to gluten sensitivities. The process remains the same, ensuring your chicken gets that crispy texture. A good tip is to check that your marinara sauce is gluten-free as well. Enjoy this dish without worry! If you prefer a vegetarian option, use eggplant or zucchini instead of chicken. Cut them into thick slices and bread them just like the chicken. Bake them until tender and golden. You can also use tofu for a protein-rich choice. Tofu will soak up all the flavors, making it delicious. Top the baked veggies or tofu with marinara and cheese for a satisfying meal. Cheese can change the whole dish! While mozzarella and Parmesan are classic, feel free to experiment. Try provolone for a stronger taste or fontina for creaminess. A mix of cheeses can add more depth. For a fun twist, sprinkle some goat cheese or blue cheese for a unique bite. Each choice adds something special to your Baked Chicken Parmesan. For the full recipe, check out my detailed guide. To store your leftover baked chicken Parmesan, let it cool first. Place it in an airtight container. You can keep it in the fridge for up to three days. If you want to keep it longer, consider freezing it. When you reheat your baked chicken Parmesan, aim for the oven. Preheat the oven to 350°F (175°C). Place the chicken in a baking dish. Add a splash of marinara sauce to keep it moist. Cover the dish with foil to prevent drying out. Heat for about 15-20 minutes. If you prefer, you can also use a microwave, but it may not stay crispy. Freezing baked chicken Parmesan is easy. Slice it into portions and wrap each piece in plastic wrap. Then, place the wrapped chicken in a freezer-safe bag. Label it with the date. You can freeze it for up to three months. When you're ready to eat, thaw it overnight in the fridge before reheating. This keeps your meal fresh and tasty. For the complete recipe, check out the Full Recipe section. Yes, you can use frozen chicken breasts. Just make sure to thaw them first. You can thaw chicken in the fridge overnight or use the microwave. Thawed chicken cooks evenly and absorbs flavors better. If you use frozen chicken directly, it may take longer to cook. Keep an eye on the internal temperature. It should reach 165°F (75°C). You can tell if the chicken is done by checking its temperature. Use a meat thermometer to check the thickest part. It should read 165°F (75°C). If you don’t have a thermometer, cut into the chicken. The juices should run clear, and the meat should no longer be pink. Cooking time can vary, so always check. The best way to reheat Baked Chicken Parmesan is in the oven. Preheat it to 350°F (175°C). Place the chicken on a baking sheet. Cover it with foil to keep it moist. Heat for about 15-20 minutes or until warm. You can also use a microwave, but it may make the chicken soggy. Enjoy your meal again! For the complete recipe, check the Full Recipe section. Baked Chicken Parmesan is a simple yet delicious dish. You learned about key ingredients, seasonings, and sides. I covered step-by-step instructions, tips for perfect cooking, and tasty variations. You can make gluten-free or vegetarian options too. Proper storage and reheating keep your meal fresh. No matter your skill level, Baked Chicken Parmesan can impress. Enjoy the crunchy crust and rich flavors. Now, get cooking and share this dish with friends!

Baked Chicken Parmesan Simple and Flavorful Guide

Get ready to delight your taste buds with my simple and flavorful Baked Chicken Parmesan guide! This dish combines crispy chicken, zesty sauce, and…

My Latest Desserts

My Latest Recipes

hey,

i’m !

I’m so happy you’re here!

My kitchen is filled with stories, flavors, and love and I’m so happy to share them with you. Here’s to dishes that feel like home.

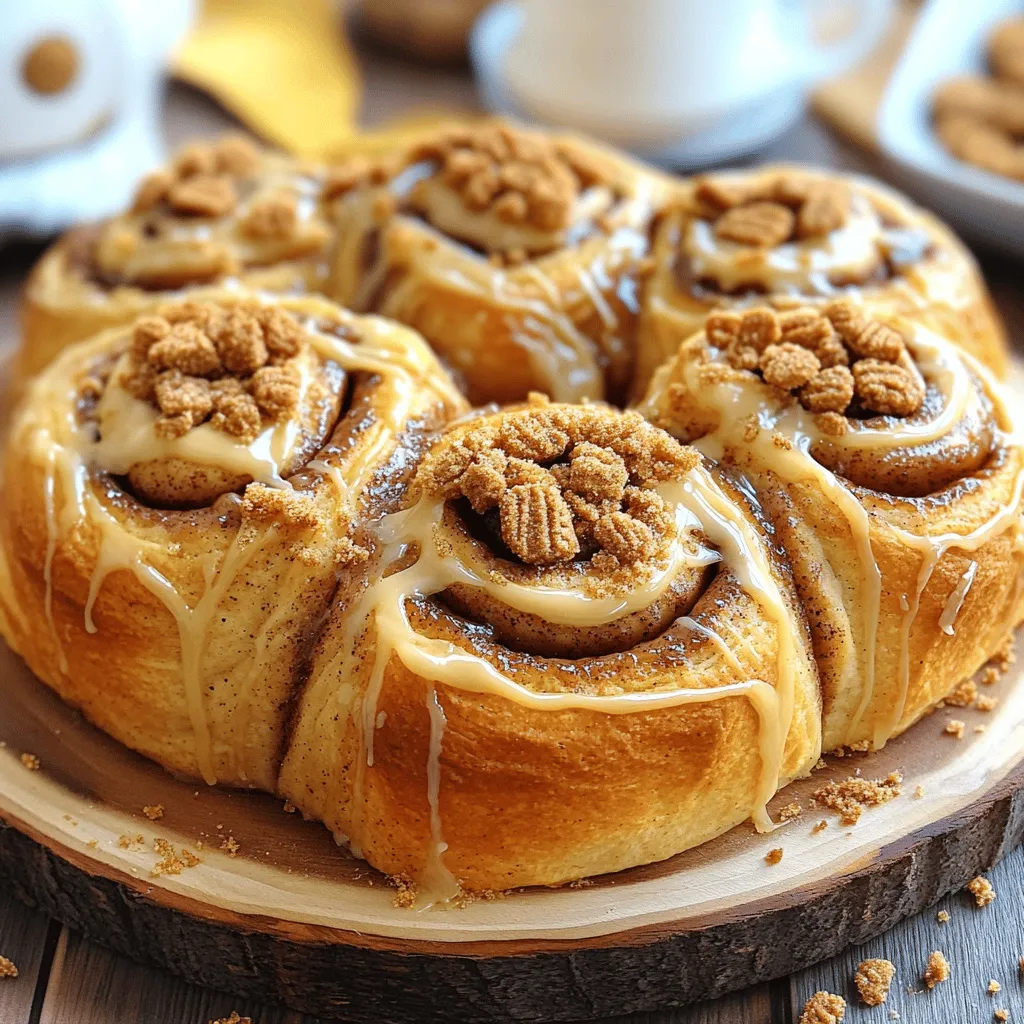
Biscoff Cookie Butter Cinnamon Rolls Delightful Treat

Craving a warm, gooey treat? These Biscoff Cookie Butter Cinnamon Rolls are your answer! I’ll guide you through every step, from mixing dough to…
To make Biscoff cookie butter cinnamon rolls, gather these simple ingredients: - 2 cups all-purpose flour - 1/4 cup granulated sugar - 1 tsp instant yeast - 1/2 tsp salt - 1/2 cup warm milk (about 110°F) - 1 large egg - 1/4 cup unsalted butter, melted - 1/2 cup Biscoff cookie butter - 1 tsp ground cinnamon - 1/4 cup brown sugar - 1/2 cup powdered sugar (for icing) - 2 tbsp milk (for icing) - 1/2 tsp vanilla extract You can change things up with these optional ingredients: - Chopped nuts (like pecans or walnuts) - Raisins or dried fruit - Different spices (like nutmeg or cardamom) - Cream cheese for a richer icing Having the right tools can make your baking easier: - Mixing bowls - Whisk - Rolling pin - Baking dish - Knife or dental floss (for cutting rolls) - Measuring cups and spoons - Clean kitchen towel for rising dough These ingredients and tools will help you create the perfect Biscoff cookie butter cinnamon rolls. For the complete method, check the Full Recipe. Start by gathering your ingredients. You will need flour, sugar, yeast, and salt. In a mixing bowl, combine 2 cups of all-purpose flour, 1/4 cup of granulated sugar, 1 teaspoon of instant yeast, and 1/2 teaspoon of salt. Mix these dry ingredients well. In another bowl, whisk together 1/2 cup of warm milk, 1 large egg, and 1/4 cup of melted butter. Gradually pour this mixture into the dry mix. Stir until you form a soft dough. Knead the dough on a floured surface for about 5 to 7 minutes. You want it to feel smooth and elastic. Place the dough in a greased bowl. Cover it with a cloth and let it rise in a warm spot for 1 hour or until it doubles in size. Once the dough has risen, it’s time to prepare the filling. First, punch down the dough to release the air. Roll it out on a floured surface into a rectangle, about 12 by 18 inches. Spread 1/2 cup of Biscoff cookie butter evenly over the dough, leaving a small border. In a small bowl, mix together 1/4 cup of brown sugar and 1 teaspoon of ground cinnamon. Sprinkle this mixture over the Biscoff spread. This adds a warm, sweet flavor to your rolls! Now, let's form the rolls. Starting from the long edge, roll the dough tightly into a log. Pinch the edges to seal it well. Cut the log into 12 equal slices. Place these rolls in a greased baking dish. Cover them with a cloth and let them rise for another 30 minutes until they puff up. While the rolls rise, preheat your oven to 350°F (175°C). Bake the cinnamon rolls for 20 to 25 minutes or until they are golden brown. While they bake, prepare the icing by whisking together 1/2 cup of powdered sugar, 2 tablespoons of milk, and 1/2 teaspoon of vanilla extract until smooth. Once the rolls are out of the oven, let them cool slightly. Drizzle the icing over the top and enjoy your sweet treat! For the full recipe, do not forget to check out the instructions provided. To make your Biscoff cookie butter cinnamon rolls fluffy, start with warm milk. Warm milk helps activate the yeast. Make sure your yeast is fresh; expired yeast won't rise well. Knead the dough until it is smooth and elastic. This step develops gluten, which gives the rolls structure. Let the dough rise in a warm, draft-free spot. Cover it with a cloth to keep moisture in. Wait until it doubles in size, about one hour. For the perfect icing, mix powdered sugar, milk, and vanilla extract in a bowl. Whisk it until smooth and creamy. If the icing is too thick, add a tiny bit more milk. If it’s too thin, add more powdered sugar. Drizzle the icing over the rolls when they are warm. This helps the icing melt slightly, creating a delicious glaze. You can also sprinkle crushed Biscoff cookies on top for extra flavor. Avoid using cold milk in your dough. Cold milk slows down yeast activity. Don’t rush the rising time; it’s key for fluffiness. If you cut the dough too quickly, the rolls can become dense. Ensure you seal the edges well when rolling to keep the filling inside. Lastly, remember to check the rolls in the oven. Overbaking will dry them out. Following these tips will help you create the best Biscoff cookie butter cinnamon rolls. {{image_2}} You can mix up your Biscoff cookie butter cinnamon rolls in fun ways. Try using Nutella instead of cookie butter for a chocolate twist. You can also spread peanut butter for a nutty flavor. If you want something fruity, add mashed bananas or apple pie filling. For toppings, consider using crushed Biscoff cookies or a sprinkle of chopped nuts. A drizzle of chocolate sauce adds extra sweetness and flair. Want to make these rolls gluten-free? You can swap all-purpose flour for a gluten-free blend. Make sure the blend contains xanthan gum for the best texture. If you prefer, almond flour can work too, but the rolls may be denser. Keep an eye on the baking time, as gluten-free dough can bake differently. These changes let everyone enjoy the treat without worry! To take your rolls to the next level, consider adding spices. A pinch of nutmeg or cardamom can deepen the flavor. You could also infuse the milk with vanilla or other extracts for a rich taste. For an extra kick, mix in a touch of espresso powder with the filling. Experimenting with these ideas will make your cinnamon rolls even more delightful. For the complete recipe, check out the Full Recipe section. To keep your Biscoff cookie butter cinnamon rolls fresh, store them in an airtight container. This method helps keep moisture in and prevents them from getting hard. If you have more rolls than you can eat, layer them with parchment paper. This prevents sticking. You can store them at room temperature for up to three days. If you want them to last longer, consider refrigerating them. When it's time to enjoy your leftover rolls, reheating is easy. Preheat your oven to 350°F (175°C). Place the rolls on a baking sheet. Cover them with aluminum foil to keep them soft. Heat for about 10-15 minutes. You can also use a microwave. Just place a roll on a microwave-safe plate. Heat it for about 15-20 seconds. Enjoy warm and gooey rolls like they just came out of the oven! Freezing is a great way to save your cinnamon rolls for later. First, let the rolls cool completely. Next, wrap each roll tightly in plastic wrap. Then, place the wrapped rolls in a freezer bag or container. Make sure to remove as much air as possible. You can freeze them for up to three months. To enjoy, simply thaw in the fridge overnight. Reheat as described earlier for a warm treat! For the full recipe, check it out above. Yes, you can make these rolls ahead. Prepare the dough and let it rise. After that, you can shape the rolls and place them in a greased dish. Cover them and store in the fridge overnight. In the morning, let them sit at room temperature for about 30 minutes. Then, bake as usual. This method saves time and gives you fresh rolls in the morning. If you don’t have Biscoff cookie butter, you can try several substitutes. Nut butter, like almond or peanut butter, works well. You can also use speculoos spread if you find it. For a different flavor, try using chocolate spread or hazelnut spread. Each option gives a unique taste to your cinnamon rolls. These rolls can last for about three days at room temperature. To keep them fresh, store them in an airtight container. You can also freeze them for up to three months. Just make sure to wrap them well. Reheat in the oven or microwave before enjoying. For the best taste, serve them warm. Check the Full Recipe for more details on storage. We covered all you need to make tasty Biscoff Cookie Butter Cinnamon Rolls. You learned the key ingredients and tools. Followed by step-by-step instructions for perfect rolls. I shared tips for fluffy texture and icing. We also explored fun variations for everyone. Lastly, I provided storage tips to keep your rolls fresh. Enjoy baking and sharing these sweet treats. Cooking should be fun and rewarding!