

Latest & Greatest

Chocolate Dipped Pretzel Rods Simple and Fun Treat
Looking for a simple and fun treat? Chocolate dipped pretzel rods are the answer! These sweet-and-salty snacks are easy to
Read more…
Caramel Apple Pie Bombs Tasty Dessert Delight
Craving a sweet treat that combines fall flavors with a fun twist? Look no further than Caramel Apple Pie Bombs!
Read more…
Strawberry Shortcake Poke Cake Easy and Delicious Treat
Are you ready to make a dessert that will wow your friends and family? This Strawberry Shortcake Poke Cake is
Read more…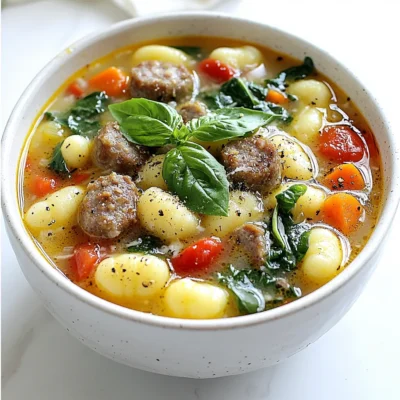
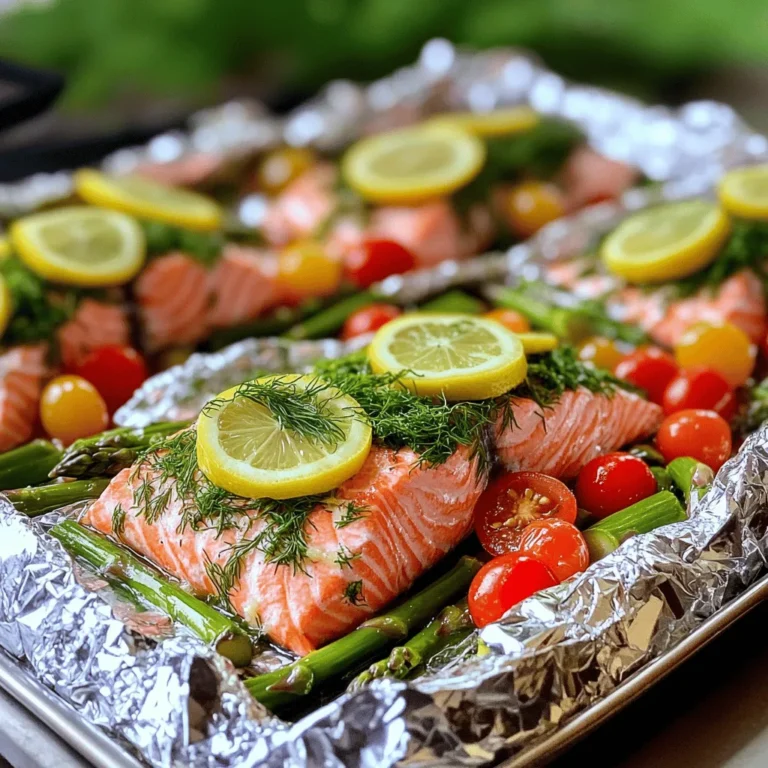
Italian Sausage Gnocchi Soup Comforting and Hearty Dish
Warm up your evenings with a bowl of Italian Sausage Gnocchi Soup. This hearty dish combines savory sausage with tender
Read more…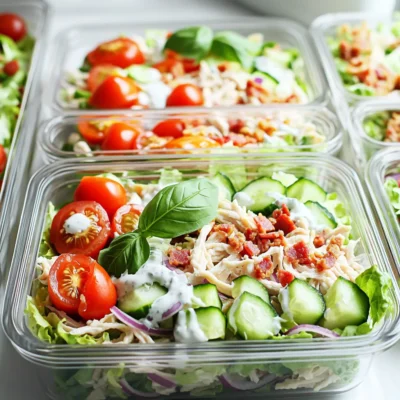
BLT Chicken Salad Meal Prep Easy and Tasty Recipe
Looking for a quick, delicious meal prep idea? This BLT Chicken Salad is your answer! With juicy chicken, crispy turkey
Read more…
Grilled Chicken Alfredo Pasta Simple and Satisfying Dish
Looking for a quick and tasty dinner? You’ve come to the right place! This Grilled Chicken Alfredo Pasta is not
Read more…
Blueberry Cheesecake Swirl Cookies Delightful Treat
If you love cookies and cheesecake, then you’re in for a treat! Blueberry Cheesecake Swirl Cookies combine two delightful desserts
Read more…
Garlic Parmesan Chicken Skewers Flavorful and Easy Recipe
Looking for a quick and tasty dinner idea? You’re in the right place! This Garlic Parmesan Chicken Skewers recipe combines
Read more…browse recipes


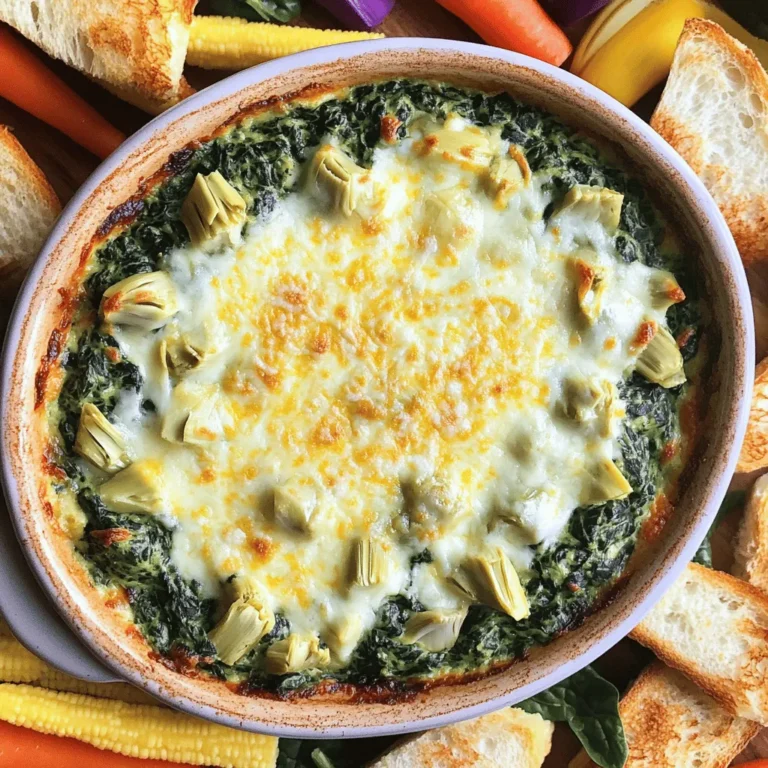
Nutella Brownies Irresistibly Rich and Gooey Treat
If you’re craving something sweet, Nutella brownies are a must-try! These brownies are rich, gooey, and packed with delicious Nutella. In this guide, I’ll…
My Latest Desserts
My Latest Recipes

hey,
i’m !
I’m so happy you’re here!
My kitchen is filled with stories, flavors, and love and I’m so happy to share them with you. Here’s to dishes that feel like home.


Spicy Thai Peanut Noodles Flavorful and Easy Recipe
Are you ready to dive into a bowl of flavor? My Spicy Thai Peanut Noodles are quick to make and full of taste. This…
![To make Spicy Thai Peanut Noodles, you need some key ingredients. Here’s what you will use: - 8 oz rice noodles - 1 tablespoon sesame oil - 1 red bell pepper, sliced - 1 carrot, julienned - 1 cup sugar snap peas, trimmed - 3 green onions, chopped - 1/4 cup cilantro, chopped - 1/4 cup peanuts, crushed (plus extra for garnish) These ingredients create a vibrant dish full of flavor and texture. The peanut sauce is what makes this dish shine. Here are the ingredients you'll need: - 1/2 cup peanut butter - 1 tablespoon soy sauce - 2 tablespoons lime juice - 2 tablespoons honey or maple syrup - 1 tablespoon sriracha (adjust for spice level) - 1 clove garlic, minced - 1/4 cup warm water (for thinning) This sauce is creamy, tangy, and spicy, perfect for coating the noodles. Garnishes add a nice touch to the dish. Consider these options: - Extra crushed peanuts for crunch - More chopped green onions for freshness - Lime wedges for extra zing - Sliced chili peppers for heat These garnishes enhance the look and flavor of your dish. For the full recipe, check out the details in the [Full Recipe]. Start by boiling a big pot of water. Once it bubbles, add the rice noodles. Cook them based on the package instructions until they are al dente. This usually takes about 4 to 6 minutes. After cooking, drain the noodles. Rinse them under cold water to stop the cooking process. Set them aside for later. In a medium bowl, mix the peanut butter, soy sauce, lime juice, honey or maple syrup, sriracha, and minced garlic. Use a whisk to blend it well until it's smooth and creamy. If the sauce is too thick, add warm water a little at a time. Keep mixing until you reach your desired consistency. Grab a large skillet and heat the sesame oil over medium heat. Once hot, add the sliced red bell pepper, julienned carrot, and sugar snap peas. Stir-fry these veggies for about 3 to 4 minutes. You want them to be tender but still a bit crisp. This keeps them vibrant and full of flavor. Add the cooked rice noodles to your skillet with the veggies. Pour the peanut sauce over everything. Toss the noodles, veggies, and sauce together. Make sure all the noodles are well coated and mixed evenly. This step brings all the flavors together! Once everything is combined, remove the skillet from heat. Stir in the chopped green onions and cilantro for freshness. Serve the noodles in bowls. For a nice touch, sprinkle crushed peanuts on top for added crunch. Enjoy your meal with friends or family! To make your peanut sauce just right, start with creamy peanut butter. I like to use natural peanut butter, as it gives a rich flavor. Mix the peanut butter with soy sauce, lime juice, honey, sriracha, and minced garlic. Then, add warm water slowly. This helps you control the thickness. If your sauce is too thick, add more water a little at a time. If it’s too thin, add more peanut butter. The perfect sauce should be smooth and pourable, but not runny. Spice can change everything in this dish! If you like it mild, use less sriracha. Start with one teaspoon and taste as you go. You can always add more for heat. If you want it spicier, try adding chili flakes or a splash of hot sauce. Balance is key. You can also add sweet ingredients like honey to tone down the heat. Everyone’s taste is different, so feel free to adjust until it’s just how you like it. Cooking rice noodles is simple, but some tips help. First, always boil water before adding the noodles. This keeps them from sticking. Cook according to the package instructions, usually about 4-6 minutes. Test them for doneness; they should be tender but firm. After cooking, drain and rinse them under cold water. This stops the cooking process and prevents clumping. Toss them with a little sesame oil if you like, to keep them separate. Follow these tips, and your noodles will turn out perfectly every time! {{image_2}} You can make Spicy Thai Peanut Noodles heartier by adding protein. Chicken, shrimp, or tofu work well. For chicken, cook thin strips in the skillet until no longer pink. For shrimp, add them just before the noodles, cooking until they turn pink. If you prefer tofu, use firm or extra-firm tofu. Cube it and sauté until golden. This adds flavor and texture. For a vegetarian or vegan dish, use tofu or mushrooms as your protein. Replace honey with maple syrup to keep it vegan. You can also add more vegetables. Broccoli, bok choy, or zucchini are great choices. They add crunch and nutrients while keeping the dish vibrant and fresh. You can swap in various vegetables based on your taste. Here are some options: - Broccoli: Adds fiber and vitamins C and K. - Bell Peppers: Boosts vitamin A and antioxidants. - Spinach: Rich in iron and helps with muscle function. - Carrots: Provides beta-carotene for eye health. These alternatives not only improve nutrition but also make your dish colorful and exciting. For the full recipe, check out the instructions above to create a dish that’s perfect for any occasion. Store your Spicy Thai Peanut Noodles in an airtight container. Make sure to cool them to room temperature before sealing. Keep them in the fridge for up to three days. This way, the noodles stay fresh and tasty. If you want to keep them longer, consider freezing them. To reheat, simply take your noodles out of the fridge. Place them in a microwave-safe bowl. Add a splash of water to keep them moist. Cover the bowl and heat for 1-2 minutes. Stir halfway to ensure even heating. You can also reheat them on the stove. Just warm them in a pan over low heat until hot. If you freeze your Spicy Thai Peanut Noodles, they can last up to three months. Use a freezer-safe container or bag. Make sure to remove as much air as possible. When you’re ready to eat, thaw them overnight in the fridge. Reheat as mentioned before. The flavors will still be great, but the texture may change slightly. Enjoy your meal anytime! You can use almond butter or sunflower seed butter. Both options taste great. They give a similar creamy texture. If you want a nut-free option, go for sunflower seed butter. It adds a nice flavor and works well with the sauce. Yes, you can prep the noodles and sauce ahead. Store them separately in the fridge. This way, they stay fresh. When ready to eat, just combine and heat them. This saves time for busy days and still tastes delicious. For a gluten-free version, swap soy sauce for tamari. Tamari has a similar taste but is gluten-free. Also, ensure your rice noodles are certified gluten-free. This way, you enjoy the flavors without worry. You can add fresh lime juice for brightness. Chopped peanuts give a nice crunch. Sliced jalapeños can add heat, if you like spice. Fresh herbs like basil or mint can also give a refreshing kick. Feel free to get creative! Spicy Thai Peanut Noodles combine great flavors and easy steps. You learned about essential ingredients, like the rich peanut sauce and tasty garnishes. I shared tips for perfecting sauce and noodle texture, plus ways to customize heat. You can add protein or go vegan too. Don't forget about storing and reheating for future meals. Experiment to find your ideal mix and enjoy every bite! These noodles are not just a meal, but a chance to get creative. Happy cooking!](https://southerndishes.com/wp-content/uploads/2025/05/ff934d65-9f2f-4c94-8c69-89f2111fba6a.webp)
