Latest & Greatest

Classic Homemade Mac and Cheese Creamy Comfort Dish
Are you ready to dive into the creamy, cheesy world of homemade mac and cheese? This classic dish is perfect
Read more…
Crunchy Asian Slaw Perfect for Any Meal
Want a side dish that brings crunch and flavor to any meal? Look no further than my Crunchy Asian Slaw!
Read more…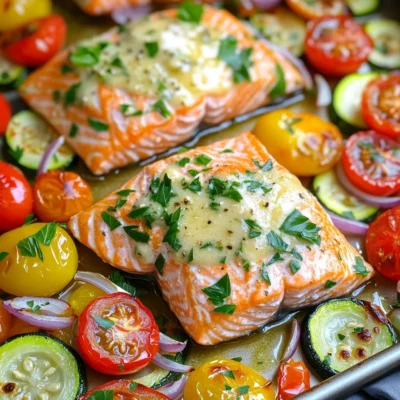
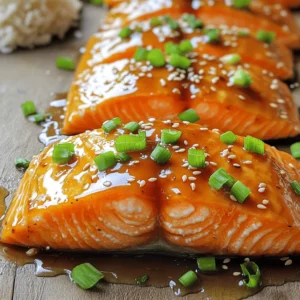
Sheet Pan Garlic Butter Salmon Simple and Quick Dish
Do you want a quick, tasty meal that anyone can make? My Sheet Pan Garlic Butter Salmon is just what
Read more…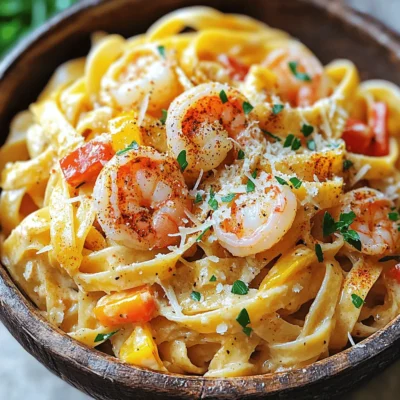
Creamy Cajun Pasta Rich and Flavorful Delight
Are you ready to spice up your dinner routine? My Creamy Cajun Pasta is a rich, flavorful delight that brings
Read more…
Loaded Nacho Fries Tasty and Easy Recipe Guide
Craving a flavorful snack that’s quick and easy to make? Look no further! Loaded Nacho Fries bring together crispy potatoes,
Read more…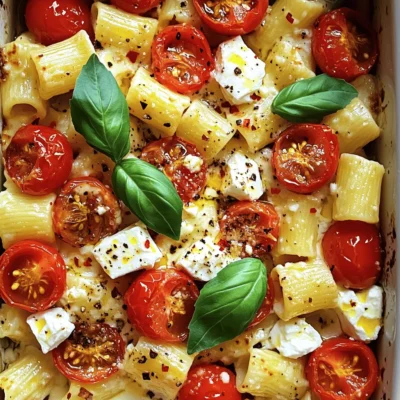
Baked Feta Pasta with Cherry Tomatoes Delightful Recipe
Are you ready to delight your taste buds with a simple yet scrumptious meal? Baked Feta Pasta with Cherry Tomatoes
Read more…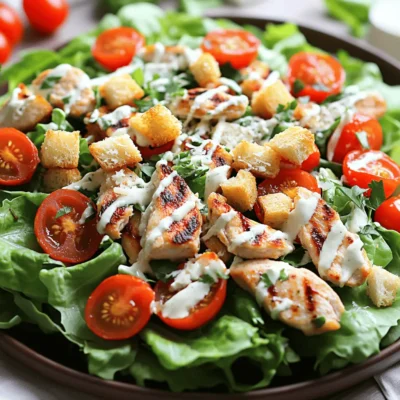
Classic Chicken Caesar Salad Tasty and Healthy Recipe
Are you craving a delicious dish that’s both tasty and healthy? Look no further! My Classic Chicken Caesar Salad recipe
Read more…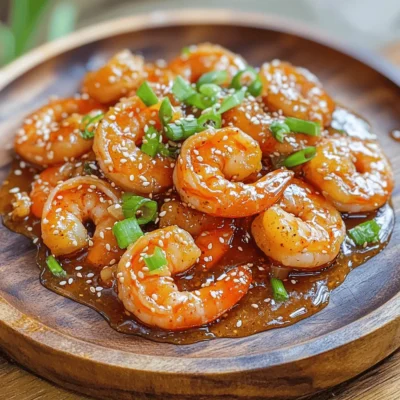
Spicy Honey Garlic Shrimp Tasty and Easy Recipe
Are you ready to spice up your dinner routine? This Spicy Honey Garlic Shrimp recipe is not just tasty but
Read more…browse recipes

![- 1 medium head of cauliflower, grated into rice-sized pieces - 2 tablespoons sesame oil - 2 cloves garlic, minced - 1 small onion, diced - 1 cup mixed vegetables (carrots, peas, bell peppers) - 2 eggs, beaten - 3 tablespoons soy sauce (or tamari for gluten-free) - 1 green onion, sliced - Salt and pepper to taste - Optional: 1 teaspoon chili flakes for heat These ingredients make a bright and tasty dish. Each one adds flavor and texture. You can swap cauliflower for broccoli rice if you like. Zucchini can work too. Instead of sesame oil, try olive oil for a lighter taste. If you don’t have soy sauce, coconut aminos is a great choice. Cauliflower is low in calories and high in nutrients. It has fiber, which helps with digestion. This veggie is rich in vitamins C and K, aiding your immune system. Using cauliflower instead of rice lowers carbs, making this dish friendly for many diets. Plus, it’s a great way to get more veggies into your meals! For the full recipe, check out the instructions to prepare this delicious dish. First, you need to prepare the cauliflower. Take a medium head of cauliflower and grate it. You can use a box grater or a food processor. Aim for rice-sized pieces. This step is key to making your fried rice. Set the grated cauliflower aside for later. Next, grab a large skillet or wok. Heat 2 tablespoons of sesame oil over medium heat. Once hot, add 2 cloves of minced garlic and 1 small diced onion. Sauté these for about 2-3 minutes. You want the onion to become soft and clear. Then, stir in 1 cup of mixed vegetables. You can use carrots, peas, and bell peppers. Cook these for another 3-4 minutes until they are tender. Now it's time to combine everything in the skillet. Push the vegetables to one side of the pan. Pour 2 beaten eggs into the other side. Scramble the eggs until they are fully cooked. After that, mix the eggs with the vegetables. Add the grated cauliflower to the skillet next. Pour in 3 tablespoons of soy sauce. Stir everything well and cook for an additional 5-7 minutes. You want the cauliflower to be tender but still a bit crunchy. Season with salt, pepper, and optional chili flakes for heat. Finally, toss in the sliced green onion, and stir again for a fresh finish. Serve your cauliflower fried rice hot and enjoy! You can find the full recipe if you need more details. To make your cauliflower fried rice shine, start with fresh cauliflower. Fresh cauliflower has a crisp bite and a mild taste. Use sesame oil for a nutty flavor that lifts the dish. Garlic and onion add depth, so don’t skip them. Sauté these until they smell great. If you want more taste, add some ginger. For the best texture, ensure the cauliflower is grated finely. If it's too chunky, it won't cook evenly. When you fry the cauliflower, keep it moving in the pan. This will help it brown slightly and stay crisp. Avoid overcooking; you want it tender but still crunchy. One common mistake is using too much liquid. Adding too much soy sauce can make it soggy. Another mistake is not prepping your ingredients first. If you chop as you cook, things may burn. Lastly, don’t forget to taste! Adjust salt and pepper to make it just right. For the full recipe, check out the instructions above. {{image_2}} You can make Cauliflower Fried Rice even better by adding protein. Chicken, shrimp, or tofu work great. Just cook the protein before adding it to the skillet. For chicken, use diced pieces. For shrimp, use small, peeled shrimp. For tofu, press it to remove water, then cube it. Each option adds flavor and makes the dish heartier. You can also use cooked beans for a plant-based option. If you want a vegetarian or vegan meal, skip the eggs. You can replace them with silken tofu. Just blend it until smooth and add it when mixing in the cauliflower. This keeps the dish creamy without using eggs. You could also add nutritional yeast for a cheesy flavor. Mixing in other veggies makes this dish colorful and tasty. Try adding broccoli, spinach, or zucchini. These vegetables not only add nutrients but also enhance the dish's texture. You can swap in whatever veggies you have, making it a flexible recipe. Just keep in mind to chop them small for even cooking. For the full recipe, check out the [Full Recipe]. After you enjoy your cauliflower fried rice, store leftovers in an airtight container. Let it cool down first. Place it in the fridge. It stays fresh for about 3 to 5 days. Make sure to label the container with the date. This way, you will know when to eat it again. To reheat your cauliflower fried rice, use a skillet or microwave. If using a skillet, heat it on medium. Add a splash of water or oil to keep it moist. Stir often until it's hot. If using a microwave, cover it with a lid or wrap. Heat for 1 to 2 minutes, checking every 30 seconds. Both methods will bring back its tasty flavor. You can freeze cauliflower fried rice for later meals. First, cool it completely. Then, pack it in a freezer-safe bag or container. Remove as much air as possible. It can last for about 2 to 3 months in the freezer. To enjoy, thaw it overnight in the fridge. Reheat it as mentioned before. This way, you can have a healthy meal anytime! For the complete recipe, check out the Full Recipe. Yes, you can make Cauliflower Fried Rice ahead of time. It stores well in the fridge for about three days. Just keep it in an airtight container. When you want to eat it, simply reheat in a skillet over medium heat. This saves time on busy days. Yes, Cauliflower Fried Rice can be gluten-free. Use tamari instead of soy sauce. Tamari is a great option for those with gluten sensitivities. Always check your ingredient labels to ensure they are gluten-free. This way, you can enjoy a tasty dish without worry. To add spice, use chili flakes when cooking. Mix in about one teaspoon for a nice kick. You can also add fresh chopped chili peppers. Another option is to drizzle some hot sauce on top before serving. Adjust the spice to your taste for a delightful heat. For the complete recipe and more tips, check the Full Recipe section. In summary, we explored cauliflower fried rice, including its ingredients, cooking steps, and tips. I shared ways to customize the dish, from adding proteins to substituting ingredients. Proper storage and reheating methods ensure you enjoy leftovers. Remember, avoiding common mistakes will enhance your cooking. Cauliflower fried rice is healthy and adaptable, making it a fantastic choice for meals. Dive in, experiment, and enjoy this tasty dish in many ways.](https://southerndishes.com/wp-content/uploads/2025/06/3edd945a-738e-456a-a6f3-d2381d907bd5.webp)
Cauliflower Fried Rice Tasty and Healthy Delight
Looking for a delightful dish that’s both tasty and healthy? Cauliflower fried rice is your answer! This colorful meal is not only easy to…
My Latest Desserts
-
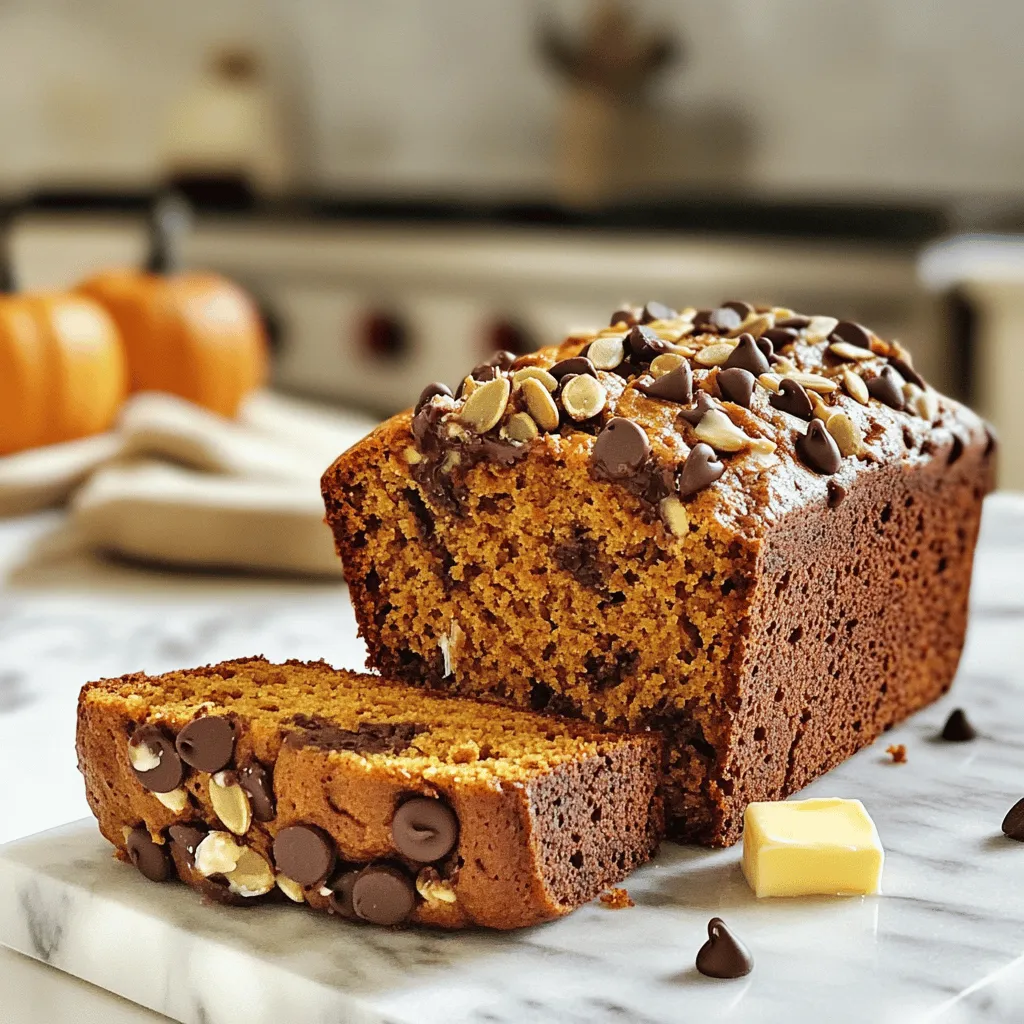
Chocolate Chip Pumpkin Bread Fresh and Tasty Recipe
Are you ready to bake something special? This Chocolate Chip Pumpkin Bread recipe is fresh and tasty! It blends the Read Full Recipe -
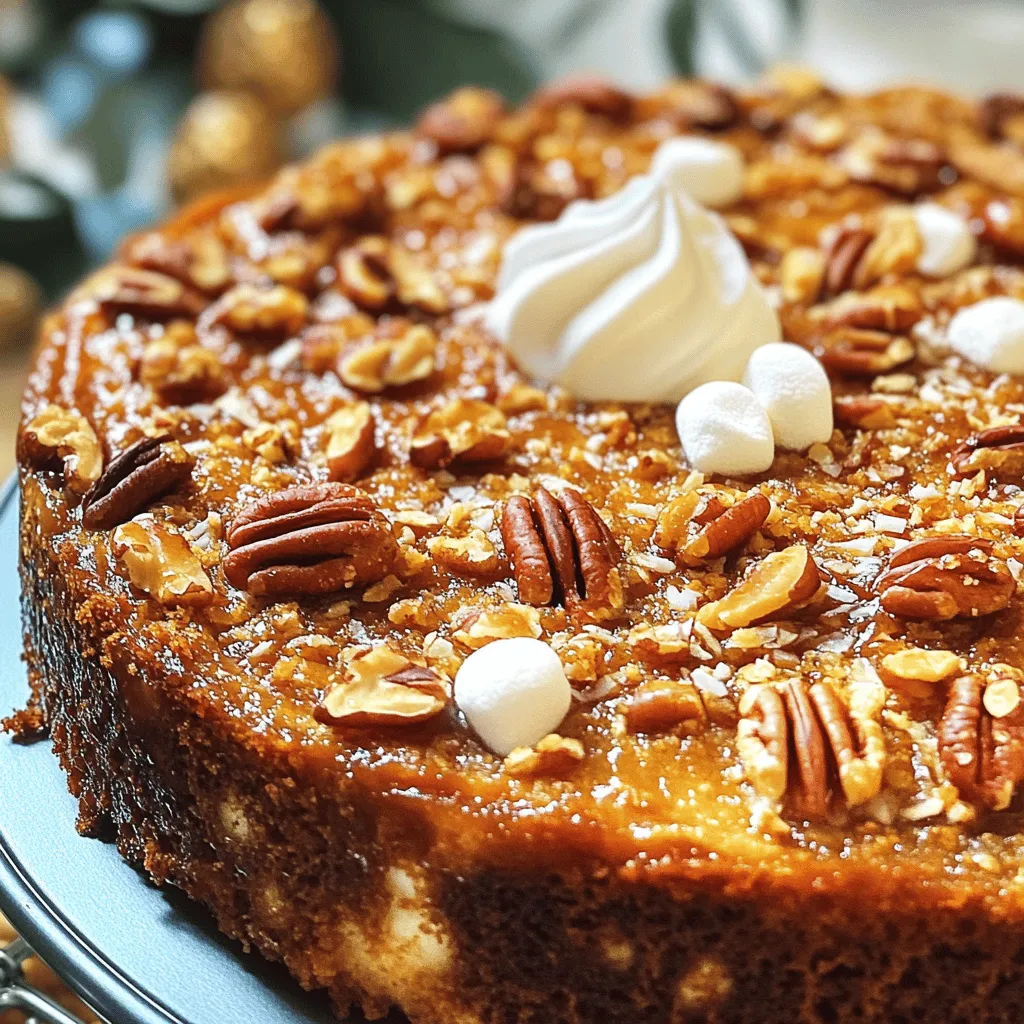
Pecan Praline Dump Cake Irresistible Easy Dessert
Are you ready to impress your friends and family with a simple yet delicious dessert? Let me introduce you to Read Full Recipe -
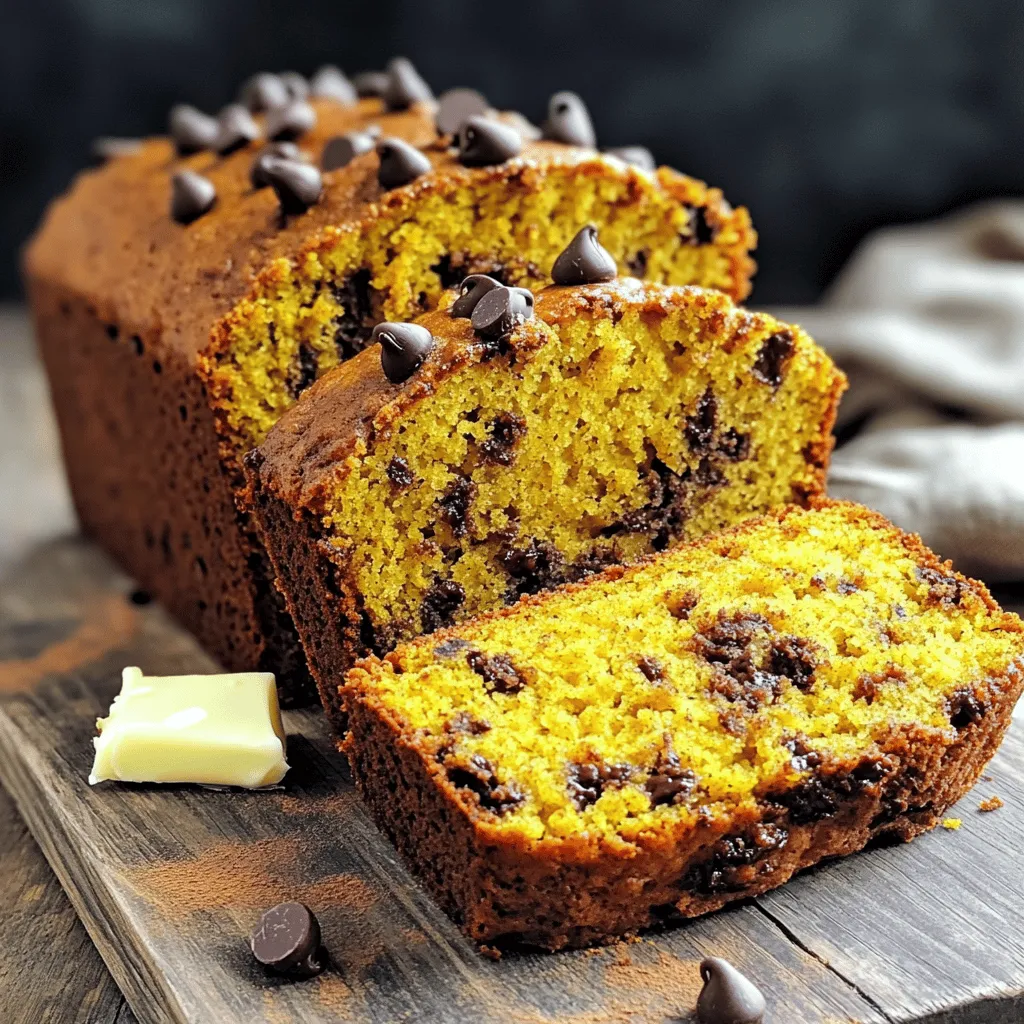
Pumpkin Chocolate Chip Bread Delightful Moist Treat
Are you ready to bake the most delightful treat of the season? Pumpkin chocolate chip bread is a moist, flavorful Read Full Recipe -

Strawberry Cream Cheese Quesadillas Delightful Treat
Get ready to delight your taste buds with Strawberry Cream Cheese Quesadillas! This sweet twist on a savory favorite will Read Full Recipe -
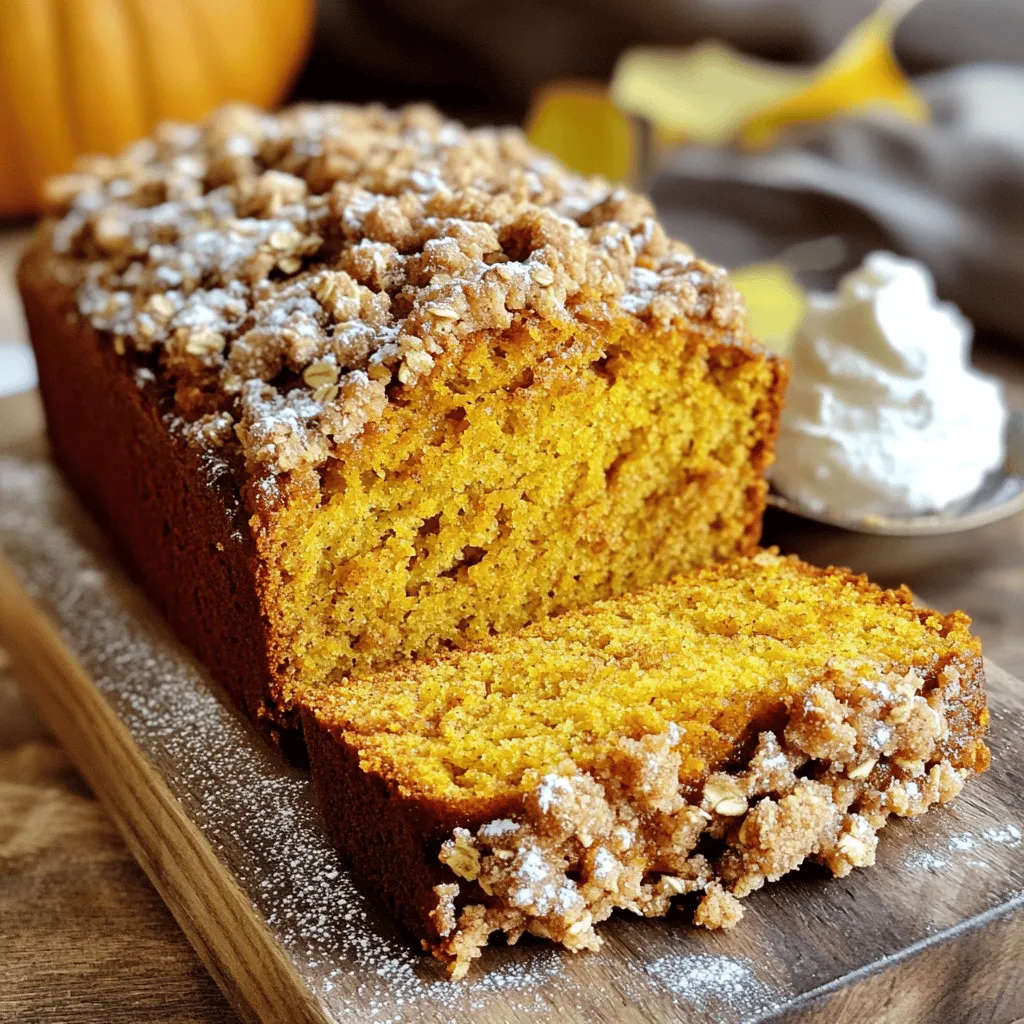
Pumpkin Bread With Streusel Topping Easy Recipe
Do you love the warm, spicy flavors of pumpkin bread? With my easy recipe for Pumpkin Bread With Streusel Topping, Read Full Recipe -
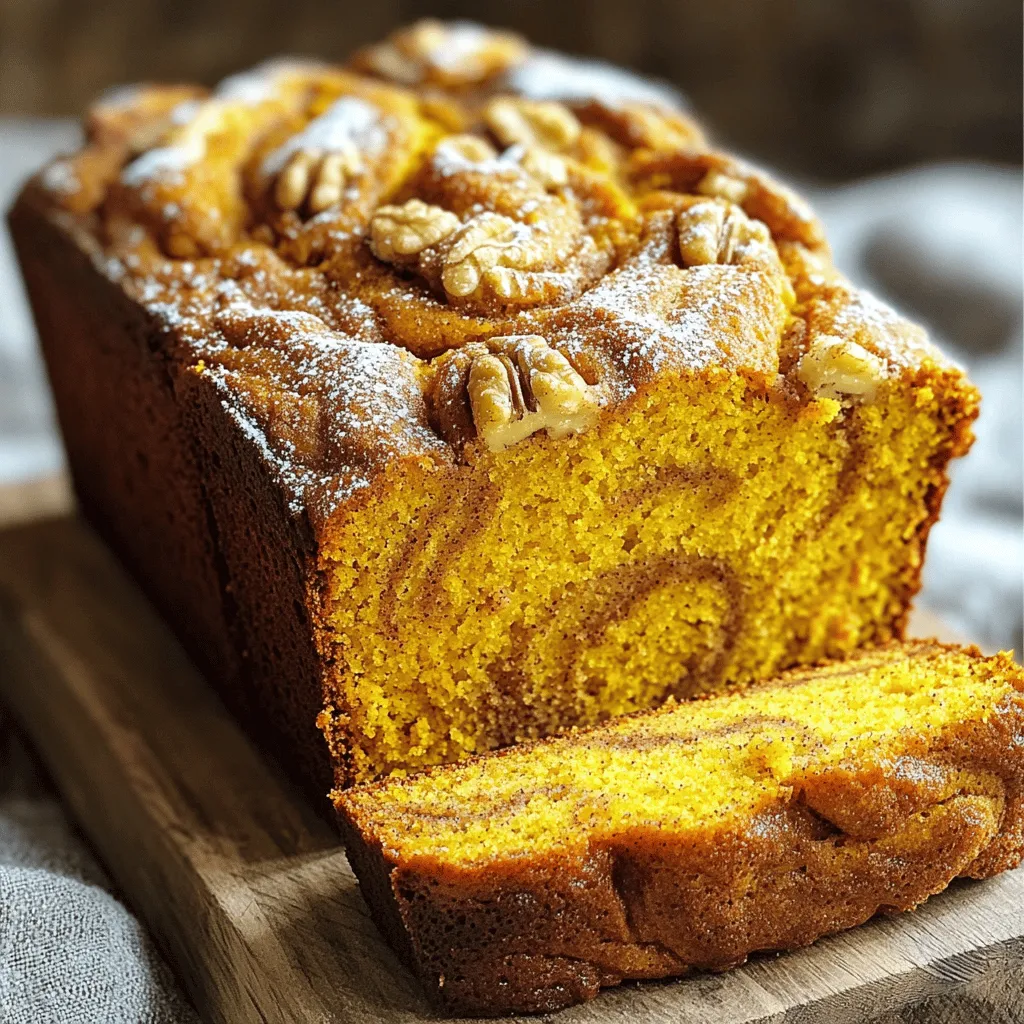
Cinnamon Swirl Pumpkin Bread Irresistible Recipe Guide
Craving a cozy, fall-inspired treat? You’ll love my Cinnamon Swirl Pumpkin Bread! This guide gives you everything you need to Read Full Recipe -

Pumpkin Chocolate Chip Muffins Delicious and Easy Recipe
If you’re looking for a simple and delicious treat, these Pumpkin Chocolate Chip Muffins are calling your name! With warm Read Full Recipe -
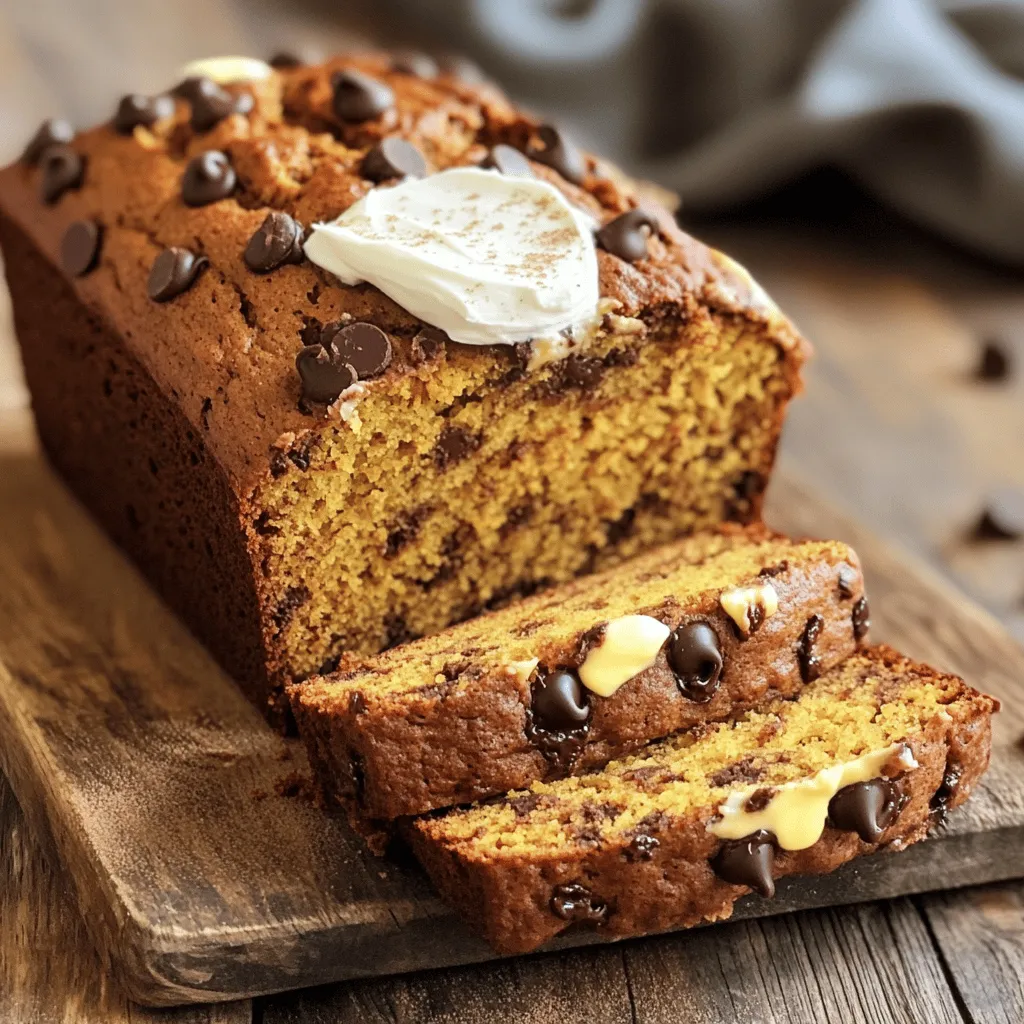
Chocolate Chip Pumpkin Bread Irresistible Treat
Are you ready to bake an irresistible treat that combines the cozy flavors of fall? This Chocolate Chip Pumpkin Bread Read Full Recipe -

No Bake Peanut Butter Bars Simple and Tasty Treat
Craving a sweet treat that’s easy to whip up? You’ll love these no bake peanut butter bars! With just a Read Full Recipe -

Apple Pie Cups Delightful Dessert for Any Occasion
Are you ready to enjoy a delightful dessert that fits any occasion? Apple Pie Cups bring the classic flavors of Read Full Recipe
My Latest Recipes

hey,
i’m !
I’m so happy you’re here!
My kitchen is filled with stories, flavors, and love and I’m so happy to share them with you. Here’s to dishes that feel like home.

. In this post, we covered how to make balsamic roasted Brussels sprouts from scratch. You learned about the ingredients you need and how to prepare and roast them perfectly. We discussed tips for freshness and suggested tasty variations. Storing and reheating leftovers is also easy. Balsamic roasted Brussels sprouts can be a delightful side or even a main dish. With the right techniques, you can enjoy a flavorful and healthy meal every time. Follow these steps, and you’ll impress everyone at the table. Enjoy your cooking!](https://southerndishes.com/wp-content/uploads/2025/06/e4d91484-630f-47ed-99db-834b7479c15c-300x300.webp)
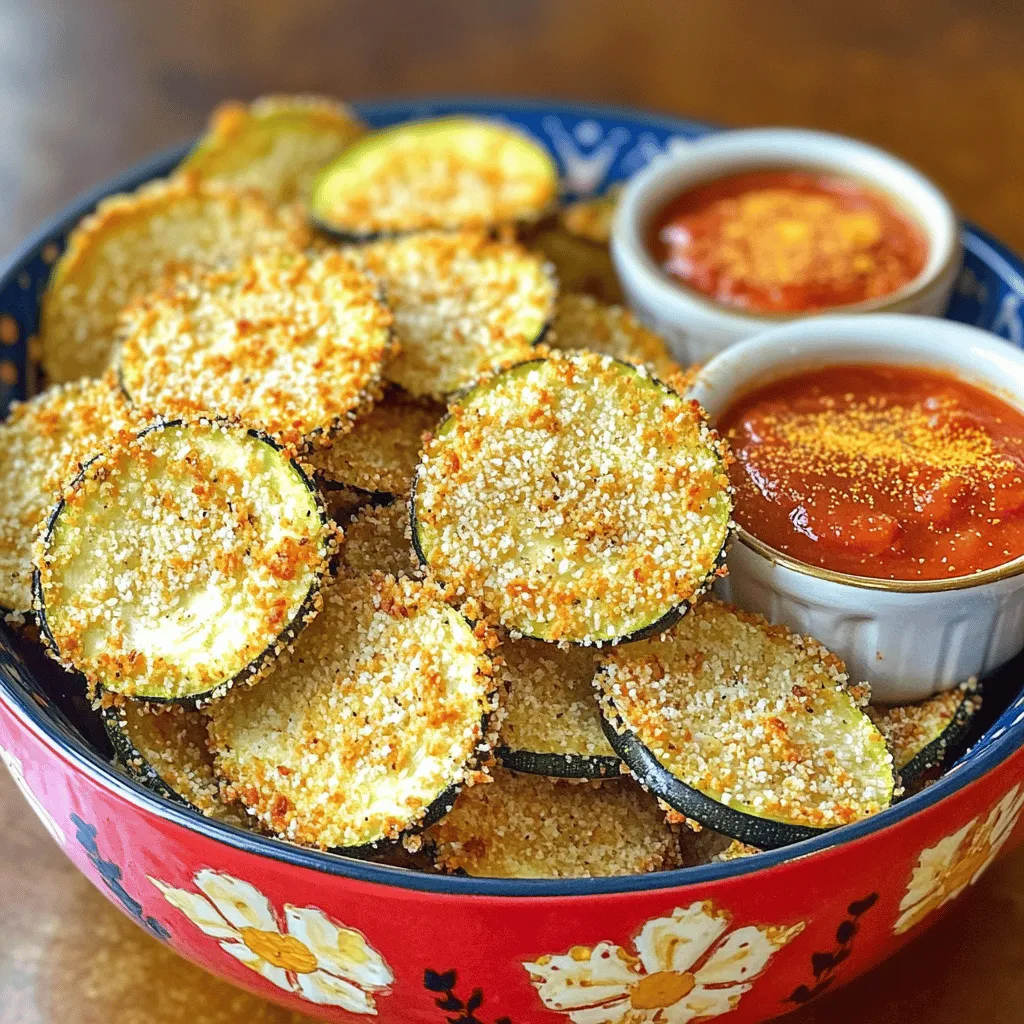
Crispy Air Fryer Zucchini Chips Simply Delicious Snack
Looking for a tasty and healthy snack? Let me show you how to make crispy air fryer zucchini chips that are simply delicious! This…