

Latest & Greatest
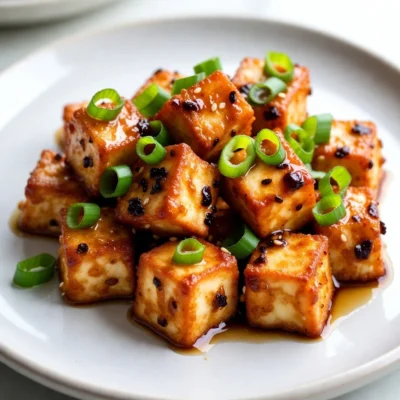
Spicy Honey Garlic Tofu Bites Tasty Vegan Treat
Looking for a tasty vegan treat that packs a flavor punch? Let me introduce you to my Spicy Honey Garlic
Read more…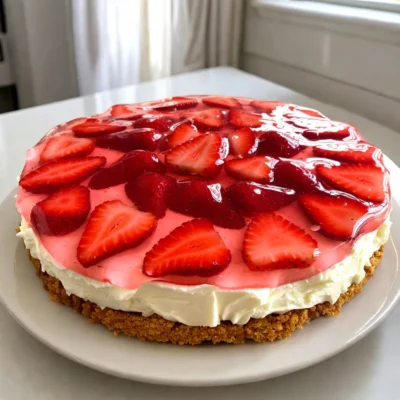
Strawberry Pretzel Salad Delightful and Fresh Treat
Looking for a fun and tasty dessert? Strawberry Pretzel Salad is a must-try! This dish combines crunchy pretzels with creamy
Read more…
Chocolate Peppermint Bark Brownies Irresistible Treat
Get ready to indulge in a festive favorite: Chocolate Peppermint Bark Brownies! These rich, fudgy treats combine chocolate and peppermint
Read more…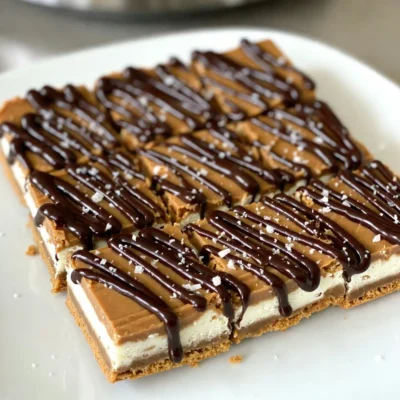
No-Bake Lotus Biscoff Bars Easy and Tasty Treat
Do you crave a sweet treat that’s easy to make? You’re in the right place! These No-Bake Lotus Biscoff Bars
Read more…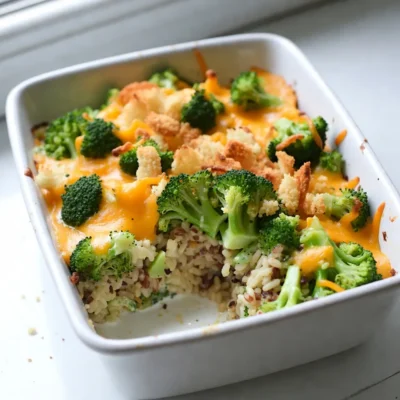
Cheesy Broccoli Rice Casserole Comforting Family Dish
Looking for a dish that warms your heart and fills your belly? Cheesy Broccoli Rice Casserole is just what you
Read more…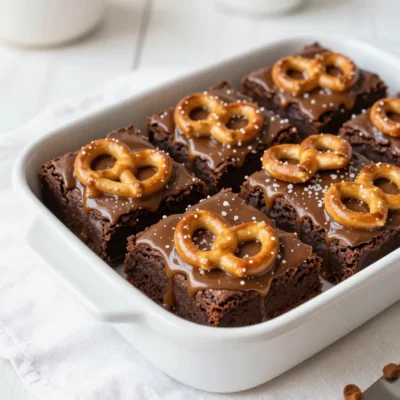
Salted Caramel Pretzel Brownies Irresistible Treat
If you crave a dessert that strikes the perfect balance between sweet and salty, you’re in for a treat! My
Read more…
Pumpkin Oreo Truffles Delightful No-Bake Treat
Get ready for a sweet treat that screams fall! These Pumpkin Oreo Truffles are a no-bake delight that’s easy to
Read more…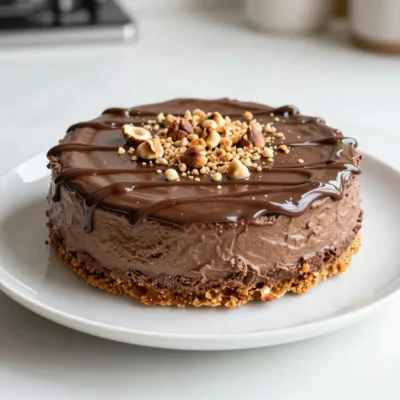
No-Bake Nutella Cheesecake Easy and Delicious Dessert
Craving a sweet treat that’s simple and delicious? Look no further! This No-Bake Nutella Cheesecake hits all the right notes.
Read more…browse recipes


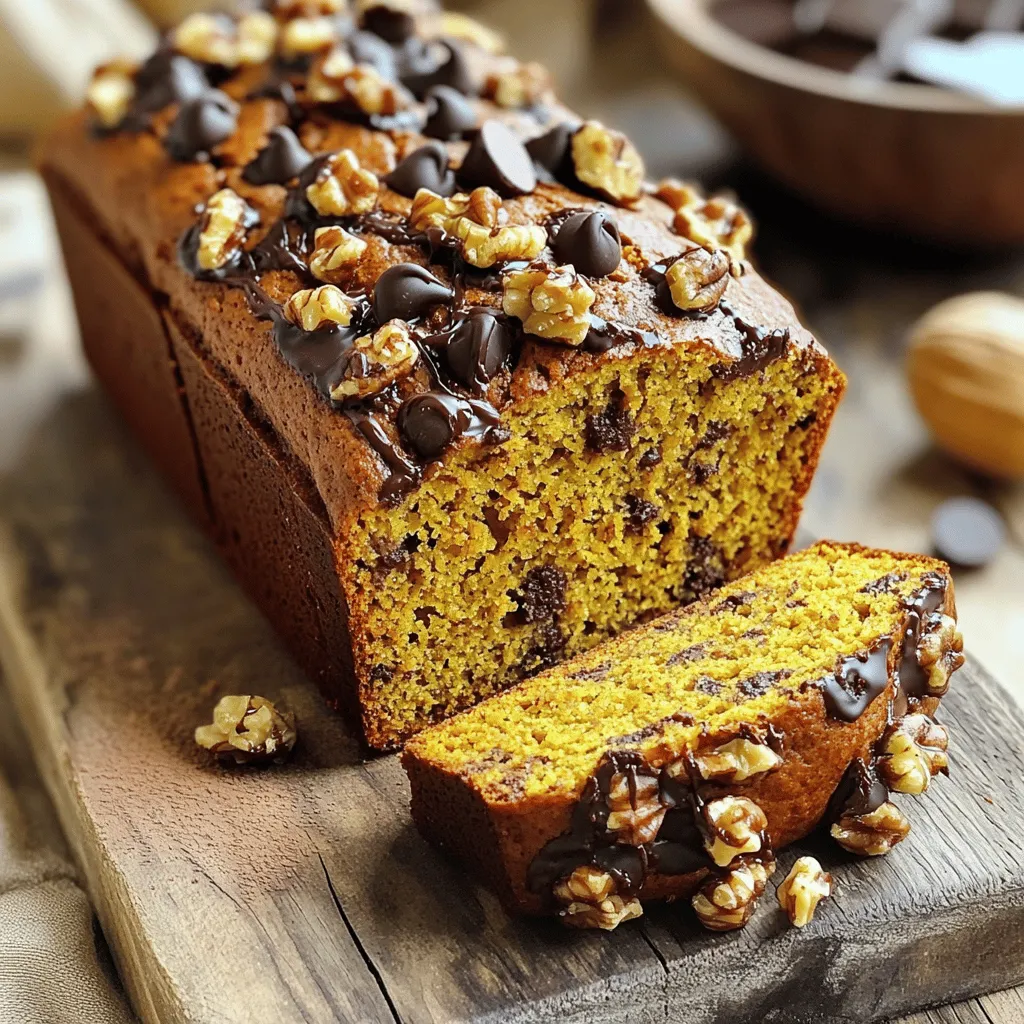
Chocolate Chip Pumpkin Bread Simple and Tasty Recipe
Fall is the perfect time for baking, and nothing says cozy like Chocolate Chip Pumpkin Bread. In this simple and tasty recipe, you’ll blend…
My Latest Desserts
My Latest Recipes

hey,
i’m !
I’m so happy you’re here!
My kitchen is filled with stories, flavors, and love and I’m so happy to share them with you. Here’s to dishes that feel like home.
![For this Garlic Parmesan Roasted Broccoli, gather these fresh items: - 1 lb fresh broccoli florets - 4 garlic cloves, minced - Juice of 1 lemon - Zest of 1 lemon - Fresh parsley, chopped (for garnish) These fresh ingredients bring life to the dish. The broccoli adds crunch, while the garlic gives a nice kick. Next, you’ll need some basic pantry items: - 4 tablespoons olive oil - ½ cup grated Parmesan cheese - 1 teaspoon red pepper flakes (optional) - Salt and pepper to taste These staples enhance the flavors of the broccoli. The olive oil helps everything roast nicely, while the cheese adds creaminess. To make this dish, you will need a few tools: - Large mixing bowl - Baking sheet - Parchment paper - Knife and cutting board These tools help you prepare and cook the broccoli easily. Using parchment paper makes cleanup a breeze. For the complete details on preparing this dish, check out the Full Recipe. First, we need to get our oven ready. Preheat it to 425°F (220°C). This step helps the broccoli roast perfectly. Next, take 1 pound of fresh broccoli florets and rinse them well. In a large mixing bowl, add the broccoli and 4 tablespoons of olive oil. Toss the broccoli until it’s well coated. Now, add 4 minced garlic cloves, 1 teaspoon of red pepper flakes (if you like some heat), salt, and pepper. Mix it all together again so every piece of broccoli is seasoned nicely. Once your broccoli is ready, spread it in a single layer on a baking sheet lined with parchment paper. This makes for easy cleanup later. Place the baking sheet in your hot oven. Roast the broccoli for about 15 to 20 minutes. Keep an eye on it. You want the edges crispy and the broccoli tender. When the broccoli is done roasting, take it out of the oven. Now it’s time for the fun part! Sprinkle ½ cup of grated Parmesan cheese over the hot broccoli. Put it back in the oven for another 3 to 5 minutes. This melts the cheese and gives it a nice golden color. After that, drizzle the juice and zest of 1 lemon over the broccoli. Toss it gently to mix everything. Finally, garnish with some chopped fresh parsley. This adds color and flavor. You can find the complete recipe [Full Recipe]. Enjoy your flavorful side dish! To get the best roasted broccoli, start with fresh florets. Fresh broccoli holds its shape and flavor well. Cut the florets into similar sizes. This way, they cook evenly. Use a large bowl to toss the broccoli with olive oil. Make sure each piece is coated. A single layer on the baking sheet helps them crisp up. Don’t overcrowd the pan; give each piece space to breathe. Seasoning is key to great flavor. I like to add garlic for a punch. Minced garlic releases its oils, giving the broccoli a nice aroma. Don’t forget salt and pepper; they bring out the taste. If you want a bit of heat, sprinkle in red pepper flakes. After roasting, drizzle lemon juice on top. The acid brightens the dish and balances the cheese. Garlic Parmesan roasted broccoli is versatile. You can serve it as a side or a main dish. Try it on top of pasta for a quick meal. You can also mix it into salads for added crunch. If you want, pair it with grilled chicken or fish. The flavors blend well together. For more ideas, check out the Full Recipe for inspiration. {{image_2}} If you want a change, you can swap the Parmesan cheese. Nutritional yeast gives a cheesy flavor without dairy. This option is great for vegan diets. You can also use Pecorino Romano for a sharper taste. Another alternative is crumbled feta, which adds a tangy twist. Just keep in mind that each cheese will change the dish's flavor. You can mix in other veggies for more color and taste. Carrots, bell peppers, or Brussels sprouts work well. Just chop them into similar sizes as the broccoli. This way, they roast evenly. Add them to the bowl with the broccoli at the start. You can also use cauliflower for a nice twist. Feel free to experiment with spices. Paprika or cumin can add warmth and depth. For a kick, add cayenne pepper or chili powder. If you like herbs, thyme or rosemary can bring fresh notes. Mix and match to find what you like best. Each spice will give your Garlic Parmesan Roasted Broccoli a unique flavor. You can find the full recipe [here](#). To keep your Garlic Parmesan Roasted Broccoli fresh, place it in an airtight container. Make sure it cools down first. Store it in the fridge for up to three days. If you want to enjoy it later, proper storage helps maintain its taste and texture. Reheating is easy. You can use the oven or microwave. For the oven, preheat to 350°F (175°C). Place the broccoli on a baking sheet and heat for about 10 minutes. If using a microwave, heat in 30-second intervals until warm. This keeps the broccoli crispy and delicious. If you want to freeze it, first, let it cool completely. Spread the broccoli in a single layer on a baking sheet. Freeze it for about two hours. Then, transfer it to a freezer bag. It can last up to three months in the freezer. When you are ready to eat, thaw in the fridge before reheating. For the full recipe, check out the complete guide. Yes, you can use frozen broccoli. However, fresh broccoli tastes better. Frozen broccoli has more water. This can make it soggy when cooked. If you use frozen, thaw it first. Pat it dry with a towel to remove excess water. This will help keep it crisp when roasting. Garlic Parmesan Roasted Broccoli pairs well with many dishes. You can serve it with grilled chicken or fish. It also complements pasta dishes. Try it with quinoa or rice for a healthy meal. This dish adds flavor and color to any plate. To make Garlic Parmesan Roasted Broccoli vegan, swap the cheese. Use a vegan cheese that melts well. Nutritional yeast is a great option too. It adds a cheesy flavor without dairy. You can also skip the cheese altogether for a lighter dish. This keeps the broccoli tasty and healthy. In this post, we discussed how to prepare Garlic Parmesan Roasted Broccoli. We covered fresh ingredients, pantry needs, and the tools that help you succeed. You learned step-by-step instructions, best practices for roasting, and fun variations. Remember, you can store leftovers easily and even make this dish vegan. With these tips, you will create a tasty dish every time. Enjoy your cooking and feel proud of your healthy meals!](https://southerndishes.com/wp-content/uploads/2025/05/7db0b965-52e8-442a-b04a-772ea4f37ea0-300x300.webp)


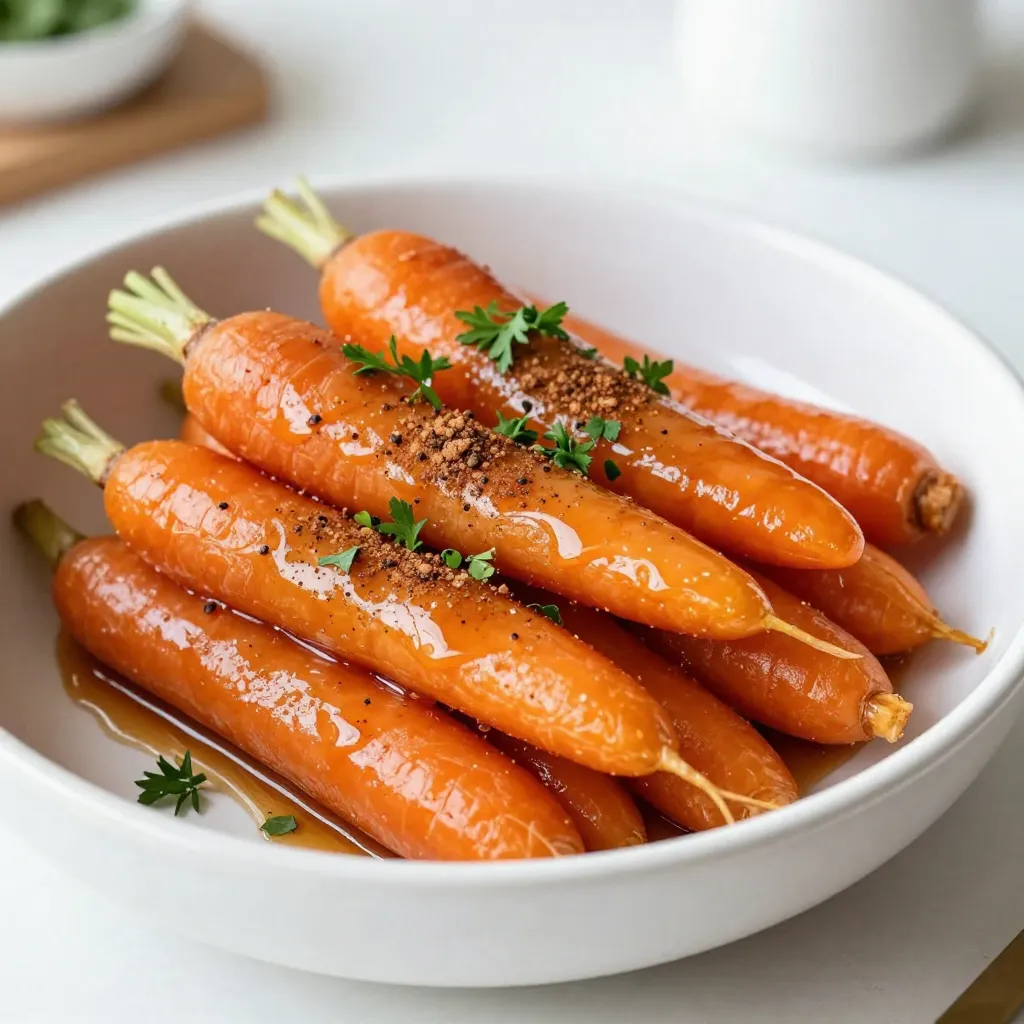
Maple Glazed Carrots Flavorful Side Dish Recipe
Looking for a vibrant side dish that will elevate your meals? Try my Maple Glazed Carrots! Sweet, tender, and easy to make, these carrots…