
Latest & Greatest

Baked Cream Cheese Chicken Taquitos Simple Delight
Craving a delicious snack that’s easy to make? Baked Cream Cheese Chicken Taquitos are your answer! With creamy filling and
Read more…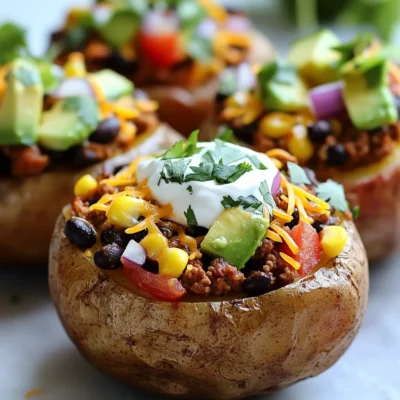
Savory Southwest Taco Loaded Potato Bowl Recipe
If you love bold flavors and comforting meals, my Savory Southwest Taco Loaded Potato Bowl recipe is perfect for you!
Read more…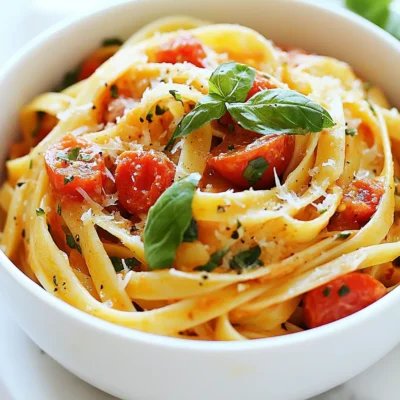
Silky Tomato Garlic Pasta Quick and Tasty Meal
Looking for a quick dinner that’s packed with flavor? My Silky Tomato Garlic Pasta is just the meal you need!
Read more…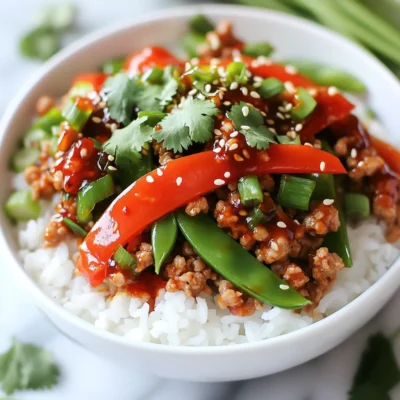
Firecracker Ground Chicken Bowl Flavorful and Simple
If you’re craving a quick, delicious meal, the Firecracker Ground Chicken Bowl is for you! This dish packs a punch
Read more…
Ground Beef Tostadas Flavorful and Easy Recipe
If you’re looking for a quick and tasty meal, you’re in the right place! Ground beef tostadas are simple to
Read more…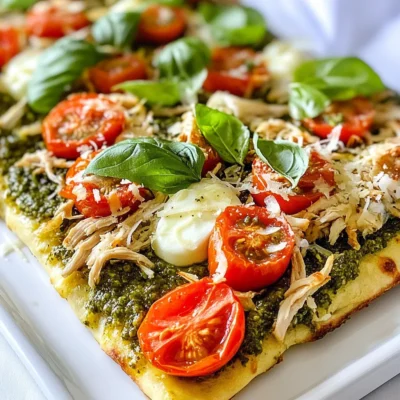
Pesto Chicken Flatbread Flavorful and Easy Recipe
Get ready to elevate your weeknight dinners with my easy and flavorful Pesto Chicken Flatbread recipe! This dish combines crispy
Read more…
g Protein Cheesecake Simple and Delicious Recipe
Are you ready to indulge in a dessert that’s both simple and packed with protein? This g Protein Cheesecake recipe
Read more…
Chicken Shawarma Bowls Flavorful and Wholesome Meal
Are you ready to dive into a delicious and healthy meal? Chicken Shawarma Bowls are flavorful, wholesome, and easy to
Read more…browse recipes


. - First, prepare the marinade. In a small bowl, whisk together: - 2 tablespoons olive oil - Zest and juice of 1 lemon - 3 cloves garlic, minced - 1 teaspoon fresh dill, chopped - 1 teaspoon fresh parsley, chopped - 1 teaspoon fresh thyme, chopped - Salt and pepper to taste This mix adds a bright flavor to the fish. - Next, coat the salmon fillets in the marinade. Make sure to cover them well. Place the fillets in a shallow dish and pour the marinade over them. Cover the dish and refrigerate for at least 30 minutes. For more flavor, you can marinate them for up to 2 hours. - Now, it's time to preheat the grill. Set it to medium-high heat. This helps the salmon cook evenly. - Oil the grill grates to prevent sticking. You can use a paper towel soaked in oil or a grill spray. This step is key to keeping the salmon intact while grilling. - Once the grill is hot, carefully place the salmon fillets on the grill, skin-side down. This helps protect the fish while it cooks. - Grill the salmon for about 6 to 8 minutes. The cooking time depends on the thickness of the fillets. Check for doneness: the salmon should be opaque and flake easily with a fork. - Flip the salmon halfway through cooking for nice grill marks. This also ensures even cooking. - After grilling, remove the salmon from the grill. Let it rest for a couple of minutes. Resting allows the juices to settle, making the salmon more tender. Feel free to check out the Full Recipe for more details! Grilling salmon can be fun and simple. Here are some tips to make it perfect. - Ideal grill temperature: Set your grill to medium-high heat. This gives you nice grill marks and helps the salmon cook evenly. Aim for about 375°F to 400°F. - Timing for varying thicknesses: The cook time depends on how thick your salmon is. For fillets that are about one inch thick, grill for 6-8 minutes. Thicker fillets will need more time, around 10-12 minutes. Always check if the salmon flakes easily with a fork. To make your grilled salmon even better, try these ideas. - Adding other herbs or spices: You can mix in herbs like basil or cilantro for a twist. A pinch of paprika can also add a smoky taste. Experiment with what you like! - Suggestions for citrus variations: Lemon is great, but don’t stop there! Try lime or orange juice for a fresh flavor. Citrus adds brightness and pairs well with the fish. If grilling isn't an option, you can still enjoy this dish. - Oven-baking instructions: Preheat your oven to 400°F. Place the salmon on a lined baking sheet. Bake for about 12-15 minutes, or until it is cooked through and flakes easily. - Stovetop options: Heat a non-stick skillet over medium heat. Add a bit of oil and cook the salmon for about 4-5 minutes on each side. This method gives a nice sear and keeps the salmon moist. For the full recipe, check out the instructions above and enjoy! {{image_2}} You can change the flavor of your salmon with different marinades. One fun option is honey mustard. To make this, mix honey, Dijon mustard, and olive oil. This blend adds a sweet tang that pairs well with the fish. Another great choice is a spicy chipotle version. Just add chipotle in adobo sauce to your olive oil and lemon juice. This will give your salmon a nice kick. Both of these marinades are easy to prepare and will excite your taste buds. If you want to switch up the fish, you have many options. Try using trout or mackerel instead of salmon. Both have rich flavors and grill well. They can absorb the lemon herb marinade nicely, too. For a vegetarian option, consider using portobello mushrooms. Their meaty texture makes them a great stand-in for fish. Marinate them just like the salmon and grill until tender. You will enjoy the smoky, herb-infused flavor. Pair your grilled salmon with tasty side dishes. Roasted vegetables or a fresh salad work well. You can also serve it with rice or quinoa for a heartier meal. These sides will complement the bright flavors of the salmon. When it comes to drinks, consider a crisp white wine, like Sauvignon Blanc. Its acidity balances the richness of the salmon. For a non-alcoholic option, serve sparkling water with lemon. This keeps the meal refreshing and light. For the full recipe, check out the [Full Recipe]. To store leftover salmon, place it in a shallow dish. Cover it tightly with plastic wrap or foil. You can also use an airtight container for better freshness. Make sure to refrigerate the salmon within two hours of cooking. This keeps it safe and tasty. Leftover salmon lasts in the fridge for up to three days. You can freeze salmon both before and after cooking. If you freeze it raw, wrap each fillet in plastic wrap. Then, place them in a freezer bag. Be sure to remove as much air as possible. Frozen raw salmon can last up to three months. If you freeze cooked salmon, let it cool first. Wrap it tightly in foil or plastic wrap. Place it in a freezer-safe bag. Cooked salmon also stays good for about three months. When you're ready to eat frozen salmon, thaw it in the fridge overnight. This helps keep the texture nice and smooth. For quicker thawing, you can use cold water. Just put the salmon in a sealed bag and submerge it in cold water for an hour. To reheat grilled salmon, you have a few good options. You can use the oven, stovetop, or microwave. If using the oven, preheat it to 275°F (135°C). Place the salmon on a baking sheet. Cover it with foil to avoid drying out. Heat for about 15 minutes, or until warmed through. If you prefer the stovetop, use a skillet over low heat. Add a splash of water or broth to keep it moist. Heat for about 5 minutes, flipping halfway through. For the microwave, place the salmon on a microwave-safe plate. Cover it with a damp paper towel. Heat in short bursts of 30 seconds to avoid overcooking. No matter how you reheat, check for dryness. Keeping it moist is key to enjoying your leftover salmon. I recommend marinating the salmon for at least 30 minutes. This time allows the flavors to soak in. You can marinate it for up to 2 hours if you want a stronger taste. Just don't go over 2 hours, as the acid from the lemon can make the fish mushy. Grilled salmon should reach an internal temperature of 145°F. This ensures the fish is safe to eat and still moist. You can use a meat thermometer to check the temperature. When it flakes easily with a fork, it is likely ready. Yes, you can use frozen salmon. However, it is best to thaw it before grilling. Cooking frozen salmon directly can lead to uneven cooking. To thaw, place it in the refrigerator overnight. If you are short on time, you can run it under cold water for about 30 minutes. Make sure to pat it dry before marinating and grilling. You now know how to grill salmon perfectly. We covered key ingredients, marinade tips, and cooking methods. I shared ways to elevate your salmon's flavor and explore variations. You learned proper storage to keep leftovers tasty. With these steps, you can enjoy delicious grilled salmon any time. Enjoy experimenting with new flavors and techniques. Happy cooking!](https://southerndishes.com/wp-content/uploads/2025/04/e12d933a-18ad-43eb-a38a-a3a5e2ef9163.webp)
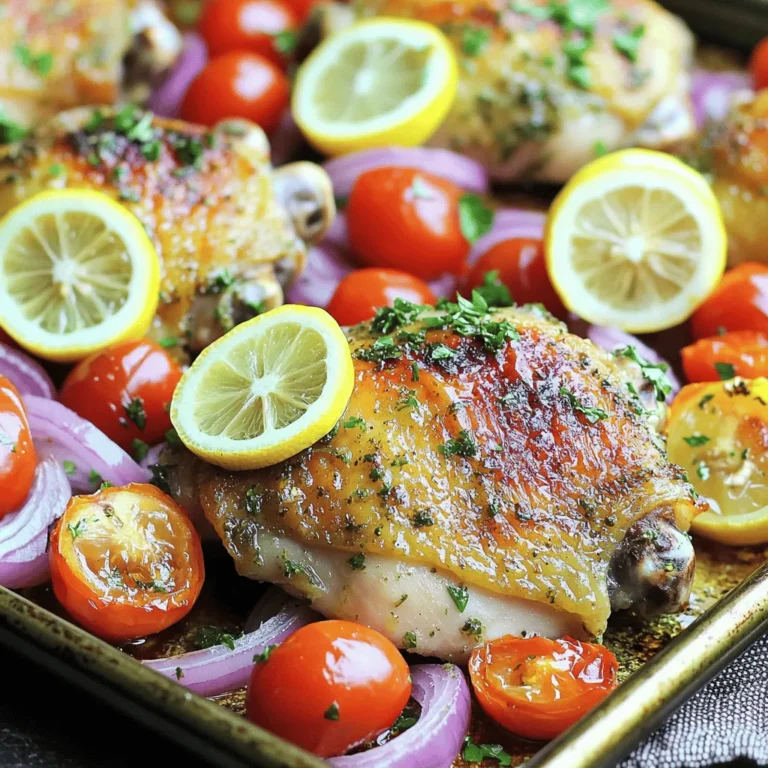
Lemon Herb Grilled Salmon Flavorful and Simple Recipe
If you’re looking for a quick, tasty meal, you’ve found it! This Lemon Herb Grilled Salmon recipe is simple yet bursting with flavor. I’ll…
My Latest Desserts
My Latest Recipes

hey,
i’m !
I’m so happy you’re here!
My kitchen is filled with stories, flavors, and love and I’m so happy to share them with you. Here’s to dishes that feel like home.
![To make the perfect make-ahead pumpkin cinnamon rolls, you will need the following ingredients: - 2 cups all-purpose flour - 1 cup pumpkin puree (canned or fresh) - 1/2 cup milk, warmed - 1/4 cup granulated sugar - 1/4 cup brown sugar - 1/4 cup unsalted butter, melted - 1 large egg - 1 packet (2 1/4 tsp) active dry yeast - 1 teaspoon vanilla extract - 1 teaspoon cinnamon - 1/2 teaspoon nutmeg - 1/4 teaspoon ginger powder - 1/4 teaspoon salt - 1/2 cup chopped pecans or walnuts (optional) You can add chopped pecans or walnuts to the filling for extra crunch. If you don’t have these nuts, try raisins or dried cranberries instead. For a twist on the flavor, consider adding a dash of cardamom or allspice. Using fresh pumpkin can make your rolls taste better, but canned pumpkin is often more convenient. Fresh pumpkin gives a vibrant flavor and a unique texture. Canned pumpkin works well and saves time. Always check the label to ensure you choose pure pumpkin puree, not pumpkin pie filling, for best results. 1. Prepare the dough: In a small bowl, mix 1/2 cup warmed milk and 1/4 cup granulated sugar. Sprinkle 1 packet of active dry yeast over the milk. Let it sit for 5 minutes until it looks frothy. This shows the yeast is ready. 2. Mix wet ingredients: In a large bowl, whisk together 1 cup pumpkin puree, 1/4 cup melted butter, 1 large egg, and 1 teaspoon vanilla extract. Add the frothy yeast mix and stir until everything combines well. 3. Combine dry ingredients: In another bowl, whisk 2 cups all-purpose flour, 1 teaspoon cinnamon, 1/2 teaspoon nutmeg, 1/4 teaspoon ginger powder, and 1/4 teaspoon salt. Gradually add this mix to the pumpkin mix. Stir until you form a soft dough. 4. Knead the dough: Lightly flour a surface and knead the dough for about 5 minutes. It should become smooth. Place the dough in a greased bowl. Cover it with a towel. Let it rise in a warm spot for about 1 hour or until it doubles in size. 5. Roll out the dough: After the dough rises, flour your surface again. Roll the dough into a rectangle about 1/4-inch thick. Spread melted butter over the dough. Sprinkle with 1/4 cup brown sugar, 1 tablespoon cinnamon, and 1/2 cup chopped nuts if you want. 6. Shape the rolls: Starting from one long edge, carefully roll the dough into a log. Pinch the seam to seal it. Cut the log into 12 equal pieces. 7. Arrange the rolls: Place the rolls in a greased baking dish. Cover them with plastic wrap. You can refrigerate overnight or let them rise for about 30 minutes in a warm place if you plan to bake right away. 8. Preheat the oven: Set your oven to 350°F (175°C). If your rolls were in the fridge, let them warm up to room temperature while the oven heats. 9. Bake the rolls: Bake the rolls for 25-30 minutes until they are golden brown. 10. Prepare the icing: While the rolls bake, mix together 1 cup powdered sugar, 2 tablespoons softened cream cheese, 1 tablespoon milk, and a pinch of cinnamon. Stir until it is smooth. 11. Finish the rolls: After baking, drizzle the icing over the warm rolls. Enjoy this treat right away! These steps ensure you create a warm, delicious batch of pumpkin cinnamon rolls. For the complete guide, check out the Full Recipe! To make your pumpkin cinnamon rolls ahead of time, follow these steps: - Prepare the dough: Make the dough as the recipe states. Let it rise until it doubles. This step is key for great texture. - Shape the rolls: After rolling and cutting the dough, place the rolls in a greased baking dish. - Refrigerate: Cover the dish with plastic wrap and put it in the fridge overnight. This makes the rolls easy to bake in the morning. Storing the rolls well helps keep their flavor fresh. If you plan to bake them later, try these tips: - Cover tightly: Use plastic wrap to keep air out. This prevents the rolls from drying out. - Check the temperature: Make sure your fridge is at the right temperature. This helps the dough stay active. When you are ready to enjoy your rolls, reheating them is simple: - Preheat the oven: Set it to 350°F (175°C) before you start. - Let them warm up: Take the rolls out and let them sit at room temperature for about 15 minutes. - Bake: Put the rolls in the oven for 10-15 minutes until they are warm and soft. This way, you can have fresh, warm rolls ready to eat whenever you want! For the full recipe, check the earlier section. {{image_2}} You can customize your pumpkin cinnamon rolls in many ways. Start by adding spices like cardamom or allspice. A pinch can change the flavor profile. You can also mix in some cocoa powder for a chocolate twist. Chocolate chips or chunks would work well too. Just sprinkle them on the dough before rolling it up. Fruits add a fresh taste to these rolls. Diced apples or cranberries can bring a new flavor. Add them to the filling along with the brown sugar and cinnamon. You can even use dried fruits like raisins or figs for a chewier texture. For frosting, try different options to keep things exciting. Instead of cream cheese icing, use a maple glaze. Mix powdered sugar with maple syrup and a bit of milk. This will give your rolls a lovely autumn flavor. You could also use a chocolate ganache if you want something richer. Feel free to mix and match these ideas. The goal is to make these rolls your own while enjoying the savory fall delight they offer. For the complete recipe, check out the full recipe section. To keep your make-ahead pumpkin cinnamon rolls fresh, follow these steps: - Cool the rolls: Allow the rolls to cool completely on a wire rack. This step prevents moisture build-up. - Wrap them tightly: Use plastic wrap or aluminum foil to wrap the rolls. This keeps air out and retains moisture. - Store in the fridge: If you plan to eat them within a few days, store wrapped rolls in the fridge. They will stay fresh for up to five days. - Freezing for later: If you want to save them for a longer time, freeze the rolls. Place the wrapped rolls in a freezer bag. They can last up to three months in the freezer. - Slice before storing: If you prefer, slice the rolls before storing. This way, they are ready to reheat and serve. - Reheat before serving: When ready to eat, reheat the rolls in the oven at 350°F (175°C) for about 10 minutes. This restores their warmth and fluffiness. - Use parchment paper: Place a piece of parchment paper between layers of rolls in the freezer. This helps prevent them from sticking together. Following these steps will ensure your pumpkin cinnamon rolls stay delicious, whether you eat them right away or save them for later. For the complete recipe, check the [Full Recipe]. Make-ahead pumpkin cinnamon rolls stay fresh for about three days at room temperature. If you keep them in the fridge, they can last up to a week. For longer storage, you can freeze them. Just wrap them tightly in plastic wrap. Yes, you can use whole wheat flour. It gives the rolls a heartier taste. But, the texture may change. You might need to add a bit more liquid to the dough. Start with one tablespoon at a time if needed. If your dough does not rise, check the yeast. Ensure it is fresh and active. If the yeast is old, it may not work. You can also try moving the dough to a warmer spot. Sometimes, a warm oven (turned off) works well. Yes, you can bake them right away. After you shape the rolls, let them rise for 30 minutes in a warm place. This will give you soft, tasty rolls, but the flavor may be less developed than if you let them sit overnight. For the Full Recipe, follow the steps to enjoy these delightful rolls! In summary, we covered everything you need for making pumpkin cinnamon rolls. We discussed the essential ingredients, step-by-step preparation, and tips for storage. Whether you want to make them today or later, these rolls can be prepped in advance for great taste. You can also explore different flavors or frostings to suit your mood. With these simple guidelines, you can enjoy fresh, delicious rolls anytime you want. Get ready to impress everyone with your baking skills!](https://southerndishes.com/wp-content/uploads/2025/07/6a1649d7-4643-415e-8ade-438d407498bc-300x300.webp)


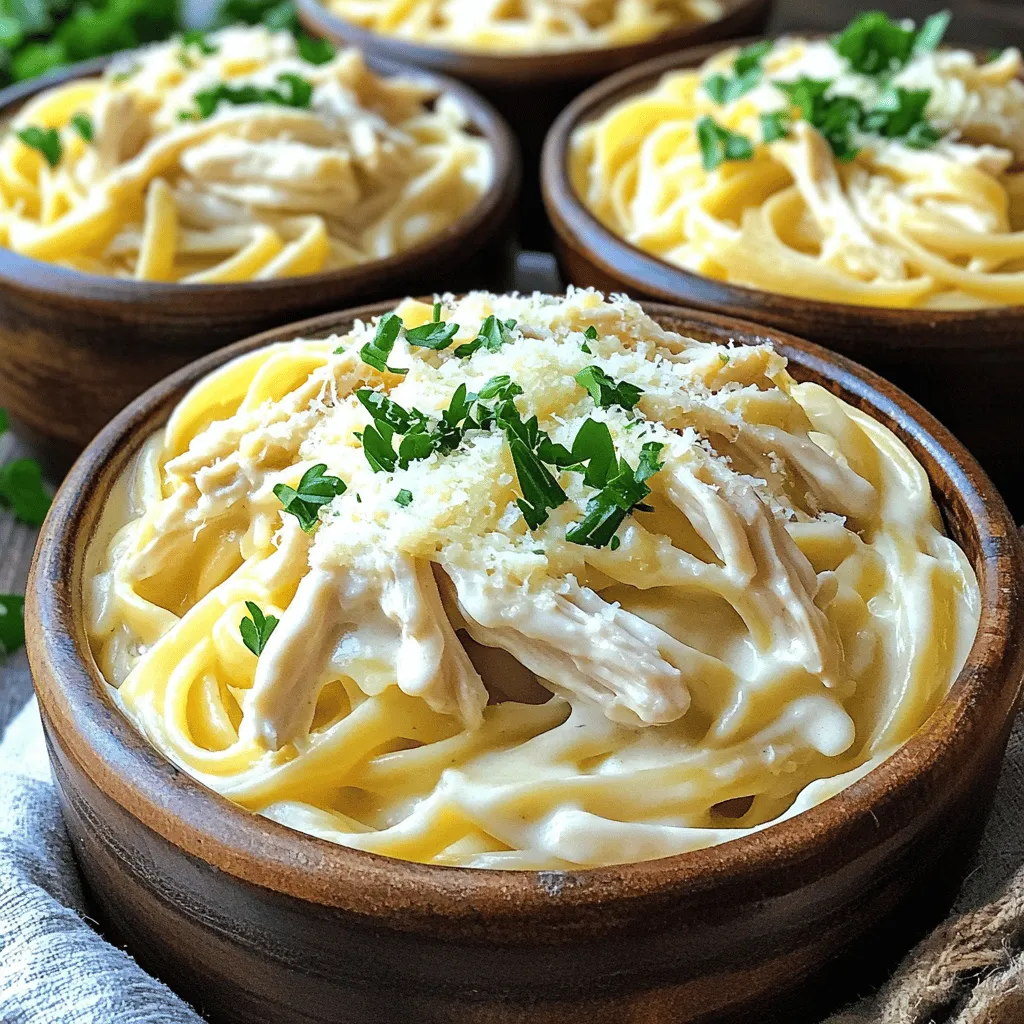
Slow Cooker Creamy Chicken Alfredo Delightful Dish
Are you ready to enjoy a creamy, dreamy dish that’s easy to make? My Slow Cooker Creamy Chicken Alfredo is a game-changer for busy…