

Latest & Greatest
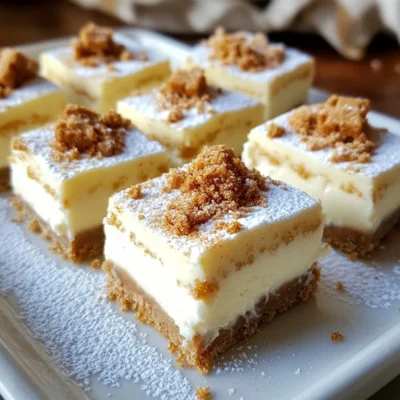
Gingerbread Cheesecake Bars Delightful Holiday Treat
Get ready to impress your family and friends this holiday season with Gingerbread Cheesecake Bars! These delightful treats blend the
Read more…
Garlic Parmesan Fries Irresistible and Crispy Snack
Craving a snack that’s both irresistible and crispy? Look no further! These Garlic Parmesan Fries are the perfect blend of
Read more…
One Pot Shrimp and Sausage Jambalaya Flavor Boost
Ready to dive into a bowl of rich, flavorful One Pot Shrimp and Sausage Jambalaya? This dish packs bold taste
Read more…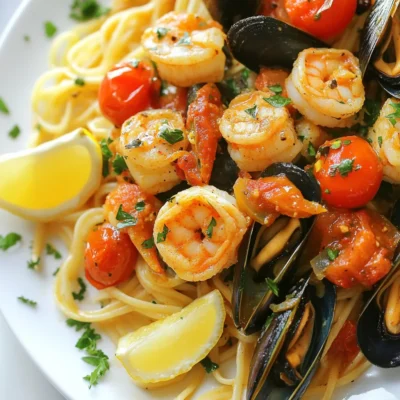
Mardi Gras Seafood Pasta Flavorful and Simple Dish
Are you ready to bring the vibrant flavors of Mardi Gras to your dinner table? This flavorful and simple Mardi
Read more…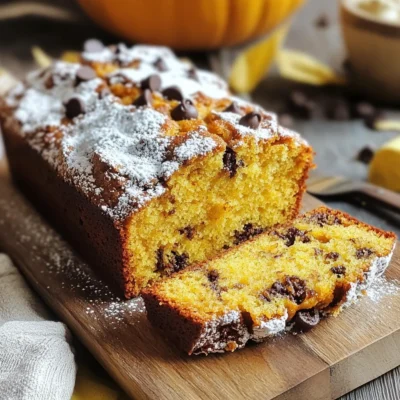
Classic Pumpkin Bread Tasty and Easy Recipe Guide
Fall is here, and what better way to celebrate than with a warm loaf of classic pumpkin bread? In this
Read more…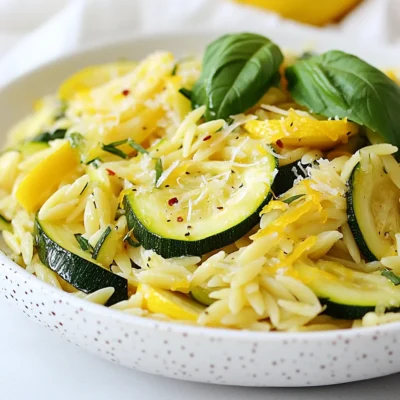
Zucchini Lemon Orzo Flavorful and Fresh Recipe
Get ready to enjoy a dish that bursts with flavor! This Zucchini Lemon Orzo recipe is fresh, easy, and perfect
Read more…
Coconut Lime Chicken Skewers Tasty Grilled Delight
Are you ready to elevate your grilling game? Coconut Lime Chicken Skewers are a vibrant, tasty choice that brings a
Read more…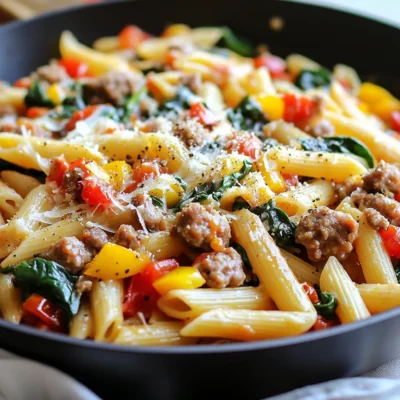
One-Skillet Sausage Pasta Quick and Easy Dinner
Looking for a quick and easy dinner that packs flavor? One-Skillet Sausage Pasta is your answer! This dish combines juicy
Read more…browse recipes


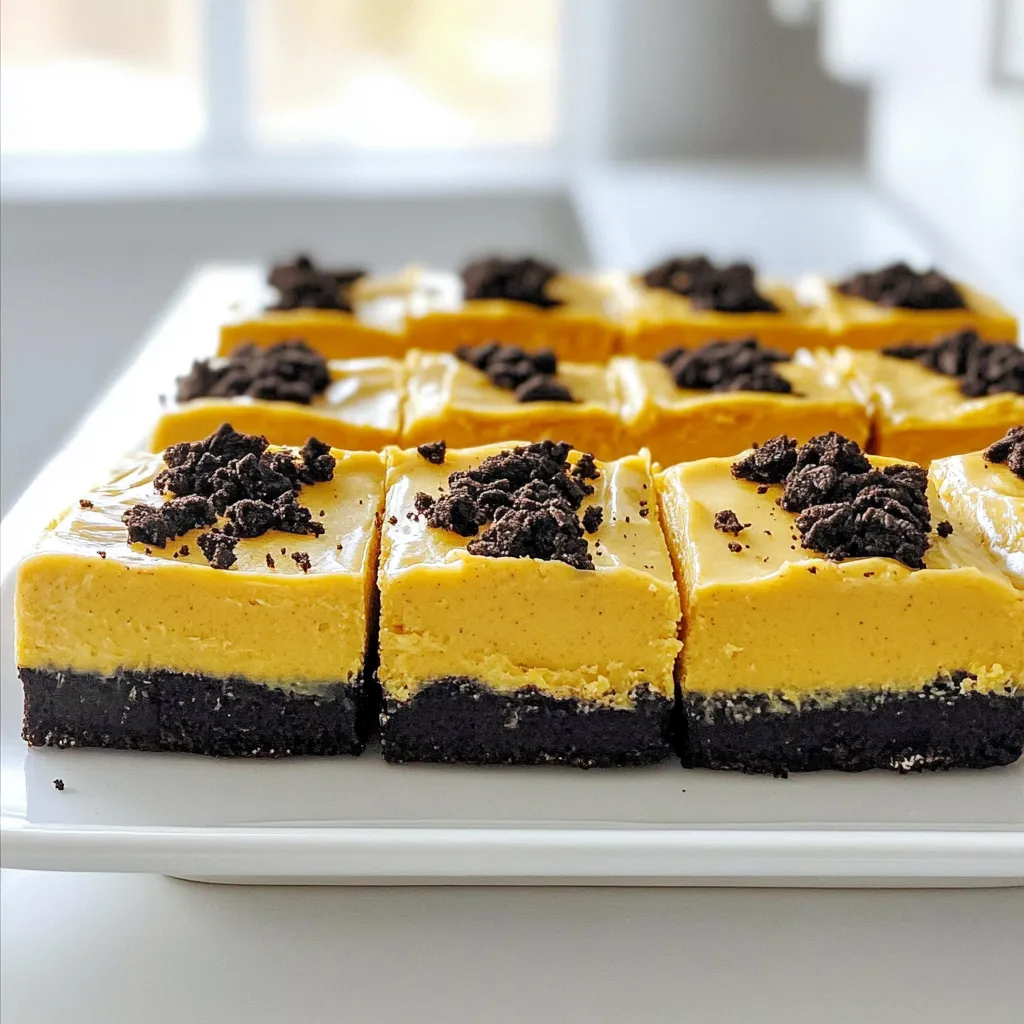
No Bake Pumpkin Oreo Bars Easy Fall Dessert Delight
Fall is here, and nothing says autumn like No Bake Pumpkin Oreo Bars! If you crave a sweet treat without turning on the oven,…
My Latest Desserts
My Latest Recipes

hey,
i’m !
I’m so happy you’re here!
My kitchen is filled with stories, flavors, and love and I’m so happy to share them with you. Here’s to dishes that feel like home.

![- 1 large head of cauliflower, cut into florets - 1 cup shredded sharp cheddar cheese - 1 cup cream cheese, softened - 1/2 cup milk - 1/2 cup grated Parmesan cheese For this dish, the cauliflower serves as the star. It provides a nice, soft base. The sharp cheddar and Parmesan add a rich, cheesy flavor. Cream cheese makes the sauce creamy and smooth. The milk helps blend everything together. - 2 cloves garlic, minced - 1 teaspoon onion powder - 1 teaspoon Italian seasoning - 1/2 teaspoon paprika - Salt and pepper to taste Seasonings are vital for a tasty bake. Minced garlic brings a nice depth to the dish. Onion powder adds a hint of sweetness. Italian seasoning gives it a warm, herbal note. Paprika adds a touch of color and flavor. Don't forget to season with salt and pepper! - Fresh parsley, chopped (for garnish) Garnishing with fresh parsley makes the dish pop. It adds a bright color and a fresh taste. This simple touch makes your Cheesy Cauliflower Bake look inviting. I found that using high-quality cheese makes a big difference. It enhances the flavor and texture. You can find the Full Recipe at the beginning of this article. Enjoy cooking! - Preheat the oven to 375°F (190°C). - In a large pot, bring salted water to a boil. Add the cauliflower florets. Cook for 5-7 minutes until tender, then drain well. - In a mixing bowl, combine 1 cup of softened cream cheese, 1/2 cup of milk, and seasonings like minced garlic, onion powder, Italian seasoning, paprika, salt, and pepper. Mix until smooth. - Stir in 1 cup of shredded sharp cheddar cheese and half of the 1/2 cup of grated Parmesan. - Add the cooked cauliflower florets to the cheese mixture. Gently stir until the cauliflower is fully coated. - Transfer the mixture to a greased baking dish. Spread it evenly and sprinkle the remaining Parmesan on top. - Bake in the preheated oven for 25-30 minutes, until the top is golden and bubbly. This cheesy cauliflower bake is rich and flavorful, making it a perfect side dish. For the full recipe, check the details above. To get the best texture, cook the cauliflower until it is just tender. Boil it for 5-7 minutes. You want it soft but not mushy. Drain the florets well to avoid excess water. For the cheese sauce, mix the ingredients until smooth. This makes it easy to coat the cauliflower. You can make this dish even tastier. Try adding fresh herbs like thyme or basil. A pinch of garlic powder can also boost flavor. For cheese, mix in Gruyère or mozzarella for a twist. Each cheese brings its own unique taste. Serve your cheesy cauliflower bake with a fresh salad. It pairs well with roasted chicken or grilled fish. If you want a vegetarian meal, add a grain like quinoa or rice. For gluten-free options, ensure your cheese and seasonings are gluten-free. This dish is sure to please everyone at the table. Enjoy it warm and share the love! For the complete details on making this dish, check the Full Recipe. {{image_2}} You can make Cheesy Cauliflower Bake even more fun by changing up the veggies. Broccoli works great if you want a different taste. Spinach can add a nice green touch too. You can even mix these vegetables for a colorful dish. If you prefer a dairy-free option, consider using plant-based cheeses. Many brands offer creamy, tasty alternatives that melt well. This swap keeps the dish rich without dairy. Want to add some extra flavor? Try adding cooked bacon or ham. These meats bring a savory punch that pairs well with the cheese. You can also spice things up! Adding jalapeños gives a nice kick, or try a bit of cayenne pepper for more heat. How you serve this dish can change the whole experience. Individual servings in ramekins look fancy and are easy to serve. Plus, they make great portions for guests. For a more casual vibe, go for a casserole-style dish. Just scoop out portions straight from the baking dish. Both ways make the Cheesy Cauliflower Bake look appealing and delicious. For the full recipe, check out the [Full Recipe]. To keep your cheesy cauliflower bake fresh, store leftovers in an airtight container. This seals in flavor and moisture. You can keep it in the fridge for about 3 to 5 days. If you notice any off smells or changes in texture, it’s best to toss it out. You can freeze cheesy cauliflower bake for longer storage. First, let it cool completely before packing it away. Use a freezer-safe container or heavy-duty freezer bag. It will stay fresh for up to 3 months. When you want to eat it, move it to the fridge overnight to thaw. When reheating, the oven is the best choice. Preheat it to 350°F (175°C). Place the bake in a dish and cover it with foil. This helps keep it moist. Bake for about 20 minutes or until heated through. If using a microwave, heat in short bursts. Stir in between to keep it even. This way, your cheesy cauliflower bake stays tasty and creamy. Yes, you can prepare Cheesy Cauliflower Bake ahead of time. To make this easier, cook the cauliflower and mix it with the cheese sauce. Then, place it in a greased baking dish. Cover the dish with plastic wrap. Store it in the fridge for up to two days. When you are ready to bake, remove the wrap and bake it straight from the fridge. You might need to add a few extra minutes to the bake time for even cooking. Yes, Cheesy Cauliflower Bake is gluten-free. The main ingredients, such as cauliflower, cheese, and cream, do not contain gluten. Always check labels on your cheese and cream for any hidden gluten. Fresh herbs and spices used in the recipe are also gluten-free. This makes it a great choice for those with gluten intolerance. If you want to add some heat, there are a few great options. You can mix in some diced jalapeños or a pinch of cayenne pepper into the cheese sauce. Another option is to add a few dashes of hot sauce. You can also sprinkle red pepper flakes on top before baking for extra flavor. Adjust the spice level to what you enjoy most. Cheesy Cauliflower Bake pairs well with many sides. A fresh green salad adds a nice crunch. Roasted vegetables like carrots or Brussels sprouts complement the dish's creaminess. Grilled chicken or fish also works well for a balanced meal. For a comforting option, serve it with garlic bread or rolls to soak up the cheese sauce. Cheesy Cauliflower Bake combines creamy cheese and tender cauliflower for a delicious dish. We explored main ingredients, including sharp cheddar, cream cheese, and seasonings. I shared tips for texture and flavor, plus storage advice for leftovers. This dish is easy to customize with other veggies or spices. Enjoy experimenting with your own twists. Make it for a cozy family dinner or a fun gathering. You’ll love how simple and tasty it is!](https://southerndishes.com/wp-content/uploads/2025/05/829c3067-7849-466a-b9f3-97d9d06c7758-300x300.webp)


Buffalo Cauliflower Tacos Flavorful and Simple Recipe
Are you ready to spice up your taco night with a delicious twist? Buffalo Cauliflower Tacos are not just flavorful; they are also simple…