Latest & Greatest
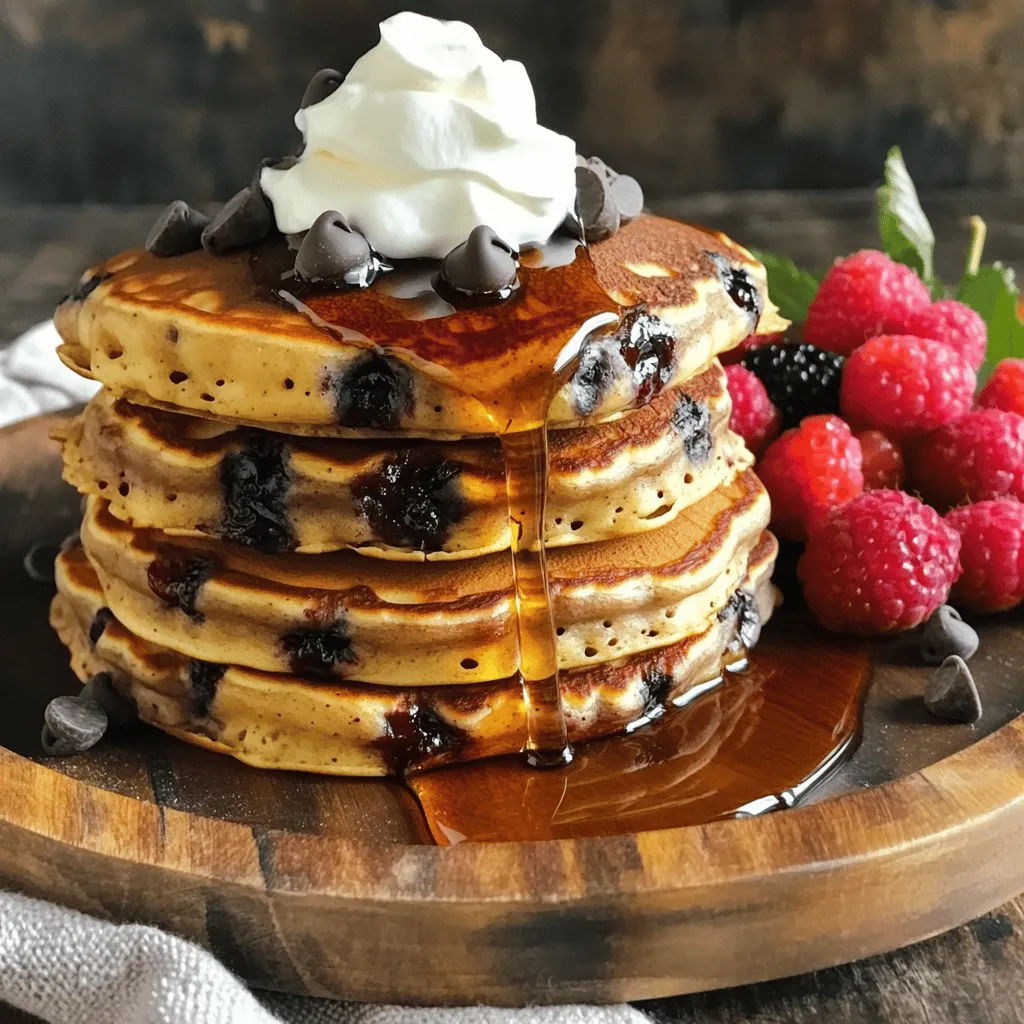
Chocolate Chip Pancakes Sweet and Simple Recipe
Wake up to a stack of gooey, warm chocolate chip pancakes that are easy to make! This sweet and simple
Read more…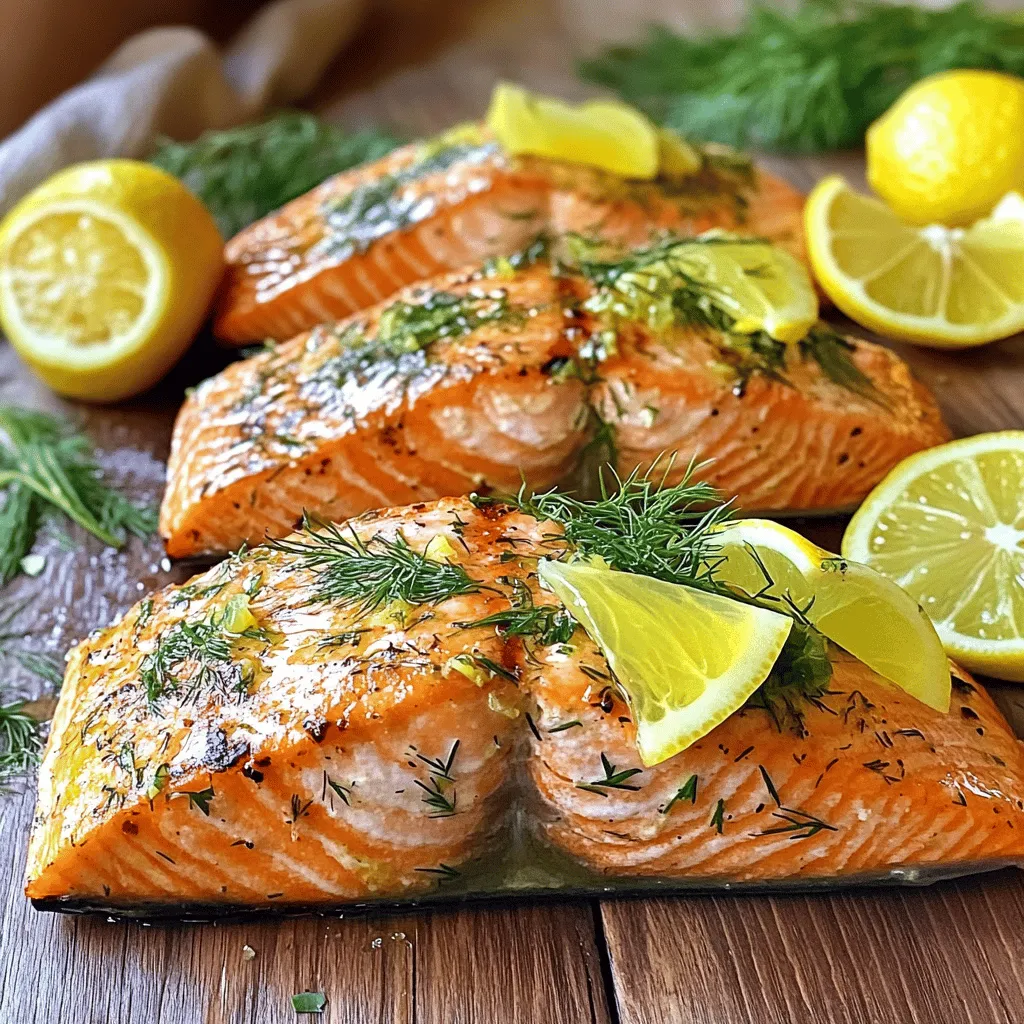
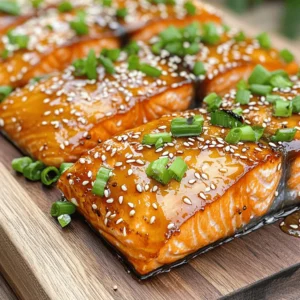
Lemon Herb Grilled Salmon Fresh and Flavorful Dish
Are you ready to bring vibrant flavors to your table? My Lemon Herb Grilled Salmon recipe is fresh, simple, and
Read more…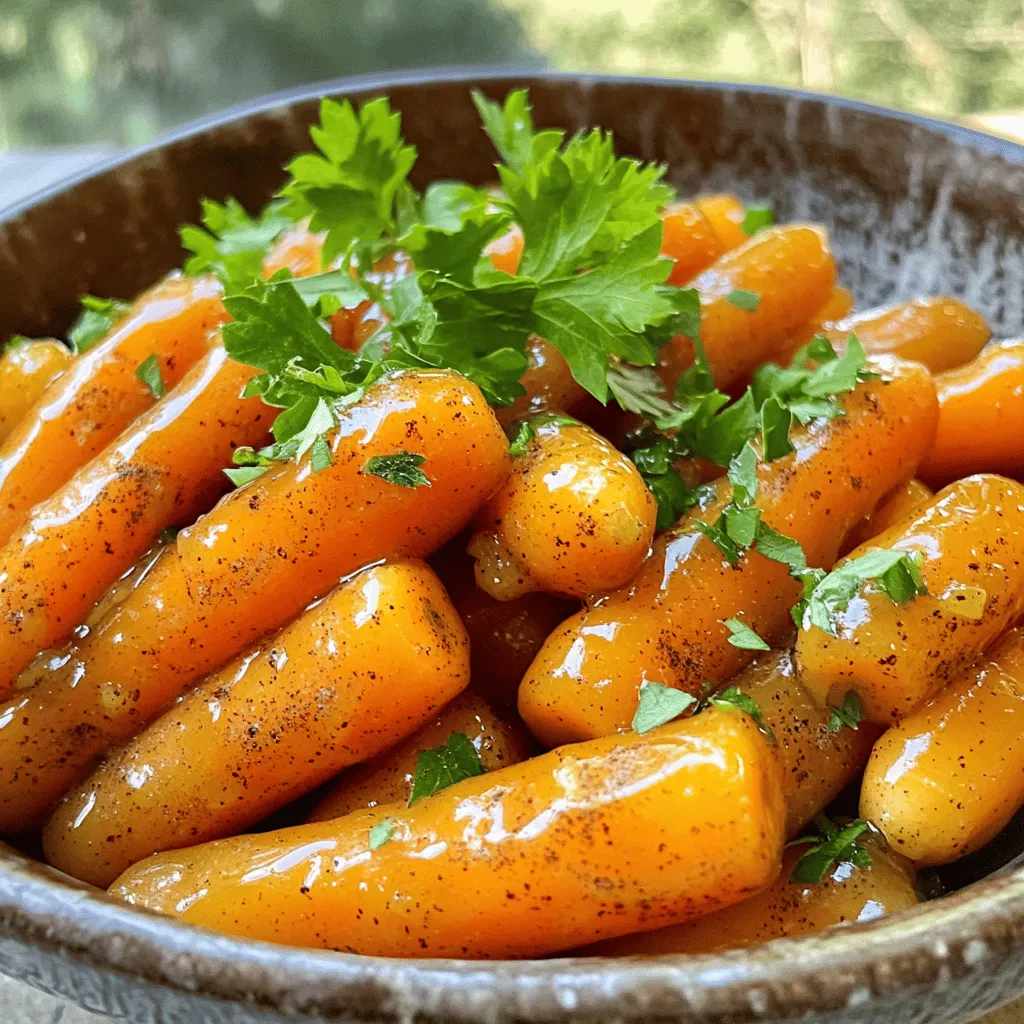
Maple Glazed Carrots Flavorful and Simple Side Dish
Maple glazed carrots are a tasty and simple side dish that you will love. With just a few easy ingredients,
Read more…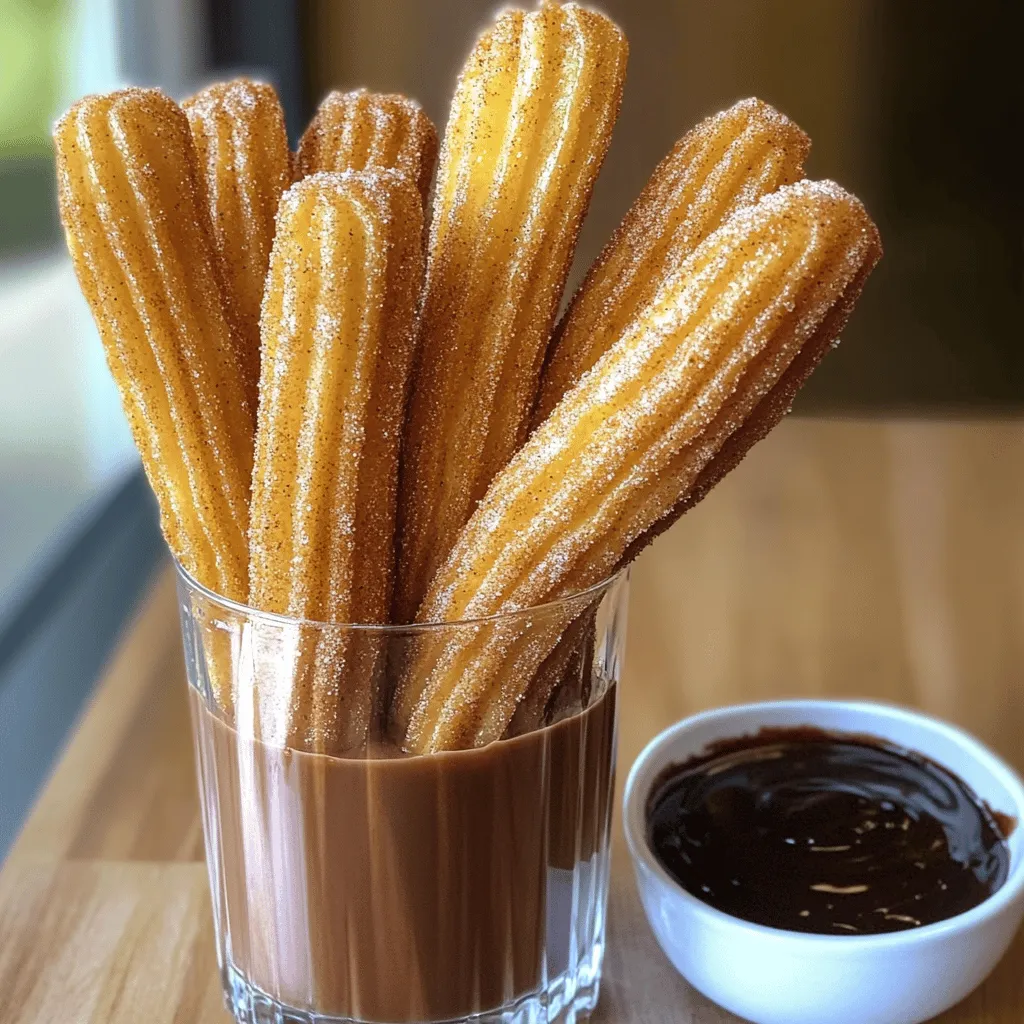
Cinnamon Sugar Churros Irresistible and Easy Recipe
Are you craving something sweet and warm? Cinnamon sugar churros are the answer! This easy recipe will guide you through
Read more…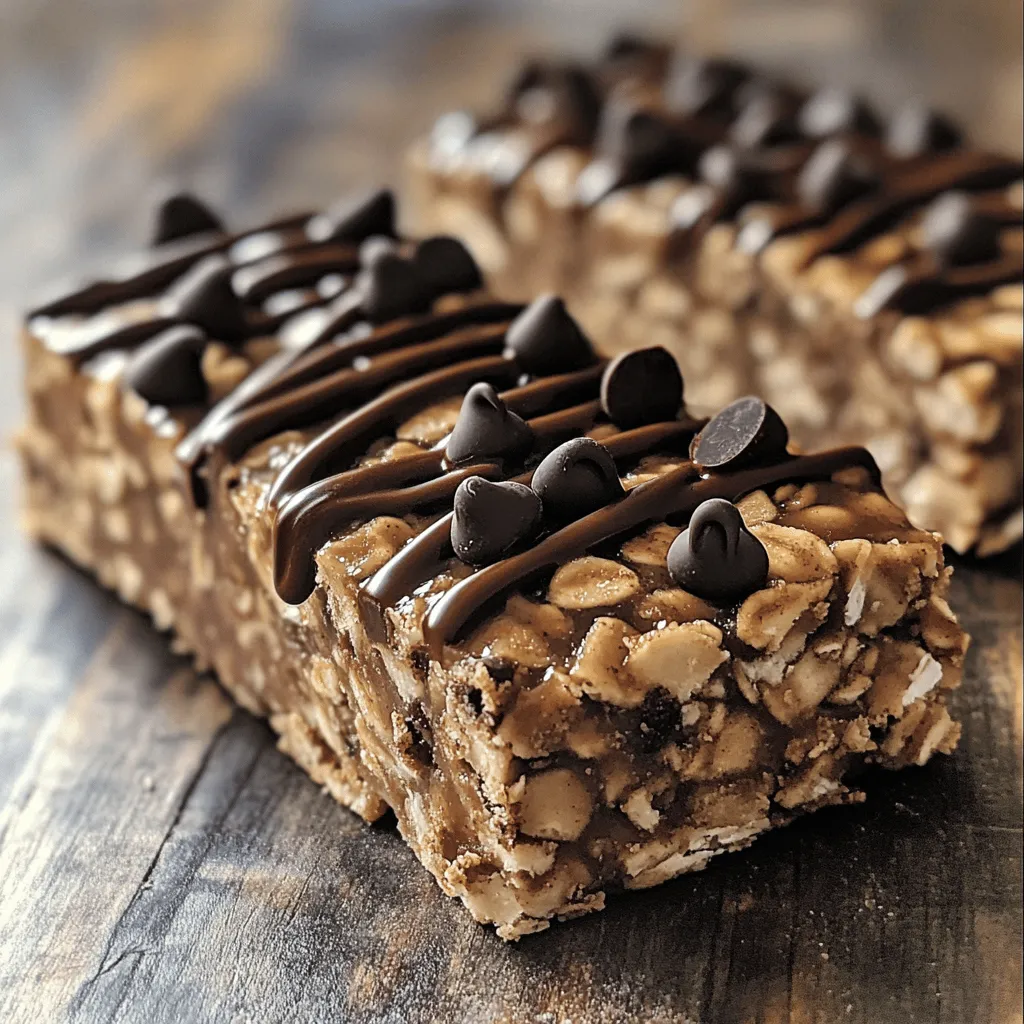
Mocha Chip Protein Bars Tasty and Nutritious Snack
Looking for a snack that gives you energy and tastes amazing? Try my Mocha Chip Protein Bars! These bars mix
Read more…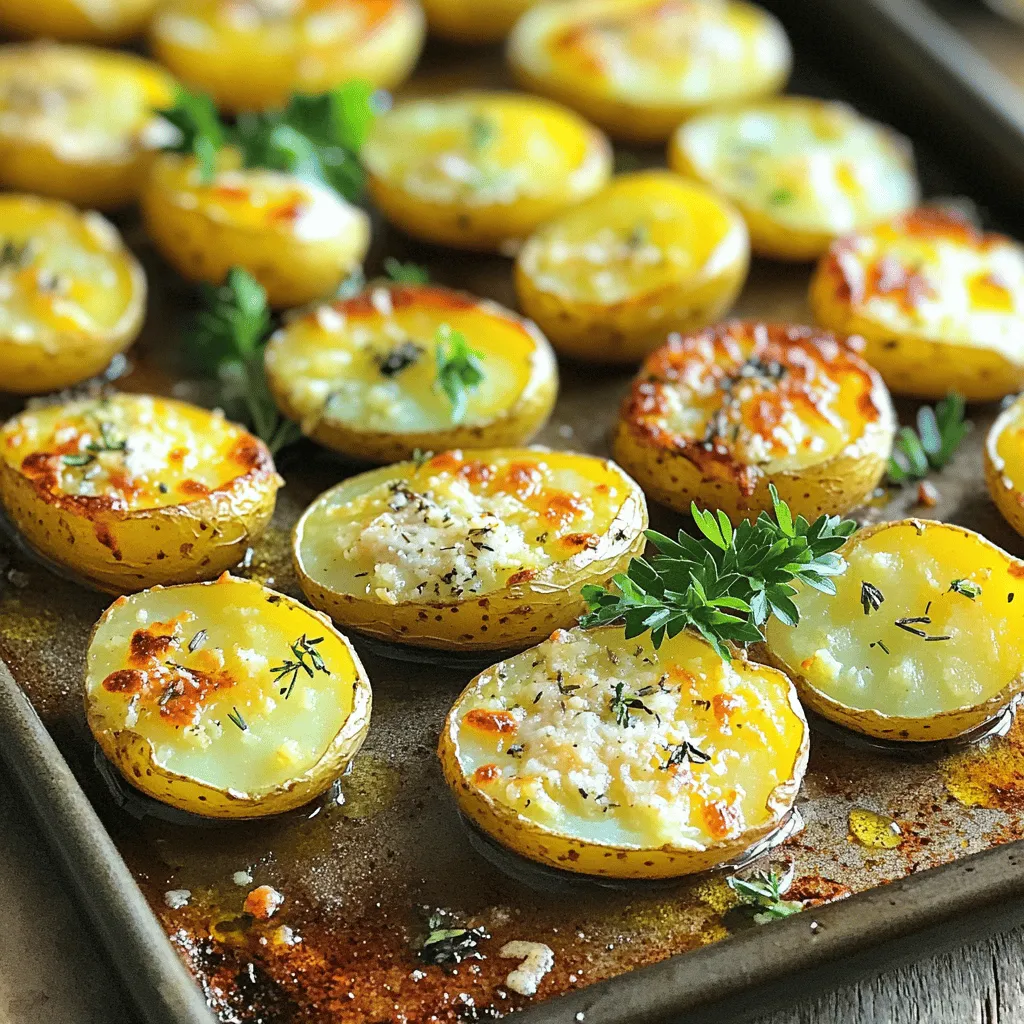
Garlic Parmesan Roasted Potatoes Simple and Tasty
Garlic Parmesan Roasted Potatoes are simple and full of flavor. If you want a tasty side dish that impresses, this
Read more…
Pesto Caprese Pasta Salad Flavorful and Simple Dish
If you’re craving a dish that strikes the perfect balance between fresh flavors and ease, look no further! My Pesto
Read more…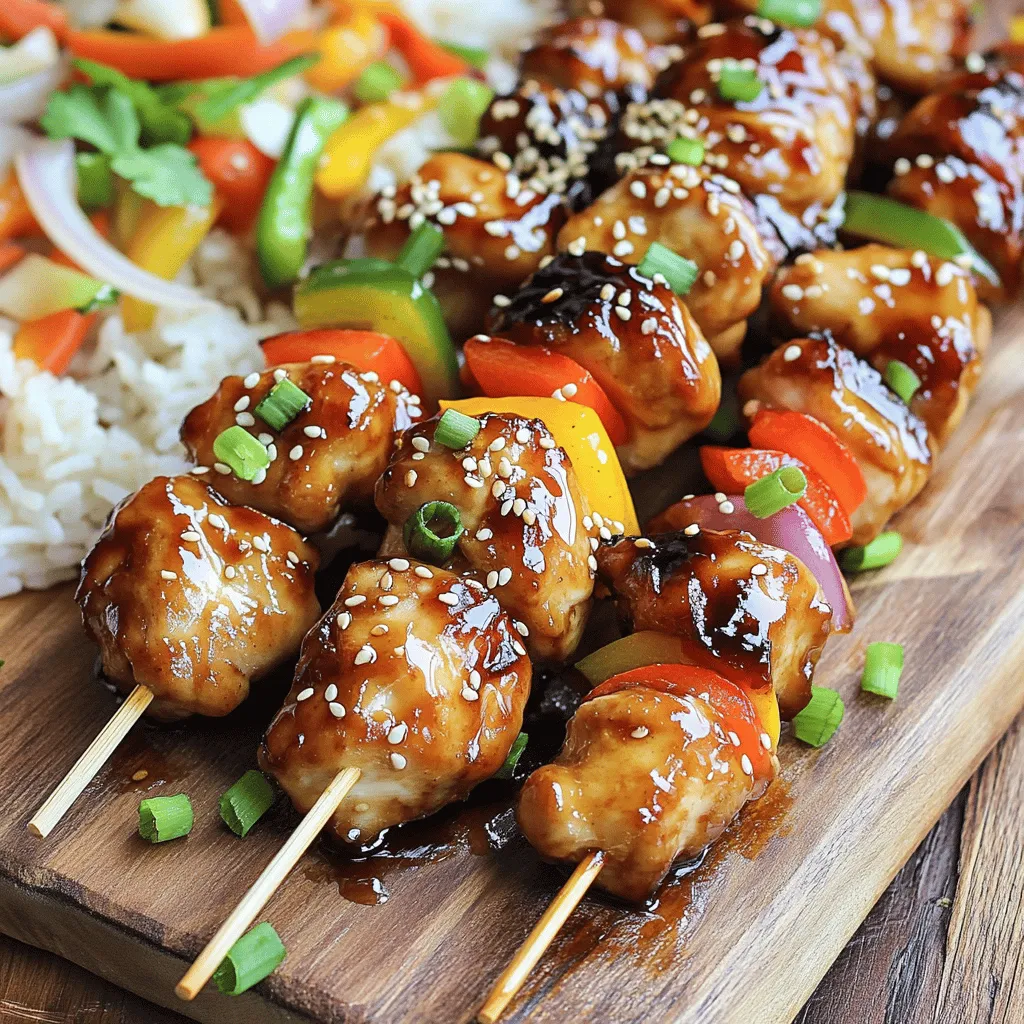
Teriyaki Chicken Skewers Easy Grill Recipe
If you’re craving a sweet and savory treat, you’ve stumbled upon the perfect recipe! My Teriyaki Chicken Skewers are easy
Read more…browse recipes


Chocolate Chip Cookie Dough Bites Simple Treat Recipe
Ready to satisfy your sweet tooth? These Chocolate Chip Cookie Dough Bites are simple and fun to make! With a few basic ingredients and…
My Latest Desserts
My Latest Recipes

hey,
i’m !
I’m so happy you’re here!
My kitchen is filled with stories, flavors, and love and I’m so happy to share them with you. Here’s to dishes that feel like home.
![- 4 salmon fillets - 4 cloves garlic, minced - 2 tablespoons olive oil - 1 lemon (zested and juiced) The main ingredients create a bright and tasty dish. Salmon fillets are rich in protein and healthy fats. Garlic adds a strong flavor, while olive oil brings richness. The lemon gives a fresh, zesty touch. Together, these ingredients make a simple yet elegant meal. - 1 teaspoon dried oregano - 1 teaspoon paprika - Salt and pepper to taste - 1 cup cherry tomatoes, halved - 1 cup asparagus, trimmed For seasonings, I use dried oregano and paprika. They give depth to the dish. Salt and pepper enhance all the flavors. The vegetables, cherry tomatoes and asparagus, add color and nutrients. They roast nicely with the salmon, soaking up all the tasty juices. - Fresh parsley Fresh parsley is the final touch. It adds a pop of color and a hint of freshness. Just chop it finely and sprinkle it over the dish right before serving. This small step makes the meal look extra special. For the complete recipe, check out the Full Recipe section. 1. Preheat the oven Set your oven to 400°F (200°C). This helps cook the salmon just right. 2. Prepare the garlic and lemon mixture In a small bowl, mix 4 minced garlic cloves, 2 tablespoons olive oil, the zest and juice of 1 lemon, 1 teaspoon dried oregano, 1 teaspoon paprika, salt, and pepper. This mixture adds great flavor. 1. Arrange salmon and vegetables Take a large baking sheet or an ovenproof skillet. Place 4 salmon fillets in the center, skin-side down. Next, scatter 1 cup halved cherry tomatoes and 1 cup trimmed asparagus around the salmon. 2. Pour sauce over salmon and veggies Drizzle the garlic and lemon mixture over the salmon fillets. Make sure each piece is well-coated. Add any leftover sauce over the veggies for extra flavor. 1. Roast in the oven Place the baking sheet in the preheated oven. Roast for about 15-20 minutes. The salmon should be cooked through and flake easily. The veggies should be tender. 2. Optional broiling step For a nice crispy top, turn on the broiler for 2-3 minutes. Keep an eye on it to avoid burning. This dish is fresh and simple, making it a go-to for any night. You can find the [Full Recipe] here for more details! Fresh ingredients make a big difference. Use fresh salmon and vibrant vegetables. I always choose organic when I can. Fresh garlic gives a strong flavor. Lemons should be juicy for the best taste. Adjust the seasoning to your liking. Add more salt if you like it salty. If you want more heat, sprinkle in some red pepper flakes. Taste as you go to find your perfect balance. To check if your salmon is done, use a fork. Gently poke the thickest part. If it flakes easily, it’s ready. Salmon should be a light pink color inside. Be careful not to overcook your vegetables. They should be tender but still crisp. Keep an eye on them while they roast. For side dishes, try a light salad or rice. Quinoa also pairs nicely with this dish. These sides balance the rich flavor of the salmon. When it comes to wine, a crisp white like Sauvignon Blanc works well. It complements the lemon and garlic nicely. Enjoy your meal with good company! For the full recipe, check out the section above. {{image_2}} You can change the fish if you want. Try using trout or cod instead of salmon. Each fish adds a new flavor twist. You can also use shrimp for a fun change. Adding different vegetables is a great idea too. Use broccoli instead of asparagus, or toss in bell peppers for color. Carrots or zucchini work well too. This makes every meal unique and fresh. Herbs and spices can elevate your dish. Fresh dill or tarragon adds a bright flavor. You can even try basil for a sweet note. If you like heat, add red pepper flakes for a spicy kick. Zesty alternatives can also excite your taste buds. Try lime juice instead of lemon for a tropical vibe. You can even mix in a splash of soy sauce for an Asian flair. If you're gluten-free, this dish is perfect for you. All the ingredients are naturally gluten-free. Just double-check any sauces or seasonings you may add. For those on a low-carb diet, skip the cherry tomatoes and asparagus. Instead, try cauliflower rice or sautéed spinach. This keeps your meal tasty and healthy without extra carbs. After enjoying your One Pan Lemon Garlic Salmon, store any leftovers properly. Allow the salmon to cool down to room temperature. Place it in airtight containers. This helps to keep the salmon fresh. It also prevents strong odors from getting in. If you have veggies left too, store them in the same way. Refrigerate the containers within two hours of cooking. This keeps the food safe and tasty for later. When it comes to reheating, you have two main choices: the microwave or the oven. The microwave is quick but may make the salmon a bit dry. If you want to keep the salmon moist, use the oven. Preheat it to 350°F (175°C). Place the salmon on a baking sheet and cover it with foil. Heat for about 10 minutes. This helps to keep the texture and flavor nice. You can also reheat the veggies the same way, so they stay crunchy. If you want to save your One Pan Lemon Garlic Salmon for later, freezing is a great option. First, let it cool completely. Then, wrap each piece of salmon tightly in plastic wrap. Place it in a freezer-safe bag or container. This prevents freezer burn. Salmon can stay in the freezer for about three months. When you’re ready to eat, thaw it in the fridge overnight. This keeps it safe and tasty. Avoid using warm water to thaw, as it can change the texture. The best temperature to cook salmon is 400°F (200°C). This heat cooks the fish evenly. It keeps the salmon moist and tender. Cooking at this temperature helps the fish absorb the lemon and garlic flavors. Cooked salmon lasts about three to four days in the fridge. Make sure to store it in an airtight container. This helps keep it fresh and safe to eat. If you notice any off smells or colors, it’s best to toss it. Yes, you can make this recipe ahead of time. Prepare the salmon and vegetable mix. Store it in the fridge for up to 24 hours. When ready, just bake it as directed. This makes dinner easy and quick. Great sides include rice, quinoa, or a fresh salad. Roasted potatoes also work nicely. These sides balance the meal and add more flavor. You can try a light white wine too, like Sauvignon Blanc, for a perfect match. For more ideas, check out the Full Recipe! In this post, we explored how to make One Pan Lemon Garlic Salmon. We covered the key ingredients, like fresh salmon, garlic, and vibrant vegetables. You learned step-by-step instructions for preparation and cooking to achieve the best flavor. I shared tips on storing leftovers and suggested variations for dietary needs. Remember, using fresh ingredients is key to great taste. Enjoy making this simple and delicious dish that can impress anyone at your table!](https://southerndishes.com/wp-content/uploads/2025/07/578ea6b8-e376-48a6-af03-a15881168894-300x300.webp)


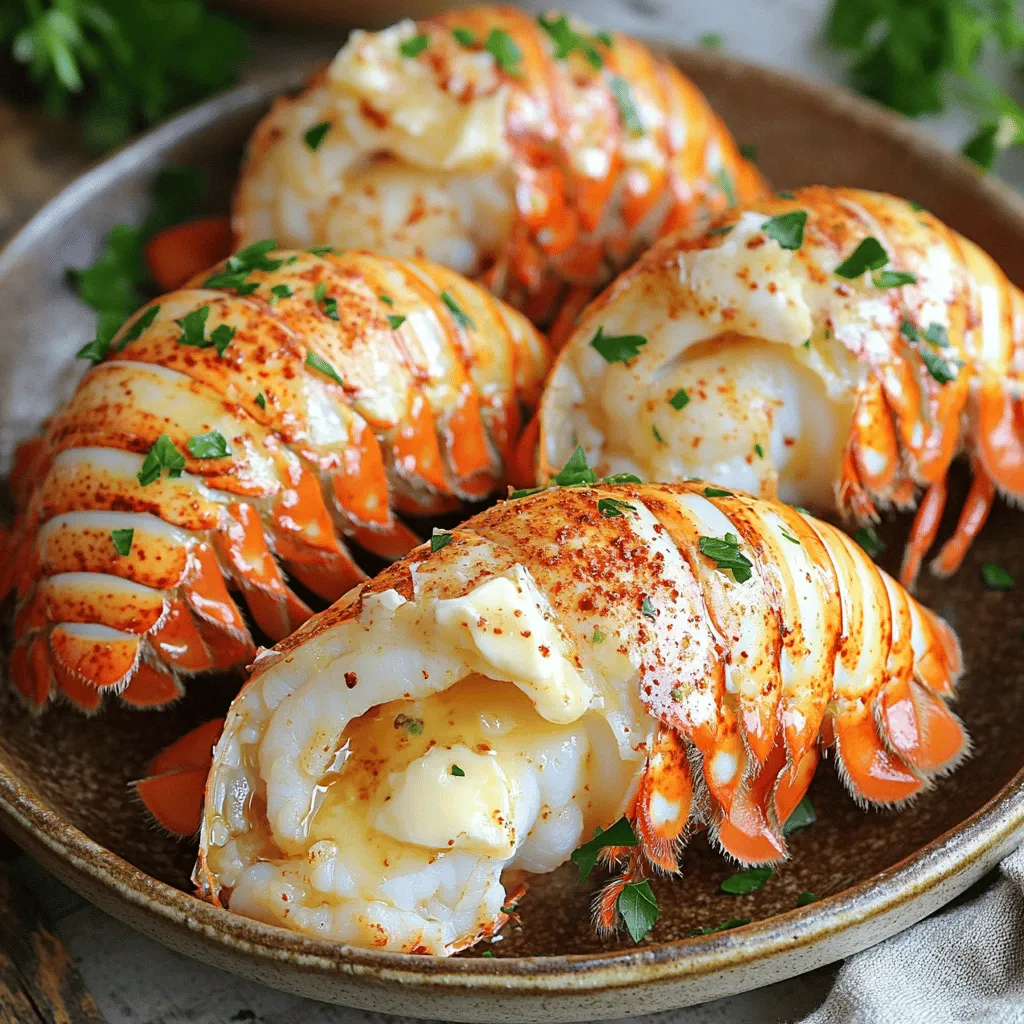
Air Fryer Garlic Butter Lobster Tails Flavorful Delight
Ready to indulge in a seafood delight? My Air Fryer Garlic Butter Lobster Tails recipe brings you rich flavors and tender meat with ease.…