

Latest & Greatest
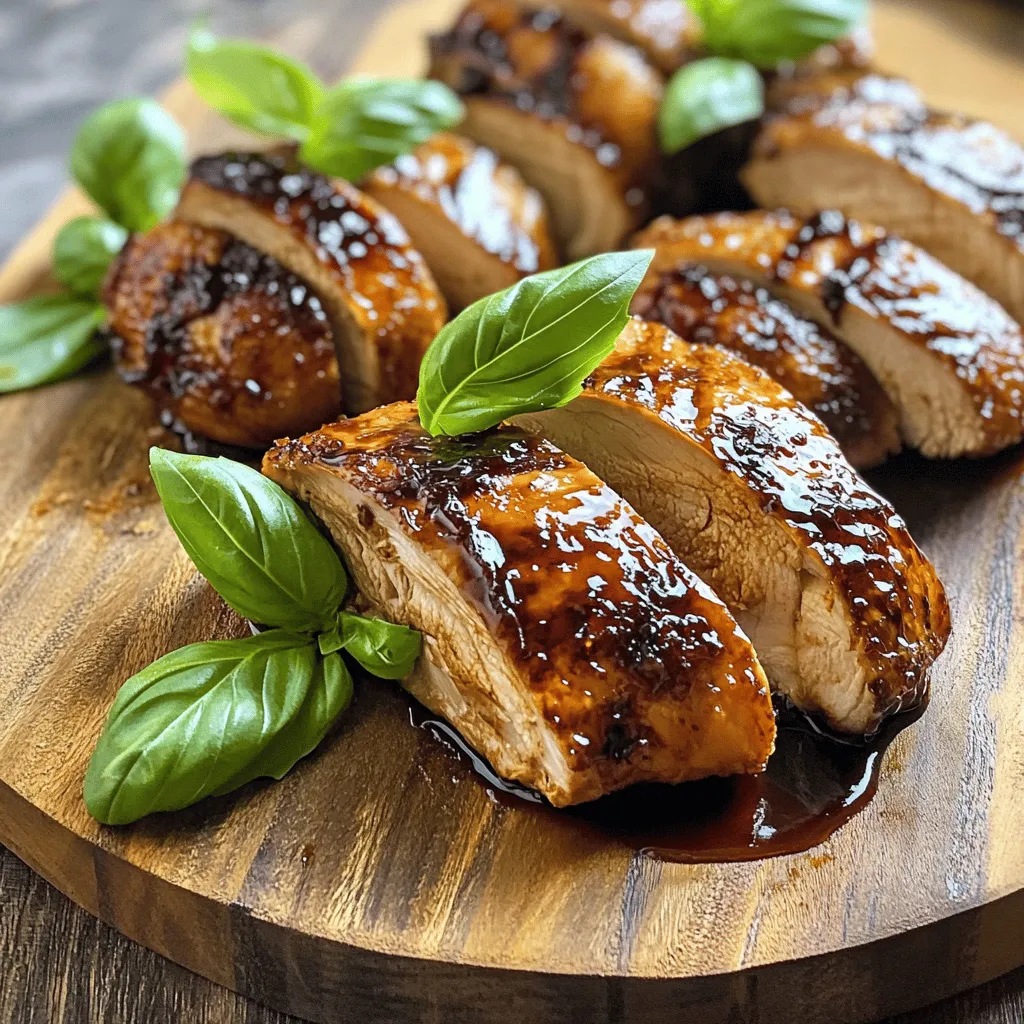
Balsamic Glazed Chicken Flavorful and Simple Recipe
Looking for a quick and tasty chicken dish? You’ve found it! Balsamic Glazed Chicken is simple, flavorful, and perfect for
Read more…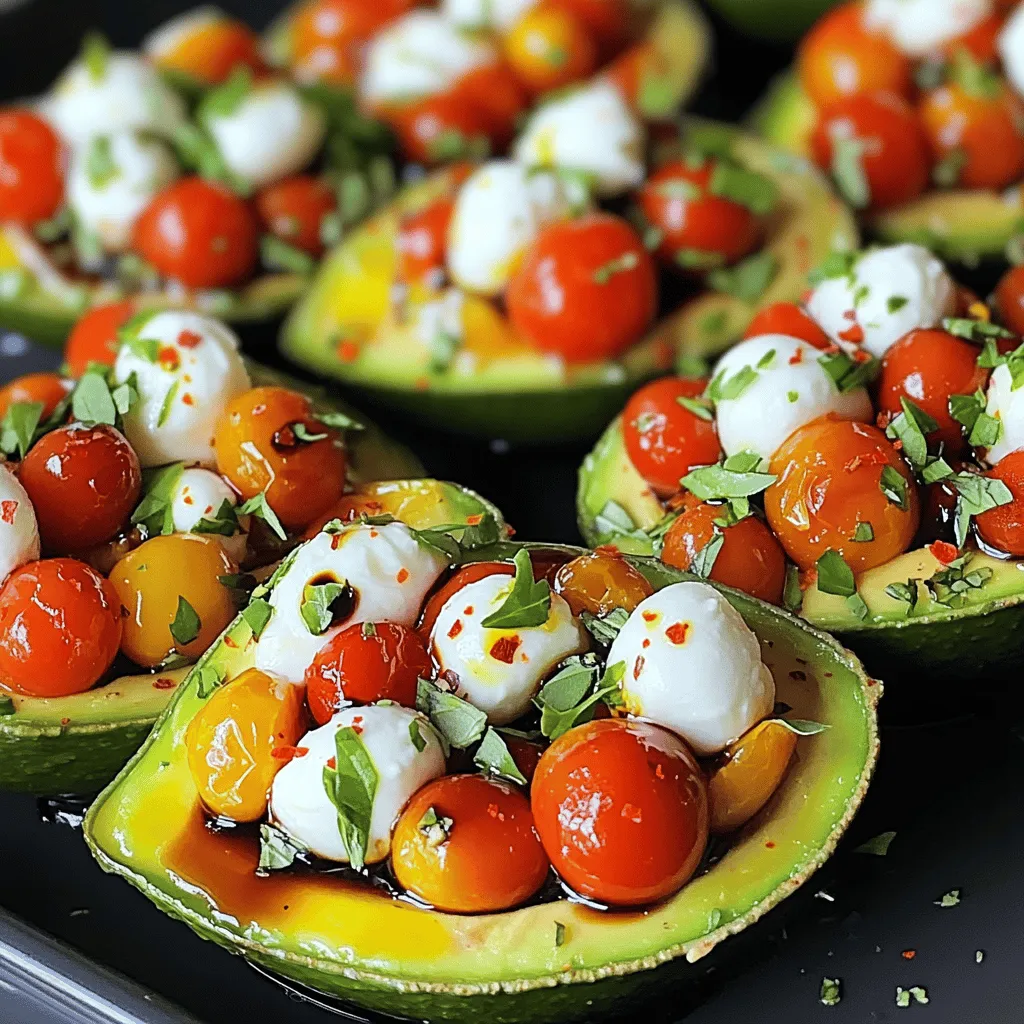
Caprese Stuffed Avocados Flavorful and Fresh Dish
Get ready to enjoy a burst of flavors with Caprese Stuffed Avocados! This fresh dish combines ripe avocados, juicy tomatoes,
Read more…
Coconut Curry Lentil Soup Easy and Flavorful Recipe
Craving something warm and comforting? This Coconut Curry Lentil Soup blends rich flavors with fresh ingredients for a delicious and
Read more…
Spicy Chickpea Tacos Flavorful and Simple Recipe
Tired of the same old taco night? Let’s spice things up! In this blog post, I’ll show you how to
Read more…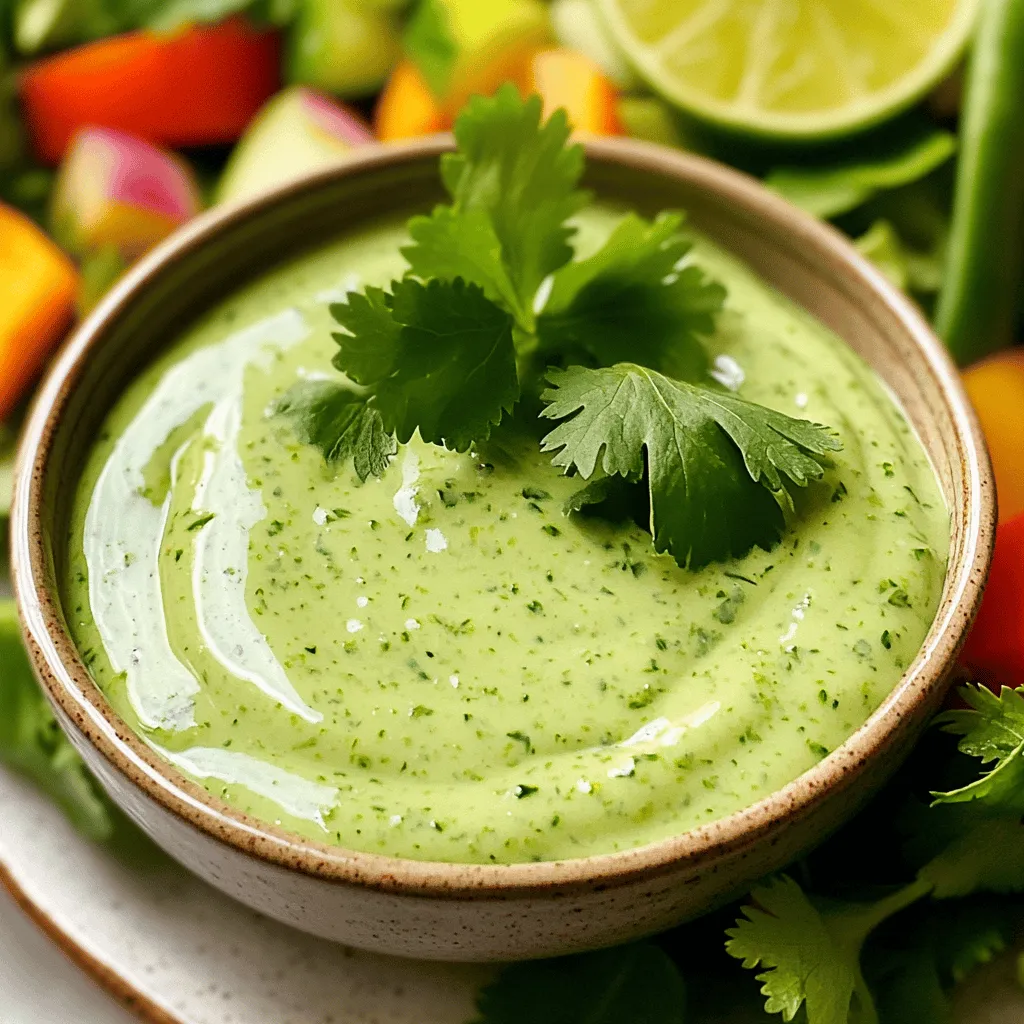
Creamy Cilantro Lime Dressing Fresh and Zesty Recipe
Looking for a fresh and zesty way to upgrade your meals? This creamy cilantro lime dressing will brighten any dish!
Read more…
Hawaiian Huli Huli Chicken Flavorful Grilling Recipe
Welcome to your next grilling adventure! Hawaiian Huli Huli Chicken is vibrant and juicy, bringing a taste of the islands
Read more…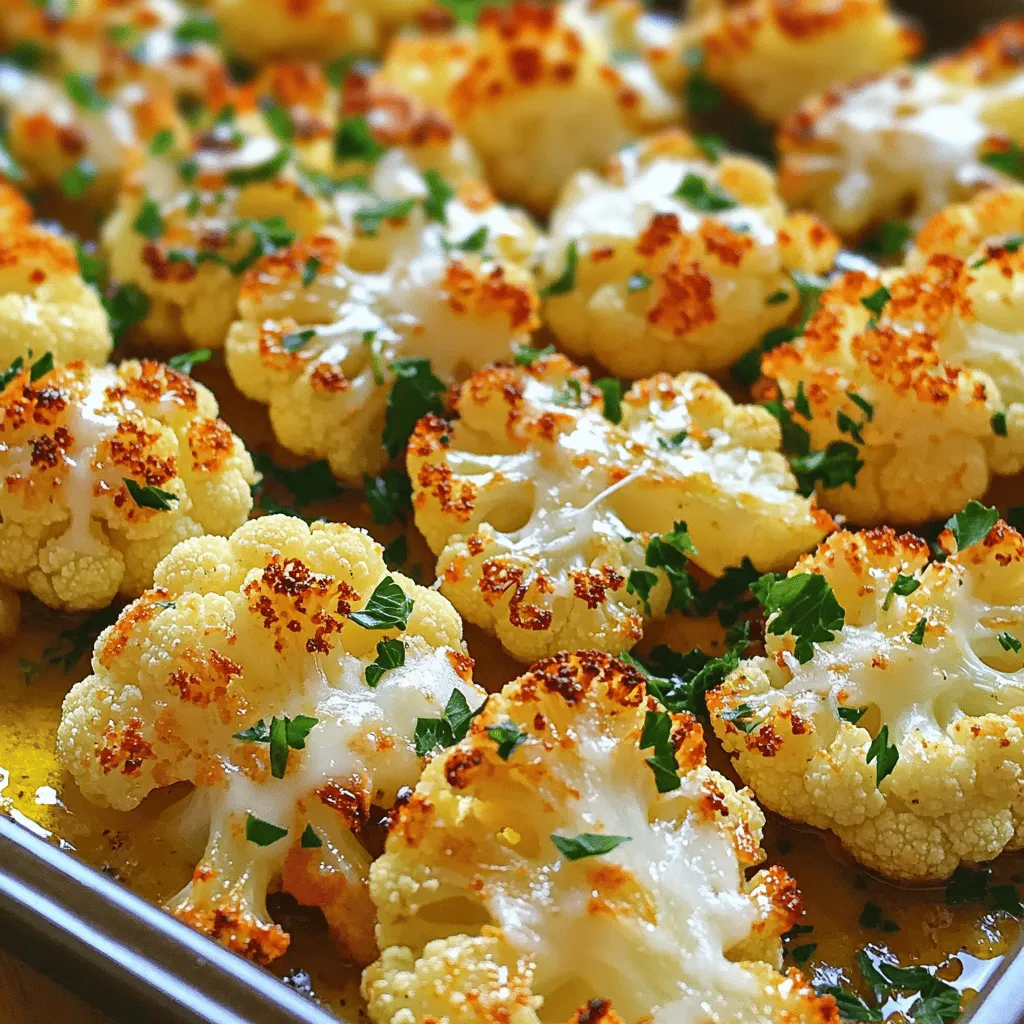
Garlic Parmesan Roasted Cauliflower Easy and Tasty Dish
Looking for a simple yet delicious dish? Garlic Parmesan Roasted Cauliflower is your answer! This tasty recipe pairs tender cauliflower
Read more…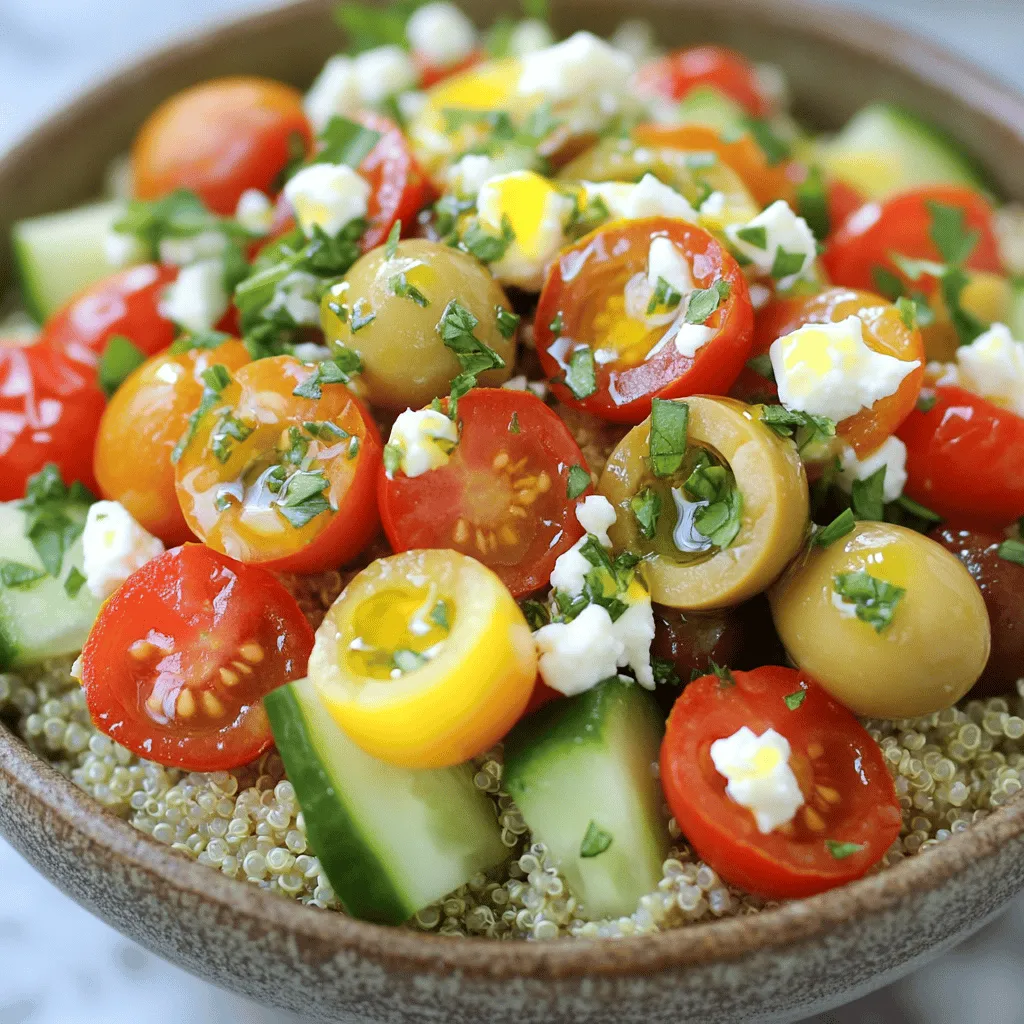
Mediterranean Quinoa Bowls Fresh and Tasty Delight
Looking for a fresh, tasty meal that packs a punch of flavor? Mediterranean quinoa bowls are your answer. This dish
Read more…browse recipes


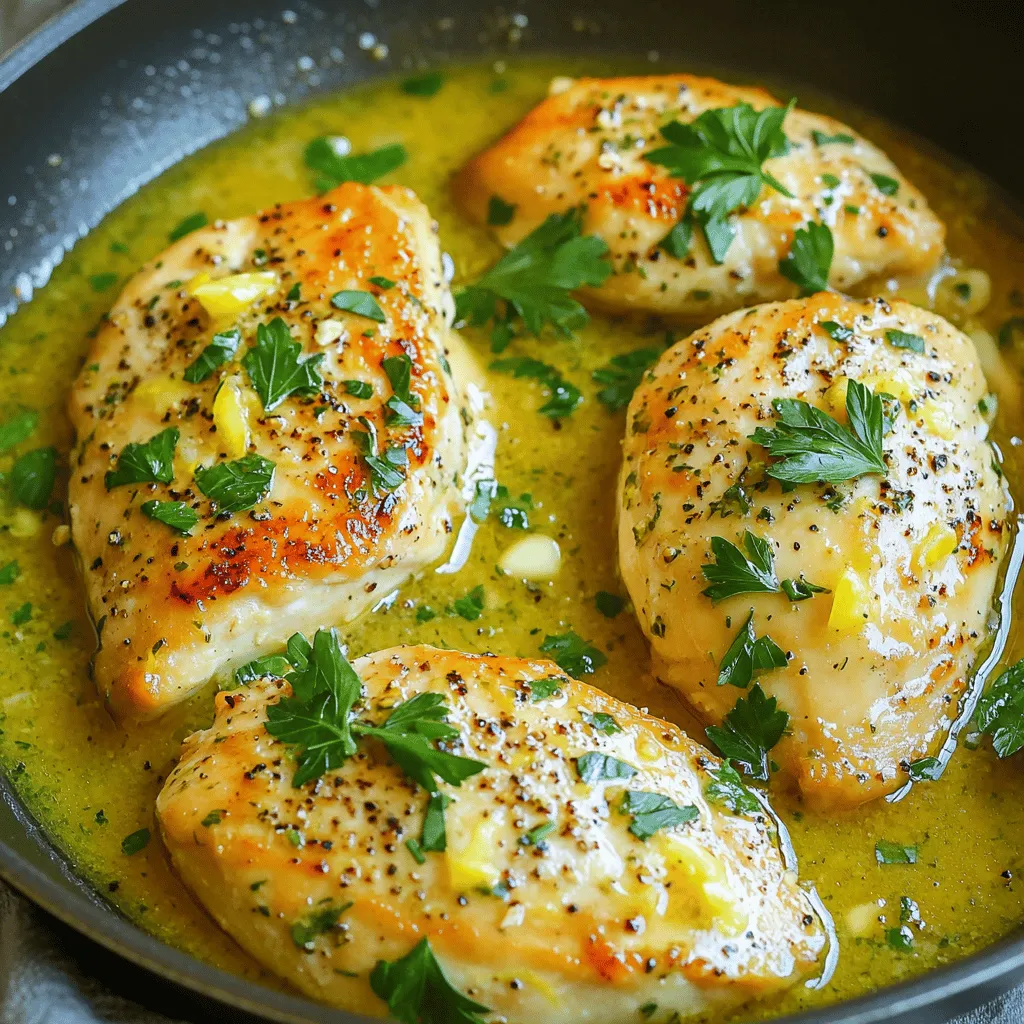
Skillet Lemon Herb Chicken Flavorful and Simple Meal
Looking for a tasty and easy meal? My Skillet Lemon Herb Chicken is just what you need! This dish combines juicy chicken, bright lemon,…
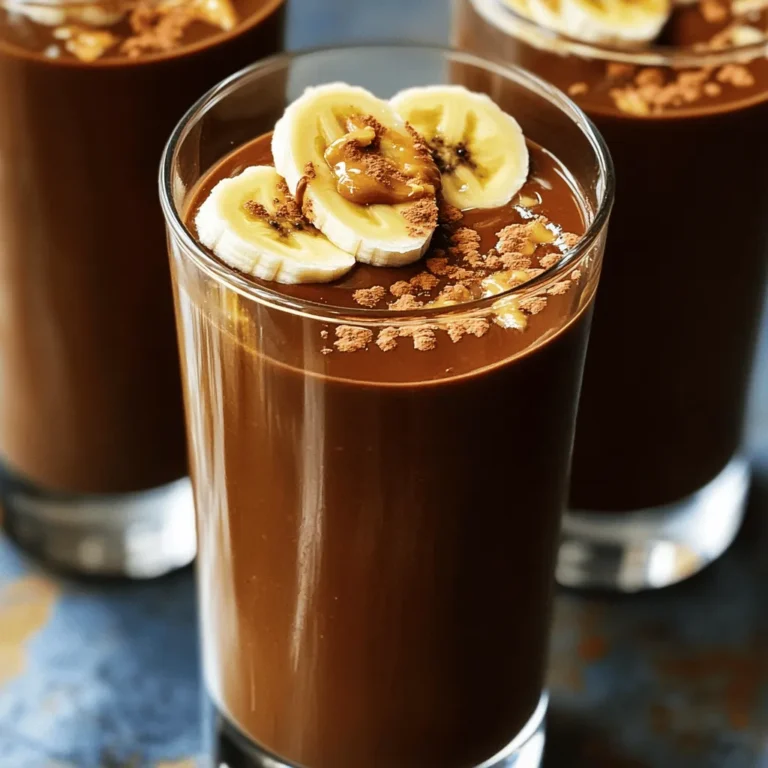
My Latest Desserts
My Latest Recipes

hey,
i’m !
I’m so happy you’re here!
My kitchen is filled with stories, flavors, and love and I’m so happy to share them with you. Here’s to dishes that feel like home.


![- 1 cup all-purpose flour - 1 cup whole wheat flour - 1/2 cup granulated sugar - 1/4 cup brown sugar, packed - 2 tsp baking powder - 1/2 tsp baking soda - 1/2 tsp salt - 1/2 cup unsalted butter, melted - 1/2 cup buttermilk - 2 large eggs - Zest of 1 large lemon - 1/4 cup fresh lemon juice - 1 1/2 cups fresh blueberries (or frozen, thawed) - 1 tsp vanilla extract Selecting the right ingredients is key for the best lemon blueberry muffins. Each part adds flavor and texture. - Selecting ripe blueberries: Look for firm, plump blueberries. They should be a deep blue color. Avoid any that are soft or mushy. Fresh blueberries give the best taste. - Choosing the right type of flour: All-purpose flour gives a light and fluffy texture. Whole wheat flour adds a nutty flavor and more fiber. A mix of both works well for balance. - Freshness of eggs and dairy: Use fresh eggs and buttermilk. This ensures the muffins rise well and taste great. Check the expiration dates before buying. For the full recipe, you can follow the instructions I shared earlier. Each ingredient plays a role in making your muffins delicious. 1. First, preheat your oven to 375°F (190°C). This step is key for even baking. 2. Next, prepare your muffin tin. Line it with paper liners or grease it lightly. This helps muffins come out easily. 1. In a large bowl, combine the all-purpose flour and whole wheat flour. 2. Add the granulated sugar, brown sugar, baking powder, baking soda, and salt. Mix well until you see no lumps. This blend gives your muffins the right rise and flavor. 1. In another bowl, prepare the wet mixture. Mix melted butter and buttermilk together. 2. Next, add the eggs, lemon zest, lemon juice, and vanilla extract. Stir until it’s smooth. The lemon adds a bright taste. 1. Pour the wet mixture into the dry ingredients. Gently mix them until just combined. Be careful not to overmix, or your muffins may become tough. 2. Now, fold in the fresh blueberries. Make sure they are evenly distributed in the batter. This adds bursts of flavor in each bite. 3. Portion the batter into the muffin cups. Fill each cup about 3/4 full for the best rise. 1. Place the muffin tin in the preheated oven. Bake for 18-20 minutes. A toothpick inserted into the center should come out clean. 2. Once baked, let the muffins cool in the tin for about 5 minutes. Then, transfer them to a wire rack to cool completely. This keeps the muffins fluffy and moist. Follow this guide, and you'll enjoy perfect lemon blueberry muffins. For the full recipe, check the details above. To make great lemon blueberry muffins, avoid overmixing. Mix wet and dry ingredients just until they blend. This keeps your muffins light and fluffy. To test for doneness, use a toothpick. Insert it in the center; if it comes out clean, your muffins are ready. You can add spices for extra flavor. Try cinnamon or nutmeg to complement the lemon. You might also want to add a splash of almond or coconut extract for a twist. Incorporating nuts can add crunch. Chopped walnuts or pecans work well with these muffins. When serving, place muffins on a pretty plate. This makes them look inviting. You can also dust them with powdered sugar for a touch of sweetness. Fresh berries or lemon slices on the side add color and appeal. Don’t forget to share the Full Recipe with friends! {{image_2}} You can make gluten-free muffins by using different flours. Almond flour or oat flour works well. Blend these flours with a gluten-free baking mix for best results. You may need to adjust cooking times. Start with the same time and check for doneness. Sometimes, gluten-free muffins take a bit longer. To make vegan muffins, replace eggs with flax eggs or applesauce. Use plant-based milk instead of buttermilk. Almond or soy milk are great choices. For flavor, add more lemon zest or a splash of vanilla. You can also use coconut oil as a butter substitute. This keeps the muffins moist and tasty. You can switch up the flavors in your muffins. Try lemon poppy seed muffins by adding poppy seeds to the batter. Mix in different berries like raspberries or strawberries for a fruity twist. Each berry brings its unique taste to the muffins. This way, you can enjoy a new treat every time. For the full recipe, check out the [Full Recipe]. Store your lemon blueberry muffins at room temperature. Use an airtight container to keep them fresh. They stay good for up to three days this way. For longer storage, wrap each muffin in plastic wrap. This keeps them moist and tasty. You can then place them in a zip-top bag. This method is great for keeping flavors intact. To reheat your muffins, use the microwave or oven. For the microwave, place a muffin on a plate. Heat it for about 10 to 15 seconds. This warms it up without drying it out. If you prefer the oven, preheat it to 350°F (175°C). Wrap the muffin in foil and heat for about 10 minutes. This keeps the muffin soft and delicious. Freezing muffins is a smart way to save them for later. Place cooled muffins in a single layer on a baking sheet. Freeze them for about an hour. Once solid, transfer them to a zip-top bag. This prevents them from sticking together. When ready to eat, take out a muffin and let it thaw at room temperature. You can also reheat it in the microwave or oven. Enjoy your tasty treat anytime! You can find the full recipe in the previous section. You can tell if your muffins are done by looking for a golden brown color. They should also spring back when you touch them lightly. Another great way is to use a toothpick. Stick it into the center of a muffin. If it comes out clean, your muffins are ready! This simple check helps ensure perfect muffins every time. Yes, you can use frozen blueberries in your muffins. However, they may change the texture a bit. Frozen berries can make the batter more watery. To avoid this, let them thaw and drain any excess moisture before adding them. This keeps your muffins fluffy and tasty. If you want a stronger lemon flavor, add more lemon zest or juice to the batter. You can also make a lemon glaze. Mix powdered sugar with lemon juice for a sweet topping. This extra touch gives your muffins a bright, zesty kick. To keep your muffins fresh, cover them with plastic wrap or aluminum foil. Store them in an airtight container at room temperature. For longer storage, place them in the fridge or freezer. This way, your muffins stay moist and delightful for days. In this post, we covered how to make delightful lemon blueberry muffins. You learned about key ingredients, tips for selection, and detailed steps for mixing and baking. Remember, using fresh blueberries and quality flour makes a big difference. Consider the variations for gluten-free or vegan muffins to fit your diet. Store your muffins properly to keep them fresh. Enjoy the process and share these treats with others. Baking these muffins can be a fun and tasty journey!](https://southerndishes.com/wp-content/uploads/2025/06/f91d3769-2e7b-45c0-8111-f3280628320f-300x300.webp)
White Sauce Chicken Enchiladas Delightful and Easy
Are you ready to dive into a creamy, savory treat? White sauce chicken enchiladas are a crowd-pleaser that you can whip up easily! In…