


Latest & Greatest

Mango Salsa with Avocado Tasty Fresh Delight
Ready to brighten your next meal? Mango Salsa with Avocado is a fresh and tasty delight that will wow your
Read more…
Cheesy Cauliflower Bake Rich and Flavorful Delight
Are you ready to elevate your dinner game? My Cheesy Cauliflower Bake is a rich, flavorful delight that makes any
Read more…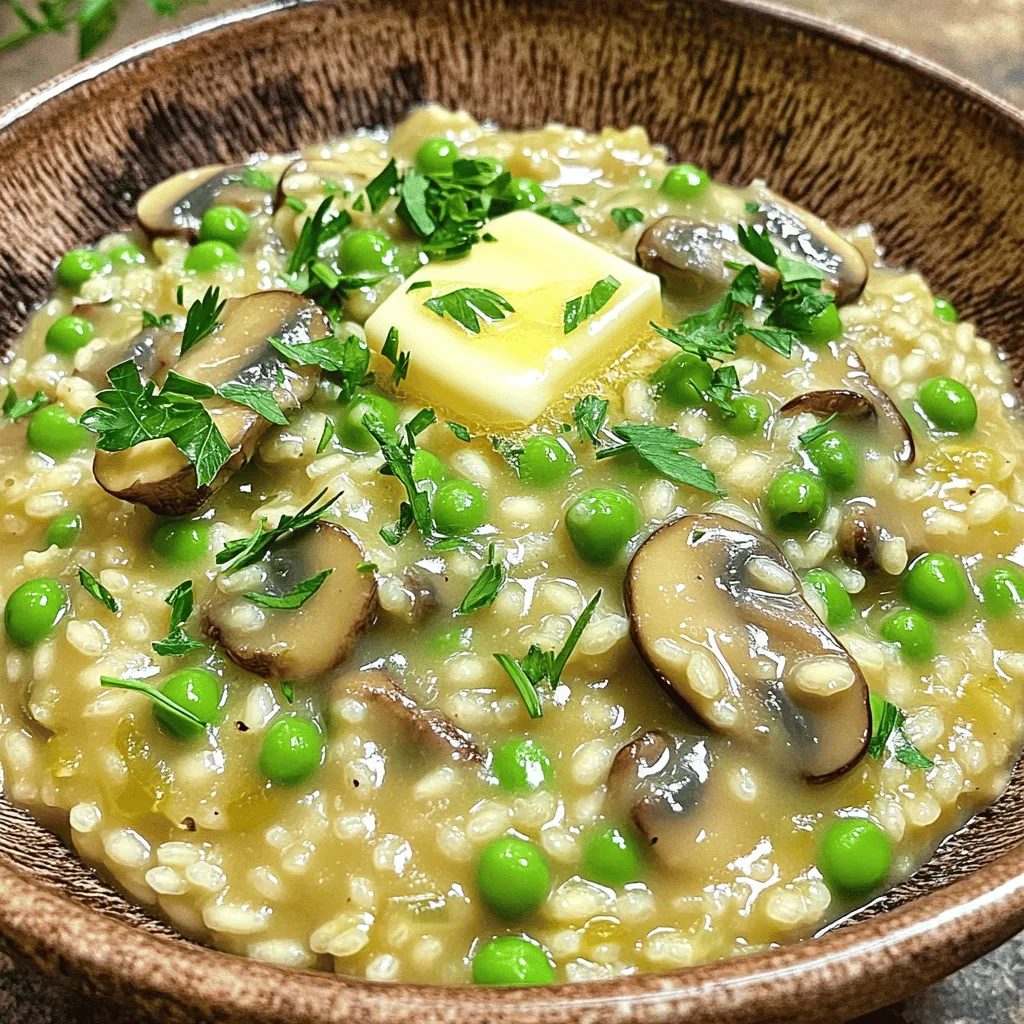
Mushroom Risotto Creamy and Flavorful Comfort Dish
If you’re craving a warm, creamy dish that wraps you in comfort, mushroom risotto is the answer. This classic recipe
Read more…
Sweet and Spicy Roasted Chickpeas Flavorful Snack Idea
Looking for a snack that packs a punch? Try my Sweet and Spicy Roasted Chickpeas! They’re crunchy, flavorful, and easy
Read more…
Crispy Veggie Spring Rolls Flavorful and Simple Recipe
Are you ready to impress your family and friends? Crispy Veggie Spring Rolls are quick, tasty, and perfect for any
Read more…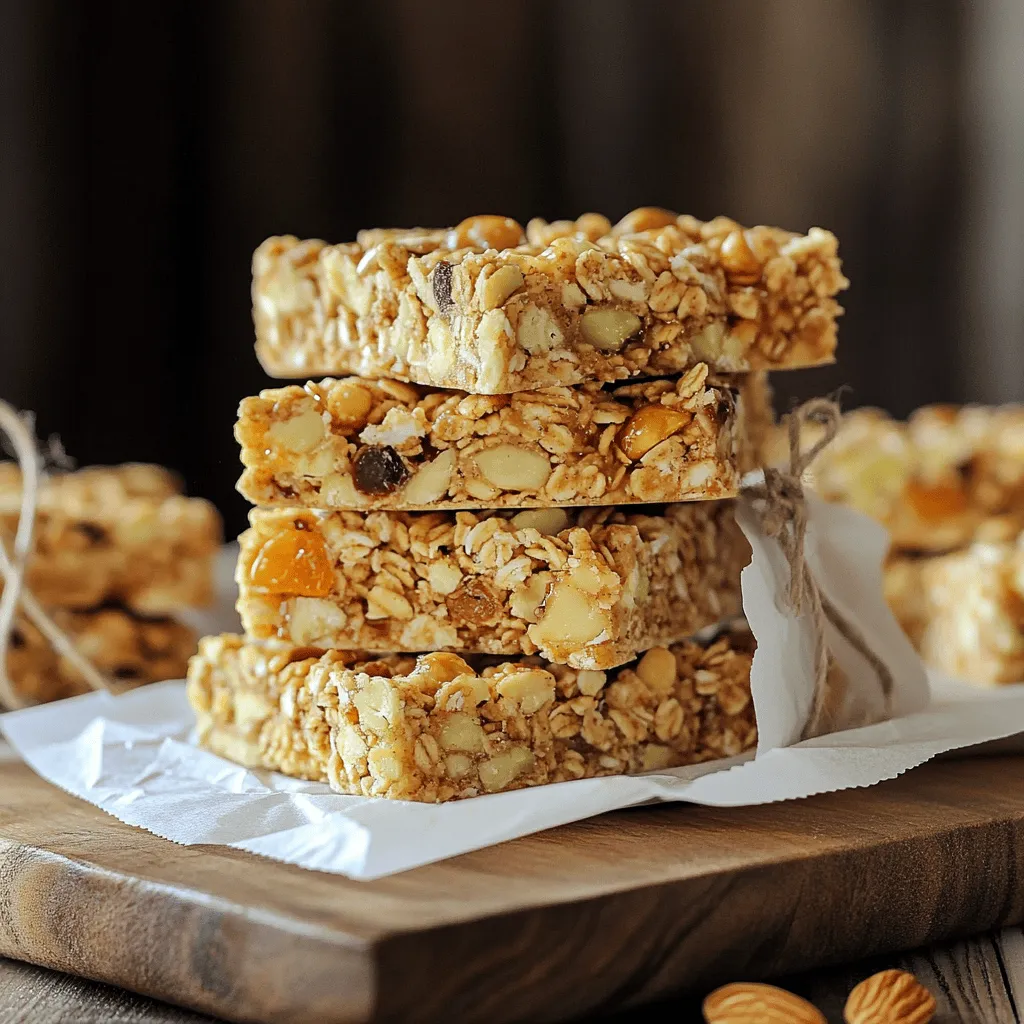
Homemade Granola Bars Simple and Healthy Recipe
Are you ready to whip up a tasty and healthy snack? Homemade granola bars are the perfect treat! They’re quick
Read more…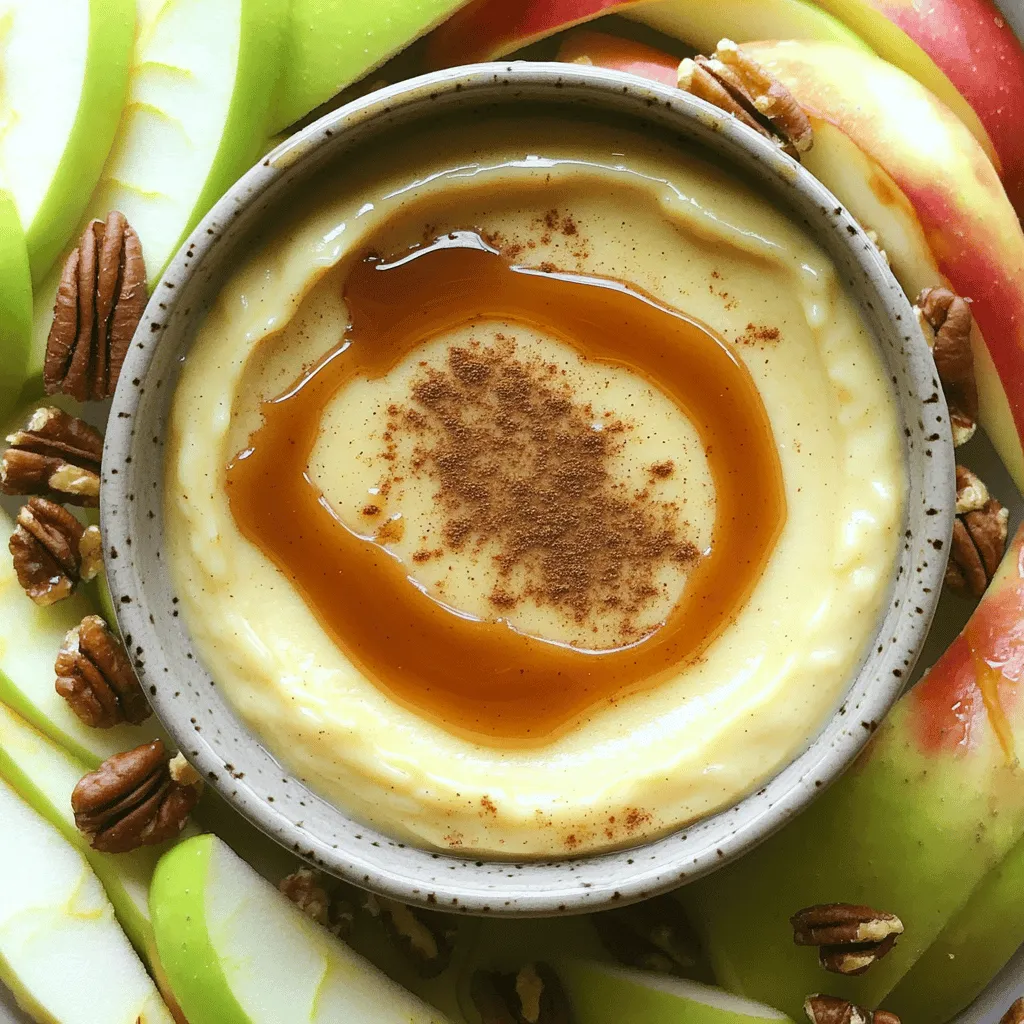
Caramel Apple Dip with Cream Cheese Delight
If you’re looking for a festive treat that pairs perfectly with crisp apple slices, you’ve found it! This Caramel Apple
Read more…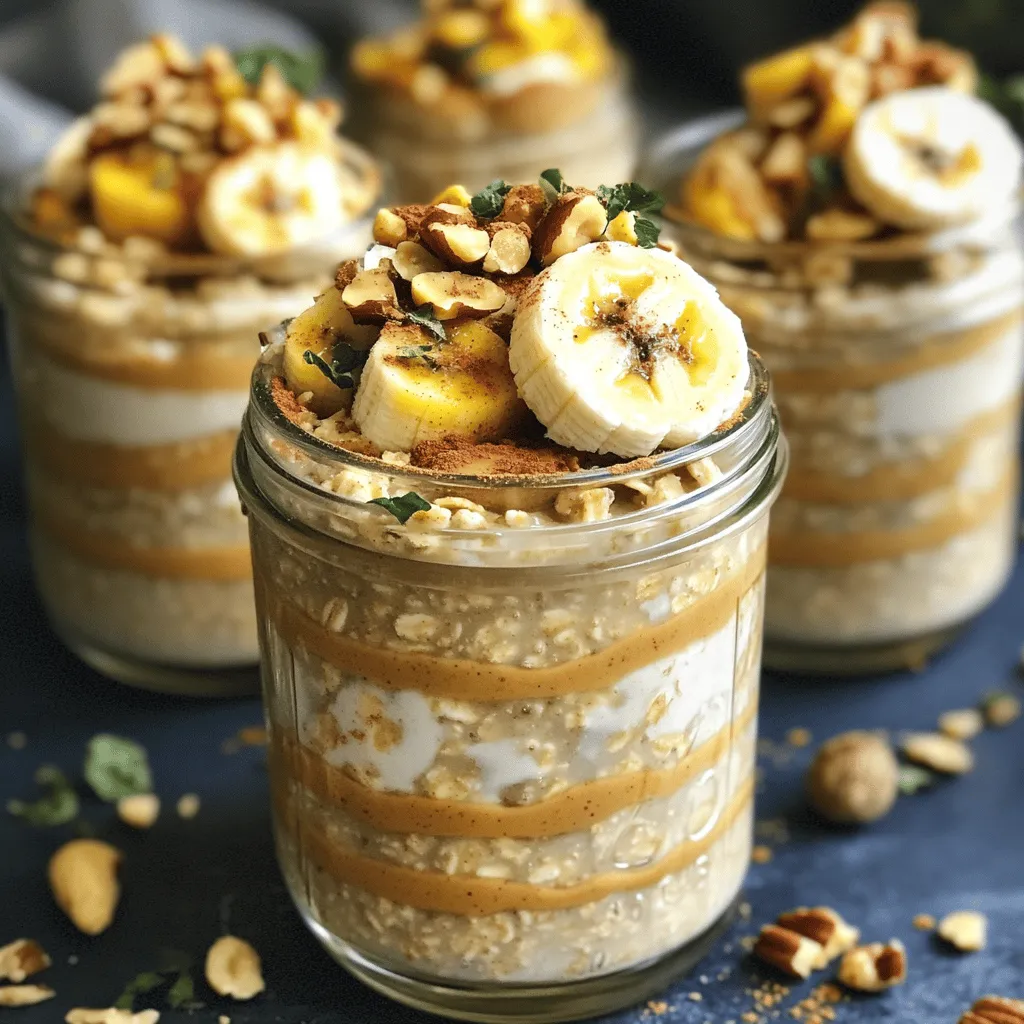
Peanut Butter Banana Overnight Oats Simple Recipe
Looking for a quick, tasty breakfast? Peanut Butter Banana Overnight Oats are perfect for you! This simple recipe takes just
Read more…browse recipes


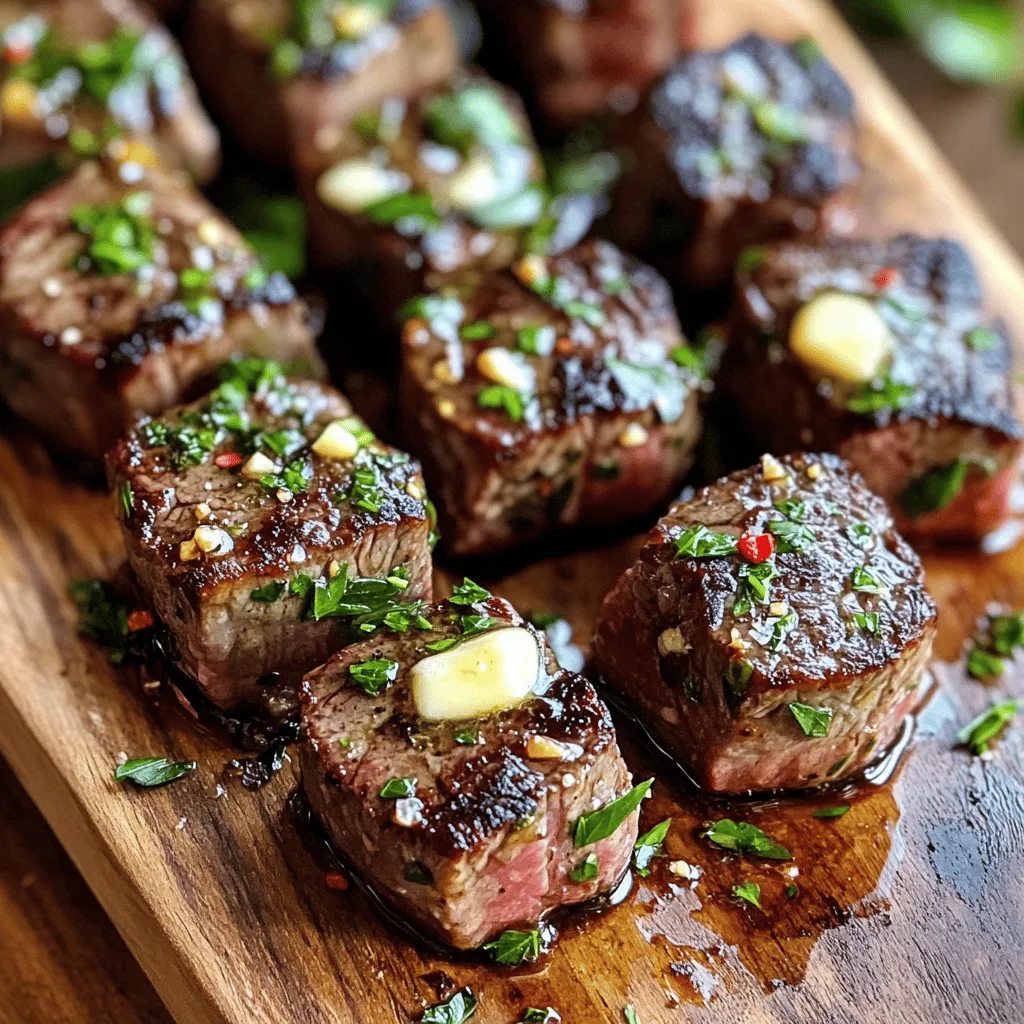
Garlic Butter Steak Bites Flavorful and Simple Recipe
If you’re craving something delicious and quick, you’re in for a treat! Garlic Butter Steak Bites offer mouth-watering flavor in every bite. With just…
My Latest Desserts
My Latest Recipes

hey,
i’m !
I’m so happy you’re here!
My kitchen is filled with stories, flavors, and love and I’m so happy to share them with you. Here’s to dishes that feel like home.
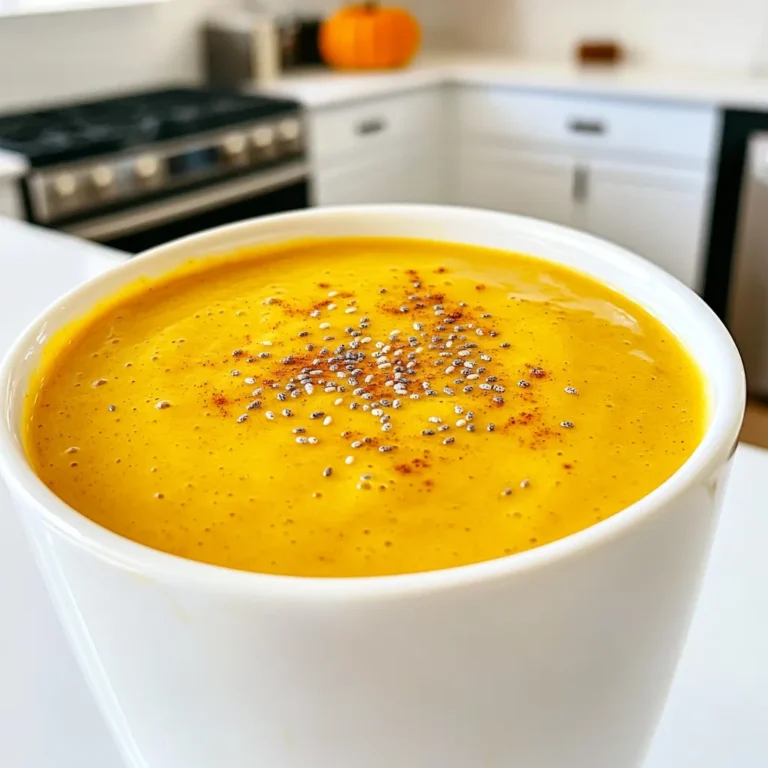
![To make Pumpkin Spice Overnight Oats, gather these simple ingredients: - 1 cup rolled oats - 1 cup almond milk (or any milk of choice) - ½ cup canned pumpkin puree - 1 tablespoon chia seeds - 2 tablespoons maple syrup (or honey) - 1 teaspoon pumpkin pie spice - ½ teaspoon vanilla extract - A pinch of salt - ¼ cup Greek yogurt (optional for creaminess) - Crushed nuts or granola for topping (optional) These ingredients bring together the warm flavors of fall. The oats serve as the base, while pumpkin adds creaminess. Chia seeds help the oats thicken. Maple syrup gives it sweetness. Pumpkin pie spice brings that cozy taste. You can change the milk type to fit your diet. Greek yogurt adds a creamy texture, but it's not a must. Toppings like nuts or granola add crunch and flavor. You can also try different toppings based on your taste. For the full recipe, click here: [Full Recipe]. To make pumpkin spice overnight oats, start by mixing your dry ingredients in a large bowl. Here’s what you need: rolled oats, chia seeds, pumpkin puree, maple syrup, pumpkin pie spice, vanilla extract, and a pinch of salt. Stir them well to blend the flavors. Next, slowly pour in the almond milk. If you want a creamier texture, add Greek yogurt at this stage. Mix everything until the oats are well coated. After that, divide the mixture evenly into two jars or airtight containers. Once you have your jars ready, seal them tightly. Place them in the refrigerator overnight. This step is key! It allows the oats to soak up the liquid and soften. If you’re short on time, let them chill for at least four hours. In the morning, take your jars out and give them a good stir. If you like your oats thinner, add a splash of milk. Now it’s time to get creative with toppings! I love adding crushed nuts or granola for a nice crunch. A sprinkle of extra pumpkin pie spice can add a lovely touch, too. Enjoy your delicious pumpkin spice overnight oats! To make great pumpkin spice overnight oats, start with a whisk. Using a whisk helps mix all the ingredients smoothly. This avoids clumps and makes your mixture creamy. I suggest letting the oats sit longer. If you let them sit for more than four hours, they become creamier and more flavorful. You can easily adjust the sweetness to fit your taste. Add more or less maple syrup based on your preference. If you have dietary needs, feel free to swap out ingredients. For example, use coconut milk instead of almond milk. You can also leave out the yogurt for a dairy-free option. When serving your oats, think about adding fresh fruit. Slices of banana or berries make a nice touch. You could also add a dollop of nut butter. This adds protein and richness. For a crunchy finish, sprinkle crushed nuts or granola on top. It makes every bite exciting! For the complete recipe, check out [Full Recipe]. {{image_2}} You can switch up the taste of your pumpkin spice overnight oats. Here are two great ideas: - Chocolate pumpkin spice oats: Just add two tablespoons of cocoa powder to the mix. This gives a rich chocolate flavor. It pairs well with pumpkin spice. You can also top it with chocolate chips for a treat. - Apple cinnamon version: Replace the pumpkin puree with ½ cup of applesauce. Add a teaspoon of cinnamon for warmth. This adds a fresh and fruity taste to your oats. You can easily adjust this recipe to fit your diet. Here are some options: - Vegan options: Use almond milk and skip the Greek yogurt. You can add a little more chia seeds for creaminess. This keeps it plant-based and delicious. - Gluten-free modifications: Use gluten-free oats instead of regular oats. This makes your breakfast safe for those who need it. You can still enjoy all the flavors without worry. Toppings can make your oats even better. Here are some fun ideas: - Fresh cranberries for a fall twist: Add a handful of fresh cranberries on top. Their tartness pairs well with the sweet oats. This adds a nice pop of color too. - Coconut flakes for added texture: Sprinkle some coconut flakes on your oats. This adds a crunchy texture and a hint of tropical flavor. It's a simple way to make your breakfast even more special. Feel free to explore these variations and make your pumpkin spice overnight oats your own! You can find the full recipe to get started. To keep your pumpkin spice overnight oats fresh, use airtight containers. This step prevents air from spoiling your oats. Store the jars in your fridge. Avoid leaving them out at room temperature. You can store your pumpkin spice overnight oats in the fridge for up to five days. After that, they may lose flavor and texture. If you notice any odd smells or colors, it’s best to toss them out. You can freeze overnight oats for up to three months. To freeze, pour the mixture into a freezer-safe container. Leave some space at the top, as it will expand when frozen. When you're ready to eat, move it to the fridge overnight to thaw. Stir well before serving. For a quick option, you can microwave it straight from the freezer, but add a splash of milk for moisture. Enjoy your pumpkin spice creation! Check out the Full Recipe for more details. Pumpkin Spice Overnight Oats are not just delicious; they are also nutritious. Here’s a quick breakdown: - Calories: About 350 per serving - Carbohydrates: 55 grams - Protein: 10 grams - Fat: 10 grams - Fiber: 8 grams These oats provide a good mix of carbs, protein, and healthy fats. The pumpkin adds vitamins A and C, making it a healthy meal choice. Yes! You can prepare these oats in bulk. Here are my tips: - Make a batch for the week. Store in airtight jars. - Layer the ingredients in jars. This keeps flavors fresh. - You can also freeze portions. Just thaw in the fridge overnight. This method saves time on busy mornings while keeping your breakfast healthy and tasty. Toppings can take your oats to the next level. Here are my favorite suggestions: - Crushed nuts: They add a nice crunch and healthy fats. - Granola: For added texture and sweetness. - Fresh fruit: Sliced bananas or apples pair well with pumpkin. - Yogurt: A dollop of Greek yogurt boosts creaminess and protein. Feel free to mix and match your toppings for fun and flavor! For the full recipe, check out the instructions above. Pumpkin Spice Overnight Oats are easy to make and fun to customize. You mix simple ingredients, let them chill overnight, and enjoy a tasty breakfast. Remember, you can tweak the flavors and add your favorite toppings. Try different nuts, fruits, or spices to make the recipe your own. These oats store well, so you can prepare meals in advance. With a little prep, you’ll have a delicious and nourishing start to your day. Enjoy your pumpkin spice mornings!](https://southerndishes.com/wp-content/uploads/2025/05/fd07b6f2-3d24-4cb3-926e-3b5316ab2d5d-300x300.webp)


Meringue Cookies with Fruit Easy and Colorful Treat
If you’re looking for a fun and colorful treat, meringue cookies topped with fresh fruit are the answer! These light and airy delights are…
![- 4 large egg whites - 1 cup superfine sugar - 1/4 teaspoon cream of tartar Meringue cookies need just a few simple ingredients. The egg whites give them their lightness. Superfine sugar helps create a smooth texture. Cream of tartar stabilizes the egg whites, ensuring they hold their shape. - 1 teaspoon vanilla extract - 1/4 teaspoon almond extract Adding flavor is key. Vanilla extract provides a warm sweetness. Almond extract adds a nice, nutty touch. Together, they create a delicious taste that pairs well with fruit. - 1 cup mixed fresh fruits (strawberries, raspberries, kiwi) - Optional: Edible flowers Fruit is the star of this treat. Use fresh strawberries, raspberries, and kiwi for bright colors and flavors. You can also add edible flowers for a beautiful touch. The fruit balances the sweetness of the meringue, making each bite refreshing. For the [Full Recipe], follow the steps to create these delightful cookies. 1. Preheat your oven. Set it to 200°F (90°C). Line two baking sheets with parchment paper. 2. Beat the egg whites. In a clean bowl, add 4 large egg whites and a pinch of salt. Use an electric mixer on medium speed. Beat until soft peaks form. This means the egg whites should hold a little shape but still flow. 1. Add sugar. Gradually add 1 cup of superfine sugar, one tablespoon at a time. Keep beating on high speed. Let the sugar dissolve fully each time. 2. Beat to stiff peaks. Once all sugar is mixed in, add 1/4 teaspoon of cream of tartar, 1 teaspoon of vanilla extract, and 1/4 teaspoon of almond extract. Beat until stiff peaks form. The meringue should look shiny and hold its shape well. 1. Dollop or pipe the meringue. Use a piping bag or a spoon to create small mounds on the lined baking sheets. Make sure to leave space between each piece. 2. Bake the meringue. Place the sheets in the oven and bake for 1.5 to 2 hours. The meringues should feel dry and lift off the parchment easily. 3. Cool properly. Turn off the oven and leave the meringue inside with the door slightly ajar. This helps prevent cracking. Once fully cool, top each meringue with fresh fruit. For a fun touch, add edible flowers as a garnish. For a full recipe, check the instructions detailed above. To make perfect meringue, start with clean tools. Any fat can ruin your egg whites. Use a glass or metal bowl for best results. Make sure your egg whites are at room temperature. This helps them whip better. When you beat the egg whites, add a pinch of salt. This aids in creating stable peaks. When adding sugar, do it slowly. Add one tablespoon at a time. Mix on high until the sugar fully dissolves. This is key for a smooth texture. Once all the sugar is added, you should see stiff peaks. The meringue should look shiny and hold its shape. Serving meringue cookies can be fun. You can stack them high for a tower of sweet. A simple way to serve is on a plate with fruit around them. This makes a colorful display. For a unique touch, use edible flowers. They add beauty and fun to your treats. Just sprinkle them on top or place them beside the cookies. You can change the flavor of your meringue easily. Try different extracts like lemon or coconut. A little spice, like cinnamon, can also add warmth. For fruits, feel free to mix it up. Use berries for a tart taste or tropical fruits for sweetness. Sliced peaches or mangoes can be a delightful surprise. You can also top them with yogurt for a creamy twist. {{image_2}} Using fresh fruit makes your meringue cookies pop. You can mix seasonal fruits like strawberries, peaches, or blueberries. These fruits add flavor and color. Berries work well because they are sweet and tart. Tropical fruits like mango, pineapple, or kiwi bring a fun twist. Choose fruits that you love. Their natural sweetness pairs well with the lightness of meringue. Want to change things up? Add some zest! You can make citrus meringue cookies by adding lemon or lime zest. This gives a bright and fresh taste. For a rich flavor, try chocolate meringue. Just mix in some cocoa powder with the sugar. You’ll have a sweet treat that is both crunchy and creamy. Are you looking for gluten-free options? Good news! Meringues are naturally gluten-free since they use egg whites and sugar. For vegan meringues, use aquafaba, the liquid from canned chickpeas. Whip it up just like egg whites. Your vegan friends will love this tasty treat! To keep your meringue cookies fresh, store them in an airtight container. Place them in a cool, dry area. Avoid moisture to keep them crisp. You can also add a piece of parchment paper between layers to prevent sticking. If your meringues start to soften, they may have absorbed moisture. To fix this, dry them in a low oven briefly. You can freeze meringue cookies for longer storage. Flash-freeze them first by placing them on a baking sheet. After they freeze solid, transfer them to a freezer bag. This method keeps them from sticking together. When you want to eat them, thaw meringue at room temperature. Don't rush this step. Thawing too fast can ruin their texture. Meringue cookies last about 1 to 2 weeks at room temperature. After that, they may lose their crunch. Signs of spoilage include a sticky surface or off smell. If they feel soft or chewy, discard them. For the best taste, enjoy them fresh after making them. For a complete guide, check out the Full Recipe. You can tell meringue is done by its texture and color. It should look dry and crisp. The outside should be firm, and the inside will be airy. If it lifts off the parchment easily, that’s a good sign. The color should remain white or slightly off-white, not browned. You can use granulated sugar, but it may change the texture. Granulated sugar takes longer to dissolve. This can lead to a grainy meringue. Superfine sugar mixes in smoothly, giving a light and fluffy texture. If you use granulated sugar, beat it longer to ensure it fully dissolves. Store leftover meringue cookies in an airtight container. Keep them in a cool, dry place. This helps maintain their crispness. Avoid the fridge, as moisture can make them soft. If you want to keep them longer, you can freeze them. Just thaw them at room temperature before serving. Meringue cookies are fun and easy to make. You need just a few main ingredients like egg whites and sugar. Each step, from beating the eggs to baking, matters. Following the tips ensures your meringue turns out perfect. You can even try different flavors and fruits to make them special. Store them right to keep them fresh. Making these cookies can be a rewarding experience. Enjoy sharing your sweet treats with others!](https://southerndishes.com/wp-content/uploads/2025/05/8362dd2c-18ce-4ac3-8ae7-4f070d0b8284.webp)
